

As the holiday season approaches, many of us start thinking about the joy of gathering with loved ones around a festive feast.
Picture a table filled with delicious roasts, colorful sides, and irresistible desserts that embody the essence of Christmas.
The savory aroma of herb-infused turkey and the sweet scent of honey-glazed ham fill the air, each dish with its own delightful story to tell.
Are you ready to explore which recipes will make this year’s celebration extra special?
Classic Roast Turkey With Herb Butter
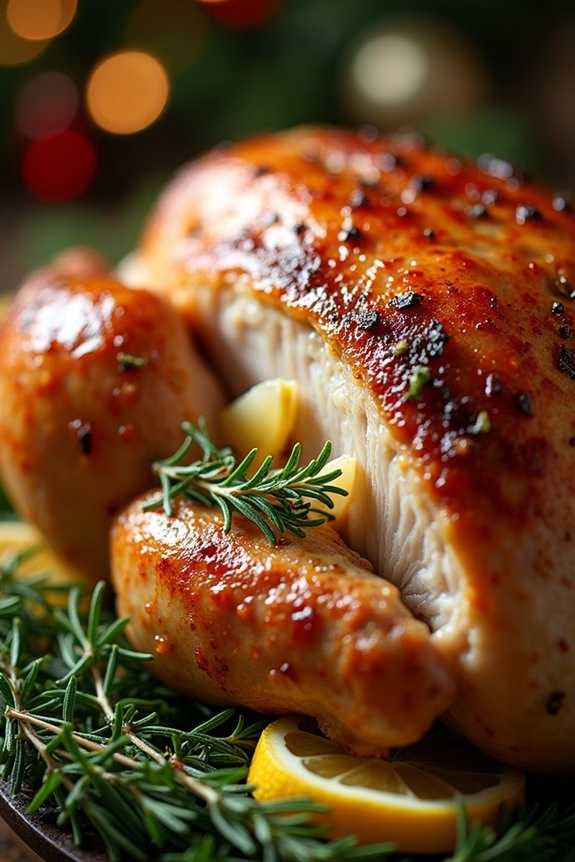
Cooking a Classic Roast Turkey With Herb Butter is a delightful way to bring tradition and flavor to your Christmas dinner table. This recipe elevates the classic roast turkey with a rich, fragrant herb butter that infuses the bird with an exquisite taste and aroma. The key to success lies in the quality of the ingredients and the attention to detail in preparation. The herb butter not only adds incredible flavor but also helps keep the turkey moist and tender during roasting.
This recipe serves 4-6 people, making it perfect for a cozy family gathering. The process involves creating a flavorful herb butter, preparing the turkey for roasting, and basting it to perfection. As your turkey roasts, the delightful aroma will fill your kitchen, setting the stage for a memorable holiday meal. Follow these steps to create a succulent turkey that will be the centerpiece of your Christmas feast.
Ingredients:
- 1 (10-12 pound) whole turkey, thawed
- 1 cup unsalted butter, softened
- 2 tablespoons fresh rosemary, chopped
- 2 tablespoons fresh thyme, chopped
- 2 tablespoons fresh sage, chopped
- 4 cloves garlic, minced
- Salt and black pepper, to taste
- 1 lemon, halved
- 1 onion, quartered
- 2 cups chicken broth
Cooking Instructions:
- Prepare the Herb Butter: In a medium bowl, combine the softened butter, chopped rosemary, thyme, sage, minced garlic, salt, and pepper. Mix until the herbs and garlic are evenly distributed throughout the butter. Set aside.
- Prepare the Turkey: Preheat your oven to 325°F (165°C). Remove the turkey from its packaging, and remove the giblets and neck from inside the cavity. Pat the turkey dry with paper towels.
- Season and Stuff the Turkey: Gently loosen the skin of the turkey breast by sliding your fingers between the skin and the meat. Be careful not to tear the skin. Rub half of the herb butter under the skin, spreading it evenly over the breast meat. Rub the remaining butter over the entire surface of the turkey. Season the cavity with salt and pepper and stuff it with the lemon halves and onion quarters.
- Truss the Turkey: Tie the legs together with kitchen twine and tuck the wing tips under the body of the turkey to prevent them from burning.
- Roast the Turkey: Place the turkey on a rack in a large roasting pan. Pour the chicken broth into the bottom of the pan. Roast the turkey in the preheated oven, basting every 30 minutes with the pan drippings, until the internal temperature reaches 165°F (74°C) in the thickest part of the thigh, about 3 to 4 hours.
- Rest the Turkey: Once cooked, remove the turkey from the oven and let it rest for at least 20 minutes before carving. This allows the juices to redistribute throughout the meat, guaranteeing a moist and flavorful turkey.
Extra Tips:
To ascertain your turkey is cooked evenly, rotate the roasting pan halfway through the cooking time. If the turkey skin is browning too quickly, tent it with aluminum foil to prevent burning.
Using a meat thermometer is essential to make sure your turkey is cooked to a safe temperature while remaining juicy. If you want even more flavor, you can brine the turkey for 24 hours before cooking, using a simple brine solution of water, salt, sugar, and spices.
Honey-Glazed Ham With Pineapple
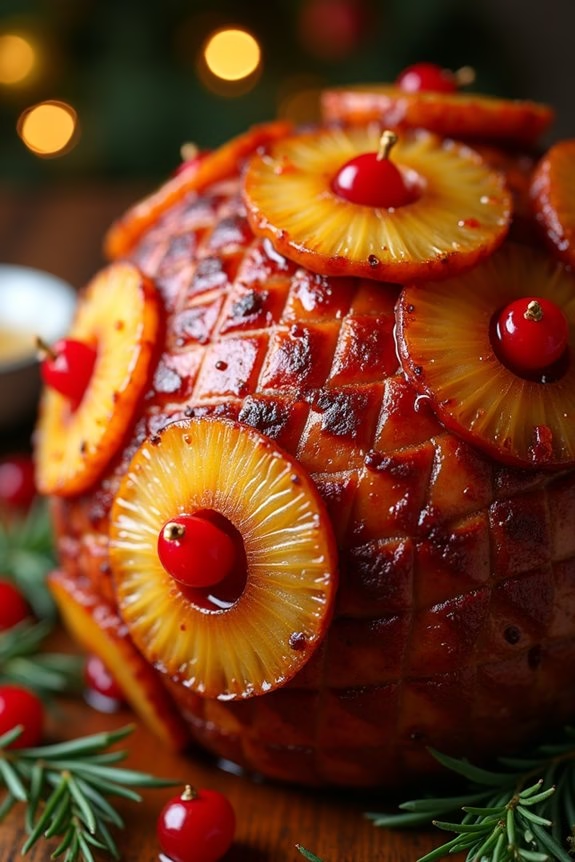
Indulge in a festive feast with this delicious Honey-Glazed Ham With Pineapple recipe. This dish combines the savory tenderness of ham with the sweet and tangy flavors of honey and pineapple, creating a delightful balance that will surely be the centerpiece of your holiday table.
Perfectly suited for Christmas dinner, this recipe serves 4-6 people, making it ideal for a family gathering or an intimate holiday celebration.
The preparation involves glazing a succulent ham with a mixture of honey, brown sugar, and mustard, then garnishing it with slices of pineapple for an added burst of flavor and a beautiful presentation. The pineapple not only enhances the sweetness but also adds an invigorating contrast to the rich, savory ham.
This recipe is straightforward to follow and results in a mouthwatering dish that’s sure to impress your guests.
Ingredients:
- 1 fully cooked bone-in ham (about 4-6 pounds)
- 1 cup honey
- 1/2 cup brown sugar
- 1/4 cup Dijon mustard
- 1 can (20 oz) pineapple slices in juice, drained (reserve juice)
- Whole cloves (optional)
- 1/2 cup pineapple juice (from the can)
- 1/4 cup maraschino cherries (optional)
Cooking Instructions:
- Preheat the Oven: Start by preheating your oven to 325°F (163°C). This temperature guarantees that the ham will cook evenly and absorb the flavors of the glaze.
- Prepare the Ham: Place the ham on a rack in a shallow roasting pan. Score the surface of the ham in a diamond pattern using a sharp knife, about 1/4 inch deep. This allows the glaze to penetrate the meat. If desired, you can insert whole cloves into the intersections of the scoring for added flavor.
- Make the Glaze: In a medium bowl, combine the honey, brown sugar, and Dijon mustard. Mix well until the sugar is dissolved and the mixture is smooth. Add the reserved pineapple juice to thin the glaze slightly if needed.
- Glaze the Ham: Brush the glaze generously over the entire surface of the ham. Arrange the pineapple slices over the ham, securing them with toothpicks if necessary. Place a maraschino cherry in the center of each pineapple slice for added color and flavor.
- Bake the Ham: Cover the ham loosely with aluminum foil to prevent excessive browning. Place the ham in the preheated oven and bake for about 1 1/2 to 2 hours, or until the internal temperature reaches 140°F (60°C). Baste the ham with the remaining glaze every 30 minutes.
- Finish and Serve: Remove the foil during the last 30 minutes of baking to allow the glaze to caramelize and the ham to develop a golden crust. Once done, remove the ham from the oven and let it rest for 10 minutes before slicing. Serve warm with the pineapple slices and cherries as garnish.
Extra Tips:
When choosing a ham, opt for a bone-in variety for the best flavor and juiciness. If you prefer a less sweet glaze, you can adjust the amounts of honey and brown sugar to taste.
Be sure to keep an eye on the ham during the final baking stage to prevent the glaze from burning. If you have any leftovers, they can be used in sandwiches or salads for a delicious post-Christmas treat!
Prime Rib With Garlic Herb Crust
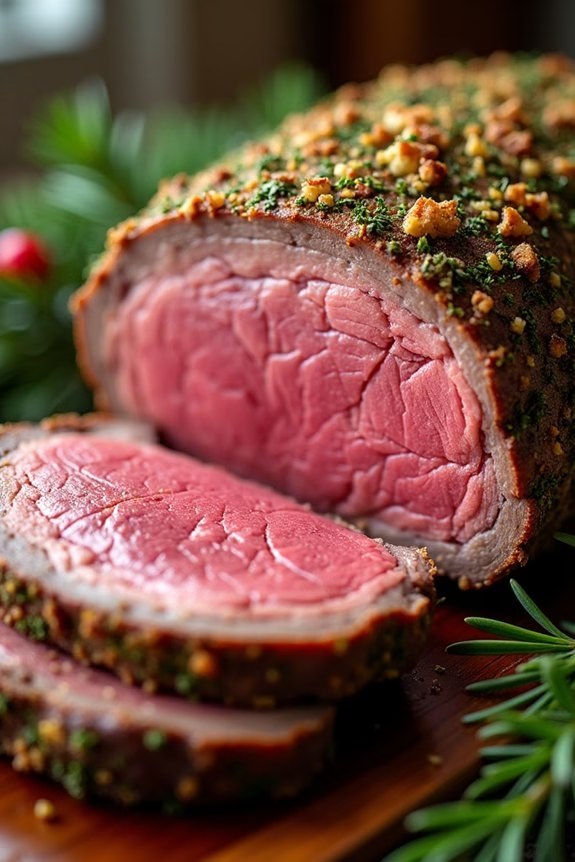
Prime rib is a classic choice for a Christmas dinner, offering a succulent and flavorful centerpiece that will impress your guests. The key to a perfect prime rib lies in the balance of seasonings and the cooking method that guarantees the meat is tender and juicy. This recipe combines a garlic herb crust with the rich flavors of the beef to create a dish that’s both elegant and satisfying.
Whether you’re hosting a small gathering or a larger celebration, this prime rib recipe is sure to be a memorable addition to your holiday menu.
A prime rib roast is a premium cut of beef that’s both tender and full of flavor, making it perfect for special occasions like Christmas. By coating the roast in a mixture of garlic and herbs, you’ll enhance the natural flavors of the beef and create a delicious crust that complements the juicy interior.
This recipe serves 4-6 people, making it ideal for a family gathering or a dinner party with friends. With careful attention to timing and temperature, you can achieve a perfect medium-rare roast that will be the highlight of your festive feast.
Ingredients for 4-6 servings:
- 1 (4-5 pound) prime rib roast, bone-in
- 6 cloves garlic, minced
- 2 tablespoons fresh rosemary, chopped
- 2 tablespoons fresh thyme, chopped
- 2 tablespoons olive oil
- 2 teaspoons salt
- 1 teaspoon black pepper
Cooking Instructions:
- Preparation: Remove the prime rib from the refrigerator at least 2 hours before cooking to allow it to come to room temperature. This guarantees even cooking.
- Preheat the Oven: Set your oven to 450°F (230°C).
- Make the Herb Mixture: In a small bowl, combine the minced garlic, chopped rosemary, thyme, olive oil, salt, and pepper. Mix well to form a paste.
- Season the Roast: Pat the prime rib dry with paper towels. Rub the garlic herb mixture all over the roast, ensuring it’s evenly coated on all sides.
- Roasting: Place the seasoned roast on a rack in a roasting pan, bone-side down. Roast in the preheated oven for 20 minutes to create a flavorful crust.
- Reduce Heat: After 20 minutes, reduce the oven temperature to 325°F (160°C) and continue roasting for approximately 1.5 to 2 hours, or until the internal temperature reaches 130°F (54°C) for medium-rare.
- Resting: Remove the roast from the oven and tent it with aluminum foil. Let it rest for at least 20-30 minutes before carving. Resting allows the juices to redistribute throughout the meat.
- Carving: Carefully carve the roast between the ribs to create even slices. Serve immediately.
Extra Tips:
To guarantee a perfect prime rib, use a meat thermometer to check the internal temperature accurately. This will help you avoid overcooking.
Remember that the roast will continue to cook slightly as it rests, so it’s best to remove it from the oven a few degrees below your desired doneness. Additionally, if you prefer your roast cooked to a different doneness, adjust the final internal temperature accordingly: 120°F (49°C) for rare, 140°F (60°C) for medium, or 160°F (71°C) for well-done.
Finally, for an extra flavorful crust, consider letting the seasoned roast sit in the refrigerator overnight before cooking.
Stuffed Pork Loin With Cranberry and Apple
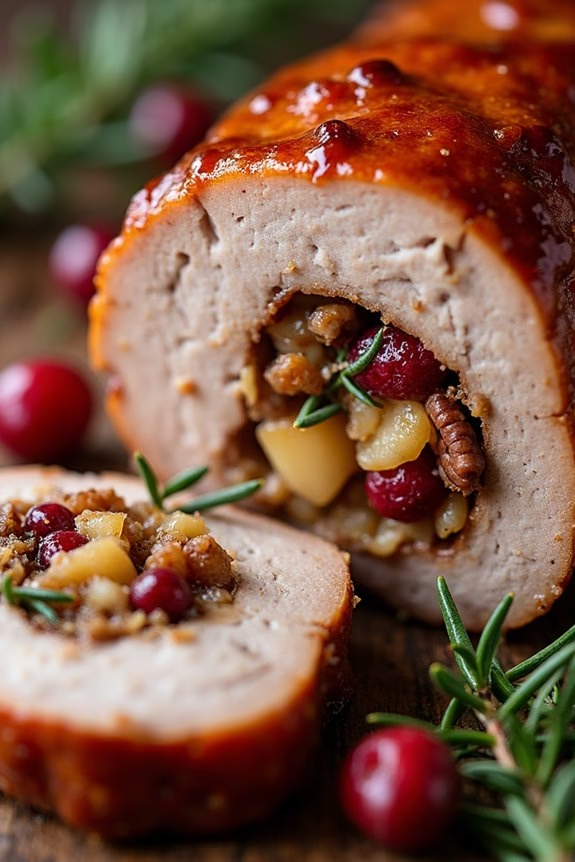
The holidays are a time for gathering with family and friends, and what better way to impress your guests than with a succulent stuffed pork loin featuring the sweet and tangy flavors of cranberry and apple? This dish combines the savory taste of pork with the tartness of cranberries and the sweetness of apples, creating a harmonious balance that will delight your taste buds.
Perfect for a festive Christmas dinner, this recipe offers a beautiful presentation and a delightful taste that’s certain to become a holiday favorite.
The stuffed pork loin isn’t only a feast for the eyes but also a surprisingly easy dish to prepare. With a little bit of preparation, you can have a stunning centerpiece on your table that requires minimal fuss. The key to this recipe is the stuffing, which is packed with flavor and helps keep the pork moist during cooking.
Whether you’re a seasoned cook or a kitchen novice, this recipe will guide you through each step to guarantee your Christmas dinner is a spectacular success.
Ingredients (Serves 4-6):
- 1 boneless pork loin (about 3-4 pounds)
- 1 cup dried cranberries
- 1 large apple, peeled and diced
- 1/2 cup chopped pecans
- 1/2 cup breadcrumbs
- 1/4 cup chicken broth
- 2 tablespoons olive oil
- 1 tablespoon fresh rosemary, chopped
- 1 teaspoon ground cinnamon
- 1 teaspoon salt
- 1/2 teaspoon black pepper
- 1/4 cup brown sugar
- 1/4 cup apple cider vinegar
Cooking Instructions:
- Preheat the Oven: Begin by preheating your oven to 375°F (190°C) to make sure it’s ready for baking once the pork loin is prepared.
- Prepare the Stuffing: In a medium bowl, combine the dried cranberries, diced apple, chopped pecans, breadcrumbs, chicken broth, 1 tablespoon of olive oil, rosemary, cinnamon, salt, and pepper. Mix well until all ingredients are evenly combined and the mixture is moist but not soggy.
- Butterfly the Pork Loin: Carefully slice the pork loin horizontally, starting from one side, until you’re about an inch from the opposite side. Open the pork loin like a book, laying it flat to create a large rectangle. This process is called butterflying.
- Add the Stuffing: Spread the cranberry and apple stuffing evenly over the butterflied pork, leaving a small border around the edges.
- Roll and Tie the Pork Loin: Starting from one end, tightly roll the pork loin around the stuffing. Use kitchen twine to tie the pork loin at 1-inch intervals to secure the stuffing inside.
- Prepare the Glaze: In a small bowl, mix the brown sugar and apple cider vinegar until the sugar is dissolved.
- Sear the Pork Loin: In a large skillet, heat the remaining tablespoon of olive oil over medium-high heat. Add the stuffed pork loin and sear on all sides until golden brown, about 3-4 minutes per side.
- Bake the Pork Loin: Transfer the seared pork loin to a roasting pan. Brush with the brown sugar and apple cider glaze, then place in the preheated oven. Roast for 1-1.5 hours, or until the internal temperature reaches 145°F (63°C).
- Rest and Serve: Once cooked, remove the pork loin from the oven and let it rest for 10 minutes before slicing. This allows the juices to redistribute, assuring a moist and tender dish. Slice and serve with your favorite holiday sides.
Extra Tips:
To guarantee your pork loin is perfectly cooked, use a meat thermometer to check the internal temperature. Avoid overcooking to prevent the pork from becoming dry.
If you prefer a more caramelized glaze, you can broil the pork for the last 5 minutes of cooking. Feel free to experiment with the stuffing by adding your favorite dried fruits or nuts for a personalized touch.
Baked Salmon With Dill and Lemon
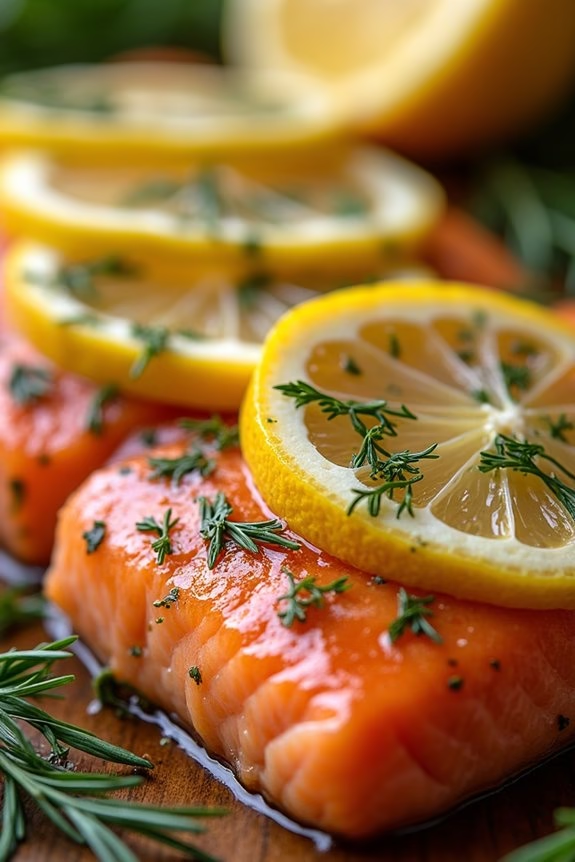
Impress your guests this Christmas with a delicious and elegant Baked Salmon With Dill and Lemon. This dish isn’t only visually stunning with its vibrant colors, but it also offers a delightful combination of flavors. The citrusy tang of the lemon complements the rich, buttery texture of the salmon, while the fresh dill adds a hint of earthiness.
This recipe is simple yet sophisticated, making it a perfect centerpiece for your holiday dinner. Preparing Baked Salmon With Dill and Lemon is straightforward and requires minimal ingredients, allowing the natural flavors of the salmon to shine through.
This recipe serves 4-6 people, making it ideal for a family gathering or an intimate dinner party. With the right preparation and a few simple steps, you can create a dish that’s both flavorful and healthy, guaranteeing that everyone at the table is satisfied.
Ingredients:
- 2 pounds of salmon fillet
- 1 lemon, thinly sliced
- 1/4 cup fresh dill, chopped
- 3 tablespoons olive oil
- 1 teaspoon sea salt
- 1/2 teaspoon black pepper
- 2 cloves garlic, minced
Instructions:
- Preheat the Oven: Start by preheating your oven to 375°F (190°C). This guarantees that the oven is at the right temperature when you place the salmon inside, allowing it to cook evenly.
- Prepare the Baking Dish: Lightly grease a baking dish with a little olive oil to prevent the salmon from sticking. This helps in easy removal after baking and makes cleaning up a breeze.
- Season the Salmon: Place the salmon fillet in the prepared baking dish. Drizzle olive oil over the top, and rub it in gently. Sprinkle the sea salt, black pepper, and minced garlic evenly over the salmon.
- Add Lemon and Dill: Arrange the lemon slices over the salmon, slightly overlapping them if needed. Sprinkle the fresh dill generously over the top. The lemon and dill will infuse the fish with flavor as it bakes.
- Bake the Salmon: Place the baking dish in the preheated oven and bake for 18-20 minutes. The salmon should be opaque and flake easily with a fork when done.
- Rest and Serve: Once baked, remove the salmon from the oven and let it rest for a few minutes. This allows the juices to redistribute throughout the fish. Serve warm, and enjoy!
Extra Tips:
For the best results, use fresh salmon rather than frozen, as it tends to have a superior texture and taste. If you prefer a more pronounced lemon flavor, squeeze additional lemon juice over the salmon just before serving.
To prevent the salmon from drying out, avoid overcooking; it should remain moist and flaky. Pair this dish with a simple green salad or roasted vegetables for a complete meal that highlights the salmon’s fresh flavors.
Vegetarian Wellington With Mushrooms and Spinach

Vegetarian Wellington With Mushrooms and Spinach is a delightful and festive dish that brings a touch of elegance to any Christmas dinner. This hearty and flavorful recipe is a perfect centerpiece for a vegetarian feast, featuring a savory mushroom and spinach filling encased in a golden, flaky puff pastry. The combination of earthy mushrooms, aromatic herbs, and tender spinach creates a delicious and satisfying main course that’s sure to impress both vegetarians and meat-eaters alike.
The beauty of the Vegetarian Wellington lies not only in its taste but also in its presentation. The puff pastry bakes to a beautiful golden brown, creating an impressive and inviting dish that looks as good as it tastes. Whether you’re hosting a large gathering or an intimate dinner, this dish serves as an excellent choice for a special occasion. It can be prepared ahead of time, allowing you to enjoy a stress-free holiday meal with your loved ones.
Ingredients (Serves 4-6):
- 2 tablespoons olive oil
- 1 large onion, finely chopped
- 3 cloves garlic, minced
- 500g mushrooms, finely chopped
- 200g fresh spinach
- 1 tablespoon fresh thyme leaves
- 1 tablespoon fresh rosemary, chopped
- Salt and black pepper to taste
- 1 tablespoon soy sauce
- 100g breadcrumbs
- 50g walnuts, chopped
- 1 sheet puff pastry (approximately 320g)
- 1 egg, beaten (for egg wash)
- 1 tablespoon milk
Cooking Instructions:
- Prepare the Filling: Heat the olive oil in a large skillet over medium heat. Add the chopped onion and sauté until it becomes translucent, about 5 minutes. Stir in the minced garlic and cook for another minute.
- Cook the Mushrooms: Add the chopped mushrooms to the skillet and cook until they release their moisture and start to brown, approximately 10 minutes. Stir occasionally to prevent sticking.
- Add Spinach and Herbs: Stir in the fresh spinach, thyme, and rosemary. Cook until the spinach has wilted, then season with salt, black pepper, and soy sauce. Remove the pan from heat.
- Combine with Breadcrumbs and Walnuts: Stir in the breadcrumbs and chopped walnuts, mixing well until everything is evenly combined. Allow the mixture to cool slightly.
- Prepare the Puff Pastry: Roll out the puff pastry on a lightly floured surface into a rectangle that’s approximately 30 cm by 40 cm. Place the cooled mushroom mixture in the center of the pastry, shaping it into a log.
- Wrap the Wellington: Fold the pastry over the filling, sealing the edges with a little water. Trim any excess pastry and press the edges to seal. Place the Wellington seam-side down on a baking sheet lined with parchment paper.
- Apply Egg Wash: Mix the beaten egg with the milk to create an egg wash. Brush the entire pastry surface with the egg wash to guarantee a golden, shiny finish.
- Bake: Preheat your oven to 200°C (400°F). Bake the Wellington in the preheated oven for 25-30 minutes, or until the pastry is golden brown and crisp.
- Rest and Serve: Allow the Wellington to rest for 5 minutes before slicing. Serve warm, garnished with fresh herbs if desired.
Extra Tips: For a more robust flavor, consider adding a splash of white wine or balsamic vinegar to the mushroom filling while cooking. You can also prepare the filling a day ahead, refrigerating it until ready to assemble the Wellington. Confirm the filling is cool before wrapping it in pastry to prevent the pastry from becoming soggy. If you’re looking for a vegan option, substitute the egg wash with a plant-based milk wash and confirm your puff pastry is vegan-friendly.
Sautéed Brussels Sprouts With Bacon and Pecans
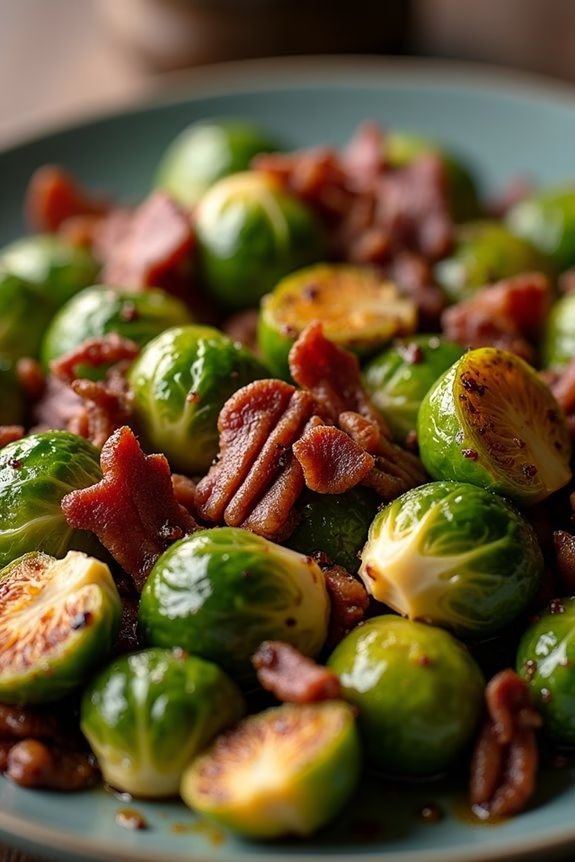
Elevate your Christmas dinner with this delightful side dish: Sautéed Brussels Sprouts With Bacon and Pecans. This dish combines the earthy flavors of Brussels sprouts with the smoky taste of crispy bacon and the rich nuttiness of pecans. It’s the perfect blend of textures and tastes, making it a standout addition to your holiday table.
Not only is this dish delicious, but it’s also relatively easy to prepare, guaranteeing you spend less time in the kitchen and more time enjoying the company of your loved ones.
This recipe serves 4-6 people, making it an ideal choice for a family gathering or a festive feast. The combination of savory and slightly sweet flavors will complement any main course you have planned. The key to achieving the best results is to guarantee that the Brussels sprouts are cooked to crispy perfection, while the bacon adds a satisfying crunch and the pecans bring a subtle sweetness to the mix.
Follow the instructions below to recreate this mouthwatering dish that’s sure to become a holiday favorite.
Ingredients
- 1 ½ pounds Brussels sprouts, trimmed and halved
- 6 slices of bacon, chopped
- ½ cup pecans, roughly chopped
- 2 tablespoons olive oil
- 2 tablespoons balsamic vinegar
- Salt and pepper to taste
- 1 tablespoon maple syrup (optional)
Cooking Instructions
- Prepare the Ingredients: Begin by washing and trimming the Brussels sprouts. Cut them in half lengthwise to guarantee even cooking. Chop the bacon into small pieces and roughly chop the pecans.
- Cook the Bacon: In a large skillet over medium heat, cook the chopped bacon until it’s crispy. This should take about 5-7 minutes. Once cooked, remove the bacon from the skillet and place it on a paper towel-lined plate to drain excess grease.
- Sauté the Brussels Sprouts: In the same skillet, add olive oil and heat over medium-high heat. Add the halved Brussels sprouts, placing them cut side down in the pan. Allow them to cook for about 6-8 minutes without moving them, so they develop a nice sear.
- Combine Ingredients: Once the Brussels sprouts are seared, stir them and add the cooked bacon back into the skillet along with the chopped pecans. Continue to sauté for another 5 minutes until the Brussels sprouts are tender and the pecans are lightly toasted.
- Season and Add Flavor: Drizzle balsamic vinegar over the Brussels sprouts and stir to coat evenly. Season with salt and pepper to taste. If you prefer a hint of sweetness, add a tablespoon of maple syrup and stir well.
- Serve: Remove the dish from heat and transfer it to a serving platter. Serve warm as a delicious side dish to your Christmas dinner.
Extra Tips
To guarantee your Brussels sprouts are perfectly cooked, avoid overcrowding the pan. This allows them to brown evenly. If you find that they aren’t browning to your liking, increase the heat slightly and give them more time without stirring.
For an added depth of flavor, consider roasting the pecans beforehand or adding a sprinkle of Parmesan cheese on top just before serving. Adjust seasoning according to your taste preference, and feel free to experiment with adding a sprinkle of red pepper flakes for a bit of heat.
Creamy Garlic Mashed Potatoes
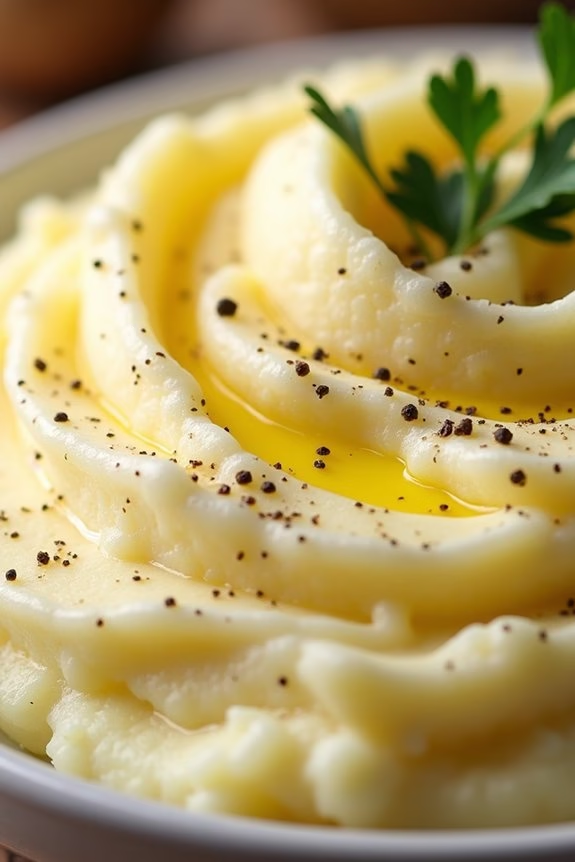
Creamy Garlic Mashed Potatoes are a quintessential side dish for any Christmas dinner, offering a comforting, velvety texture infused with the irresistible aroma of garlic. This dish can perfectly complement the succulent flavors of roasted meats or serve as a cozy, stand-alone comfort food.
With a rich and buttery taste, these mashed potatoes are bound to be a crowd-pleaser at your holiday table, bringing warmth and satisfaction to each bite.
Crafting the perfect mashed potatoes involves selecting the right type of potatoes, precise cooking, and balancing flavors with cream and butter. The key to achieving the creamy consistency is to use starchy potatoes like Yukon Gold or Russets, which mash smoothly and absorb the flavors of garlic and butter beautifully.
This recipe makes enough to serve 4-6 people, guaranteeing that everyone at your gathering gets a generous helping of this delightful dish.
Ingredients:
- 3 pounds of Yukon Gold or Russet potatoes
- 6 cloves of garlic, peeled
- 1 cup heavy cream
- 1/2 cup unsalted butter
- Salt to taste
- Freshly ground black pepper to taste
- Optional: chopped fresh parsley for garnish
Cooking Instructions:
- Prepare the Potatoes: Begin by peeling the potatoes and cutting them into evenly sized chunks. This guarantees that they cook at the same rate. Rinse the potatoes under cold water to remove excess starch.
- Cook the Potatoes and Garlic: Place the potatoes and whole garlic cloves in a large pot. Fill the pot with cold water until the potatoes are covered by about an inch. Add a generous pinch of salt to the water. Bring the pot to a boil over medium-high heat, then reduce to a simmer. Cook until the potatoes are tender when pierced with a fork, about 15-20 minutes.
- Heat the Cream and Butter: While the potatoes are cooking, heat the heavy cream and butter together in a small saucepan over low heat until the butter is melted. Keep warm until the potatoes are ready.
- Mash the Potatoes: Drain the cooked potatoes and garlic, then return them to the pot. Use a potato masher or a ricer to mash the potatoes and garlic until smooth. Avoid over-mashing, as this can make them gluey.
- Mix in Cream and Butter: Gradually add the warm cream and butter mixture to the mashed potatoes, stirring gently until fully incorporated. Season with salt and freshly ground black pepper to taste.
- Serve: Transfer the creamy garlic mashed potatoes to a serving dish. If desired, garnish with chopped fresh parsley for a pop of color and extra flavor.
Extra Tips:
For the best texture, avoid using a blender or food processor, as they can turn the potatoes into a paste rather than a fluffy mash.
If you prefer an even richer flavor, consider roasting the garlic cloves before adding them to the potatoes. Simply wrap them in foil with a little olive oil and roast at 400°F (200°C) for about 30 minutes.
This process will give your mashed potatoes a deeper, more complex flavor profile. Enjoy your creamy garlic mashed potatoes as a delicious, heartwarming addition to your Christmas feast!
Sweet Potato Casserole With Marshmallow Topping
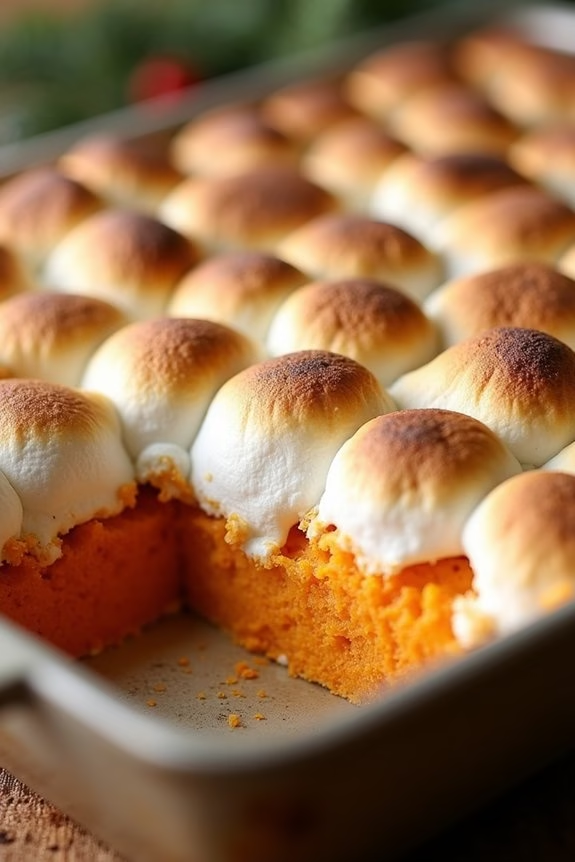
Sweet Potato Casserole With Marshmallow Topping is a classic holiday dish that combines the natural sweetness of sweet potatoes with a crunchy, gooey marshmallow topping. This dish is a staple at many Christmas dinners, offering a delightful combination of textures and flavors that can complement any festive meal.
The creamy, smooth sweet potato base is perfectly balanced by the sweet and slightly crisp topping, making it a favorite among both children and adults.
This casserole isn’t only delicious but also relatively simple to prepare, making it a great choice for both novice and experienced cooks. It can easily be made ahead of time and reheated, allowing you to focus on other aspects of your holiday meal.
Whether you’re looking to recreate a family tradition or try something new, this Sweet Potato Casserole With Marshmallow Topping is sure to be a hit on your Christmas table.
Ingredients (Serves 4-6)
- 4 large sweet potatoes
- 1/2 cup brown sugar
- 1/4 cup melted butter
- 1/2 cup milk
- 1 teaspoon vanilla extract
- 1/2 teaspoon salt
- 1 teaspoon ground cinnamon
- 1/2 teaspoon ground nutmeg
- 2 cups mini marshmallows
Cooking Instructions
- Preheat the Oven: Start by preheating your oven to 350°F (175°C) to guarantee it’s ready once your casserole is assembled.
- Prepare the Sweet Potatoes: Peel the sweet potatoes and cut them into large chunks. Boil them in a large pot of water until they’re tender, which should take about 20 minutes. Drain and let them cool for a few minutes.
- Mash the Sweet Potatoes: In a large mixing bowl, mash the boiled sweet potatoes until smooth. You can use a potato masher or an electric mixer for a smoother texture.
- Mix in Other Ingredients: Add the brown sugar, melted butter, milk, vanilla extract, salt, cinnamon, and nutmeg to the mashed sweet potatoes. Stir until all ingredients are well combined and the mixture is smooth.
- Transfer to Baking Dish: Spoon the sweet potato mixture into a greased 9×13 inch baking dish, spreading it evenly.
- Add Marshmallow Topping: Sprinkle the mini marshmallows evenly over the top of the sweet potato mixture, covering the entire surface.
- Bake: Place the baking dish in the preheated oven and bake for 25-30 minutes, or until the marshmallows are golden brown and the sweet potato mixture is heated through.
- Serve: Allow the casserole to cool for a few minutes before serving. This will give the marshmallows time to firm up slightly, making it easier to cut and serve portions.
Extra Tips
For an added crunch, consider adding a layer of chopped pecans or walnuts to the marshmallow topping before baking. This will provide a delightful contrast to the soft marshmallows and creamy sweet potatoes.
If you’re preparing this dish ahead of time, complete all steps except for adding the marshmallows, cover, and refrigerate. When ready to bake, add the marshmallows and proceed with the baking instructions.
This casserole can be easily adjusted to suit your taste preferences by adding spices such as ginger or allspice, or by reducing the sugar for a less sweet version.
Green Bean Almondine With Shallots

Green Bean Almondine with Shallots is a classic and elegant side dish that pairs perfectly with your Christmas dinner. This dish features tender green beans tossed with lightly toasted almonds and caramelized shallots, creating a delightful balance of flavors and textures. The nuttiness of the almonds complements the savory sweetness of the shallots, bringing out the best in the crisp, fresh green beans.
This simple yet sophisticated side dish not only adds a splash of color to your holiday table but also provides a delicious contrast to the richer components of your meal. Ideal for serving 4-6 people, this dish is both quick to prepare and impressive to serve. Whether you’re having a small family gathering or a larger celebration, Green Bean Almondine with Shallots is sure to be a hit.
The key to this dish is using fresh ingredients and taking care with each step to enhance the flavors and textures. With just a few ingredients and steps, you can create this delightful dish that will be cherished by all your guests.
Ingredients:
- 1 1/2 pounds fresh green beans, trimmed
- 3 tablespoons unsalted butter
- 1/3 cup sliced almonds
- 2 large shallots, thinly sliced
- 2 tablespoons lemon juice
- Salt and freshly ground black pepper, to taste
Cooking Instructions:
- Prepare the Green Beans: Fill a large pot with water and bring it to a boil. Add a generous pinch of salt to the boiling water. Add the green beans and cook them for about 4-5 minutes until they’re just tender but still crisp. Drain the beans and immediately plunge them into a bowl of ice water to stop the cooking process. This will help maintain their vibrant green color. Once cooled, drain and set aside.
- Toast the Almonds: In a large skillet over medium heat, melt 1 tablespoon of the unsalted butter. Add the sliced almonds to the skillet and cook, stirring frequently, until they’re golden brown and fragrant. This should take about 3-4 minutes. Be careful not to burn them. Once toasted, remove the almonds from the skillet and set aside.
- Cook the Shallots: In the same skillet, add the remaining 2 tablespoons of butter. Add the thinly sliced shallots and cook over medium heat, stirring occasionally, until they’re soft and caramelized, about 5-7 minutes.
- Combine the Ingredients: Add the blanched green beans to the skillet with the caramelized shallots. Toss to coat the beans in the buttery shallot mixture. Stir in the toasted almonds and lemon juice. Season with salt and freshly ground black pepper to taste. Cook for another 2-3 minutes, just until everything is heated through.
- Serve: Transfer the Green Bean Almondine with Shallots to a serving platter. Serve warm and enjoy this delightful side dish with your Christmas dinner.
Extra Tips:
For best results, choose fresh, firm green beans as they’ll provide the best texture and flavor. You can prepare the green beans and toast the almonds ahead of time to save on preparation. Just store them separately until you’re ready to combine everything.
If you prefer a slightly sweeter dish, consider adding a teaspoon of honey to the shallots as they caramelize. When seasoning, start with a small amount of salt and pepper, and adjust to taste, as the freshness of the ingredients can greatly influence the flavor balance.
Roasted Butternut Squash and Sage Risotto
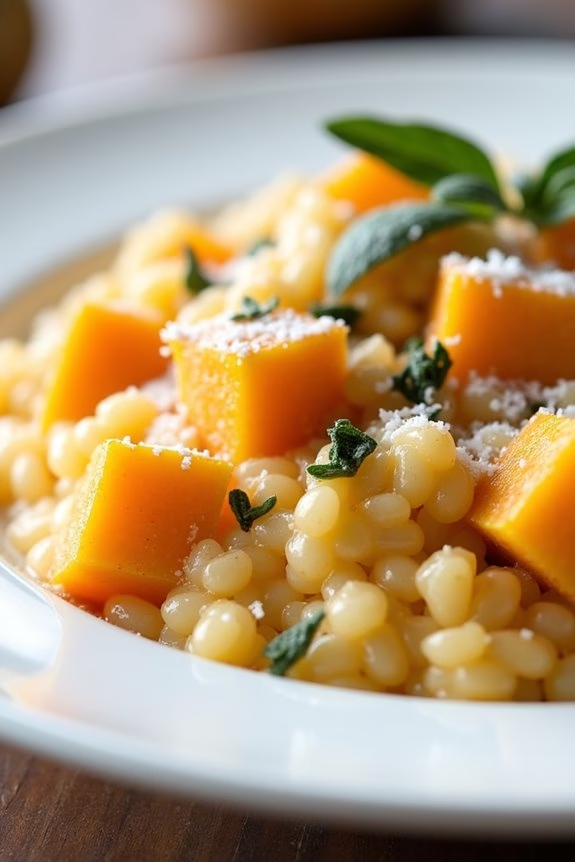
Roasted Butternut Squash and Sage Risotto is a comforting and flavorful dish perfect for a festive Christmas dinner. This creamy risotto combines the nutty, sweet flavor of roasted butternut squash with the earthy aroma of fresh sage, creating a dish that’s both rich and sophisticated.
The risotto is cooked slowly, allowing the Arborio rice to absorb the savory broth and develop a luscious, creamy texture, while the roasted butternut squash adds a delightful sweetness to each bite. This dish is an excellent vegetarian option for your holiday spread, and it pairs beautifully with other traditional Christmas sides.
It’s a warming meal that can serve as a main course or a hearty side dish. The combination of sage and roasted squash not only celebrates the season but also fills your home with a wonderful aroma that will have everyone gathered around the table in anticipation.
Ingredients (Serves 4-6):
- 1 medium butternut squash, peeled and diced
- 2 tablespoons olive oil
- Salt and pepper to taste
- 6 cups vegetable broth
- 2 tablespoons unsalted butter
- 1 small onion, finely chopped
- 2 cloves garlic, minced
- 1 1/2 cups Arborio rice
- 1/2 cup dry white wine
- 1/2 cup grated Parmesan cheese
- 2 tablespoons fresh sage, finely chopped
- Freshly grated nutmeg, to taste (optional)
Instructions:
- Preheat the oven: Set your oven to 400°F (200°C). Prepare a baking sheet by lining it with parchment paper.
- Roast the butternut squash: Place the diced butternut squash on the prepared baking sheet. Drizzle with olive oil, and season with salt and pepper. Toss to coat evenly. Roast in the preheated oven for about 25-30 minutes, or until the squash is tender and caramelized. Set aside.
- Prepare the broth: In a saucepan, bring the vegetable broth to a simmer over low heat. Keep it warm throughout the cooking process.
- Sauté the aromatics: In a large, heavy-bottomed pan, melt the butter over medium heat. Add the chopped onion and sauté for about 3-4 minutes until translucent. Stir in the minced garlic and cook for an additional minute.
- Toast the rice: Add the Arborio rice to the pan with the onions and garlic. Stir continuously for about 2 minutes, allowing the rice to toast slightly.
- Deglaze with wine: Pour in the white wine, stirring until it’s mostly absorbed by the rice.
- Cook the risotto: Begin adding the warm vegetable broth to the rice, one ladle at a time. Stir frequently and allow each addition of broth to be absorbed before adding the next. This process should take about 18-20 minutes, resulting in a creamy consistency.
- Incorporate the squash and cheese: Once the rice is al dente and creamy, gently fold in the roasted butternut squash, grated Parmesan cheese, and chopped sage. Season with additional salt, pepper, and a pinch of freshly grated nutmeg, if desired.
- Serve: Remove from heat and let the risotto sit for a couple of minutes before serving. This allows the flavors to meld together beautifully.
Tips:
When making risotto, patience is key. Stirring constantly helps release the rice’s starch, which is essential for achieving that signature creamy texture.
If you find the risotto getting too thick, simply add more warm broth until you reach the desired consistency. Using fresh sage and high-quality Parmesan cheese will elevate the flavor of the dish considerably.
If you’re preparing this dish ahead of time, you can roast the butternut squash in advance and reheat it gently before folding it into the risotto.
Cranberry Sauce With Orange Zest
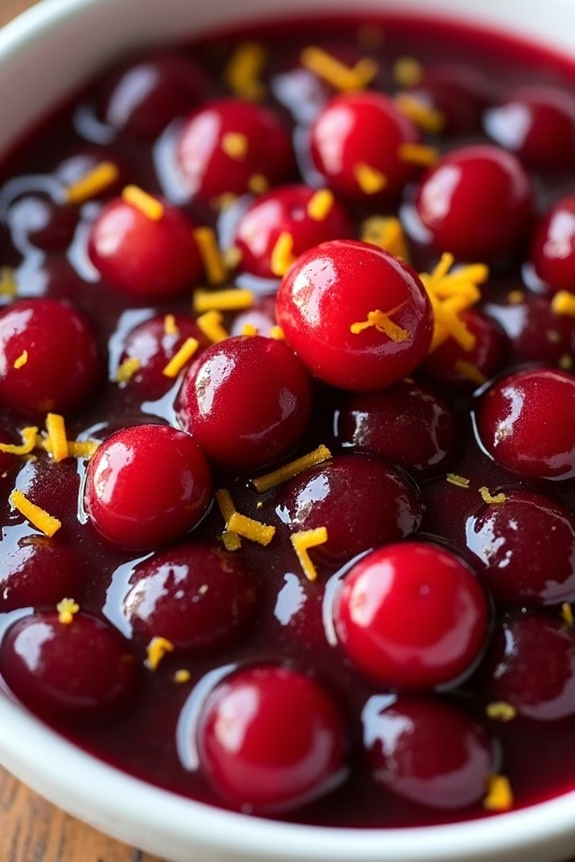
Cranberry sauce is an essential part of any Christmas dinner, adding a vibrant burst of color and a tangy-sweet flavor that perfectly complements savory dishes like roasted turkey or ham. This particular recipe for Cranberry Sauce with Orange Zest takes the classic dish to a new level with the addition of fresh orange zest, which adds a delightful citrusy aroma and taste. The combination of cranberries and orange creates a harmonious blend that will enhance your holiday meal and impress your guests with its rich flavor and beautiful presentation.
This recipe is straightforward and quick to prepare, allowing you to focus on other complex dishes on your Christmas menu. The key to perfecting this cranberry sauce is to balance the tartness of the cranberries with the sweetness of sugar and the natural tang of orange. This dish can also be made ahead of time, which is a wonderful time-saver during the busy holiday season. Plan to make this simple yet delicious cranberry sauce a staple in your festive traditions.
Ingredients for 4-6 servings:
- 12 ounces fresh or frozen cranberries
- 1 cup granulated sugar
- 1 cup freshly squeezed orange juice (about 2-3 oranges)
- Zest of 1 orange
- 1/4 teaspoon cinnamon (optional)
- 1/4 teaspoon salt
Cooking Instructions:
- Prepare the Ingredients: Begin by rinsing the cranberries under cold water and discarding any that are soft or damaged. Zest one orange and juice two to three oranges to obtain one cup of fresh orange juice.
- Combine Ingredients in a Saucepan: In a medium-sized saucepan, combine the cranberries, granulated sugar, orange juice, and orange zest. If desired, add cinnamon and salt for additional flavor depth.
- Cook the Sauce: Place the saucepan over medium heat and bring the mixture to a gentle boil. Stir occasionally to guarantee the sugar dissolves and the ingredients are well combined.
- Simmer Until Thickened: Reduce the heat to low and let the sauce simmer for about 10-15 minutes, stirring occasionally. The cranberries will begin to pop and release their juices, thickening the sauce as it simmers.
- Check Consistency: Once the cranberries have burst and the sauce has reached your desired consistency, remove the saucepan from heat. The sauce will continue to thicken as it cools, so keep this in mind when deciding on the final thickness.
- Cool and Serve: Allow the sauce to cool to room temperature before transferring it to a serving dish. For best results, refrigerate the sauce for at least an hour before serving to let the flavors meld together.
Extra Tips:
For a richer flavor, consider using a combination of white and brown sugar in the sauce. If you prefer a chunkier texture, leave some cranberries whole, or if you like a smoother sauce, mash the cranberries slightly with a potato masher during the simmering process.
This cranberry sauce can be made up to three days in advance and stored in the refrigerator, making it a convenient option for busy holiday preparations. Feel free to experiment by adding other spices like nutmeg or cloves to customize the sauce to your taste.
Yorkshire Puddings With Gravy
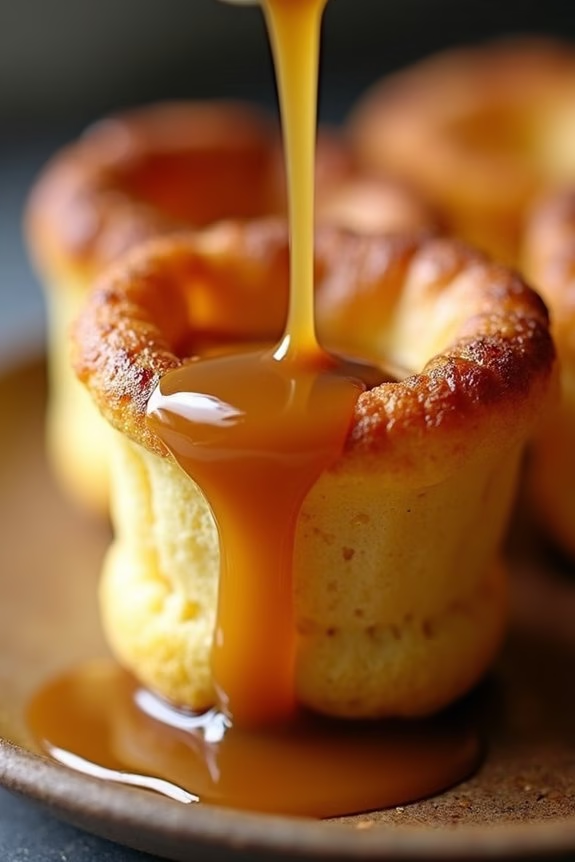
Yorkshire Puddings With Gravy are a classic British side dish that can elevate any Christmas dinner. These light and fluffy puddings are perfect for soaking up rich, flavorful gravy, making them an ideal accompaniment to a traditional roast.
Yorkshire puddings are made from a simple batter of eggs, flour, and milk, and are baked until they puff up and turn golden brown. The contrasting texture of the crispy exterior and soft, airy interior makes them a delightful addition to your festive feast.
Gravy is the perfect partner for Yorkshire puddings, enhancing their flavor and adding a savory depth to every bite. A well-made gravy, rich and smooth, complements the lightness of the puddings and ties the entire meal together.
Whether you’re serving them alongside roasted beef, turkey, or even a vegetarian main, Yorkshire puddings with gravy are sure to impress your guests and become a beloved holiday tradition.
Ingredients (Serves 4-6)
- 1 cup all-purpose flour
- 1 cup whole milk
- 3 large eggs
- 1/2 teaspoon salt
- 2 tablespoons vegetable oil
- 1/4 cup beef or vegetable drippings (for the gravy)
- 2 tablespoons all-purpose flour (for the gravy)
- 2 cups beef or vegetable stock (for the gravy)
- Salt and pepper to taste (for the gravy)
Cooking Instructions
1. Prepare the Batter: In a mixing bowl, whisk together 1 cup of all-purpose flour and 1/2 teaspoon of salt. In a separate bowl, beat 3 large eggs and 1 cup of whole milk until well combined. Gradually pour the milk and egg mixture into the flour, whisking continuously until a smooth batter forms. Let the batter rest for at least 30 minutes at room temperature.
2. Preheat the Oven: Preheat your oven to 425°F (220°C). Place a muffin or Yorkshire pudding tin in the oven to heat up.
3. Prepare the Tin: Once the oven is preheated, carefully remove the tin and add 1/2 teaspoon of vegetable oil into each cup. Return the tin to the oven for 5 minutes, allowing the oil to become very hot.
4. Bake the Puddings: Quickly and carefully pour the batter into the hot, oiled cups, filling each about halfway. Place the tin back in the oven and bake for 20-25 minutes, or until the puddings are puffed up and golden brown.
Don’t open the oven door during baking, as this can cause the puddings to deflate.
5. Make the Gravy: While the puddings are baking, heat 1/4 cup of beef or vegetable drippings in a saucepan over medium heat. Stir in 2 tablespoons of flour, cooking until it forms a paste and begins to brown. Gradually whisk in 2 cups of beef or vegetable stock, stirring constantly to prevent lumps.
Bring the mixture to a boil, then reduce the heat and simmer until the gravy thickens. Season with salt and pepper to taste.
6. Serve: Once the Yorkshire puddings are done, remove them from the oven and serve immediately with the prepared gravy on the side or poured over the top.
Extra Tips
For the best results, make sure that your batter is well-rested, as this helps the puddings rise properly.
It’s also vital that the oil and tin are very hot before adding the batter, as this sudden heat is what causes the puddings to puff up. If you prefer a vegetarian option, use vegetable stock and drippings for the gravy.
Remember to serve the puddings immediately after baking, as they can deflate quickly when cooled.
Classic Caesar Salad With Parmesan
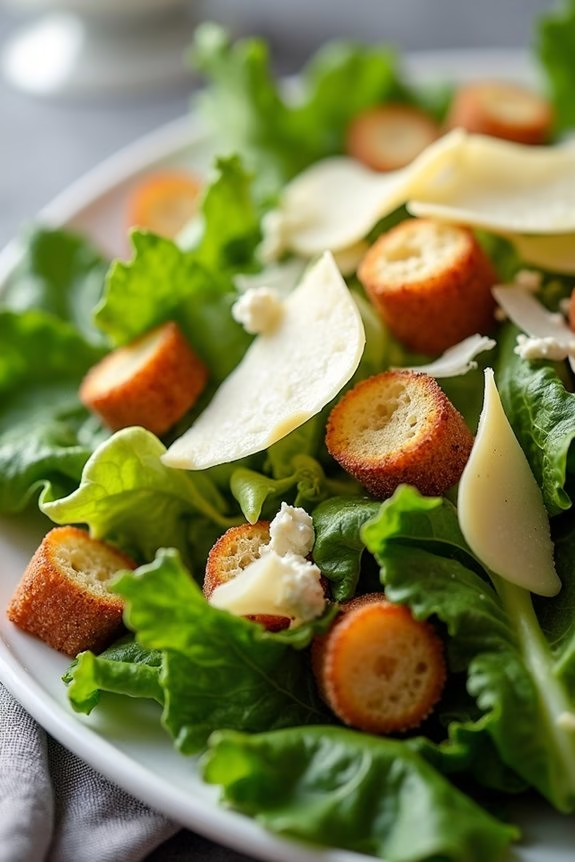
Indulge in the timeless flavors of a Classic Caesar Salad with Parmesan, a perfect addition to your Christmas dinner menu. This elegant and invigorating salad features crisp romaine lettuce, creamy Caesar dressing, crunchy croutons, and generous shavings of Parmesan cheese.
It’s a dish that beautifully balances richness with freshness, making it an excellent choice for a festive meal. The combination of textures and flavors in this salad is sure to please your guests and add a touch of sophistication to your holiday table.
Whether you’re hosting a large gathering or an intimate dinner, this Caesar Salad is designed to serve 4-6 people. The key to a successful Caesar salad lies in its quality ingredients, from fresh lettuce and homemade croutons to a well-crafted dressing and the finest Parmesan cheese.
Read on to discover a simple yet delicious recipe that will elevate your Christmas dinner experience.
Ingredients (Serves 4-6):
- 2 large heads of romaine lettuce
- 1 cup croutons
- 3/4 cup freshly grated Parmesan cheese
- 1/2 cup Caesar dressing
- 2 tablespoons olive oil
- 1 clove garlic, minced
- Salt and pepper to taste
- Optional: Anchovy fillets or paste
Cooking Instructions:
1. Prepare the Lettuce: Start by washing and drying the romaine lettuce thoroughly. Once dry, chop the lettuce into bite-sized pieces and set aside in a large salad bowl.
2. Make the Croutons: Preheat your oven to 350°F (175°C). Cut a loaf of crusty bread into small cubes. In a medium bowl, combine the bread cubes with olive oil, minced garlic, salt, and pepper. Toss to coat the bread evenly.
Spread the cubes on a baking sheet and bake for 10-15 minutes, or until golden brown and crisp. Allow the croutons to cool.
3. Prepare the Dressing: If you prefer homemade dressing, whisk together olive oil, minced garlic, a dash of Worcestershire sauce, lemon juice, and anchovy paste or fillets if using. Season with salt and pepper to taste.
4. Assemble the Salad: Add the cooled croutons to the bowl of chopped romaine lettuce. Drizzle the Caesar dressing over the salad and toss gently to make sure the lettuce is evenly coated.
5. Add Parmesan Cheese: Using a vegetable peeler or cheese slicer, shave thin slices of Parmesan cheese over the top of the salad. Toss lightly to distribute the cheese throughout.
6. Serve and Enjoy: Transfer the salad to a serving platter or individual plates. Add extra croutons or Parmesan cheese if desired. Serve immediately and enjoy the fresh, vibrant flavors.
Extra Tips:
For the best results, use fresh, high-quality ingredients. Freshly grated Parmesan cheese will impart a richer flavor than pre-packaged options.
If you’re making the dressing from scratch, adjust the amount of anchovy to suit your taste—start with a small amount and add more if you enjoy a stronger anchovy flavor.
To keep the lettuce crisp, dress the salad just before serving. If you’re preparing the salad in advance, keep the lettuce and dressing separate until it’s time to serve. This way, you maintain the salad’s invigorating crunch and vibrant appearance.
Red Velvet Trifle With Cream Cheese Frosting

Red Velvet Trifle with Cream Cheese Frosting is a show-stopping dessert that combines the rich flavors of red velvet cake with the creamy, tangy goodness of cream cheese. This layered dessert not only looks impressive but also offers a delightful blend of textures and tastes, making it a perfect choice for your Christmas dinner.
The vibrant red color of the cake, paired with the creamy white frosting and garnished with festive toppings, makes it an eye-catching addition to your holiday table.
This trifle is designed to serve 4-6 people and is perfect for those who love a classic red velvet cake but want to try something a little different. The dessert is assembled in layers, allowing the flavors to meld together beautifully. The cream cheese frosting adds a luscious creaminess, while the cake provides a soft, moist contrast.
This dessert can be made ahead of time, making it a convenient option for busy holiday preparations.
Ingredients for 4-6 servings:
- 1 box red velvet cake mix
- 3 large eggs
- 1/3 cup vegetable oil
- 1 cup water
- 8 oz cream cheese, softened
- 1/2 cup unsalted butter, softened
- 2 cups powdered sugar
- 1 tsp vanilla extract
- 1 cup heavy whipping cream
- 1 tbsp granulated sugar
- 1/4 cup milk
- 1/2 cup crushed peppermint candies (optional)
- Fresh mint leaves for garnish (optional)
Instructions:
- Prepare the Cake:
- Preheat your oven to 350°F (175°C). Grease and flour a 9×13 inch baking pan.
- In a large bowl, combine the red velvet cake mix, eggs, vegetable oil, and water. Mix until well-blended.
- Pour the batter into the prepared pan and bake according to the package instructions, typically about 25-30 minutes, or until a toothpick inserted into the center comes out clean.
- Allow the cake to cool completely on a wire rack. Once cooled, cut the cake into 1-inch cubes.
- Make the Cream Cheese Frosting:
- In a medium bowl, beat the softened cream cheese and butter together until smooth and creamy.
- Gradually add in the powdered sugar and vanilla extract, beating until fully incorporated and fluffy.
- Prepare the Whipped Cream:
- In a separate chilled bowl, combine the heavy whipping cream and granulated sugar.
- Beat on high speed until stiff peaks form.
- Assemble the Trifle:
- In a trifle bowl or large glass serving dish, start by layering half of the red velvet cake cubes at the bottom.
- Drizzle a few tablespoons of milk over the cake cubes to keep them moist.
- Spread half of the cream cheese frosting over the cake cubes, followed by a layer of half the whipped cream.
- Repeat the layers with the remaining cake cubes, milk, cream cheese frosting, and whipped cream.
- Finish with a final dollop of whipped cream on top.
- Garnish and Serve:
- Sprinkle crushed peppermint candies over the top for a festive touch.
- Garnish with fresh mint leaves if desired.
- Chill the trifle in the refrigerator for at least 2 hours before serving to allow the flavors to meld.
Extra Tips:
For the best results, verify that the cake is completely cooled before assembling the trifle to prevent the frosting from melting.
You can also make the cake a day in advance and store it in an airtight container, which allows for easy assembly on the day of serving.
If you prefer, you can substitute homemade red velvet cake for the boxed mix for an even richer flavor.
Experiment with different toppings like chocolate shavings or berries to customize your trifle.