
In the hustle and bustle of busy mornings, finding quick and satisfying breakfast options can feel like a challenge. I’ve gathered some of my favorite go-to recipes that make mornings a little easier. From creamy overnight oats to easy smoothie packs, these options keep things simple and delicious. Picture enjoying a peanut butter banana wrap as you head out the door. Ready to discover more morning game-changers? Let’s explore these delightful recipes together!
Overnight Oats: The Ultimate Grab-and-Go Breakfast
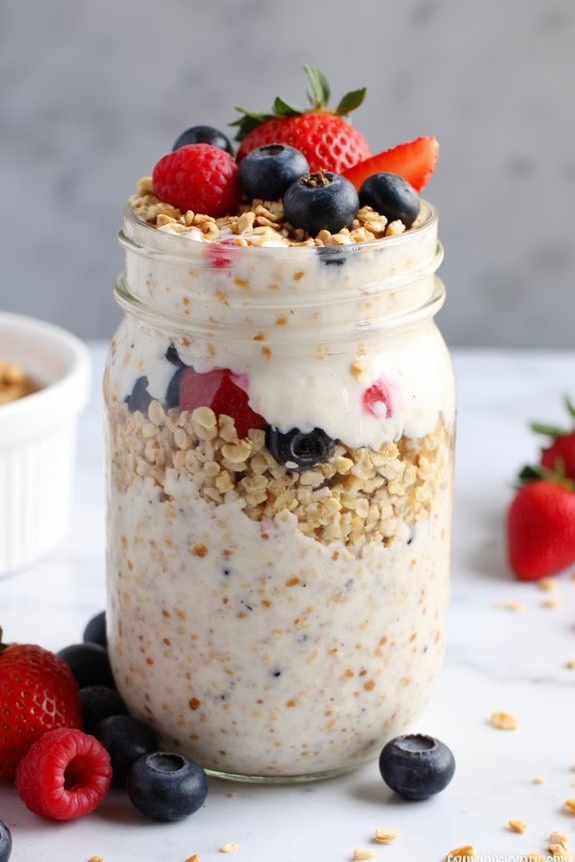
Overnight oats are a lifesaver for busy mornings, providing a nutritious and satisfying meal that you can prepare ahead of time. This versatile breakfast option allows you to customize flavors and toppings according to your preferences, making it a crowd-pleaser for the whole family.
The beauty of overnight oats lies in their simplicity and convenience, as they require minimal effort and no cooking. Simply mix your ingredients, let them sit in the fridge overnight, and wake up to a delicious breakfast that’s ready to eat.
Perfect for a serving size of 4-6 people, this basic overnight oats recipe can be easily scaled up or down depending on your needs. The base ingredients are pantry staples, and you can add any combination of fruits, nuts, and sweeteners to suit your taste.
Once you get the hang of the process, feel free to experiment with different flavors and textures to keep your breakfasts exciting and varied.
Ingredients (for 4-6 servings):
- 3 cups rolled oats
- 3 cups milk (dairy or non-dairy)
- 1 cup Greek yogurt
- 2 tablespoons chia seeds
- 2 tablespoons honey or maple syrup
- 1 teaspoon vanilla extract
- 1 teaspoon cinnamon
- 1 cup mixed berries (fresh or frozen)
- 1/2 cup chopped nuts (such as almonds or walnuts)
Cooking Instructions:
1. Combine Base Ingredients:
In a large mixing bowl, combine the rolled oats, milk, and Greek yogurt. Stir until the oats are fully coated and the ingredients are well integrated.
2. Add Flavorings:
Stir in the chia seeds, honey or maple syrup, vanilla extract, and cinnamon. Make sure everything is evenly distributed throughout the mixture.
3. Add Fruits and Nuts:
Gently fold in the mixed berries and chopped nuts. This will add texture and flavor to the oats, making each bite delightful.
4. Portion into Containers:
Divide the mixture evenly among 4-6 airtight containers or mason jars. Leave some space at the top for additional toppings if desired.
5. Refrigerate:
Seal the containers and place them in the refrigerator. Allow the oats to soak for at least 6 hours, or overnight, to achieve the desired creamy consistency.
6. Serve:
In the morning, give the oats a good stir and add any additional toppings you like, such as sliced bananas, a dollop of nut butter, or a sprinkle of granola. Enjoy your ready-to-eat breakfast!
Extra Tips:
For the best results, use rolled oats rather than instant oats, as they maintain a better texture after soaking. Feel free to adjust the sweetness and flavors by varying the amount of honey or maple syrup and trying different spices like nutmeg or cardamom.
If you prefer a thicker consistency, reduce the milk slightly or add more chia seeds. Overnight oats can be stored in the refrigerator for up to 5 days, making them a perfect meal prep option for the entire week.
Smoothie Packs for a Quick Morning Boost
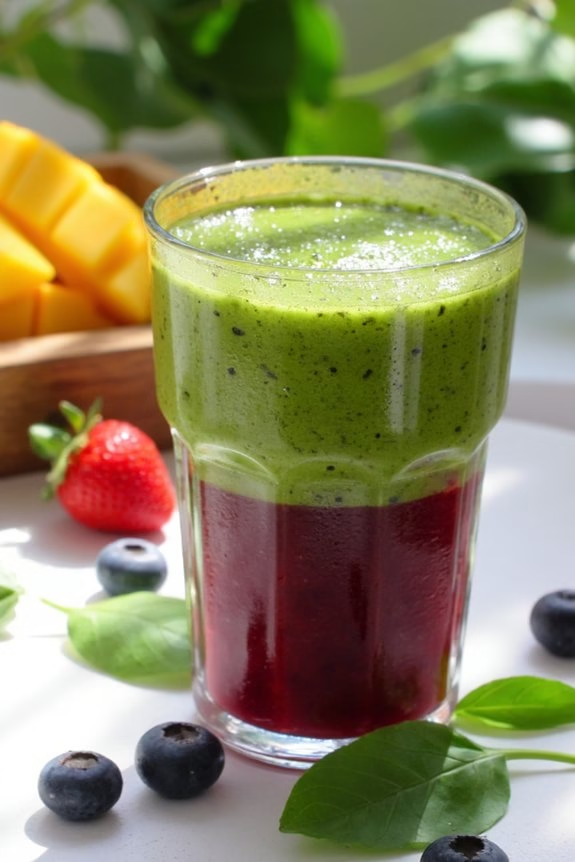
Start your day off right with these Energizing Morning Smoothie Packs, perfect for those busy mornings when you need a quick yet nutritious breakfast. Prepped in advance, these smoothie packs save valuable time and guarantee a healthy start to your day. The packs are filled with a delightful mix of fruits, greens, and optional superfoods, offering a revitalizing energy boost that keeps you fueled throughout the morning.
With a combination of vibrant flavors and essential nutrients, these smoothie packs are ideal for anyone looking for a convenient and wholesome breakfast option. Simply blend, pour, and enjoy your smoothie on the go! Preparing a batch for the week means less stress in the morning and more time for the things that matter. Here’s how you can make smoothie packs for 4-6 servings.
Ingredients (for 4-6 servings):
- 2 cups spinach
- 2 bananas, sliced
- 1 cup strawberries, hulled and halved
- 1 cup blueberries
- 1 mango, diced
- 2 cups almond milk (or any milk of your choice)
- 1 cup Greek yogurt
- 2 tablespoons chia seeds
- 2 tablespoons honey (optional)
- 1 teaspoon vanilla extract
Instructions:
- Prepare the Ingredients: Begin by washing the spinach thoroughly and allowing it to dry. Slice the bananas, hull and halve the strawberries, rinse the blueberries, and dice the mango.
- Portion the Fruits: Divide the sliced bananas, strawberries, blueberries, and diced mango evenly into 4-6 freezer-safe bags or containers. This will guarantee each smoothie pack has a balanced mixture of fruits.
- Add the Greens: Add an equal portion of spinach to each of the bags. Spinach is a great way to add nutrients without altering the taste of your smoothie appreciably.
- Incorporate the Extras: For an added nutritional boost, sprinkle about 1/2 tablespoon of chia seeds into each bag. If you prefer, add a small drizzle of honey and a drop of vanilla extract for extra flavor.
- Freeze the Packs: Seal each bag or container tightly, removing as much air as possible to prevent freezer burn. Place the smoothie packs in the freezer for up to two weeks.
- Blend and Enjoy: When ready to enjoy, empty one smoothie pack into a blender. Add 1/2 cup of almond milk and 1/4 cup of Greek yogurt. Blend until smooth. If the consistency is too thick, add more almond milk to reach your desired consistency.
Extra Tips:
To enhance the taste and nutritional value of your smoothies, consider adding a tablespoon of flax seeds or protein powder when blending. If you prefer a creamier smoothie, replace some or all of the almond milk with coconut milk.
For those who enjoy a sweeter taste, a ripe banana or a splash of orange juice can naturally sweeten your smoothie without the need for additional sugar. Always taste your smoothie before pouring, as you might want to adjust the sweetness or thickness according to your preference.
Egg Muffins: Protein-Packed and Portable

Egg muffins are a fantastic on-the-go breakfast option that combines the richness of eggs with the versatility of your favorite add-ins like vegetables, meats, and cheese. They aren’t only easy to make but also incredibly convenient for busy mornings.
These portable delights are perfect for meal prepping; you can make a batch at the start of the week and have breakfast ready in minutes each day. Full of protein and flavor, egg muffins are an excellent way to fuel your morning.
Ideal for a family breakfast or a quick solo meal, this recipe serves 4-6 people. You can customize the fillings according to your preference, making them as varied or as simple as you like. Whether you prefer them with a spicy kick or loaded with veggies, these egg muffins are sure to start your day off right.
They’re great for kids and adults alike, and you can easily adjust the ingredients to suit dietary needs.
Ingredients:
- 10 large eggs
- 1 cup diced bell peppers (any color)
- 1 cup cooked and crumbled bacon or sausage
- 1 cup shredded cheddar cheese
- 1/2 cup chopped spinach
- Salt and pepper to taste
- Cooking spray or paper muffin liners
Cooking Instructions:
- Preheat the Oven: Begin by preheating your oven to 375°F (190°C). This guarantees that the oven is at the right temperature when you place the egg muffins inside, allowing them to cook evenly.
- Prepare the Muffin Tin: Spray a 12-cup muffin tin with cooking spray or line it with paper muffin liners. This step is vital to prevent the egg muffins from sticking to the tin, making them easy to remove once cooked.
- Mix the Ingredients: In a large bowl, crack the eggs and whisk them until smooth. Add in the diced bell peppers, cooked bacon or sausage, shredded cheddar cheese, chopped spinach, salt, and pepper. Mix everything well to distribute the ingredients evenly throughout the egg mixture.
- Fill the Muffin Cups: Pour the egg mixture into the prepared muffin tin, filling each cup about three-quarters full. This allows space for the muffins to rise as they bake.
- Bake: Place the muffin tin in the preheated oven and bake for 20-25 minutes, or until the egg muffins are set and a toothpick inserted into the center comes out clean. Keep an eye on them to make sure they don’t overcook.
- Cool and Serve: Once baked, let the egg muffins cool in the tin for a few minutes before removing them. Serve warm, or let them cool completely before storing them in the refrigerator for up to five days.
Extra Tips:
For added flavor, consider adding herbs such as chives or parsley to the egg mixture. If you prefer a spicier kick, a pinch of red pepper flakes can do the trick.
To make the muffins more uniform in size, use a ladle or a measuring cup to pour the egg mixture into the muffin cups. If you’re planning to freeze them for later, allow the muffins to cool completely before placing them in a freezer-safe container. They can be reheated in the microwave for about a minute for a quick and easy breakfast.
Peanut Butter Banana Wraps for a Sweet Start
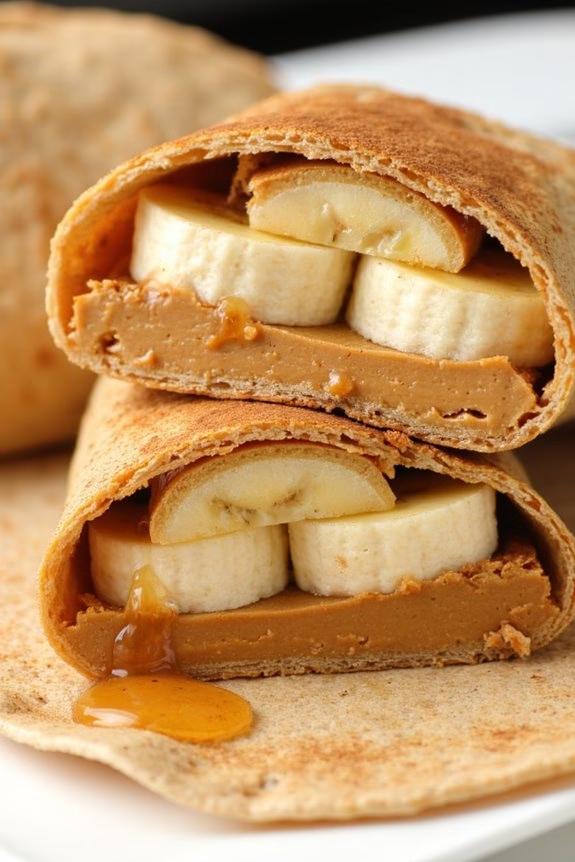
Start your morning on a high note with these delicious and easy-to-make Peanut Butter Banana Wraps. Perfect for those busy mornings when you’re rushing out the door, these wraps combine the creamy, nutty goodness of peanut butter with the natural sweetness of bananas. The whole-wheat tortilla adds a touch of heartiness, while the optional drizzle of honey or sprinkle of cinnamon can take the flavor to the next level.
Whether you’re preparing breakfast for the family or need a portable snack for your commute, these wraps are sure to satisfy your cravings and keep you energized throughout the morning.
Not only are these wraps incredibly tasty, but they also pack a nutritious punch. Bananas are a fantastic source of potassium and fiber, while peanut butter provides healthy fats and protein. By choosing whole-wheat tortillas, you’re adding some whole grains into the mix, making this breakfast option a balanced meal that you can feel good about serving to your loved ones.
In just a few simple steps, you’ll have a breakfast that’s delicious, nutritious, and ready to go.
Ingredients for 4-6 servings:
- 4-6 whole-wheat tortillas
- 4-6 bananas (one per wrap)
- 1 cup creamy peanut butter
- 2 tablespoons honey (optional)
- 1 teaspoon ground cinnamon (optional)
Cooking Instructions:
- Prepare the tortillas: Lay out the whole-wheat tortillas on a clean work surface. If they aren’t pliable, warm them up slightly in the microwave for about 10-15 seconds to make them easier to fold.
- Spread the peanut butter: Using a butter knife or spatula, spread a generous layer of creamy peanut butter evenly over each tortilla, leaving about an inch around the edges to prevent overflow when wrapping.
- Add the bananas: Peel the bananas and place one banana in the center of each tortilla. For easier wrapping, you can slice the banana in half lengthwise or into smaller pieces if preferred.
- Optional toppings: Drizzle a bit of honey over the banana for added sweetness, or sprinkle some cinnamon for a hint of spice if desired.
- Wrap it up: Carefully fold in the sides of the tortilla over the banana, then roll it up from the bottom to the top, ensuring the wrap is secure and the filling is contained.
- Slice and serve: For easier handling, cut each wrap in half using a sharp knife. Serve immediately with a napkin for a convenient on-the-go breakfast.
Extra Tips:
For an added crunch, consider sprinkling some granola or crushed nuts over the peanut butter before adding the banana. If you prefer, swap out the peanut butter for almond or sunflower seed butter for a different flavor profile.
These wraps can also be prepared the night before and stored in the refrigerator, tightly wrapped in plastic wrap, for a quick grab-and-go option in the morning. Just be aware that bananas may darken slightly over time, so it’s best to enjoy them fresh if possible.
Yogurt Parfaits to Kickstart Your Day
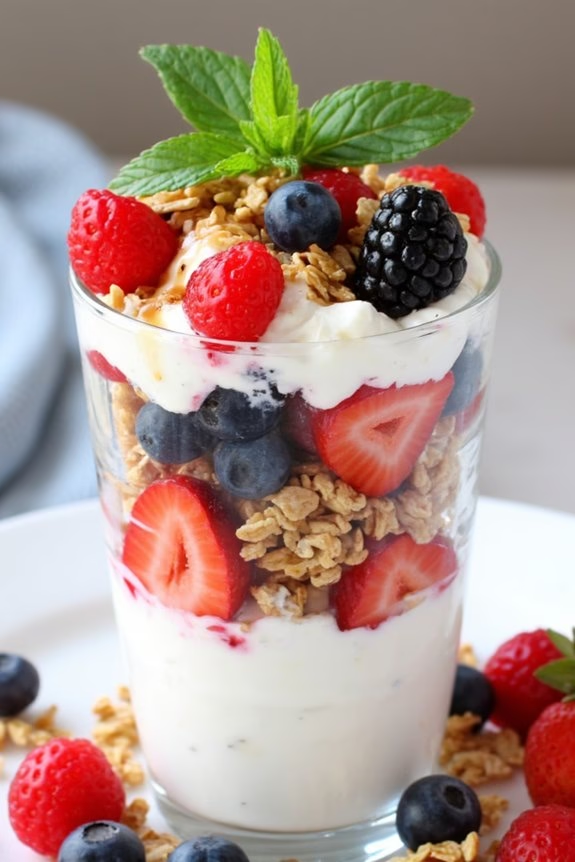
Start your day with a burst of flavor and nourishment with these Berry and Granola Yogurt Parfaits. Perfect for busy mornings, these parfaits aren’t only easy to assemble but also offer a delightful combination of creamy yogurt, sweet berries, and crunchy granola.
Whether you’re preparing breakfast for your family or need a quick on-the-go option, this recipe will guarantee everyone starts their day satisfied and energized.
The beauty of these yogurt parfaits lies in their versatility and simplicity. You can customize them with your favorite fruits, granola, or even swap the yogurt for a dairy-free alternative if needed.
With minimal preparation time, this recipe is ideal for serving 4-6 people, making it perfect for family breakfasts or brunch gatherings.
Ingredients (Serves 4-6):
- 4 cups of Greek yogurt (plain or vanilla)
- 2 cups of mixed berries (such as strawberries, blueberries, raspberries)
- 1 cup of granola
- 2 tablespoons of honey or maple syrup (optional)
- Mint leaves for garnish (optional)
Instructions:
- Prepare the Ingredients:
- Wash the berries thoroughly and pat them dry with a paper towel. If using strawberries, hull and slice them into smaller pieces.
- If you prefer a sweeter parfait, mix the Greek yogurt with honey or maple syrup in a bowl until well combined.
- Assemble the Parfaits:
- Take 4-6 glasses or jars and start by spooning a layer of yogurt at the bottom of each glass.
- Add a layer of mixed berries on top of the yogurt, guaranteeing an even distribution for each glass.
- Sprinkle a layer of granola over the berries, adding a satisfying crunch.
- Repeat the layers: yogurt, berries, and granola until the glasses are filled, finishing with a dollop of yogurt on top.
- Garnish and Serve:
- Optionally, drizzle a little more honey or maple syrup over the top to enhance sweetness.
- Garnish with a few fresh mint leaves for an added touch of freshness and color.
- Serve immediately or cover with lids or plastic wrap and refrigerate for up to a day if making ahead.
Extra Tips:
For best results, use fresh, ripe berries to guarantee maximum flavor and nutritional benefits. If fresh berries aren’t available, frozen berries can be a great alternative; just let them thaw before assembling the parfaits.
When choosing granola, opt for one that complements your flavor preferences—whether it’s nutty, chocolatey, or spiced. To make this recipe even healthier, consider using a low-sugar or homemade granola.
Finally, these parfaits can be a fun and engaging activity for kids, allowing them to create their personalized breakfast by choosing their own layers and toppings.
Breakfast Burritos: A Savory Morning Delight

Start your day on a delicious note with Breakfast Burritos, a savory and satisfying meal that’s perfect for busy mornings. These burritos aren’t only flavorful but also incredibly versatile, allowing you to customize them to suit your taste preferences. Wrapped in a warm tortilla and filled with a delightful combination of eggs, cheese, vegetables, and protein, Breakfast Burritos are a portable breakfast option that can be enjoyed on the go.
Whether you’re heading to work, school, or taking a road trip, these burritos are a convenient way to fuel your morning. Breakfast Burritos are a great way to incorporate a variety of nutrients into your first meal of the day. The combination of eggs, which are rich in protein, and vegetables, which are high in vitamins and minerals, makes this dish both nourishing and filling.
Whether you prefer a vegetarian version or one loaded with bacon or sausage, these burritos can be tailored to meet your dietary needs. Not only are they delicious and easy to prepare, but they also store well, allowing you to make them ahead of time and reheat as necessary.
Ingredients for 4-6 servings:
- 12 large eggs
- 1/4 cup milk
- Salt and pepper to taste
- 1 tablespoon olive oil
- 1 cup diced bell peppers (any color)
- 1 cup diced onions
- 1 cup cooked and crumbled bacon or sausage (optional)
- 1 cup shredded cheddar cheese
- 6 large flour tortillas
- 1 cup salsa (optional)
- 1 avocado, sliced (optional)
Cooking Instructions:
- Prepare the Egg Mixture: In a large bowl, whisk together the eggs, milk, salt, and pepper until well combined. This will create a fluffy and evenly seasoned egg mixture for your burritos.
- Cook the Vegetables: Heat the olive oil in a large skillet over medium heat. Add the diced bell peppers and onions, sautéing them for about 5 minutes or until they’re soft and fragrant.
- Scramble the Eggs: Pour the egg mixture into the skillet with the vegetables. Gently stir with a spatula, making certain the eggs cook evenly and don’t stick to the bottom. Cook until the eggs are scrambled and fully set, approximately 5-7 minutes.
- Add Protein and Cheese: If using, add the cooked and crumbled bacon or sausage to the egg mixture, stirring to combine. Sprinkle the shredded cheese over the eggs and gently fold until the cheese melts.
- Warm the Tortillas: While the eggs are cooking, warm the flour tortillas in a dry skillet over medium heat for about 30 seconds on each side, or until they’re pliable.
- Assemble the Burritos: Lay each tortilla flat and spoon a generous portion of the egg mixture onto the center. If desired, add a spoonful of salsa and a few slices of avocado for extra flavor.
- Roll the Burritos: Fold in the sides of the tortilla over the filling, then roll tightly from one end to the other, creating a secure burrito. Repeat with the remaining tortillas and filling.
- Serve and Enjoy: Serve the breakfast burritos immediately, or wrap them in aluminum foil for an easy on-the-go meal. They can also be stored in the refrigerator and reheated in the microwave when ready to eat.
Extra Tips:
For a breakfast burrito that stays together and doesn’t fall apart, make certain that the tortillas are warm and pliable before filling and rolling them. This prevents cracking and makes for a more secure wrap.
If you plan to store them, wrap each burrito individually in foil or plastic wrap to maintain freshness. To prevent the tortillas from becoming soggy, avoid adding too much salsa directly inside; instead, serve it on the side.
Additionally, if you prefer a spicier kick, consider adding a few dashes of hot sauce to the egg mixture or using pepper jack cheese instead of cheddar.
Chia Seed Pudding for a Nutrient-Rich Meal
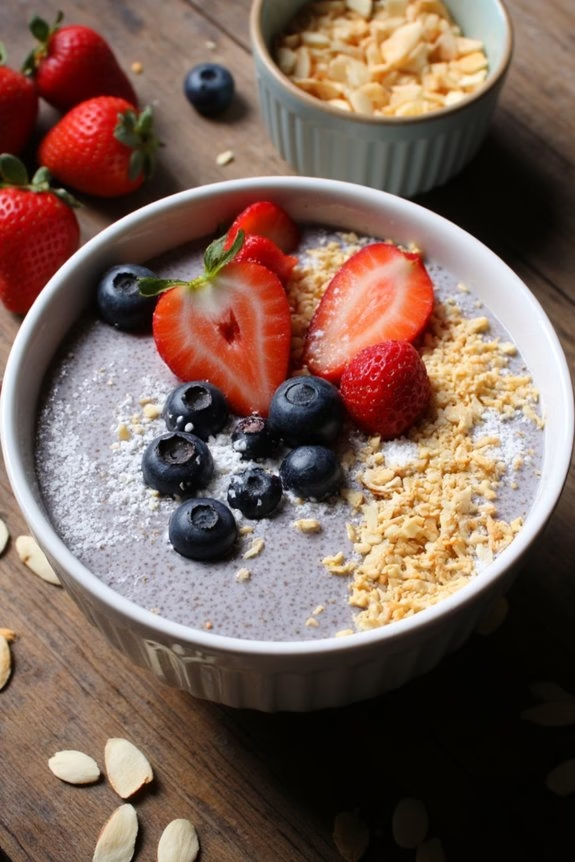
Chia Seed Pudding is an ideal breakfast option for those who want a healthy, easy, and on-the-go meal. Packed with omega-3 fatty acids, fiber, and protein, chia seeds are a nutritional powerhouse. This pudding isn’t only simple to prepare but can also be customized with your favorite flavors and toppings.
Whether you prefer a fruity, nutty, or chocolatey twist, you can create a dish that suits your palate while keeping you full and energized throughout the morning.
The beauty of Chia Seed Pudding lies in its make-ahead nature. Preparing it the night before guarantees that you have a delicious breakfast ready to grab in the morning. This recipe serves 4-6 people, making it perfect for meal prepping for your family or yourself for the week ahead.
By adjusting the flavors and toppings, it’s easy to keep this breakfast fresh and exciting day after day.
Ingredients (Serving size: 4-6 people):
- 1 cup chia seeds
- 4 cups almond milk (or milk of choice)
- 1/4 cup maple syrup or honey
- 1 teaspoon vanilla extract
- 1/4 teaspoon salt
- Fresh fruits (e.g., berries, bananas)
- Nuts or seeds (e.g., almonds, pumpkin seeds)
- Optional: Shredded coconut, cinnamon, cocoa powder
Cooking Instructions:
- Mix Ingredients: In a large mixing bowl, combine the chia seeds, almond milk, maple syrup, vanilla extract, and salt. Stir well until all ingredients are thoroughly mixed.
- Rest and Stir: Let the mixture sit for about 5 minutes, then give it another stir to break up any clumps of chia seeds. This helps promote an even consistency in the pudding.
- Refrigerate: Cover the bowl with plastic wrap or transfer the mixture into a container with a lid. Place it in the refrigerator for at least 4 hours, or overnight. This allows the chia seeds to absorb the liquid and swell, creating a pudding-like texture.
- Serve and Top: Once the pudding has set, give it a good stir before serving. Divide it into bowls or jars and top with your choice of fresh fruits, nuts, seeds, or optional toppings like shredded coconut or cocoa powder.
Extra Tips:
To promote a creamy consistency, feel free to adjust the liquid ratio by adding more almond milk if needed. For a thicker pudding, use less liquid.
Experiment with flavors by adding a dash of cinnamon or a tablespoon of cocoa powder to the mixture before refrigerating. Don’t hesitate to play around with different milk alternatives such as coconut milk for a tropical twist or oat milk for a creamier texture.
The pudding can be stored in the refrigerator for up to 5 days, making it a great option for batch preparation.
Avocado Toast on the Run

Start your day with a wholesome and delicious breakfast that’s both quick and satisfying. Avocado Toast on the Run is a perfect solution for busy mornings when time is of the essence, yet you still want to enjoy a nutrient-packed meal. This recipe combines creamy avocado with a hint of lime and a sprinkle of chili flakes for an invigorating and slightly spicy kick. With minimal preparation time, you can have a healthy breakfast ready in minutes.
Not only is this dish easy to make, but it’s also versatile, allowing you to customize it to suit your taste preferences. Whether you’re rushing out the door or need a quick bite before a morning meeting, Avocado Toast on the Run provides the energy and nutrients you need to fuel your day. This recipe yields enough for 4-6 servings, making it ideal for family breakfasts or meal prepping for the week.
Ingredients for 4-6 servings:
- 4 large ripe avocados
- 6 slices of whole-grain bread
- 1 lime
- 1 teaspoon of chili flakes
- Salt to taste
- Freshly ground black pepper to taste
- Optional toppings: cherry tomatoes, radish slices, microgreens, or poached eggs
Instructions:
- Prepare the Avocados: Begin by cutting the avocados in half, removing the pits, and scooping the flesh into a bowl. Use a fork to mash the avocado until it reaches your desired consistency—smooth or chunky, whichever you prefer.
- Season the Avocado: Squeeze the juice of one lime over the mashed avocado. Add the chili flakes, salt, and freshly ground black pepper. Mix well to confirm the flavors are evenly distributed throughout the avocado.
- Toast the Bread: While preparing the avocado mixture, toast the slices of whole-grain bread to your preferred level of crispiness. You can use a toaster or an oven for this step.
- Assemble the Toasts: Once the bread is toasted, spread a generous amount of the avocado mixture over each slice. Make sure to cover the entire surface for maximum flavor in every bite.
- Add Optional Toppings: If desired, add additional toppings such as sliced cherry tomatoes, radish slices, microgreens, or a poached egg on top of the avocado spread for extra flavor and nutrition.
- Serve Immediately: Serve the avocado toasts immediately while the bread is still warm and crispy. Enjoy as a quick breakfast or snack on-the-go.
Extra Tips:
For the best results, choose avocados that are ripe but not overly soft. A ripe avocado will yield slightly to gentle pressure.
If you want to add more protein to your breakfast, consider topping your avocado toast with a poached egg or a few slices of smoked salmon.
Additionally, storing any leftover avocado mixture can be tricky due to oxidation. To keep it fresh, place a piece of plastic wrap directly on the surface of the avocado mash and refrigerate. This will help prevent browning and maintain its vibrant green color.
Mini Quiches: A Bite-Sized Breakfast Option

Mini Quiches are the perfect bite-sized breakfast option for those busy mornings when you need something quick, tasty, and portable. These delightful little quiches pack a flavorful punch and can be customized to suit your tastes by adding your favorite vegetables, meats, and cheeses. Not only are they easy to prepare, but they also store well, making them an excellent choice for meal prep or feeding a crowd.
The beauty of Mini Quiches lies in their versatility and simplicity. You can whip up a batch in no time and enjoy them warm straight from the oven or cold as a snack later in the day. Whether you’re hosting a brunch, need a breakfast on-the-go, or just want something different to shake up your morning routine, Mini Quiches are bound to please everyone. Below is a recipe that serves 4-6 people, providing a delightful and satisfying breakfast treat.
Ingredients (Serves 4-6)
- 6 large eggs
- 1/3 cup milk
- Salt and pepper to taste
- 1 cup shredded cheese (such as cheddar or mozzarella)
- 1/2 cup cooked bacon or sausage, crumbled
- 1/2 cup chopped spinach
- 1/4 cup diced bell peppers
- 1/4 cup chopped onion
- 1 package of pre-made mini phyllo pastry shells (around 24 shells)
Cooking Instructions
- Preheat the Oven: Start by preheating your oven to 375°F (190°C). This guarantees that your mini quiches will cook evenly and develop a nice golden crust.
- Prepare the Egg Mixture: In a large mixing bowl, whisk together the eggs, milk, salt, and pepper until well combined. Make sure the mixture is smooth and uniform to guarantee even cooking.
- Add Fillings: Stir in the shredded cheese, cooked bacon or sausage, chopped spinach, diced bell peppers, and chopped onion. Mix everything together thoroughly so each mini quiche will have a balanced distribution of ingredients.
- Fill the Pastry Shells: Arrange the mini phyllo pastry shells on a baking sheet. Carefully spoon the egg mixture into each shell, filling them almost to the top. Be cautious not to overfill, as the mixture will expand as it cooks.
- Bake: Place the baking sheet in the preheated oven and bake for 15-20 minutes, or until the egg mixture is set and the tops are slightly golden. Keep an eye on them to avoid over-browning.
- Cool and Serve: Once baked, remove the mini quiches from the oven and let them cool for a few minutes on the baking sheet. Serve warm or let them cool completely before storing in the refrigerator for later consumption.
Extra Tips
For best results, confirm that your vegetables and meats are pre-cooked before adding them to the egg mixture. This prevents excess moisture from making the quiches soggy.
Feel free to experiment with different ingredients, such as mushrooms, tomatoes, or different types of cheese, to create unique flavor combinations. If you prefer a vegetarian option, simply omit the meat.
Mini Quiches can be stored in an airtight container in the refrigerator for up to 3 days or frozen for longer storage. Reheat them in a toaster oven or microwave for a quick and delicious breakfast anytime.
Energy Bars for a Quick and Easy Morning Snack
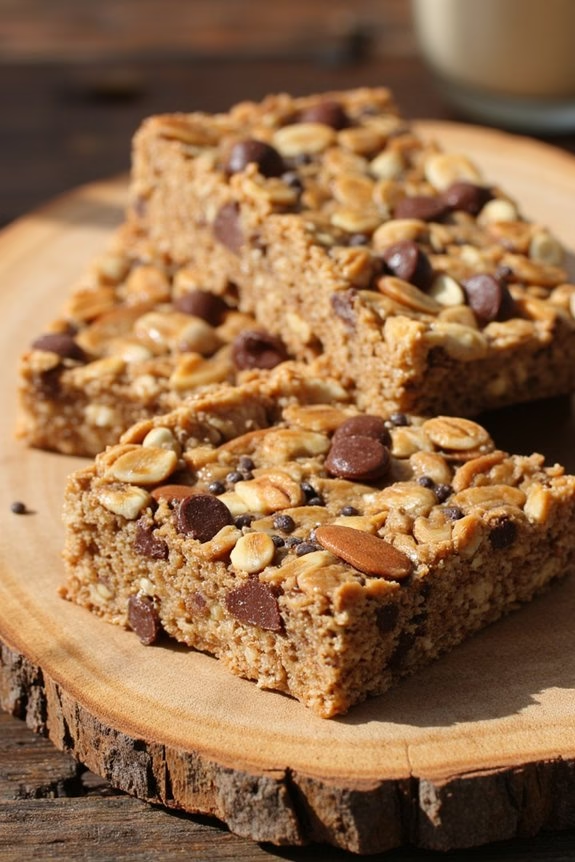
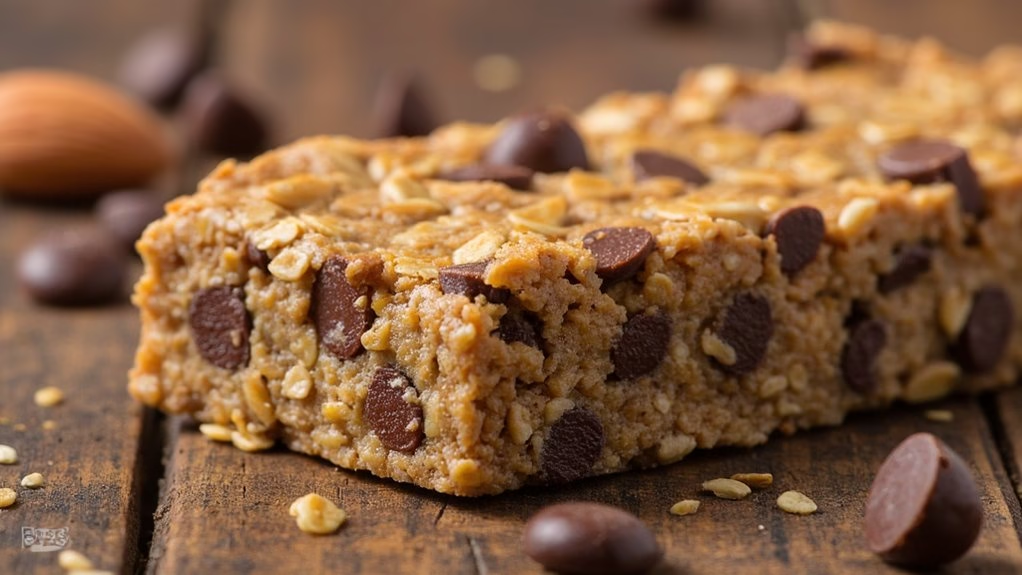
Start your day with a burst of energy by indulging in these Nutty Chocolate Chip Energy Bars. Perfect for busy mornings, these bars combine the natural sweetness of dates with the satisfying crunch of nuts and the irresistible taste of chocolate chips. Not only are they delicious, but they’re also packed with nutrients that will keep you fueled and focused throughout the morning.
These bars are an excellent grab-and-go option for those who want a wholesome breakfast without the fuss. Whether you’re heading to the office, school, or the gym, these energy bars make for an ideal snack that can be prepared in advance and stored for convenience. They’re easy to customize with your favorite nuts and seeds, making them versatile to suit any preference. Plus, they’re gluten-free and can be made vegan-friendly by using dairy-free chocolate chips.
Make a batch over the weekend and enjoy a quick, nutritious breakfast throughout the week.
Ingredients for 4-6 servings:
- 1 cup pitted dates
- 1 cup almonds
- 1 cup rolled oats
- 1/2 cup peanut butter
- 1/4 cup honey or maple syrup
- 1/4 cup chocolate chips
- 1/4 cup chopped walnuts
- 1 tablespoon chia seeds
- 1 teaspoon vanilla extract
- 1/4 teaspoon salt
Cooking Instructions:
- Prepare the Dates: Place the pitted dates in a bowl of warm water and soak for about 10 minutes to soften. This will make them easier to blend.
- Blend the Base Ingredients: Drain the dates and add them to a food processor along with the almonds, rolled oats, and salt. Blend until the mixture becomes a coarse, sticky dough, with small chunks of almonds remaining for texture.
- Add Wet Ingredients: Add the peanut butter, honey or maple syrup, and vanilla extract to the processor. Blend again until all the ingredients are well combined and the mixture starts to clump together.
- Mix in Toppings: Transfer the mixture to a large bowl. Stir in the chocolate chips, chopped walnuts, and chia seeds until they’re evenly distributed throughout the dough.
- Shape the Bars: Line an 8×8 inch baking pan with parchment paper. Press the mixture firmly into the pan, ensuring it’s evenly spread and compacted to avoid crumbling.
- Chill and Set: Place the pan in the refrigerator for at least 1 hour to allow the bars to firm up. Once set, lift the parchment paper to remove the bars from the pan.
- Cut and Serve: Cut the chilled mixture into rectangular bars or squares. Store the bars in an airtight container in the fridge for up to one week.
Extra Tips:
For added flavor and crunch, consider toasting the nuts and oats lightly before blending them with the dates. If you prefer a sweeter bar, you can increase the amount of honey or maple syrup.
These bars can also be frozen for up to three months, making them a perfect make-ahead breakfast option. Remember to let them thaw for a few minutes at room temperature before eating.
Adjust the ingredient quantities to accommodate your taste preferences, such as swapping out walnuts for pecans or adding dried fruits for variety.