

Hosting a sophisticated Christmas party is all about the little touches that make it special. I’ve put together a list of ten elegant appetizers that will elevate your gathering. Picture your guests enjoying smoked salmon and avocado crostini or savoring prosciutto-wrapped asparagus spears. These recipes perfectly blend taste and style for an unforgettable celebration. Curious to see what else is on the menu? Join me on this culinary journey.
Smoked Salmon and Avocado Crostini
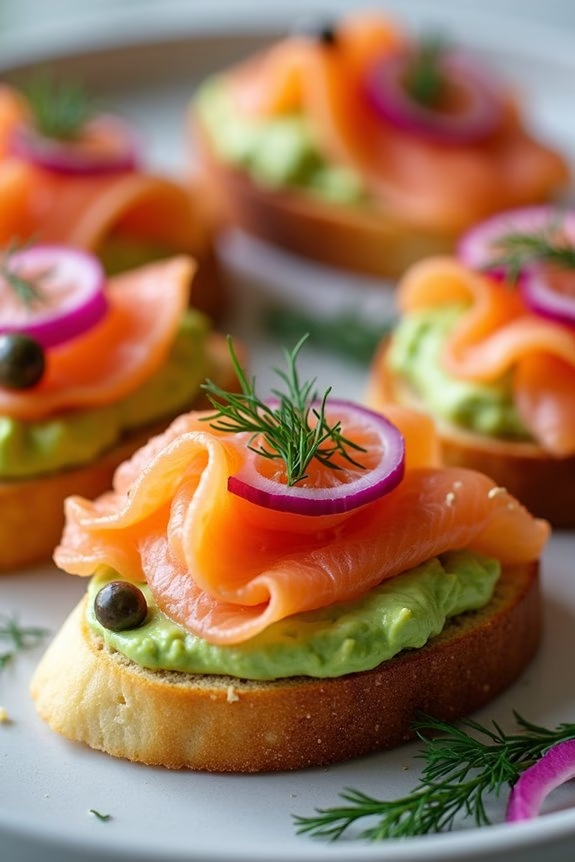
This Christmas, elevate your appetizer game with a sophisticated and delectable dish: Smoked Salmon and Avocado Crostini. A delightful combination of creamy avocado, smoky salmon, and crunchy crostini, this appetizer isn’t only a feast for the palate but also a visual treat. The richness of the smoked salmon perfectly complements the creaminess of the avocado, while the crispiness of the crostini adds a satisfying crunch to every bite.
It’s an elegant choice for your holiday gatherings and is sure to impress your guests. This dish isn’t only delicious but also quick and easy to prepare, making it an ideal choice for a festive occasion. With just a few simple steps, you can create a stunning appetizer that highlights fresh and vibrant ingredients.
The crostinis can be prepared ahead of time, allowing you to focus on assembling the dish just before your guests arrive. Whether you’re hosting an intimate dinner or a large party, these Smoked Salmon and Avocado Crostinis will be the perfect addition to your Christmas menu.
Ingredients (Serves 4-6):
- 1 French baguette
- 2 ripe avocados
- 200g smoked salmon
- 1 tablespoon lemon juice
- 2 tablespoons olive oil
- Salt and pepper to taste
- Fresh dill for garnish
- 1 small red onion, finely sliced
- 1 tablespoon capers, drained
Cooking Instructions:
- Prepare the Crostini: Preheat your oven to 375°F (190°C). Cut the baguette into 1/4-inch slices. Brush each slice lightly with olive oil on both sides, then place them on a baking sheet. Bake for 8-10 minutes or until they’re golden and crispy. Remove from the oven and let them cool.
- Make the Avocado Spread: In a medium bowl, mash the avocados until smooth. Add lemon juice, salt, and pepper, then mix well to combine. Adjust seasoning to taste.
- Assemble the Crostini: Spread a generous amount of the avocado mixture on each crostini slice. Top each with a slice of smoked salmon.
- Garnish: Add a few slices of red onion and a couple of capers to each crostini. Garnish with fresh dill for a burst of flavor and a touch of color.
- Serve: Arrange the crostinis on a serving platter and serve immediately to enjoy the perfect balance of textures and flavors.
Extra Tips:
For the best results, choose a ripe avocado that yields slightly to gentle pressure, ensuring a creamy and smooth spread. If you prefer a bit of heat, consider adding a pinch of red pepper flakes to the avocado mixture.
Additionally, the crostinis can be prepared a day in advance and stored in an airtight container to save time on the day of your event. Remember to assemble the crostinis just before serving to maintain the freshness and crispness of the ingredients. Enjoy this elegant appetizer with a glass of chilled white wine or champagne for a truly festive experience.
Prosciutto-Wrapped Asparagus Spears
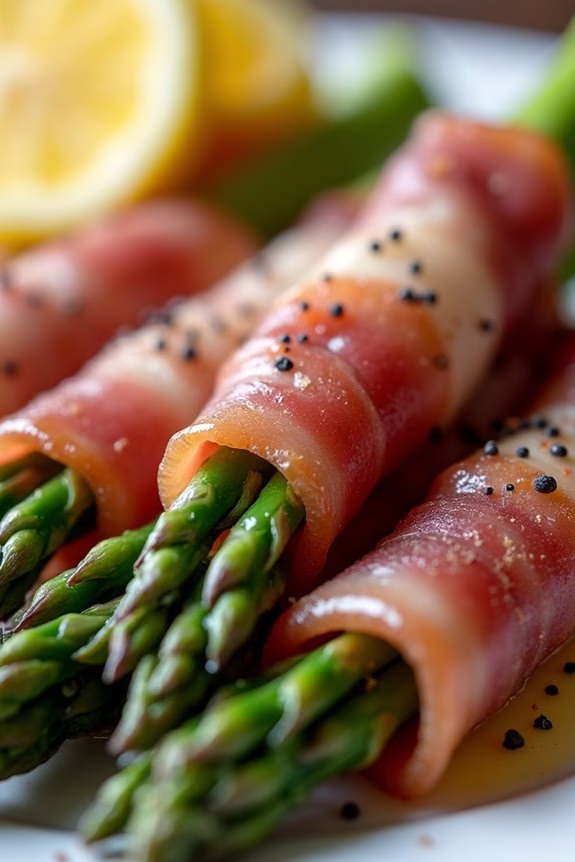
Prosciutto-Wrapped Asparagus Spears are an elegant and flavorful appetizer perfect for any festive occasion, adding a touch of sophistication to your Christmas spread. The salty prosciutto complements the earthy, fresh asparagus, creating a delightful contrast in both flavor and texture. This dish isn’t only visually appealing but also incredibly easy to prepare, guaranteeing you have more time to enjoy the company of your guests.
To create these delicious spears, fresh asparagus is wrapped with thin slices of prosciutto and roasted until perfectly tender and slightly crisp. This combination guarantees a savory bite with each spear. Ideal for serving 4-6 people, this appetizer is quick to assemble and can be prepared in advance, allowing for seamless entertaining. Whether served warm or at room temperature, Prosciutto-Wrapped Asparagus Spears will be a hit at your holiday gathering.
Ingredients
- 1 pound fresh asparagus (about 24 spears)
- 12 slices thinly sliced prosciutto
- 1 tablespoon olive oil
- Salt and freshly ground black pepper, to taste
- 1 tablespoon freshly grated Parmesan cheese (optional)
- Lemon wedges, for serving (optional)
Cooking Instructions
- Preheat the Oven: Begin by preheating your oven to 400°F (200°C). This will help guarantee the asparagus spears cook evenly and the prosciutto becomes slightly crispy.
- Prepare the Asparagus: Wash the asparagus thoroughly and trim the tough ends by snapping them off at their natural breaking point. Pat the asparagus dry with a paper towel to remove any excess moisture.
- Wrap the Asparagus: Take a slice of prosciutto and wrap it around the middle of each asparagus spear, covering about half of the spear. Guarantee the prosciutto is snug enough to stay in place during baking but not too tight to avoid tearing.
- Season and Arrange: Place the wrapped asparagus spears on a baking sheet lined with parchment paper or a silicone baking mat. Drizzle them with olive oil and season with a light sprinkle of salt and freshly ground black pepper. Be cautious with the salt, as the prosciutto is already salty.
- Bake the Spears: Bake in the preheated oven for 10-12 minutes, or until the asparagus is tender and the prosciutto is starting to crisp. If desired, sprinkle freshly grated Parmesan cheese over the top and return to the oven for an additional 1-2 minutes until melted.
- Serve: Transfer the spears to a serving platter. For an extra touch of flavor, serve with lemon wedges on the side for guests to squeeze over the spears before enjoying.
Extra Tips
When selecting asparagus, look for spears that are firm and bright green with closed tips, as these are the freshest and will cook more evenly.
If you prefer a crispier prosciutto, consider broiling the spears for the last minute of cooking, keeping a close eye to prevent burning.
Additionally, prosciutto-wrapped asparagus can be prepared a few hours in advance and stored in the refrigerator; simply bake them just before serving to guarantee they’re warm and crispy.
Cranberry Brie Bites
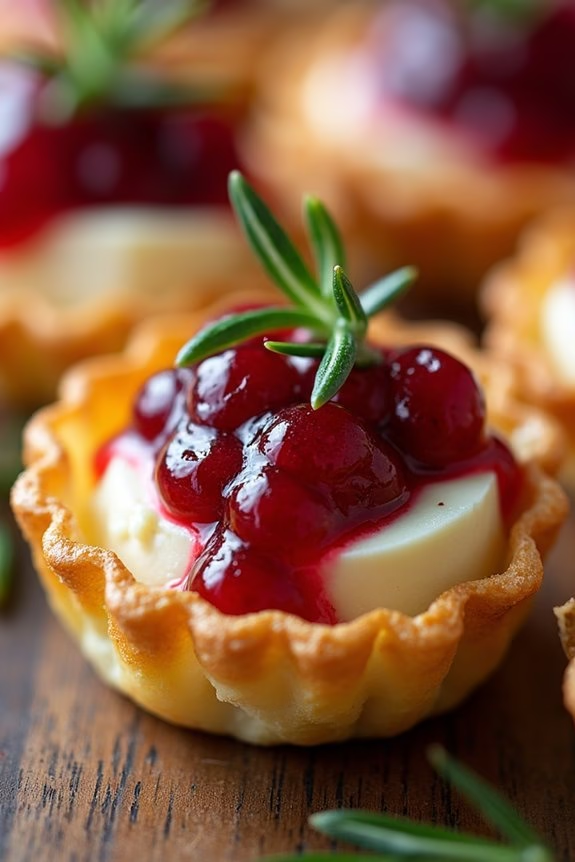
Cranberry Brie Bites are an elegant and delicious appetizer that perfectly encapsulates the flavors of the holiday season. These delightful bites combine the creamy richness of Brie cheese with the tartness of cranberry sauce, all nestled in a crispy, golden phyllo pastry shell.
Perfect for Christmas gatherings, these appetizers aren’t only visually appealing but also incredibly easy to make, ensuring you spend more time with your guests and less time in the kitchen.
The sweet and savory combination of flavors in Cranberry Brie Bites makes them a crowd favorite. The warm, melty Brie pairs beautifully with the sweet-tart cranberry sauce, while the phyllo pastry provides a satisfying crunch.
These bites can be prepared in advance and baked just before serving, making them convenient for holiday entertaining. Ideal for a serving size of 4-6 people, this recipe will quickly become a staple at your holiday table.
Ingredients:
- 1 sheet of phyllo pastry
- 8 oz Brie cheese
- 1/2 cup cranberry sauce
- 2 tablespoons chopped fresh rosemary
- 2 tablespoons melted butter
Instructions:
- Prepare the Oven and Baking Tray: Preheat your oven to 375°F (190°C). Line a baking tray with parchment paper to prevent the phyllo pastry from sticking.
- Cut the Phyllo Pastry: Unroll the phyllo pastry sheet and cut it into 12 equal squares. Place each square into the cups of a mini muffin tin, pressing gently to form small pastry cups.
- Add the Brie: Cut the Brie cheese into small cubes, approximately 1 inch in size. Place a cube of Brie into each phyllo cup.
- Top with Cranberry Sauce: Spoon about a teaspoon of cranberry sauce on top of the Brie in each pastry cup. Make sure to distribute the sauce evenly.
- Sprinkle with Rosemary: Sprinkle a little bit of chopped rosemary over the cranberry sauce in each cup for an aromatic touch.
- Brush with Butter: Using a pastry brush, lightly brush the edges of the phyllo pastry with melted butter. This will help the pastry turn golden and crispy when baked.
- Bake the Bites: Place the tray in the preheated oven and bake for 10-12 minutes, or until the phyllo pastry is golden brown and the Brie is melted.
- Serve Immediately: Remove the tray from the oven and allow the bites to cool for a few minutes before serving. Enjoy them warm for the best flavor experience.
Extra Tips:
When working with phyllo pastry, keep it covered with a damp kitchen towel to prevent it from drying out while you prepare the bites.
If you prefer a slightly sweeter appetizer, consider adding a touch of honey to the cranberry sauce before spooning it over the Brie.
These bites can also be customized with different herbs or even a sprinkle of nuts for added texture.
Finally, if you have leftovers, store them in an airtight container and reheat in the oven to retain their crispiness.
Stuffed Mushrooms With Goat Cheese and Herbs
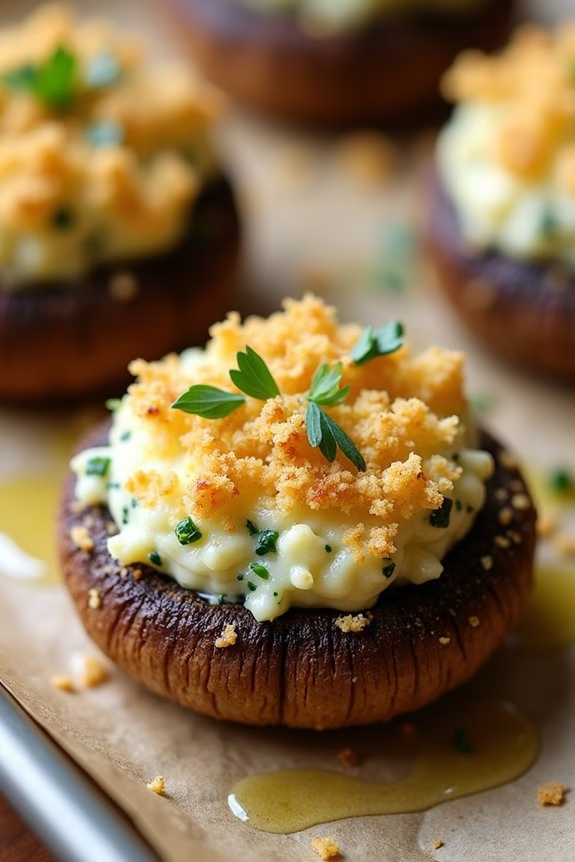
Stuffed Mushrooms With Goat Cheese and Herbs is an elegant appetizer perfect for any Christmas gathering. These bite-sized delights are packed with flavorful goat cheese, fresh herbs, and a hint of garlic, making them a delicious and sophisticated addition to your holiday spread.
Whether you’re hosting a large party or an intimate dinner, these stuffed mushrooms are guaranteed to impress your guests with their creamy texture and savory taste.
The key to this dish is selecting the right mushrooms; opt for large button or cremini mushrooms, as their size makes them ideal for stuffing. The combination of tangy goat cheese, aromatic herbs, and rich garlic creates a harmonious blend of flavors that complement the earthiness of the mushrooms.
This recipe serves 4-6 people and can be easily doubled for larger gatherings.
Ingredients:
- 16 large button or cremini mushrooms
- 8 ounces goat cheese, softened
- 1/4 cup finely chopped fresh parsley
- 2 tablespoons finely chopped fresh chives
- 2 cloves garlic, minced
- 1/4 teaspoon salt
- 1/4 teaspoon black pepper
- 2 tablespoons olive oil
- 1/4 cup grated Parmesan cheese
- 2 tablespoons breadcrumbs
- Optional: fresh thyme for garnish
Instructions:
- Prepare the Mushrooms: Preheat your oven to 375°F (190°C). Gently clean the mushrooms with a damp cloth to remove any dirt. Carefully remove the stems and set them aside. Arrange the mushroom caps on a baking sheet lined with parchment paper, cavity side up.
- Make the Filling: In a medium-sized bowl, combine the softened goat cheese, fresh parsley, chives, and minced garlic. Mix until the ingredients are well incorporated. Season the mixture with salt and black pepper to taste.
- Stuff the Mushrooms: Using a teaspoon, generously fill each mushroom cap with the goat cheese mixture. Confirm the filling is mounded slightly over the top of each mushroom for a generous bite.
- Prepare the Topping: In a small bowl, mix together the grated Parmesan cheese and breadcrumbs. Sprinkle this mixture evenly over the stuffed mushrooms, pressing down gently to adhere.
- Bake the Mushrooms: Drizzle the olive oil over the stuffed mushrooms to help them crisp up during baking. Place the baking sheet in the preheated oven and bake for 20-25 minutes, or until the mushrooms are tender and the tops are golden brown.
- Serve: Remove the mushrooms from the oven and let them cool slightly before transferring them to a serving platter. Garnish with fresh thyme, if desired, for an added touch of elegance.
Extra Tips: When cleaning the mushrooms, avoid soaking them in water as they can absorb moisture and become soggy during baking. Instead, use a damp cloth or paper towel to wipe them clean.
Additionally, if you prefer a spicier kick, consider adding a pinch of red pepper flakes to the cheese mixture. For a more robust flavor, you can also experiment with other herbs such as rosemary or oregano.
These stuffed mushrooms are best enjoyed warm, but they can also be made ahead of time and reheated just before serving, making them a convenient choice for holiday entertaining.
Mini Beef Wellington Bites
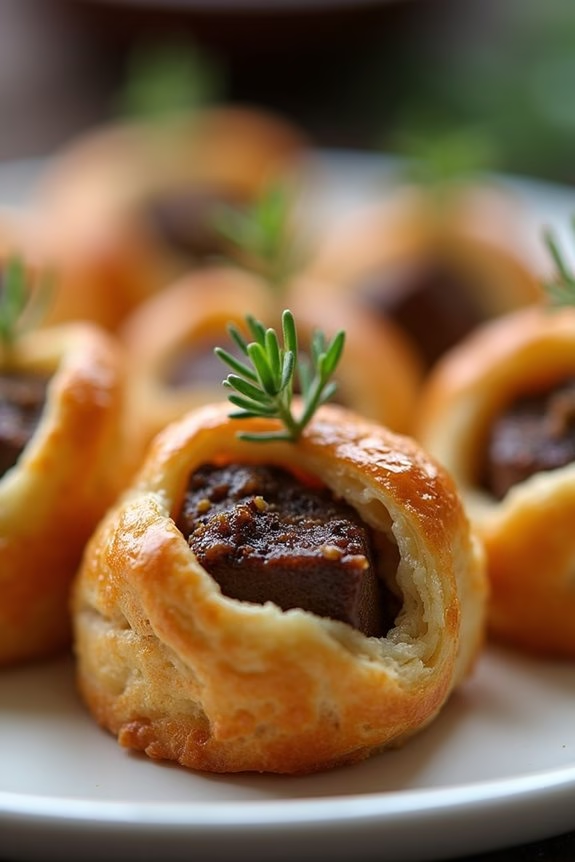
For an elegant and festive appetizer that’s certain to impress your guests this holiday season, try making Mini Beef Wellington Bites. These bite-sized delights capture all the flavors and charm of a classic beef Wellington, but in a convenient, single-serving format that’s perfect for a Christmas gathering.
With tender, juicy beef, flavorful mushroom duxelles, and flaky puff pastry, these little bites are a gourmet treat that will elevate your holiday spread.
Mini Beef Wellington Bites are an ideal choice for hosts looking to add a touch of sophistication to their Christmas menu without the need for a full-scale entrée. Despite their impressive presentation, they’re surprisingly simple to prepare and can even be made in advance, making them a stress-free option for entertaining.
Whether you’re planning an intimate dinner or a festive cocktail party, these appetizers are certain to be a crowd-pleaser.
Ingredients (for 4-6 servings):
- 1 pound beef tenderloin, cut into 1-inch cubes
- Salt and pepper, to taste
- 1 tablespoon olive oil
- 1 tablespoon butter
- 1/2 cup finely chopped mushrooms
- 1/4 cup finely chopped shallots
- 1 clove garlic, minced
- 1 tablespoon Dijon mustard
- 1 sheet puff pastry, thawed
- 1 egg, beaten
- Fresh thyme leaves, for garnish (optional)
Cooking Instructions:
- Prepare the Beef: Season the beef tenderloin cubes with salt and pepper. Heat the olive oil in a skillet over medium-high heat. Sear the beef cubes for about 2 minutes on each side until browned but not fully cooked through. Remove from the skillet and set aside to cool.
- Make the Mushroom Duxelles: In the same skillet, melt the butter over medium heat. Add the mushrooms, shallots, and garlic. Sauté for 5-7 minutes until the mixture is soft and most of the liquid has evaporated. Stir in the Dijon mustard and remove from heat. Allow the mixture to cool.
- Assemble the Wellingtons: Preheat the oven to 400°F (200°C). Roll out the puff pastry on a lightly floured surface and cut it into small squares, approximately 3 inches each. Place a spoonful of the mushroom mixture in the center of each square, then top with a cube of beef. Fold the corners of the pastry over the beef and seal the edges to form a neat package.
- Bake the Wellingtons: Place the assembled bites on a baking sheet lined with parchment paper. Brush each with beaten egg to guarantee a golden finish. Bake in the preheated oven for 12-15 minutes until the pastry is golden brown and puffed.
- Serve: Remove from the oven and let cool slightly before serving. Garnish with fresh thyme leaves if desired. Serve warm as a delightful appetizer.
Extra Tips:
To guarantee the best flavor and texture, make sure the beef is at room temperature before searing, as this prevents it from being tough.
You can prepare the mushroom duxelles a day ahead and store it in the refrigerator to save time on the day of your event.
If you prefer stronger flavors, feel free to add a splash of white wine to deglaze the pan after cooking the mushrooms.
Remember to keep an eye on the oven, as oven temperatures can vary and you want to avoid overcooking the beef or burning the pastry.
Roasted Red Pepper and Feta Dip
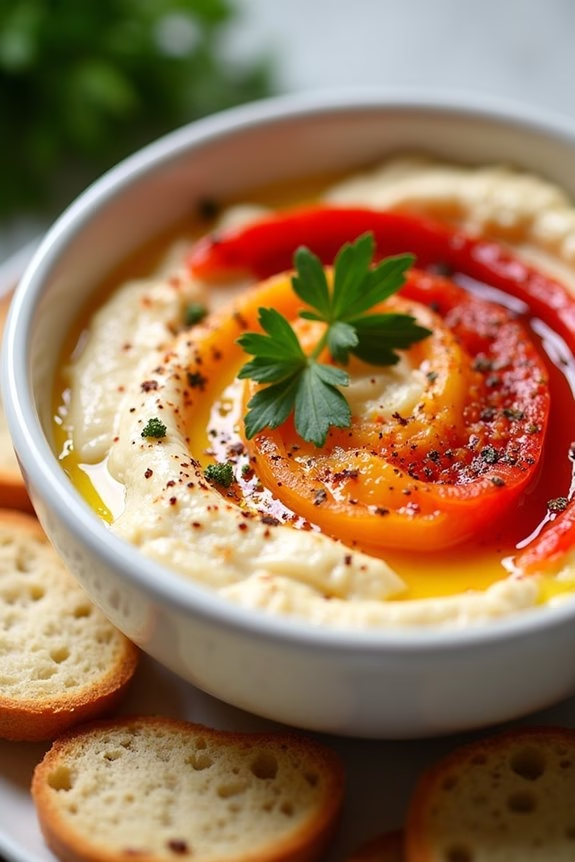
Roasted Red Pepper and Feta Dip is an exquisite appetizer perfect for adding a touch of elegance to your Christmas gathering. This delightful dip brings together the smoky sweetness of roasted red peppers with the creamy tang of feta cheese, resulting in a flavorful spread that pairs wonderfully with an array of dippers like crusty bread, pita chips, or fresh vegetables.
It’s a simple yet sophisticated dish that’s sure to impress your guests and add a splash of festive color to your appetizer table.
The beauty of this Roasted Red Pepper and Feta Dip lies in its simplicity and the ease with which it can be made. Despite its gourmet appearance and taste, this dip requires minimal ingredients and can be prepared in under 30 minutes.
This makes it an excellent choice for busy holiday hosts who still want to offer something special. With a texture that’s perfectly creamy and a flavor profile that’s both savory and slightly sweet, this dip will quickly become a favorite at your holiday festivities.
Ingredients for 4-6 servings:
- 2 large red bell peppers
- 1 cup crumbled feta cheese
- 1/4 cup Greek yogurt or sour cream
- 2 cloves garlic, minced
- 2 tablespoons olive oil
- 1 tablespoon lemon juice
- 1/2 teaspoon smoked paprika
- Salt and pepper, to taste
- Fresh parsley, chopped (for garnish)
Cooking Instructions:
- Roast the Peppers: Preheat your oven to 450°F (230°C). Place the red bell peppers on a baking sheet lined with parchment paper. Roast them for about 25-30 minutes, turning occasionally, until the skins are charred and blistered.
- Cool and Peel: Remove the peppers from the oven and place them in a bowl covered with plastic wrap or a lid. Let them cool for 10 minutes. This will make peeling the skin easier. Once cooled, peel off the charred skin, remove the seeds, and roughly chop the peppers.
- Blend the Ingredients: In a food processor, combine the roasted peppers, feta cheese, Greek yogurt, minced garlic, olive oil, lemon juice, smoked paprika, salt, and pepper. Blend until smooth and creamy. Taste and adjust the seasoning if necessary.
- Chill the Dip: Transfer the dip into a serving bowl, cover, and refrigerate for at least 30 minutes to allow the flavors to meld together.
- Serve: Before serving, garnish the dip with chopped fresh parsley for a burst of color and freshness. Serve with your choice of dippers.
Extra Tips:
For a more intense flavor, you can roast the peppers a day in advance, allowing them to sit overnight and develop a richer taste.
If you prefer a chunkier texture, pulse the ingredients in the food processor, leaving small bits of feta and pepper. Additionally, for a spicier kick, consider adding a pinch of cayenne pepper or a few red pepper flakes.
Fig and Blue Cheese Tartlets
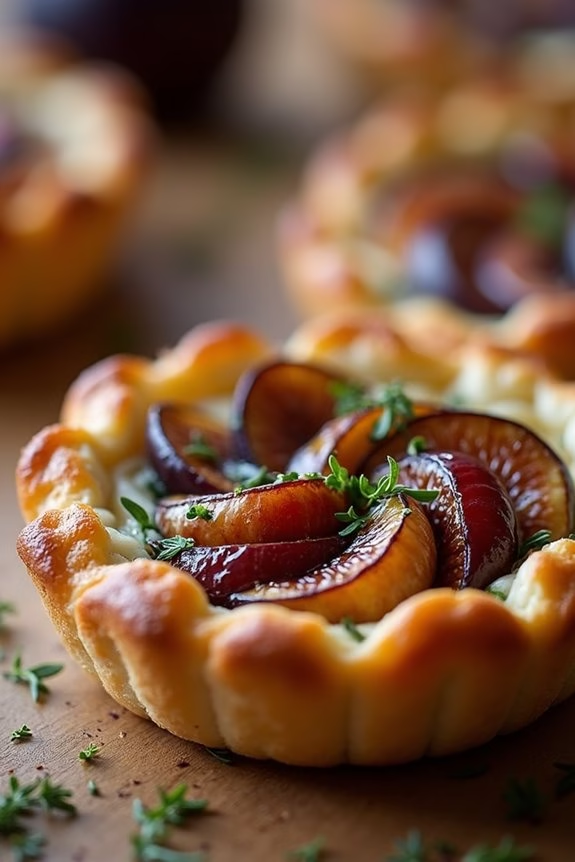
Fig and Blue Cheese Tartlets are a sophisticated and flavorful addition to your holiday appetizer spread. These tartlets combine the sweet, honey-like flavor of ripe figs with the tangy, creamy texture of blue cheese, all nestled in a buttery, flaky pastry shell. They’re perfect for those who want to impress their guests with minimal effort, as the recipe is simple yet delivers an elegant presentation.
Ideal for a serving size of 4-6 people, these tartlets can be prepared ahead of time, allowing you to enjoy the festivities without being tied to the kitchen. The beauty of this dish lies in its balance of flavors and textures. The caramelized sweetness of the figs pairs beautifully with the sharpness of the blue cheese, while the crisp pastry shell provides a delightful contrast to the soft filling.
Whether served warm or at room temperature, these Fig and Blue Cheese Tartlets are sure to be a hit at your holiday gathering.
Ingredients (Serves 4-6):
- 1 sheet of puff pastry
- 6 ripe figs, quartered
- 100g blue cheese, crumbled
- 1 tablespoon honey
- 1 tablespoon balsamic glaze
- 1 egg, beaten (for egg wash)
- Fresh thyme leaves, for garnish
- Salt and pepper to taste
Cooking Instructions:
- Preheat and Prepare: Preheat your oven to 400°F (200°C). Line a baking sheet with parchment paper to prevent sticking.
- Roll Out Pastry: On a lightly floured surface, roll out the puff pastry sheet to about 1/8-inch thickness. Cut the pastry into 12 equal squares using a sharp knife or pastry cutter.
- Prepare Tartlet Shells: Place the pastry squares on the prepared baking sheet. Score a smaller square inside each pastry square, about 1/4-inch from the edge, being careful not to cut all the way through. This will help the edges puff up to form a border.
- Assemble Tartlets: Arrange three fig quarters on each pastry square within the scored lines. Sprinkle the crumbled blue cheese evenly over the figs. Drizzle a small amount of honey and balsamic glaze over each tartlet for added sweetness and tang.
- Apply Egg Wash: Brush the edges of the pastry squares with the beaten egg to guarantee a golden-brown finish when baked.
- Bake the Tartlets: Place the baking sheet in the preheated oven and bake for 15-20 minutes, or until the pastry is puffed and golden-brown, and the cheese is melted and bubbly.
- Garnish and Serve: Remove the tartlets from the oven and let them cool slightly. Garnish with fresh thyme leaves and a sprinkle of salt and pepper to enhance the flavors before serving.
Extra Tips:
To make these Fig and Blue Cheese Tartlets even more special, consider using a variety of figs if available, such as Black Mission or Calimyrna, for a richer flavor profile.
If blue cheese is too intense for your taste, you can substitute it with a milder cheese like goat cheese or brie. These tartlets are versatile and can be prepared up to a day in advance; simply reheat them in the oven at 350°F (175°C) for about 5 minutes before serving to restore their crispiness.
Remember to adjust the seasoning to taste and enjoy the delightful combination of flavors that these tartlets offer!
Shrimp Cocktail Shooters
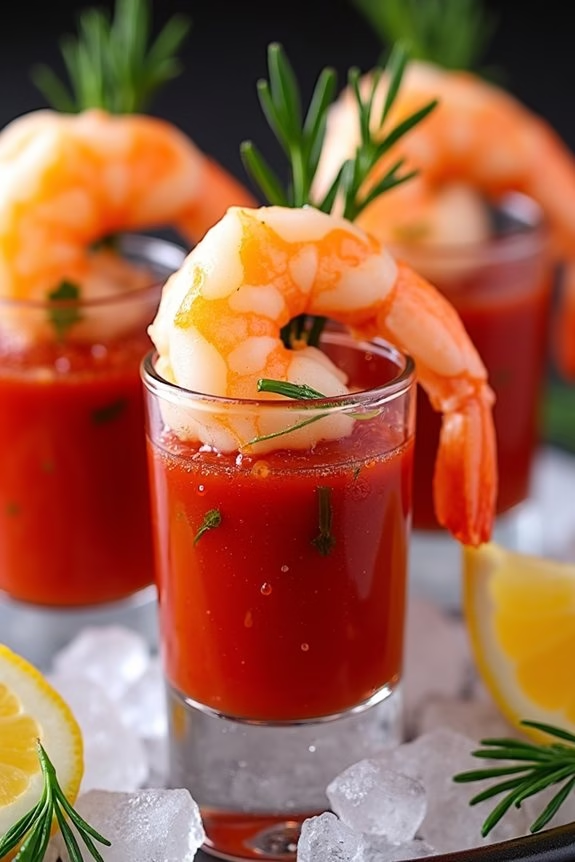
Shrimp Cocktail Shooters are a sophisticated and visually striking appetizer that can elevate any holiday gathering. These shooters combine tender shrimp with a zesty cocktail sauce, served in individual shot glasses for a unique presentation.
Whether you’re hosting an intimate dinner or a large Christmas party, these shrimp cocktail shooters are a crowd-pleaser that can be prepared in advance, allowing you to enjoy your event without being tied to the kitchen.
The beauty of Shrimp Cocktail Shooters lies in their simplicity and elegance. They require minimal cooking, making them an ideal choice for home cooks of all skill levels.
By using high-quality shrimp and balancing the flavors of the cocktail sauce, you can create a dish that’s both flavorful and visually appealing. With just the right touch of spice and citrus, these shooters will tantalize your guests’ taste buds and set the stage for a memorable holiday feast.
Ingredients for 4-6 Servings:
- 1 pound large shrimp (peeled and deveined)
- 1 cup cocktail sauce
- 1 tablespoon prepared horseradish
- 1 tablespoon fresh lemon juice
- 1 teaspoon Worcestershire sauce
- 1/4 teaspoon hot sauce (optional)
- 1 tablespoon fresh dill, finely chopped
- Lemon wedges, for garnish
- Fresh dill sprigs, for garnish
Cooking Instructions:
- Prepare the Shrimp:
- Fill a large pot with water and bring it to a boil. Add a pinch of salt to the water.
- Once boiling, add the shrimp and cook for about 2-3 minutes, or until they turn pink and opaque. Be careful not to overcook them.
- Immediately drain the shrimp and transfer them to a bowl of ice water to stop the cooking process. Let them chill for a few minutes before draining thoroughly.
- Make the Cocktail Sauce:
- In a medium bowl, combine the cocktail sauce, horseradish, lemon juice, Worcestershire sauce, and hot sauce (if using). Mix well until all the ingredients are fully incorporated.
- Taste and adjust seasoning if necessary, adding more lemon juice or hot sauce to achieve the desired flavor.
- Assemble the Shooters:
- Divide the cocktail sauce evenly among 4-6 shot glasses or small serving cups.
- Arrange 2-3 shrimp on the rim of each glass, ensuring they’re securely placed.
- Sprinkle a small amount of chopped dill over the cocktail sauce in each glass.
- Garnish and Serve:
- Garnish each shooter with a lemon wedge and a sprig of fresh dill.
- Serve immediately, or refrigerate until ready to serve. If refrigerating, cover the shooters lightly with plastic wrap to prevent drying out.
Extra Tips:
- For a more intense flavor, consider marinating the cooked shrimp in a little lemon juice and dill before assembling the shooters.
- If you prefer a milder sauce, reduce the amount of horseradish and hot sauce.
- These shooters can be made a couple of hours in advance and kept refrigerated, which makes them perfect for stress-free entertaining.
- For an extra touch of elegance, serve the shooters on a bed of crushed ice on a platter to keep them chilled throughout the event.
Pear and Gorgonzola Bruschetta
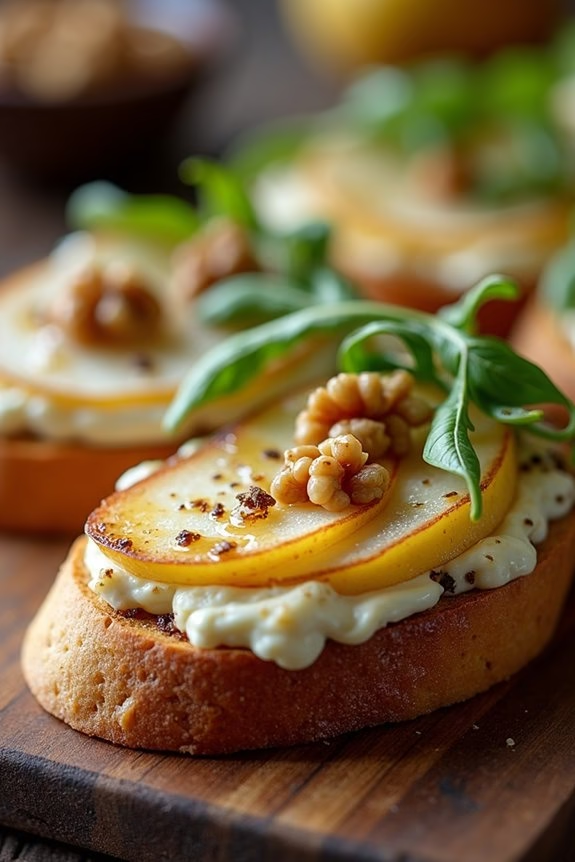
Pear and Gorgonzola Bruschetta is an exquisite appetizer that effortlessly combines the sweet and juicy flavors of ripe pears with the distinct, creamy tang of Gorgonzola cheese, all atop a toasted slice of artisan bread.
This dish not only delightfully teases the taste buds, but also adds a touch of elegance to any holiday gathering. Perfect for a Christmas appetizer, this bruschetta offers a unique and sophisticated starter that’s sure to impress your guests.
The harmony between the sweetness of the pears and the robust flavor of Gorgonzola creates a memorable flavor profile that’s both comforting and luxurious. The crispness of the toasted bread provides a pleasant texture contrast, while a drizzle of honey or balsamic glaze can enhance the flavors even further.
Whether you’re hosting a large festive party or a small intimate gathering, this recipe for Pear and Gorgonzola Bruschetta serves 4-6 people and is sure to be a hit.
Ingredients (Serves 4-6):
- 1 French baguette or artisan bread loaf
- 2 ripe pears
- 150 grams of Gorgonzola cheese
- 2 tablespoons of olive oil
- 1/4 cup of walnuts, chopped
- Honey or balsamic glaze (optional)
- Fresh arugula or basil leaves for garnish
- Salt and pepper to taste
Cooking Instructions:
- Prepare the Bread: Preheat your oven to 375°F (190°C). Slice the baguette or artisan bread into 1/2-inch thick slices. Arrange them on a baking sheet and brush each slice lightly with olive oil.
- Toast the Bread: Place the baking sheet in the oven and toast the bread slices for about 5-7 minutes, or until they’re golden brown and crisp. Keep an eye on them to prevent burning. Once toasted, remove from the oven and let them cool slightly.
- Prepare the Pears: While the bread is toasting, wash and core the pears. Slice them thinly, maintaining a consistent thickness for even cooking and presentation.
- Assemble the Bruschetta: Spread a generous layer of Gorgonzola cheese on each toasted bread slice. Top with a few slices of pear, then sprinkle the chopped walnuts evenly over each piece.
- Finish and Serve: Optionally, drizzle each bruschetta with honey or balsamic glaze to add a touch of sweetness and depth. Garnish with fresh arugula or basil leaves and sprinkle with a pinch of salt and pepper to taste.
Extra Tips:
When selecting pears for this dish, choose varieties that are firm yet ripe, such as Bosc or Anjou, as they hold their shape well and provide the right balance of sweetness.
If you prefer a more intense flavor, you can use a blue cheese variety with a stronger profile than Gorgonzola. To enhance the presentation, consider using a mix of colored pears, such as red and green, for a more vibrant and festive look.
If you’re preparing this dish ahead of time, keep the toast and toppings separate until just before serving to maintain the perfect texture.
Truffle Parmesan Popcorn

Truffle Parmesan Popcorn is a sophisticated and delightful twist on a classic snack, perfect for your Christmas appetizer spread. This savory treat combines the rich flavor of truffle oil with the sharp, nutty taste of Parmesan cheese to create a luxurious nibble that’s bound to impress your guests.
Whether served in elegant bowls at a cocktail party or as a pre-dinner snack, this gourmet popcorn will add a touch of elegance to your holiday festivities.
Creating this dish is incredibly straightforward, yet it yields a wonderfully complex flavor profile that belies its simplicity. The key to achieving the perfect Truffle Parmesan Popcorn is using high-quality ingredients: freshly popped corn, a good-quality truffle oil, and freshly grated Parmesan cheese.
By making certain these elements are of exceptional quality, you’ll elevate your popcorn to a delightful appetizer that pairs beautifully with a glass of champagne or a festive cocktail.
Ingredients (serves 4-6):
- 1/2 cup popcorn kernels
- 2 tablespoons vegetable oil
- 3 tablespoons truffle oil
- 1/2 cup freshly grated Parmesan cheese
- Salt to taste
- Freshly ground black pepper to taste
- Optional: a sprinkle of finely chopped fresh parsley for garnish
Instructions:
1. Pop the Popcorn: Start by heating the vegetable oil in a large pot over medium-high heat. Add a few popcorn kernels to the pot and cover. Once these kernels pop, the oil is hot enough. Add the rest of the popcorn kernels in an even layer and cover the pot.
Shake the pot occasionally to prevent burning and guarantee even popping. Once the popping slows to about 2 seconds between pops, remove the pot from the heat.
2. Season the Popcorn: Immediately transfer the hot, freshly popped popcorn to a large bowl. Drizzle the truffle oil over the popcorn while it’s still warm, as this will help the flavor to distribute evenly.
3. Add Cheese and Seasonings: Sprinkle the grated Parmesan cheese over the popcorn, tossing gently to coat the kernels evenly. Season with salt and freshly ground black pepper to taste.
4. Garnish and Serve: If desired, add a sprinkle of finely chopped fresh parsley for a touch of color and an extra layer of flavor. Serve the popcorn in a large bowl or divide it into individual servings.
Extra Tips:
For the best results, use fresh, high-quality truffle oil and Parmesan cheese. The truffle oil should be added judiciously as its flavor can be quite overpowering if overused. Adjust the amount according to your taste preferences.
Additionally, always season the popcorn while it’s still warm to make sure the flavors meld into the kernels. If you don’t have a pot with a lid for popping, a popcorn maker can also be used for convenience. Enjoy this elegant snack with a glass of your favorite holiday drink to complete the experience.