
As someone who adores starting the day with a touch of sweetness, I’ve often battled with the morning rush. That’s until I stumbled upon a collection of easy sweet breakfast ideas that are as quick as they are delicious. From overnight oats to microwave mug cakes, these recipes have brightened my mornings. Curious about how these can fit into your busy schedule and satisfy your sweet tooth? Let’s explore these delightful recipes together.
Quick Overnight Oats for a Sweet Start
Start your morning with a delicious and nutritious breakfast that requires minimal effort with our Quick Overnight Oats for a Sweet Start. Perfect for those busy mornings when you need to grab something healthy and satisfying as you dash out the door, overnight oats are a lifesaver.
Simply prepare them the night before, and enjoy the ease of a ready-to-eat meal that’s packed with fiber, protein, and a touch of sweetness to kick-start your day.
This recipe allows flexibility with toppings and mix-ins, so you can customize your oats to suit your taste preferences. Whether you prefer fresh berries, crunchy nuts, or a hint of cinnamon, you can make breakfast exciting each morning. Plus, this recipe serves 4-6 people, making it ideal for families or for meal prepping for the week ahead.
Ingredients (Serves 4-6):
- 3 cups rolled oats
- 3 cups milk (or any non-dairy alternative)
- 1/2 cup yogurt (optional for creaminess)
- 2 tablespoons chia seeds
- 1/4 cup honey or maple syrup
- 1 teaspoon vanilla extract
- 1 teaspoon ground cinnamon
- Pinch of salt
- Assorted toppings: fresh berries, sliced banana, nuts, coconut flakes, or chocolate chips
Instructions:
- Combine the Base Ingredients: In a large mixing bowl, combine the rolled oats, milk, and yogurt. Stir until the oats are fully submerged in the liquid. The yogurt adds creaminess, but you can omit it if you prefer a thinner consistency.
- Add Sweeteners and Flavorings: Stir in the chia seeds, honey or maple syrup, vanilla extract, ground cinnamon, and a pinch of salt. Mix well to guarantee that the flavors are evenly distributed throughout the oat mixture.
- Refrigerate Overnight: Cover the bowl with a lid or plastic wrap and refrigerate it overnight, or for at least 6 hours. This soaking period allows the oats to absorb the liquid and soften, while the chia seeds will swell and create a pudding-like texture.
- Serve and Enjoy: The next morning, give the oats a good stir and taste for sweetness. Adjust according to your preference. Serve the oats in bowls, and top with your favorite toppings. Fresh berries, sliced bananas, nuts, coconut flakes, and chocolate chips make excellent additions.
- Store Leftovers: Any leftovers can be stored in the refrigerator in an airtight container for up to 3 days. Just give them a stir before serving.
Extra Tips: To save time in the morning, prepare individual portions in mason jars or small containers the night before. This way, each serving is ready to grab and go.
You can also experiment with different flavors by adding cocoa powder for a chocolatey twist or a spoonful of peanut butter for extra protein. Remember, the consistency of your overnight oats can be adjusted by adding more or less liquid based on your preference. If you find the oats too thick in the morning, simply stir in a splash of milk before serving.
5-Minute Microwave Mug Cakes
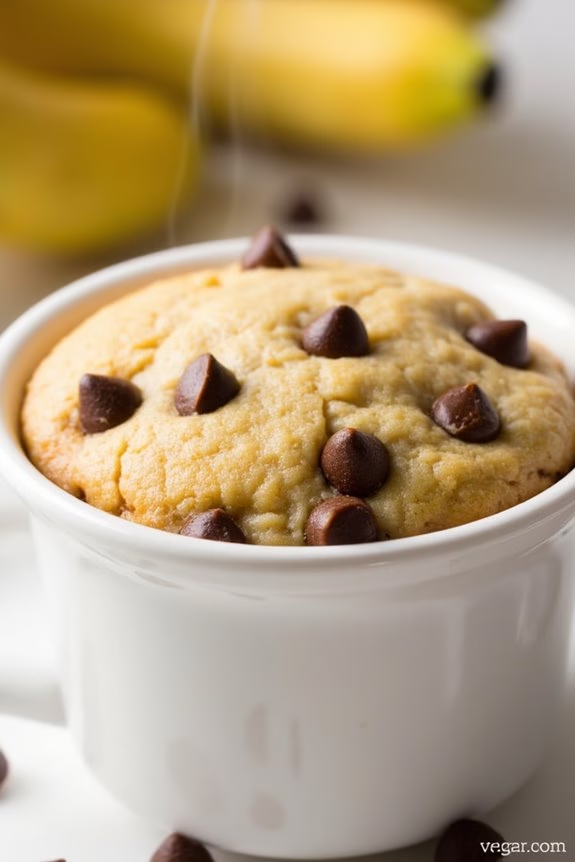
Start your day with a deliciously sweet and easy breakfast that takes just minutes to prepare. The Chocolate Chip Banana Microwave Mug Cake is the perfect solution for busy mornings when you’re craving something warm and indulgent. This recipe combines the classic flavors of banana and chocolate in a quick-to-make mug cake that will satisfy your sweet tooth without the hassle of baking an entire cake.
Plus, it’s a fun and interactive way to get your family involved in breakfast preparation. This recipe yields 4-6 servings, making it ideal for a small group or family breakfast. Each mug cake is individually prepared, so everyone gets their own personal treat! The combination of ripe bananas, chocolate chips, and a hint of vanilla creates a moist and flavorful cake that’s ready in less than five minutes.
It’s an excellent way to use up overripe bananas while guaranteeing that breakfast is a delightful experience for everyone.
Ingredients (for 4-6 servings):
- 4 ripe bananas
- 2 large eggs
- 1 cup all-purpose flour
- 1 teaspoon baking powder
- 1/2 teaspoon baking soda
- 1/4 cup granulated sugar
- 1/4 cup brown sugar
- 1/4 cup melted butter
- 1 teaspoon vanilla extract
- 1/2 cup milk
- 1/2 cup chocolate chips
- Pinch of salt
Cooking Instructions:
- Mash the Bananas: In a large mixing bowl, use a fork to thoroughly mash the ripe bananas until smooth and free of lumps. This will be the base of your mug cake batter and provide natural sweetness.
- Mix Wet Ingredients: Add the eggs, melted butter, milk, and vanilla extract to the mashed bananas. Whisk together until all ingredients are well combined and smooth.
- Combine Dry Ingredients: In a separate bowl, mix together the flour, baking powder, baking soda, granulated sugar, brown sugar, and a pinch of salt. Confirm the dry ingredients are evenly distributed.
- Create the Batter: Gradually add the dry ingredients to the wet ingredients, stirring gently with a spatula until just combined. Be careful not to over-mix, as this can lead to a dense cake. Fold in the chocolate chips.
- Prepare the Mugs: Lightly grease 4-6 microwave-safe mugs with cooking spray or a small amount of butter to prevent the cake from sticking.
- Fill the Mugs: Pour the batter into each mug, filling them halfway to allow room for the cake to rise. This guarantees even cooking and prevents overflow.
- Microwave the Cakes: Place one mug at a time in the microwave and cook on high for 1 to 2 minutes, or until the cake has risen and is set in the center. Cooking times may vary depending on your microwave’s power.
- Cool and Serve: Allow the mug cakes to cool for a minute before serving. Enjoy them straight from the mug or transfer them to a plate for a more elegant presentation.
Extra Tips:
To enhance the flavor, consider adding a sprinkle of cinnamon or a handful of chopped nuts to the batter before microwaving. If you prefer a gooier texture, reduce the cooking time slightly to achieve a molten center.
Additionally, you can top your mug cakes with whipped cream, a scoop of vanilla ice cream, or a drizzle of chocolate syrup for an extra special breakfast treat. Remember that microwaves can vary in power, so it might take a couple of tries to find the perfect cooking time for your specific appliance.
Enjoy your quick and delightful Chocolate Chip Banana Microwave Mug Cakes!
No-Bake Breakfast Bars for Busy Days
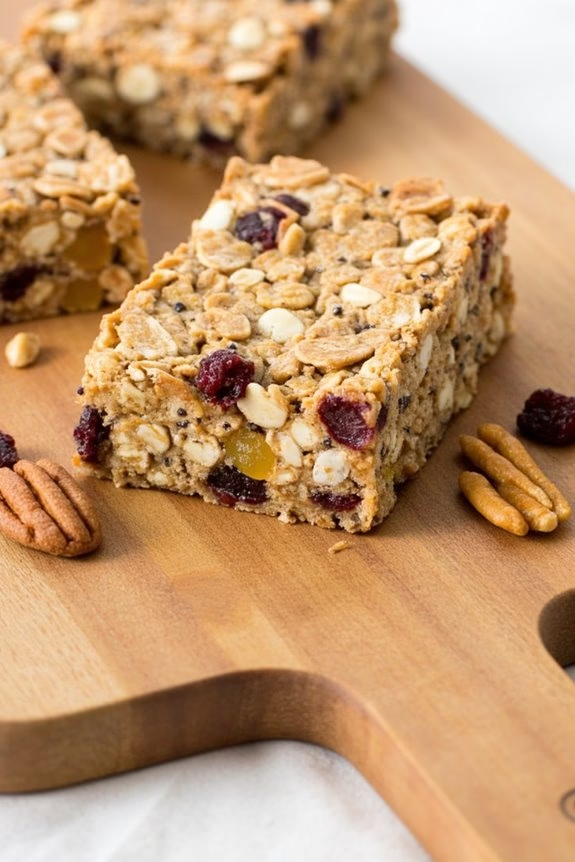
Start your day with a burst of energy by preparing these delightful No-Bake Breakfast Bars. They’re the perfect solution for those hectic mornings when time is of the essence but you still want something nutritious and satisfying.
These bars are packed with wholesome ingredients like oats, nuts, and dried fruits, providing you with the fiber and protein needed to power through your day. Plus, their sweet and chewy texture makes them a delightful treat that even kids will love.
What makes these breakfast bars especially convenient is that they require no baking at all. You can prepare them in advance and have a quick grab-and-go breakfast option ready for the entire week. Whether you’re rushing out the door to work, school, or a workout, these bars are a delicious and nourishing way to fuel your morning.
Here’s how you can make a batch that serves 4-6 people.
Ingredients:
- 2 cups rolled oats
- 1 cup almond butter
- 1/2 cup honey
- 1/2 cup chopped nuts (such as almonds or walnuts)
- 1/2 cup dried fruits (such as cranberries or raisins)
- 1/4 cup chia seeds
- 1 teaspoon vanilla extract
- 1/2 teaspoon sea salt
Instructions:
- Prepare the Mixture: In a large mixing bowl, combine the rolled oats, chopped nuts, dried fruits, and chia seeds. Stir together until evenly distributed.
- Melt and Mix: In a small saucepan over low heat, combine the almond butter and honey. Stir continuously until they’re well blended and smooth, then remove from heat. Add the vanilla extract and sea salt, and stir until completely incorporated.
- Combine Ingredients: Pour the warm almond butter and honey mixture over the dry ingredients in the mixing bowl. Stir the ingredients together with a spatula until everything is evenly coated and the mixture becomes sticky and holds together.
- Shape the Bars: Line an 8×8 inch baking dish with parchment paper, leaving some overhang on the sides for easy removal. Transfer the mixture into the lined dish and press it down firmly and evenly using the back of a spoon or your fingers.
- Chill: Place the dish in the refrigerator and allow the mixture to chill for at least 2 hours, or until it’s firm enough to cut into bars.
- Serve: Once the mixture is set, lift it out of the dish using the parchment paper overhang. Cut into bars of the desired size and store them in an airtight container in the refrigerator for up to a week.
Extra Tips:
These No-Bake Breakfast Bars are versatile and can be customized to suit your tastes. Feel free to substitute almond butter with peanut butter or sunflower seed butter if you prefer.
For added flavor, consider mixing in a handful of dark chocolate chips or a sprinkle of cinnamon. If you’d like the bars to be a little firmer, you can add a bit more oats.
To guarantee the bars hold their shape, press the mixture firmly into the dish and chill thoroughly. Enjoy these delicious bars as a quick breakfast or a snack throughout the day!
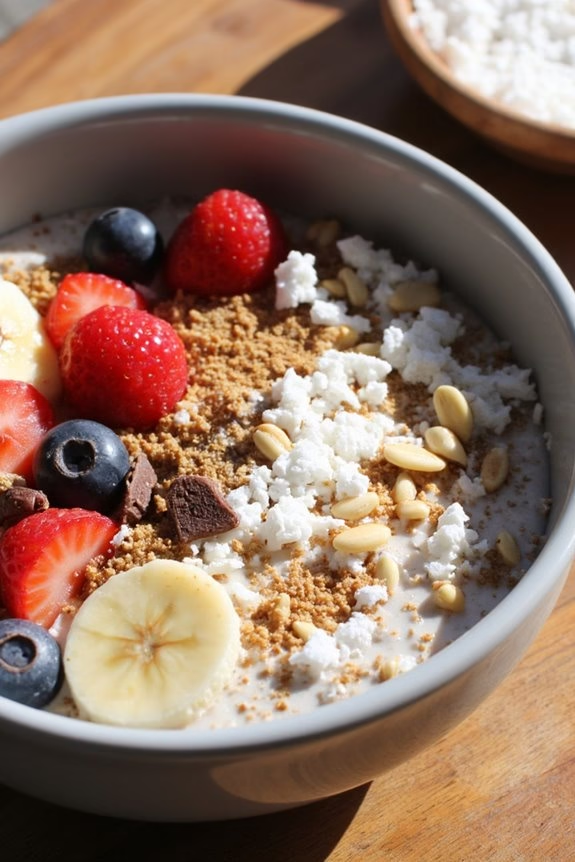
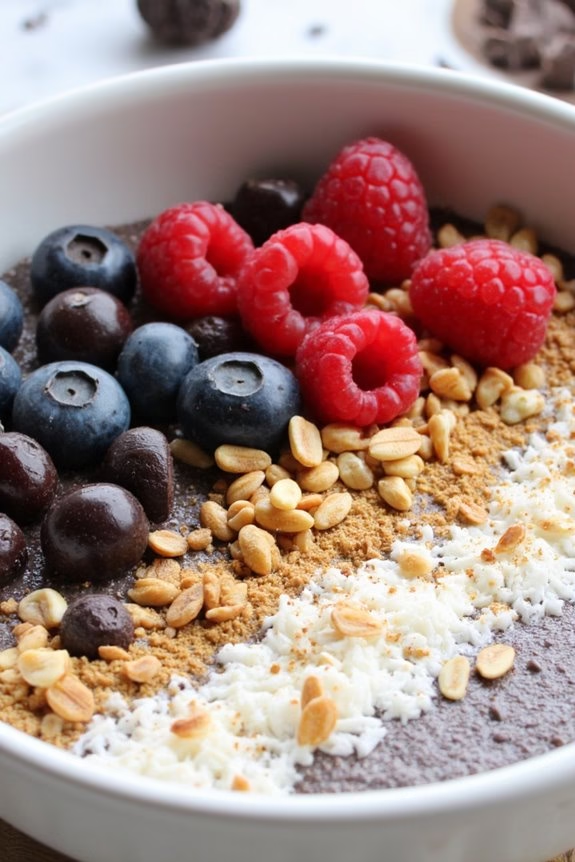
Sweet Smoothie Bowls With Toppings
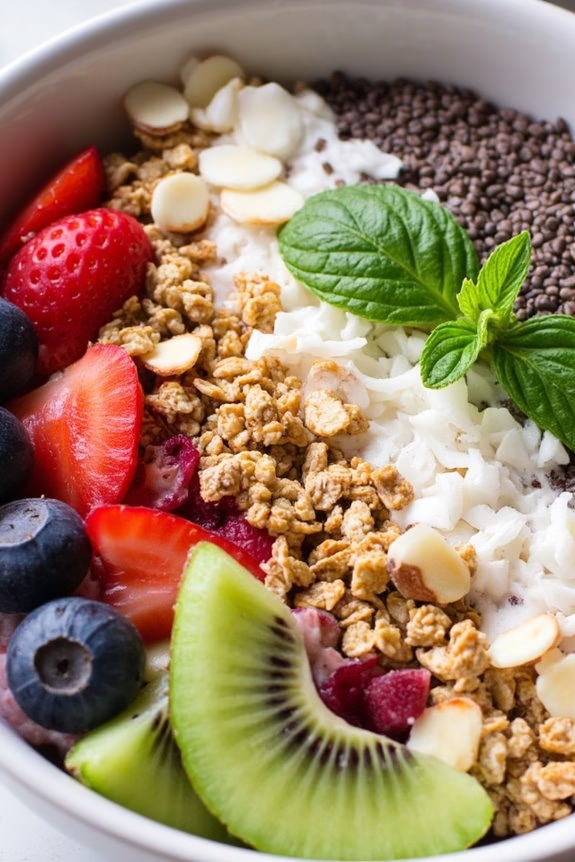
Indulge in a delightful and invigorating breakfast with our Tropical Paradise Smoothie Bowl. This vibrant and colorful dish combines the natural sweetness of tropical fruits with the creamy texture of yogurt to create a perfect start to your day. Packed with nutrients and topped with a variety of crunchy and fresh ingredients, this smoothie bowl isn’t only delicious but also visually stunning.
Whether you’re hosting a brunch or just treating yourself to a special breakfast, this recipe is sure to impress. Smoothie bowls are a fun and versatile breakfast option that can be customized to suit your taste preferences. In this recipe, we’ll use a blend of tropical fruits like mango, pineapple, and banana, creating a sweet and creamy base.
We’ll then top it off with an assortment of toppings, adding texture and extra flavor. Enjoy a taste of the tropics with each spoonful of this beautiful and nourishing breakfast bowl.
Ingredients for 4-6 servings:
- 2 ripe bananas
- 1 cup frozen mango chunks
- 1 cup frozen pineapple chunks
- 1 cup Greek yogurt
- 1 cup coconut milk
- 2 tablespoons honey or maple syrup
- 1 teaspoon vanilla extract
- 1/2 cup granola
- 1/4 cup shredded coconut
- 1/4 cup sliced almonds
- 1/4 cup fresh berries (such as blueberries or raspberries)
- 1/4 cup diced kiwi
- 2 tablespoons chia seeds
- Fresh mint leaves for garnish
Cooking Instructions:
- Prepare the Smoothie Base: In a blender, combine the ripe bananas, frozen mango chunks, frozen pineapple chunks, Greek yogurt, coconut milk, honey or maple syrup, and vanilla extract. Blend on high speed until the mixture is smooth and creamy. If the smoothie is too thick, you can add a little more coconut milk to reach your desired consistency.
- Divide the Smoothie into Bowls: Pour the smoothie mixture evenly into 4-6 bowls, depending on your serving size preference. Use a spatula to smooth out the top of the smoothie in each bowl.
- Add the Toppings: Sprinkle the granola evenly over each smoothie bowl. Next, add the shredded coconut, sliced almonds, and chia seeds. Arrange the fresh berries and diced kiwi artfully on top to add color and freshness. Finally, garnish with a few fresh mint leaves for an extra pop of flavor.
- Serve Immediately: Serve the Tropical Paradise Smoothie Bowls immediately to enjoy them at their freshest and most vibrant. Encourage guests to mix the toppings into the smoothie base for a delightful combination of textures and flavors with every bite.
Extra Tips:
For the best texture and flavor, use ripe bananas and high-quality frozen fruits. If you prefer a thicker smoothie, you can add a handful of ice cubes to the blender.
Feel free to customize the toppings based on what you have available; sliced fruits like strawberries or papaya work well, as do nuts like walnuts or pecans. To make this recipe vegan, simply substitute the Greek yogurt with a dairy-free alternative and use maple syrup instead of honey.
Enjoy your tropical escape, even if it’s just for breakfast!
Instant Pancake Bites: Add Syrup
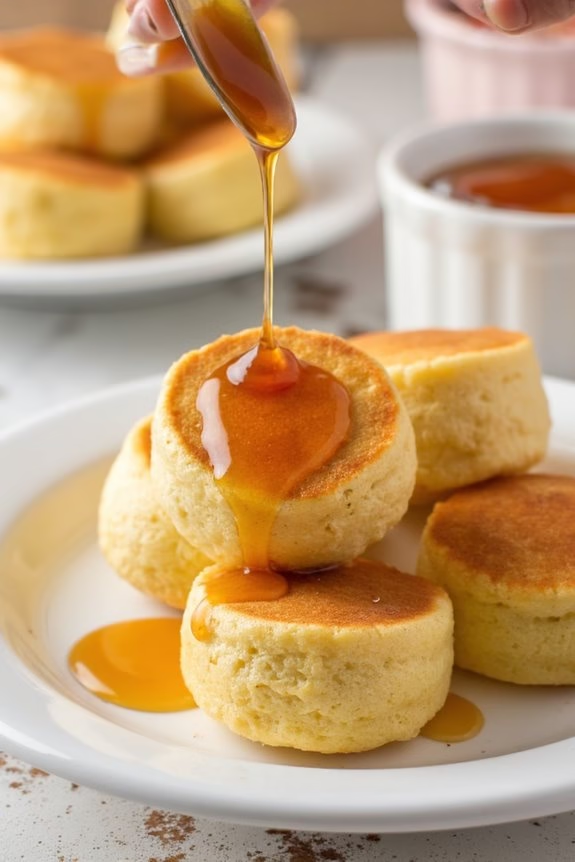
Instant Pancake Bites are a delightful twist on traditional pancakes, perfect for those mornings when you’re craving something sweet but don’t have the time for a full breakfast spread.
These bite-sized treats aren’t only quick to prepare but also versatile, allowing you to customize them with your favorite toppings and fillings. Whether you’re hosting a brunch or looking for a fun breakfast option for the family, these pancake bites are sure to be a hit.
The best part about Instant Pancake Bites is their simplicity. Using a basic pancake mix as the foundation, you can create fluffy, golden bites that are perfectly paired with a drizzle of sweet syrup.
With just a few ingredients and minimal preparation time, you can have a delicious breakfast ready in no time. Plus, these bites are kid-friendly, making them an excellent choice for families on the go.
Ingredients (Serves 4-6):
- 2 cups pancake mix
- 1 cup milk
- 2 large eggs
- 1 teaspoon vanilla extract
- 1 tablespoon melted butter
- Cooking spray or additional butter for greasing
- 1 cup maple syrup (for serving)
Cooking Instructions:
- Preheat the Oven: Begin by preheating your oven to 350°F (175°C). This guarantees that your pancake bites cook evenly and develop a nice golden color.
- Prepare the Batter: In a large mixing bowl, combine the pancake mix, milk, eggs, vanilla extract, and melted butter. Stir the ingredients together until you have a smooth batter. Make sure there are no lumps remaining to guarantee even cooking.
- Grease the Baking Tray: Lightly grease a mini muffin tin with cooking spray or melted butter. This step is essential to prevent the pancake bites from sticking to the tray during baking.
- Fill the Muffin Tin: Pour the batter into the muffin tin, filling each cup about two-thirds full. This allows room for the pancake bites to rise while baking.
- Bake: Place the muffin tin in the preheated oven and bake for 10-12 minutes, or until the pancake bites are puffed up and golden brown. To check for doneness, insert a toothpick into the center of a bite; if it comes out clean, they’re ready.
- Serve: Once baked, remove the pancake bites from the oven and allow them to cool slightly before serving. Serve warm with a generous drizzle of maple syrup.
Extra Tips:
For added flavor and texture, consider incorporating mix-ins such as chocolate chips, blueberries, or chopped nuts into the batter before baking.
You can also experiment with different syrups or serve the pancake bites alongside fresh fruit or yogurt for a more balanced breakfast. If you’re preparing these in advance, store them in an airtight container and reheat them in the oven for a few minutes before serving to retain their fluffiness.
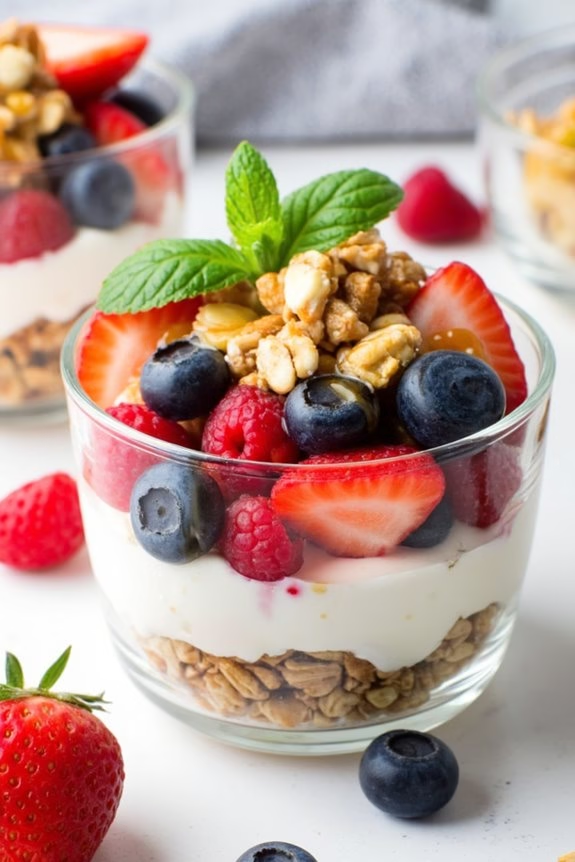
Easy Yogurt Parfaits With a Crunch
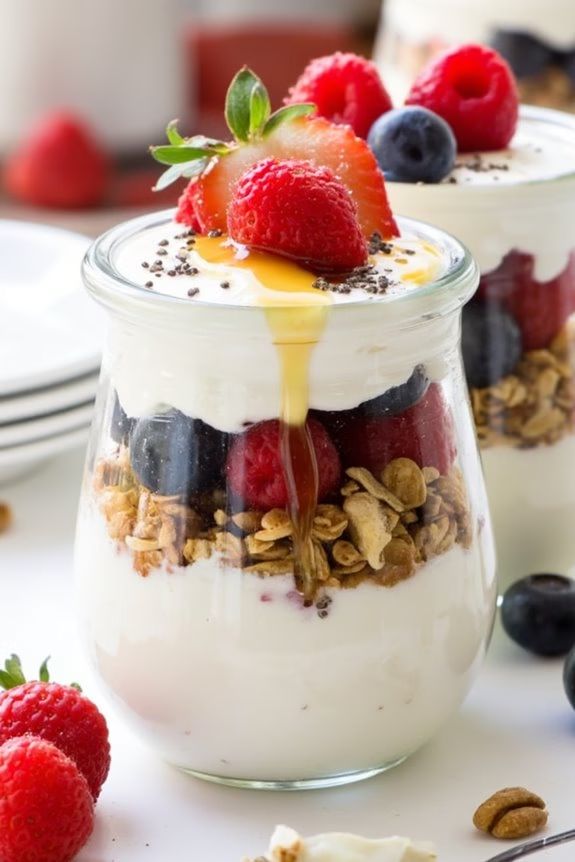
Start your morning right with an easy and delicious breakfast that doesn’t require any cooking: Easy Yogurt Parfaits With a Crunch. These parfaits aren’t only visually appealing but also packed with layers of creamy yogurt, sweet fruit, and a crunchy texture that will keep you coming back for more.
Parfaits are a versatile breakfast option, allowing you to customize them according to your taste preferences and dietary needs. Whether you’re rushing out the door or enjoying a leisurely morning, these yogurt parfaits are a perfect choice.
The beauty of yogurt parfaits lies in their simplicity and adaptability. They can be made with a variety of ingredients that you probably already have at home. For a touch of sweetness, seasonal fruits and a drizzle of honey make a delightful addition.
The crunch comes from granola, nuts, or seeds, which can be mixed and matched to suit your taste. This breakfast idea isn’t only quick to prepare but also provides a balanced meal with protein, carbohydrates, and healthy fats to keep you energized throughout the day.
Ingredients (Serving Size: 4-6 people):
- 4 cups Greek yogurt
- 3 cups mixed berries (such as strawberries, blueberries, and raspberries)
- 2 cups granola
- 1/4 cup honey
- 1/2 cup chopped nuts (such as almonds or walnuts)
- 1 teaspoon vanilla extract
- 1 tablespoon chia seeds (optional)
Cooking Instructions:
- Prepare the Ingredients: Begin by washing the mixed berries thoroughly and patting them dry with a paper towel. If you’re using larger fruits like strawberries, slice them into bite-sized pieces.
- Mix the Yogurt: In a medium-sized bowl, combine the Greek yogurt with the vanilla extract. Stir until the vanilla is well incorporated into the yogurt, giving it a lovely aroma and subtle flavor.
- Layer the Parfaits: Take six clear glasses or small jars to showcase the beautiful layers of your parfait. Begin by spooning a generous layer of Greek yogurt into the bottom of each glass.
- Add the Crunch: Over the yogurt layer, sprinkle a layer of granola followed by a scattering of chopped nuts. This will add the desired crunch to your parfaits.
- Sweeten with Fruit: Add a layer of mixed berries over the granola and nuts. This not only adds natural sweetness but also vibrant colors to your parfait.
- Repeat the Layers: Continue layering the yogurt, granola, nuts, and berries until the glasses are filled, ending with a top layer of yogurt.
- Finish with a Drizzle: Drizzle a small amount of honey over the top layer of yogurt in each parfait. This will add a hint of sweetness and a glossy finish to the presentation.
- Garnish (Optional): If desired, sprinkle some chia seeds on top for added texture and nutrition.
- Serve Immediately: These parfaits are best enjoyed immediately to maintain the crunchiness of the granola and nuts.
Extra Tips:
To make these yogurt parfaits even more nutritious, consider adding a layer of sliced bananas or diced apples for extra fiber. If you’re preparing these ahead of time, keep the granola separate and add it just before serving to prevent it from becoming soggy.
You can also swap Greek yogurt for a dairy-free alternative if you have dietary restrictions. For an extra touch of indulgence, try adding a spoonful of peanut butter or almond butter between the layers. With these tips, you can create a parfait that’s perfectly suited to your taste and dietary needs.
Fruit-Filled Breakfast Wraps in 5 Minutes
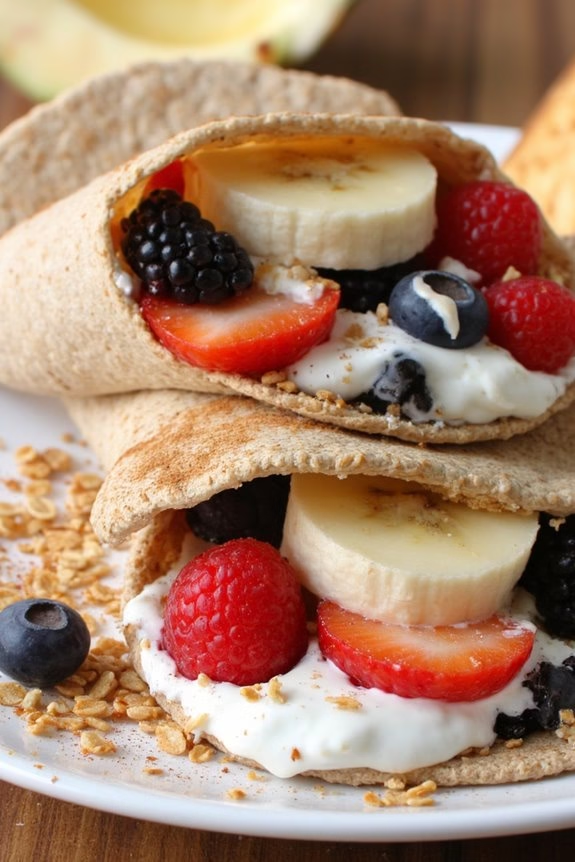
Start your day off right with these quick and delicious Fruit-Filled Breakfast Wraps. Perfect for those busy mornings when you want something sweet but don’t have much time to spare, these wraps are both satisfying and nutritious. They’re packed with fresh fruits and a hint of sweetness, making them a delightful breakfast option for the whole family.
In just five minutes, you can whip up these wraps and enjoy a burst of flavors that will keep you energized throughout the morning.
These breakfast wraps aren’t only easy to make but also versatile, allowing you to customize them based on your favorite fruits or whatever is in season. Whether you’re rushing out the door or simply want to enjoy a leisurely morning meal, these wraps are perfect for any occasion.
With a few simple ingredients and a quick assembly process, you’ll have a delightful breakfast ready in no time.
Ingredients (Serves 4-6):
- 4 large whole wheat tortillas
- 2 cups mixed berries (such as strawberries, blueberries, and raspberries)
- 2 bananas, sliced
- 1 cup Greek yogurt
- 2 tablespoons honey
- 1/4 cup granola
- 1 teaspoon cinnamon
- Optional: a handful of chopped nuts (such as almonds or walnuts)
Instructions:
- Prepare the Ingredients: Begin by washing the mixed berries thoroughly and slicing the bananas. Set them aside for easy assembly.
- Mix the Yogurt: In a small bowl, combine the Greek yogurt with honey and cinnamon. Stir until the mixture is smooth and well-blended. This will serve as the creamy base for your wraps.
- Assemble the Wraps: Lay one whole wheat tortilla flat on a clean surface. Spread a generous layer of the yogurt mixture over the entire tortilla, leaving a small border around the edges.
- Add the Fruits: Evenly distribute the sliced bananas and mixed berries over the yogurt layer. Sprinkle a small handful of granola over the fruits for added crunch.
- Wrap It Up: Carefully fold in the sides of the tortilla, then roll it up tightly from the bottom to the top, ensuring all the fillings are securely tucked inside.
- Serve and Enjoy: Repeat the assembly process with the remaining tortillas and ingredients. Once all wraps are prepared, slice them in half, if desired, and serve immediately.
Extra Tips:
For an extra burst of flavor, try adding a dash of vanilla extract to the yogurt mixture. If you prefer a warm wrap, you can lightly toast the assembled wraps in a skillet over medium heat for about a minute on each side.
Feel free to experiment with different fruits or even add a dollop of nut butter for added richness. These wraps are best enjoyed fresh, but if you need to prepare them in advance, keep the fruits and yogurt mixture separate until you’re ready to assemble, to prevent the tortillas from becoming soggy.
Instant Chia Seed Pudding for a Quick Fix
Chia seed pudding is a delightful and healthy option for those mornings when you need a quick and satisfying breakfast. This dish isn’t only easy to prepare but also packed with nutrients, making it a perfect choice for a busy morning.
With a creamy texture and the ability to absorb flavors, chia seeds are a versatile ingredient that can be tailored to suit your taste preferences. Whether you’re a fan of sweet fruits, nuts, or a hint of chocolate, this pudding can be customized to become your favorite morning treat.
In just a few minutes of preparation time and a short wait, you can have a delicious breakfast ready to kickstart your day. This recipe is designed to serve 4-6 people, making it ideal for a family breakfast or a meal prep option for the week.
With minimal ingredients and effort required, this chia seed pudding is a hassle-free way to enjoy a nutritious meal.
Ingredients (serves 4-6):
- 1 cup chia seeds
- 4 cups almond milk (or any milk of your choice)
- 1/4 cup maple syrup or honey
- 2 teaspoons vanilla extract
- Fresh fruits for topping (e.g., berries, bananas)
- Nuts or seeds for topping (optional)
- Shredded coconut or chocolate chips for garnish (optional)
Instructions:
- Combine Ingredients: In a large mixing bowl, combine the chia seeds, almond milk, maple syrup or honey, and vanilla extract. Stir well to guarantee the chia seeds are evenly distributed and not clumping together.
- Mix Thoroughly: Use a whisk or a fork to stir the mixture vigorously for a minute or two. This helps the chia seeds start to absorb the liquid and prevents them from settling at the bottom.
- Refrigerate: Cover the bowl with plastic wrap or a lid and place it in the refrigerator. Allow the pudding to set for at least 2 hours, or overnight if preparing in advance. The chia seeds will absorb the liquid and thicken the mixture to a pudding-like consistency.
- Check Consistency: Before serving, check the consistency of the pudding. If it’s too thick, add a little more milk to reach your desired consistency and stir again.
- Serve: Spoon the chia seed pudding into serving bowls. Top with fresh fruits, nuts, seeds, shredded coconut, or chocolate chips as desired.
- Enjoy: Serve immediately for a fresh and delicious breakfast.
Extra Tips:
For a smoother texture, consider blending the mixture before refrigerating. This will create a more uniform pudding without the seed texture.
Additionally, feel free to experiment with different flavors by adding cocoa powder for a chocolate version or cinnamon for a spiced twist. If preparing for meal prep, store the pudding in individual airtight containers for easy grab-and-go breakfasts throughout the week.
Adjust the sweetness to your liking by varying the amount of maple syrup or honey used in the recipe.
Quick French Toast Sticks

Looking for an easy, sweet breakfast idea that will please both kids and adults alike? Quick French Toast Sticks are a delightful option. These delicious sticks are perfect for dipping and offer a fun twist on traditional French toast. With a crispy exterior and a soft, custardy interior, they make a satisfying morning treat that can be prepared in a matter of minutes.
Whether you’re serving them for a family breakfast, brunch gathering, or just treating yourself to a cozy morning at home, these French Toast Sticks are bound to become a breakfast favorite.
To make these Quick French Toast Sticks, you’ll need a few simple ingredients that you likely already have in your kitchen. The recipe is designed to serve 4-6 people, making it ideal for family breakfasts or small gatherings. With some slices of bread, eggs, milk, and a few spices, you’ll create a deliciously sweet and satisfying breakfast that everyone will love.
These French Toast Sticks are best enjoyed fresh off the griddle, dipped in warm syrup or dusted with powdered sugar for an extra touch of sweetness.
Ingredients (Serves 4-6):
- 8 slices of thick bread (such as Texas toast or brioche)
- 4 large eggs
- 1 cup whole milk
- 1 teaspoon vanilla extract
- 1 teaspoon ground cinnamon
- 2 tablespoons granulated sugar
- Pinch of salt
- 3 tablespoons unsalted butter
- Maple syrup or powdered sugar for serving
Instructions:
- Prepare the Bread: Start by slicing each piece of bread into thirds to create sticks. This will guarantee that they cook evenly and are easy to handle.
- Make the Custard Mixture: In a large bowl, whisk together the eggs, milk, vanilla extract, cinnamon, sugar, and salt until well combined. This mixture will coat the bread and give the French toast its rich flavor.
- Soak the Bread: Dip the bread sticks into the custard mixture, making sure each piece is well-coated. Allow them to soak for about 30 seconds to absorb the flavors, but not too long to prevent them from becoming soggy.
- Preheat and Add Butter: Heat a large non-stick skillet or griddle over medium heat. Add 1 tablespoon of butter to the pan and let it melt, swirling to coat the surface.
- Cook the Sticks: Place the soaked bread sticks in the skillet, making sure not to overcrowd the pan. Cook for 2-3 minutes on each side, or until golden brown and crispy. You may need to cook them in batches, adding more butter as needed.
- Serve Warm: Remove the French Toast Sticks from the skillet and serve immediately with warm maple syrup or a dusting of powdered sugar.
Extra Tips:
When making Quick French Toast Sticks, it’s important to choose the right type of bread. Thick-sliced bread like Texas toast or brioche works best, as it absorbs the custard mixture well without falling apart.
For added flavor, consider adding a pinch of nutmeg or a splash of orange juice to the custard. If you’re preparing these for a large crowd, keep the cooked sticks warm in a low oven (around 200°F) until ready to serve. Enjoy!
Portable Fruit and Nut Cups
Start your day on a sweet note with these delightful Portable Fruit and Nut Cups. Perfectly portioned for easy grab-and-go breakfasts, these cups combine the natural sweetness of fresh fruits with the crunch of nuts, making them a healthy and satisfying morning treat.
They’re easy to prepare and can be customized with your favorite seasonal fruits and nuts, allowing you to enjoy a variety of flavors throughout the year.
These Portable Fruit and Nut Cups aren’t only quick to prepare but are also packed with nutrients, providing a balanced breakfast option that’s both nourishing and delicious. The combination of fruits and nuts provides a good mix of vitamins, minerals, healthy fats, and fiber, helping to keep you full and energized.
Whether you’re heading to work or sending the kids off to school, these cups make for a convenient and wholesome breakfast choice.
Ingredients for 4-6 Servings:
- 2 cups Greek yogurt
- 1/2 cup granola
- 1 cup mixed berries (such as strawberries, blueberries, and raspberries)
- 1/4 cup chopped almonds
- 1/4 cup chopped walnuts
- 2 tablespoons honey
- Mint leaves for garnish (optional)
Cooking Instructions:
- Prepare the Base: Start by spooning about 1/4 cup of Greek yogurt into each of the 4-6 small serving cups or jars. This will serve as the creamy base for your fruit and nut cups.
- Layer the Granola: Evenly distribute the granola over the yogurt layer in each cup, using about 1-2 tablespoons per cup. This adds a satisfying crunch and texture.
- Add Fresh Fruits: Rinse and pat dry the mixed berries. Divide them evenly among the cups, layering them over the granola. This provides a burst of fresh, juicy flavor.
- Top with Nuts: Sprinkle the chopped almonds and walnuts over the fruit layer in each cup. This step adds a delightful nutty crunch and boosts the protein content.
- Drizzle with Honey: Drizzle about 1 teaspoon of honey over each cup to enhance the sweetness. Adjust the amount according to your taste preference.
- Garnish and Serve: Optionally, add a few mint leaves on top for a pop of color and a invigorating aroma. Serve immediately or cover and refrigerate if preparing in advance.
Extra Tips:
For a more personalized touch, feel free to swap out the mixed berries for other fruits like sliced bananas, kiwi, or mango.
If you’re watching your sugar intake, you can reduce or eliminate the honey, as the natural sweetness of the fruits may be sufficient.
Additionally, consider using different types of nuts or seeds, such as pecans or chia seeds, to vary the texture and nutritional profile.
These Portable Fruit and Nut Cups can be made the night before and stored in the refrigerator, making them an excellent choice for busy mornings.
Easy Puff Pastry Breakfasts
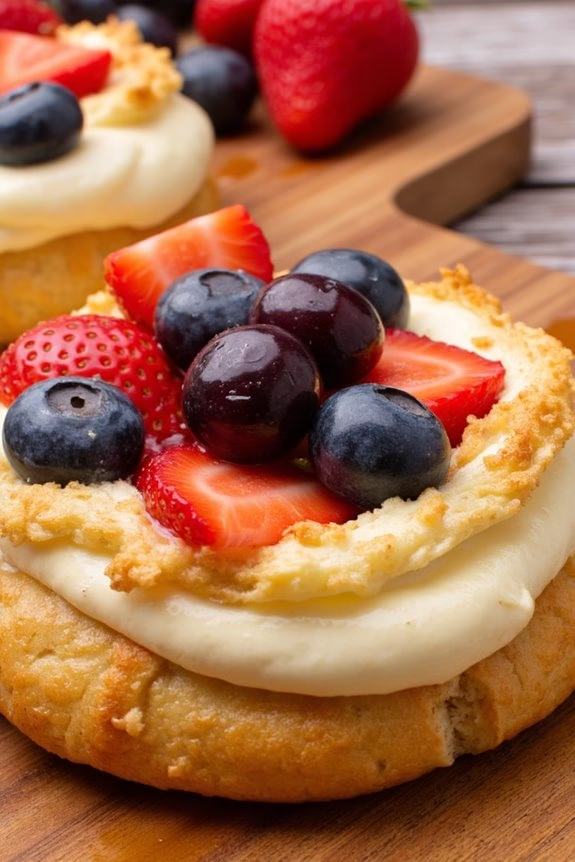
Puff pastry fruit danishes are a delightful and easy breakfast option that combines the buttery, flaky goodness of puff pastry with the sweet and tangy flavors of fresh fruit and cream cheese. Perfect for a weekend brunch or a special morning treat, these danishes aren’t only delicious but also visually appealing.
They’re surprisingly simple to make with store-bought puff pastry, allowing you to spend less time in the kitchen and more time enjoying your breakfast.
This recipe utilizes the convenience of ready-made puff pastry, which serves as a perfect base for a sweet and creamy filling topped with your choice of fruit. You can customize each danish with a variety of fruits like blueberries, strawberries, peaches, or apples, making it a versatile option to cater to different tastes.
With just a few ingredients and some quick assembly, you can have these delightful pastries fresh out of the oven in under an hour, ready to be devoured by family and friends.
Ingredients (Serving Size: 4-6 people):
- 1 package of frozen puff pastry (2 sheets), thawed
- 1/2 cup cream cheese, softened
- 1/4 cup granulated sugar
- 1 teaspoon vanilla extract
- 1 cup mixed fresh fruit (such as blueberries, raspberries, or sliced strawberries)
- 1 egg, beaten
- 1 tablespoon water
- 2 tablespoons apricot jam or honey (for glaze)
Cooking Instructions:
- Preheat the Oven: Preheat your oven to 400°F (200°C) and line a baking sheet with parchment paper to prevent sticking.
- Prepare the Pastry: Unfold the thawed puff pastry sheets on a lightly floured surface. Cut each sheet into four equal squares, giving you eight squares total for the danishes.
- Make the Cream Cheese Filling: In a medium bowl, combine the softened cream cheese, granulated sugar, and vanilla extract. Mix until smooth and creamy.
- Assemble the Danishes: Place a tablespoon of the cream cheese mixture in the center of each puff pastry square. Top with a few pieces of your chosen fruit, spreading them out slightly.
- Shape the Pastries: Gently fold the corners of each puff pastry square towards the center, slightly overlapping them over the filling. Press lightly to seal.
- Egg Wash: In a small bowl, whisk together the beaten egg and water. Brush the edges of the puff pastry with the egg wash to give the danishes a golden color when baked.
- Bake: Place the assembled danishes onto the prepared baking sheet. Bake in the preheated oven for 15-20 minutes or until the pastry is puffed and golden brown.
- Glaze: While the danishes are baking, warm the apricot jam or honey in a small saucepan or microwave until it becomes liquid. Once the danishes are out of the oven, brush the fruit with the warm glaze to give them a glossy finish.
- Cool and Serve: Allow the danishes to cool slightly on a wire rack before serving. Enjoy warm or at room temperature.
Extra Tips:
For the best results, make sure the puff pastry is fully thawed before handling; this will prevent cracking. If you prefer a sweeter danish, consider adding a dusting of powdered sugar before serving.
You can also experiment with different fillings such as Nutella or lemon curd for a different flavor profile. To save time in the morning, prepare the cream cheese filling and cut your fruit the night before.
Sweet Avocado Toast With a Twist

Start your morning with a delightful and nutritious twist on a classic breakfast favorite: Sweet Avocado Toast. This fusion of creamy avocado, sweet honey, and a touch of cinnamon will elevate your breakfast game and satisfy your sweet tooth.
Perfect for brunch gatherings or a cozy morning at home, this recipe takes traditional avocado toast to new heights by balancing the savory richness of avocado with the natural sweetness of honey and the warm spice of cinnamon. The result is a balanced and satisfying breakfast that’s bound to become a staple in your morning routine.
This Sweet Avocado Toast With a Twist isn’t only delicious but also packed with nutrients. Avocados are a great source of healthy fats, fiber, and essential vitamins, while whole-grain bread adds heartiness and additional fiber to keep you full longer.
This recipe is designed for 4-6 people, making it ideal for sharing with family or friends. Whether you’re looking to impress guests or simply treat yourself to a special breakfast, this recipe is a guaranteed crowd-pleaser.
Ingredients for 4-6 people:
- 4 ripe avocados
- 8-12 slices of whole-grain bread
- 4 tablespoons of honey
- 1 teaspoon of ground cinnamon
- 1 tablespoon of lemon juice
- A pinch of salt
- Fresh berries (such as strawberries, blueberries, or raspberries) for garnish
- Optional: crushed nuts (such as almonds or walnuts) for garnish
Cooking Instructions:
- Prepare the Avocados: Start by cutting the avocados in half, removing the pits, and scooping the flesh into a medium-sized bowl. Add the lemon juice and a pinch of salt. Mash the avocado mixture with a fork until you achieve a smooth, creamy consistency.
- Toast the Bread: While preparing the avocado, place the slices of whole-grain bread in a toaster or under a broiler until they’re golden brown and crispy. This should take about 3-5 minutes.
- Sweeten the Avocado: Add the honey and ground cinnamon to the mashed avocado. Mix thoroughly to guarantee that the honey and cinnamon are evenly distributed throughout the avocado mixture.
- Assemble the Toast: Once the bread is toasted, spread a generous amount of the sweet avocado mixture on each slice. Be sure to cover the entire surface for maximum flavor.
- Garnish: Top the avocado toast with fresh berries and a sprinkle of crushed nuts if desired. This not only adds a burst of flavor but also enhances the presentation of the dish.
- Serve: Arrange the Sweet Avocado Toast on a serving platter and serve immediately while the toast is still warm. Enjoy the delightful combination of sweet and savory flavors.
Extra Tips:
To keep the avocado from browning, prepare the avocado mixture right before serving. If you need to prepare it in advance, store it in an airtight container with a layer of plastic wrap directly on the surface of the avocado to minimize air exposure.
For an extra touch of flavor, consider adding a pinch of vanilla extract or a drizzle of maple syrup instead of honey. Experiment with different types of bread, such as sourdough or rye, to find your preferred taste and texture combination.
Fast Microwave Muffins
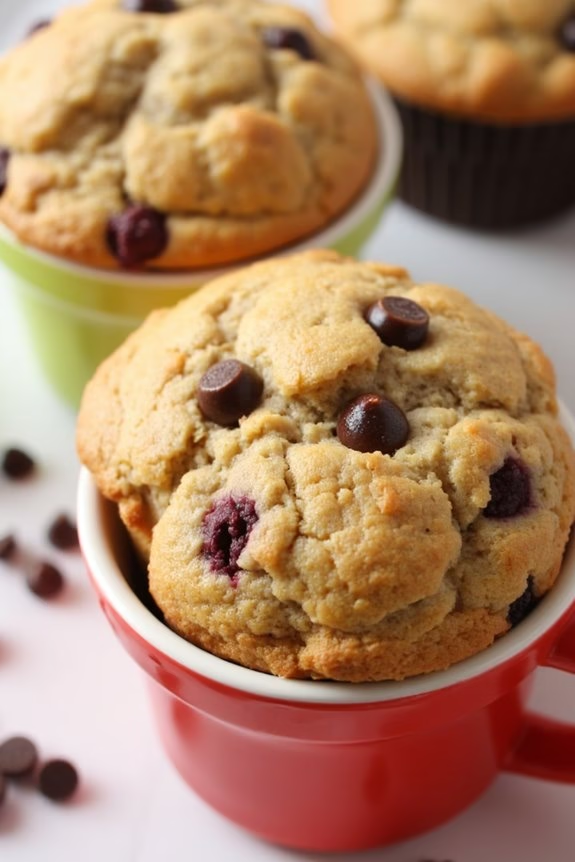
Looking for a quick and satisfying breakfast treat? Fast Microwave Muffins are an ideal choice for those hectic mornings when time is of the essence.
These muffins deliver a delightful burst of sweetness and can be prepared in minutes using just a microwave. With their moist texture and rich flavor, they’re perfect for anyone craving a warm, homemade breakfast without the hassle of traditional baking.
These muffins aren’t only fast to make but also incredibly versatile. You can customize the recipe by adding your favorite mix-ins such as chocolate chips, nuts, or berries to suit your taste. Perfect for serving 4-6 people, this recipe guarantees that everyone gets to enjoy a fresh, delicious muffin that’s perfect for starting the day on a sweet note.
Ingredients (serving size: 4-6 people):
- 1 cup all-purpose flour
- ½ cup granulated sugar
- 1 teaspoon baking powder
- ½ teaspoon baking soda
- ¼ teaspoon salt
- ½ cup milk
- ¼ cup vegetable oil
- 1 large egg
- 1 teaspoon vanilla extract
- Optional: ½ cup chocolate chips, nuts, or berries
Cooking Instructions:
- Prepare the Batter: In a medium-sized mixing bowl, combine the all-purpose flour, granulated sugar, baking powder, baking soda, and salt. Stir these dry ingredients together until they’re well mixed.
- Add Wet Ingredients: In a separate bowl, whisk together the milk, vegetable oil, egg, and vanilla extract until well combined. Pour the wet mixture into the dry ingredients and stir gently until just incorporated. Be careful not to overmix.
- Customize Your Muffins: If you want to add chocolate chips, nuts, or berries, gently fold them into the batter now. This is your chance to tailor the muffins to your liking.
- Prepare the Mugs: Lightly grease four to six microwave-safe mugs or ramekins with a bit of oil or cooking spray. This will help prevent the muffins from sticking.
- Divide the Batter: Evenly distribute the batter into the prepared mugs, filling each about halfway to allow room for rising.
- Microwave the Muffins: Place the mugs in the microwave and cook on high for approximately 1½ to 2 minutes. The muffins are done when a toothpick inserted into the center comes out clean. Microwaves vary, so you may need to adjust the time slightly.
- Cool and Serve: Allow the muffins to cool for a minute or two before serving. Enjoy them warm straight from the mug, or let them cool completely if you prefer.
Extra Tips:
For the best results, be sure to not overmix the batter as this can make the muffins dense.
If you’re using different mix-ins, try to keep them small to guarantee even distribution and cooking. Additionally, to avoid overflowing, don’t fill the mugs more than halfway with batter.
If you find that the muffins aren’t fully cooked after the initial microwave time, continue cooking in 15-second intervals, checking each time. Enjoy your fast and easy sweet breakfast!
Quick Chocolate Banana Quesadillas
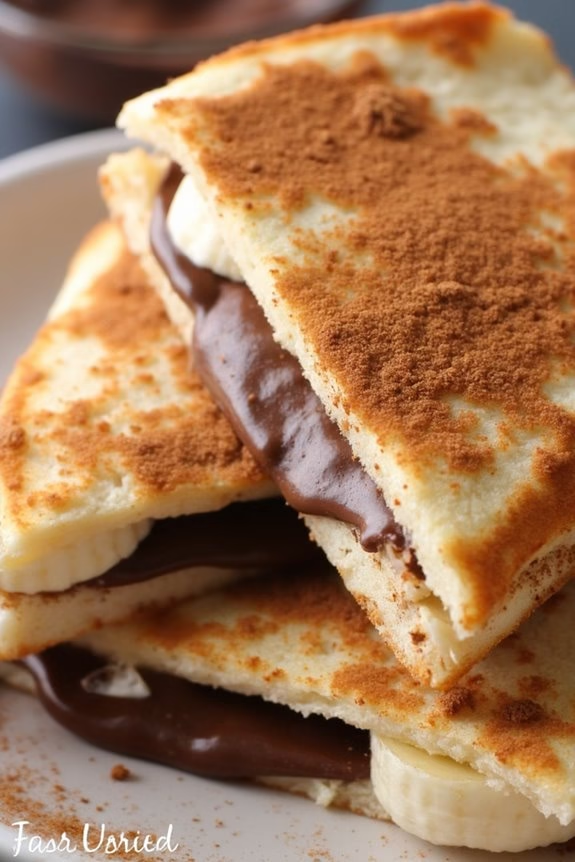
If you’re searching for a deliciously sweet breakfast that’s easy to whip up, seek no further than Quick Chocolate Banana Quesadillas. This treat combines the creamy richness of bananas with the irresistible allure of melted chocolate, all wrapped up in a warm, crispy tortilla. Perfect for a lazy weekend morning or a special breakfast treat, these quesadillas are sure to satisfy any sweet tooth.
Not only are these Chocolate Banana Quesadillas a delight to eat, but they’re also incredibly simple to prepare. Whether you’re cooking for yourself or serving a small group, this recipe is versatile and can be adjusted to suit your needs. With just a few ingredients and minimal preparation time, you’ll have a sweet breakfast that tastes indulgent without the hassle.
Ingredients for 4-6 people:
- 4 large flour tortillas
- 4 ripe bananas
- 1 cup of semi-sweet chocolate chips
- 2 tablespoons of unsalted butter
- 2 tablespoons of granulated sugar
- 1 teaspoon of ground cinnamon
Cooking Instructions:
- Prepare the Ingredients: Begin by peeling and slicing the bananas into thin rounds. This will help them spread evenly across the tortillas and guarantee every bite is filled with banana goodness.
- Make the Cinnamon Sugar: In a small bowl, mix together the granulated sugar and ground cinnamon. Set aside for later use. This will add a sweet, spicy touch to the quesadillas.
- Assemble the Quesadillas: Lay out the flour tortillas on a clean surface. Evenly distribute the banana slices over half of each tortilla. Sprinkle the chocolate chips evenly over the bananas, ensuring each spot is covered. Fold the other half of the tortilla over the filling to create a semicircle.
- Cook the Quesadillas: Heat a large non-stick skillet over medium heat. Add a small amount of butter to the pan, allowing it to melt and coat the surface. Carefully place the assembled quesadillas in the skillet, cooking two at a time if space allows.
- Brown the Tortillas: Cook each side of the quesadilla for about 2-3 minutes, or until the tortillas are golden brown and the chocolate has melted. Press down gently with a spatula to confirm even cooking and melting of the chocolate.
- Sprinkle with Cinnamon Sugar: Once cooked, remove the quesadillas from the skillet and immediately sprinkle the tops with the prepared cinnamon sugar mixture. The warmth of the tortillas will help the sugar adhere.
- Serve and Enjoy: Allow the quesadillas to cool slightly before slicing them into wedges. Serve warm, and enjoy the gooey, chocolatey goodness.
Extra Tips:
For an even more decadent twist, consider adding a drizzle of caramel sauce or a dollop of whipped cream on top before serving.
If you’re preparing these quesadillas for a crowd, you can keep them warm in a low oven (around 200°F) until ready to serve.
Additionally, feel free to experiment with different types of chocolate or add a handful of nuts for an extra crunch. Adjust the sweetness to your liking by modifying the amount of cinnamon sugar used.
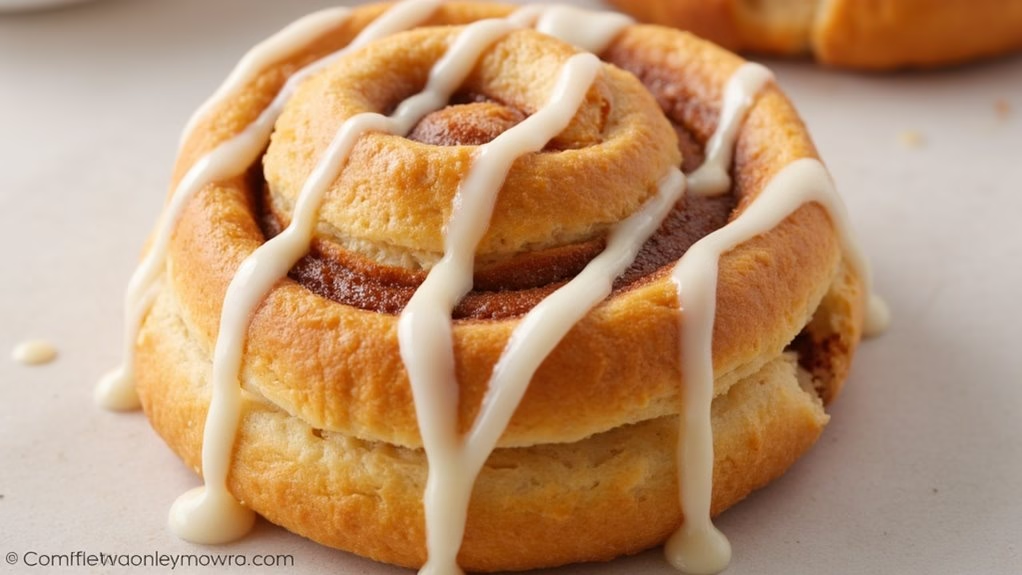
Cinnamon Roll-Ups in a Flash

If you’re craving a sweet breakfast treat but don’t want to spend hours in the kitchen, Cinnamon Roll-Ups are the perfect solution. These delightful roll-ups combine the classic flavors of cinnamon and sugar with the convenience of refrigerated crescent roll dough, making them a quick and easy option for busy mornings or a spontaneous sweet snack.
With a golden-brown exterior and a gooey cinnamon-sugar filling, these roll-ups are sure to satisfy your sweet tooth and leave you with a warm, comforting feeling. Perfect for serving 4-6 people, this recipe takes minimal time to prepare and bake, allowing you to enjoy a delicious breakfast without the fuss.
Whether you’re hosting a brunch or simply treating your family to a special morning meal, these Cinnamon Roll-Ups will be a hit. Gather your ingredients, roll up your sleeves, and get ready to enjoy the irresistible aroma of cinnamon wafting through your kitchen.
Ingredients:
- 1 can (8 oz) refrigerated crescent roll dough
- 4 tablespoons unsalted butter, melted
- 1/3 cup granulated sugar
- 1 tablespoon ground cinnamon
- 1/4 cup all-purpose flour (for dusting)
- 1/2 cup powdered sugar
- 1 tablespoon milk
- 1/2 teaspoon vanilla extract
Instructions:
- Preheat the Oven: Begin by preheating your oven to 375°F (190°C). Line a baking sheet with parchment paper or lightly grease it to prevent sticking.
- Prepare the Dough: On a lightly floured surface, unroll the crescent roll dough and separate it into individual triangles.
- Mix Cinnamon Sugar: In a small bowl, combine the granulated sugar and ground cinnamon. Mix well until the cinnamon is evenly distributed.
- Add Butter and Cinnamon Sugar: Brush each triangle of dough with melted butter, ensuring you cover the entire surface. Sprinkle a generous amount of the cinnamon sugar mixture over the buttered dough.
- Roll and Shape: Starting from the wider end, roll up each triangle tightly. Place the rolled dough on the prepared baking sheet with the point side down to prevent unrolling during baking.
- Bake: Place the baking sheet in the preheated oven and bake for 10-12 minutes or until the roll-ups are golden brown and cooked through.
- Prepare the Glaze: While the roll-ups are baking, prepare the glaze by whisking together the powdered sugar, milk, and vanilla extract in a small bowl until smooth.
- Glaze the Roll-Ups: Once the roll-ups are done, remove them from the oven and let them cool for a few minutes. Drizzle the prepared glaze over the warm roll-ups before serving.
Extra Tips:
For an extra burst of flavor, consider adding a pinch of nutmeg or cardamom to the cinnamon sugar mixture. If you prefer a slightly crunchier texture, sprinkle chopped nuts, such as pecans or walnuts, inside the roll-ups before baking.
Make sure to roll the dough tightly to prevent the filling from leaking out during baking. If you’re planning to serve the roll-ups later, you can reheat them in the oven at a low temperature to maintain their freshness and warmth.