
Holiday gatherings are just around the corner, and having a stash of easy Christmas potluck recipes is a true blessing. Think about wowing your friends and family with dishes like Cheesy Spinach and Artichoke Dip or Honey Glazed Ham Sliders. From savory bites to sweet treats, these recipes are not only simple to prepare but sure to please everyone. Want to uncover the secrets behind these festive favorites? Let’s explore the magic together!
Cheesy Spinach and Artichoke Dip
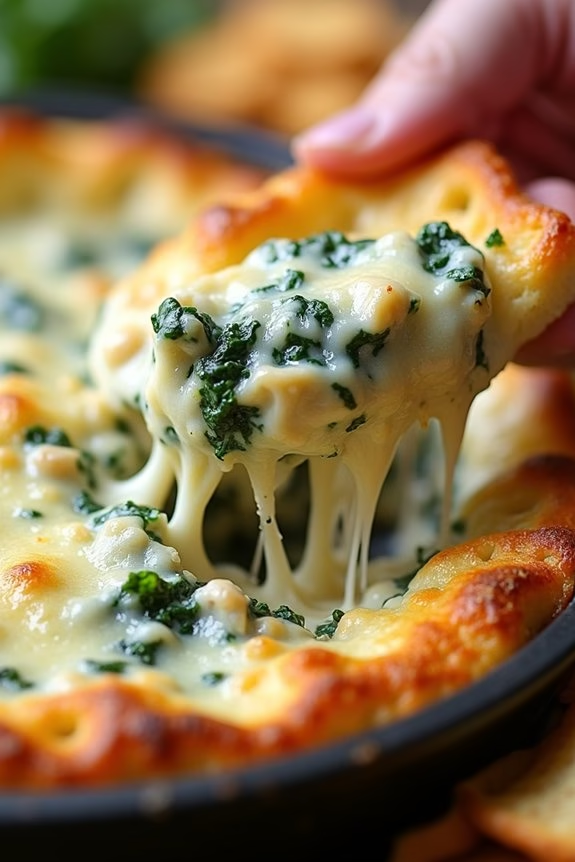
Cheesy Spinach and Artichoke Dip is a classic, crowd-pleasing appetizer perfect for any Christmas potluck. This creamy, cheesy delight is loaded with rich flavors from the combination of spinach, artichoke hearts, and a blend of cheeses.
Whether you’re serving it with crispy tortilla chips, fresh veggies, or slices of warm baguette, this dip is bound to be a hit among guests. It’s easy to prepare and can be made ahead of time, making it a stress-free option for your holiday gathering.
This dip’s creamy texture and savory flavor profile make it an irresistible addition to any festive spread. With a perfect balance of garlic, Parmesan, mozzarella, and cream cheese, this dip is both comforting and indulgent.
The earthy spinach and tangy artichoke hearts add a delightful contrast, making every bite a flavorful experience. Follow this simple recipe to create a delicious Cheesy Spinach and Artichoke Dip that serves 4-6 people, guaranteeing your guests leave with satisfied smiles.
Ingredients:
- 1 (10-ounce) package frozen chopped spinach, thawed and drained
- 1 (14-ounce) can artichoke hearts, drained and chopped
- 1 cup cream cheese, softened
- 1 cup sour cream
- 1/2 cup mayonnaise
- 1 cup shredded mozzarella cheese
- 1/2 cup grated Parmesan cheese
- 2 cloves garlic, minced
- Salt and pepper to taste
- 1 tablespoon olive oil
Cooking Instructions:
- Preheat the Oven: Start by preheating your oven to 350°F (175°C) to ascertain it’s ready for baking the dip once prepared.
- Prepare the Spinach: In a skillet over medium heat, add the olive oil and sauté the minced garlic until fragrant, about 1 minute. Add the thawed and drained spinach to the skillet, stirring well to mix with the garlic. Cook for about 3-4 minutes, until any excess moisture evaporates, then remove from heat.
- Mix Ingredients: In a large mixing bowl, combine the cream cheese, sour cream, and mayonnaise. Stir until smooth and well combined. Add the cooked spinach, chopped artichoke hearts, mozzarella cheese, Parmesan cheese, salt, and pepper. Mix until all ingredients are thoroughly incorporated.
- Transfer to Baking Dish: Spoon the mixture into a baking dish, spreading it evenly. You can use a 9-inch pie dish or any similar-sized oven-safe dish.
- Bake the Dip: Place the baking dish in the preheated oven and bake for about 25-30 minutes, or until the top is bubbly and golden brown.
- Serve Warm: Remove from the oven and let it sit for a few minutes before serving. Serve warm with your choice of tortilla chips, sliced baguette, or fresh vegetables for dipping.
Extra Tips:
For a more robust flavor, consider adding a pinch of red pepper flakes for a hint of heat, or incorporate some freshly chopped herbs like parsley or basil for added freshness.
If you prefer a more rustic texture, use fresh spinach instead of frozen by sautéing it with the garlic until wilted. This dip can also be prepared a day in advance; simply store it in the refrigerator and bake just before serving to save time during the hustle and bustle of holiday preparations.
Honey Glazed Ham Sliders
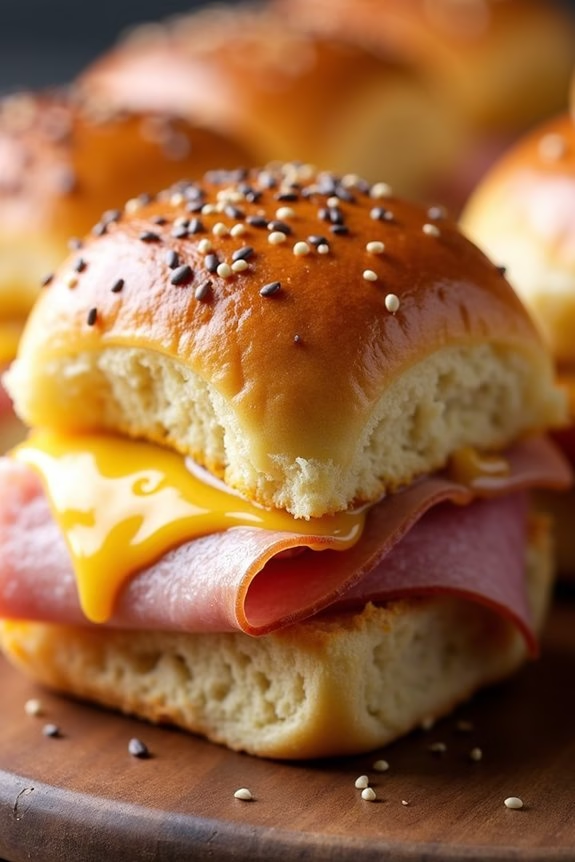
Honey Glazed Ham Sliders are the perfect addition to any Christmas potluck, offering a delectable combination of sweet and savory flavors in every bite. These sliders feature tender slices of ham glazed with honey, nestled between soft, buttery rolls, and topped with a hint of tangy mustard.
They’re easy to make, serve, and enjoy, making them a crowd favorite during the holiday season. Not only are they delicious, but they’re also convenient to prepare ahead of time, allowing you to spend more time with your loved ones.
The beauty of Honey Glazed Ham Sliders lies in their simplicity and flexibility. You can customize the toppings to suit your taste, adding pickles, cheese, or even a touch of spicy mayo for an extra kick. This recipe is designed to serve 4-6 people, making it perfect for a small gathering or as part of a larger spread.
Whether you’re hosting a festive dinner or attending a potluck, these sliders are sure to impress with their delightful flavor and ease of preparation.
Ingredients (Serves 4-6):
- 12 slices of cooked ham
- 12 mini slider buns or Hawaiian rolls
- 1/2 cup honey
- 2 tablespoons Dijon mustard
- 1 tablespoon butter, melted
- 6 slices of Swiss cheese (optional)
- 1/4 cup mayonnaise
- 1 tablespoon poppy seeds (optional)
- Salt and pepper to taste
Cooking Instructions:
- Preheat the Oven: Start by preheating your oven to 350°F (175°C). This will guarantee that your sliders are cooked evenly and have a nice, golden finish.
- Prepare the Ham Glaze: In a small saucepan over medium heat, combine the honey and Dijon mustard. Stir well until the mixture is smooth and heated through. Remove from heat and let it cool slightly.
- Assemble the Sliders: Slice the buns in half and place the bottom halves on a baking sheet. Spread a thin layer of mayonnaise on each bun. Place a slice of ham on each bun, followed by a slice of Swiss cheese if using. Drizzle the honey mustard glaze over the ham and top with the other half of the bun.
- Brush with Butter: In a small bowl, mix the melted butter with poppy seeds. Brush the top of each slider with this mixture to add extra flavor and a hint of crunch.
- Bake the Sliders: Cover the sliders with foil and bake in the preheated oven for about 15 minutes. Remove the foil and continue to bake for an additional 5 minutes, or until the tops are golden brown and the cheese is melted.
- Serve Hot: Once baked, remove the sliders from the oven and let them cool for a few minutes before serving. These are best enjoyed warm.
Extra Tips:
For an added burst of flavor, consider adding a thin slice of pickle or a dash of hot sauce inside each slider.
If you’re preparing these sliders in advance, assemble them up to the point of baking, cover them tightly, and store in the refrigerator. When ready to serve, simply bake as directed, adding an additional 5 minutes to the covered baking time to guarantee they’re heated through.
Cranberry Brie Bites

Cranberry Brie Bites are the perfect festive appetizer to add to your Christmas potluck spread. These delightful bites combine creamy brie cheese with the tartness of cranberries, all nestled in a flaky puff pastry shell. Not only are they visually appealing, but they also offer a delicious balance of flavors that are certain to impress your guests.
Whether you’re hosting a large gathering or attending a small family dinner, these bites are easy to make and will be a hit at any holiday celebration.
The best part about Cranberry Brie Bites is their simplicity. With minimal ingredients and straightforward preparation, even novice cooks can create a dish that looks and tastes gourmet. These bites are versatile enough to be made in advance, allowing you to focus on other aspects of your holiday menu.
Serve them warm to enjoy the gooey cheese and warm pastry, or at room temperature if you’re short on oven space. Either way, they’re guaranteed to be a crowd-pleaser.
Ingredients (Serves 4-6):
- 1 sheet of puff pastry, thawed
- 8 oz brie cheese
- 1/2 cup whole cranberry sauce
- 1/4 cup chopped pecans (optional)
- 1 tablespoon chopped fresh rosemary
- 1 egg, beaten (for egg wash)
Instructions:
- Preheat the Oven: Preheat your oven to 375°F (190°C) to guarantee it reaches the right temperature by the time you’re ready to bake the bites.
- Prepare the Puff Pastry: Roll out the thawed puff pastry sheet on a lightly floured surface to smooth out any creases. Cut the sheet into 12 equal squares.
- Prepare the Baking Tray: Lightly grease a mini muffin tin or line it with parchment paper. This will prevent the pastry from sticking and make it easier to remove the bites once they’re baked.
- Assemble the Bites: Place a square of puff pastry into each muffin tin cup, gently pressing down so the pastry fits into the cup. Cut the brie into small cubes and place a piece into each pastry-lined cup.
- Add Toppings: Spoon approximately a teaspoon of cranberry sauce over the brie in each cup. If desired, sprinkle chopped pecans and a pinch of rosemary on top for added texture and flavor.
- Apply Egg Wash: Brush the edges of the puff pastry with the beaten egg. This will give the pastry a golden, glossy finish once baked.
- Bake: Place the muffin tin in the oven and bake for 15-20 minutes, or until the puff pastry is golden brown and the cheese is bubbly.
- Cool and Serve: Remove from the oven and allow the bites to cool for a few minutes before transferring them to a serving platter. Serve warm or at room temperature.
Extra Tips:
To save time during your holiday preparations, you can assemble these Cranberry Brie Bites a few hours in advance and store them in the refrigerator until you’re ready to bake. Just be sure to apply the egg wash right before baking for that perfect golden color.
Feel free to experiment with different toppings, such as walnuts or dried cranberries, to suit your taste preferences. If you’re serving a larger crowd, simply double the ingredients and use an additional sheet of puff pastry. Enjoy and have a merry Christmas!
Garlic Parmesan Roasted Potatoes
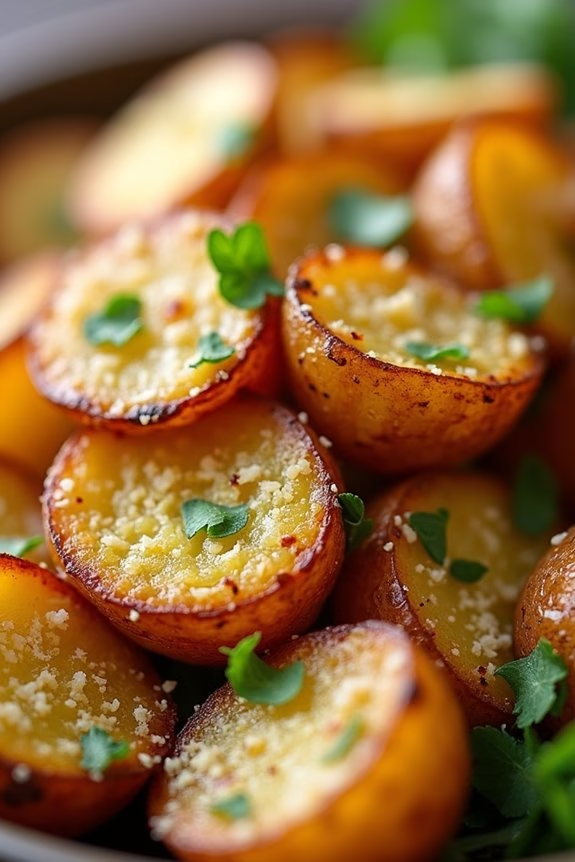
Garlic Parmesan Roasted Potatoes are a delicious and comforting side dish that pairs perfectly with any holiday meal, especially during a festive Christmas potluck. These savory potatoes are beautifully golden and crispy on the outside, while remaining tender and fluffy on the inside. The combination of garlic and parmesan cheese provides a depth of flavor that’s both rich and satisfying, making this dish a crowd favorite.
Whether you’re hosting a gathering or attending a potluck, these roasted potatoes are sure to impress your family and friends.
The preparation of Garlic Parmesan Roasted Potatoes is both simple and rewarding, requiring minimal ingredients and effort. The key to achieving the perfect texture lies in the roasting technique, which guarantees that each potato piece is evenly cooked and crisped to perfection.
Using fresh garlic and high-quality parmesan cheese will elevate the flavors, giving the dish an exquisite taste that’s both comforting and sophisticated. Let’s plunge into the ingredients and steps needed to create this mouthwatering dish for a serving size of 4-6 people.
Ingredients:
- 2 pounds baby potatoes, halved
- 3 tablespoons olive oil
- 4 cloves garlic, minced
- 1 teaspoon salt
- 1/2 teaspoon black pepper
- 1 teaspoon dried Italian herbs (such as oregano and thyme)
- 1/2 cup grated Parmesan cheese
- Fresh parsley, chopped (for garnish)
Instructions:
- Preheat the Oven: Start by preheating your oven to 400°F (200°C). Preheating guarantees that the potatoes begin roasting immediately upon being placed in the oven, leading to better crisping.
- Prepare the Potatoes: Wash the baby potatoes thoroughly and pat them dry with a kitchen towel. Halve each potato to guarantee they cook evenly and have ample surface area for crisping.
- Season the Potatoes: In a large mixing bowl, combine the halved potatoes with olive oil, minced garlic, salt, black pepper, and dried Italian herbs. Toss the potatoes until they’re evenly coated with the oil and seasonings.
- Add Parmesan Cheese: Sprinkle the grated Parmesan cheese over the seasoned potatoes and toss again to confirm that the cheese adheres to the potatoes, giving them a delicious, cheesy crust.
- Roast in the Oven: Spread the potatoes in a single layer on a baking sheet lined with parchment paper. This prevents sticking and guarantees even roasting. Place the baking sheet in the preheated oven and roast for 25-30 minutes, or until the potatoes are golden brown and tender.
- Garnish and Serve: Once done, remove the potatoes from the oven and allow them to cool slightly. Transfer them to a serving dish and garnish with freshly chopped parsley for a burst of color and freshness.
Extra Tips:
For the best results, confirm the potatoes are dry before seasoning to maximize crispiness. If you prefer your potatoes extra crispy, you can increase the oven temperature to 425°F (220°C) but keep a close eye to prevent burning.
Additionally, consider flipping the potatoes halfway through the roasting time for even browning. Finally, feel free to experiment with herbs and spices according to your personal taste, or add a sprinkle of red pepper flakes for a subtle kick.
Classic Deviled Eggs
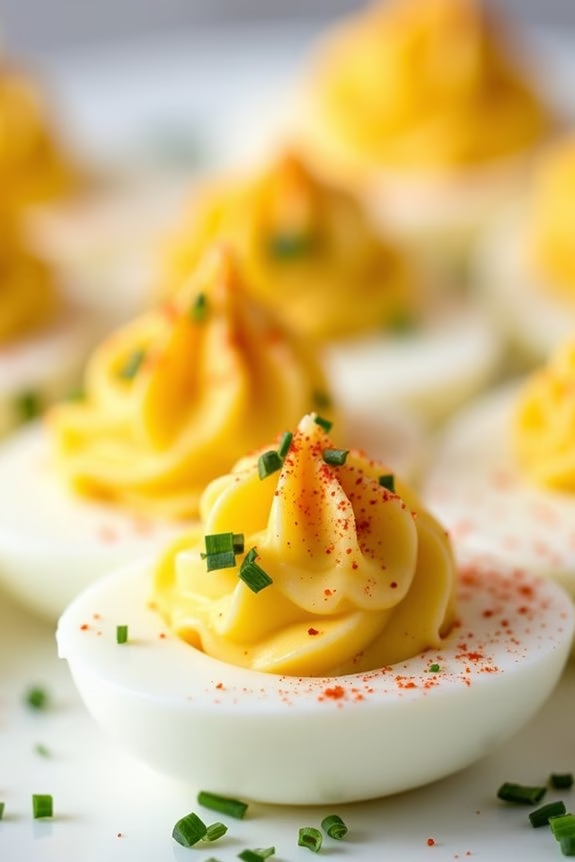
Deviled eggs are a timeless and crowd-pleasing dish perfect for any Christmas potluck. Their creamy, tangy filling and smooth, savory flavor make them an ideal appetizer that guests of all ages enjoy. The beauty of deviled eggs lies in their simplicity and versatility, allowing you to easily adjust the recipe to suit your taste or dietary preferences.
Whether you prefer the traditional mustard-mayo filling or like to spice things up with a hint of cayenne, deviled eggs are always a hit.
Preparing deviled eggs requires just a handful of ingredients, most of which are likely already in your kitchen. The process is straightforward, making it a fantastic choice for both novice and experienced cooks alike. You can make them ahead of time, allowing you to focus on other dishes on the day of the event.
Below is a classic recipe for deviled eggs that serves 4-6 people, perfect for sharing at your holiday gathering.
Ingredients for Classic Deviled Eggs (Serves 4-6):
- 6 large eggs
- 3 tablespoons mayonnaise
- 1 teaspoon Dijon mustard
- 1 teaspoon white vinegar
- Salt, to taste
- Black pepper, to taste
- Paprika, for garnish
- Fresh chives or parsley, for garnish (optional)
Instructions:
- Boil the Eggs: Place the eggs in a single layer in a saucepan and cover them with cold water by about an inch. Bring the water to a boil over medium-high heat. Once boiling, cover the saucepan, remove it from heat, and let it sit for 10-12 minutes.
- Cool and Peel the Eggs: Once the eggs are done, transfer them to a bowl of ice water to cool for at least 5 minutes. This makes peeling easier and helps prevent the yolks from developing a green ring. Gently crack and peel the eggs under cool running water.
- Prepare the Yolks: Slice each egg in half lengthwise. Carefully remove the yolks and place them in a separate bowl. Arrange the egg whites on a serving platter.
- Make the Filling: Mash the yolks with a fork until they’re crumbly. Add mayonnaise, Dijon mustard, white vinegar, salt, and black pepper. Mix until smooth and creamy. Adjust seasoning to taste.
- Fill the Egg Whites: Spoon or pipe the yolk mixture back into the egg whites. Use a piping bag or a plastic bag with the corner snipped off for a more decorative finish.
- Garnish and Serve: Sprinkle paprika over the filled eggs for a classic touch. For added color and flavor, garnish with chopped fresh chives or parsley. Serve immediately or refrigerate them until ready to serve.
Extra Tips:
For perfectly cooked eggs, it’s important to time your boiling and resting accurately. Overcooking can lead to a rubbery texture or a green ring around the yolk.
Additionally, using older eggs makes peeling easier, as the pH level of the whites changes, making them less likely to stick to the shell. If you want to add a bit of heat, consider incorporating a dash of hot sauce or a sprinkle of cayenne pepper into the filling.
Enjoy experimenting with different flavors and decorations to make your deviled eggs uniquely yours.
Maple Roasted Brussels Sprouts
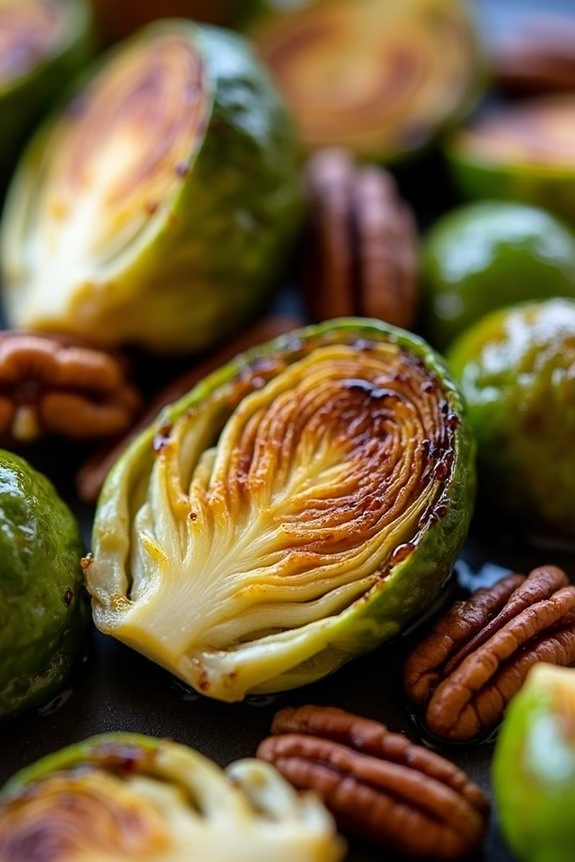
Maple Roasted Brussels Sprouts are a delightful and flavorful addition to any Christmas potluck. The natural sweetness of maple syrup perfectly complements the earthy flavor of Brussels sprouts, resulting in a side dish that’s both delicious and visually appealing.
This dish isn’t only easy to prepare but also a great way to introduce Brussels sprouts to those who mightn’t be their biggest fans. The caramelization from roasting enhances the taste and provides a lovely texture that’s sure to satisfy a crowd.
This recipe serves 4-6 people, making it perfect for a family gathering or potluck event. The combination of maple syrup, olive oil, and a touch of balsamic vinegar adds depth to the dish, while the roasted pecans or walnuts provide a satisfying crunch.
Whether you’re a seasoned cook or a beginner, this Maple Roasted Brussels Sprouts recipe is straightforward and guarantees a delightful addition to your holiday table.
Ingredients:
- 1 1/2 pounds Brussels sprouts, trimmed and halved
- 3 tablespoons olive oil
- 1/4 cup maple syrup
- 1 tablespoon balsamic vinegar
- Salt and pepper, to taste
- 1/2 cup pecans or walnuts, roughly chopped
Cooking Instructions:
- Preheat the Oven: Start by preheating your oven to 400°F (200°C). This temperature is ideal for roasting the Brussels sprouts until they’re tender and caramelized.
- Prepare the Brussels Sprouts: Wash the Brussels sprouts thoroughly, trim the ends, and cut them in half. This guarantees even cooking and allows the maple syrup mixture to coat them evenly.
- Mix the Dressing: In a large mixing bowl, combine the olive oil, maple syrup, balsamic vinegar, salt, and pepper. Whisk these ingredients together until well combined.
- Coat the Brussels Sprouts: Add the halved Brussels sprouts to the bowl with the dressing. Toss them until they’re well coated, confirming that each piece has a good amount of the maple mixture.
- Spread on Baking Sheet: Line a baking sheet with parchment paper for easy cleanup. Spread the Brussels sprouts in a single layer on the sheet to ensure even roasting.
- Roast in the Oven: Place the baking sheet in the preheated oven and roast for 25-30 minutes, stirring halfway through. The Brussels sprouts should be tender and golden brown when done.
- Add the Nuts: About 5 minutes before the Brussels sprouts are finished roasting, sprinkle the chopped pecans or walnuts over them. This will toast the nuts slightly and add a delightful crunch to the dish.
- Serve: Once done, remove the Brussels sprouts from the oven. Transfer them to a serving platter and enjoy them warm.
Extra Tips:
For an added layer of flavor, consider adding a sprinkle of crumbled bacon or a handful of dried cranberries to the dish before serving.
If you prefer a spicier kick, a dash of red pepper flakes can be added to the maple syrup mixture. Additionally, verify that the Brussels sprouts are spread in a single layer on the baking sheet to avoid steaming and promote caramelization.
Adjust the roasting time if you prefer your Brussels sprouts more charred or less tender.
Creamy Butternut Squash Soup
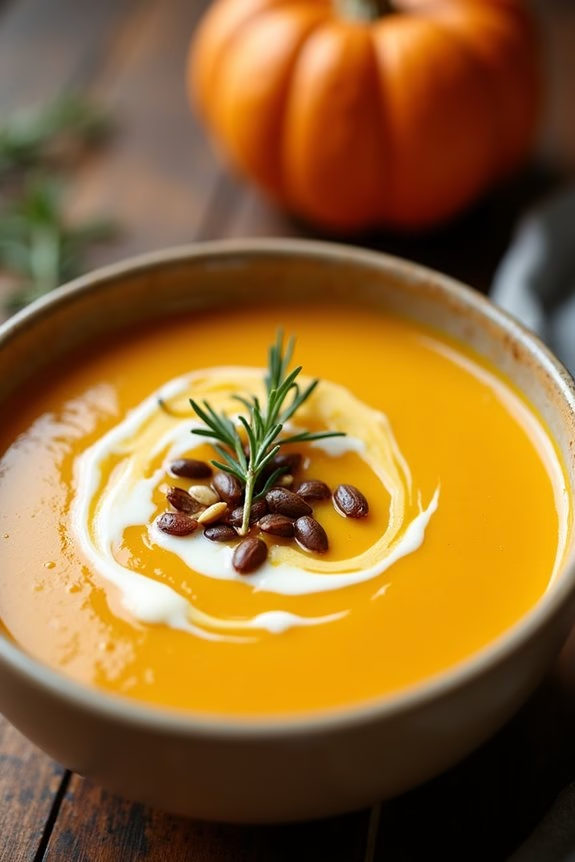
Creamy Butternut Squash Soup is a delightful and warming dish perfect for a Christmas potluck. This soup combines the naturally sweet and nutty flavors of butternut squash with savory ingredients to create a smooth, velvety texture. Its rich creaminess is balanced with a touch of spice, making it a comforting meal that’s sure to please a crowd.
Whether served as an appetizer or a main dish, this soup is a fantastic addition to any holiday gathering. This recipe is designed to serve 4-6 people, allowing everyone to enjoy a generous bowl. The preparation involves roasting the squash for enhanced flavor, followed by blending it with aromatic ingredients to achieve the signature creamy consistency.
Simple yet sophisticated, this recipe is both easy to make and impressive to serve. Let’s explore the ingredients and steps to create this holiday favorite.
Ingredients:
- 1 medium butternut squash (about 2 pounds)
- 2 tablespoons olive oil
- 1 medium onion, chopped
- 2 cloves garlic, minced
- 4 cups vegetable broth
- 1/2 teaspoon ground nutmeg
- 1/2 teaspoon ground cinnamon
- Salt and pepper to taste
- 1/2 cup heavy cream
- Optional garnish: fresh thyme, croutons, or roasted pumpkin seeds
Cooking Instructions:
1. Preheat and Prepare Squash:
Preheat your oven to 400°F (200°C). Peel the butternut squash, cut it in half, and scoop out the seeds. Chop the squash into 1-inch cubes.
2. Roast the Squash:
Place the squash cubes on a baking sheet, drizzle with 1 tablespoon of olive oil, and season with salt and pepper. Toss to coat evenly. Roast in the preheated oven for 25-30 minutes, or until the squash is tender and slightly caramelized.
3. Sauté Aromatics:
In a large pot, heat the remaining 1 tablespoon of olive oil over medium heat. Add the chopped onion and garlic, sautéing until the onion is translucent and the garlic is fragrant, about 5 minutes.
4. Combine Ingredients:
Add the roasted squash to the pot, along with the vegetable broth, nutmeg, and cinnamon. Stir to combine all the ingredients.
5. Simmer the Soup:
Bring the mixture to a boil, then reduce the heat to low and let it simmer for 15-20 minutes, allowing the flavors to meld together.
6. Blend to Perfection:
Remove the pot from heat. Using an immersion blender, blend the soup until smooth and creamy. Alternatively, you can transfer the soup in batches to a countertop blender, blending until smooth and returning it to the pot.
7. Add Cream and Season:
Stir in the heavy cream and taste the soup. Adjust the seasoning with additional salt and pepper if needed.
8. Serve and Garnish:
Ladle the soup into bowls and garnish with fresh thyme, croutons, or roasted pumpkin seeds for added texture and flavor.
Extra Tips:
To enhance the sweetness of the butternut squash, consider adding a tablespoon of maple syrup or honey to the soup during the simmering stage.
If you prefer a vegan version, substitute the heavy cream with coconut milk or almond milk for a dairy-free alternative. When blending the soup, be cautious of the hot liquid—allow it to cool slightly if using a countertop blender to prevent splatters.
This soup can also be made a day ahead, as the flavors develop beautifully overnight, making it an ideal dish to prepare in advance of your holiday event.
Festive Caprese Salad Wreath
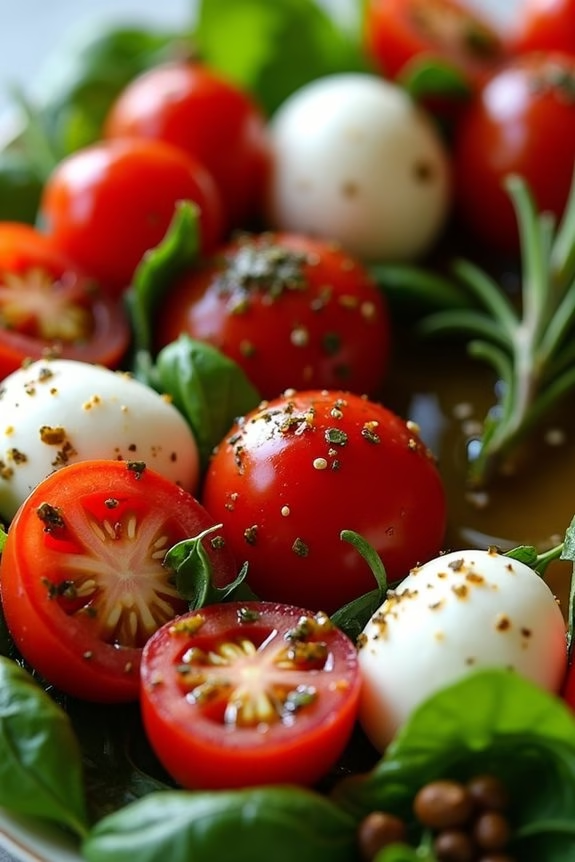
The Festive Caprese Salad Wreath is a delightful and visually stunning appetizer that’s perfect for your Christmas potluck. This dish transforms the classic Caprese salad into a holiday masterpiece with its vibrant colors and circular wreath arrangement.
It’s an invigorating, light, and healthy option that balances out the heavier dishes often found on the holiday table. The combination of juicy tomatoes, creamy mozzarella, fresh basil, and a drizzle of balsamic glaze creates a harmonious blend of flavors that will surely impress your guests.
Not only is the Festive Caprese Salad Wreath delicious, but it’s also incredibly easy to prepare. The presentation is what makes this dish stand out, as the ingredients are artfully arranged in a circular pattern to mimic a festive wreath. This recipe serves 4-6 people, making it a great choice whether you’re hosting a small gathering or bringing a dish to share.
The vibrant colors and aromatic ingredients will make it a centerpiece of your holiday spread.
Ingredients (Serves 4-6):
- 2 cups cherry tomatoes, halved
- 1 pound fresh mozzarella balls (bocconcini), drained
- 1 bunch fresh basil leaves
- Salt and freshly ground black pepper, to taste
- 3 tablespoons extra-virgin olive oil
- 2 tablespoons balsamic glaze
- 1 sprig fresh rosemary (for garnish)
Instructions:
- Prepare the Ingredients: Start by washing and drying the cherry tomatoes and basil leaves. Halve the cherry tomatoes and drain the mozzarella balls thoroughly. This guarantees that the salad doesn’t become watery.
- Arrange the Wreath Base: On a large, round platter, begin forming the base of the wreath by alternating the halved cherry tomatoes and mozzarella balls in a circular pattern. Leave space in the center to resemble a wreath.
- Add the Basil and Season: Tuck fresh basil leaves between the tomatoes and mozzarella balls, ensuring they’re evenly distributed. Season the salad with salt and freshly ground black pepper to taste.
- Drizzle with Olive Oil and Balsamic Glaze: Drizzle the extra-virgin olive oil evenly over the entire salad. Follow with a drizzle of balsamic glaze, adding a sweet and tangy note to the dish.
- Garnish and Serve: Place a sprig of fresh rosemary at the top or bottom of the wreath to enhance the festive appearance. Serve immediately as an invigorating starter or side dish.
Extra Tips:
To make this dish even more festive, consider using a mix of red and yellow cherry tomatoes to add an extra pop of color. If balsamic glaze is unavailable, you can reduce regular balsamic vinegar until it thickens and becomes syrupy.
For added flavor, consider sprinkling some crushed red pepper flakes for a hint of heat. Make sure to assemble the salad just before serving to keep the basil fresh and vibrant. Adjust the seasoning and drizzle according to your preference for a perfectly balanced taste.
Sweet Potato Casserole With Pecan Topping
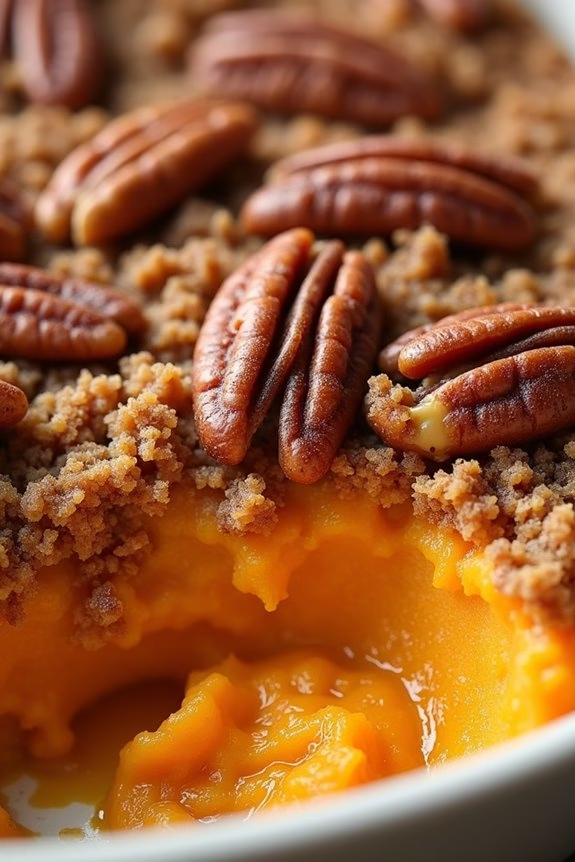
Sweet Potato Casserole With Pecan Topping is a classic holiday dish that combines the creamy sweetness of mashed sweet potatoes with a crunchy, buttery pecan topping. This dish is a delightful blend of flavors and textures, making it a perfect addition to your Christmas potluck.
The sweet potatoes are cooked until tender and then mixed with brown sugar, vanilla, and spices to enhance their natural sweetness. Topped with a generous layer of pecans mixed with brown sugar and butter, this casserole bakes to a golden perfection that’s bound to be a hit with everyone.
This recipe serves 4-6 people, making it an ideal choice for a family gathering or a festive potluck. The combination of sweet and nutty flavors creates a comforting dish that can be served as a side or even a dessert.
With a few simple ingredients and easy steps, you can prepare this delicious Sweet Potato Casserole With Pecan Topping that everyone will love.
Ingredients:
- 4 large sweet potatoes
- 1/2 cup brown sugar
- 1/4 cup unsalted butter, melted
- 1/2 cup heavy cream
- 1 teaspoon vanilla extract
- 1/2 teaspoon ground cinnamon
- 1/4 teaspoon ground nutmeg
- Salt to taste
- 1 cup chopped pecans
- 1/2 cup brown sugar (for topping)
- 1/4 cup all-purpose flour
- 1/4 cup unsalted butter, melted (for topping)
Cooking Instructions:
- Preheat the Oven: Begin by preheating your oven to 350°F (175°C). This will guarantee that the oven is at the right temperature when you’re ready to bake the casserole.
- Cook the Sweet Potatoes: Peel and chop the sweet potatoes into large chunks. Place them in a pot of boiling water and cook until they’re tender, about 20 minutes. Drain and transfer to a large mixing bowl.
- Mash the Sweet Potatoes: Use a potato masher or fork to mash the sweet potatoes until they’re smooth. You can also use a hand mixer for a creamier texture.
- Mix the Sweet Potato Base: Add 1/2 cup brown sugar, 1/4 cup melted butter, heavy cream, vanilla extract, cinnamon, nutmeg, and a pinch of salt to the mashed sweet potatoes. Stir until well combined and creamy.
- Prepare the Pecan Topping: In a separate bowl, mix the chopped pecans, 1/2 cup brown sugar, all-purpose flour, and 1/4 cup melted butter. Stir until the mixture is crumbly and the pecans are well-coated.
- Assemble the Casserole: Spread the mashed sweet potato mixture evenly in a baking dish. Sprinkle the pecan topping evenly over the sweet potato layer.
- Bake the Casserole: Place the baking dish in the preheated oven and bake for 25-30 minutes, or until the pecan topping is golden brown and crunchy.
- Cool and Serve: Allow the casserole to cool for a few minutes before serving. This will help the topping set and make it easier to serve.
Extra Tips:
For an extra depth of flavor, you can add a splash of maple syrup to the sweet potato mixture before baking. If you prefer a less sweet casserole, reduce the amount of brown sugar in the sweet potato base.
To save time, you can prepare the sweet potato base and pecan topping a day in advance and store them separately in the refrigerator. Assemble and bake just before serving to guarantee a fresh and crispy topping.
Gingerbread Trifle
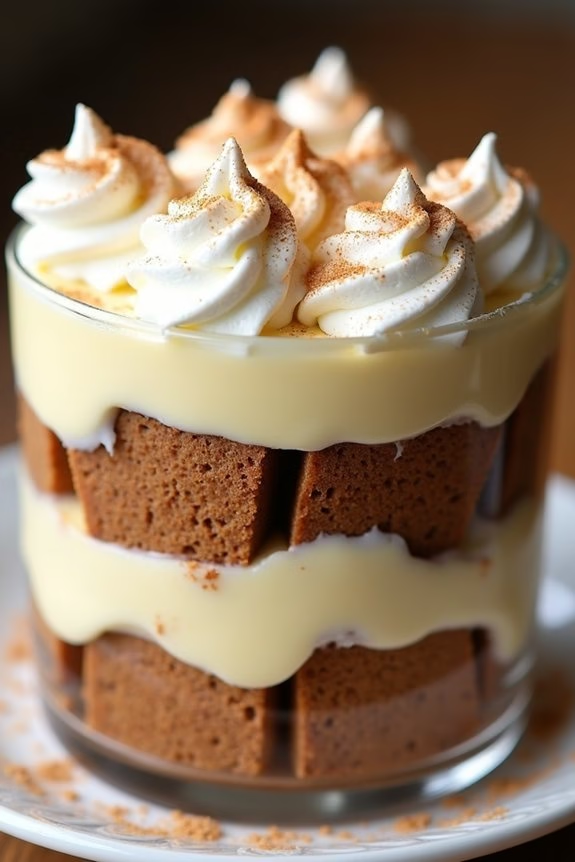
A Gingerbread Trifle is a festive and delicious dessert that brings together layers of gingerbread cake, creamy custard, and whipped cream, all topped with a sprinkle of holiday spices. This delightful dish is perfect for a Christmas potluck, offering a beautiful presentation and a rich combination of flavors that are certain to impress guests. The warmth of gingerbread combined with the creaminess of the custard makes each bite a celebration of holiday cheer.
To make a Gingerbread Trifle, you’ll need to start with a flavorful gingerbread cake, which serves as the foundation of this dessert. The cake is then layered with a luscious vanilla custard and topped with freshly whipped cream. The trifle is finished with a sprinkle of ground cinnamon or nutmeg to enhance the seasonal flavors. This recipe serves 4-6 people, making it an ideal choice for gatherings where you want to provide a sweet treat without having to bake multiple desserts.
Ingredients:
- 1 gingerbread cake (9-inch round or equivalent)
- 2 cups vanilla custard
- 1 cup heavy cream
- 2 tablespoons powdered sugar
- 1 teaspoon vanilla extract
- Ground cinnamon or nutmeg for garnish
Instructions:
- Bake the Gingerbread Cake: Prepare your gingerbread cake according to your preferred recipe or boxed mix instructions. Allow the cake to cool completely before moving on to the next step.
- Prepare the Custard: If using store-bought custard, confirm it’s chilled and ready to use. If making from scratch, cook your custard according to your recipe, allowing it to cool to room temperature before use.
- Whip the Cream: In a mixing bowl, combine the heavy cream, powdered sugar, and vanilla extract. Use an electric mixer to whip the cream until it forms soft peaks. Be careful not to overwhip, as this can cause the cream to become grainy.
- Assemble the Trifle: Cut the gingerbread cake into cubes. In a trifle dish, begin by placing a layer of gingerbread cubes at the bottom. Follow with a layer of custard, spreading it evenly over the cake. Add a layer of whipped cream. Repeat the layering process until all ingredients are used, finishing with a layer of whipped cream on top.
- Garnish and Chill: Lightly sprinkle ground cinnamon or nutmeg over the top layer of whipped cream for garnish. Cover the trifle and refrigerate for at least 2 hours before serving to allow the flavors to meld together.
Extra Tips:
For the best results, verify that the gingerbread cake is completely cooled before assembling the trifle to prevent it from becoming soggy.
Consider using a clear trifle dish to showcase the beautiful layers, adding to the visual appeal of the dessert. If you want to add an extra touch of flavor and texture, consider incorporating crushed ginger snaps or crumbled speculoos cookies between layers.
This trifle can be made a day in advance, making it a convenient option for busy holiday schedules.
Peppermint Bark Brownies
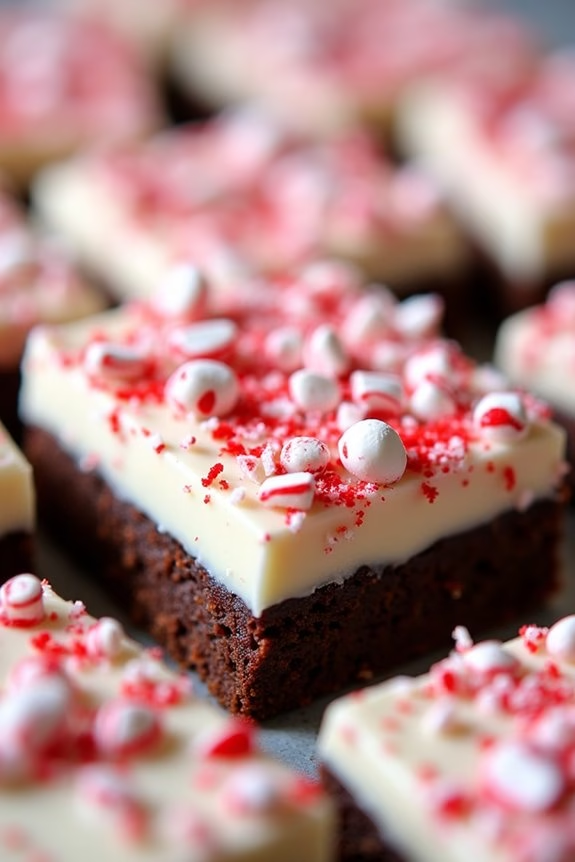
If you’re looking to add a festive twist to your Christmas potluck, Peppermint Bark Brownies are the way to go. These decadent treats combine the rich, fudgy goodness of classic brownies with the invigorating and crunchy delight of peppermint bark. Perfectly suited for a holiday gathering, these brownies are sure to be a crowd-pleaser, offering a contrast of textures and flavors that capture the very essence of the season.
The preparation involves a simple brownie batter that’s enriched with cocoa for an intense chocolate flavor. Once baked to perfection, the brownies are topped with a smooth layer of white chocolate and a generous sprinkle of crushed peppermint candies, creating a visually appealing and deliciously festive dessert. With just the right balance of sweetness and minty invigorating, these Peppermint Bark Brownies are a must-try for your Christmas potluck menu.
Ingredients (Serves 4-6):
- 1/2 cup unsalted butter
- 1 cup granulated sugar
- 2 large eggs
- 1 teaspoon vanilla extract
- 1/3 cup unsweetened cocoa powder
- 1/2 cup all-purpose flour
- 1/4 teaspoon salt
- 1/4 teaspoon baking powder
- 1 cup white chocolate chips
- 1/2 cup crushed peppermint candies
Cooking Instructions:
- Preheat and Prepare Pan: Preheat your oven to 350°F (175°C). Grease an 8×8 inch baking dish or line it with parchment paper, making sure the parchment paper hangs over the sides for easy removal.
- Melt Butter: In a medium saucepan, melt the butter over low heat. Once melted, remove from heat and stir in the sugar, eggs, and vanilla extract until well combined.
- Mix Dry Ingredients: In a separate bowl, sift together the cocoa powder, flour, salt, and baking powder. Gradually fold the dry ingredients into the wet mixture, stirring until just combined to form a smooth batter.
- Bake the Brownies: Pour the brownie batter into the prepared baking dish, spreading it evenly. Bake in the preheated oven for 20-25 minutes, or until a toothpick inserted into the center comes out with a few moist crumbs.
- Prepare Topping: While the brownies are baking, melt the white chocolate chips in a heatproof bowl placed over a pot of simmering water, stirring frequently until smooth. Alternatively, you can melt them in the microwave in 30-second intervals, stirring in between.
- Add Topping: Once the brownies are baked, remove them from the oven and allow them to cool slightly. Pour the melted white chocolate over the brownies, spreading it evenly with a spatula.
- Add Peppermint: Immediately sprinkle the crushed peppermint candies over the white chocolate layer before it sets. Gently press down to make sure they stick.
- Cool and Serve: Allow the brownies to cool completely, letting the white chocolate set. Once cooled, lift the brownies out of the pan using the overhanging parchment paper. Cut into squares and serve.
Extra Tips:
To make sure your Peppermint Bark Brownies have the perfect texture, avoid overbaking them. The key is to remove them from the oven when they’re just slightly underdone in the center, as they’ll continue to cook and firm up as they cool.
If you prefer a stronger peppermint flavor, you can add a few drops of peppermint extract to the brownie batter. For an added festive touch, you can use colored peppermint candies or drizzle some dark chocolate over the white chocolate layer before adding the crushed peppermint. Enjoy your festive creation!
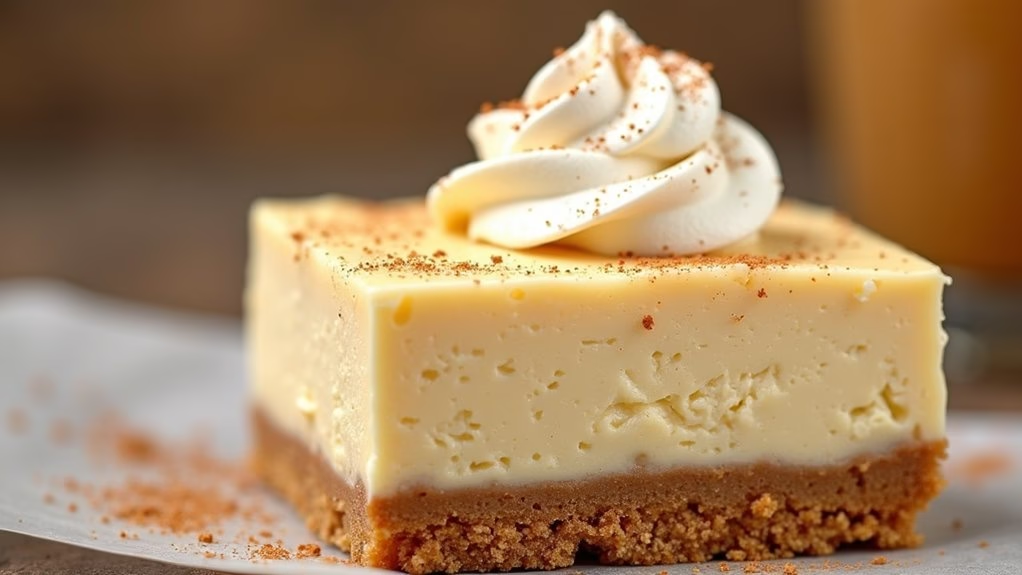
Eggnog Cheesecake Bars
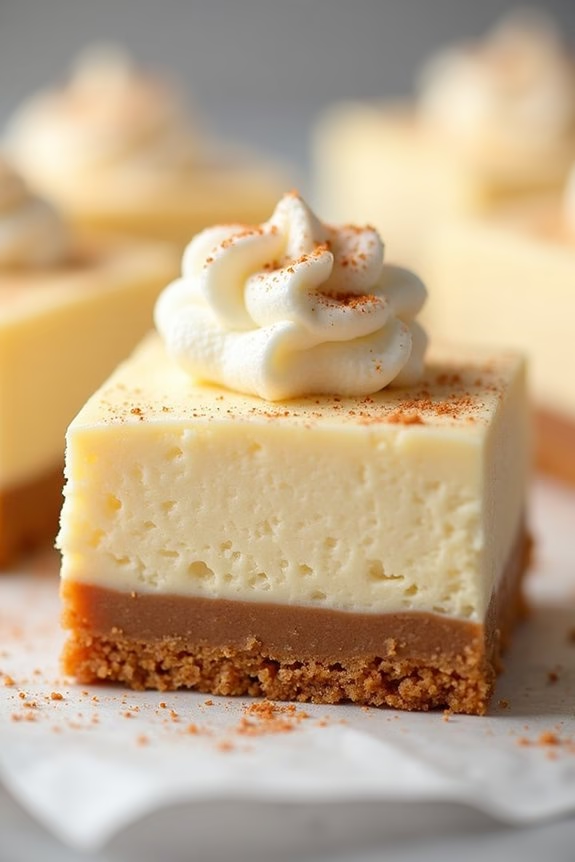
Eggnog Cheesecake Bars are a delightful twist on the classic holiday drink, adding a luscious, creamy layer to your festive dessert spread. These bars combine the rich flavors of traditional eggnog with the smooth texture of cheesecake, making them a show-stopper at any Christmas potluck. The buttery graham cracker crust perfectly complements the creamy, spiced filling, while a hint of nutmeg and cinnamon brings out the warm holiday flavors.
Designed to serve 4-6 people, these bars are perfect for sharing with friends and family during the holiday season.
To start, the crust is made from crushed graham crackers mixed with melted butter, which is then baked to create a firm base. The cheesecake filling is infused with eggnog, cream cheese, and a blend of winter spices that capture the essence of the season. Once baked, the bars are cooled and can be garnished with a sprinkle of nutmeg or a dollop of whipped cream to enhance their festive appeal.
These Eggnog Cheesecake Bars are a crowd-pleaser, combining traditional holiday flavors with the indulgence of cheesecake.
Ingredients (serves 4-6):
- 1 cup graham cracker crumbs
- 1/4 cup unsalted butter, melted
- 2 tablespoons granulated sugar
- 8 oz cream cheese, softened
- 1/4 cup granulated sugar
- 1 large egg
- 1/2 cup eggnog
- 1 teaspoon vanilla extract
- 1/2 teaspoon ground nutmeg
- 1/4 teaspoon ground cinnamon
- Optional: whipped cream and additional nutmeg for garnish
Instructions:
- Preheat Oven: Preheat your oven to 325°F (160°C). Line an 8-inch square baking pan with parchment paper, leaving some overhang on the sides for easy removal.
- Prepare Crust: In a medium bowl, mix the graham cracker crumbs, melted butter, and 2 tablespoons of sugar until well combined. Press the mixture firmly and evenly into the bottom of the prepared baking pan to form the crust.
- Bake Crust: Place the crust in the preheated oven and bake for 10 minutes. Remove from the oven and set aside to cool slightly.
- Make Filling: In a large mixing bowl, beat the softened cream cheese and 1/4 cup of sugar until smooth. Add the egg, eggnog, vanilla extract, nutmeg, and cinnamon, and continue mixing until the filling is creamy and well blended.
- Pour Filling Over Crust: Pour the cheesecake filling over the cooled crust, spreading it evenly with a spatula.
- Bake Cheesecake: Return to the oven and bake for 25-30 minutes, or until the center of the cheesecake is set and no longer jiggles.
- Cool and Refrigerate: Allow the bars to cool to room temperature, then refrigerate for at least 2 hours or until fully chilled.
- Serve: Use the parchment paper overhang to lift the bars from the pan. Cut into squares and, if desired, top with whipped cream and a sprinkle of nutmeg before serving.
Extra Tips:
For best results, verify that the cream cheese is thoroughly softened before mixing to achieve a smooth, lump-free filling. If you find the crust mixture crumbly, add an extra tablespoon of melted butter to help it bind.
For a stronger eggnog flavor, you can increase the amount of nutmeg or add a dash of rum extract. These cheesecake bars can be made a day ahead, as chilling overnight enhances their flavor and texture.
When cutting the bars, use a clean, sharp knife for clean edges, wiping it between cuts if necessary.