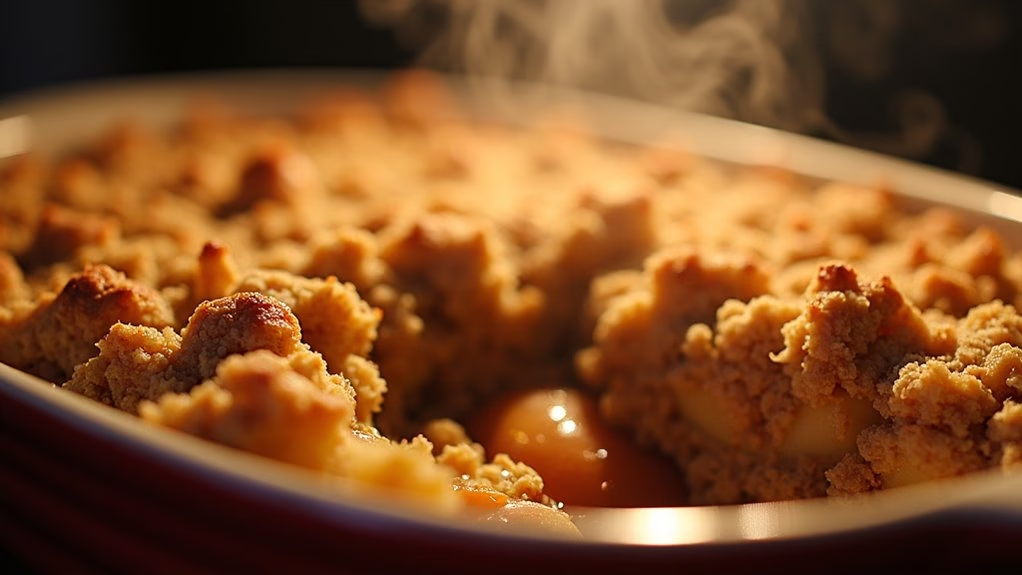
Hosting holiday dinners can feel overwhelming, but I’ve found 12 easy Christmas recipes that keep things festive and stress-free. Picture serving a succulent roast chicken with lemon and herbs or a delightful honey-glazed ham without the fuss. Pair these with classic sides and a warm apple crisp dessert for a truly dazzling meal. These recipes are perfect for creating a memorable feast with ease. Get ready to impress without the stress!
Roast Chicken With Lemon and Herbs

Roast Chicken With Lemon and Herbs is a classic and delightful dish perfect for a festive Christmas dinner. The combination of juicy roast chicken with the bright, zesty flavor of lemon and aromatic herbs creates a meal that’s both comforting and elegant. This dish isn’t only delicious but also fairly simple to prepare, making it an ideal main course for your holiday feast.
To bring out the best flavors, the chicken is marinated with a mixture of olive oil, lemon juice, garlic, and a blend of herbs such as rosemary and thyme. This marinade infuses the meat with a rich aroma and guarantees it remains moist during roasting. When cooked to perfection, the skin turns golden and crispy while the meat stays tender and succulent, creating an irresistible centerpiece for your holiday table.
Ingredients (serving size: 4-6 people):
- 1 whole chicken (about 4-5 pounds)
- 2 lemons
- 4 tablespoons olive oil
- 6 cloves garlic, minced
- 1 tablespoon fresh rosemary, chopped
- 1 tablespoon fresh thyme, chopped
- Salt and pepper to taste
- 1 cup chicken broth
- 1 onion, quartered
- 4-6 sprigs of fresh herbs (such as rosemary and thyme) for garnish
Cooking Instructions:
- Prepare the Marinade: In a small bowl, combine olive oil, minced garlic, chopped rosemary, chopped thyme, the juice of one lemon, salt, and pepper. Mix well to create a marinade.
- Marinate the Chicken: Pat the chicken dry with paper towels. Rub the marinade all over the chicken, including under the skin and inside the cavity. Let it marinate in the refrigerator for at least 1 hour, or preferably overnight, for best flavor.
- Preheat the Oven: About 30 minutes before roasting, preheat your oven to 425°F (220°C).
- Stuff the Chicken: Cut the remaining lemon into quarters and place inside the chicken cavity along with the quartered onion. This will add extra moisture and flavor as the chicken roasts.
- Roast the Chicken: Place the chicken in a roasting pan, breast side up. Pour the chicken broth into the pan around the chicken to keep it moist during cooking. Roast in the preheated oven for about 1.5 to 2 hours, or until the internal temperature reaches 165°F (75°C) and the skin is golden brown.
- Rest the Chicken: Once cooked, remove the chicken from the oven and let it rest for 10-15 minutes before carving. This allows the juices to redistribute throughout the meat, guaranteeing it remains juicy.
- Serve: Garnish with fresh herb sprigs and serve with your favorite sides.
Extra Tips:
For a truly flavorful dish, take the time to marinate the chicken overnight. If you’re short on time, make sure to at least marinate it for an hour.
When roasting, you can baste the chicken every 30 minutes with the pan juices to add extra moisture and flavor. Additionally, using a meat thermometer is key to avoiding overcooking; it guarantees the chicken is cooked perfectly without being dry.
Finally, feel free to experiment with your favorite herbs to customize the flavor profile to your liking.
Honey-Glazed Ham
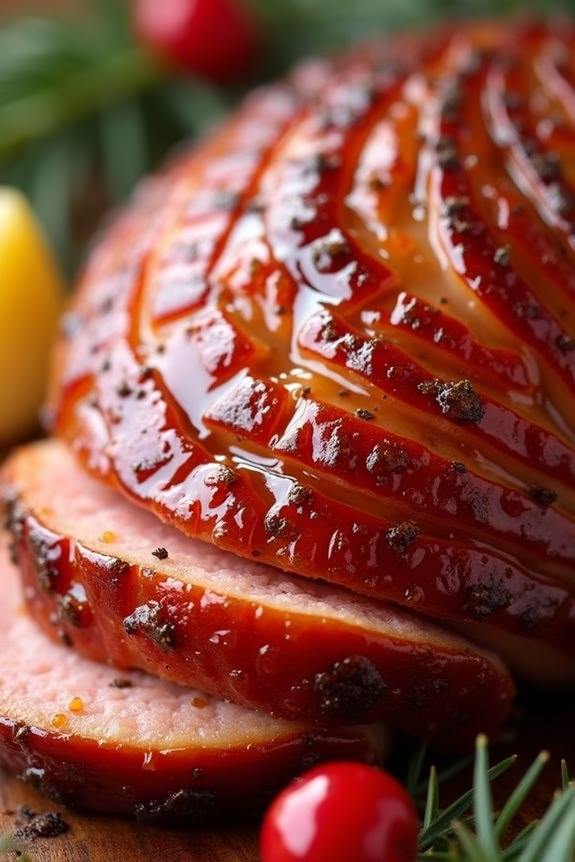
The holidays are a time for family, joy, and delicious food, and nothing says Christmas dinner quite like a beautifully cooked Honey-Glazed Ham. This dish combines the savory flavors of a perfectly baked ham with the sweet, sticky goodness of honey. It’s a centerpiece that not only looks impressive but also fills the house with an irresistible aroma.
Whether you’re hosting a large gathering or a cozy family meal, this Honey-Glazed Ham will surely be a hit. This recipe is designed to serve 4-6 people, making it perfect for an intimate holiday setting. The ham is marinated in a delightful honey glaze, which caramelizes during baking to create a mouthwatering crust.
The key to success is in the balance of flavors and guaranteeing the ham is cooked to perfection. So, gather your ingredients, and let’s get started on creating a memorable Christmas dinner masterpiece.
Ingredients:
- 1 fully cooked bone-in ham (about 5-6 pounds)
- 1 cup honey
- 1/2 cup brown sugar
- 1/4 cup Dijon mustard
- 1/4 cup apple cider vinegar
- 1 tablespoon ground cloves
- 1 teaspoon ground cinnamon
- 1/2 teaspoon ground nutmeg
- 1/2 cup water
Cooking Instructions:
- Preheat the Oven: Preheat your oven to 325°F (160°C). This temperature guarantees that the ham heats evenly and the glaze caramelizes without burning.
- Prepare the Ham: Remove the ham from its packaging and place it on a roasting rack in a large roasting pan. Score the surface of the ham in a diamond pattern, making shallow cuts about 1/4-inch deep. This allows the glaze to penetrate the ham.
- Make the Glaze: In a medium saucepan, combine the honey, brown sugar, Dijon mustard, apple cider vinegar, ground cloves, ground cinnamon, and ground nutmeg. Bring the mixture to a simmer over medium heat, stirring occasionally until the sugar has dissolved and the glaze is smooth.
- Apply the Glaze: Pour half of the glaze over the ham, ensuring it’s evenly coated. Use a brush or spoon to work the glaze into the scored cuts. Reserve the remaining glaze for later.
- Bake the Ham: Pour 1/2 cup of water into the bottom of the roasting pan to prevent the glaze from burning. Cover the ham loosely with aluminum foil and bake in the preheated oven for about 1 1/2 to 2 hours, or until the internal temperature reaches 140°F (60°C).
- Finish with More Glaze: Every 30 minutes, baste the ham with the pan juices and additional glaze to maintain moisture and enhance flavor. During the last 20 minutes of baking, remove the foil to allow the glaze to caramelize and form a beautiful crust.
- Rest and Serve: Once cooked, remove the ham from the oven and let it rest for about 15 minutes before carving. This allows the juices to redistribute, guaranteeing a juicy and flavorful ham.
Extra Tips:
To guarantee the perfect Honey-Glazed Ham, consider using a meat thermometer to accurately gauge when it’s fully heated. If you want a deeper flavor, you can marinate the ham in the glaze for a few hours or overnight before cooking.
Additionally, for an extra touch, garnish the ham with pineapple slices or cherries during the final 20 minutes of baking for a festive presentation. Remember, patience is key—basting regularly and letting the ham rest post-bake will yield the best results. Enjoy your holiday feast!
Beef Tenderloin With Garlic Butter

Beef Tenderloin With Garlic Butter is an exquisite dish that takes center stage at any festive gathering, especially during Christmas dinner. The tenderloin, known for its buttery tenderness, pairs beautifully with the rich and fragrant garlic butter, creating a symphony of flavors that’s sure to impress your family and friends.
This dish isn’t only a delight to the palate but also a visual masterpiece, with its perfectly seared crust and tender interior.
Preparing Beef Tenderloin With Garlic Butter may seem intimidating at first, but with the right ingredients and a few simple steps, you can create a restaurant-quality dish in the comfort of your home. The key is to start with a high-quality cut of beef tenderloin and pair it with a garlic-infused butter that enhances the natural flavors of the meat.
By following this recipe, you’ll have a succulent and flavorful main course that serves 4-6 people, perfect for that special Christmas dinner.
Ingredients for 4-6 people:
- 2-3 pounds beef tenderloin, trimmed
- 4 tablespoons unsalted butter
- 4 cloves garlic, minced
- 1 tablespoon olive oil
- 1 tablespoon fresh rosemary, chopped
- 1 tablespoon fresh thyme, chopped
- 1 teaspoon salt
- 1 teaspoon black pepper
- 1/2 teaspoon smoked paprika
Cooking Instructions:
- Prepare the Beef Tenderloin: Remove the beef tenderloin from the refrigerator and allow it to come to room temperature for about 30 minutes. This guarantees even cooking. Pat the beef dry with paper towels to remove any excess moisture, which helps in achieving a nice sear.
- Season the Beef: In a small bowl, mix together the salt, black pepper, and smoked paprika. Rub this mixture evenly over the entire surface of the beef tenderloin to season it well.
- Preheat the Oven: Preheat your oven to 425°F (220°C). This high heat is essential for roasting the beef to perfection.
- Sear the Beef: In a large ovenproof skillet, heat the olive oil over medium-high heat. Once the oil is hot, add the beef tenderloin and sear it on all sides until it forms a golden-brown crust, about 3-4 minutes per side. This step locks in the juices and enhances the flavor.
- Prepare the Garlic Butter: While the beef is searing, melt the butter in a small saucepan over low heat. Add the minced garlic, rosemary, and thyme, stirring until the garlic is fragrant, about 1-2 minutes. Be careful not to burn the garlic.
- Roast the Beef: Once the beef is seared, pour the garlic butter over the tenderloin in the skillet. Transfer the skillet to the preheated oven and roast the beef for about 20-25 minutes, or until the internal temperature reaches 135°F (57°C) for medium-rare.
- Rest the Beef: Remove the skillet from the oven and transfer the beef tenderloin to a cutting board. Tent it loosely with aluminum foil and let it rest for at least 10 minutes. Resting allows the juices to redistribute throughout the meat, guaranteeing a moist and tender result.
- Slice and Serve: After resting, slice the beef tenderloin into 1-inch thick slices, and serve with the remaining garlic butter from the skillet drizzled over the top.
Extra Tips:
For the best results, use a meat thermometer to check the internal temperature of the beef tenderloin. This guarantees that the meat is cooked to your desired level of doneness.
Additionally, when slicing the beef, make sure to cut against the grain to achieve the most tender slices. If you’re looking to enhance the presentation, garnish with additional fresh herbs or serve with a side of roasted vegetables for a complete and satisfying meal.
Herb-Crusted Pork Loin
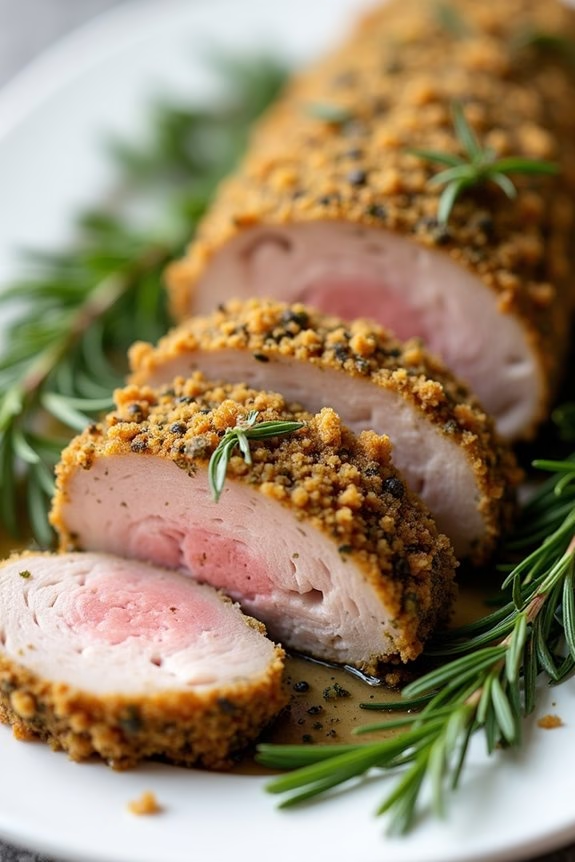
Herb-Crusted Pork Loin is a delightful and elegant main course, perfect for Christmas dinner. This dish features a succulent pork loin, generously coated with a mixture of fresh herbs and seasonings, which infuse the meat with aromatic flavors. When roasted to perfection, the herb crust forms a delicious and slightly crispy exterior, while the inside remains tender and juicy. It’s a dish that not only looks impressive but also captures the festive spirit with its rich and savory taste.
This recipe is designed to serve 4-6 people, making it an ideal choice for a family gathering or an intimate celebration. The herb crust is a blend of rosemary, thyme, and parsley, creating a fragrant aroma that fills the kitchen as the pork loin roasts. Paired with your favorite holiday sides, such as roasted vegetables or creamy mashed potatoes, this Herb-Crusted Pork Loin will surely be a memorable centerpiece for your Christmas dinner table.
Ingredients (Serves 4-6):
- 1 (3 to 4-pound) pork loin
- 2 tablespoons olive oil
- 2 tablespoons Dijon mustard
- 3 cloves garlic, minced
- 1 tablespoon fresh rosemary, chopped
- 1 tablespoon fresh thyme, chopped
- 1 tablespoon fresh parsley, chopped
- 1 teaspoon salt
- 1/2 teaspoon black pepper
- 1/2 cup bread crumbs
Cooking Instructions:
- Preheat the Oven: Preheat your oven to 375°F (190°C) to guarantee that it reaches the proper temperature for roasting.
- Prepare the Pork Loin: Pat the pork loin dry with paper towels to remove any excess moisture, which helps the seasoning adhere better.
- Make the Herb Mixture: In a small bowl, combine the olive oil, Dijon mustard, minced garlic, rosemary, thyme, parsley, salt, and pepper. Mix well until you have a uniform paste.
- Coat the Pork Loin: Rub the herb mixture evenly over the entire surface of the pork loin, making sure that all sides are covered. This will form the flavorful crust.
- Add the Bread Crumbs: Sprinkle the bread crumbs over the herb-coated pork loin, pressing them gently into the herb mixture so they adhere well.
- Roast the Pork Loin: Place the pork loin on a roasting rack in a shallow pan. Roast in the preheated oven for about 1 to 1.5 hours, or until the internal temperature reaches 145°F (63°C).
- Rest the Meat: Once cooked, remove the pork loin from the oven and let it rest for 10-15 minutes before slicing. This allows the juices to redistribute, keeping the meat moist and flavorful.
- Slice and Serve: Using a sharp knife, slice the pork loin into medallions and arrange them on a serving platter. Serve with your choice of holiday sides.
Extra Tips:
For the best results, use a meat thermometer to accurately check the internal temperature of the pork loin, avoiding overcooking. If you’re short on fresh herbs, dried herbs can be a substitute, but remember to use about half the amount since dried herbs are more concentrated.
To enhance the presentation, garnish the sliced pork with fresh herb sprigs or a sprinkle of chopped parsley. Additionally, letting the pork loin rest is essential, as it guarantees that the juices are evenly distributed, leading to a tender and flavorful dish.
Baked Salmon With Dill and Lemon
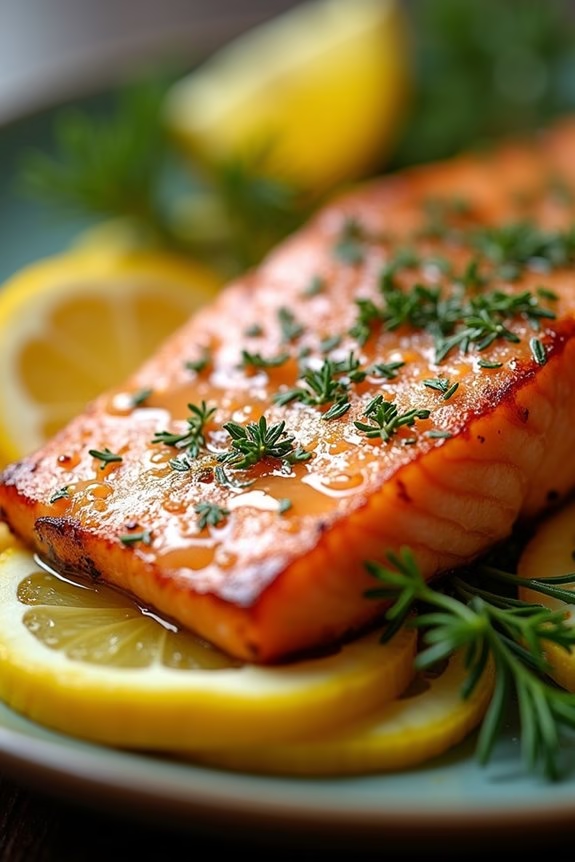
Baked Salmon with Dill and Lemon is a delightfully fresh and flavorful dish that’s perfect for a festive Christmas dinner. This sophisticated yet simple recipe brings out the delicate flavors of the salmon, complemented by the aromatic dill and zesty lemon. Not only is this dish visually appealing with its vibrant colors, but it also offers a healthy and delicious option for your holiday spread.
Whether you’re a seafood lover or looking for a lighter alternative to traditional holiday meats, this dish is bound to impress your family and friends.
This recipe is designed to serve 4-6 people, making it a great choice for a small to medium-sized gathering. The combination of fresh dill and lemon juice enhances the natural taste of the salmon, while a touch of garlic and olive oil adds depth and richness. The ease of preparation, along with the quick cooking time, guarantees that you can enjoy more time with your guests instead of being stuck in the kitchen.
Ingredients for 4-6 servings:
- 2 lbs salmon fillet (skin-on)
- 2 tablespoons olive oil
- 3 tablespoons fresh dill, finely chopped
- 2 lemons (one sliced, one juiced)
- 3 cloves garlic, minced
- Salt and pepper to taste
- Lemon wedges and dill sprigs for garnish (optional)
Cooking Instructions:
- Preheat the Oven: Start by preheating your oven to 375°F (190°C). This guarantees the salmon cooks evenly and achieves the perfect texture.
- Prepare the Baking Dish: Lightly grease a baking dish with a bit of olive oil. Arrange lemon slices on the bottom of the dish, which won’t only prevent sticking but infuse the salmon with additional lemony flavor during the baking process.
- Season the Salmon: Place the salmon fillet on top of the lemon slices, skin-side down. Drizzle olive oil over the salmon, making sure to coat it evenly. Sprinkle the minced garlic, fresh dill, salt, and pepper over the salmon. Finally, pour the juice of one lemon over the seasoned fillet.
- Bake the Salmon: Transfer the baking dish to the preheated oven. Bake for 20-25 minutes, or until the salmon flakes easily with a fork and is cooked through. The internal temperature should reach 145°F (63°C).
- Serve: Once baked, remove the salmon from the oven and let it rest for a couple of minutes. Garnish with extra dill sprigs and lemon wedges before serving for an added touch of freshness and presentation.
Extra Tips:
For the best results, choose a salmon fillet that’s evenly thick to guarantee uniform cooking. If you prefer a slight crispy texture, you can broil the salmon for the last 2-3 minutes of cooking.
It’s also important to let the salmon rest after baking, as this allows the juices to redistribute, resulting in a more moist and flavorful dish. Additionally, feel free to adjust the amount of garlic and dill according to your taste preferences.
Enjoy this flavorful and elegant dish as a standout centerpiece for your Christmas dinner!
Vegetarian Mushroom Wellington
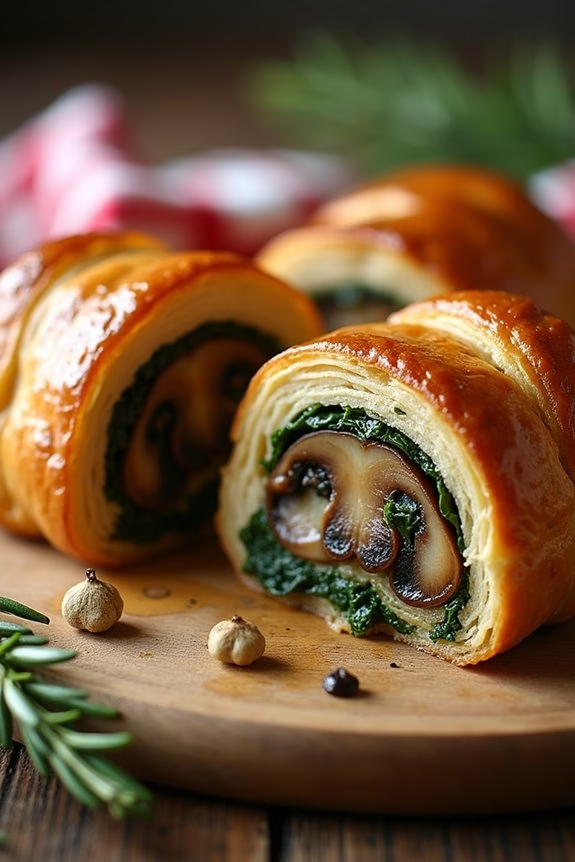
Vegetarian Mushroom Wellington is a delightful and impressive dish that makes a perfect centerpiece for a Christmas dinner. It combines a rich and savory mushroom filling encased in flaky puff pastry, offering a satisfying alternative to traditional meat-based dishes. This recipe isn’t only suitable for vegetarians but also sure to please all guests with its earthy flavors and elegant presentation.
The mushroom filling is enhanced with aromatic herbs and spices, making it a flavorful component that stands out on its own. The puff pastry provides a crispy contrast to the soft filling, creating a harmonious balance of textures. This dish is best served fresh out of the oven, where the pastry is at its crispiest and the filling is warm and fragrant. It pairs wonderfully with seasonal vegetables and a rich gravy, completing a festive meal that celebrates the flavors of the season.
Ingredients (serving size: 4-6 people):
- 2 tablespoons olive oil
- 1 large onion, finely chopped
- 2 cloves garlic, minced
- 500g (about 1 lb) mixed mushrooms, finely chopped
- 1 teaspoon dried thyme
- 1 teaspoon dried rosemary
- Salt and pepper to taste
- 1 tablespoon soy sauce
- 150g (5 oz) cooked chestnuts, chopped
- 100g (3.5 oz) spinach leaves
- 1 sheet puff pastry (approximately 250g/9 oz)
- 1 egg, beaten, for egg wash
Cooking Instructions:
- Prepare the Filling: Heat the olive oil in a large skillet over medium heat. Add the chopped onion and sauté for about 5 minutes until soft and translucent. Add the minced garlic and cook for another minute.
- Cook the Mushrooms: Add the finely chopped mushrooms to the skillet. Stir occasionally and cook until the mushrooms have released their moisture and are beginning to brown, about 8-10 minutes.
- Season the Mixture: Stir in the dried thyme, dried rosemary, salt, and pepper. Add the soy sauce and continue to cook until the liquid has evaporated.
- Add Remaining Ingredients: Mix in the chopped chestnuts and spinach leaves. Cook until the spinach has wilted. Remove the pan from heat and let the filling cool completely.
- Preheat the Oven: Preheat your oven to 200°C (400°F).
- Assemble the Wellington: Roll out the puff pastry on a lightly floured surface. Spoon the cooled mushroom mixture onto the center of the pastry, shaping it into a log.
- Wrap the Filling: Fold the pastry over the filling, sealing the edges well to enclose it completely. Place the Wellington seam-side down on a baking sheet lined with parchment paper.
- Apply Egg Wash: Brush the beaten egg over the top and sides of the pastry.
- Bake: Bake in the preheated oven for 25-30 minutes until the pastry is golden brown and puffed.
- Serve: Allow the Wellington to cool slightly before slicing and serving.
Extra Tips:
To guarantee the bottom of the Wellington remains crisp, make sure the mushroom filling is completely cooled before wrapping it in the pastry. If you find that your filling is too moist, you can add a tablespoon of breadcrumbs to help absorb excess liquid.
For added flavor, you can include a layer of béchamel sauce or a sprinkle of parmesan cheese over the mushroom mixture before wrapping it in the pastry. Serve with a rich vegetarian gravy or a cranberry sauce for an extra festive touch.
Classic Green Bean Casserole
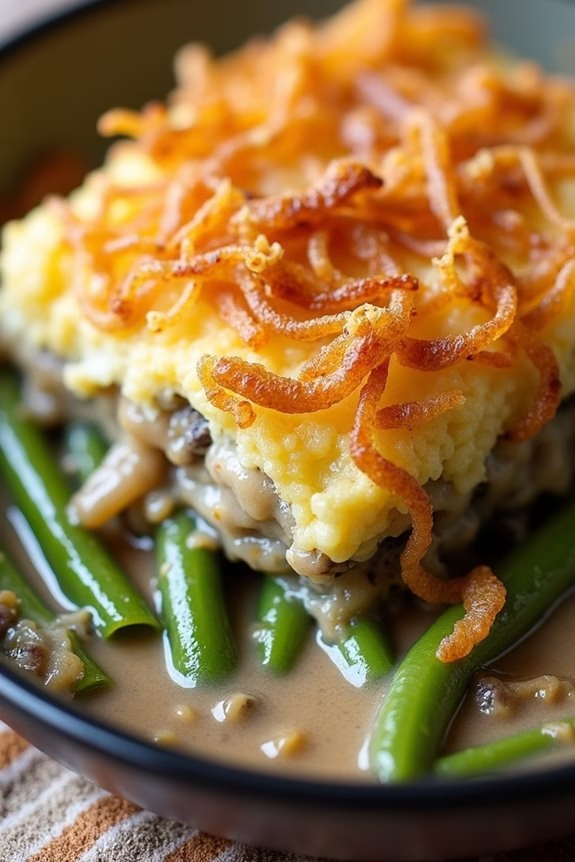
Classic Green Bean Casserole is a timeless holiday favorite that adds a touch of nostalgia to any Christmas dinner. This dish combines tender green beans with a creamy mushroom sauce, topped with crispy fried onions for a delightful crunch. Perfect for family gatherings, this casserole is simple to prepare and can easily be made ahead of time, freeing up precious minutes on the big day.
Whether you’re hosting a large family dinner or a cozy gathering with friends, this dish is sure to be a hit on your festive table.
The origins of the Classic Green Bean Casserole date back to the 1950s, when it was first created by the Campbell Soup Company as a way to promote their cream of mushroom soup. Over the years, it has become a staple at holiday dinners across America, loved for its rich flavors and comforting texture.
The combination of savory mushroom sauce with the freshness of green beans and the irresistible crunch of fried onions makes it a must-have side dish for Christmas and beyond.
Ingredients (Serves 4-6):
- 1 pound fresh green beans, trimmed and cut into 1-inch pieces
- 1 can (10.5 ounces) cream of mushroom soup
- 1/2 cup milk
- 1 teaspoon soy sauce
- 1/4 teaspoon black pepper
- 1 1/3 cups crispy fried onions
- Salt, to taste
Cooking Instructions:
- Preheat the Oven: Start by preheating your oven to 350°F (175°C). This is essential to guarantee the casserole bakes evenly.
- Prepare the Beans: Bring a large pot of salted water to a boil. Add the green beans and cook for 5 minutes until they’re bright green and slightly tender. Drain and set aside.
- Mix the Sauce: In a large mixing bowl, combine the cream of mushroom soup, milk, soy sauce, black pepper, and a pinch of salt. Stir until the mixture is smooth and well blended.
- Assemble the Casserole: Add the blanched green beans to the soup mixture and gently stir to coat the beans evenly. Add 2/3 cup of the crispy fried onions and mix again.
- Bake the Casserole: Transfer the mixture into a 9×13-inch baking dish, spreading it evenly. Place it in the preheated oven and bake for 25 minutes until the edges are bubbling.
- Add the Topping: Remove the casserole from the oven and sprinkle the remaining crispy fried onions on top. Return it to the oven and bake for an additional 5 minutes until the onions are golden brown.
- Serve: Allow the casserole to cool for a few minutes before serving. This helps the sauce thicken slightly and the flavors to meld together.
Extra Tips: For an extra touch of flavor, consider adding a pinch of garlic powder to the sauce mixture. If you prefer a more decadent version, substitute half of the milk with heavy cream for a richer sauce.
To save time on the big day, you can prepare the casserole a day in advance and store it in the refrigerator. Simply add the final topping of fried onions and bake before serving. If you’re using frozen green beans, guarantee they’re fully thawed and drained to prevent excess moisture in the dish.
Garlic Mashed Potatoes
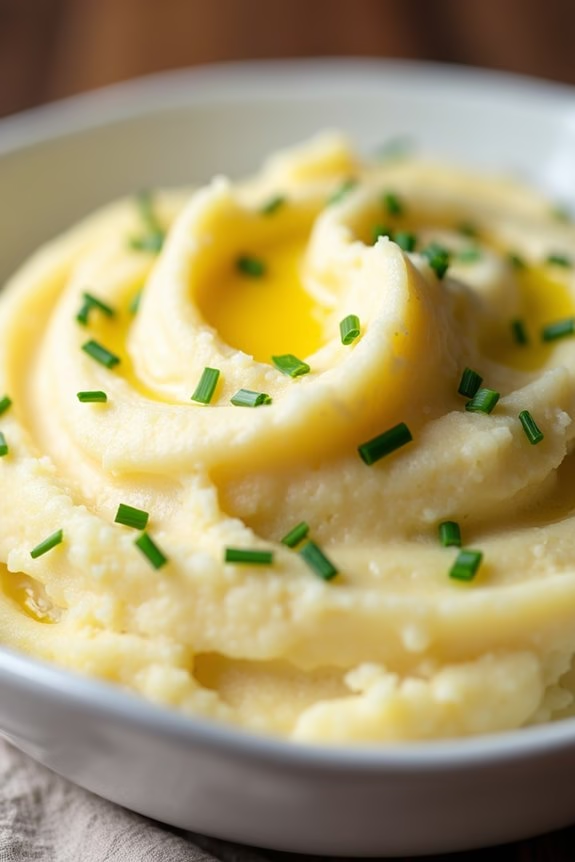
Garlic Mashed Potatoes are a creamy and flavorful addition to any Christmas dinner. This classic side dish combines the rich taste of roasted garlic with the smooth texture of perfectly mashed potatoes, making it a comforting complement to any holiday meal. The key to achieving the perfect garlic mashed potatoes lies in the balance of flavors and the technique of mashing to guarantee a fluffy and creamy consistency.
This recipe serves 4-6 people and is the perfect size for a festive family gathering. By using Yukon Gold potatoes, you’ll achieve a naturally buttery flavor and a creamy texture that pairs beautifully with the aromatic roasted garlic. Whether you’re a seasoned cook or a beginner, this recipe is straightforward and sure to impress your guests with its savory taste and delightful aroma.
Ingredients:
- 3 pounds Yukon Gold potatoes
- 1 bulb of garlic
- 1/2 cup unsalted butter
- 1/2 cup heavy cream
- Salt to taste
- Freshly ground black pepper to taste
- Fresh chives for garnish (optional)
Cooking Instructions:
- Prepare the Garlic: Preheat your oven to 400°F (200°C). Slice off the top of the garlic bulb to expose the cloves. Drizzle with olive oil, wrap in aluminum foil, and roast for about 30-35 minutes until the cloves are soft and golden brown.
- Cook the Potatoes: While the garlic is roasting, peel the Yukon Gold potatoes and cut them into even chunks. Place them in a large pot, cover with cold water, and add a generous pinch of salt. Bring to a boil, then reduce the heat to a simmer and cook for 15-20 minutes, or until the potatoes are fork-tender.
- Mash the Potatoes: Drain the potatoes thoroughly and return them to the pot. Allow them to sit for a minute to let any excess steam evaporate, which will prevent watery mashed potatoes.
- Add the Roasted Garlic and Butter: Squeeze the roasted garlic cloves out of their skins and add them to the potatoes along with the butter. Use a potato masher or a ricer to mash the potatoes until smooth.
- Incorporate the Cream: Warm the heavy cream slightly and gradually add it to the mashed potatoes, mixing continuously until you achieve a creamy consistency. Season with salt and freshly ground black pepper to taste.
- Serve and Garnish: Transfer the garlic mashed potatoes to a serving dish. If desired, garnish with freshly chopped chives for a touch of color and extra flavor.
Extra Tips:
For the creamiest mashed potatoes, consider using a potato ricer instead of a traditional masher, as it helps prevent lumps. If you prefer a stronger garlic flavor, you can add more roasted garlic cloves to suit your taste.
Be careful not to overmix the potatoes, as this can result in a gluey texture. Finally, always taste and adjust the seasoning before serving to guarantee the perfect balance of flavors.
Maple-Glazed Carrots

Maple-Glazed Carrots are a delightful addition to any Christmas dinner table, bringing a touch of natural sweetness and vibrant color to your holiday spread. These carrots are glazed with a luscious maple syrup coating that enhances their natural flavors and adds a festive flair. The combination of tender carrots and the rich maple glaze makes this dish a favorite during the holiday season.
Not only are they easy to prepare, but they also pair perfectly with a variety of main courses, from roasted turkey to glazed ham. This dish serves 4-6 people, making it an ideal side dish for a family gathering or festive celebration. The recipe uses simple ingredients that are easy to find, yet it delivers a depth of flavor that’s sure to impress your guests.
The key to this recipe is allowing the glaze to caramelize slightly, creating a delicious coating that clings to each carrot. Whether you’re a seasoned cook or a beginner, this recipe is straightforward and guarantees a beautiful and tasty result every time.
Ingredients:
- 2 pounds of carrots, peeled and cut into sticks
- 3 tablespoons unsalted butter
- 1/4 cup pure maple syrup
- 1 tablespoon brown sugar
- 1/2 teaspoon ground cinnamon
- Salt and pepper to taste
- Fresh parsley, chopped (optional, for garnish)
Instructions:
- Prepare the Carrots: Start by peeling the carrots and cutting them into uniform sticks, about 3-4 inches long. This will guarantee they cook evenly.
- Cook the Carrots: In a large pot of boiling salted water, cook the carrots for about 5-7 minutes until they’re just tender. Drain the carrots and set them aside.
- Make the Maple Glaze: In a large skillet over medium heat, melt the butter. Once melted, add the maple syrup, brown sugar, and cinnamon. Stir until the sugar has dissolved and the mixture is well combined.
- Glaze the Carrots: Add the cooked carrots to the skillet, stirring to coat them evenly with the glaze. Continue to cook for about 5-7 minutes, occasionally stirring, until the glaze thickens and begins to caramelize slightly.
- Season the Carrots: Season the glazed carrots with salt and pepper to taste. Stir well to guarantee the seasoning is evenly distributed.
- Garnish and Serve: Transfer the maple-glazed carrots to a serving dish. If desired, garnish with freshly chopped parsley for a pop of color and freshness. Serve warm as a side dish.
Extra Tips: For an added layer of flavor, consider adding a pinch of nutmeg to the glaze mixture. If you prefer a hint of citrus, a splash of orange juice can be added when making the glaze.
Make sure not to overcook the carrots in the boiling water as they’ll continue to cook in the glaze. This guarantees they remain tender yet slightly firm, providing a pleasing texture. Adjust the sweetness to your liking by varying the amount of brown sugar used in the glaze.
Cranberry and Walnut Stuffing
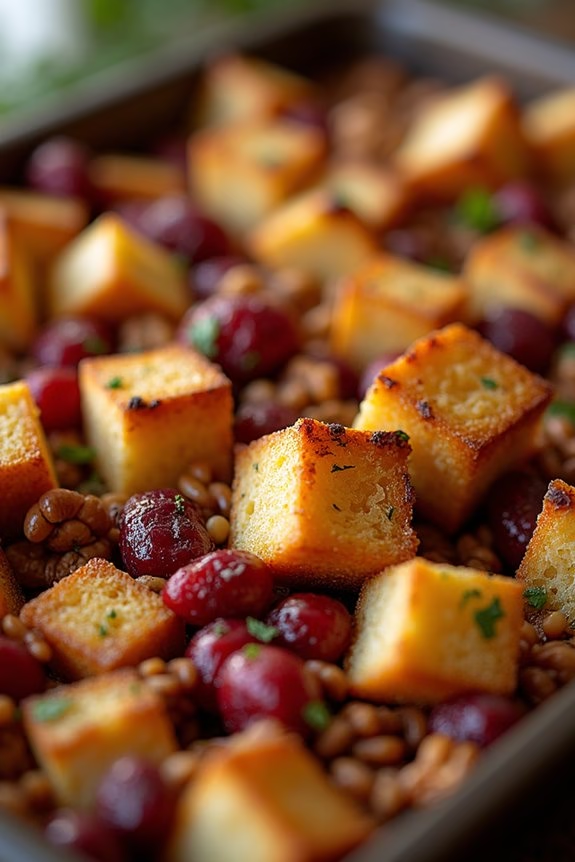
Cranberry and Walnut Stuffing is a delightful addition to your Christmas dinner, offering a perfect harmony of sweet and savory flavors. This stuffing is a delightful twist on the traditional recipe, incorporating the tartness of cranberries and the rich nuttiness of walnuts. It pairs beautifully with turkey or ham, adding a unique dimension to your festive meal.
The combination of fresh herbs, crusty bread, and aromatic vegetables makes this dish a true holiday favorite. Ideal for serving 4-6 people, this stuffing isn’t only delicious but also relatively easy to prepare. The key to its success lies in the balance of flavors and textures, guaranteeing that each bite is both satisfying and memorable.
This recipe is perfect for those looking to add a touch of sophistication to their Christmas dinner without spending hours in the kitchen. Whether you’re a seasoned cook or a beginner, this Cranberry and Walnut Stuffing will surely impress your guests.
Ingredients (serving size: 4-6 people):
- 8 cups of cubed bread (preferably a mix of sourdough and whole wheat)
- 1 cup of dried cranberries
- 1 cup of chopped walnuts
- 2 tablespoons of olive oil
- 1 large onion, finely chopped
- 2 celery stalks, chopped
- 2 cloves garlic, minced
- 2 teaspoons fresh sage, chopped
- 1 teaspoon fresh thyme, chopped
- 2 cups chicken or vegetable broth
- Salt and pepper to taste
- 2 tablespoons unsalted butter, melted
Instructions:
- Preheat and Prepare Bread: Begin by preheating your oven to 350°F (175°C). Place the cubed bread on a baking sheet and toast in the oven for about 10-15 minutes, or until lightly crispy. This will help the bread absorb the flavors without becoming soggy.
- Sauté Aromatics: In a large skillet, heat the olive oil over medium heat. Add the chopped onion and celery, sautéing until they become translucent, about 5 minutes. Add the minced garlic and continue to cook for an additional minute, stirring frequently to prevent burning.
- Mix Ingredients: In a large mixing bowl, combine the toasted bread cubes, sautéed vegetables, dried cranberries, chopped walnuts, fresh sage, and thyme. Toss the mixture gently to evenly distribute the ingredients.
- Add Broth: Gradually pour in the chicken or vegetable broth, stirring the mixture gently to guarantee the bread absorbs the liquid evenly. The stuffing should be moist but not overly wet.
- Season and Transfer: Season the mixture with salt and pepper to taste. Transfer the stuffing to a greased baking dish, spreading it out evenly.
- Bake: Drizzle the melted butter over the top of the stuffing. Cover the dish with aluminum foil and bake in the preheated oven for 25 minutes. Remove the foil and bake for an additional 15-20 minutes, or until the top is golden brown and crispy.
Extra Tips:
For the best results, use day-old bread as it holds up better during baking and absorbs the flavors more effectively. Feel free to experiment with different types of bread or add your favorite herbs to customize the dish to your liking.
If you prefer a slightly sweeter stuffing, consider adding a touch of honey or maple syrup when mixing the ingredients. Remember to taste and adjust seasoning before baking to guarantee the stuffing is perfectly flavored.
Brussels Sprouts With Bacon
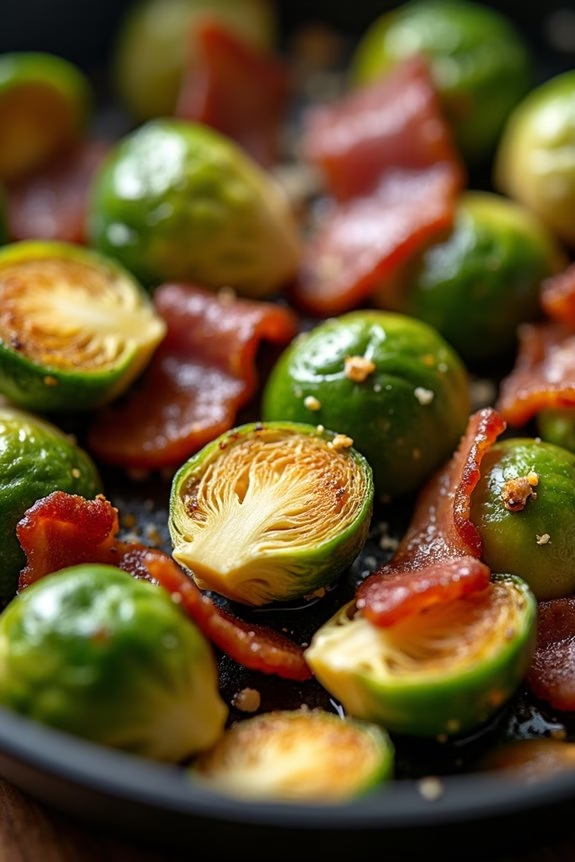
Brussels sprouts with bacon is a delightful side dish that brings together the earthy bitterness of Brussels sprouts with the savory, smoky flavor of crispy bacon. This dish is perfect for a Christmas dinner, offering a balance of textures and flavors that complement the richness of holiday meals. The bacon not only adds a deliciously salty crunch but also infuses the Brussels sprouts with its irresistible aroma, making this dish a favorite among both sprout lovers and skeptics alike.
Whether you’re hosting a large gathering or simply enjoying a cozy family meal, this Brussels sprouts with bacon recipe is bound to be a hit. It serves 4-6 people and can easily be scaled up if you’re expecting more guests. The recipe is simple yet elegant, making it a stress-free addition to your festive menu. With just a handful of ingredients, you can whip up this tasty side dish in no time, leaving you more time to enjoy the company of loved ones.
Ingredients (Serves 4-6):
- 1 1/2 pounds Brussels sprouts, trimmed and halved
- 6 slices of bacon, chopped
- 2 tablespoons olive oil
- 2 cloves garlic, minced
- Salt and black pepper, to taste
- 1 tablespoon balsamic vinegar
- Optional: 1/4 cup grated Parmesan cheese
Cooking Instructions:
- Prepare the Brussels sprouts: Begin by washing the Brussels sprouts thoroughly, then trim the ends and remove any yellow or damaged leaves. Cut each sprout in half to guarantee even cooking.
- Cook the bacon: In a large skillet over medium heat, add the chopped bacon. Cook until the bacon is crispy and has released its fat, about 5-7 minutes. Use a slotted spoon to remove the bacon bits and place them on a paper towel-lined plate to drain excess grease.
- Sauté the Brussels sprouts: In the same skillet with the bacon fat, add the olive oil. Once heated, add the halved Brussels sprouts cut side down. Let them cook undisturbed for about 5 minutes until they develop a golden-brown crust.
- Add garlic and season: Add the minced garlic to the skillet and stir to combine with the sprouts. Season with salt and pepper to taste. Continue cooking for another 5-7 minutes, stirring occasionally, until the Brussels sprouts are tender when pierced with a fork.
- Finish with balsamic vinegar: Drizzle the balsamic vinegar over the Brussels sprouts and stir well to coat evenly. Add the crispy bacon back into the skillet and mix everything together. Cook for an additional 2 minutes to let the flavors meld.
- Serve and garnish: Transfer the Brussels sprouts with bacon to a serving dish. If using, sprinkle grated Parmesan cheese over the top just before serving to add an extra layer of flavor.
Extra Tips:
For an even cook, try to select Brussels sprouts that are roughly the same size. This guarantees they cook evenly and are all tender at the same time.
If you prefer a little sweetness to balance the dish, consider adding a tablespoon of maple syrup or honey when you add the balsamic vinegar.
Additionally, if you want to prepare this dish ahead of time, you can blanch the Brussels sprouts by boiling them for 3-4 minutes, then shock them in ice water. This will reduce the final cooking time and help maintain their vibrant green color.
Warm Apple Crisp Dessert
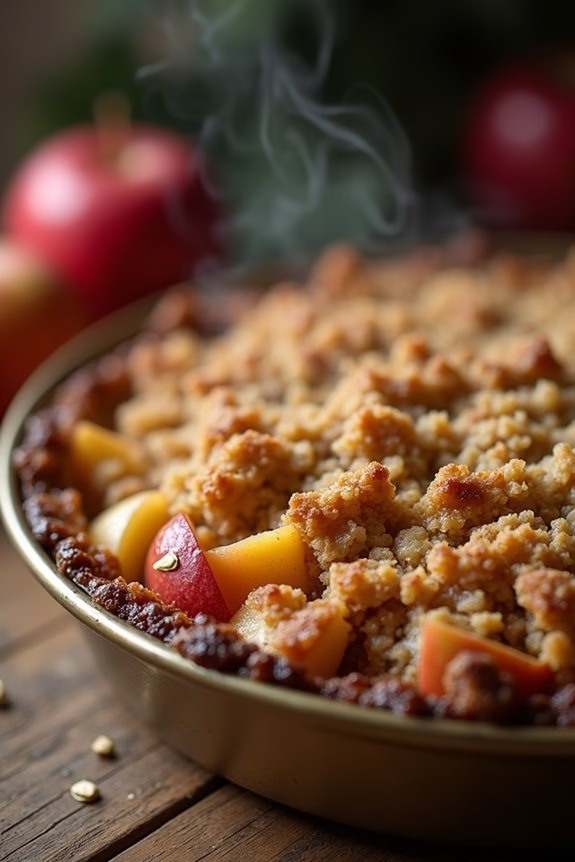
Warm Apple Crisp Dessert is a delightful treat that perfectly captures the essence of the holiday season. With its tender, spiced apples and irresistibly crispy topping, this dessert is bound to be a hit at your Christmas dinner. The dish combines the natural sweetness of apples with the comforting flavors of cinnamon and nutmeg, all topped with a buttery, crumbly oat mixture.
It’s simple to prepare, making it a fantastic option for both experienced cooks and those new to holiday baking. This dessert isn’t only delicious, but it also fills the kitchen with a mouth-watering aroma that’s reminiscent of cozy winter evenings. Best served warm, this apple crisp pairs beautifully with a scoop of vanilla ice cream or a dollop of whipped cream.
It’s a dessert that invites you to gather around the table, share stories, and create lasting memories with loved ones.
Ingredients (serves 4-6):
- 6 medium-sized apples, peeled, cored, and sliced
- 1 tablespoon lemon juice
- 1/2 cup granulated sugar
- 1 teaspoon ground cinnamon
- 1/4 teaspoon ground nutmeg
- 1 tablespoon all-purpose flour
- 1 cup rolled oats
- 1/2 cup all-purpose flour
- 1/2 cup brown sugar
- 1/2 teaspoon salt
- 1/2 cup unsalted butter, cold and cubed
Cooking Instructions:
- Preheat Your Oven: Begin by preheating your oven to 350°F (175°C). This guarantees that the apple crisp will cook evenly and achieve that perfect, golden-brown topping.
- Prepare the Apples: In a large bowl, combine the sliced apples with lemon juice to prevent them from browning. Add granulated sugar, cinnamon, nutmeg, and 1 tablespoon of flour. Toss everything together until the apples are well-coated with the mixture.
- Make the Topping: In another bowl, mix the rolled oats, 1/2 cup of flour, brown sugar, and salt. Add the cold, cubed butter to the mixture. Using a pastry cutter or your fingers, work the butter into the dry ingredients until the mixture resembles coarse crumbs.
- Assemble the Dish: Spread the apple mixture evenly into a greased 9×13-inch baking dish. Evenly sprinkle the oat topping over the apples, ensuring the entire surface is covered.
- Bake the Dessert: Place the baking dish in the preheated oven and bake for 45-50 minutes. The apple crisp is done when the topping is golden brown and the apples are tender when pierced with a fork.
- Let it Cool Slightly: Remove the apple crisp from the oven and allow it to cool for at least 10 minutes before serving. This allows the juices to thicken slightly and makes serving easier.
Extra Tips:
For the best flavor, choose a mix of sweet and tart apples, such as Granny Smith and Honeycrisp. Keep in mind that the topping can be prepared in advance and stored in the refrigerator for up to two days, making it convenient for holiday meal planning.
If you prefer a nuttier flavor, consider adding chopped walnuts or pecans to the topping mixture. Finally, if you desire a richer taste, you can substitute some or all of the granulated sugar with brown sugar for the apple mixture.

