
As I get ready for my Christmas dinner party, I’m all about finding that sweet spot between joy and simplicity. This year, I’m focused on creating a menu that will wow my guests without the typical holiday chaos. With 14 easy yet delightful recipes, from savory cheese and herb stuffed mushrooms to a luscious chocolate yule log, I’ve put together a festive feast that’s stress-free. Want to know how to make your holiday meal special with minimal effort? Let’s explore these ideas together.
Savory Cheese and Herb Stuffed Mushrooms
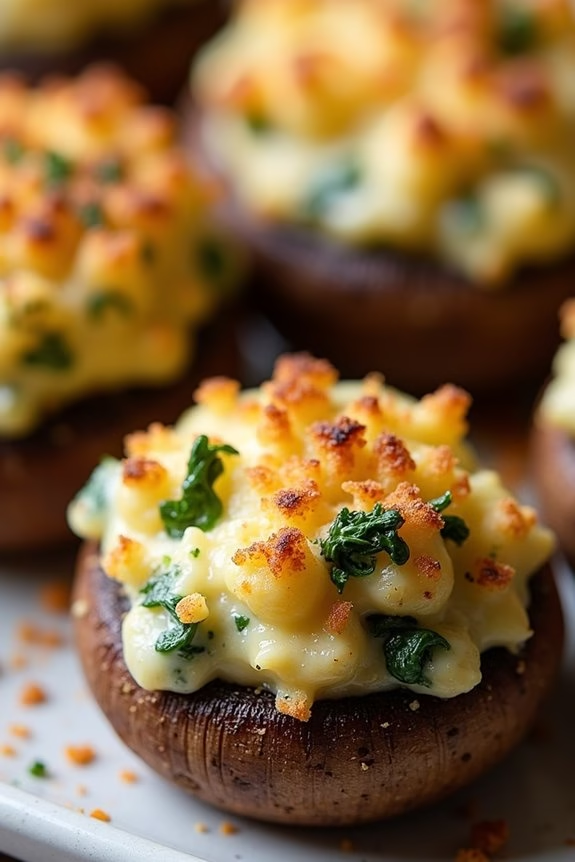
Savory Cheese and Herb Stuffed Mushrooms are a delightful appetizer perfect for a Christmas dinner party. These bite-sized treats combine the earthiness of mushrooms with the creamy richness of cheese and the fresh aroma of herbs.
They’re easy to prepare and make for a sophisticated addition to your festive spread. Whether served as a starter or as part of a larger buffet, these stuffed mushrooms are certain to impress your guests and become a holiday favorite.
The mushrooms are hollowed out to create a perfect vessel for a delicious filling made from a blend of cheeses, fresh herbs, and a touch of garlic. Baking them in the oven allows the flavors to meld together, creating a savory and aromatic dish.
The melted cheese adds a gooey texture, while the herbs provide a burst of flavor. This recipe is designed to serve 4-6 people, making it an ideal choice for small gatherings or as part of a larger dinner menu.
Ingredients:
- 24 large white or cremini mushrooms
- 1 tablespoon olive oil
- 4 cloves garlic, minced
- 1 cup cream cheese, softened
- 1/2 cup grated Parmesan cheese
- 1/2 cup shredded mozzarella cheese
- 2 tablespoons fresh parsley, chopped
- 1 tablespoon fresh thyme, chopped
- Salt and pepper to taste
- 1/4 cup breadcrumbs
- 2 tablespoons butter, melted
Instructions:
1. Prepare the Mushrooms: Preheat your oven to 375°F (190°C). Clean the mushrooms with a damp paper towel to remove any dirt. Carefully remove the stems and set aside for later use.
Arrange the mushroom caps on a baking sheet, open side up, and lightly brush them with olive oil.
2. Make the Filling: Finely chop the reserved mushroom stems. In a skillet over medium heat, add the minced garlic and chopped mushroom stems. Sauté for about 3-4 minutes, or until the garlic is fragrant and the mushroom stems are softened.
Remove from heat and allow to cool slightly.
3. Mix the Filling: In a mixing bowl, combine the sautéed garlic and mushroom stems with cream cheese, Parmesan, mozzarella, parsley, thyme, salt, and pepper.
Mix until all ingredients are well incorporated.
4. Stuff the Mushrooms: Using a spoon, fill each mushroom cap generously with the cheese and herb mixture.
Press the filling down gently to verify it stays in place.
5. Top with Breadcrumbs: In a small bowl, combine the breadcrumbs with melted butter.
Sprinkle this mixture over the top of each stuffed mushroom to add a crunchy texture.
6. Bake the Mushrooms: Place the baking sheet in the preheated oven and bake for 20-25 minutes or until the mushrooms are tender and the tops are golden brown.
7. Serve: Remove from the oven and let the stuffed mushrooms cool slightly before serving.
They can be served warm or at room temperature.
Extra Tips:
For the best results, choose mushrooms that are uniform in size to verify even cooking. Avoid washing mushrooms under running water, as they can absorb excess moisture and become soggy; instead, use a damp paper towel to clean them.
If you prefer a bit of heat, add a pinch of red pepper flakes to the cheese mixture. You can also experiment with different herbs, such as basil or oregano, to suit your taste.
These Savory Cheese and Herb Stuffed Mushrooms can be made ahead of time and baked just before serving, making them a stress-free addition to your holiday menu.
Cranberry Brie Bites

Cranberry Brie Bites are a delightful appetizer that perfectly marries the creamy richness of Brie cheese with the tart sweetness of cranberries. This elegant yet simple dish is an ideal starter for any Christmas dinner party, offering a burst of flavor in every bite-sized morsel.
These bites are both visually appealing and delicious, making them a crowd favorite at festive gatherings. With their flaky pastry base and melty cheese center topped with a hint of cranberry sauce, they’re sure to leave your guests craving more.
Preparing these Cranberry Brie Bites is a straightforward process that doesn’t require extensive culinary skills, making it an excellent choice for both novice and experienced cooks. The use of ready-made puff pastry simplifies the process, allowing you to focus on assembling and baking these tasty morsels.
The recipe serves 4-6 people, making it perfect for small gatherings or as part of a larger spread of appetizers. With just a few ingredients and minimal preparation time, you can have a festive and flavorful appetizer ready to impress your guests.
Ingredients (Serves 4-6):
- 1 sheet of puff pastry, thawed
- 8 oz Brie cheese
- 1/2 cup cranberry sauce
- 1/4 cup chopped pecans
- 1 tablespoon fresh rosemary, finely chopped
- 1 egg, beaten (for egg wash)
Cooking Instructions:
- Preheat the Oven: Preheat your oven to 375°F (190°C) to guarantee it’s hot enough to bake the pastry to golden perfection.
- Prepare the Puff Pastry: Roll out the thawed puff pastry sheet on a lightly floured surface. Cut the sheet into 12 equal squares using a sharp knife or a pastry cutter.
- Prepare the Brie Cheese: Cut the Brie cheese into small cubes, approximately 1-inch in size, guaranteeing you have enough pieces to place one on each square of pastry.
- Assemble the Bites: Place each puff pastry square into a mini muffin tin, gently pressing down to create a small cup. Place a cube of Brie cheese into the center of each pastry cup.
- Add the Cranberry Sauce: Spoon about 1 teaspoon of cranberry sauce over the Brie cheese in each pastry cup. Make sure the sauce is evenly distributed.
- Top with Pecans and Rosemary: Sprinkle some chopped pecans and a pinch of fresh rosemary over the cranberry sauce to add texture and flavor.
- Apply Egg Wash: Brush the edges of the pastry with the beaten egg. This will give your Cranberry Brie Bites a beautiful golden color once baked.
- Bake the Bites: Place the muffin tin in the preheated oven and bake for 15-18 minutes, or until the puff pastry is golden brown and the Brie cheese is melted.
- Cool and Serve: Allow the bites to cool for a few minutes before removing them from the tin. Serve warm for the best flavor experience.
Extra Tips:
For the best results, confirm your puff pastry is well chilled before cutting and shaping; this helps maintain its structure during baking.
If you prefer a sweeter flavor, consider using a cranberry sauce with added orange zest or juice. Additionally, you can prepare these bites a few hours ahead of your event and reheat them in the oven for about 5 minutes before serving to guarantee they’re warm and gooey.
Prosciutto-Wrapped Asparagus
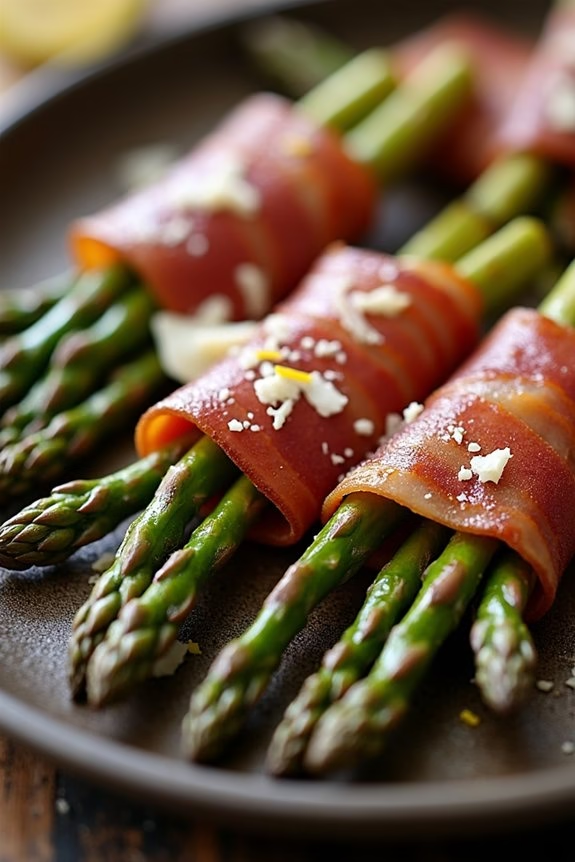
Prosciutto-wrapped asparagus is a delicious and elegant appetizer perfect for a Christmas dinner party. The salty, savory flavor of prosciutto complements the fresh, earthy taste of asparagus, creating a dish that’s both simple and sophisticated. This recipe adds a delightful crunch to your holiday table and is sure to captivate your guests with its gourmet appearance despite being easy to prepare.
Not only is this dish tasty, but it’s also quick to assemble, making it a great option for hosts who want to focus on other elements of their Christmas feast. The combination of tender asparagus spears and crispy prosciutto creates a harmonious blend of textures and flavors, making it a crowd favorite. Serve this as a starter or as a side dish to elevate your holiday meal.
Ingredients for 4-6 servings:
- 1 pound of fresh asparagus spears
- 12 slices of prosciutto
- 2 tablespoons olive oil
- Salt to taste
- Freshly ground black pepper to taste
- Optional: grated Parmesan cheese, lemon zest for garnish
Cooking Instructions:
- Preparation of Asparagus: Begin by preheating your oven to 400°F (200°C). Wash and trim the asparagus spears, snapping off the woody ends. Pat them dry with a paper towel to guarantee they roast properly.
- Seasoning: Place the asparagus in a large bowl. Drizzle with olive oil, and season lightly with salt and freshly ground black pepper. Toss them gently to guarantee they’re evenly coated.
- Wrapping with Prosciutto: Take one slice of prosciutto and lay it flat on a clean surface. Place an asparagus spear at one end of the prosciutto slice, then roll the prosciutto around the asparagus, spiraling downwards to cover the spear. Repeat this process with the remaining asparagus and prosciutto.
- Baking: Arrange the wrapped asparagus spears on a baking sheet lined with parchment paper. Guarantee they’re spaced out evenly to allow for even cooking. Bake in the preheated oven for 10-15 minutes or until the prosciutto is crispy and the asparagus is tender.
- Serving: Remove the baking sheet from the oven and let the asparagus cool slightly. Arrange on a serving platter and, if desired, sprinkle with grated Parmesan cheese and a touch of lemon zest for an added burst of flavor.
Extra Tips:
For the best results, choose medium-thick asparagus spears; they hold up well during baking and balance nicely with the prosciutto. If you prefer a bit more flavor, consider adding a light drizzle of balsamic glaze just before serving.
To make this dish in advance, prepare the asparagus and prosciutto wraps a day ahead, store them in the fridge, and bake just before your guests arrive. Remember, the key to this dish is simplicity, so let the quality of your ingredients shine.
Garlic Butter Roasted Shrimp
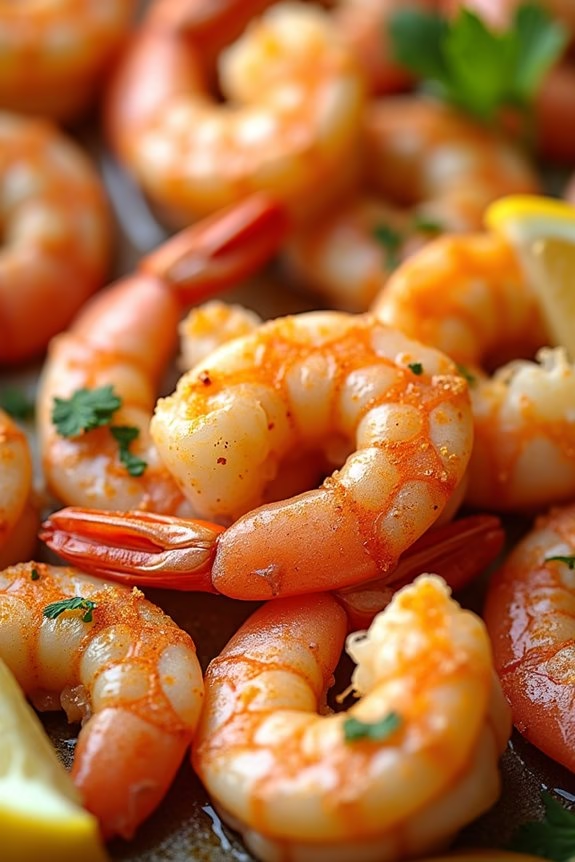
Garlic Butter Roasted Shrimp is a delightful and flavorful dish that’s perfect for a festive Christmas dinner party. The combination of succulent shrimp with rich, aromatic garlic butter will surely impress your guests and elevate your holiday dining experience. This dish isn’t only delicious but also quick and easy to prepare, making it an ideal choice for a busy holiday schedule.
Whether served as an appetizer or a main course, Garlic Butter Roasted Shrimp is a versatile dish that pairs beautifully with a variety of side dishes, from crusty bread to fresh salads or even creamy risotto.
The beauty of Garlic Butter Roasted Shrimp lies in its simplicity and the quality of its ingredients. To achieve the best flavor, it’s crucial to use fresh shrimp, high-quality butter, and aromatic fresh garlic. Additionally, a hint of lemon juice and a sprinkle of fresh parsley add a bright, fresh finish to the dish.
This recipe serves 4-6 people, making it a great option for a small gathering or as part of a larger holiday feast.
Ingredients for 4-6 servings:
- 2 pounds large shrimp, peeled and deveined
- 6 tablespoons unsalted butter, melted
- 4 cloves garlic, minced
- 1 tablespoon lemon juice
- Salt and pepper to taste
- 1 teaspoon paprika
- 2 tablespoons fresh parsley, chopped
- Lemon wedges, for serving
Cooking Instructions:
- Preheat the Oven: Begin by preheating your oven to 400°F (200°C). This guarantees that the shrimp will cook evenly and quickly.
- Prepare the Baking Dish: Lightly grease a large baking dish or sheet pan with a bit of melted butter or cooking spray to prevent the shrimp from sticking.
- Combine Ingredients: In a medium mixing bowl, combine the melted butter, minced garlic, lemon juice, salt, pepper, and paprika. Stir until all the ingredients are well blended.
- Arrange the Shrimp: Lay the shrimp in a single layer in the prepared baking dish. Pour the garlic butter mixture over the shrimp, making sure they’re well coated.
- Roast the Shrimp: Place the baking dish in the preheated oven and roast for about 8-10 minutes or until the shrimp are pink, opaque, and cooked through. Be mindful not to overcook, as this can make the shrimp rubbery.
- Finish with Parsley: Once cooked, remove the dish from the oven and sprinkle the chopped parsley over the shrimp for a fresh pop of color and flavor.
- Serve: Serve the Garlic Butter Roasted Shrimp hot with lemon wedges on the side for squeezing over the top, enhancing the dish’s flavor with a zesty touch.
Extra Tips:
When making Garlic Butter Roasted Shrimp, it’s important to keep an eye on the cooking time, as shrimp cook very quickly. Using jumbo or large shrimp is recommended for this recipe to guarantee they remain juicy and tender.
If desired, you can add a pinch of red pepper flakes for a bit of heat. Additionally, make sure your garlic is finely minced to avoid any large chunks that might overwhelm the dish. This recipe can also be easily doubled to accommodate a larger group, making it versatile for different party sizes.
Maple Glazed Carrots

Maple Glazed Carrots are the perfect side dish for your Christmas dinner party, adding a touch of sweetness and a burst of vibrant color to your festive spread. This dish combines the natural sweetness of carrots with the rich, caramel-like flavor of maple syrup, creating a delightful harmony that will impress your guests. Not only are these carrots a treat for the taste buds, but they’re also incredibly easy to prepare, making them an ideal choice for both novice and experienced cooks alike.
The beauty of this recipe lies in its simplicity, with just a handful of ingredients and straightforward cooking methods. The carrots are cooked to perfection, retaining a slight crunch, while the maple glaze infuses them with a luscious, sticky coating. The result is a dish that beautifully complements other Christmas classics, such as roasted meats or savory stuffing, while standing out as a star in its own right. With this recipe, you can offer your guests a taste of the holiday spirit and warmth.
Ingredients (Serves 4-6):
- 2 pounds of carrots, peeled and cut into sticks
- 2 tablespoons of unsalted butter
- 1/4 cup of pure maple syrup
- 1 tablespoon of brown sugar
- 1 tablespoon of apple cider vinegar
- Salt, to taste
- Freshly ground black pepper, to taste
- Fresh thyme leaves, for garnish (optional)
Cooking Instructions:
- Prepare the Carrots: Start by peeling the carrots and cutting them into uniform sticks, about 3-4 inches long. This guarantees even cooking and makes them easy to eat.
- Blanch the Carrots: In a large pot of boiling salted water, blanch the carrot sticks for about 4-5 minutes until they’re just tender but still firm. Drain the carrots and immediately plunge them into a bowl of ice water to stop the cooking process. This step helps preserve the vibrant color and texture of the carrots.
- Make the Maple Glaze: In a large skillet over medium heat, melt the butter. Add the maple syrup, brown sugar, and apple cider vinegar to the skillet. Stir the mixture until the sugar is fully dissolved and the glaze is smooth.
- Glaze the Carrots: Add the blanched carrots to the skillet with the maple glaze. Toss the carrots gently to confirm they’re well-coated in the glaze. Cook for an additional 5-7 minutes, stirring occasionally, until the carrots are tender and the glaze has thickened slightly.
- Season and Serve: Season the glazed carrots with salt and freshly ground black pepper to taste. Transfer the carrots to a serving dish and, if desired, garnish with fresh thyme leaves for an aromatic touch.
Extra Tips:
When preparing Maple Glazed Carrots, it’s important not to overcook them during the blanching stage, as they’ll continue to cook in the glaze. The goal is to achieve a texture that’s tender yet retains a slight crunch.
Additionally, using high-quality pure maple syrup will enhance the flavor of the dish considerably. If you prefer a spicier version, consider adding a pinch of cayenne pepper for a subtle kick.
Finally, these carrots can be prepared a day in advance; simply reheat them gently on the stovetop before serving to maintain their delicious glaze.
Creamy Garlic Mashed Potatoes
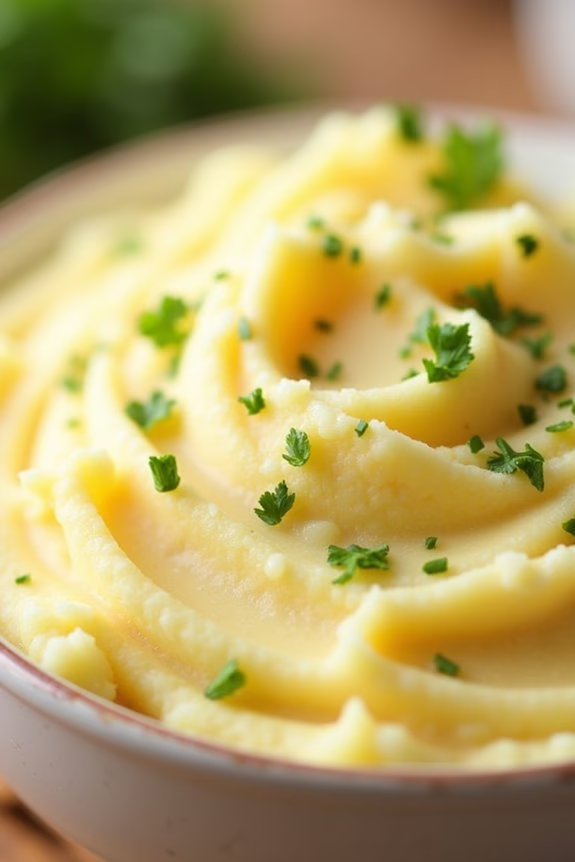
Creamy Garlic Mashed Potatoes are a classic side dish that complements any Christmas dinner party spread. With their velvety texture and rich flavor, these potatoes are certain to be a hit with your guests. The combination of tender potatoes, aromatic garlic, and creamy butter creates a dish that’s both comforting and indulgent. Perfect for pairing with roasted meats or serving alongside your favorite holiday vegetables, these mashed potatoes are a must-have on your festive table.
The secret to achieving the perfect creamy consistency lies in the choice of potatoes and the method of preparation. Opt for Yukon Gold potatoes for their naturally buttery flavor and smooth texture. To infuse the potatoes with a subtle garlic flavor, the garlic is cooked alongside the potatoes, allowing it to soften and blend seamlessly into the mash. This dish isn’t only delicious but also simple to prepare, making it an ideal choice for a stress-free holiday cooking experience.
Ingredients (Serves 4-6):
- 3 pounds Yukon Gold potatoes, peeled and cut into chunks
- 4 cloves garlic, peeled and smashed
- 1 cup heavy cream
- 1/2 cup unsalted butter
- Salt and pepper to taste
- Fresh parsley, chopped (optional, for garnish)
Instructions:
- Prepare the Potatoes: Start by peeling and cutting the Yukon Gold potatoes into even-sized chunks. This guarantees they cook evenly. Rinse the potatoes under cold water to remove excess starch.
- Cook the Potatoes and Garlic: Place the potato chunks and smashed garlic cloves into a large pot, and cover them with cold water. Add a generous pinch of salt. Bring to a boil over medium-high heat, then reduce the heat to a simmer. Cook for 15-20 minutes or until the potatoes are tender when pierced with a fork.
- Drain and Steam Dry: Once the potatoes are cooked, drain them using a colander. Return the drained potatoes and garlic to the pot. Set the pot over low heat for a minute to allow any excess moisture to evaporate, which helps achieve a fluffier texture.
- Heat the Cream and Butter: In a small saucepan, heat the heavy cream and unsalted butter over low heat until the butter is melted and the mixture is warm. Don’t boil.
- Mash the Potatoes: Using a potato masher or ricer, mash the potatoes and garlic until smooth. Gradually add the warm cream and butter mixture, continuing to mash until the potatoes reach your desired creamy consistency.
- Season and Serve: Season the mashed potatoes with salt and pepper to taste. Transfer to a serving dish, and if desired, garnish with freshly chopped parsley before serving.
Extra Tips:
For the best results, avoid overworking the potatoes, as this can lead to a gluey texture. A potato masher or ricer is preferable to a food processor, which can over-mash the potatoes. If you prefer a stronger garlic flavor, consider roasting the garlic before adding it to the potatoes.
Additionally, you can adjust the cream and butter quantities based on your preference for creaminess. These mashed potatoes can be prepared a day in advance and reheated gently over low heat or in the oven, making them a convenient option for busy holiday cooking.
Holiday Spiced Roast Chicken

The Holiday Spiced Roast Chicken is a delightful centerpiece for your Christmas dinner party that combines the warmth of festive spices with the comfort of a well-roasted bird. This recipe captures the essence of holiday flavors with a medley of spices, creating a symphony of taste that’s sure to impress your family and friends.
The chicken is marinated with a blend of spices and roasted to perfection, resulting in a succulent, flavorful dish that pairs perfectly with your favorite holiday sides. For a serving size of 4-6 people, this recipe guarantees that everyone at your table enjoys a generous portion of this holiday treat.
The preparation involves a simple yet effective spice rub, allowing the chicken to absorb the rich flavors before being roasted to a golden brown crisp. The combination of sweet, savory, and slightly spicy elements makes this dish a memorable addition to your festive menu.
Ingredients:
- 1 whole chicken (approximately 4-5 pounds)
- 2 tablespoons olive oil
- 1 tablespoon ground cinnamon
- 1 tablespoon ground nutmeg
- 1 tablespoon ground allspice
- 1 tablespoon smoked paprika
- 1 teaspoon ground cloves
- 1 teaspoon salt
- 1/2 teaspoon black pepper
- 4 cloves garlic, minced
- 2 tablespoons fresh rosemary, chopped
- 1 lemon, quartered
- 1 onion, quartered
Instructions:
- Prepare the Chicken: Preheat your oven to 375°F (190°C). Rinse the chicken thoroughly under cold water and pat it dry with paper towels. Confirm the chicken cavity is empty and remove any excess fat around the opening.
- Make the Spice Rub: In a small bowl, mix together the olive oil, ground cinnamon, nutmeg, allspice, smoked paprika, ground cloves, salt, and black pepper. This spice blend will create a festive aroma and flavor profile.
- Season the Chicken: Rub the spice mixture generously all over the chicken, making sure it’s evenly coated. Make sure to get some of the rub under the skin and inside the cavity for maximum flavor infusion.
- Stuff the Chicken: Fill the cavity of the chicken with the minced garlic, fresh rosemary, lemon quarters, and onion quarters. This will help to infuse the chicken with additional moisture and flavor as it roasts.
- Roast the Chicken: Place the chicken on a roasting rack in a roasting pan. Roast in the preheated oven for about 1.5 to 2 hours, or until the internal temperature reaches 165°F (74°C) when checked with a meat thermometer in the thickest part of the thigh. Basting the chicken every 30 minutes with the juices from the pan will enhance the flavor and guarantee a crispy skin.
- Rest and Serve: Once roasted, remove the chicken from the oven and let it rest for about 10-15 minutes before carving. This allows the juices to redistribute, making the meat tender and juicy. Carve the chicken and serve with your choice of holiday sides.
Extra Tips:
To guarantee the skin of the chicken turns out crispy, make sure to thoroughly dry the chicken with paper towels before applying the spice rub.
Also, letting the chicken sit with the spice rub on it for a few hours (or even overnight in the refrigerator) can enhance the depth of the flavors. If you don’t have a roasting rack, you can create a makeshift one with vegetables like carrots and celery to elevate the chicken and allow even cooking.
Finally, don’t skip the resting period after roasting, as this is vital for maintaining the juiciness of the meat.
Honey Glazed Ham
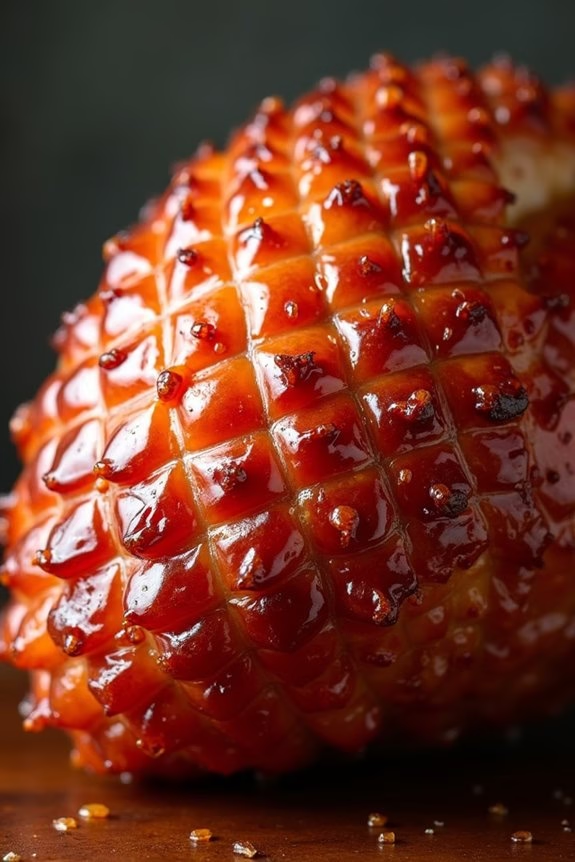
When it comes to celebrating the holiday season, a Honey Glazed Ham is a timeless centerpiece that brings warmth and flavor to any Christmas dinner party. This classic dish combines the savory richness of ham with the sweet, sticky goodness of honey glaze, creating a perfect harmony of flavors that’s sure to impress your guests.
Whether you’re hosting an intimate gathering or a festive feast, this honey glazed ham will be the highlight of your meal, offering a delicious and satisfying experience for everyone at the table.
Preparing a Honey Glazed Ham is both a simple and rewarding culinary endeavor. The key to success is selecting a high-quality ham and taking the time to craft a flavorful glaze that complements the natural juiciness of the meat.
By following this recipe, you’ll create a beautifully glazed ham with a crispy, caramelized crust and tender, juicy interior that will have your guests coming back for seconds. Let’s explore the ingredients and steps needed to prepare this delightful dish for 4-6 people.
Ingredients:
- 1 (5-7 pound) fully cooked, bone-in ham
- 1 cup honey
- 1/2 cup brown sugar
- 1/4 cup Dijon mustard
- 1/4 cup apple cider vinegar
- 2 teaspoons ground cinnamon
- 1/2 teaspoon ground cloves
- 1/2 teaspoon ground nutmeg
- 1/2 teaspoon ground ginger
- 1/4 teaspoon black pepper
Cooking Instructions:
- Preheat the Oven: Preheat your oven to 325°F (165°C). Position the oven rack in the lower third of the oven to accommodate the size of the ham.
- Prepare the Ham: Remove the ham from its packaging and place it on a roasting pan with the flat side down. Score the surface of the ham in a diamond pattern, being careful not to cut too deep into the meat.
- Make the Glaze: In a medium saucepan over medium heat, combine the honey, brown sugar, Dijon mustard, apple cider vinegar, cinnamon, cloves, nutmeg, ginger, and black pepper. Stir the mixture well and bring it to a simmer. Allow it to cook for about 5 minutes until the sugar has dissolved and the glaze has thickened slightly.
- Apply the Glaze: Using a pastry brush, generously coat the scored ham with about half of the glaze, making sure it gets into the cuts and covers the entire ham surface.
- Bake the Ham: Place the glazed ham in the preheated oven and bake for approximately 1.5 to 2 hours, or until the internal temperature reaches 140°F (60°C). Baste the ham with the remaining glaze every 30 minutes to keep it moist and flavorful.
- Caramelize the Glaze: For a beautifully caramelized finish, increase the oven temperature to 425°F (220°C) during the last 15-20 minutes of baking. Keep a close eye on the ham to prevent the glaze from burning.
- Rest and Serve: Once the ham has reached the desired temperature, remove it from the oven and allow it to rest for 15-20 minutes before carving. This will help the juices redistribute and guarantee a tender, juicy ham.
Extra Tips:
When choosing your ham, opt for a bone-in variety for added flavor and moisture. Always allow the ham to rest before carving to enhance its tenderness.
If you have leftover glaze, serve it as a sauce alongside the ham for extra flavor. Additionally, if you prefer a less sweet glaze, reduce the amount of honey and brown sugar to your taste.
Mushroom and Spinach Stuffed Pork Tenderloin

Mushroom and Spinach Stuffed Pork Tenderloin is a deliciously elegant dish perfect for a Christmas dinner party. This recipe combines the earthiness of mushrooms with the fresh taste of spinach, all wrapped in tender pork tenderloin. The stuffing infuses the pork with incredible flavor while keeping it moist and juicy. The dish isn’t only impressive in presentation but also in taste, making it a delightful centerpiece for your festive table.
Preparing Mushroom and Spinach Stuffed Pork Tenderloin is simpler than it seems. By following this step-by-step guide, you’ll create a mouthwatering dish that will surely please your guests. The stuffing, seasoned with garlic and herbs, complements the tender pork, guaranteeing each bite is a harmonious blend of flavors. Pair it with roasted vegetables or a fresh salad to complete your Christmas feast.
Ingredients (Serves 4-6):
- 2 pork tenderloins (about 1 pound each)
- 2 tablespoons olive oil, divided
- 1 cup cremini mushrooms, finely chopped
- 2 cups fresh spinach, chopped
- 2 cloves garlic, minced
- 1 teaspoon dried thyme
- 1 teaspoon dried rosemary
- Salt and pepper to taste
- 1/4 cup grated Parmesan cheese
- 1/4 cup bread crumbs
- 1/4 cup chicken broth
- Kitchen twine
Cooking Instructions:
- Prepare the Pork Tenderloin: Preheat your oven to 375°F (190°C). Trim any excess fat from the pork tenderloins. Using a sharp knife, carefully slice each tenderloin lengthwise, not cutting all the way through, to create a pocket for the stuffing.
- Make the Stuffing: Heat 1 tablespoon of olive oil in a skillet over medium heat. Add the chopped mushrooms and cook for about 5 minutes until they begin to soften. Add the garlic, spinach, thyme, and rosemary; cook until the spinach is wilted, about 2 minutes. Season with salt and pepper. Remove from heat and stir in Parmesan cheese and bread crumbs. Add chicken broth to moisten the mixture slightly.
- Stuff the Tenderloin: Open the tenderloins and spread the mushroom and spinach mixture evenly inside. Roll the tenderloins tightly and secure them with kitchen twine at 2-inch intervals to hold the stuffing in place.
- Sear the Tenderloin: Heat the remaining tablespoon of olive oil in a large oven-proof skillet over medium-high heat. Sear the stuffed tenderloins on all sides until browned, about 2-3 minutes per side.
- Bake: Transfer the skillet to the preheated oven and bake for 20-25 minutes, or until the internal temperature of the pork reaches 145°F (63°C).
- Rest and Serve: Remove from the oven and let the tenderloins rest for 5 minutes before slicing. This allows the juices to redistribute throughout the meat. Slice and serve warm.
Extra Tips:
To ascertain even cooking, make sure the tenderloins are of similar size. If necessary, you can also use a meat mallet to flatten the tenderloin slightly before stuffing.
When searing the tenderloin, avoid overcrowding the skillet to achieve a nice, even golden crust. If you don’t have an oven-proof skillet, sear the tenderloin in a regular skillet, then transfer it to a baking dish before placing it in the oven.
Enjoy this delightful dish with your favorite sides and revel in the joy of a holiday meal well done!
Festive Quinoa and Cranberry Salad

Elevate your Christmas dinner party with a vibrant and nutritious Festive Quinoa and Cranberry Salad. This delightful dish combines the nutty flavor of quinoa with the tangy sweetness of cranberries, creating a harmonious blend that’s both satisfying and revitalizing.
Perfect as a side dish or a light main course, this salad isn’t only visually appealing with its brilliant colors but also packed with nutrients. The addition of crunchy nuts and fresh herbs gives it a wonderful texture and aromatic depth, making it an ideal festive treat.
Whether you’re catering to vegetarians or looking for a wholesome dish to balance out the rich holiday fare, this quinoa salad is a versatile option that can be prepared ahead of time, allowing you to enjoy the festivities without spending too much time in the kitchen.
Serve this salad warm or chilled, and watch as it becomes a favorite at your holiday table.
Ingredients (Serving Size: 4-6 people):
- 1 1/2 cups quinoa
- 3 cups water
- 1/2 teaspoon salt
- 1 cup dried cranberries
- 1/2 cup chopped walnuts or pecans
- 1/4 cup finely chopped red onion
- 1/4 cup chopped fresh parsley
- 1/4 cup chopped fresh mint
- 1/4 cup olive oil
- 2 tablespoons fresh lemon juice
- 1 tablespoon apple cider vinegar
- Salt and pepper to taste
Cooking Instructions:
- Rinse and Cook Quinoa: Start by rinsing the quinoa under cold water using a fine mesh strainer. This helps remove any bitterness. In a medium saucepan, combine the quinoa, water, and 1/2 teaspoon of salt. Bring it to a boil over medium-high heat. Once boiling, reduce the heat to low, cover, and let it simmer for about 15 minutes, or until the quinoa is cooked and the water is absorbed.
- Prepare the Dressing: While the quinoa is cooking, prepare the dressing. In a small bowl, whisk together the olive oil, fresh lemon juice, apple cider vinegar, and a pinch of salt and pepper. Set aside to allow the flavors to meld.
- Fluff and Cool Quinoa: Once the quinoa is cooked, remove it from the heat and let it sit, covered, for 5 minutes. Then, fluff it with a fork and transfer it to a large mixing bowl to cool slightly.
- Mix the Salad: Add the dried cranberries, chopped walnuts or pecans, red onion, parsley, and mint to the quinoa. Pour the prepared dressing over the salad. Gently toss everything together until well combined and coated with the dressing.
- Adjust Seasoning: Taste the salad and adjust the seasoning with additional salt and pepper if needed.
- Serve: Transfer the salad to a serving dish and garnish with extra parsley or mint if desired. Serve warm or refrigerate for about an hour to allow the flavors to blend further and serve chilled.
Extra Tips:
For an even more festive touch, consider adding some pomegranate seeds for a burst of color and flavor. Toasting the nuts before adding them to the salad enhances their flavor and adds an extra layer of crunch.
If you prefer, you can substitute the walnuts or pecans with almonds or pistachios. This salad is highly adaptable; feel free to include other fresh herbs like basil or dill, or even add some feta cheese for a creamy contrast.
Enjoy the flexibility of this dish, and tweak it to your taste preferences or dietary needs.
Classic Green Bean Casserole
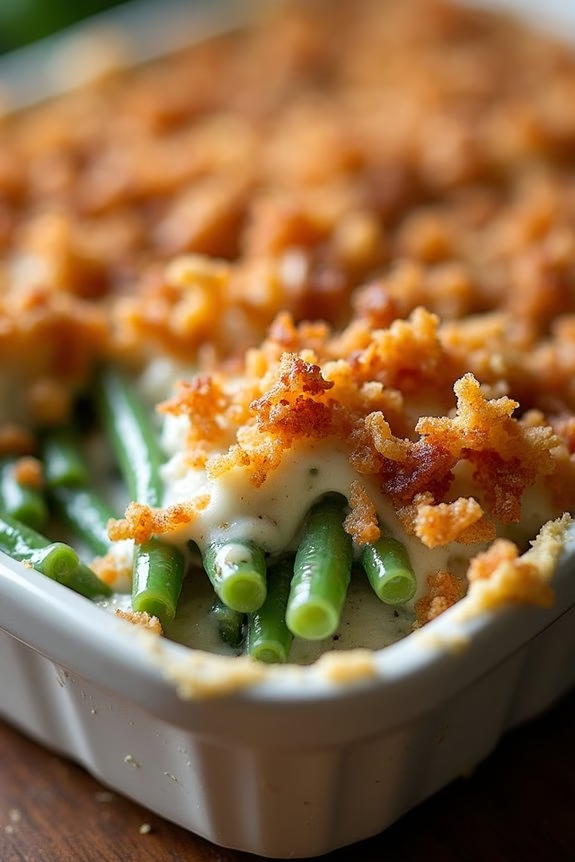
The Classic Green Bean Casserole is a beloved staple at Christmas dinner parties, known for its creamy texture and savory flavor. This dish combines tender green beans with a rich, mushroom cream sauce and a crispy fried onion topping. The casserole isn’t only delicious but also easy to prepare, making it a perfect side dish option for your festive gathering.
Whether you’re cooking for family or friends, this comforting casserole is bound to be a crowd-pleaser. Originating in the 1950s, the Classic Green Bean Casserole has become synonymous with holiday meals and is often associated with warmth and togetherness. Its popularity can be attributed to the simplicity of its ingredients, which are readily available and require minimal preparation.
While there are many variations of this dish, the classic version remains a favorite due to its nostalgic appeal and satisfying balance of flavors and textures.
Ingredients for 4-6 servings:
- 1 pound fresh green beans, trimmed and cut into 1-inch pieces
- 1 can (10.5 ounces) condensed cream of mushroom soup
- 1/2 cup milk
- 1 teaspoon soy sauce
- 1/4 teaspoon black pepper
- 1 1/3 cups crispy fried onions, divided
- Salt to taste
Cooking Instructions:
- Preheat the oven: Start by preheating your oven to 350°F (175°C). This guarantees the casserole will cook evenly once it’s assembled.
- Prepare the green beans: Fill a large pot with water and bring it to a boil. Add a pinch of salt, then add the green beans. Cook for about 4-5 minutes until they’re bright green and tender-crisp. Drain and set aside.
- Mix the sauce: In a large mixing bowl, combine the condensed cream of mushroom soup, milk, soy sauce, and black pepper. Stir until the mixture is smooth and well combined.
- Combine ingredients: Add the cooked green beans and 2/3 cup of the crispy fried onions to the sauce mixture. Stir gently to coat the green beans evenly with the sauce.
- Assemble the casserole: Transfer the green bean mixture into a 9×13-inch baking dish, spreading it out evenly. Sprinkle the remaining crispy fried onions over the top of the casserole.
- Bake the casserole: Place the baking dish in the preheated oven and bake for about 25-30 minutes, or until the top is golden brown and the sauce is bubbling.
- Serve: Remove from the oven and let it cool for a few minutes before serving. The casserole can be served directly from the baking dish.
Extra Tips:
When making the Classic Green Bean Casserole, consider using fresh green beans for the best texture, but canned or frozen green beans can also be used if you’re short on time.
If you like a bit more crunch, try adding extra crispy fried onions just before serving. For a richer flavor, consider substituting the milk with half-and-half or adding a pinch of nutmeg to the sauce.
This dish can also be prepared a day in advance; simply assemble and refrigerate until ready to bake. Enjoy this comforting side dish alongside your main Christmas meal, and watch it disappear quickly!
Decadent Chocolate Yule Log
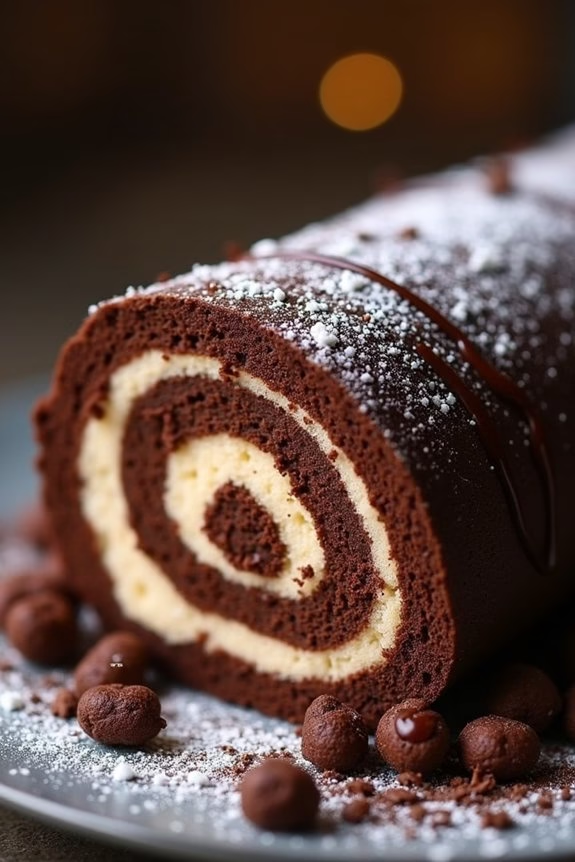
The Decadent Chocolate Yule Log is a classic Christmas dessert that captures the essence of the festive season with its rich, chocolatey flavor and beautiful presentation.
Often resembling a log, this dessert is a combination of a light, fluffy sponge cake rolled with creamy chocolate filling, and finished with a luscious chocolate ganache. Whether you’re hosting a small gathering or a larger festive dinner, this treat is sure to impress your guests with its intricate yet inviting appearance and indulgent taste.
A Chocolate Yule Log isn’t just a dessert; it’s a centerpiece that brings warmth and joy to your Christmas table. The process of making it involves a few steps, but the result is well worth the effort. This recipe serves 4-6 people, making it perfect for a cozy family celebration or a small party.
With its smooth textures and deep chocolate flavor, this yule log will surely become a favorite in your holiday dessert repertoire.
Ingredients:
- 4 large eggs
- 100g (1/2 cup) granulated sugar
- 1 teaspoon vanilla extract
- 65g (1/2 cup) all-purpose flour
- 25g (1/4 cup) unsweetened cocoa powder
- 1/4 teaspoon salt
- 125ml (1/2 cup) heavy cream
- 150g (3/4 cup) dark chocolate, chopped
- 2 tablespoons unsalted butter
- 150g (3/4 cup) confectioners’ sugar, sifted
- 1 tablespoon milk
- Icing sugar for dusting
Cooking Instructions:
- Preheat and Prepare: Preheat the oven to 180°C (350°F). Line a 10×15 inch jelly roll pan with parchment paper, making sure the paper extends over the edges for easy removal.
- Make the Sponge: In a large bowl, beat the eggs and granulated sugar together using an electric mixer until the mixture is pale and thick, about 5 minutes. Stir in the vanilla extract.
- Combine Dry Ingredients: In a separate bowl, sift together the flour, cocoa powder, and salt. Gently fold the dry ingredients into the egg mixture using a spatula, being careful not to deflate the batter.
- Bake the Cake: Pour the batter into the prepared pan, spreading it evenly. Bake in the preheated oven for 10-12 minutes, or until the cake springs back when lightly touched.
- Roll the Cake: While the cake is still warm, invert it onto a clean kitchen towel dusted with confectioners’ sugar. Peel off the parchment paper, then roll the cake up with the towel starting from a short end. Let it cool completely.
- Prepare the Filling: Heat the heavy cream in a small saucepan until just boiling. Remove from heat and add the chopped dark chocolate and butter. Stir until smooth. Allow the mixture to cool and thicken slightly.
- Fill the Cake: Unroll the cooled cake and spread the chocolate filling evenly over the surface. Roll the cake back up (without the towel) and place it seam-side down on a serving platter.
- Make the Ganache: In a small bowl, combine the confectioners’ sugar and milk until smooth. Pour over the rolled cake, smoothing with a spatula.
- Decorate and Serve: Dust the yule log with icing sugar for a snowy effect. Refrigerate for at least 1 hour before slicing and serving.
Extra Tips:
When preparing the chocolate yule log, it’s essential to handle the sponge cake gently to prevent it from cracking.
Rolling the cake with a towel while it’s warm helps shape it without breaking. If the cake does crack, don’t worry; you can hide imperfections with the ganache and powdered sugar.
Additionally, verify all ingredients are at room temperature for the best texture. Finally, allow adequate time for chilling to guarantee the flavors meld together beautifully.
Eggnog Bread Pudding
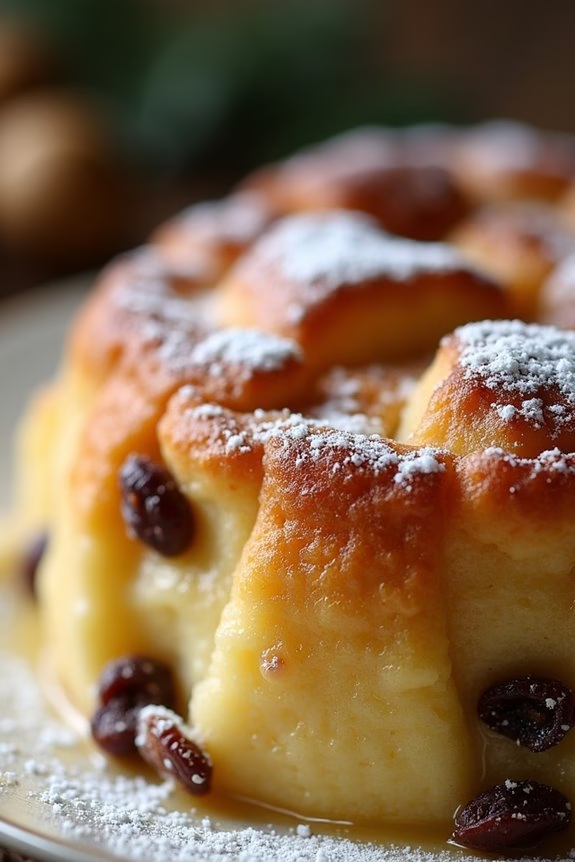
Eggnog Bread Pudding is a delightful and festive dessert that combines the rich, creamy flavors of eggnog with the comforting texture of bread pudding. This holiday treat is perfect for warming the spirit and satisfying sweet cravings during the Christmas season.
The custard-like consistency of the pudding pairs wonderfully with the aromatic spices of nutmeg and cinnamon, creating a dish that’s both nostalgic and celebratory.
This recipe is designed to serve 4-6 people, making it ideal for a small gathering or family dinner. The ingredients are straightforward and can be easily sourced, allowing you to focus on the joy of cooking and sharing this delicious dessert with loved ones.
Whether you’re a seasoned baker or a beginner, eggnog bread pudding is simple to prepare and certain to impress your guests.
Ingredients:
- 4 cups of cubed day-old French bread
- 2 cups of eggnog
- 1/2 cup of granulated sugar
- 3 large eggs
- 1 teaspoon of vanilla extract
- 1/2 teaspoon of ground nutmeg
- 1/4 teaspoon of ground cinnamon
- 1/4 cup of unsalted butter, melted
- 1/4 cup of raisins (optional)
- Powdered sugar for dusting (optional)
Instructions:
- Preparation: Preheat your oven to 350°F (175°C). Grease a 9×9 inch baking dish with butter or a non-stick cooking spray to prevent sticking.
- Mix the Custard: In a large mixing bowl, whisk together the eggnog, granulated sugar, eggs, vanilla extract, nutmeg, and cinnamon until well combined. This will form the custard base for the bread pudding.
- Combine with Bread: Add the cubed bread to the custard mixture, stirring gently to guarantee all the bread pieces are soaked evenly. Let it sit for about 10 minutes to allow the bread to absorb the flavors.
- Add Raisins: If using raisins, mix them into the bread and custard mixture. This adds a lovely burst of sweetness and texture to the pudding.
- Transfer to Baking Dish: Pour the bread and custard mixture into the prepared baking dish, spreading it evenly. Drizzle the melted butter over the top to add richness to the dish.
- Bake: Place the baking dish in the preheated oven and bake for 35-40 minutes, or until the top is golden brown and a knife inserted into the center comes out clean.
- Cool and Serve: Allow the eggnog bread pudding to cool slightly before serving. Optionally, dust the top with powdered sugar for a festive presentation.
Extra Tips:
For an added touch of flavor, consider incorporating a splash of rum or bourbon into the custard mixture. This will enhance the warm, spicy notes of the eggnog.
If you prefer a softer pudding, use a bit more eggnog to increase the custard’s creaminess. Remember, using day-old bread is vital as it absorbs the custard better without becoming too mushy.
Finally, serve the pudding warm or at room temperature, perhaps with a scoop of vanilla ice cream or a dollop of whipped cream for an indulgent finish. Enjoy your festive creation!
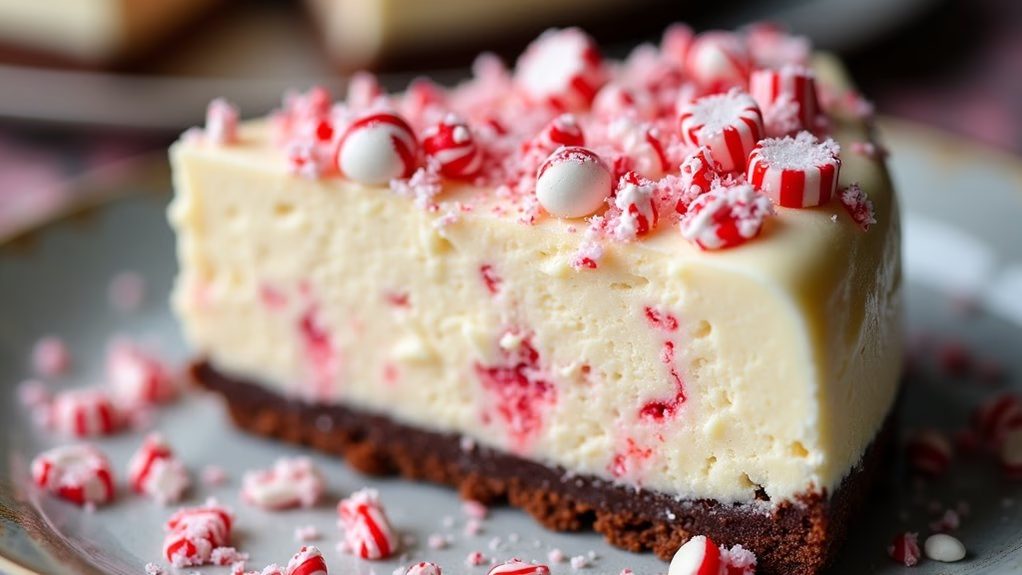
Peppermint Bark Cheesecake
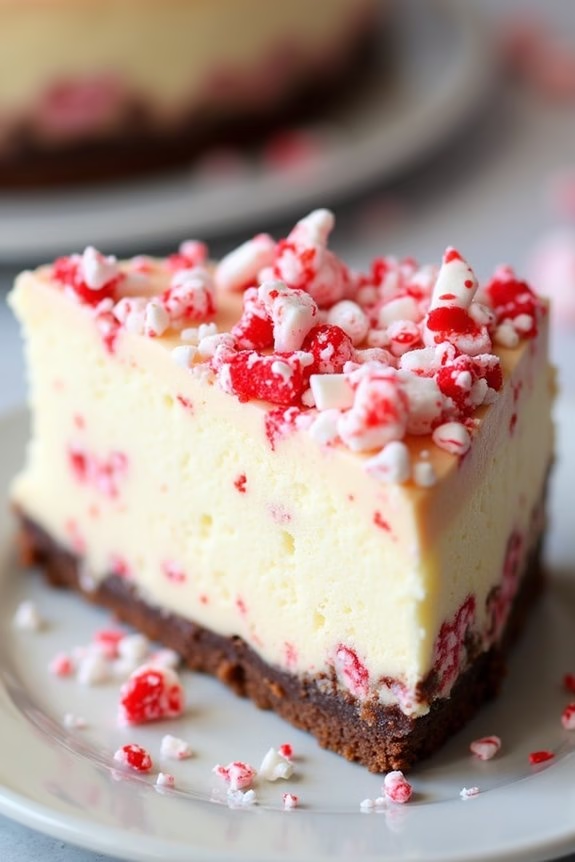
Peppermint Bark Cheesecake is the perfect blend of creamy cheesecake with the festive and invigorating taste of peppermint. This rich and decadent dessert combines a classic cheesecake base with a crushed peppermint bark topping, making it a must-have for your Christmas dinner party.
The contrasting textures of the smooth cheesecake and the crunchy peppermint bark create a delightful experience that will leave your guests craving more. Whether you’re a seasoned baker or a newcomer to the world of cheesecakes, this recipe is sure to impress and bring the holiday spirit to your table.
This recipe serves 4-6 people, making it ideal for small gatherings or a festive family dinner. The creamy interior is infused with a hint of peppermint extract, which perfectly complements the chocolate and peppermint bark topping. It’s important to let the cheesecake cool and set properly to achieve the best results, so make sure to plan ahead.
With just a few ingredients and some simple steps, you can create a show-stopping dessert that will be the highlight of your holiday celebrations.
Ingredients:
- 1 1/2 cups chocolate wafer crumbs
- 1/4 cup melted butter
- 3 (8 oz) packages cream cheese, softened
- 1 cup granulated sugar
- 3 large eggs
- 1 tsp vanilla extract
- 1/2 tsp peppermint extract
- 1/4 cup all-purpose flour
- 1/2 cup sour cream
- 1 cup heavy cream
- 1 cup peppermint bark, crushed
Cooking Instructions:
- Prepare the Crust: Preheat your oven to 325°F (160°C). In a medium-sized bowl, combine the chocolate wafer crumbs and melted butter. Mix until the crumbs are well coated. Press the mixture firmly into the bottom of a 9-inch springform pan to form an even layer. Bake the crust for 10 minutes, then remove it from the oven and let it cool.
- Make the Cheesecake Filling: In a large mixing bowl, beat the softened cream cheese and sugar until smooth and creamy. Add the eggs one at a time, beating well after each addition. Mix in the vanilla and peppermint extracts. Gradually add the flour, mixing just until combined. Stir in the sour cream and heavy cream until the mixture is smooth.
- Assemble the Cheesecake: Pour the cheesecake filling over the cooled crust in the springform pan. Spread it evenly with a spatula. Sprinkle the crushed peppermint bark evenly over the top of the cheesecake filling.
- Bake the Cheesecake: Place the springform pan on a baking sheet and bake in the preheated oven for 55-65 minutes, or until the center is set but still slightly jiggly. Turn off the oven and leave the cheesecake inside with the door ajar for an additional hour to cool gradually.
- Chill and Serve: Once cooled, cover the cheesecake with plastic wrap and refrigerate for at least 4 hours, or overnight, to allow it to set properly. Before serving, remove the cheesecake from the springform pan and transfer it to a serving platter. Garnish with additional crushed peppermint bark, if desired.
Extra Tips:
For a smooth and crack-free cheesecake, verify that all your ingredients are at room temperature before you begin mixing. This will help create a smooth batter and prevent overmixing, which can lead to cracks.
Additionally, if you don’t have chocolate wafer crumbs, you can substitute with crushed chocolate graham crackers or even Oreo cookies without the filling for a similar effect. Remember to let the cheesecake set in the refrigerator for the recommended time to achieve the perfect texture and flavor. Enjoy your festive creation!