
I’ve found that starting my mornings with a quick and nutritious breakfast makes all the difference. Saving time while enjoying something delicious and healthy is a win-win. Whether it’s overnight oats or a vibrant smoothie bowl, these 11 easy breakfast ideas are perfect for busy mornings. Each option promises a tasty start to your day. Ready to transform your mornings?
Overnight Oats
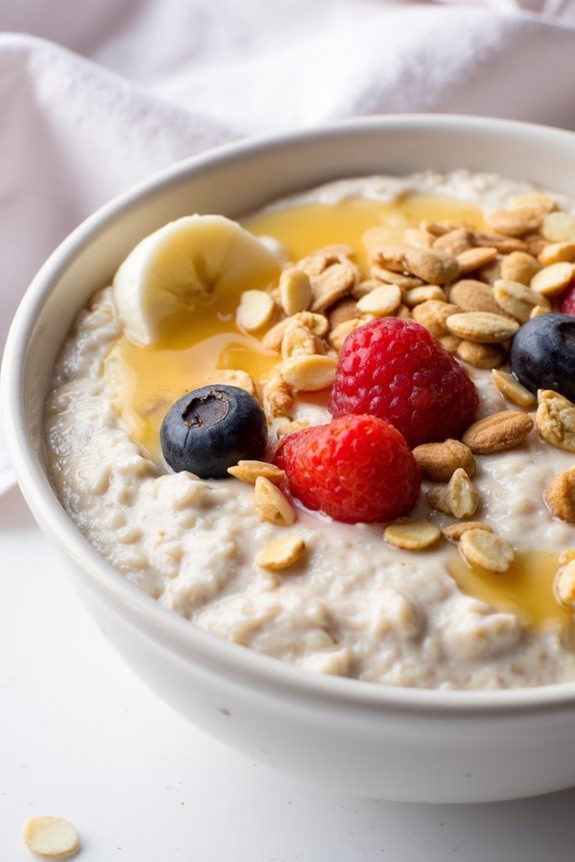
Overnight oats are a delicious, nutritious, and convenient breakfast option that you can prepare ahead of time, making your mornings easier and stress-free. This recipe for classic overnight oats combines hearty rolled oats with creamy yogurt and milk, guaranteeing a rich and satisfying texture. The addition of fresh fruits and nuts not only enhances the flavor but also boosts the nutritional profile, keeping you full and energized throughout the morning.
Perfect for busy mornings or meal prep Sundays, this recipe serves 4-6 people, making it ideal for families or for preparing breakfast for the entire week. The beauty of overnight oats lies in their adaptability; you can customize them with your favorite toppings or mix-ins to suit your taste preferences. With just a little preparation the night before, you’ll wake up to a ready-to-eat, wholesome breakfast that everyone will enjoy.
Ingredients (Serves 4-6):
- 3 cups rolled oats
- 3 cups milk (dairy or non-dairy)
- 1 cup Greek yogurt
- 2 tablespoons chia seeds
- 2 tablespoons honey or maple syrup
- 1 teaspoon vanilla extract
- 1/2 teaspoon ground cinnamon
- 1/2 cup chopped nuts (e.g., almonds, walnuts)
- 1 cup mixed fresh fruits (e.g., berries, banana slices)
- Pinch of salt
Instructions:
- Combine Dry Ingredients: In a large mixing bowl, combine the rolled oats, chia seeds, cinnamon, and a pinch of salt. Stir well to guarantee the ingredients are evenly distributed.
- Mix Wet Ingredients: In a separate bowl, whisk together the milk, Greek yogurt, honey or maple syrup, and vanilla extract until smooth.
- Combine All Ingredients: Pour the wet mixture over the dry ingredients. Stir thoroughly to make sure all the oats are well-coated with the liquid.
- Add Toppings: Gently fold in the chopped nuts and half of the fresh fruits into the oat mixture. Reserve the remaining fruits for topping before serving.
- Refrigerate: Transfer the mixture into a large airtight container or individual serving jars. Cover and refrigerate overnight, or for at least 6-8 hours, allowing the oats to absorb the liquid and soften.
- Serve: In the morning, give the oats a gentle stir. Divide into bowls or serve directly from jars. Top with the reserved fresh fruits and any additional toppings you prefer, like a sprinkle of nuts or a drizzle of honey.
Extra Tips:
When preparing overnight oats, feel free to experiment with different flavors and textures. You can swap the milk for almond or oat milk for a dairy-free version, or add a spoonful of nut butter for extra creaminess.
Adjust the sweetness to your liking by varying the amount of honey or syrup, or try adding a splash of fruit juice for a fruity twist. Overnight oats will keep in the refrigerator for up to five days, making them a convenient option for a week’s worth of breakfasts.
Remember to give them a good stir before serving, and enjoy them cold or warmed up, depending on your preference.
Smoothie Bowls
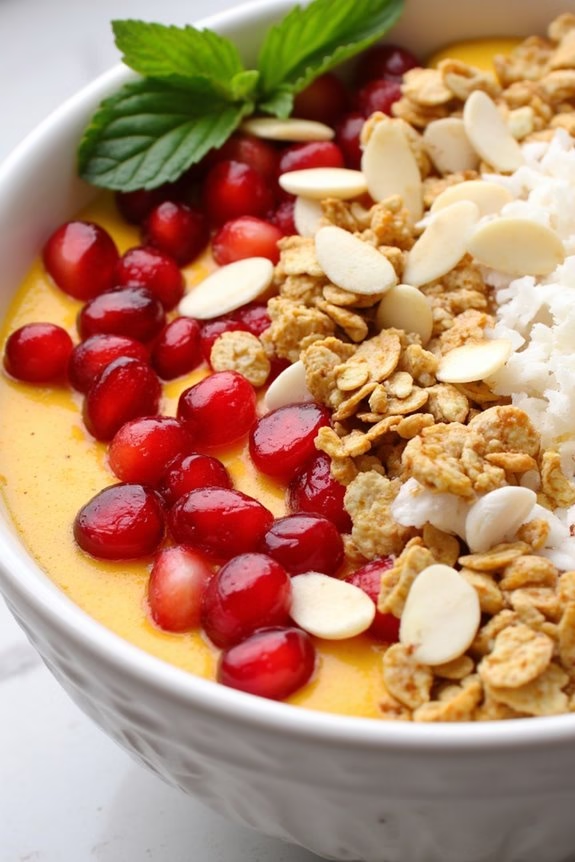
Start your day with a burst of vibrant flavors and a load of nutrients with this Tropical Smoothie Bowl. This bowl isn’t only visually appealing but also packed with fruits and superfoods that will keep you energized throughout the morning.
Its rich and creamy texture comes from a blend of tropical fruits, while the toppings offer a delightful crunch and additional nutritional benefits. Perfect for breakfast or a revitalizing snack, this smoothie bowl is a great way to enjoy a healthy and delicious start to your day.
This Tropical Smoothie Bowl is versatile and can be customized to your taste preferences. Whether you like your smoothie bowl thick or slightly runny, you can adjust the consistency by altering the amount of liquid.
Topped with a variety of fruits, nuts, seeds, and granola, each spoonful is a delightful combination of flavors and textures. Make this recipe for 4-6 people and enjoy a wholesome meal that’s as satisfying as it’s nutritious.
Ingredients for 4-6 servings:
- 2 cups frozen mango chunks
- 2 cups frozen pineapple chunks
- 2 ripe bananas
- 1 cup coconut milk or almond milk
- 1 tablespoon chia seeds
- 1 tablespoon honey or agave syrup (optional)
- 1/2 cup granola
- 1/2 cup sliced strawberries
- 1/4 cup shredded coconut
- 1/4 cup sliced almonds
- 1/4 cup pomegranate seeds
- Fresh mint leaves for garnish
Instructions:
- Blend the Base: In a high-powered blender, combine the frozen mango chunks, frozen pineapple chunks, ripe bananas, and coconut milk or almond milk. Blend on high speed until smooth and creamy. If the mixture is too thick, add a little more milk to reach your desired consistency.
- Add Chia Seeds and Sweetener: Add the chia seeds and honey or agave syrup to the blender. Blend again for a few seconds until the chia seeds are fully incorporated into the smoothie mixture.
- Pour into Bowls: Divide the smoothie mixture evenly among 4-6 bowls. Use a spatula to spread the mixture evenly in each bowl.
- Add Toppings: Now it’s time to get creative with your toppings! Evenly distribute the granola, sliced strawberries, shredded coconut, sliced almonds, and pomegranate seeds over each smoothie bowl.
- Garnish and Serve: Finish each bowl with a few fresh mint leaves as a garnish. Serve immediately and enjoy your Tropical Smoothie Bowl while it’s fresh and chilled.
Extra Tips:
When making smoothie bowls, it’s essential to use frozen fruits to achieve a thick, ice cream-like texture. Make sure to pre-slice and freeze your fruits the night before if you prefer using fresh fruits.
Don’t hesitate to swap or add toppings according to your preferences or what you have on hand – options like kiwi slices, blueberries, or hemp seeds can also be delightful. If you prefer a sweeter bowl, adjust the amount of honey or agave syrup to your liking.
Finally, if you want to prepare in advance, you can blend the base the night before and store it in the fridge, then add your fresh toppings in the morning for a quick and easy breakfast.
Avocado Toast
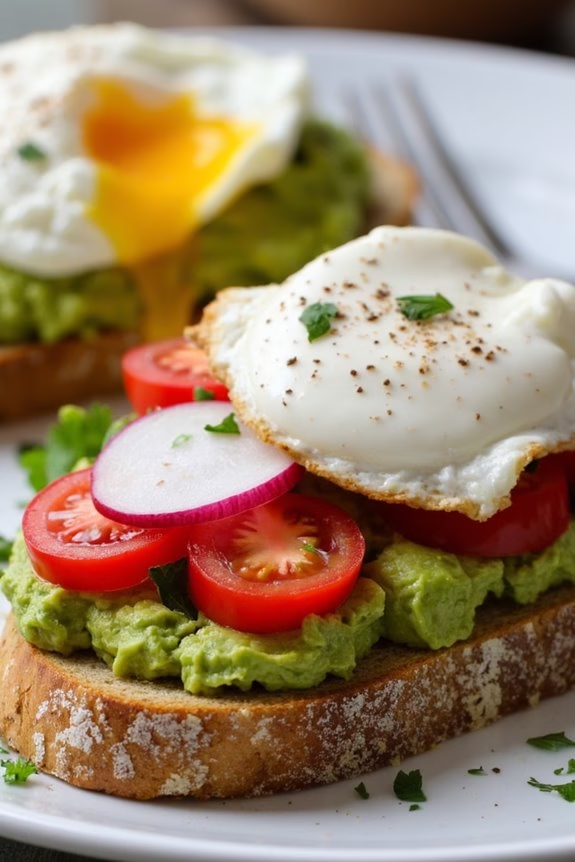
Avocado toast is a simple yet delicious breakfast option that’s packed with nutrients and flavor. It’s become a popular choice for health-conscious individuals who want to enjoy a quick and satisfying meal to start their day. The creamy texture of ripe avocados combined with the crunch of toasted bread creates a delightful contrast that’s both comforting and energizing.
With endless topping options, you can customize your avocado toast to suit your taste preferences, making it a versatile dish that’s sure to please everyone at the table.
Making avocado toast is incredibly easy and requires minimal ingredients. This recipe serves 4-6 people, making it perfect for a family breakfast or a small gathering with friends. The key to a perfect avocado toast lies in using high-quality ingredients, such as fresh avocados, good bread, and flavorful toppings.
Whether you prefer a classic version with a sprinkle of salt and pepper or a more adventurous take with additional toppings like poached eggs, tomatoes, or smoked salmon, this recipe provides a solid foundation to create your perfect breakfast dish.
Ingredients (Serves 4-6):
- 4 large ripe avocados
- 1-2 lemons or limes
- Salt (to taste)
- Black pepper (to taste)
- 6-8 slices of whole-grain or sourdough bread
- Olive oil (optional)
- Optional toppings: cherry tomatoes, radishes, poached eggs, smoked salmon, red pepper flakes, fresh herbs
Cooking Instructions:
- Prepare the Avocados: Cut the avocados in half and remove the pits. Scoop the flesh into a bowl and mash it with a fork until you reach your desired consistency—smooth or chunky.
- Season the Avocado: Add the juice of one lemon or lime to the mashed avocado to enhance the flavor and prevent browning. Season with salt and black pepper to taste, and mix well.
- Toast the Bread: While preparing the avocado, lightly toast the slices of bread in a toaster or on a grill until they’re golden brown and crispy. If desired, drizzle a little olive oil on the bread before toasting for extra flavor.
- Assemble the Toast: Once the bread is toasted, spread a generous layer of the seasoned avocado mixture over each slice.
- Add Toppings: Top the avocado toast with your choice of additional toppings. For example, cherry tomatoes and radishes add freshness and crunch, while a poached egg or smoked salmon provides extra protein and richness.
- Serve and Enjoy: Arrange the avocado toast on a serving platter and enjoy immediately, while the toast is still warm and crisp.
Extra Tips:
To keep your avocado toast fresh and vibrant, always use ripe avocados that yield slightly to gentle pressure. If you’re preparing the toast in advance, keep the mashed avocado in an airtight container with a layer of plastic wrap pressed directly against its surface to prevent oxidation.
Experiment with different types of bread and toppings to find your favorite combination. For a spicier kick, consider adding red pepper flakes or a dash of hot sauce to the avocado mixture. Enjoy your avocado toast with a freshly brewed cup of coffee or tea for a complete breakfast experience.
Greek Yogurt Parfaits
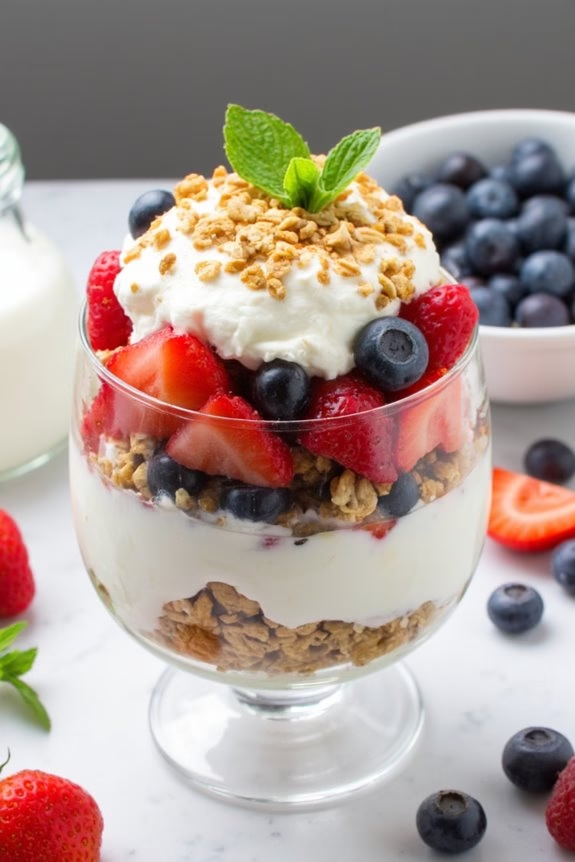
Greek Yogurt Parfaits are a delightful and healthy breakfast option that can be enjoyed by the whole family. These parfaits aren’t only visually appealing but are also packed with nutrients, providing a well-balanced start to your day. Layered with creamy Greek yogurt, fresh fruits, and crunchy granola, this dish offers a perfect mix of textures and flavors that are sure to satisfy your morning cravings.
Perfect for a quick breakfast, Greek Yogurt Parfaits can be easily customized to suit individual tastes. Whether you prefer berries, tropical fruits, or a combination of both, you can adjust the ingredients to match your preferences. Additionally, these parfaits can be prepared in advance, making them an excellent option for busy mornings when you need a nutritious meal on the go.
Ingredients (Serves 4-6):
- 4 cups of Greek yogurt
- 2 cups of mixed fresh berries (such as strawberries, blueberries, and raspberries)
- 1 cup of granola
- 2 tablespoons of honey or maple syrup
- 1 teaspoon of vanilla extract
- 1/4 cup of chopped nuts (such as almonds or walnuts, optional)
- Fresh mint leaves for garnish (optional)
Cooking Instructions:
- Prepare the Ingredients: Wash the berries thoroughly and pat them dry. If you’re using larger berries like strawberries, hull and slice them into bite-sized pieces. Set aside.
- Flavor the Yogurt: In a medium-sized bowl, combine the Greek yogurt, honey or maple syrup, and vanilla extract. Stir well until the mixture is smooth and the sweetener is fully incorporated.
- Layer the Parfaits: Take 4-6 serving glasses or jars. Begin by spooning a layer of the flavored Greek yogurt into the bottom of each glass. Next, add a layer of mixed berries, followed by a layer of granola. Repeat the layers until the glasses are filled, finishing with a yogurt layer on top.
- Top with Extras: Sprinkle chopped nuts over the top layer of yogurt for added crunch. Garnish with fresh mint leaves if desired.
- Serve or Store: Serve the parfaits immediately for the best texture, or cover them with plastic wrap and store them in the refrigerator for up to 2 days. If storing, add the granola just before serving to maintain its crunchiness.
Extra Tips:
To make your Greek Yogurt Parfaits even more exciting, consider adding a drizzle of nut butter or a sprinkle of chia seeds for added nutrition. If you prefer a sweeter parfait, you can adjust the amount of honey or maple syrup to taste.
Additionally, using seasonal fruits will guarantee you get the freshest flavor possible. Remember, the key to a great parfait is balancing the layers, so be mindful of the proportions as you assemble your dish.
Breakfast Burritos

Breakfast burritos are a versatile and delicious way to start your day. Packed with protein, veggies, and customizable fillings, they provide a hearty meal that can be enjoyed on the go. Whether you’re rushing to work or enjoying a leisurely weekend breakfast, these burritos are certain to satisfy. The combination of scrambled eggs, cheese, and your choice of fillings wrapped in a warm tortilla makes for a quick yet fulfilling breakfast option.
Perfect for serving 4-6 people, breakfast burritos can easily be made in advance and stored for later, making them an excellent choice for meal prep. You can customize the fillings to suit your taste, adding ingredients such as sausage, bacon, or a variety of vegetables. With this recipe, you’ll have everyone at the table raving about breakfast.
Ingredients (Serves 4-6):
- 6 large eggs
- 1/4 cup milk
- 8 flour tortillas
- 1 cup shredded cheddar cheese
- 1/2 pound breakfast sausage or bacon, cooked and crumbled
- 1 bell pepper, diced
- 1/2 onion, diced
- 1 cup cooked hash browns
- Salt and pepper to taste
- 1 tablespoon butter or oil
- Salsa and sour cream for serving (optional)
Cooking Instructions:
- Prepare the Ingredients: Begin by cooking the sausage or bacon in a skillet over medium heat until crispy. Remove from the skillet and set aside. In the same skillet, add the diced bell pepper and onion, cooking until they’re softened. Remove and set aside.
- Scramble the Eggs: In a mixing bowl, whisk together the eggs, milk, salt, and pepper. Heat butter or oil in a non-stick skillet over medium heat. Pour in the egg mixture and cook, stirring gently, until the eggs are just set and scrambled. Remove from heat.
- Assemble the Burritos: Lay out the tortillas on a clean surface. Evenly distribute the scrambled eggs, cooked sausage or bacon, bell pepper and onion mixture, hash browns, and shredded cheese among the tortillas.
- Wrap the Burritos: Fold in the sides of each tortilla, then roll them up tightly to encase the fillings. Confirm the burrito is snug to prevent the contents from falling out.
- Warm the Burritos: Heat a clean skillet or griddle over medium heat. Place the burritos seam-side down on the skillet and cook for 2-3 minutes on each side until the tortillas are golden brown and the cheese has melted.
- Serve: Slice each burrito in half and serve with salsa and sour cream on the side, if desired.
Extra Tips:
To make the breakfast burritos ahead of time, assemble them as directed and wrap each burrito individually in aluminum foil. Store them in the refrigerator for up to 3 days. For longer storage, place the wrapped burritos in a freezer-safe bag and freeze for up to 1 month.
To reheat, unwrap the foil and warm in the microwave for 1-2 minutes or in the oven at 350°F (175°C) for 10-15 minutes until heated through.
Chia Seed Pudding

Chia Seed Pudding is a versatile and nutritious breakfast option that requires minimal effort yet delivers maximum flavor and health benefits. This dish is perfect for those busy mornings when you need a quick and satisfying start to the day.
Chia seeds are rich in omega-3 fatty acids, fiber, and protein, making them an excellent choice for maintaining energy levels throughout the morning. With just a few simple ingredients, you can prepare a creamy, delicious pudding that can be customized with your favorite toppings to suit your taste.
This recipe is designed to serve 4-6 people, making it ideal for family breakfasts or meal prepping for the week. The pudding can be prepared the night before and left in the refrigerator to set, guaranteeing a hassle-free morning routine. Whether you enjoy it plain or with a variety of toppings, this Chia Seed Pudding is sure to become a staple in your breakfast repertoire.
Ingredients (serving size: 4-6 people):
- 1 cup chia seeds
- 4 cups almond milk (or any milk of choice)
- 1 teaspoon vanilla extract
- 1/4 cup maple syrup (or sweetener of choice)
- A pinch of salt
- Fresh fruits for topping (e.g., berries, banana slices)
- Nuts or seeds for topping (e.g., almonds, sunflower seeds)
Cooking Instructions:
- Combine Ingredients: In a large mixing bowl, add the chia seeds, almond milk, vanilla extract, maple syrup, and a pinch of salt. Stir the mixture thoroughly to guarantee the chia seeds are evenly distributed and begin to absorb the liquid.
- Mix Well: After initially stirring, let the mixture sit for about 5 minutes. Then, stir again to break up any clumps of chia seeds. This guarantees a smooth and even pudding texture.
- Refrigerate: Cover the bowl with a lid or plastic wrap and place it in the refrigerator. Allow the pudding to set for at least 4 hours, preferably overnight. The chia seeds will swell and absorb the liquid, transforming into a pudding-like consistency.
- Serve and Enjoy: Once set, give the pudding a good stir before serving. Spoon the pudding into individual bowls and top with fresh fruits, nuts, or seeds as desired. Serve chilled for a revitalizing breakfast.
Extra Tips:
For an extra creamy texture, consider blending half of the mixture before refrigerating. This will break down some of the seeds and result in a smoother pudding.
You can also experiment with different flavorings such as cinnamon, cocoa powder, or matcha for variation. If you prefer a sweeter pudding, adjust the amount of maple syrup to taste.
Egg Muffins

Egg muffins are a delightful and nutritious breakfast option that are perfect for busy mornings. They’re easy to make, customizable, and can be prepared ahead of time. These muffins aren’t only great as a breakfast dish but also serve as a quick snack throughout the day. Packed with protein and veggies, egg muffins are a convenient way to start your day with a burst of energy.
Whether you’re trying to eat healthier or simply need a meal on the go, these egg muffins are guaranteed to satisfy.
One of the best things about egg muffins is their versatility. You can add your favorite ingredients like spinach, peppers, cheese, or bacon to suit your taste. They’re also an excellent way to use up leftover veggies or meats from previous meals. This recipe is designed to serve 4-6 people, making it perfect for a family breakfast or a small gathering.
Once baked, these muffins can be stored in the refrigerator and reheated quickly, making your mornings seamless and delicious.
Ingredients (Serves 4-6):
- 8 large eggs
- 1/2 cup milk
- 1 cup shredded cheese (cheddar, mozzarella, or your choice)
- 1 cup diced vegetables (such as bell peppers, spinach, or mushrooms)
- 1/2 cup cooked and crumbled bacon or sausage (optional)
- Salt and pepper to taste
- Cooking spray or muffin liners
Cooking Instructions:
- Preheat the Oven: Start by preheating your oven to 375°F (190°C). This guarantees that your egg muffins will bake evenly and have a nice, fluffy texture.
- Prepare the Muffin Tin: Lightly spray a 12-cup muffin tin with cooking spray or line each cup with muffin liners. This will prevent the egg muffins from sticking and make them easier to remove once baked.
- Mix the Egg Base: In a large mixing bowl, whisk together the eggs, milk, salt, and pepper until well combined. This mixture will form the base of your egg muffins and provide a creamy texture.
- Add Fillings: Stir in the shredded cheese, diced vegetables, and crumbled bacon or sausage into the egg mixture. Confirm that the ingredients are evenly distributed for a consistent taste in each muffin.
- Fill the Muffin Cups: Pour the egg mixture into the prepared muffin tin, filling each cup about three-quarters full. Be careful not to overfill, as the mixture will expand as it cooks.
- Bake: Place the muffin tin in the preheated oven and bake for 20-25 minutes, or until the egg muffins are set and lightly golden on top. You can check for doneness by inserting a toothpick into the center of a muffin; if it comes out clean, they’re ready.
- Cool and Serve: Allow the egg muffins to cool in the tin for a few minutes before removing them. Serve warm, or let them cool completely and store them in an airtight container in the refrigerator for up to 3 days.
Extra Tips:
To prevent your egg muffins from being too dry, avoid overbaking them and remember that they’ll continue to cook slightly after being removed from the oven.
Feel free to experiment with different cheese types or add herbs like chives or parsley for extra flavor. If you prefer a vegetarian version, simply omit the meat and add more vegetables.
For a spicy kick, consider adding a dash of hot sauce or a sprinkle of red pepper flakes to the egg mixture before baking. Enjoy these egg muffins with a side of toast or fresh fruit for a balanced breakfast.
Nut Butter and Banana Sandwich

Nut Butter and Banana Sandwiches are a delicious and nutritious breakfast option that can be whipped up in just a few minutes. Combining the creamy texture of your favorite nut butter with the natural sweetness of ripe bananas, this sandwich provides a perfect balance of protein and energy to kick-start your day.
It’s a versatile dish that can be customized with different types of bread or additional toppings to suit your personal taste preferences. Perfect for serving a family or a small group, this recipe yields enough for 4-6 people.
It’s ideal for busy mornings when you need a quick yet satisfying meal. Plus, it’s easy to pack for an on-the-go breakfast or a snack later in the day. With minimal ingredients and preparation time, the Nut Butter and Banana Sandwich is a staple that belongs in everyone’s breakfast repertoire.
Ingredients (serving size: 4-6 people):
- 8-12 slices of whole-grain or your preferred bread
- 1 cup of nut butter (peanut, almond, or cashew)
- 4-6 ripe bananas
- 4 tablespoons of honey or maple syrup (optional)
- 1 teaspoon of cinnamon (optional)
Cooking Instructions:
- Prepare the Bread: Begin by toasting the slices of bread to your desired level of crispiness. This step is optional, but toasted bread adds a nice crunch to the sandwich.
- Spread the Nut Butter: Once the bread is ready, spread a generous layer of nut butter on one side of each slice. Make sure the nut butter is evenly distributed to guarantee every bite is delicious.
- Slice the Bananas: Peel the bananas and slice them into thin, even rounds. If you prefer thicker slices, adjust accordingly to your taste.
- Assemble the Sandwich: Place the banana slices evenly over the nut butter on half of the bread slices. If desired, drizzle honey or maple syrup over the bananas for added sweetness.
- Add Spices: Sprinkle a light dusting of cinnamon over the bananas if using. This adds a nice flavor contrast and elevates the sandwich.
- Complete the Sandwich: Top each banana and nut butter-covered slice with a plain slice of bread, nut butter side down, to form a sandwich.
- Serve: Cut each sandwich in half or quarters for easy serving, and enjoy your Nut Butter and Banana Sandwich immediately.
Extra Tips:
For an additional layer of flavor, consider adding a sprinkle of chia seeds or flaxseeds to the banana layer for a boost of omega-3 fatty acids and fiber.
If you’re looking to make this sandwich even more filling, you can add slices of fresh strawberries or apples. For those with a sweet tooth, a small amount of chocolate spread can be added alongside the nut butter.
Cottage Cheese and Fruit Bowl
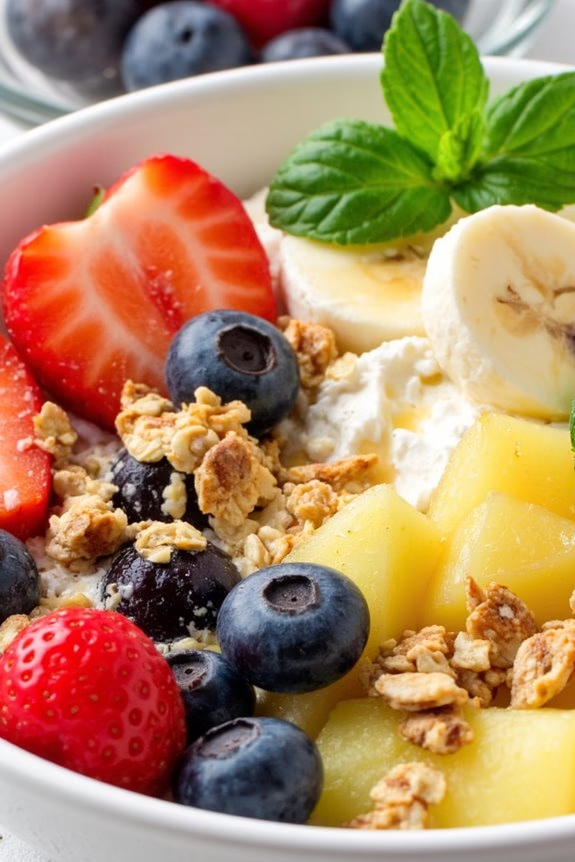
Start your morning on a delicious and nutritious note with a Cottage Cheese and Fruit Bowl, an ideal breakfast option for those who want something quick, easy, and fulfilling. This dish combines creamy cottage cheese with a medley of fresh fruits, offering a perfect balance of protein, fiber, and natural sweetness. It’s suitable for all ages and can easily be customized to suit personal tastes and dietary needs.
Whether you’re in a rush or just want to enjoy a leisurely breakfast, this dish comes together in minutes and is a surefire way to start your day with energy and satisfaction.
The Cottage Cheese and Fruit Bowl isn’t only a treat for your taste buds but also a feast for the eyes. With vibrant colors from the fresh fruits, it looks as good as it tastes. The creamy texture of the cottage cheese complements the crispness and juiciness of the fruits, making each bite a delightful experience.
Moreover, it’s highly adaptable; you can mix and match fruits, add a drizzle of honey, or sprinkle some nuts or seeds to enhance the flavor and nutritional value. Here’s how you can prepare this delightful dish for a serving size of 4-6 people.
Ingredients:
- 3 cups of cottage cheese
- 1 cup of strawberries, hulled and sliced
- 1 cup of blueberries
- 1 cup of diced pineapple
- 1 banana, sliced
- ¼ cup of honey (optional)
- ¼ cup of granola (optional)
- ¼ cup of chopped nuts (such as almonds or walnuts, optional)
- Fresh mint leaves for garnish (optional)
Instructions:
- Prepare the Ingredients: Begin by washing all the fruits thoroughly under cold running water. Pat them dry with a clean towel. Hull and slice the strawberries, dice the pineapple into bite-sized pieces, and slice the banana. Set these aside.
- Assemble the Bowl: In a large mixing bowl, add the cottage cheese. Gently fold in the strawberries, blueberries, pineapple, and banana, ensuring an even distribution of fruits throughout the cottage cheese.
- Add Sweeteners and Crunch (Optional): If you prefer a sweeter taste, drizzle honey over the mixture. Stir gently to evenly coat the fruits and cottage cheese with honey. For added texture, sprinkle granola and chopped nuts on top.
- Garnish and Serve: Divide the mixture into individual bowls or plates. Garnish each serving with a few fresh mint leaves for an aromatic touch and a burst of freshness. Serve immediately to enjoy the best texture and flavor.
Extra Tips:
Feel free to experiment with different fruit combinations depending on your preference or what’s in season. Mangoes, peaches, and raspberries are excellent alternatives.
You can also substitute Greek yogurt for cottage cheese if you prefer a smoother consistency. For those with dietary restrictions, using low-fat or lactose-free cottage cheese can make the dish more accommodating.
To prevent the bananas from browning quickly, you can toss them in a little lemon juice before adding them to the mixture.
Quick Omelettes

Start your day right with these Quick Omelettes, a perfect breakfast dish that combines simplicity with nutritious deliciousness. Omelettes are a classic morning favorite, and this version is designed with busy mornings in mind.
It’s a versatile dish that caters to a variety of taste preferences, allowing you to mix and match ingredients based on what you have in your pantry or fridge. Whether you’re feeding a family or preparing a hearty breakfast for guests, these omelettes offer a satisfying start to the day.
This recipe serves 4-6 people, providing everyone with a fluffy, protein-packed breakfast that can be prepared in no time. The ingredients are straightforward and the cooking process is efficient, making it a perfect addition to your easy breakfast ideas. Follow this simple recipe to enjoy a delicious and stress-free morning meal.
Ingredients for 4-6 People:
- 12 large eggs
- 1 cup milk
- Salt to taste
- Pepper to taste
- 1 cup shredded cheese (cheddar, mozzarella, or your choice)
- 1 cup diced ham, cooked bacon, or sausage
- 1 cup mixed vegetables (such as bell peppers, onions, mushrooms)
- 2 tablespoons butter or cooking oil
- Fresh herbs (such as parsley or chives), for garnishing
Cooking Instructions:
- Prepare the Ingredients: Start by cracking the eggs into a large mixing bowl. Add the milk, and whisk together until well combined. Season the mixture with a pinch of salt and a sprinkle of pepper to taste. Set aside.
- Preheat the Pan: Place a large non-stick skillet over medium heat and add 1 tablespoon of butter or a drizzle of cooking oil. Allow it to heat until melted and slightly shimmering.
- Sauté the Fillings: Add the diced ham (or your choice of meat) and mixed vegetables to the skillet. Sauté for about 5 minutes, stirring occasionally, until the vegetables are tender and the meat is heated through. Transfer the mixture to a plate and set aside.
- Cook the Omelettes: Return the skillet to the heat, adding the remaining tablespoon of butter or oil. Pour a portion of the egg mixture into the skillet, enough to coat the bottom thinly. Tilt the skillet to distribute the eggs evenly.
- Add the Fillings: As the edges begin to set, sprinkle a portion of the cheese, sautéed vegetables, and meat over one half of the omelette. Allow to cook for another minute or until the cheese begins to melt.
- Fold and Serve: Using a spatula, gently fold the omelette in half to cover the fillings. Cook for an additional minute to confirm the eggs are fully set. Slide the omelette onto a plate, and repeat with the remaining egg mixture and fillings.
- Garnish and Enjoy: Once all omelettes are cooked, garnish with freshly chopped herbs such as parsley or chives. Serve immediately while hot.
Extra Tips:
For fluffier omelettes, make sure your eggs are at room temperature before whisking, as this helps them incorporate more air.
If you’re aiming for a healthier version, consider using egg whites or a combination of whole eggs and egg whites.
Additionally, get creative with your fillings! Use seasonal vegetables or leftover meats from dinner to add variety and reduce waste.
Remember not to overfill the omelettes to prevent them from tearing when folded. Enjoy experimenting with different cheese and herb combinations to cater to your family’s taste preferences.
Energy Bars and Fruit
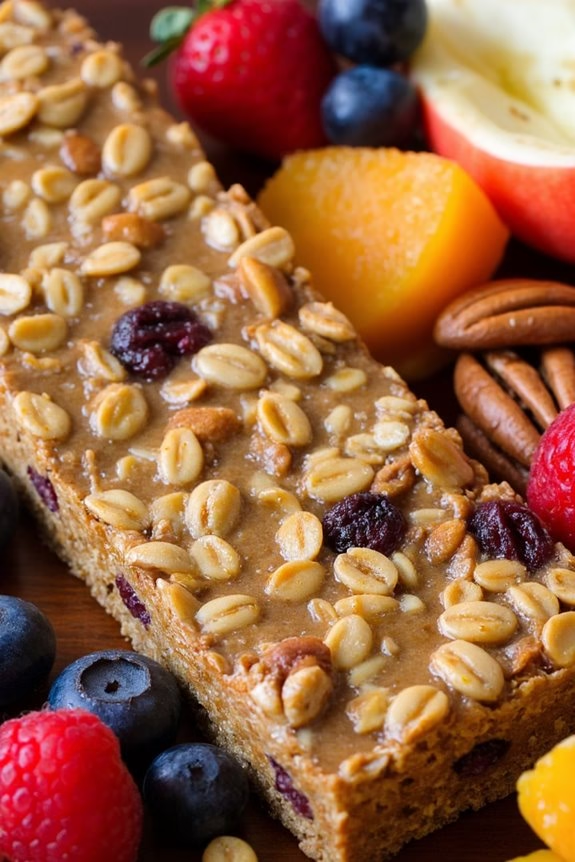
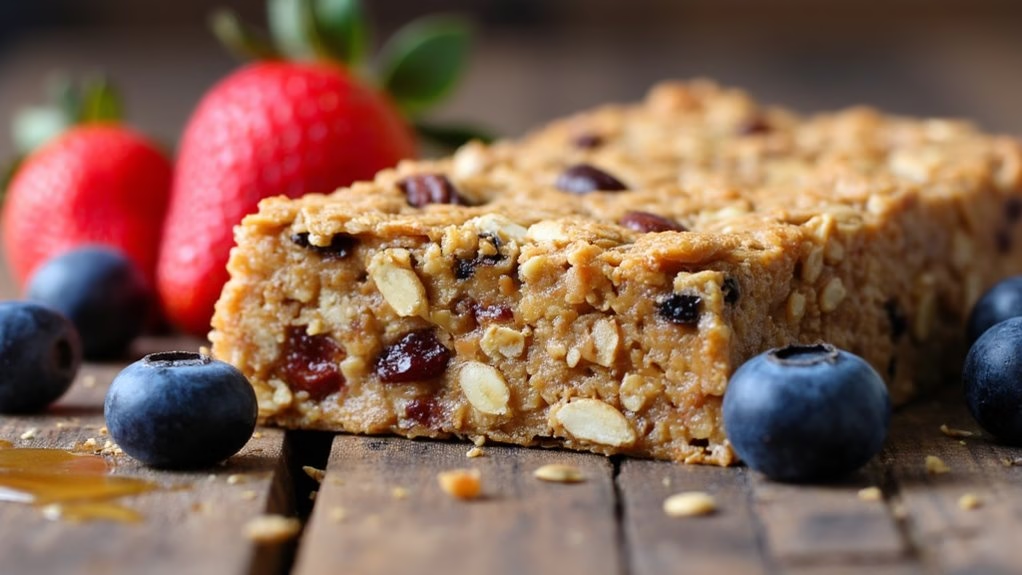
Start your day with a burst of energy by preparing these delicious homemade energy bars paired with fresh fruit. These bars are packed with nutrients from oats, nuts, and honey, providing a wholesome start to your morning. Coupled with a selection of fresh fruit, this breakfast idea isn’t only satisfying but also quick and easy to prepare.
Whether you’re heading to work or getting the kids ready for school, this breakfast option is perfect for fueling your body and keeping you invigorated until lunchtime. The combination of chewy homemade energy bars and rejuvenating fruit creates a balanced meal that’s both delicious and nutritious.
The energy bars can be made in advance, making them a perfect grab-and-go breakfast solution. Meanwhile, the fresh fruit adds a burst of natural sweetness and a touch of hydration. Customize your energy bars with your favorite nuts and dried fruits to suit your taste, and enjoy them with seasonal fresh fruit for an extra dose of vitamins and minerals.
Ingredients for 4-6 servings:
- 2 cups rolled oats
- 1 cup mixed nuts (such as almonds, walnuts, or pecans)
- 1/2 cup honey
- 1/4 cup natural peanut butter
- 1/2 cup dried fruits (such as cranberries, apricots, or raisins)
- 1 teaspoon vanilla extract
- 1/2 teaspoon salt
- 1 tablespoon chia seeds (optional)
- 1 tablespoon flaxseeds (optional)
- Fresh fruit of choice (such as berries, apple slices, or orange segments)
Cooking Instructions:
- Prepare the Ingredients: Preheat your oven to 350°F (175°C). Line a baking dish with parchment paper for easy removal later. Gather all your ingredients so you’re ready to mix them together.
- Mix the Dry Ingredients: In a large mixing bowl, combine the rolled oats, mixed nuts, dried fruits, chia seeds, and flaxseeds (if using). Stir them together until they’re well distributed.
- Combine the Wet Ingredients: In a small saucepan over low heat, gently heat the honey and peanut butter until they become smooth and well combined. Stir in the vanilla extract and salt.
- Combine All Ingredients: Pour the warm honey and peanut butter mixture over the dry ingredients. Mix everything together with a spatula until the oats and nuts are fully coated and sticky.
- Press into the Baking Dish: Transfer the mixture into the prepared baking dish. Use the back of a spoon or a spatula to firmly press the mixture into an even layer. Make sure it’s compact to help the bars hold together.
- Bake the Bars: Place the baking dish in the preheated oven and bake for 20-25 minutes, or until the edges turn golden brown. Remove from the oven and let it cool completely in the dish.
- Cut and Serve: Once cooled, lift the mixture out of the dish using the parchment paper and cut it into bars of your desired size. Serve these homemade energy bars with a selection of your favorite fresh fruits.
Extra Tips:
For a vegan version of these energy bars, replace honey with maple syrup and confirm your peanut butter is vegan. Feel free to experiment with different combinations of nuts and dried fruits to suit your preferences; just make sure to keep the total quantity the same.
Store the energy bars in an airtight container at room temperature for up to a week, or freeze them for longer storage. When serving, mix up the fresh fruits based on what’s in season or what you have available to keep your breakfast varied and exciting.