

The first time I made a poke cake, my kitchen filled with the intoxicating aroma of chocolate as I gently poked holes into the warm, spongy cake.
What began as a simple dessert soon became a masterpiece when I poured a luscious, creamy filling over it.
There’s something magical about poke cakes—their ability to surprise and delight with every forkful.
Whether you’re drawn to the zesty Lemon Blueberry Delight or the decadent Tiramisu Temptation, these 14 recipes promise a symphony of flavors that will enchant your taste buds.
But, oh, there’s even more to explore…

Classic Chocolate Poke Cake

Classic Chocolate Poke Cake is a delightful dessert that combines the rich flavors of chocolate cake with a creamy, luscious filling. This cake is perfect for any chocolate lover and is surprisingly easy to prepare. The moist chocolate cake is “poked” to create small holes, which are then filled with a decadent mixture that seeps into the cake, adding extra flavor and moisture. Topped with a light, fluffy whipped topping, this cake is sure to impress at any gathering or family dinner.
This recipe serves 4-6 people and is ideal for those who want a delicious, homemade dessert without spending hours in the kitchen. The combination of simple ingredients and easy-to-follow instructions makes this Classic Chocolate Poke Cake a go-to recipe for both novice and experienced bakers alike. Enjoy a slice of this heavenly cake with a scoop of vanilla ice cream or a dollop of whipped cream for an extra special treat.
Ingredients:
- 1 box of chocolate cake mix
- 3 large eggs
- 1/2 cup vegetable oil
- 1 cup water
- 1 package (3.9 oz) instant chocolate pudding mix
- 2 cups cold milk
- 1 cup heavy cream
- 1/4 cup powdered sugar
- 1 teaspoon vanilla extract
- 1/4 cup chocolate syrup
Cooking Instructions:
- Prepare the Cake Batter: Preheat your oven to 350°F (175°C). In a large mixing bowl, combine the chocolate cake mix, eggs, vegetable oil, and water. Mix until the batter is smooth and well combined.
- Bake the Cake: Pour the cake batter into a greased 9×13-inch baking dish. Spread it evenly and bake in the preheated oven for 25-30 minutes, or until a toothpick inserted into the center comes out clean. Remove the cake from the oven and let it cool for about 10 minutes.
- Poke the Cake: Once the cake has slightly cooled, use the handle of a wooden spoon or a straw to poke holes evenly across the surface of the cake. Make sure the holes are deep enough for the pudding mixture to seep in.
- Prepare the Pudding Mixture: In a medium-sized bowl, whisk together the instant chocolate pudding mix and cold milk until smooth and thick, about 2 minutes. Pour the pudding mixture over the cake, ensuring it fills all the holes. Spread any remaining pudding evenly across the top of the cake.
- Chill the Cake: Place the cake in the refrigerator for at least 1 hour to allow the pudding to set and the flavors to meld.
- Make the Whipped Topping: In a separate bowl, whip the heavy cream, powdered sugar, and vanilla extract together until soft peaks form. Spread the whipped topping over the chilled cake.
- Drizzle with Chocolate Syrup: Finish by drizzling chocolate syrup over the whipped topping for that extra chocolatey goodness.
Extra Tips:
For an even more indulgent experience, try using different flavors of pudding or adding chocolate chips to the cake batter. You can also top the cake with chocolate shavings or sprinkles for added texture and visual appeal.
If you’re short on time, store-bought whipped topping can be used as a substitute for homemade whipped cream. Remember, the key to a great poke cake is ensuring the pudding penetrates the cake thoroughly, so don’t be shy about making plenty of holes!
Lemon Blueberry Delight
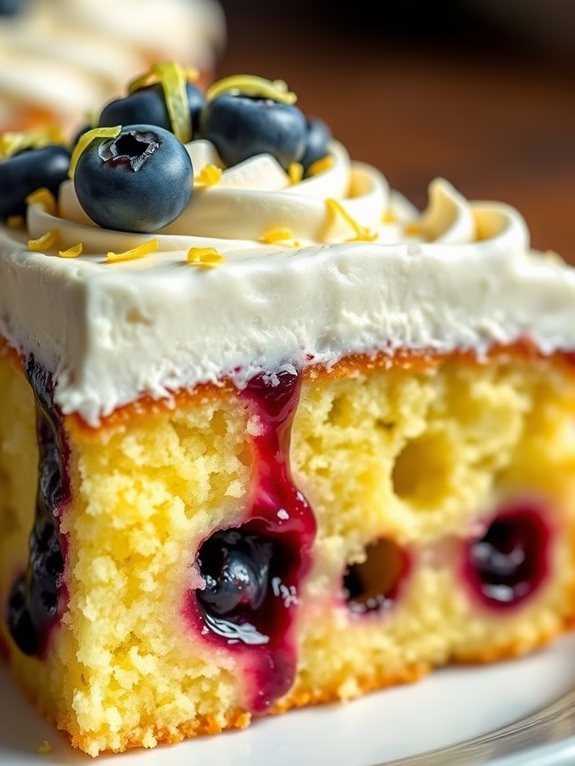
Lemon Blueberry Delight is a rejuvenating and vibrant poke cake that combines the zesty flavor of lemon with the sweet burst of blueberries, making it an ideal dessert for any occasion. This delightful cake isn’t only eye-catching with its swirls of bright yellow and deep blue, but it also offers a surprising taste experience as each slice reveals pockets of luscious lemon blueberry filling.
Perfect for summer gatherings or as a special treat for your loved ones, Lemon Blueberry Delight is easy to make and guaranteed to impress.
The process of creating this dessert involves preparing a soft, moist lemon-flavored cake, which is then enhanced by poking holes throughout and filling them with a sweet blueberry sauce. This allows the flavors to meld together, guaranteeing that every bite is infused with fruity goodness.
A creamy lemon frosting tops the cake, adding a smooth and tangy finish that complements the blueberry filling perfectly. Whether you’re a seasoned baker or a novice in the kitchen, this recipe is straightforward and fun to make.
Ingredients (Serves 4-6):
- 1 box lemon cake mix
- 1 cup water
- 1/3 cup vegetable oil
- 3 large eggs
- 1 cup fresh or frozen blueberries
- 1/4 cup granulated sugar
- 2 tablespoons lemon juice
- 1 teaspoon cornstarch
- 1/2 cup lemon curd
- 1 cup heavy whipping cream
- 2 tablespoons powdered sugar
- Zest of 1 lemon
Instructions:
- Prepare the Cake Batter: Preheat your oven to 350°F (175°C). In a large mixing bowl, combine the lemon cake mix, water, vegetable oil, and eggs. Beat with an electric mixer on medium speed for about 2 minutes until the batter is smooth.
- Bake the Cake: Pour the cake batter into a greased 9×13 inch baking dish. Smooth the top with a spatula. Bake in the preheated oven for 25-30 minutes or until a toothpick inserted into the center comes out clean. Allow the cake to cool in the pan for about 10 minutes.
- Prepare the Blueberry Sauce: While the cake is cooling, in a small saucepan over medium heat, combine the blueberries, granulated sugar, lemon juice, and cornstarch. Stir constantly until the mixture begins to thicken and bubble, about 5-7 minutes. Remove from heat and let cool slightly.
- Poke the Cake: Using the end of a wooden spoon or a straw, poke holes throughout the cooled cake, spacing them about 1 inch apart.
- Fill the Cake: Spoon the blueberry sauce over the cake, guaranteeing the sauce seeps into the holes. Gently spread the lemon curd over the top of the cake, allowing it to mix slightly with the blueberry sauce.
- Prepare the Frosting: In a chilled mixing bowl, beat the heavy whipping cream and powdered sugar together until soft peaks form. Fold in the lemon zest gently.
- Frost the Cake: Spread the whipped cream frosting evenly over the top of the cake. Refrigerate the cake for at least 2 hours before serving to allow the flavors to meld.
Extra Tips:
For the perfect Lemon Blueberry Delight, guarantee your blueberries are ripe and sweet, as this will enhance the overall flavor of the dessert.
If using frozen blueberries, thaw them completely and drain any excess liquid before making the sauce. When poking holes in the cake, be gentle to avoid tearing it apart.
Finally, for a decorative touch, sprinkle extra lemon zest or a few fresh blueberries on top of the whipped cream frosting before serving. This will add a beautiful finish and a hint of extra flavor.
Tres Leches Twist
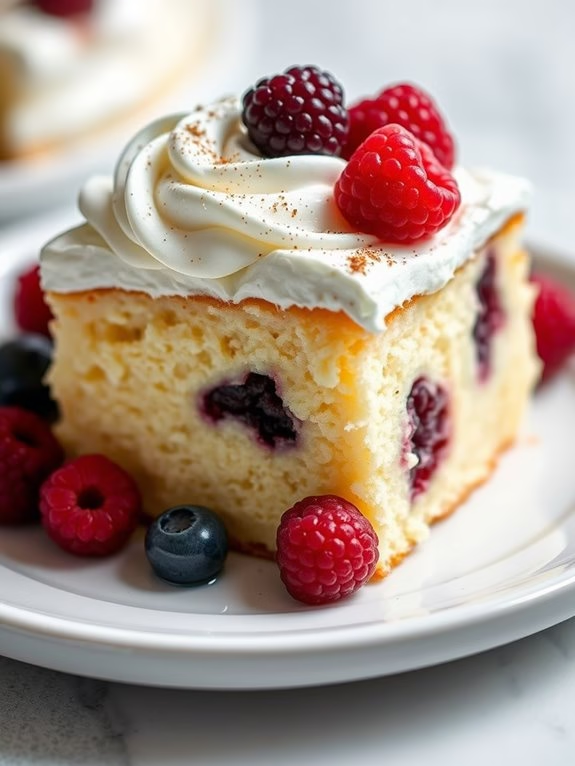
Tres Leches Twist Poke Cake
Tres Leches Cake is a traditional Latin American dessert known for its moist texture and rich flavor, achieved by soaking a sponge cake in three types of milk: evaporated milk, condensed milk, and heavy cream. This Tres Leches Twist Poke Cake adds a modern flair to the classic recipe by incorporating a unique blend of flavors and textures, making it perfect for any celebration or dessert craving.
The cake is light and airy, while the milky mixture is creamy and sweet, creating a delightful contrast that will leave your taste buds craving more. This recipe serves 4-6 people and is an excellent choice for those who want to impress their guests with a delicious and unique dessert.
The preparation involves baking a simple sponge cake, poking holes throughout the cake, and then drenching it with the luscious milk mixture. The result is a moist and flavorful cake that’s both comforting and indulgent. To enhance the traditional flavors, this recipe adds a hint of vanilla and a touch of cinnamon to the milk mixture, providing a warm and inviting aroma that complements the cake’s sweetness.
Ingredients (serves 4-6):
- 1 cup all-purpose flour
- 1 1/2 teaspoons baking powder
- 1/4 teaspoon salt
- 5 large eggs, separated
- 1 cup granulated sugar
- 1/3 cup whole milk
- 1 teaspoon vanilla extract
- 1 can (12 ounces) evaporated milk
- 1 can (14 ounces) sweetened condensed milk
- 1/4 cup heavy cream
- 1/2 teaspoon ground cinnamon
- Whipped cream and fresh berries for topping (optional)
Cooking Instructions:
- Preheat the Oven: Set your oven to 350°F (175°C) and prepare a 9×13 inch baking dish by greasing it lightly with butter or non-stick spray.
- Mix Dry Ingredients: In a medium-sized bowl, whisk together the flour, baking powder, and salt. Set aside.
- Beat Egg Yolks and Sugar: In a large bowl, beat the egg yolks with 3/4 cup of sugar until the mixture is pale yellow and thick. Stir in the whole milk and vanilla extract.
- Combine with Dry Ingredients: Gradually add the dry ingredients to the egg yolk mixture, stirring until just combined.
- Whip Egg Whites: In a separate bowl, beat the egg whites until soft peaks form. Gradually add the remaining 1/4 cup sugar and continue to beat until stiff peaks form.
- Fold Egg Whites into Batter: Gently fold the egg whites into the batter, being careful not to deflate the mixture.
- Bake the Cake: Pour the batter into the prepared baking dish and bake for 25-30 minutes, or until a toothpick inserted into the center comes out clean.
- Prepare the Milk Mixture: While the cake is baking, combine the evaporated milk, sweetened condensed milk, heavy cream, and cinnamon in a bowl. Mix well.
- Cool and Poke the Cake: Once the cake has finished baking, allow it to cool for 10 minutes. Then, using a fork, poke holes all over the surface of the cake.
- Drench with Milk Mixture: Slowly pour the milk mixture over the cake, making sure it seeps into all the holes. Refrigerate the cake for at least 1 hour, allowing it to fully absorb the mixture.
- Serve and Garnish: Before serving, top the cake with whipped cream and fresh berries if desired. Slice and serve chilled.
Extra Tips:
For an extra flavor boost, consider adding a tablespoon of rum or coconut milk to the milk mixture for a tropical twist.
Make sure the cake is completely cooled before poking holes to prevent crumbling. When pouring the milk mixture, take your time to let it absorb fully, which will guarantee every bite is perfectly moist.
If you prefer a less sweet cake, reduce the amount of sweetened condensed milk slightly. Finally, for the best taste, prepare this cake a day in advance to allow the flavors to meld beautifully.
Caramel Apple Indulgence
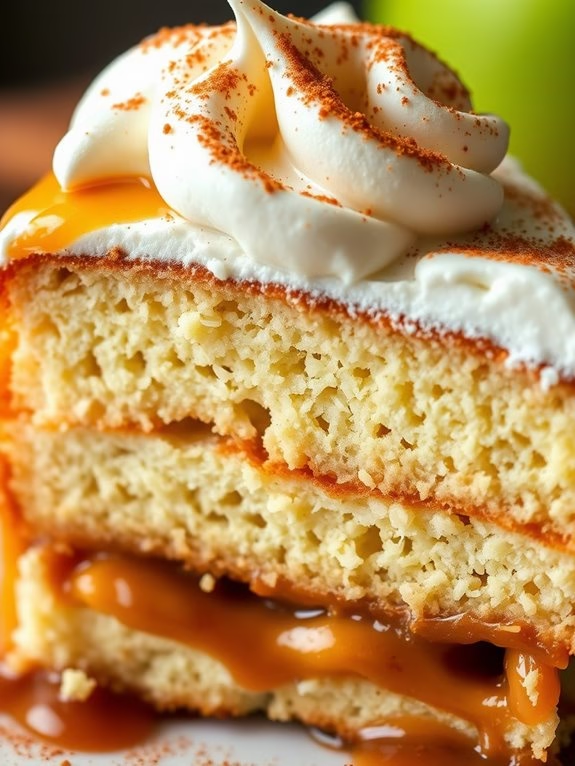
Caramel Apple Indulgence Poke Cake
Indulge in the delightful fusion of caramel and apple with this irresistible Caramel Apple Indulgence Poke Cake. Perfect for a cozy autumn gathering or a special dessert treat, this cake combines the rich flavors of caramel and spiced apples with a moist and tender cake base.
The unique “poke” technique allows the luscious caramel sauce to seep into the cake, creating a gooey and flavorful experience in every bite. With a topping of whipped cream and a sprinkle of cinnamon, this cake promises to be a showstopper at any occasion.
Begin by preparing a simple vanilla cake base and transform it into a gourmet delight with the addition of caramel sauce and spiced apple filling. The process is straightforward yet results in a cake that tastes like it took hours to prepare. This recipe serves 4-6 people, making it an ideal choice for a family dessert or an intimate gathering. Prepare to wow your guests with this delectable, autumn-inspired treat.
Ingredients:
- 1 box vanilla cake mix
- 3 large eggs
- 1 cup water
- 1/3 cup vegetable oil
- 1 can (21 oz) apple pie filling
- 1 cup caramel sauce
- 1 teaspoon cinnamon
- 1/2 teaspoon nutmeg
- 1 cup heavy cream
- 2 tablespoons powdered sugar
- 1 teaspoon vanilla extract
Cooking Instructions:
- Prepare the Cake Batter: Preheat your oven to 350°F (175°C). In a large mixing bowl, combine the vanilla cake mix, eggs, water, and vegetable oil. Mix well until the batter is smooth and free of lumps.
- Bake the Cake: Pour the batter into a greased 9×13 inch baking dish. Bake in the preheated oven for 25-30 minutes or until a toothpick inserted into the center comes out clean. Once baked, remove the cake from the oven and allow it to cool for about 15 minutes.
- Poke the Cake: Using the handle of a wooden spoon, poke holes all over the surface of the cake, spacing them about an inch apart. This will allow the caramel sauce to seep into the cake, making it flavorful and moist.
- Add Caramel and Apple Filling: Pour the caramel sauce evenly over the cake, ensuring it seeps into the holes. In a separate bowl, mix the apple pie filling with cinnamon and nutmeg. Spread this mixture evenly over the caramel-covered cake.
- Prepare Whipped Cream Topping: In a chilled bowl, whip the heavy cream with powdered sugar and vanilla extract until soft peaks form. Spread the whipped cream over the top of the cake using a spatula.
- Chill and Serve: Refrigerate the cake for at least 2 hours to allow the flavors to meld together. Once chilled, slice and serve your Caramel Apple Indulgence Poke Cake, optionally garnished with a sprinkle of cinnamon on top.
Extra Tips:
For an added crunch, consider sprinkling chopped pecans or walnuts over the whipped cream topping before serving.
If you want to add a homemade touch to the caramel sauce, you can easily make it by melting sugar over medium heat until it turns a golden brown, then adding butter and cream.
Make sure the cake is completely cool before adding the whipped cream topping to prevent it from melting. Enjoy this delicious dessert with a warm cup of apple cider for the ultimate fall treat.
Strawberry Shortcake Dream
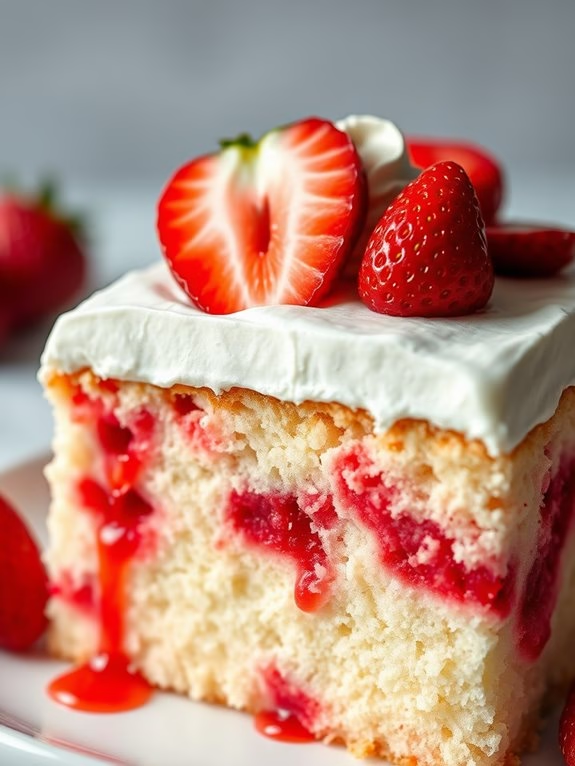
Strawberry Shortcake Dream is a delightful twist on the classic dessert that combines the moistness of a poke cake with the fresh flavors of strawberry shortcake. This dessert is perfect for summer gatherings or anytime you want to treat your friends and family to something special.
The cake is infused with a sweet strawberry syrup that guarantees every bite is bursting with flavor, and it’s topped with a light, creamy frosting and fresh strawberries for a revitalizing finish.
This cake isn’t only delicious but also quite simple to make. The process involves baking a basic vanilla cake, poking holes throughout it, and then pouring a homemade strawberry syrup over the top. This allows the syrup to seep into the cake, creating a moist and flavorful dessert.
The final touch is a whipped cream topping that adds a light and airy texture, perfect for complementing the rich strawberry syrup.
Ingredients (Serves 4-6)
- 1 box of vanilla cake mix
- 3 large eggs
- 1/2 cup vegetable oil
- 1 cup water
- 1 cup fresh strawberries, hulled and sliced
- 1/2 cup granulated sugar
- 1/4 cup water
- 1 teaspoon vanilla extract
- 1 package (3.4 oz) instant vanilla pudding mix
- 2 cups cold milk
- 1 tub (8 oz) whipped topping, thawed
- Additional fresh strawberries for garnish
Instructions
- Prepare the Cake Batter: Preheat your oven to 350°F (175°C). In a large mixing bowl, combine the vanilla cake mix, eggs, vegetable oil, and water. Mix until the ingredients are fully incorporated and smooth. Pour the batter into a greased 9×13 inch baking pan.
- Bake the Cake: Bake the cake in the preheated oven for 25-30 minutes or until a toothpick inserted into the center comes out clean. Allow the cake to cool for about 10 minutes.
- Make the Strawberry Syrup: While the cake is baking, prepare the strawberry syrup. In a medium saucepan, combine the sliced strawberries, granulated sugar, and 1/4 cup water. Heat over medium heat, stirring occasionally, until the strawberries break down and the mixture thickens, about 5-7 minutes. Remove from heat and stir in the vanilla extract.
- Poke the Cake: Using the end of a wooden spoon or a straw, poke holes evenly across the surface of the warm cake. Make sure the holes are spaced adequately to allow the syrup to soak through.
- Pour the Syrup: Slowly pour the warm strawberry syrup over the poked cake, making sure it seeps into all the holes. Let the cake cool completely.
- Prepare the Pudding: In a medium bowl, whisk together the instant vanilla pudding mix and cold milk until thickened. Fold in the whipped topping gently until well combined.
- Top the Cake: Spread the pudding mixture evenly over the cooled cake. Refrigerate the cake for at least 2 hours or until set.
- Garnish and Serve: Just before serving, garnish the top of the cake with additional fresh strawberries. Slice and serve chilled.
Extra Tips
For the best texture and flavor, make sure the cake is fully cooled before adding the pudding mixture. This will help the topping set properly without becoming runny.
Additionally, for a more intense strawberry flavor, consider adding a tablespoon of strawberry jam to the syrup mix. It can also be helpful to use a clear vanilla extract to maintain the bright color of the strawberry syrup.
Enjoy your Strawberry Shortcake Dream with a scoop of vanilla ice cream for an extra indulgent treat!
Coconut Cream Fantasy
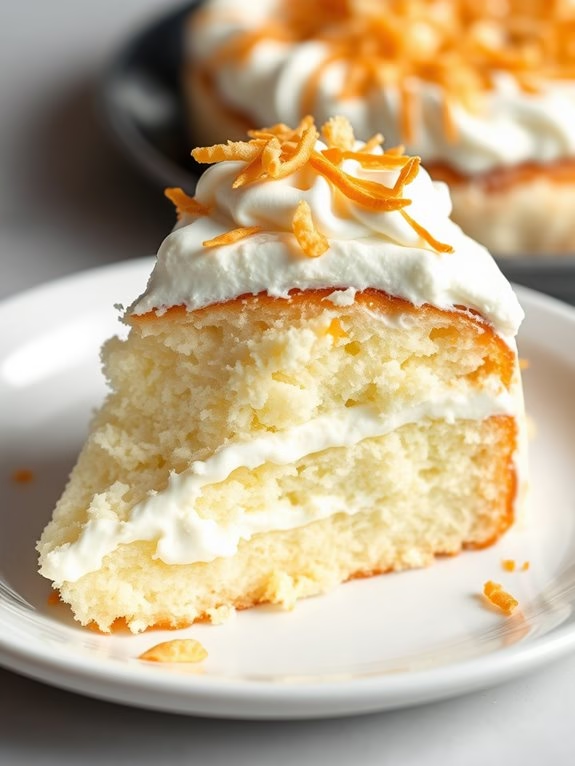
Coconut Cream Fantasy is a delightful poke cake recipe that’s sure to transport your taste buds to a tropical paradise. This scrumptious dessert combines the delicate flavors of coconut with a creamy, luscious filling, making it an ideal treat for any occasion. The moist cake absorbs the rich coconut cream, guaranteeing each bite is bursting with flavor and texture.
Whether you’re hosting a dinner party or simply want to indulge in something sweet, Coconut Cream Fantasy is a must-try for coconut lovers.
Poke cakes are famous for their simplicity and ability to be customized with different flavors and fillings. The Coconut Cream Fantasy is no exception, offering a perfect balance between the soft cake and rich cream. The magic happens when holes are poked into the freshly baked cake, allowing the creamy coconut mixture to seep in, adding moisture and an explosion of coconut flavor.
The cake is then topped with a fluffy whipped cream and sprinkled with toasted coconut flakes, creating an irresistible dessert that’s both elegant and easy to make.
Ingredients (Serves 4-6):
- 1 box white cake mix
- 1 can (14 oz) coconut milk
- 1 can (14 oz) sweetened condensed milk
- 1 cup heavy whipping cream
- 1/4 cup powdered sugar
- 1 teaspoon vanilla extract
- 1 cup sweetened shredded coconut, toasted
Cooking Instructions:
- Prepare the Cake Mix: Preheat your oven to 350°F (175°C). Follow the instructions on the white cake mix box to prepare the batter. Pour the batter into a greased 9×13 inch baking pan and bake for the time recommended on the package instructions.
- Create the Coconut Cream Mixture: While the cake is baking, mix the coconut milk and sweetened condensed milk in a bowl until well combined. This will be used to soak the cake with rich coconut flavor.
- Poke the Cake: Once the cake is baked and still warm, use the handle of a wooden spoon or a similar tool to poke holes evenly across the surface of the cake, ensuring they reach the bottom.
- Infuse the Cake: Pour the coconut cream mixture over the cake, focusing on the holes to guarantee the liquid soaks into the cake. Let the cake cool completely, allowing the flavors to meld together.
- Prepare Whipped Cream Topping: In a chilled bowl, whip the heavy whipping cream with the powdered sugar and vanilla extract until soft peaks form. This will be the fluffy topping for your cake.
- Assemble the Cake: Once the cake has cooled and absorbed the coconut cream mixture, spread the whipped cream evenly over the top of the cake, smoothing it out with a spatula.
- Add Finishing Touches: Sprinkle the toasted shredded coconut evenly over the whipped cream. This adds a delicious crunch and extra coconut flavor.
Extra Tips:
For a more intense coconut flavor, consider adding a teaspoon of coconut extract to the cake batter. To toast the shredded coconut, spread it on a baking sheet and bake in a preheated 350°F (175°C) oven for 5-10 minutes, stirring occasionally, until golden brown.
Be sure to keep a close eye on it to prevent burning. This cake can be made a day in advance, as the flavors deepen over time, making it a perfect make-ahead dessert. Enjoy your Coconut Cream Fantasy cold, straight from the refrigerator for a revitalizing treat.

Red Velvet Surprise
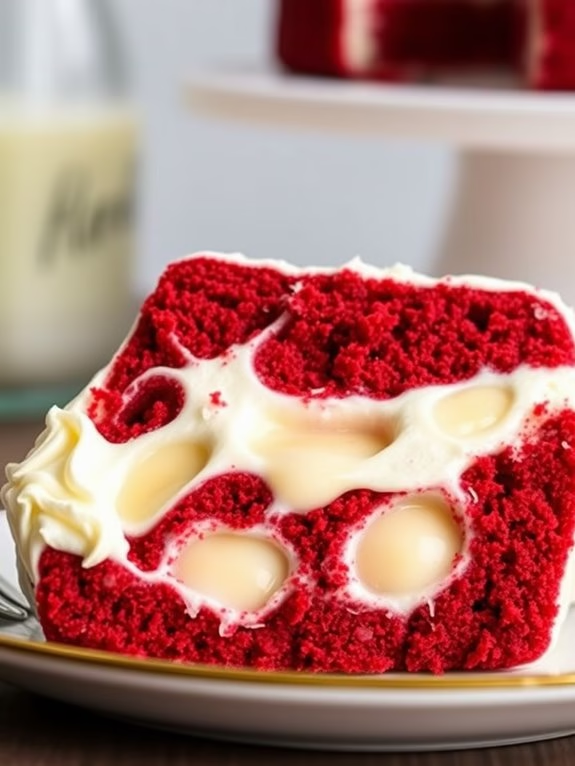
Red Velvet Surprise Poke Cake
Red Velvet Surprise Poke Cake is a delightful twist on the classic red velvet cake that adds an extra layer of flavor and texture. This cake features a moist red velvet base that’s infused with a creamy filling, creating a surprise burst of sweetness with every bite. It’s topped with a luscious cream cheese frosting that complements the rich, velvety cake perfectly, making it an irresistible treat for any occasion.
Ideal for a gathering with family and friends, this cake serves 4-6 people and is sure to impress with its vibrant color and decadent taste.
The secret to the “surprise” element of this cake lies in the technique of poking holes into the baked cake and filling them with a delicious, creamy mixture. This method guarantees that every slice has a delightful combination of cake and filling, offering a unique experience that elevates the traditional red velvet cake to new heights.
Whether you’re a seasoned baker or a novice, this recipe is straightforward and rewarding, providing a perfect opportunity to create a stunning dessert that will leave your guests in awe.
Ingredients (Serves 4-6):
- 1 box of red velvet cake mix
- 1 cup of water
- 1/3 cup of vegetable oil
- 3 large eggs
- 1 package (3.4 oz) of instant vanilla pudding mix
- 2 cups of cold milk
- 1 cup of heavy cream
- 1/4 cup of powdered sugar
- 1 teaspoon of vanilla extract
- 1 package (8 oz) of cream cheese, softened
- 1/2 cup of unsalted butter, softened
- 2 cups of powdered sugar
- 1 teaspoon of vanilla extract
Cooking Instructions:
- Preheat the Oven: Begin by preheating your oven to 350°F (175°C). This guarantees that the oven is at the right temperature when your cake batter is ready to be baked.
- Prepare the Cake Batter: In a large mixing bowl, combine the red velvet cake mix, water, vegetable oil, and eggs. Use an electric mixer to beat the mixture on low speed for about 30 seconds, then increase to medium speed and beat for 2 minutes until the batter is smooth.
- Bake the Cake: Pour the batter into a greased 9×13 inch baking pan. Place the pan in the preheated oven and bake for 30-35 minutes, or until a toothpick inserted into the center comes out clean.
- Prepare the Filling: While the cake is baking, whisk together the instant vanilla pudding mix and cold milk in a medium bowl for about 2 minutes, or until the mixture thickens. Set aside.
- Poke the Cake: Once the cake is baked, remove it from the oven and allow it to cool for about 10 minutes. Use the handle of a wooden spoon or a large straw to poke holes all over the cake, spaced about an inch apart.
- Fill the Cake: Pour the prepared pudding mixture over the cake, guaranteeing that it fills the holes. Gently spread any remaining pudding evenly over the surface of the cake.
- Whip the Cream: In a separate bowl, beat the heavy cream, powdered sugar, and vanilla extract with an electric mixer on high speed until stiff peaks form. Gently spread this whipped cream over the pudding layer on the cake.
- Prepare the Frosting: In a large bowl, beat together the softened cream cheese and butter until creamy. Gradually add the powdered sugar and vanilla extract, beating until smooth and fluffy.
- Frost the Cake: Carefully spread the cream cheese frosting over the whipped cream layer on the cake. Guarantee it’s evenly distributed for a smooth finish.
- Chill and Serve: Refrigerate the cake for at least 2 hours before serving. This allows the flavors to meld and the cake to set properly.
Extra Tips:
For the best results, verify all your ingredients are at room temperature before starting, particularly the cream cheese and butter, which will make the frosting easier to prepare.
If you prefer a more intense vanilla flavor in the filling, consider adding a few extra drops of vanilla extract.
Also, when poking holes in the cake, be sure to reach all the way to the bottom for an even distribution of the pudding filling.
Finally, if you wish to add a decorative touch, consider sprinkling some red velvet cake crumbs or chocolate shavings on top of the frosting before serving.
S’mores Sensation
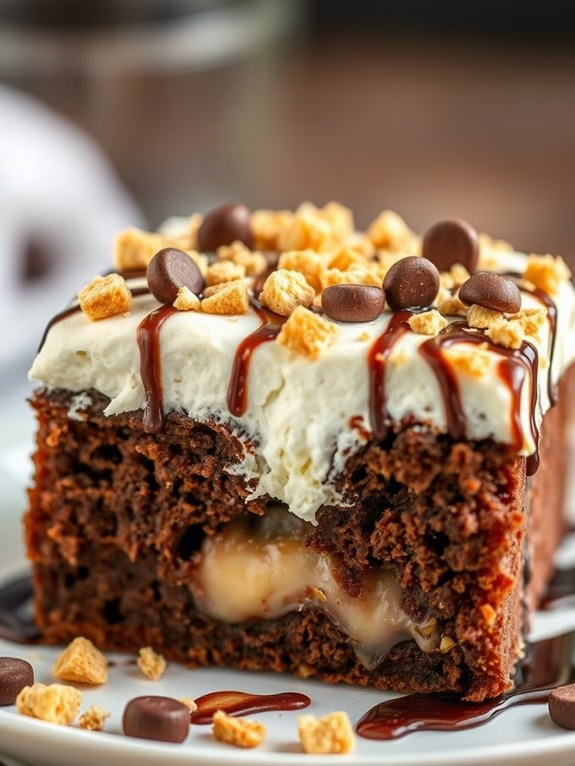
S’mores Sensation Poke Cake is a delightful fusion of the classic campfire treat and a moist, delectable cake. This dessert takes the beloved flavors of graham crackers, marshmallows, and chocolate, and transforms them into a mouthwatering poke cake that’s perfect for any occasion. The cake isn’t only easy to make but also serves as a show-stopping centerpiece at parties, family gatherings, or any event where a sweet treat is needed.
This poke cake is all about layers of flavor and texture. The base is a rich chocolate cake, which is then infused with a luscious chocolate pudding mixture that seeps into the holes poked throughout the cake. Topped off with a fluffy marshmallow topping and finished with crumbled graham crackers and a drizzle of chocolate syrup, this dessert captures the essence of s’mores in every bite. The combination of the creamy filling and the light topping results in a dessert that’s both satisfying and irresistible.
Ingredients (Serving Size: 4-6 people)
- 1 box chocolate cake mix
- 1 cup water
- 1/2 cup vegetable oil
- 3 large eggs
- 1 box (3.9 oz) instant chocolate pudding mix
- 2 cups cold milk
- 1 jar (7 oz) marshmallow creme
- 1 cup whipped topping
- 1 cup crushed graham crackers
- 1/2 cup mini chocolate chips
- 1/4 cup chocolate syrup
Cooking Instructions
- Preheat and Prepare Cake: Preheat your oven to 350°F (175°C). Grease and flour a 9×13 inch baking dish. In a large mixing bowl, combine the chocolate cake mix, water, vegetable oil, and eggs. Mix until well combined and smooth. Pour the batter into the prepared baking dish.
- Bake the Cake: Place the baking dish in the preheated oven and bake for 30-35 minutes, or until a toothpick inserted into the center of the cake comes out clean. Once baked, remove the cake from the oven and allow it to cool for about 10 minutes.
- Poke the Cake: Using the handle of a wooden spoon, poke holes all over the top of the cake, spacing them about 1 inch apart.
- Prepare the Pudding: In a medium bowl, whisk together the instant chocolate pudding mix and cold milk for about 2 minutes, until the pudding is slightly thickened. Pour the pudding evenly over the cake, ensuring it seeps into the holes.
- Chill the Cake: Cover the cake with plastic wrap and refrigerate for at least 1 hour, allowing the pudding to set and fully integrate with the cake.
- Top with Marshmallow Mixture: In a microwave-safe bowl, heat the marshmallow creme for about 15-20 seconds to make it easier to spread. Fold in the whipped topping until smooth. Spread this mixture evenly over the chilled cake.
- Add Garnishes: Sprinkle the crushed graham crackers and mini chocolate chips over the marshmallow topping. Drizzle the chocolate syrup over the top to finish.
- Serve: Slice the cake into squares and serve chilled. Enjoy the delightful combination of s’mores flavors in every bite.
Extra Tips
To make this S’mores Sensation Poke Cake even more flavorful, consider toasting the graham cracker crumbs lightly in a skillet for a deeper flavor. If you want to add extra crunch, you can also incorporate some crushed nuts like almonds or walnuts.
Additionally, if you have a kitchen torch, you can lightly toast the marshmallow topping for an authentic campfire taste. Serve the cake chilled or at room temperature, depending on your preference, and watch it disappear as your guests savor each delicious bite.
Pineapple Coconut Escape

Pineapple Coconut Escape Poke Cake
Indulge in the tropical flavors of the Pineapple Coconut Escape Poke Cake, a delightful dessert that brings together the tangy sweetness of pineapple with the rich creaminess of coconut. This cake isn’t only visually stunning but also a burst of taste and texture, making it perfect for any occasion or simply to satisfy your sweet tooth.
With each bite, you’ll experience a luscious combination of moist cake, creamy pudding, and a topping that feels like a tropical breeze.
The Pineapple Coconut Escape Poke Cake begins with a base of light and fluffy cake, which is infused with a pineapple-flavored pudding mix to create a moist and flavorful foundation. Once baked, the cake is poked to allow a delicious coconut cream mixture to seep into every bite. Topped with whipped cream and a sprinkle of shredded coconut, this cake is a true indulgence that transports you to a sunny paradise with every forkful.
Ingredients (Serves 4-6):
- 1 box of yellow cake mix
- 3 large eggs
- 1/2 cup vegetable oil
- 1 cup water
- 1 package (3.4 oz) instant pineapple pudding mix
- 1 can (14 oz) sweetened condensed milk
- 1 can (8 oz) crushed pineapple, drained
- 1 cup coconut milk
- 1 cup heavy whipping cream
- 1 cup shredded coconut
- 1/4 cup powdered sugar
- 1 teaspoon vanilla extract
Cooking Instructions:
1. Prepare the Cake Batter:
Preheat your oven to 350°F (175°C). In a large mixing bowl, combine the yellow cake mix, eggs, vegetable oil, and water. Beat the mixture on medium speed with an electric mixer for about 2 minutes until smooth and well combined.
2. Bake the Cake:
Grease a 9×13-inch baking pan and pour the cake batter into it. Smooth the top with a spatula. Bake in the preheated oven for 25-30 minutes or until a toothpick inserted into the center comes out clean. Remove the cake from the oven and let it cool slightly.
3. Prepare the Pineapple Pudding:
In a separate bowl, prepare the pineapple pudding mix according to package directions. Typically, this involves whisking the pudding mix with cold milk until it thickens. Once thickened, gently fold in the drained crushed pineapple.
4. Poke the Cake:
Using the handle of a wooden spoon, poke holes all over the top of the warm cake at about 1-inch intervals. Pour the pineapple pudding mixture over the cake, spreading it evenly to guarantee it seeps into the holes.
5. Make the Coconut Cream Topping:
In another bowl, combine the sweetened condensed milk and coconut milk. Pour this mixture over the cake, allowing it to soak into the holes and the cake itself. Refrigerate the cake for at least 2 hours to let it set.
6. Whip the Cream:
In a chilled bowl, whip the heavy cream, powdered sugar, and vanilla extract together until stiff peaks form. Spread the whipped cream over the chilled cake as a topping.
7. Finish with Coconut:
Sprinkle shredded coconut evenly over the top of the whipped cream layer. You can toast the coconut beforehand for extra flavor and texture if desired.
8. Serve:
Slice the cake into squares and serve chilled. Enjoy the invigorating tropical flavors with every bite!
Tips:
For an extra burst of flavor, you can add a splash of rum extract to the coconut milk mixture. If you prefer a more textured experience, consider toasting the shredded coconut in a dry skillet over medium heat until golden brown before using it as a topping.
To store, keep the cake covered in the refrigerator for up to 3 days, maintaining its moistness and flavor. Remember, the longer the cake chills, the more the flavors meld together, making it even more delicious!
Peanut Butter Cup Explosion
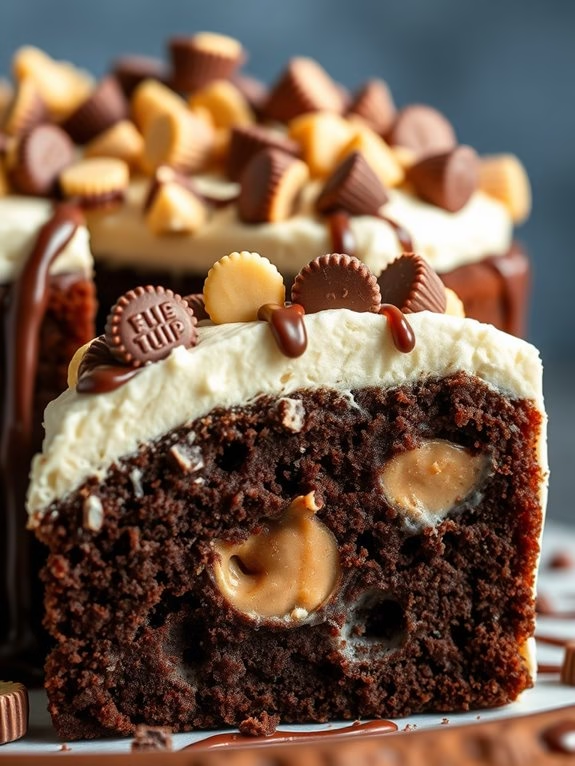
Indulge your sweet tooth and experience a burst of flavor with the Peanut Butter Cup Explosion poke cake. This delightful dessert combines the rich flavors of chocolate and peanut butter, creating a decadent treat that’s sure to satisfy any craving. Perfect for parties, gatherings, or simply as a special treat for yourself, this cake is a showstopper.
The magic of a poke cake lies in its ability to absorb delicious toppings, making every bite a moist, flavor-packed experience. The Peanut Butter Cup Explosion takes this concept to the next level by infusing the cake with creamy peanut butter, chocolate pudding, and a generous topping of peanut butter cups.
The cake is first baked to perfection, then holes are poked into it, allowing the luscious fillings to seep in and create a delightful surprise in every slice. Whether you’re a seasoned baker or just starting out, this recipe is easy to follow and guarantees a scrumptious result.
Ingredients (serves 4-6 people):
- 1 box of chocolate cake mix (plus ingredients required by the box)
- 1 cup of creamy peanut butter
- 1 cup of milk
- 1 package (3.9 ounces) of instant chocolate pudding mix
- 1 cup of heavy cream
- 2 tablespoons of powdered sugar
- 1 teaspoon of vanilla extract
- 1 cup of mini peanut butter cups, chopped
- Chocolate syrup (optional, for drizzling)
Instructions:
- Prepare the Cake Batter: Start by preheating your oven to the temperature specified on the chocolate cake mix box. Follow the instructions on the box to prepare the cake batter. Pour the batter into a greased 9×13 inch baking pan.
- Bake the Cake: Place the pan in the preheated oven and bake according to the package instructions, usually around 25-30 minutes, or until a toothpick inserted into the center comes out clean. Once baked, remove from the oven and let it cool slightly.
- Poke the Cake: Once the cake has cooled for about 10 minutes, use the handle of a wooden spoon or a similar object to poke holes all over the cake, about 1 inch apart.
- Prepare the Filling: In a medium bowl, combine the peanut butter and milk, stirring until smooth and fully combined. Pour this mixture over the cake, making sure it fills all the holes.
- Prepare the Pudding: In another bowl, mix the instant chocolate pudding mix with 2 cups of cold milk (or as instructed on the package). Whisk for about 2 minutes until it thickens, then pour over the cake, spreading evenly.
- Chill the Cake: Place the cake in the refrigerator for at least 2 hours to allow the fillings to set.
- Make the Whipped Topping: In a mixing bowl, beat the heavy cream, powdered sugar, and vanilla extract together until soft peaks form. Spread this whipped cream over the chilled cake.
- Garnish the Cake: Sprinkle the chopped mini peanut butter cups on top of the whipped cream layer. Drizzle with chocolate syrup if desired.
- Serve and Enjoy: Cut into pieces and serve. Enjoy the rich and creamy flavors of your Peanut Butter Cup Explosion poke cake!
Extra Tips: For an added touch of peanut butter flavor, you can melt some extra peanut butter and drizzle it over the cake before serving. If you prefer a more intense chocolate flavor, consider using a chocolate fudge cake mix and adding chocolate chips to the batter.
Make sure the cake is completely cooled before adding the whipped topping to prevent it from melting. For best results, refrigerate the cake overnight to allow the flavors to meld together beautifully.
Cookies and Cream Bliss
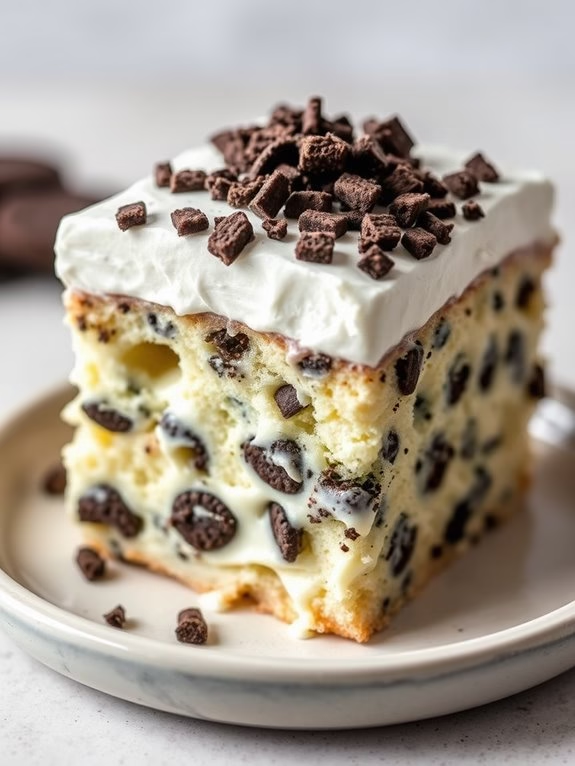
Cookies and Cream Bliss Poke Cake****
Indulge in a dessert that brings together the delightful combination of cookies and cream with the classic appeal of a poke cake. This Cookies and Cream Bliss Poke Cake is perfect for any occasion, offering a soft and moist cake infused and topped with creamy, cookie-filled goodness.
As the cake bakes, it fills the kitchen with a sweet aroma that will have everyone excitedly anticipating a slice. Once you poke holes through the baked cake, a rich cookies and cream pudding mixture is poured over, seeping into every crevice and making sure each bite is luscious and flavorful.
This dessert not only looks impressive but is also incredibly easy to make. It’s a fantastic way to end a meal or to serve at gatherings, where it’s sure to be a crowd-pleaser. The creamy topping, combined with the soft cake and crunchy cookie bits, creates a texture profile that’s second to none.
The following recipe serves 4-6 people, making it perfect for a small group or as a special treat for your family.
Ingredients:
- 1 box of white cake mix
- 1 cup of water
- 1/2 cup of vegetable oil
- 3 large eggs
- 1 package (3.4 oz) instant cookies and cream pudding mix
- 2 cups of cold milk
- 1 container (8 oz) whipped topping, thawed
- 10 chocolate sandwich cookies, crushed
Instructions:
- Prepare the Cake: Preheat your oven to 350°F (175°C). In a large mixing bowl, combine the white cake mix, water, vegetable oil, and eggs. Mix until the batter is smooth and well combined. Pour the batter into a greased 9×13 inch baking dish.
- Bake the Cake: Place the baking dish in the preheated oven and bake for 25-30 minutes, or until a toothpick inserted in the center comes out clean. Remove the cake from the oven and let it cool for about 10 minutes.
- Poke the Cake: Using the handle of a wooden spoon, poke holes all over the cake, making sure they’re evenly spaced and cover the entire surface.
- Prepare the Pudding Mixture: In a separate bowl, whisk together the instant cookies and cream pudding mix and cold milk until the mixture thickens slightly, about 2 minutes.
- Pour the Pudding: Pour the prepared pudding mixture evenly over the cake, making sure it fills the holes. Gently spread it with a spatula if necessary.
- Top with Whipped Topping: Spread the whipped topping over the pudding layer, making sure it covers the entire cake evenly.
- Add Cookie Crumbs: Sprinkle the crushed chocolate sandwich cookies over the top of the whipped topping.
- Chill: Cover the cake with plastic wrap and refrigerate for at least 2 hours, allowing the pudding to set and the flavors to meld.
Extra Tips:
For added texture, consider saving a few whole cookies to use as decorative toppings on each slice before serving. This not only adds a nice visual touch but also enhances the cookies and cream theme.
If you’re making this dish ahead of time, it can be refrigerated overnight, which allows the flavors to develop even more. Be sure to allow the cake to chill thoroughly, as this makes sure the pudding sets properly and the cake absorbs all the delicious flavors.
Enjoy your Cookies and Cream Bliss Poke Cake with a tall glass of milk or a scoop of vanilla ice cream for an extra indulgent treat!
Banana Pudding Perfection
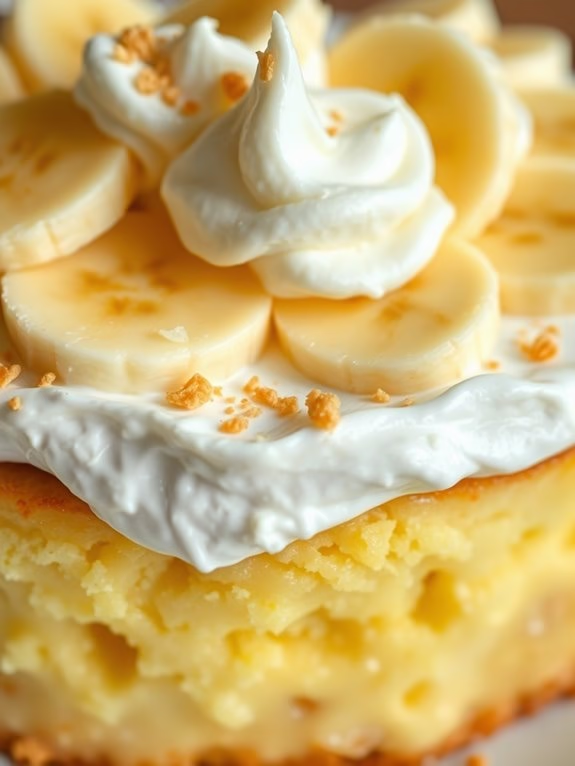
Banana Pudding Perfection Poke Cake
Banana Pudding Perfection Poke Cake is a delightful fusion of traditional banana pudding and a moist, fluffy cake – a treat that will leave you craving more with every bite. This dessert combines the flavorful essence of ripe bananas and the creamy texture of pudding, all nestled within a tender cake. The poke cake technique allows the pudding to seep into the cake, creating a deliciously moist and flavorful dessert experience.
Perfect for family gatherings or a simple evening treat, this cake is sure to impress with its rich flavors and beautiful presentation.
The magic of this recipe lies in its simplicity and the combination of familiar, comforting flavors. By using a few basic ingredients and following a straightforward process, you can create a dessert that tastes like it took hours to prepare. The layers of cake and pudding, topped with a dollop of whipped cream and fresh banana slices, make for a visually stunning dish that’s as delicious as it looks.
Enjoy this Banana Pudding Perfection Poke Cake with friends and family and watch it disappear in no time.
Ingredients (Serves 4-6):
- 1 box yellow cake mix
- 3 large eggs
- 1 cup water
- 1/3 cup vegetable oil
- 2 boxes (3.4 oz each) instant banana pudding mix
- 4 cups cold milk
- 4 ripe bananas, sliced
- 1 tub (8 oz) whipped topping
- 1/2 cup crushed vanilla wafers
Cooking Instructions:
- Preheat and Prepare Cake Mix: Preheat your oven to 350°F (175°C). In a large mixing bowl, combine the yellow cake mix, eggs, water, and vegetable oil. Mix on medium speed for about 2 minutes until the batter is smooth and well combined.
- Bake the Cake: Pour the cake batter into a greased 9×13 inch baking dish. Spread it evenly and bake in the preheated oven for 25 to 30 minutes, or until a toothpick inserted into the center comes out clean. Remove the cake from the oven and allow it to cool for about 10 minutes.
- Poke the Cake: Once slightly cooled, use the end of a wooden spoon or a straw to poke holes all over the cake, spacing them about an inch apart.
- Prepare the Pudding Mix: In a medium bowl, whisk together the instant banana pudding mix and cold milk until well combined and slightly thickened, about 2 minutes.
- Pour Pudding Over Cake: Pour the prepared pudding over the cake, ensuring that it fills the holes and covers the entire surface. Use a spatula to spread it evenly if necessary.
- Chill the Cake: Cover the cake with plastic wrap and refrigerate for at least 2 hours, allowing the pudding to set and soak into the cake.
- Add Banana Slices: Before serving, arrange the sliced bananas over the pudding layer.
- Top with Whipped Topping: Spread the whipped topping over the bananas, covering the entire cake.
- Garnish with Vanilla Wafers: Sprinkle the crushed vanilla wafers over the whipped topping for added texture and flavor.
Extra Tips:
For the best banana flavor, use bananas that are ripe but not overly mushy. If you prefer a stronger banana taste, you can also add a few drops of banana extract to the pudding mix.
To prevent the banana slices from browning, you can dip them in a little lemon juice before arranging them on the cake. This cake can be made a day in advance and stored in the refrigerator, making it a convenient option for parties and gatherings.
Enjoy your Banana Pudding Perfection Poke Cake chilled for the best taste and texture.
Raspberry Lemonade Refresh

Raspberry Lemonade Refresh is a delightful poke cake that brings together the tangy flavor of lemonade and the sweet, tart burst of raspberries. Perfect for summer gatherings or a light dessert after a hearty meal, this cake is designed to refresh and impress. The magic of this cake lies in its moistness, achieved through the “poke” technique where holes are made in the baked cake and filled with a luscious raspberry lemonade mixture. Each bite delivers a perfect balance of zesty and sweet, making it an irresistible treat for all ages.
The Raspberry Lemonade Refresh isn’t only visually appealing with its vibrant colors but also offers a unique texture and flavor that will have your family and friends asking for seconds. The preparation and cooking process is straightforward, making it a fun baking project even for beginners. Once completed, this cake can be garnished with fresh raspberries and a dollop of whipped cream, adding an extra layer of indulgence.
Ingredients (Serves 4-6)
- 1 box (15.25 oz) lemon cake mix
- 1 cup water
- 1/2 cup vegetable oil
- 3 large eggs
- 1 package (3 oz) raspberry flavored gelatin
- 1 cup boiling water
- 1/2 cup cold water
- 1/2 cup lemonade concentrate
- 1 cup fresh raspberries
- Whipped cream for topping (optional)
- Extra fresh raspberries for garnish (optional)
Cooking Instructions
- Preheat Oven and Prepare Baking Dish: Preheat your oven to 350°F (175°C). Grease a 9×13 inch baking dish with butter or non-stick spray to guarantee easy removal of the cake later.
- Make the Lemon Cake: In a large mixing bowl, combine the lemon cake mix, 1 cup of water, vegetable oil, and eggs. Mix using an electric mixer on medium speed for 2 minutes until the batter is smooth and well combined.
- Bake the Cake: Pour the batter into the prepared baking dish and smooth the top with a spatula. Bake in the preheated oven for 25-30 minutes, or until a toothpick inserted into the center comes out clean.
- Prepare Raspberry Gelatin Mixture: While the cake is baking, dissolve the raspberry flavored gelatin in 1 cup of boiling water in a medium-sized bowl. Stir until completely dissolved, then add 1/2 cup of cold water and 1/2 cup of lemonade concentrate. Mix well and set aside to cool slightly.
- Poke the Cake: Once the cake is baked, remove it from the oven and allow it to cool for about 15 minutes. Use the handle of a wooden spoon to poke holes evenly throughout the cake, making sure they’re deep enough to reach the bottom.
- Pour Gelatin Mixture Over Cake: Slowly pour the raspberry lemonade mixture over the cake, guaranteeing it fills the holes. Allow the cake to absorb the mixture by refrigerating it for at least 2 hours, or until fully set.
- Garnish and Serve: Once set, garnish the cake with fresh raspberries and a generous layer of whipped cream if desired. Slice and serve chilled.
Extra Tips
For a more intense raspberry flavor, consider using fresh or frozen raspberries to make a homemade raspberry sauce to drizzle over the top of the cake before serving. If you prefer a less sweet cake, reduce the amount of lemonade concentrate.
Always confirm that the cake is completely cooled before adding the gelatin mixture to prevent it from melting. Additionally, this cake can be made a day in advance and stored in the refrigerator to let the flavors meld even more.
Tiramisu Temptation
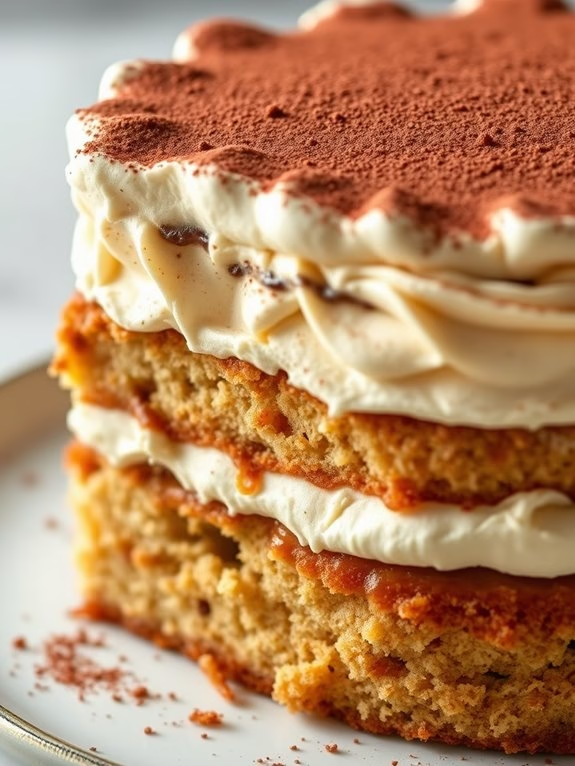
Tiramisu Temptation Poke Cake
Tiramisu Temptation Poke Cake is a delightful twist on the classic Italian dessert, combining the rich flavors of espresso, creamy mascarpone, and a touch of cocoa powder with the simplicity of a poke cake. This dessert is perfect for gatherings, offering a sophisticated taste that’s surprisingly easy to prepare.
By infusing the cake with a coffee-flavored syrup and topping it with a luscious mascarpone frosting, this recipe captures the essence of tiramisu while being accessible for bakers of any level.
This recipe is designed to serve 4-6 people, making it an ideal choice for a small dinner party or a cozy family dessert. The moist cake base absorbs the coffee syrup, guaranteeing each bite is bursting with flavor. The creamy topping adds a luxurious element that balances the bold coffee taste, making every forkful an indulgence.
Follow the steps below to create your own Tiramisu Temptation Poke Cake and impress your guests with this easy yet elegant dessert.
Ingredients:
- 1 box of vanilla cake mix (and ingredients required to make it, as per package)
- 1 cup strong brewed coffee or espresso, cooled
- 2 tablespoons sugar
- 1 teaspoon vanilla extract
- 1 cup mascarpone cheese
- 1 cup heavy whipping cream
- 1/2 cup powdered sugar
- 2 tablespoons cocoa powder
- 1 tablespoon coffee liqueur (optional)
Instructions:
- Prepare the Cake Base: Preheat your oven to 350°F (175°C) and prepare the vanilla cake mix according to the package instructions. Pour the batter into a greased 9×13 inch baking dish and bake until a toothpick inserted into the center comes out clean. This usually takes about 25-30 minutes. Allow the cake to cool completely in the pan.
- Make the Coffee Syrup: While the cake is baking, prepare the coffee syrup. In a small bowl, combine the cooled brewed coffee, 2 tablespoons of sugar, and the vanilla extract. Stir until the sugar has dissolved completely.
- Poke the Cake: Once the cake has cooled, use the end of a wooden spoon or a skewer to poke holes all over the top of the cake, spacing them about an inch apart.
- Infuse with Coffee Syrup: Slowly pour the coffee syrup evenly over the top of the cake, allowing it to soak into the holes. This will infuse the cake with the rich coffee flavor characteristic of tiramisu.
- Prepare the Mascarpone Frosting: In a large mixing bowl, beat the mascarpone cheese, heavy whipping cream, and powdered sugar together until soft peaks form. If using, add the coffee liqueur for an extra depth of flavor and beat until well incorporated.
- Frost the Cake: Spread the mascarpone frosting evenly over the top of the cake, smoothing it out with a spatula. Be generous to guarantee every piece gets a good amount of frosting.
- Dust with Cocoa Powder: Finally, dust the top of the cake with cocoa powder for that classic tiramisu finish. Use a fine-mesh sieve to ensure an even layer.
Extra Tips:
For an even more authentic tiramisu flavor, consider adding a layer of ladyfinger crumbs on top of the cake before frosting. This adds a bit of texture and an extra nod to the traditional dessert.
If you prefer a stronger coffee flavor, adjust the amount of coffee liqueur to taste or use a stronger brew of coffee. The cake can be made a day in advance, allowing the flavors to meld together beautifully overnight in the refrigerator. Just be sure to cover it tightly to keep the frosting fresh.
Enjoy your Tiramisu Temptation Poke Cake chilled for the best experience!