
The holiday season is here, and I can’t wait to share some amazing dairy-free recipes with you. Picture yourself enjoying creamy butternut squash soup that warms your soul. Add to that vibrant maple-glazed carrots on your plate. The star of the show? A mouthwatering vegan mushroom Wellington. Trust me, even the biggest dairy fans won’t miss a thing.
Creamy Butternut Squash Soup
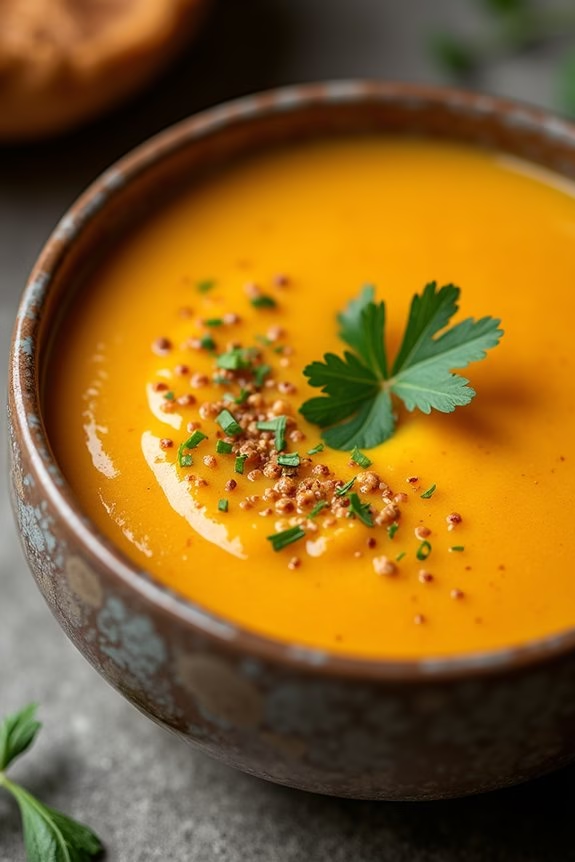
The Dairy-Free Creamy Butternut Squash Soup is a perfect starter for a festive Christmas dinner. This velvety, warming soup isn’t only comforting but also caters to those who are lactose intolerant or following a dairy-free diet. The natural sweetness of butternut squash combined with the aromatic spices creates a rich and flavorful dish that will delight your guests.
This soup is simple to prepare and can be made ahead of time, allowing you to enjoy more time with your loved ones during the holiday celebrations. This recipe yields enough soup to serve 4-6 people, making it ideal for a small family gathering or as an addition to a larger spread.
The key to achieving the creamy texture without dairy is using coconut milk, which blends beautifully with the roasted squash and adds a subtle tropical note. With just a few fresh ingredients and some carefully chosen spices, you can create a soup that’s both nutritious and indulgent, embodying the spirit of Christmas with every spoonful.
Ingredients:
- 1 large butternut squash, peeled and diced
- 2 tablespoons olive oil
- 1 medium onion, chopped
- 3 cloves garlic, minced
- 1 teaspoon ground cumin
- 1 teaspoon ground cinnamon
- 4 cups vegetable broth
- 1 cup full-fat coconut milk
- Salt and pepper to taste
- Freshly chopped parsley for garnish (optional)
Instructions:
- Preheat the Oven and Prepare the Squash: Preheat your oven to 400°F (200°C). Place the diced butternut squash on a baking sheet, drizzle with 1 tablespoon of olive oil, and sprinkle with salt and pepper. Toss to coat evenly and roast for 25-30 minutes, or until the squash is tender and slightly caramelized.
- Sauté the Aromatics: In a large pot, heat the remaining tablespoon of olive oil over medium heat. Add the chopped onion and sauté for about 5 minutes, until translucent. Stir in the minced garlic, cumin, and cinnamon, and cook for an additional 1-2 minutes until the spices are fragrant.
- Combine Ingredients: Add the roasted butternut squash to the pot. Pour in the vegetable broth and bring the mixture to a boil. Reduce the heat to low and let it simmer for about 10 minutes to allow the flavors to meld.
- Blend the Soup: Remove the pot from the heat and use an immersion blender to puree the soup until smooth. Alternatively, you can transfer the soup in batches to a countertop blender, being careful with the hot liquid.
- Add Coconut Milk: Return the soup to the pot if using a countertop blender, and stir in the coconut milk. Heat gently over low heat until warmed through. Taste and adjust seasoning with more salt and pepper if necessary.
- Serve and Garnish: Ladle the soup into bowls and garnish with freshly chopped parsley if desired. Serve hot and enjoy.
Extra Tips:
For an added depth of flavor, consider roasting the squash with a few sprigs of thyme or rosemary. If you prefer a spicier soup, you can add a pinch of cayenne pepper or a dash of chili flakes.
This soup can be made a day in advance and stored in the refrigerator; simply reheat gently on the stove before serving. For a thicker consistency, reduce the amount of vegetable broth slightly or simmer the soup longer to thicken.
Garlic Herb Roasted Potatoes

Garlic Herb Roasted Potatoes are a delightful addition to any dairy-free Christmas dinner menu. These potatoes are roasted to perfection with a combination of aromatic garlic and fresh herbs, creating a crisp exterior and a fluffy interior. The natural flavors are enhanced with just the right amount of seasoning, making them a crowd-pleaser for both kids and adults.
This dish pairs beautifully with a variety of main courses, providing a satisfying and flavorful side that everyone will enjoy. Preparing Garlic Herb Roasted Potatoes is straightforward and requires minimal effort, yet it delivers maximum taste. Whether you’re hosting a holiday feast or enjoying a cozy family dinner, these potatoes are certain to complement your meal.
The use of fresh herbs like rosemary and thyme, combined with the robustness of garlic, infuses the potatoes with a vibrant taste that’s both comforting and festive. Perfect for those following a dairy-free diet, this recipe guarantees that everyone at your table can indulge in a delicious holiday treat.
Ingredients (serves 4-6):
- 2 pounds of baby potatoes, halved
- 3 tablespoons olive oil
- 4 cloves garlic, minced
- 1 tablespoon fresh rosemary, chopped
- 1 tablespoon fresh thyme, chopped
- 1 teaspoon salt
- 1/2 teaspoon black pepper
- Optional: 1 tablespoon chopped parsley for garnish
Cooking Instructions:
- Preheat the Oven: Start by preheating your oven to 425°F (220°C), guaranteeing it’s hot enough to give the potatoes a crispy texture.
- Prepare the Potatoes: Wash and halve the baby potatoes, making sure they’re all approximately the same size for even cooking. Pat them dry with a paper towel to remove excess moisture.
- Mix the Seasoning: In a large mixing bowl, combine the olive oil, minced garlic, chopped rosemary, chopped thyme, salt, and black pepper. Stir well to create a cohesive seasoning mixture.
- Coat the Potatoes: Add the halved potatoes to the bowl with the seasoning mixture. Toss the potatoes until they’re evenly coated with the oil and herb mixture.
- Arrange for Roasting: Spread the seasoned potatoes in a single layer on a large baking sheet. Ensure that they aren’t overcrowded to allow for proper roasting.
- Roast the Potatoes: Place the baking sheet in the preheated oven and roast for 25-30 minutes, flipping the potatoes halfway through to ensure even browning. They should be golden and crispy on the outside while tender on the inside.
- Garnish and Serve: Once roasted, remove the potatoes from the oven and let them cool slightly. Transfer them to a serving dish and garnish with freshly chopped parsley if desired. Serve warm.
Extra Tips:
For the best results, use a variety of baby potatoes such as Yukon Gold or red potatoes, which hold their shape well and have a creamy texture. To intensify the flavor, you can add a sprinkle of lemon zest before serving for a hint of citrus freshness.
If you prefer a spicier dish, consider adding a pinch of red pepper flakes to the seasoning mix. Always verify the oven is fully preheated before placing the potatoes in, as this helps achieve the perfect crispiness.
Stuffed Acorn Squash With Quinoa and Cranberries
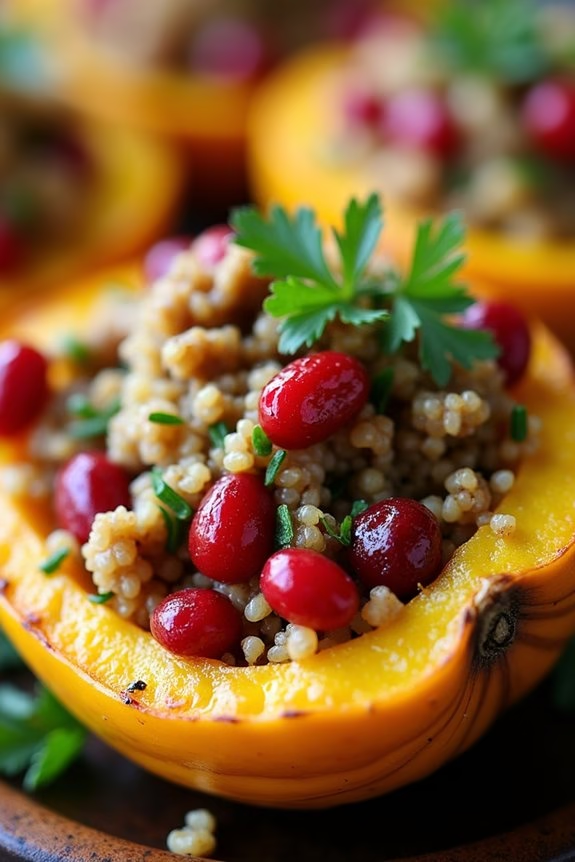
For a festive and hearty dish that’s both delicious and suitable for a dairy-free Christmas dinner, try this Stuffed Acorn Squash with Quinoa and Cranberries. This recipe combines the earthy flavors of acorn squash with the nutty texture of quinoa, complemented by the sweet-tart burst of cranberries.
It’s a vibrant and nutritious option that will add a splash of color and flavor to your holiday table. Whether hosting a gathering or enjoying a quiet dinner with family, this dish is bound to impress and satisfy all palates.
Acorn squash provides a sturdy vessel and a sweet, nutty flavor that pairs beautifully with the filling of quinoa, cranberries, and a medley of spices. The stuffing isn’t only flavorful but also packed with protein, making it a wholesome choice for a main course.
This recipe serves 4-6 people and can be easily doubled for larger gatherings. The preparation is simple and can be done ahead of time, allowing you to enjoy more time with your loved ones.
Ingredients:
- 3 medium acorn squashes, halved and seeded
- 1 cup quinoa, rinsed
- 2 cups vegetable broth
- 1 cup fresh cranberries
- 1/2 cup chopped walnuts
- 1/2 cup chopped celery
- 1/2 cup chopped onion
- 2 tablespoons olive oil
- 1 teaspoon dried thyme
- 1 teaspoon ground cinnamon
- Salt and pepper to taste
- Fresh parsley for garnish (optional)
Cooking Instructions:
1. Preheat the Oven: Set your oven to 400°F (200°C). This temperature will guarantee that the acorn squash becomes perfectly tender while baking.
2. Prepare the Squash: Cut the acorn squashes in half and remove the seeds. Brush the cut sides of the squash with 1 tablespoon of olive oil and sprinkle with salt and pepper.
Place the squash halves cut side down on a baking sheet lined with parchment paper.
3. Bake the Squash: Put the baking sheet in the preheated oven and bake for about 30-35 minutes, or until the squash is tender when pierced with a fork.
4. Cook the Quinoa: While the squash is baking, bring the vegetable broth to a boil in a medium saucepan. Add the rinsed quinoa, reduce the heat to low, cover, and let it simmer for about 15 minutes or until all the broth is absorbed and the quinoa is fluffy.
5. Prepare the Filling: In a large skillet, heat the remaining tablespoon of olive oil over medium heat. Add the chopped onion and celery, and sauté until they’re soft and translucent, about 5 minutes.
Stir in the walnuts, cranberries, thyme, cinnamon, and cooked quinoa. Mix well and season with salt and pepper to taste.
6. Stuff the Squash: Once the squash is baked, remove it from the oven and carefully turn the halves over. Fill each squash cavity with the quinoa mixture, pressing down gently to pack the stuffing.
7. Bake Again: Return the stuffed squash halves to the oven and bake for an additional 10-15 minutes, until everything is heated through and the tops are slightly browned.
8. Serve: Remove from the oven, let cool slightly, and garnish with fresh parsley if desired. Serve warm and enjoy the delightful combination of flavors.
Extra Tips:
To make the process more efficient, you can prepare the quinoa filling a day in advance and store it in the refrigerator.
When ready to serve, simply stuff the squash and bake. If fresh cranberries aren’t available, dried cranberries can be used as an alternative, though they’ll add a slightly sweeter flavor.
For a nut-free version, omit the walnuts or replace them with sunflower seeds. Adjust the seasoning to your taste, adding more cinnamon or thyme if you prefer a stronger flavor profile.
Maple Glazed Carrots
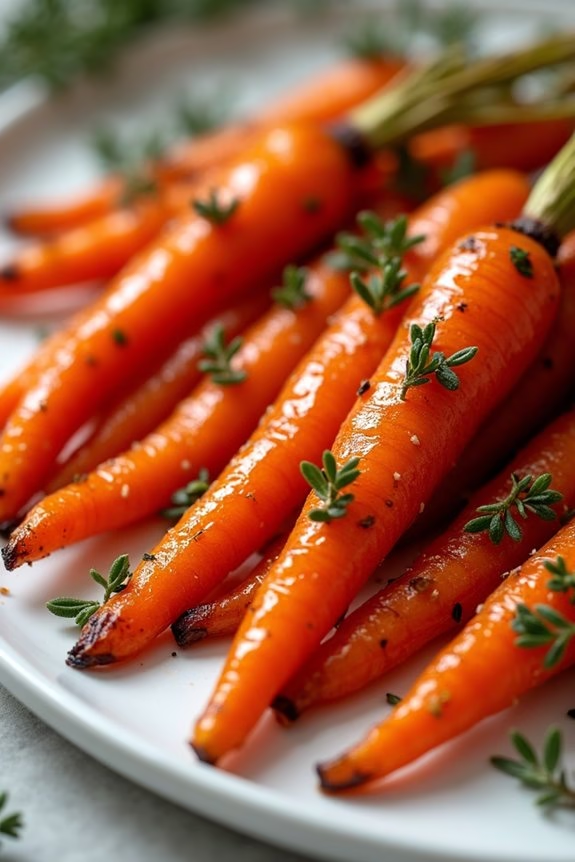
Maple Glazed Carrots are a delightful addition to any dairy-free Christmas dinner, offering a perfect balance of sweetness and savory flavors. The natural sweetness of the carrots is enhanced by the rich, caramelized maple syrup, creating a side dish that’s both simple and elegant.
This recipe isn’t only easy to prepare, but it also provides a vibrant pop of color to your holiday table, making it both a visual and culinary treat. The preparation involves roasting the carrots to bring out their natural sweetness, while the maple glaze adds a lovely glossy finish.
The dish is seasoned with a hint of salt and pepper, which complements the sweetness of the maple. A touch of fresh thyme provides an aromatic depth, making these Maple Glazed Carrots a memorable dish that can be enjoyed by everyone, regardless of dietary restrictions.
Ingredients (serves 4-6):
- 2 pounds of carrots, peeled and cut into 2-inch pieces
- 3 tablespoons olive oil
- 1/4 cup pure maple syrup
- 1 teaspoon salt
- 1/2 teaspoon black pepper
- 1 tablespoon fresh thyme leaves
Instructions:
- Preheat the Oven: Begin by preheating your oven to 400°F (200°C). This will guarantee that the carrots roast evenly and develop a nice caramelization.
- Prepare the Carrots: In a large mixing bowl, combine the peeled and cut carrots with olive oil, salt, and pepper. Toss them well to confirm that each piece is evenly coated with the oil and seasoning.
- Roast the Carrots: Arrange the seasoned carrots in a single layer on a large baking sheet. Place the baking sheet in the preheated oven and roast for about 20-25 minutes, or until the carrots are tender and slightly browned at the edges.
- Prepare the Maple Glaze: While the carrots are roasting, prepare the glaze by placing the maple syrup in a small saucepan over medium heat. Let it simmer gently for about 2-3 minutes, allowing it to thicken slightly.
- Glaze the Carrots: Once the carrots are roasted, remove them from the oven and drizzle the thickened maple syrup over them. Sprinkle the fresh thyme leaves on top and gently toss the carrots to coat them evenly with the maple glaze.
- Final Roasting: Return the glazed carrots to the oven and roast for an additional 5-10 minutes, just until the glaze is bubbly and the carrots are fully coated.
- Serve: Transfer the Maple Glazed Carrots to a serving dish and enjoy them warm as a delightful side dish.
Extra Tips: To guarantee the best texture and flavor, try to cut the carrots into uniform pieces so they roast evenly. If available, use fresh, high-quality maple syrup for the richest flavor.
You can also add a pinch of cayenne pepper to the glaze for a subtle kick, or garnish with chopped parsley for added freshness and color. If you prefer a smokier flavor, consider roasting the carrots with a sprinkle of smoked paprika.
Vegan Mushroom Wellington
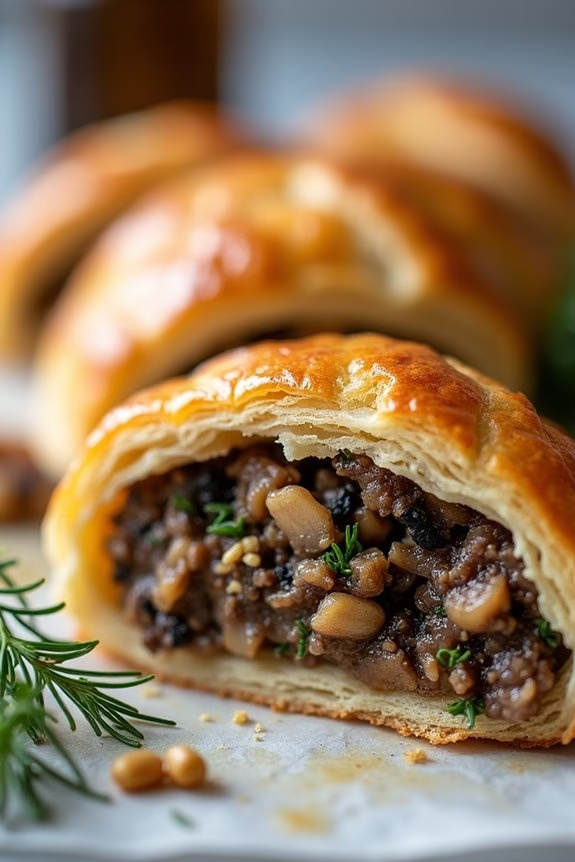
Vegan Mushroom Wellington is a delightful and savory dish perfect for a festive dairy-free Christmas dinner. This hearty entrée features a rich mushroom and walnut filling encased in a golden, flaky puff pastry. The combination of earthy mushrooms, aromatic herbs, and a hint of garlic creates a robust flavor profile that even non-vegans will appreciate.
This dish isn’t only delicious but also visually impressive, making it a stunning centerpiece for your holiday table.
The preparation of Vegan Mushroom Wellington begins with the sautéing of mushrooms, onions, and garlic, which are then combined with walnuts, breadcrumbs, and herbs to form a delectable filling. This mixture is enveloped in a layer of puff pastry, which turns beautifully golden and crisp when baked.
The Wellington can be prepared in advance, allowing you to enjoy a stress-free Christmas dinner with your loved ones. With its mouth-watering taste and elegant presentation, Vegan Mushroom Wellington is sure to become a favorite holiday tradition.
Ingredients for 4-6 servings:
- 2 tablespoons olive oil
- 1 large onion, finely chopped
- 3 cloves garlic, minced
- 500g mixed mushrooms, finely chopped
- 100g walnuts, finely chopped
- 1 teaspoon fresh thyme leaves
- 1 teaspoon fresh rosemary, chopped
- 2 tablespoons soy sauce
- 100g breadcrumbs
- Salt and pepper, to taste
- 500g vegan puff pastry
- 2 tablespoons plant-based milk
- 1 tablespoon sesame seeds (optional)
Cooking Instructions:
- Preheat the Oven: Begin by preheating your oven to 200°C (390°F). This guarantees that your Wellington bakes evenly and achieves a lovely golden crust.
- Prepare the Filling: Heat the olive oil in a large skillet over medium heat. Add the chopped onion and garlic, sautéing until the onion becomes translucent. Stir in the mushrooms and cook until they release their moisture and become tender, about 8-10 minutes.
- Combine Ingredients: Add the chopped walnuts, thyme, rosemary, and soy sauce to the mushroom mixture. Cook for another 2-3 minutes, allowing the flavors to meld. Remove the skillet from heat and stir in the breadcrumbs. Season with salt and pepper to taste, and let the filling cool slightly.
- Assemble the Wellington: Roll out the puff pastry on a floured surface to form a rectangle. Place the mushroom filling down the center of the pastry, leaving space at the edges for folding. Carefully fold the pastry over the filling, sealing the edges with a bit of water. Transfer the Wellington seam-side down onto a baking sheet lined with parchment paper.
- Bake the Wellington: Brush the top of the pastry with plant-based milk to encourage browning. If desired, sprinkle sesame seeds on top for added texture and flavor. Bake the Wellington in the preheated oven for 25-30 minutes, or until the pastry is golden brown and crisp.
- Serve: Once baked, allow the Wellington to cool for a few minutes before slicing. Serve warm, garnished with fresh herbs if desired.
Extra Tips:
For the best results, make sure your mushroom filling isn’t too wet; excess moisture can make the pastry soggy. If needed, cook the mushrooms a bit longer to evaporate any extra liquid.
Additionally, you can prepare the mushroom filling a day ahead and store it in the refrigerator, saving you time on the day of your Christmas feast. If you have any leftovers, Vegan Mushroom Wellington can be refrigerated and reheated, making it an excellent option for a Boxing Day meal as well.
Cranberry Orange Relish

Cranberry Orange Relish is a vibrant, tangy, and invigorating side dish that perfectly complements any festive holiday meal. This dairy-free recipe accentuates the natural tartness of cranberries with the sweet and citrusy notes of fresh oranges, creating a balance of flavors that’s both zingy and delightful.
Whether you’re hosting a Christmas dinner or attending a potluck, this relish is an easy-to-make dish that adds a pop of color and flavor to your table, giving your guests a delicious reason to celebrate the holiday season.
This relish is quick to prepare and requires no cooking, making it a perfect choice for those looking to minimize time spent in the kitchen during the busy holiday season. With just a few simple ingredients, you can whip up a batch of this relish in no time, allowing you to focus on other aspects of your holiday preparations.
Served either as a side dish or a topping for turkey or ham, Cranberry Orange Relish will surely become a festive favorite.
Ingredients (Serves 4-6):
- 12 ounces fresh cranberries
- 1 large navel orange
- 1/2 cup granulated sugar
- 1/4 teaspoon ground cinnamon
- A pinch of salt
Instructions:
- Prepare the Ingredients:
- Rinse the cranberries thoroughly under cold water and drain them well. This helps remove any debris or imperfect berries.
- Cut the orange into quarters and remove any seeds. There’s no need to peel the orange as the zest adds extra flavor.
- Process the Cranberries and Orange:
- In a food processor, add the cranberries and orange quarters. Pulse until the mixture is finely chopped but still retains some texture. Be careful not to over-process, as you want the relish to have some chunkiness.
- Mix in the Sugar and Spices:
- Transfer the cranberry-orange mixture to a bowl. Stir in the granulated sugar, ground cinnamon, and a pinch of salt. Mix until the sugar and spices are well incorporated.
- Chill the Relish:
- Cover the bowl with plastic wrap or transfer the relish to an airtight container. Refrigerate for at least 2 hours before serving. This allows the flavors to meld together beautifully.
Extra Tips:
For a variation, you can add a handful of chopped nuts, such as pecans or walnuts, to the relish for added texture and a nutty flavor.
If you prefer a sweeter relish, you can increase the amount of sugar to taste, or consider using honey or maple syrup as alternative sweeteners.
The relish can be made a day in advance, which allows the flavors to develop even more, making it a convenient dish for holiday preparations.
Enjoy your festive meal with this invigorating and colorful Cranberry Orange Relish!
Spiced Roasted Brussels Sprouts

Brussels sprouts are a quintessential vegetable for any holiday feast, and when prepared with the right spices, they can become the star of your dairy-free Christmas dinner. This recipe for Spiced Roasted Brussels Sprouts combines the earthy flavors of the sprouts with a blend of warm spices to create a dish that’s both comforting and festive.
Roasting the Brussels sprouts brings out their natural sweetness and results in a delightful caramelization on the edges, while the spices add a complex depth of flavor that will have your guests reaching for seconds. This dish isn’t only delicious but also incredibly easy to prepare, making it an ideal choice for a stress-free holiday meal.
The recipe serves 4-6 people, making it perfect for a small gathering or as a side dish for a larger feast. Whether you’re catering to dietary restrictions or simply looking for a new twist on a classic, these Spiced Roasted Brussels Sprouts are sure to impress.
Ingredients for 4-6 servings:
- 1 ½ pounds Brussels sprouts, trimmed and halved
- 3 tablespoons olive oil
- 1 teaspoon ground cumin
- 1 teaspoon smoked paprika
- ½ teaspoon ground coriander
- ½ teaspoon ground cinnamon
- ½ teaspoon garlic powder
- Salt and pepper to taste
- 1 tablespoon maple syrup (optional)
- ¼ cup chopped toasted almonds (optional for garnish)
Cooking Instructions:
1. Preheat the Oven:
Preheat your oven to 400°F (200°C). Line a large baking sheet with parchment paper or lightly grease it with olive oil to prevent sticking.
2. Prepare the Brussels Sprouts:
In a large bowl, toss the halved Brussels sprouts with olive oil, making sure they’re well coated. Add the ground cumin, smoked paprika, ground coriander, ground cinnamon, garlic powder, salt, and pepper. Mix until the Brussels sprouts are evenly coated with the spices.
3. Roast the Brussels Sprouts:
Spread the seasoned Brussels sprouts in a single layer on the prepared baking sheet. Place in the preheated oven and roast for 20-25 minutes, or until the sprouts are tender and the edges are crispy and caramelized. Stir halfway through the cooking time to guarantee even roasting.
4. Add a Touch of Sweetness (Optional):
If desired, drizzle the roasted Brussels sprouts with maple syrup for a hint of sweetness. Toss gently to coat and return them to the oven for an additional 5 minutes.
5. Serve:
Remove from the oven and transfer to a serving dish. Garnish with chopped toasted almonds for added crunch and flavor, if using. Serve warm as a side dish for your Christmas dinner.
Extra Tips:
For the best results, make sure your Brussels sprouts are roughly the same size, which guarantees even cooking. If your Brussels sprouts are notably different in size, consider cutting the larger ones into quarters.
Be sure to preheat the oven thoroughly to achieve the perfect roast, as a hot oven helps caramelize the sprouts quickly, enhancing their natural sweetness. Finally, feel free to adjust the spice levels to suit your taste; if you prefer a bit of heat, a pinch of cayenne pepper can be a great addition.
Lentil and Nut Roast
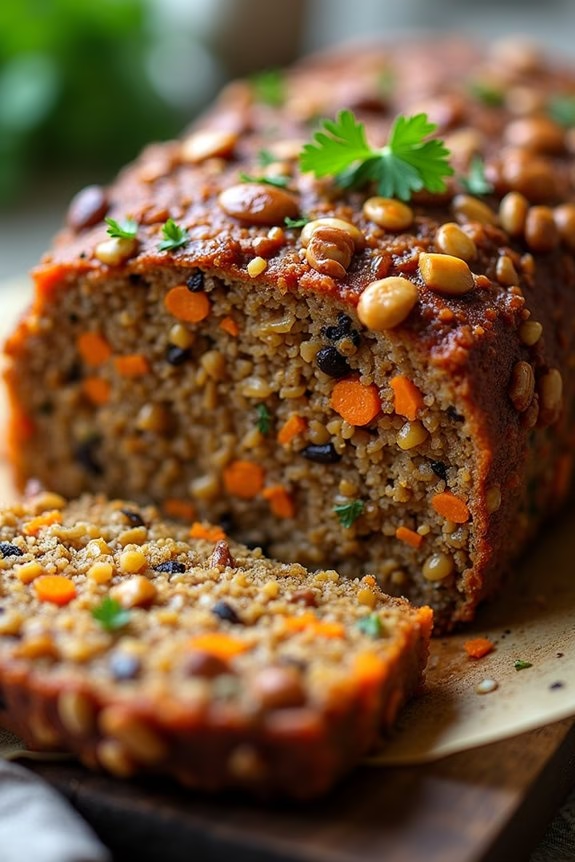
Lentil and nut roast is a hearty, nutritious, and delicious option for a dairy-free Christmas dinner. This savory dish combines protein-rich lentils with a variety of nuts, vegetables, and aromatic spices, creating a satisfying alternative to traditional meat dishes.
Whether you’re hosting a festive gathering or simply looking for a comforting meal, this recipe promises to impress both vegans and non-vegans alike with its rich flavors and textures.
The lentil and nut roast isn’t only a great main dish, but it also pairs wonderfully with a range of side dishes, such as roasted vegetables, mashed potatoes, or a fresh salad. It’s a versatile recipe that can be prepared in advance, making it ideal for holiday meal planning.
With a moist and flavorful interior and a slightly crispy exterior, this roast is destined to become a favorite staple in your holiday cooking repertoire.
Ingredients (Serves 4-6):
- 1 cup dried green or brown lentils
- 2 tablespoons olive oil
- 1 large onion, finely chopped
- 2 cloves garlic, minced
- 1 carrot, grated
- 1 celery stalk, finely chopped
- 1 cup mixed nuts (such as walnuts, almonds, and cashews), roughly chopped
- 1 tablespoon soy sauce
- 1 teaspoon dried thyme
- 1 teaspoon dried rosemary
- 1 teaspoon smoked paprika
- 1 tablespoon tomato paste
- 1 tablespoon ground flaxseeds mixed with 2.5 tablespoons water (flax egg)
- Salt and pepper, to taste
- 1 cup breadcrumbs
- 1 tablespoon fresh parsley, chopped (optional)
- 1 tablespoon lemon juice
Cooking Instructions:
- Prepare the Lentils: Rinse the lentils under cold water. In a large pot, combine the lentils with 2.5 cups of water. Bring to a boil, then reduce the heat and simmer for about 25-30 minutes until the lentils are tender but not mushy. Drain any excess water and set aside.
- Sauté the Vegetables: Preheat the oven to 350°F (175°C). In a large skillet, heat the olive oil over medium heat. Add the onion and garlic, sautéing until the onion becomes translucent. Stir in the grated carrot and chopped celery, cooking for another 5 minutes until the vegetables are softened.
- Combine Ingredients: In a large mixing bowl, combine the cooked lentils, sautéed vegetables, and chopped nuts. Add the soy sauce, thyme, rosemary, smoked paprika, tomato paste, flax egg, salt, and pepper. Mix well to combine.
- Add the Binding Agents: Incorporate the breadcrumbs into the lentil mixture, making sure everything is well mixed. The mixture should be cohesive and slightly sticky. If it seems too dry, add a splash of water or vegetable broth. Stir in the lemon juice and parsley, if using.
- Shape and Bake the Roast: Line a loaf pan with parchment paper, leaving some overhang for easy removal. Spoon the lentil mixture into the pan, pressing down firmly to make sure it holds together. Smooth the top with the back of a spoon. Bake in the preheated oven for 45-50 minutes until the top is golden and firm.
- Cool and Serve: Once baked, let the roast cool in the pan for 10 minutes. Carefully lift it out using the parchment overhang and transfer to a serving platter. Slice and serve warm, garnished with additional parsley if desired.
Extra Tips:
When preparing the lentil and nut roast, it’s important to taste the mixture before baking to adjust the seasoning to your liking.
You can experiment with different combinations of nuts based on your preference or what you have on hand. If you prefer a spicier flavor, consider adding a pinch of cayenne pepper or chili flakes.
This dish can be prepared a day in advance; simply store it in the refrigerator and reheat before serving. Additionally, leftovers make for a delicious sandwich filling or can be crumbled over salads for added protein.
Dairy-Free Scalloped Potatoes

If you’re looking for a comforting and indulgent side dish for your holiday meal without the dairy, these Dairy-Free Scalloped Potatoes are a perfect choice. This dish offers all the creamy goodness you expect from traditional scalloped potatoes but uses plant-based ingredients to create a luscious, velvety sauce. The potatoes are thinly sliced and layered with a savory mixture of garlic, herbs, and a rich dairy-free cream sauce, then baked to golden perfection. It’s a dish that will complement any holiday spread and satisfy both dairy-free eaters and those who love classic flavors.
These Dairy-Free Scalloped Potatoes aren’t only delicious but also simple to prepare, making them an excellent option for any home cook. They’re ideal for serving 4-6 people, which makes them perfect for an intimate family gathering or a small holiday dinner. With a few easy steps and some basic ingredients, you can create a dish that’s both visually impressive and irresistibly tasty. Serve these potatoes alongside your favorite festive main course for a meal that’s sure to delight.
Ingredients (Serves 4-6):
- 2 pounds russet potatoes, peeled and thinly sliced
- 2 tablespoons olive oil
- 1 onion, finely chopped
- 3 cloves garlic, minced
- 1 cup unsweetened almond milk or any dairy-free milk
- 1 cup vegetable broth
- 2 tablespoons nutritional yeast
- 1 tablespoon cornstarch
- 1 teaspoon salt
- 1/2 teaspoon black pepper
- 1 teaspoon dried thyme
- 1 teaspoon dried rosemary
- Fresh parsley, chopped, for garnish
Instructions:
- Preheat the Oven: Preheat your oven to 375°F (190°C). Grease a 9×13-inch baking dish with a little olive oil to prevent sticking.
- Prepare the Potatoes: Peel the potatoes and slice them into thin, even slices. A mandoline slicer can be very helpful for achieving uniform slices.
- Cook the Onion and Garlic: In a large skillet over medium heat, heat the olive oil. Add the chopped onion and sauté for about 5 minutes, until the onion becomes translucent. Add the minced garlic and cook for another minute until fragrant.
- Make the Sauce: In a medium bowl, combine the almond milk, vegetable broth, nutritional yeast, cornstarch, salt, pepper, thyme, and rosemary. Whisk until the cornstarch is completely dissolved.
- Layer the Ingredients: Arrange a layer of potato slices at the bottom of the prepared baking dish. Pour a portion of the sauce over the potatoes, then sprinkle a portion of the cooked onions and garlic on top. Repeat these layers until all the ingredients are used, finishing with a layer of sauce on top.
- Bake the Dish: Cover the baking dish with aluminum foil and bake in the preheated oven for 45 minutes. Remove the foil and bake for an additional 15-20 minutes, or until the potatoes are tender and the top is golden brown.
- Garnish and Serve: Remove the dish from the oven and let it cool slightly. Garnish with freshly chopped parsley before serving.
Extra Tips:
For the best texture, try to slice the potatoes as evenly as possible. This guarantees they cook uniformly. If you don’t have a mandoline slicer, take your time slicing by hand.
Additionally, feel free to customize the herbs based on your taste preferences; fresh thyme or rosemary can also be used for a more vibrant flavor. For those who enjoy a bit of spice, a pinch of cayenne pepper can add a nice heat to the dish. Enjoy your dairy-free creation!
Vegan Gravy
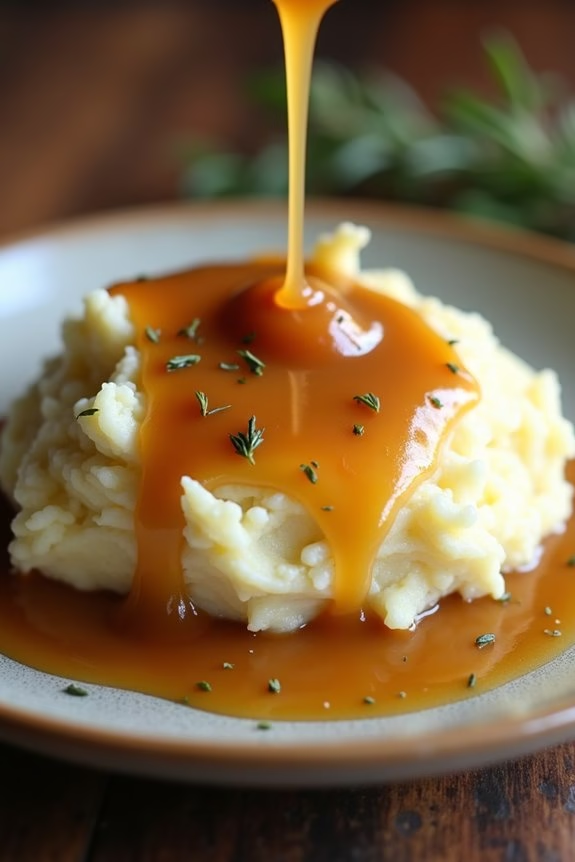
When it comes to crafting a memorable dairy-free Christmas dinner, a rich and flavorful vegan gravy can be the perfect finishing touch. This plant-based gravy isn’t only delicious but also incredibly satisfying and pairs wonderfully with a variety of festive dishes.
Whether you’re serving it over mashed potatoes, roasted vegetables, or a hearty loaf, this vegan gravy is sure to become a staple in your holiday repertoire. This recipe yields enough vegan gravy to generously serve 4 to 6 people, ensuring everyone at your Christmas table can enjoy its savory goodness.
Made with simple, wholesome ingredients, this vegan gravy comes together quickly and easily, allowing you to focus on other aspects of your holiday meal.
Ingredients:
- 2 tablespoons olive oil
- 1 medium onion, finely chopped
- 3 cloves garlic, minced
- 1 cup mushrooms, finely chopped
- 1/4 cup all-purpose flour
- 2 cups vegetable broth
- 2 tablespoons soy sauce
- 1 tablespoon nutritional yeast
- 1 teaspoon dried thyme
- 1 teaspoon dried sage
- Salt and pepper to taste
Instructions:
1. Prepare the Aromatics: Begin by heating the olive oil in a medium saucepan over medium heat. Add the chopped onion and sauté for about 5 minutes, or until the onion becomes translucent and tender.
Stir in the minced garlic and cook for an additional minute, being careful not to let it burn.
2. Add the Mushrooms: Stir in the finely chopped mushrooms, and cook for 5 to 7 minutes until they release their moisture and become golden brown. This step is essential as the mushrooms add a rich, umami flavor to the gravy.
3. Create the Roux: Sprinkle the flour over the onion and mushroom mixture, stirring continuously for about 2 minutes. This forms a roux, which will help thicken the gravy as it cooks.
4. Incorporate the Liquid: Gradually pour in the vegetable broth while whisking constantly to avoid lumps. Add the soy sauce, nutritional yeast, thyme, and sage. Bring the mixture to a gentle simmer.
5. Simmer and Thicken: Allow the gravy to simmer for about 10 to 15 minutes, stirring occasionally, until it thickens to your desired consistency. Taste and season with salt and pepper as needed.
6. Blend for Smoothness (Optional): For an ultra-smooth gravy, use an immersion blender to puree the mixture until it reaches your preferred texture. Alternatively, you can transfer the gravy to a blender, blend until smooth, then return it to the saucepan to reheat.
Extra Tips:
For a deeper flavor, you can add a splash of balsamic vinegar or a teaspoon of maple syrup for a subtle sweetness.
If the gravy becomes too thick, simply whisk in a bit more vegetable broth until the desired consistency is achieved. This gravy can be made a day in advance and reheated before serving, saving you time on the day of your holiday feast.
Enjoy your vegan gravy with all your favorite Christmas dishes!
Chocolate Avocado Mousse

Indulge in a decadent dessert that’s both dairy-free and delicious with this Chocolate Avocado Mousse. Perfect for a festive Christmas dinner, this creamy and rich mousse is sure to impress your guests while accommodating dietary needs.
Avocado is the secret ingredient that provides the mousse with its smooth texture, all while packing in healthy fats and nutrients. The combination of ripe avocados, cocoa powder, and a hint of sweetener creates a truly luxurious treat that will leave everyone asking for seconds.
This recipe isn’t only a healthier alternative to traditional chocolate mousse, but it’s also incredibly easy to make. In just a few simple steps, you can whip up a dessert that looks and tastes like it took hours to prepare.
This Chocolate Avocado Mousse serves 4-6 people, making it a perfect option for a small gathering or an intimate family dinner.
Ingredients:
- 3 ripe avocados, peeled and pitted
- 1/2 cup unsweetened cocoa powder
- 1/2 cup coconut milk
- 1/2 cup maple syrup or agave syrup
- 1 teaspoon vanilla extract
- A pinch of salt
- Fresh berries or mint leaves for garnish (optional)
Cooking Instructions:
- Prepare the Avocados: Start by cutting the avocados in half and removing the pits. Use a spoon to scoop the flesh into a food processor or blender.
- Add the Core Ingredients: To the avocados, add the unsweetened cocoa powder, coconut milk, and maple syrup. These ingredients will create the base of your mousse.
- Flavor Enhancements: Add the vanilla extract and a pinch of salt to the mixture. The vanilla will enhance the chocolate flavor, while the salt will balance the sweetness.
- Blend Until Smooth: Secure the lid on your food processor or blender and blend the ingredients until the mixture is completely smooth and creamy. This should take about 1-2 minutes. Stop occasionally to scrape down the sides with a spatula.
- Taste and Adjust: Taste the mousse and adjust the sweetness if necessary by adding more syrup to your liking. Blend again if more syrup is added.
- Chill the Mousse: Transfer the mousse into individual serving bowls or glasses and refrigerate for at least 30 minutes to allow the flavors to meld and the mousse to firm up.
- Garnish and Serve: Before serving, garnish with fresh berries or mint leaves for an extra touch of elegance. Enjoy your dairy-free dessert!
Extra Tips:
For the best results, verify your avocados are perfectly ripe, as this will greatly affect the texture and taste of the mousse.
If you’re not a fan of coconut milk, you can substitute it with almond milk or any other non-dairy milk of your choice. Additionally, this recipe can be easily doubled if you’re expecting more guests.
Remember to keep the mousse refrigerated until you’re ready to serve, as it tastes best when chilled. Enjoy this guilt-free indulgence that brings a sweet conclusion to your Christmas feast!
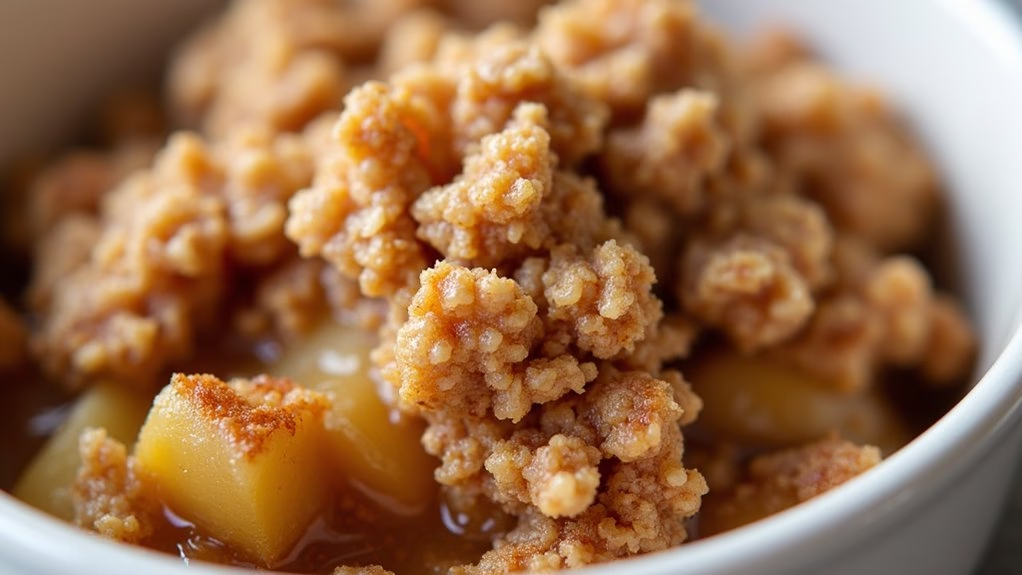
Classic Apple Crisp
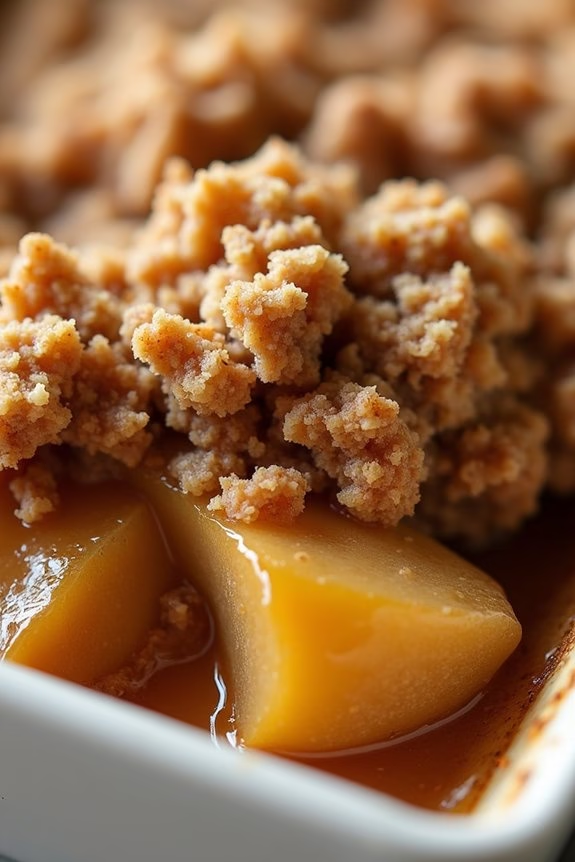
The holiday season is synonymous with indulgent desserts, and a Classic Apple Crisp is a perfect choice for a festive, dairy-free treat. This comforting dish combines juicy apples with a crispy, spiced topping, making it a favorite addition to any Christmas dinner. By swapping out traditional dairy ingredients for plant-based alternatives, this recipe guarantees that everyone at your table, regardless of dietary restrictions, can enjoy a delicious and satisfying dessert.
This apple crisp offers a delightful balance of sweet and tart flavors, enhanced by the warm notes of cinnamon and nutmeg. The crumbly topping provides a pleasing contrast to the soft, baked apples beneath. Simple to prepare and even easier to enjoy, this dish is sure to become a staple in your festive repertoire. The following recipe yields enough to serve 4-6 people, making it ideal for small gatherings or family dinners.
Ingredients:
- 6 medium apples (such as Granny Smith or Honeycrisp)
- 1 tablespoon lemon juice
- 1/2 cup granulated sugar
- 1 teaspoon ground cinnamon
- 1/4 teaspoon ground nutmeg
- 1 cup rolled oats
- 1/2 cup all-purpose flour
- 1/2 cup brown sugar, packed
- 1/2 cup dairy-free margarine, melted
- 1/4 teaspoon salt
Instructions:
- Prepare the Apples: Preheat your oven to 350°F (175°C). Peel, core, and slice the apples into thin wedges. Place them in a large mixing bowl and toss with lemon juice to prevent browning.
- Flavor the Apples: Add granulated sugar, cinnamon, and nutmeg to the bowl with the apples. Mix well until the apple slices are evenly coated with the sugar and spices.
- Arrange the Apples: Transfer the seasoned apples into a greased 9×13-inch baking dish, spreading them out evenly.
- Make the Crisp Topping: In a separate bowl, combine the rolled oats, all-purpose flour, brown sugar, and salt. Pour in the melted dairy-free margarine and stir until the mixture resembles coarse crumbs.
- Top the Apples: Evenly sprinkle the oat mixture over the apples in the baking dish, ensuring the apples are fully covered.
- Bake the Crisp: Place the baking dish in the preheated oven and bake for 45-50 minutes, or until the topping is golden brown and the apples are tender when pierced with a fork.
- Cool and Serve: Allow the apple crisp to cool slightly before serving. This dish is delicious on its own or paired with a scoop of dairy-free vanilla ice cream or whipped topping.
Extra Tips: For the best flavor, choose apples that are firm and slightly tart, as they hold up well during baking and balance the sweetness of the topping. If you prefer a more indulgent topping, consider adding chopped nuts such as pecans or walnuts for extra crunch.
To enhance the spice profile, you can also add a pinch of ground cloves or allspice. Remember, this dish can be prepared ahead of time and reheated just before serving, which makes it a convenient option for busy holiday schedules.