
When the holiday season arrives, I always look for those tried-and-true recipes that bring joy and clean plates at the Christmas potluck. Some dishes just have a magical way of vanishing quickly. From a rich Cheesy Spinach and Artichoke Dip to a stunning Honey Glazed Ham, these recipes have guests returning for seconds. Want to know what makes these festive dishes so irresistible? Let’s find out together.
Cheesy Spinach and Artichoke Dip
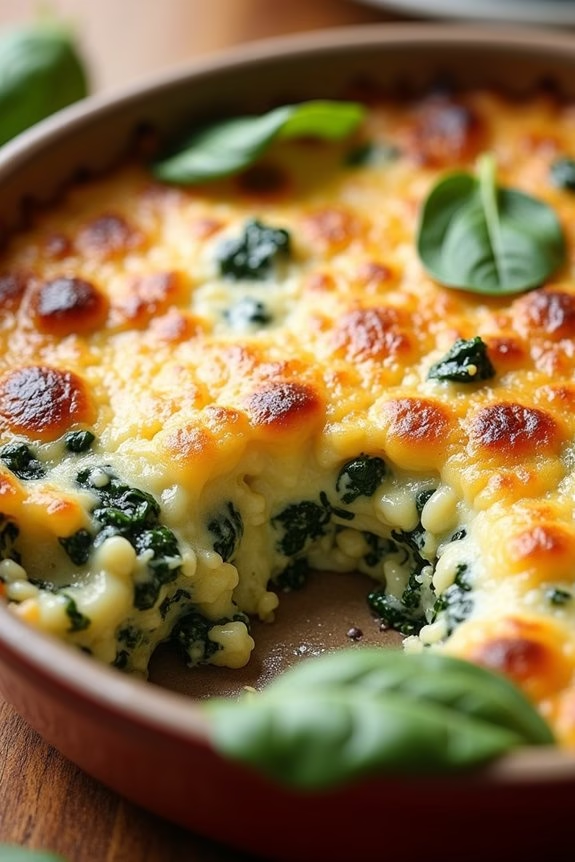
Cheesy Spinach and Artichoke Dip is a classic and crowd-pleasing appetizer perfect for any Christmas potluck. This creamy and flavorful dish combines the richness of cheese with the freshness of spinach and the tanginess of artichokes, creating a delicious blend that will have your guests coming back for more.
Easy to prepare and even easier to enjoy, this dip is a must-have for any festive gathering. This recipe serves 4-6 people, making it ideal for a small gathering or a potluck contribution. It can be served with a variety of dippers such as baguette slices, tortilla chips, or fresh vegetables. The creamy texture and savory taste of this dip will surely make it a highlight of your holiday spread.
Ingredients:
- 1 cup frozen chopped spinach, thawed and drained
- 1 can (14 oz) artichoke hearts, drained and chopped
- 1/2 cup mayonnaise
- 1/2 cup sour cream
- 1 cup cream cheese, softened
- 1 cup shredded mozzarella cheese
- 1/2 cup grated Parmesan cheese
- 2 cloves garlic, minced
- 1/4 teaspoon salt
- 1/4 teaspoon black pepper
Instructions:
- Preheat the oven: Start by preheating your oven to 350°F (175°C). This will guarantee that the dip bakes evenly and achieves a bubbly, golden top.
- Prepare the spinach: After thawing the frozen spinach, make sure to squeeze out all excess moisture. This will prevent the dip from becoming watery.
- Mix the base ingredients: In a large mixing bowl, combine the mayonnaise, sour cream, and cream cheese. Use a hand mixer or a whisk to blend these ingredients until smooth and creamy.
- Add the spinach and artichokes: Stir in the well-drained spinach and chopped artichoke hearts to the creamy base. Mix well to guarantee even distribution of the vegetables.
- Incorporate the cheeses and seasoning: Add the shredded mozzarella, grated Parmesan, minced garlic, salt, and pepper to the mixture. Stir until all ingredients are well combined.
- Transfer to a baking dish: Pour the mixture into an 8×8 inch baking dish, spreading it out evenly. This size dish will allow the dip to bake through properly without overflowing.
- Bake the dip: Place the baking dish in the preheated oven and bake for 25-30 minutes or until the top is bubbly and lightly golden brown.
- Cool and serve: Once baked, remove the dip from the oven and let it cool for a few minutes before serving. This will help set the dip slightly, making it easier to scoop.
Extra Tips:
For an added layer of flavor, consider sprinkling some extra Parmesan cheese on top before baking. You can also add a pinch of red pepper flakes for a bit of heat.
If you’re preparing this dish ahead of time, assemble the dip and store it in the refrigerator; bake just before serving to guarantee it’s hot and fresh. To make it even more convenient, you can use a slow cooker to keep the dip warm throughout your event. This dish pairs wonderfully with a variety of dippers, so feel free to get creative with your serving options!
Honey Glazed Ham

A honey glazed ham is a festive centerpiece perfect for a Christmas potluck, combining savory and sweet flavors to create a dish that’s both comforting and impressive. This dish is typically prepared using a pre-cooked ham, which is then enhanced with a luscious glaze made of honey, brown sugar, and other aromatic ingredients. The glaze not only imbues the ham with a delightful sweetness but also helps to keep it moist and tender during baking, resulting in a beautifully caramelized finish that’s sure to be a hit at any festive gathering.
The process of making honey glazed ham is relatively simple, making it a great choice even for those who aren’t seasoned cooks. The key to success lies in creating the perfect glaze and ensuring the ham is baked to perfection. Once you have the right ingredients and follow the steps carefully, you’ll have a delicious dish that’s ready to be the star of the Christmas potluck.
Here is a recipe to create a honey glazed ham that serves 4-6 people.
Ingredients:
- 1 (4-6 pounds) fully cooked bone-in ham
- 1 cup honey
- 1/2 cup brown sugar
- 1/4 cup Dijon mustard
- 1/4 cup apple cider vinegar
- 1/4 teaspoon ground cloves
- 1/4 teaspoon ground cinnamon
- 1/4 teaspoon ground ginger
- 1/2 teaspoon black pepper
- Whole cloves (optional, for studding)
Cooking Instructions:
- Preheat the Oven: Preheat your oven to 325°F (163°C). This temperature is ideal for gently warming the ham without drying it out.
- Prepare the Ham: Remove any packaging from the ham and place it flat-side down in a roasting pan. If desired, score the surface of the ham in a diamond pattern using a sharp knife and stud with whole cloves in the intersections.
- Make the Glaze: In a medium saucepan, combine the honey, brown sugar, Dijon mustard, apple cider vinegar, ground cloves, ground cinnamon, ground ginger, and black pepper. Heat over medium heat, stirring occasionally, until the sugar dissolves and the mixture is smooth and slightly thickened.
- Apply the Glaze: Brush half of the glaze generously over the surface of the ham, making sure to cover all exposed areas. Reserve the remaining glaze for later.
- Bake the Ham: Cover the roasting pan loosely with aluminum foil and place it in the preheated oven. Bake the ham for approximately 1.5 to 2 hours, or until the internal temperature reaches 140°F (60°C).
- Reapply the Glaze: Every 30 minutes, uncover the ham and brush with additional glaze to build up a nice caramelized coating.
- Finish Baking: In the last 20 minutes of cooking, remove the foil to allow the glaze to caramelize fully. Keep a close eye on it to prevent burning.
- Rest and Serve: Once done, remove the ham from the oven and let it rest for about 15 minutes before carving. This resting period allows the juices to redistribute, ensuring moist slices.
Extra Tips:
When selecting a ham for this recipe, opt for a bone-in variety as it tends to be more flavorful and juicy. If you don’t have a roasting rack, you can create a makeshift one by placing the ham on a bed of thickly sliced onions or carrots.
For a more intense flavor, you can prepare the glaze a day in advance, allowing the spices to meld together. Additionally, if you have leftover glaze, consider serving it warm on the side as a dipping sauce for the ham slices.
Cranberry Brie Bites
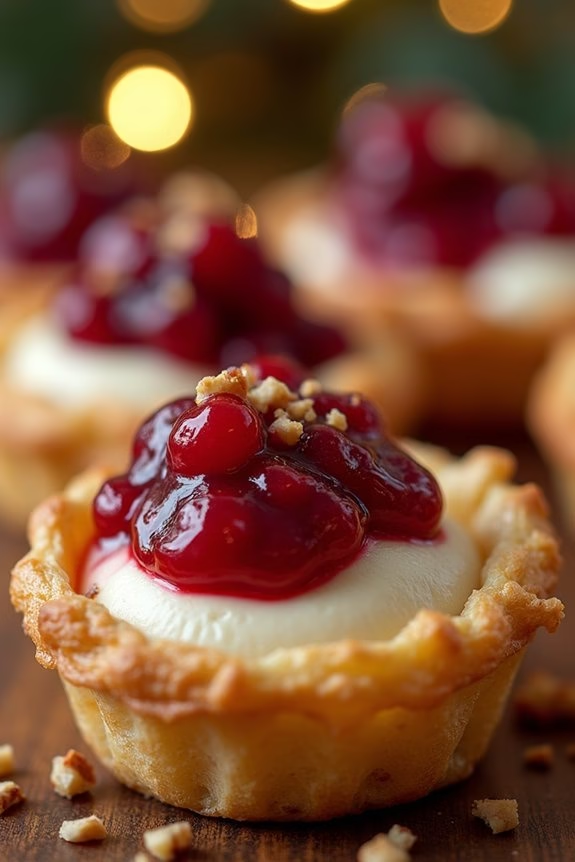
Cranberry Brie Bites are an irresistible addition to any Christmas potluck, offering a delightful combination of creamy brie, sweet-tart cranberry sauce, and the buttery crunch of puff pastry.
These bite-sized appetizers aren’t only delicious but also incredibly easy to prepare, making them perfect for both novice and experienced cooks. The rich, melty brie pairs beautifully with the cranberry sauce, providing a festive flavor that captures the essence of the holiday season.
Perfect for gatherings, these bites can be prepared ahead of time and baked just before serving, guaranteeing they’re warm and fresh when presented to your guests. The use of puff pastry makes the preparation simple yet elegant, as it forms a beautiful golden shell around the creamy filling.
Their small size makes them an ideal finger food, allowing guests to mingle and enjoy the festive atmosphere while indulging in a delightful treat.
Ingredients for 4-6 people:
- 1 sheet of puff pastry, thawed
- 1/2 cup cranberry sauce
- 1 small wheel of brie cheese
- 1/4 cup chopped pecans (optional)
- 1 egg, beaten
Instructions:
- Prepare the Puff Pastry: Preheat your oven to 375°F (190°C). Roll out the thawed puff pastry on a lightly floured surface to avoid it sticking. Cut the pastry into 24 equal squares, approximately 2×2 inches each.
- Assemble the Bites: Place the pastry squares into a mini muffin tin, pressing them down gently to form small cups. Be sure to let the corners of the pastry extend slightly over the edges of the tin.
- Add the Brie and Cranberry: Cut the brie into small cubes that fit comfortably into the pastry cups. Place one cube of brie into each pastry-lined tin. Top each with a teaspoon of cranberry sauce. If desired, sprinkle a few chopped pecans on top for added crunch and flavor.
- Seal and Brush: Gently fold the corners of the pastry over the filling. The corners don’t need to completely cover the top. Brush each pastry bite with beaten egg to promote a golden, shiny finish when baked.
- Bake: Place the muffin tin in the preheated oven and bake for 15 to 20 minutes, or until the pastry is puffed and golden brown. Keep an eye on them to prevent over-browning.
- Serve: Remove the bites from the muffin tin and let them cool for a few minutes before serving. They can be enjoyed warm or at room temperature, making them versatile for various serving times.
Extra Tips:
For the best results, use high-quality brie and a good cranberry sauce—either homemade or a favorite store-bought brand.
The bites can be prepared a few hours in advance and baked just before serving. If you prefer a bit more sweetness, consider adding a touch of honey or brown sugar to the cranberry sauce before assembling.
Additionally, the bites can be customized with other toppings or fillings like fig jam or chopped walnuts, giving you plenty of flexibility to suit your taste or the preferences of your guests.
Garlic Parmesan Roasted Potatoes
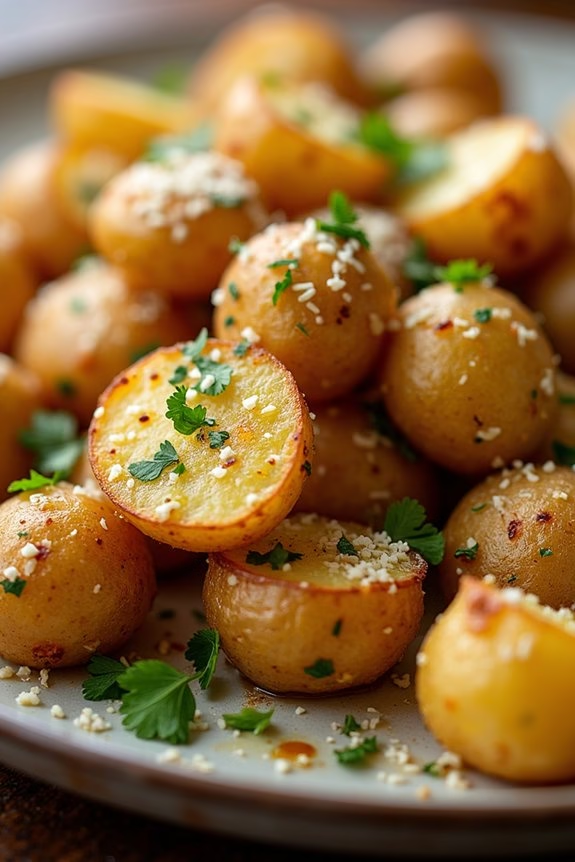
Garlic Parmesan Roasted Potatoes are the perfect side dish for any Christmas potluck. They’re crispy on the outside, tender on the inside, and packed with flavor. The combination of garlic and Parmesan cheese creates a savory, aromatic experience that complements the natural earthiness of the potatoes.
This recipe isn’t only delicious but also incredibly easy to prepare, making it suitable for any festive gathering. These roasted potatoes pair beautifully with a variety of main courses, from roasted meats to vegetarian dishes. The preparation requires minimal ingredients, yet delivers maximum taste, guaranteeing your contribution to the potluck will be a hit.
Follow the steps below to create a dish that will have everyone asking for the recipe.
Ingredients for 4-6 Servings:
- 2 pounds baby potatoes, halved
- 3 tablespoons olive oil
- 4 cloves garlic, minced
- 1 teaspoon dried oregano
- 1 teaspoon dried thyme
- Salt and pepper to taste
- ½ cup grated Parmesan cheese
- 2 tablespoons chopped fresh parsley (optional)
Cooking Instructions:
- Preheat the Oven: Preheat your oven to 400°F (200°C). This temperature is suitable for roasting potatoes, guaranteeing they become perfectly crispy.
- Prepare the Baking Sheet: Line a large baking sheet with parchment paper or foil for easy cleanup. If using foil, lightly grease it with a bit of olive oil to prevent sticking.
- Mix the Ingredients: In a large bowl, combine the halved potatoes, olive oil, minced garlic, oregano, thyme, salt, and pepper. Toss everything together until the potatoes are evenly coated with the oil and seasonings.
- Spread the Potatoes: Arrange the coated potatoes in a single layer on the prepared baking sheet. Make sure the cut side of each potato is facing down for maximum crispiness.
- Roast the Potatoes: Place the baking sheet in the preheated oven and roast for 30-35 minutes. Halfway through, use a spatula to gently flip the potatoes to guarantee even cooking.
- Add Parmesan Cheese: Once the potatoes are golden brown and crisp, sprinkle the grated Parmesan cheese over them. Return the baking sheet to the oven for an additional 5 minutes, allowing the cheese to melt and adhere to the potatoes.
- Garnish and Serve: Remove the potatoes from the oven, garnish with fresh parsley if desired, and serve immediately. Enjoy the delightful combination of crunchy, cheesy, and garlicky goodness.
Extra Tips:
For best results, try to cut the potatoes into uniform sizes to guarantee even cooking. If you prefer a bit more spice, consider adding a pinch of red pepper flakes to the seasoning mix.
Additionally, if you have some leftover roasted potatoes, they can be easily reheated in the oven at 350°F (175°C) for about 10 minutes to regain their crispiness.
Classic Deviled Eggs
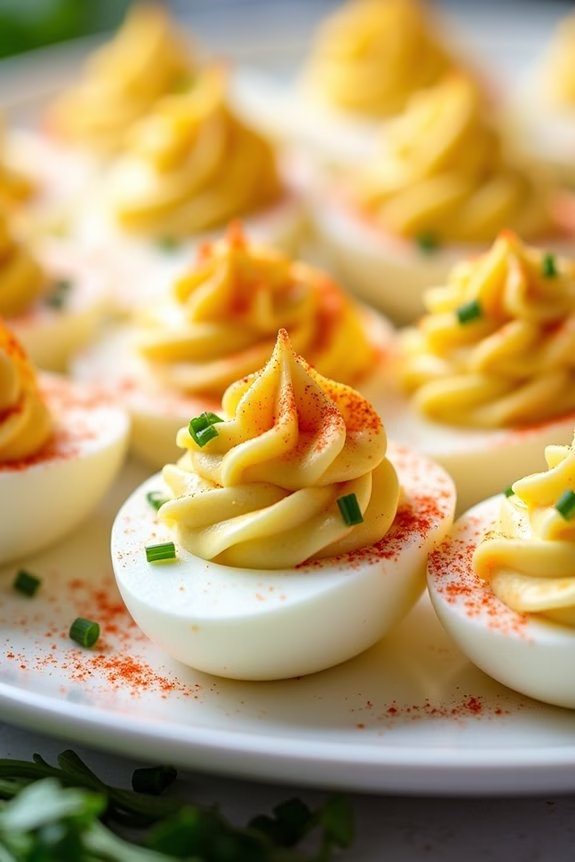
Deviled eggs are a timeless favorite at any gathering, and they make a perfect addition to your Christmas potluck. These bite-sized treats aren’t only delicious but also incredibly easy to prepare, making them an ideal choice for both novice and seasoned cooks. The combination of creamy yolk filling with a hint of tanginess from mustard and a sprinkle of paprika creates a delightful burst of flavor that will surely be a hit among guests.
This classic recipe serves 4-6 people and can be easily doubled or even tripled if you’re expecting a larger crowd. The key to perfect deviled eggs lies in achieving a smooth and creamy filling, which can be customized with additional ingredients like chopped herbs or a dash of hot sauce to suit your preferences. Whether you’re serving them as an appetizer or a side dish, these deviled eggs are sure to impress.
Ingredients:
- 6 large eggs
- 3 tablespoons mayonnaise
- 1 teaspoon Dijon mustard
- 1 teaspoon white vinegar
- Salt, to taste
- Black pepper, to taste
- Paprika, for garnish
- Fresh chives or parsley, chopped, for garnish (optional)
Instructions:
- Boil the Eggs: Place the eggs in a single layer in a saucepan and cover them with cold water, about an inch above the eggs. Bring the water to a rolling boil over medium-high heat. Once boiling, remove the saucepan from the heat, cover with a lid, and let the eggs sit for 10-12 minutes for fully cooked yolks.
- Cool and Peel the Eggs: After the eggs have rested, transfer them to a bowl of ice water to cool for at least 5 minutes. This makes peeling easier. Gently tap the eggs on a hard surface and peel under running water to remove the shells completely.
- Prepare the Filling: Slice the peeled eggs in half lengthwise. Carefully remove the yolks and place them in a mixing bowl. Arrange the egg whites on a serving platter.
- Make the Yolk Mixture: Mash the yolks with a fork until smooth. Add mayonnaise, Dijon mustard, white vinegar, salt, and black pepper. Mix until well combined and creamy.
- Fill the Egg Whites: Spoon or pipe the yolk mixture back into the hollow of each egg white half. For a neat presentation, use a piping bag with a star tip.
- Garnish and Serve: Lightly sprinkle paprika over the filled eggs for a pop of color. Optionally, add a sprinkle of chopped chives or parsley for added freshness. Serve chilled.
Extra Tips:
For the smoothest filling, make certain that the yolk mixture is well-mashed and free of lumps. If you prefer a tangier flavor, consider adding a little extra mustard or vinegar. For a touch of heat, a pinch of cayenne pepper or a dash of hot sauce can be incorporated into the yolk mixture.
To save time, you can boil and peel the eggs a day in advance, storing them in the refrigerator until you’re ready to assemble the deviled eggs.
Sweet Potato Casserole
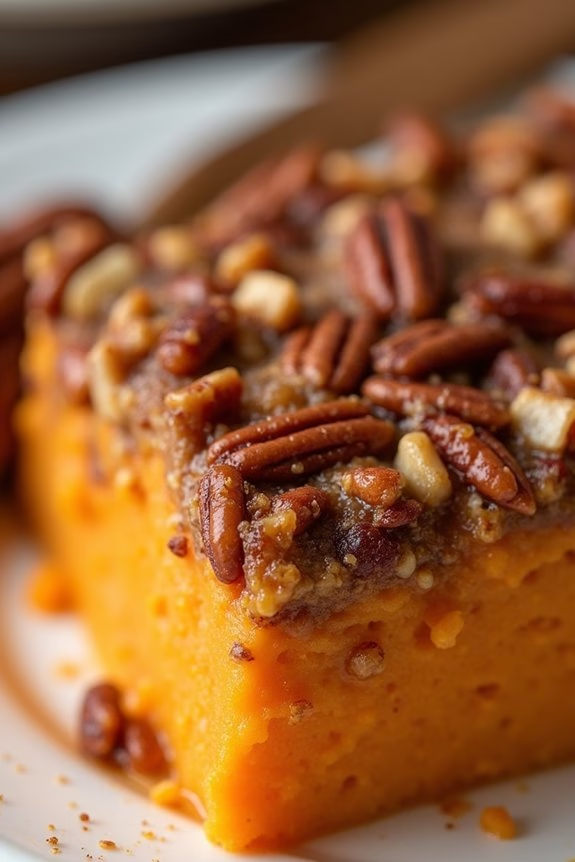
Sweet Potato Casserole is a beloved holiday dish that combines the natural sweetness of sweet potatoes with a crunchy pecan topping, creating a delightful contrast of textures and flavors. This classic dish is perfect for a Christmas potluck, offering a comforting taste of home that’s guaranteed to please a crowd.
The creamy sweet potato base, lightly spiced with cinnamon and nutmeg, pairs beautifully with the caramelized, buttery topping, making this casserole a standout on any holiday table.
Whether you’re hosting or attending a potluck, Sweet Potato Casserole is an easy-to-make, crowd-pleasing dish that can be prepared ahead of time and baked just before serving. This recipe serves 4-6 people, making it ideal for sharing with family and friends during festive gatherings.
With a few simple ingredients and a little bit of preparation, you’ll have a delicious dish that captures the essence of holiday flavors.
Ingredients for Serving Size of 4-6:
- 4 large sweet potatoes
- 1/2 cup granulated sugar
- 1/4 cup unsalted butter, melted
- 1/2 cup whole milk
- 2 large eggs
- 1 teaspoon vanilla extract
- 1/2 teaspoon cinnamon
- 1/4 teaspoon nutmeg
- 1/4 teaspoon salt
For the Topping:
- 1/2 cup all-purpose flour
- 1/2 cup brown sugar
- 1/4 cup unsalted butter, melted
- 1/2 cup chopped pecans
Cooking Instructions:
- Preheat and Prepare Sweet Potatoes: Preheat your oven to 350°F (175°C). Peel the sweet potatoes and cut them into large chunks. Place the chunks in a large pot of salted water, bring to a boil, and cook until tender, about 15-20 minutes. Drain and allow them to cool slightly.
- Mash Sweet Potatoes: In a large mixing bowl, mash the sweet potatoes using a potato masher or electric mixer until smooth and creamy.
- Mix Ingredients: Add granulated sugar, melted butter, milk, eggs, vanilla extract, cinnamon, nutmeg, and salt to the mashed sweet potatoes. Mix well until all the ingredients are combined and the mixture is smooth.
- Transfer to Baking Dish: Pour the sweet potato mixture into a greased 9×13 inch baking dish, spreading it evenly.
- Prepare Topping: In a separate bowl, combine flour, brown sugar, melted butter, and chopped pecans. Mix until the ingredients form a crumbly texture.
- Add Topping: Evenly sprinkle the pecan topping over the sweet potato mixture in the baking dish.
- Bake: Place the baking dish in the preheated oven and bake for 30-35 minutes, or until the topping is golden brown and slightly crispy.
- Serve: Allow the casserole to cool for a few minutes before serving. This will guarantee that the flavors meld together perfectly.
Extra Tips:
When making Sweet Potato Casserole, it’s important to taste the sweet potato mixture before adding it to the baking dish to adjust the sugar and spice levels to your preference.
If you prefer a sweeter dish, you can increase the amount of sugar. Additionally, for a different texture, consider adding mini marshmallows on top of the pecan topping before baking for an extra gooey, sweet layer.
For a smoother consistency, you can use a food processor to mash the sweet potatoes instead of a masher. Finally, if you want to prepare this dish ahead of time, you can assemble the casserole and store it in the refrigerator for up to 24 hours before baking.
Maple Dijon Brussels Sprouts
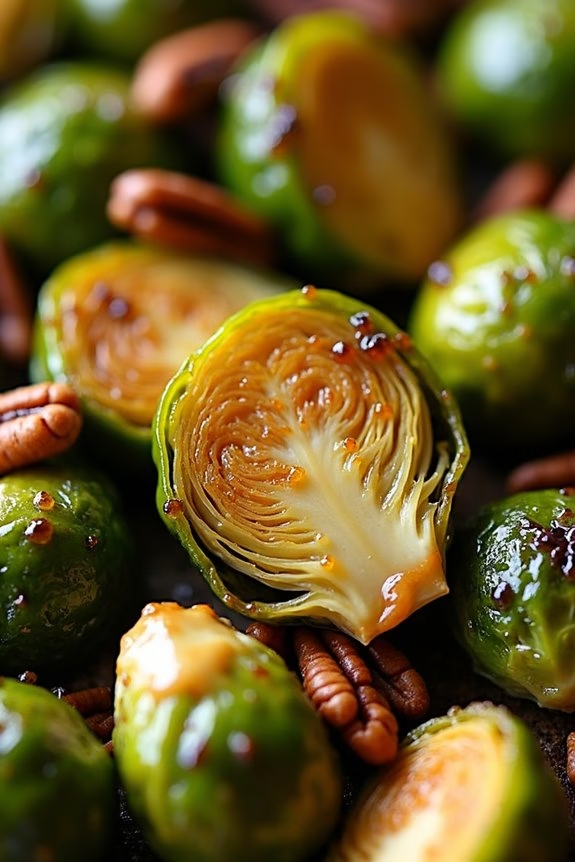
Maple Dijon Brussels Sprouts are a delightful and flavorful addition to any Christmas potluck. This recipe takes the nutritious Brussels sprout and elevates it with a sweet and tangy glaze made from maple syrup and Dijon mustard. The result is a dish that’s both savory and sweet, making it a perfect side dish to accompany any holiday meal. The caramelized exterior of the sprouts, achieved through roasting, provides a satisfying texture contrast to the tender insides.
When preparing Maple Dijon Brussels Sprouts, the key is to guarantee even cooking and proper seasoning. By cutting the Brussels sprouts in half, you increase the surface area for the glaze to adhere to, while also promoting even roasting. The combination of maple syrup and Dijon mustard not only enhances the flavor but also adds a glossy finish that makes the dish visually appealing. This recipe serves 4-6 people, making it an ideal choice for a small gathering or as a side dish among a variety of others.
Ingredients:
- 1 1/2 pounds Brussels sprouts
- 3 tablespoons olive oil
- 1/4 cup pure maple syrup
- 2 tablespoons Dijon mustard
- 2 cloves garlic, minced
- Salt and black pepper to taste
- Optional: 1/2 cup toasted pecans or walnuts
Cooking Instructions:
- Preheat Oven: Preheat your oven to 400°F (200°C) to guarantee it’s hot enough for roasting the Brussels sprouts to perfection.
- Prepare Brussels Sprouts: Trim the ends of the Brussels sprouts and remove any yellow or damaged outer leaves. Cut each sprout in half to allow for even cooking and maximum glaze coverage.
- Make the Glaze: In a small bowl, whisk together the olive oil, maple syrup, Dijon mustard, minced garlic, salt, and pepper. Mix until well combined and smooth.
- Coat the Sprouts: Place the halved Brussels sprouts in a large mixing bowl. Pour the maple Dijon glaze over the sprouts and toss them until they’re evenly coated.
- Roast the Sprouts: Arrange the Brussels sprouts in a single layer on a baking sheet lined with parchment paper. Roast in the preheated oven for 20-25 minutes, stirring halfway through, until they’re caramelized and tender.
- Add Nuts (Optional): If using, add the toasted pecans or walnuts during the final 5 minutes of roasting for extra crunch and flavor.
- Serve: Once cooked, transfer the roasted Brussels sprouts to a serving dish and drizzle any remaining glaze from the pan over the top. Serve warm.
Extra Tips:
When cooking Maple Dijon Brussels Sprouts, it’s important to watch them closely as they roast, especially during the final few minutes. Overcooking can lead to overly bitter sprouts.
Additionally, you can experiment with the glaze by adding a splash of balsamic vinegar for more depth of flavor. For a bit of heat, consider adding a pinch of red pepper flakes to the glaze.
Finally, make sure to toast the nuts beforehand if you’re using them, as this enhances their flavor and adds a delightful crunch to the dish.
Stuffed Mushrooms
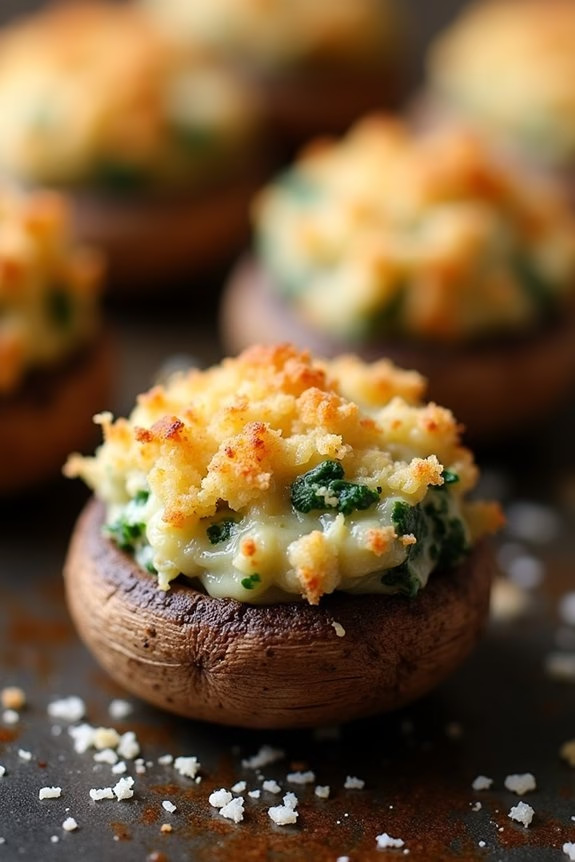
Stuffed Mushrooms are a delightful appetizer that adds a touch of elegance to any Christmas potluck. These savory bites are perfect for the holiday season, offering a burst of flavors and textures that will impress your family and friends. The earthy aroma of mushrooms is beautifully complemented by a rich and creamy filling, making these stuffed mushrooms a hit at any festive gathering.
Easy to make and even easier to devour, this dish is a must-have on your holiday menu. The combination of garlic, cream cheese, and herbs creates a luscious filling that pairs perfectly with the tender, baked mushrooms. Whether you’re a seasoned cook or a beginner in the kitchen, this recipe is straightforward and rewarding.
Each mushroom cap is a little package of goodness, packed with flavors that will have everyone reaching for more. Prepare to indulge in these delicious stuffed mushrooms and bring a bit of gourmet flair to your Christmas celebration.
Ingredients (Serves 4-6):
- 24 large white mushrooms
- 1 tablespoon olive oil
- 3 cloves garlic, minced
- 1/4 cup onion, finely chopped
- 1/3 cup cream cheese, softened
- 1/4 cup grated Parmesan cheese
- 2 tablespoons chopped fresh parsley
- 1/4 teaspoon black pepper
- 1/2 teaspoon salt
- 1/4 cup breadcrumbs
- 2 tablespoons butter, melted
Cooking Instructions:
- Preheat the Oven: Start by preheating your oven to 375°F (190°C). This guarantees the mushrooms will cook evenly and develop a nice, golden color.
- Prepare the Mushrooms: Clean the mushrooms using a damp paper towel to remove any dirt. Carefully remove the stems from the mushroom caps and set them aside. Place the mushroom caps on a baking sheet lined with parchment paper.
- Cook the Filling: Heat olive oil in a skillet over medium heat. Add the chopped onion and minced garlic, sautéing until the onion is translucent. Chop the reserved mushroom stems finely and add them to the skillet, cooking for another 3 minutes until tender.
- Combine Ingredients: In a mixing bowl, combine the cooked onion, garlic, and mushroom stems with cream cheese, Parmesan cheese, parsley, salt, and black pepper. Mix until the ingredients are well incorporated and the mixture is creamy.
- Stuff the Mushrooms: Spoon the cream cheese mixture into each mushroom cap, using about a teaspoon per mushroom. Press gently to make certain the filling is compact and covers the entire surface.
- Top with Breadcrumbs: In a small bowl, mix the breadcrumbs with melted butter until the crumbs are evenly coated. Sprinkle a small amount of breadcrumb mixture over each stuffed mushroom.
- Bake: Place the baking sheet in the preheated oven and bake for 20-25 minutes, or until the mushrooms are tender and the topping is golden brown.
- Serve: Remove the mushrooms from the oven and allow them to cool for a few minutes before serving. Arrange them on a platter and garnish with additional parsley if desired.
Extra Tips:
For a more robust flavor, consider adding finely chopped cooked bacon or sausage to the filling. If you prefer a bit of spice, a pinch of red pepper flakes can elevate the taste.
Make sure to use mushrooms of similar size for even cooking, and don’t overcrowd the baking sheet to allow the mushrooms to roast rather than steam. These stuffed mushrooms can also be prepared in advance and baked just before serving, making them a convenient option for busy holiday preparations.
Enjoy your culinary creation and the smiles it brings to your guests!
Festive Caprese Skewers
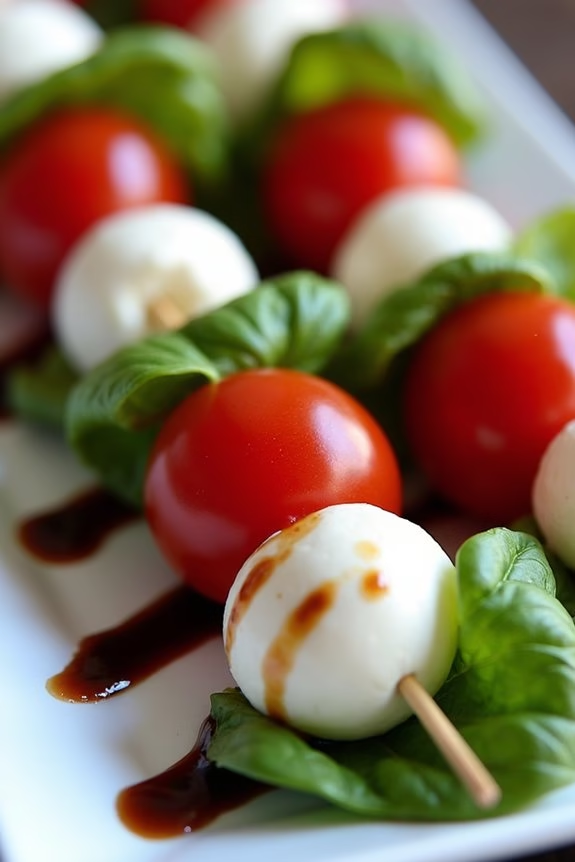
Celebrate the Christmas season with these delightful Festive Caprese Skewers that are as pleasing to the eye as they’re to the palate. This dish combines the fresh and vibrant flavors of cherry tomatoes, creamy mozzarella, and aromatic basil leaves, all drizzled with a balsamic glaze to add a touch of sweetness and tanginess. Ideal for a potluck gathering, these skewers are easy to prepare and serve, making them a perfect appetizer or side dish for your holiday festivities.
The Festive Caprese Skewers not only capture the colors of the holiday season with their red, green, and white hues but also offer a harmonious blend of textures and tastes. The juicy pop of the tomatoes complements the soft, rich mozzarella, while the fresh basil adds an herbal note that ties everything together. These skewers are a stunning addition to any Christmas table, offering a revitalizing and healthy option amidst more indulgent holiday treats.
Ingredients (Serves 4-6 people):
- 24 cherry tomatoes
- 24 small mozzarella balls (bocconcini)
- 24 fresh basil leaves
- 1/4 cup balsamic glaze
- Salt, to taste
- Freshly ground black pepper, to taste
- 24 wooden skewers or toothpicks
Instructions:
- Prepare the Ingredients: Begin by washing the cherry tomatoes and basil leaves under cold running water and pat them dry with a paper towel. Drain the mozzarella balls from their packaging and set them aside.
- Assemble the Skewers: Take a wooden skewer or toothpick and start by threading a cherry tomato onto it. Follow with a fresh basil leaf, then a mozzarella ball. Repeat this sequence until all ingredients are used, confirming you end with a cherry tomato on top for a balanced look.
- Season the Skewers: Once all skewers are assembled, lay them out on a serving platter. Lightly sprinkle with salt and freshly ground black pepper to enhance the flavors of the ingredients.
- Drizzle with Balsamic Glaze: Just before serving, generously drizzle the balsamic glaze over the skewers. This adds a beautiful glossy finish and a sweet-tangy contrast to the savory elements.
- Serve Immediately: For the best flavor and freshness, serve the Festive Caprese Skewers immediately after assembling and drizzling with balsamic glaze.
Extra Tips:
For a touch of gourmet flair, consider using heirloom cherry tomatoes in a variety of colors to add visual interest. If you prefer a homemade touch, you can easily make your own balsamic glaze by reducing balsamic vinegar with a bit of sugar over low heat until it thickens.
When assembling the skewers, confirm the basil leaves are fully dry to prevent them from wilting quickly. Finally, these skewers are best enjoyed fresh, so prepare them close to serving time to maintain their vibrant appearance and flavor.
Cranberry Orange Relish
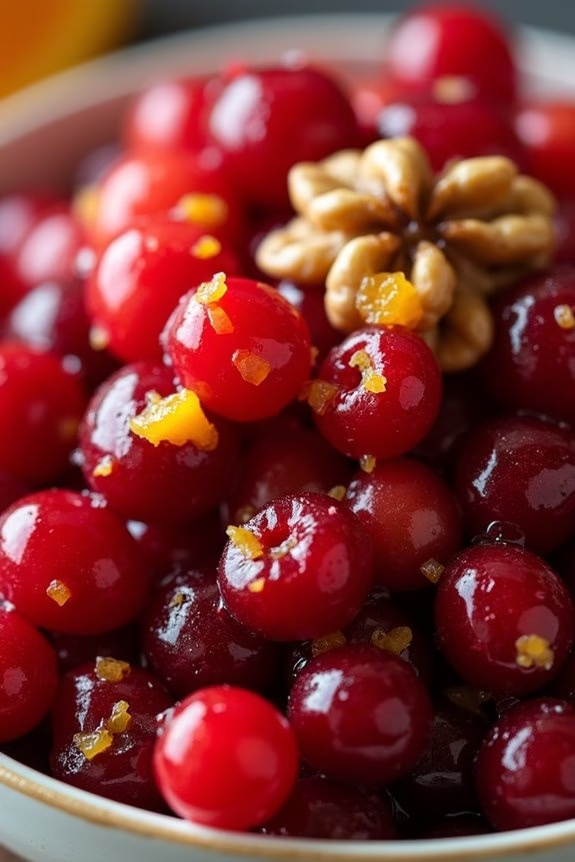
Cranberry Orange Relish is a delightful and vibrant dish that perfectly complements any holiday spread, especially during Christmas. This tangy and sweet relish is a fantastic addition to your potluck menu, offering a burst of flavor that pairs beautifully with roasted meats or as a condiment for savory dishes.
Made with fresh cranberries and juicy oranges, this dish isn’t only a treat for the taste buds but also a visual delight with its rich, festive colors.
The best part about Cranberry Orange Relish is that it’s incredibly easy to prepare and can be made ahead of time, allowing the flavors to meld together perfectly. This means less stress on the day of your Christmas potluck, giving you more time to enjoy the company of family and friends.
Whether you’re an experienced cook or a beginner, this recipe is straightforward, requiring minimal cooking skills and equipment.
Ingredients (Serves 4-6):
- 1 bag (12 oz) fresh cranberries
- 1 large orange, unpeeled and seeded
- 1 cup granulated sugar
- 1/4 cup chopped walnuts (optional)
Cooking Instructions:
- Prepare the Ingredients: Start by washing the cranberries thoroughly under cold water. Drain them well and set aside. Next, wash the orange, ensuring it’s clean since you’ll be using the peel in the recipe.
- Chop the Orange: Cut the orange into small chunks, removing any seeds you come across. Make sure to keep the peel on as it adds a wonderful zest to the relish.
- Blend the Mixture: In a food processor, combine the cranberries, orange pieces, and sugar. Pulse the mixture until the cranberries and orange are finely chopped and everything is well combined. Avoid over-processing; you want the mixture to have a slightly coarse texture.
- Add Walnuts (Optional): If you desire a bit of crunch and nuttiness, gently fold in the chopped walnuts using a spoon or spatula. This step is optional but highly recommended for added texture and flavor.
- Chill the Relish: Transfer the relish to a serving bowl, cover with plastic wrap, and refrigerate for at least 2 hours before serving. This resting time allows the flavors to blend and the relish to firm up a bit.
Extra Tips:
For the best results, make the Cranberry Orange Relish a day in advance. This allows the flavors to intensify and develop, making the dish even more delicious.
If you prefer a sweeter relish, feel free to adjust the sugar content to your liking. Additionally, you can experiment with adding other fruits like apples or pears for a unique twist.
Store any leftovers in an airtight container in the refrigerator for up to a week. This relish also freezes well, so you can make it in advance and enjoy it throughout the holiday season.
Herb-Crusted Prime Rib
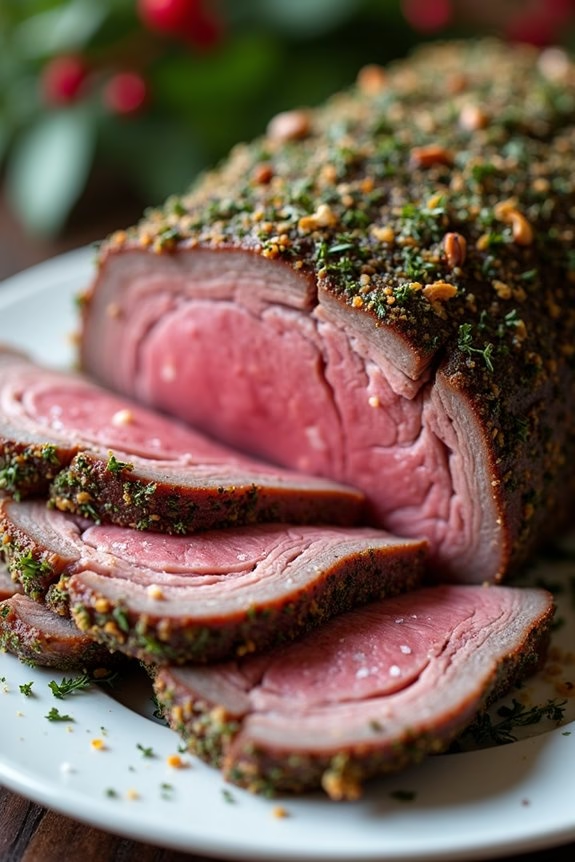
Herb-Crusted Prime Rib is a show-stopping centerpiece for any festive Christmas potluck. This dish combines the rich, juicy flavors of a prime rib roast with a savory, aromatic herb crust. The prime rib is cooked to perfection, with a tender, melt-in-your-mouth interior and a beautifully crisp exterior. It’s the perfect way to impress your family and friends with minimal effort, as the oven does most of the work for you.
To make this exquisite dish, you’ll need to start by selecting a high-quality cut of prime rib. The herb crust, made with a blend of fresh herbs, garlic, and spices, adds a fragrant and flavorful touch that complements the natural taste of the beef. This recipe serves 4-6 people, making it perfect for a small gathering or intimate dinner party. Not only is it delicious, but it also presents beautifully on any holiday table, making your meal feel extra special.
Ingredients for Serving 4-6 People:
- 1 (5-pound) bone-in prime rib roast
- 2 tablespoons olive oil
- 3 cloves garlic, minced
- 1 tablespoon fresh rosemary, chopped
- 1 tablespoon fresh thyme, chopped
- 1 tablespoon fresh parsley, chopped
- 1 tablespoon kosher salt
- 1 teaspoon black pepper
- 1 teaspoon Dijon mustard
Cooking Instructions:
- Preparation: Remove the prime rib from the refrigerator and allow it to sit at room temperature for about 1 to 2 hours. This guarantees even cooking.
- Preheat the Oven: Preheat your oven to 450°F (232°C).
- Prepare the Herb Mixture: In a small bowl, combine olive oil, minced garlic, chopped rosemary, thyme, parsley, kosher salt, black pepper, and Dijon mustard. Mix well to form a paste.
- Season the Roast: Pat the prime rib dry with paper towels. Rub the herb mixture generously over the entire surface of the roast, making sure it’s evenly coated.
- Roasting: Place the prime rib on a roasting rack in a large roasting pan. Insert a meat thermometer into the thickest part of the roast, avoiding bone. Roast in the preheated oven for 15 minutes to create a crust.
- Reduce Temperature: After 15 minutes, reduce the oven temperature to 325°F (163°C). Continue roasting until the thermometer reads 120°F (49°C) for medium-rare, or until desired doneness, approximately 1 ½ to 2 hours.
- Rest the Meat: Once cooked to your liking, remove the prime rib from the oven and tent it loosely with aluminum foil. Let it rest for at least 20 minutes to allow the juices to redistribute.
- Serving: Slice the roast between the ribs to serve. Plate with your favorite sides and enjoy the tender, flavorful prime rib.
Extra Tips:
For the best results, make sure to let the prime rib come to room temperature before cooking, as cold meat doesn’t cook evenly. Investing in a good meat thermometer is vital for achieving the perfect doneness.
Remember that the temperature of the meat will continue to rise by about 5°F (3°C) as it rests, so remove it from the oven just before it reaches your desired temperature. Additionally, resist the temptation to cut into the meat immediately after roasting; resting is essential for juicy, succulent slices.
Chocolate Peppermint Bark
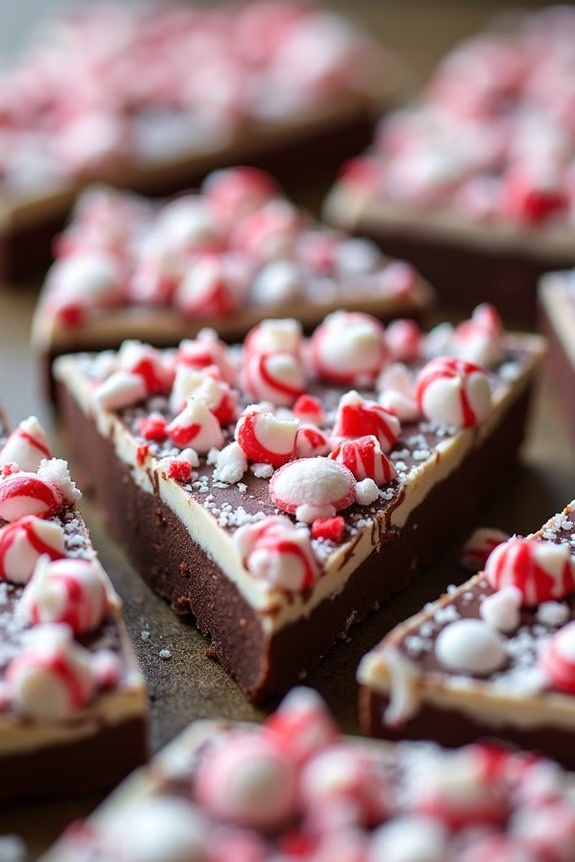
Chocolate Peppermint Bark is a festive and delicious treat that’s perfect for Christmas potlucks. Combining the rich and creamy flavor of chocolate with the invigorating taste of peppermint, this bark is both simple to make and delightful to eat. The contrast of smooth chocolate and crunchy peppermint creates a satisfying texture that’s sure to be a hit with holiday guests.
This sweet snack isn’t only easy to prepare, but it also makes for a beautiful addition to any dessert table with its striking black and white appearance sprinkled with red peppermint pieces.
This recipe for Chocolate Peppermint Bark serves 4-6 people, making it an ideal choice for a small gathering or as a part of a larger dessert spread. With just a few ingredients and minimal kitchen equipment, you can whip up a batch of this delightful holiday treat in no time.
Ingredients:
- 12 ounces of semisweet chocolate chips
- 12 ounces of white chocolate chips
- 1 teaspoon of peppermint extract
- 1/2 cup of crushed peppermint candies or candy canes
Cooking Instructions:
- Prepare a Baking Sheet: Line a baking sheet with parchment paper or a silicone baking mat. This will prevent the chocolate from sticking and make it easy to remove the bark once it has hardened.
- Melt the Semisweet Chocolate: In a microwave-safe bowl, melt the semisweet chocolate chips in 30-second intervals, stirring in between, until fully melted and smooth. Alternatively, you can melt the chocolate in a double boiler over simmering water.
- Spread the Semisweet Chocolate: Pour the melted semisweet chocolate onto the prepared baking sheet and use a spatula to spread it into an even layer, about 1/4-inch thick. Allow it to cool slightly while you prepare the next layer.
- Melt the White Chocolate: In another microwave-safe bowl, melt the white chocolate chips in 30-second intervals, stirring in between, until smooth. Stir in the peppermint extract once melted.
- Layer the White Chocolate: Pour the melted white chocolate over the semisweet chocolate layer. Carefully spread it to cover the entire surface evenly.
- Add the Peppermint Topping: Immediately sprinkle the crushed peppermint candies over the top of the white chocolate layer, pressing lightly to make sure they adhere.
- Chill the Bark: Place the baking sheet in the refrigerator for about 1 hour or until the chocolate is fully set and hardened.
- Break into Pieces: Once the bark is set, remove it from the refrigerator and break it into pieces of your desired size using your hands or a sharp knife.
Extra Tips:
To achieve the best texture and flavor, use high-quality chocolate chips for this recipe. When melting the chocolate, be careful not to overheat it, as this can cause the chocolate to seize or become grainy.
If you prefer a more intense peppermint flavor, you can add a few extra drops of peppermint extract to the white chocolate layer. Additionally, feel free to get creative with your toppings by adding nuts, dried fruit, or even a drizzle of colored chocolate for a more festive presentation.
Store any leftover bark in an airtight container in a cool place to keep it fresh.
Classic Gingerbread Cookies

Gingerbread cookies are a quintessential holiday treat, perfect for Christmas potlucks and gatherings. Their delightful aroma, warm spices, and charming shapes bring cheer and nostalgia to any festive occasion.
These classic gingerbread cookies are easy to make and can be decorated in various ways, making them an enjoyable activity for both kids and adults. Whether you prefer them soft and chewy or crisp and snappy, these cookies are certain to please everyone at your holiday table.
This recipe makes approximately 24 gingerbread cookies, serving 4-6 people. They’re perfect for sharing or gifting, and their sturdy construction makes them ideal for decorating with icing, candies, or sprinkles. With just a few simple ingredients and some holiday spirit, you can create a batch of gingerbread cookies that will become a beloved holiday tradition.
Ingredients:
- 3 cups all-purpose flour
- 3/4 cup packed dark brown sugar
- 1 tablespoon ground ginger
- 1 tablespoon ground cinnamon
- 1/2 teaspoon ground cloves
- 1/2 teaspoon baking soda
- 1/2 teaspoon salt
- 3/4 cup (1 1/2 sticks) unsalted butter, softened
- 3/4 cup molasses
- 1 large egg
Instructions:
- Prepare the Dough: In a large mixing bowl, whisk together the flour, brown sugar, ginger, cinnamon, cloves, baking soda, and salt until well combined. Add the softened butter and molasses to the dry ingredients. Using an electric mixer, blend the ingredients at medium speed until the mixture is crumbly. Add the egg and continue mixing until the dough comes together and is smooth.
- Chill the Dough: Divide the dough into two equal portions and flatten each into a disk. Wrap each disk in plastic wrap and refrigerate for at least 1 hour. Chilling the dough helps to firm it up, making it easier to roll out and shape.
- Preheat the Oven: When ready to bake, preheat your oven to 350°F (175°C) and line two baking sheets with parchment paper.
- Roll and Cut the Dough: On a lightly floured surface, roll out one disk of dough to about 1/4-inch thickness. Use cookie cutters to cut out shapes and transfer them to the prepared baking sheets, spacing them about 1 inch apart.
- Bake the Cookies: Bake the cookies in the preheated oven for 8-10 minutes, or until the edges are firm and the centers are set. The exact baking time may vary depending on the size and thickness of your cookies.
- Cool and Decorate: Remove the cookies from the oven and let them cool on the baking sheets for 5 minutes before transferring them to a wire rack to cool completely. Once cooled, decorate with icing, sprinkles, or any desired toppings.
Extra Tips:
For the best results, verify your butter is at room temperature before starting the recipe. This will help it blend smoothly with the other ingredients.
If the dough becomes too soft while rolling out, simply place it back in the refrigerator for a few minutes to firm up. When cutting out the cookies, dust the cookie cutters with flour to prevent sticking.
Finally, if you prefer softer cookies, slightly underbake them; for crisper cookies, bake a minute or two longer. Enjoy your festive creations!
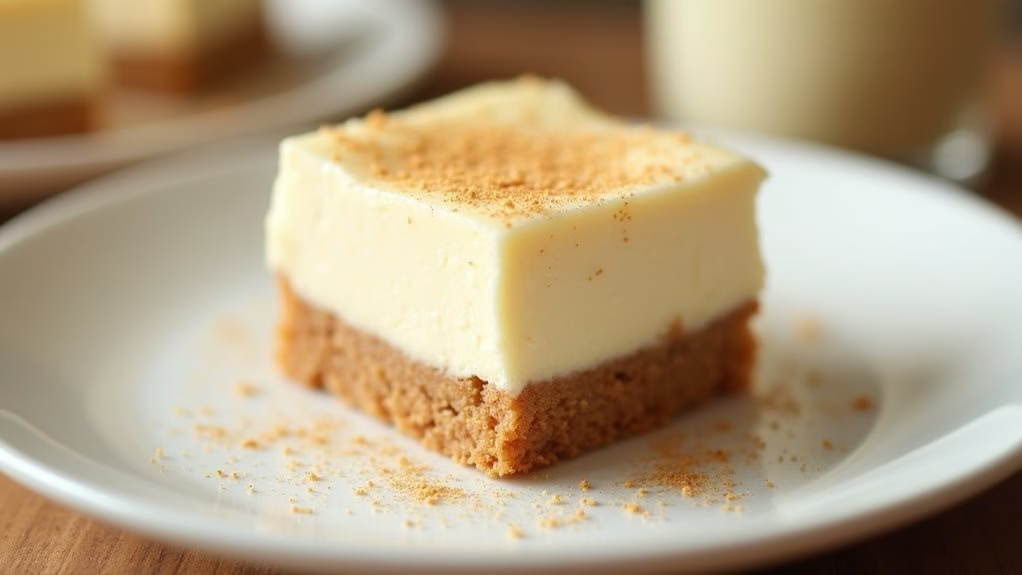
Eggnog Cheesecake Bars
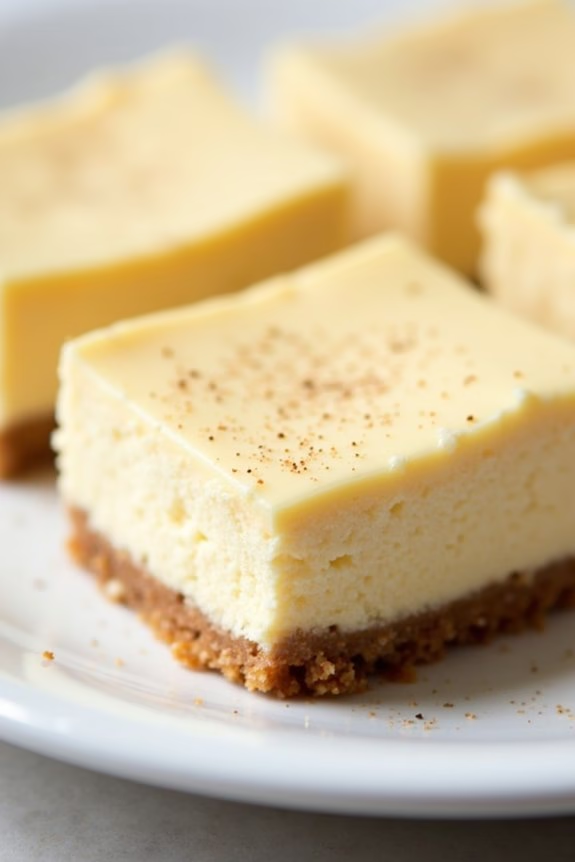
Eggnog Cheesecake Bars are the perfect holiday treat, combining the rich and creamy flavors of cheesecake with the festive notes of eggnog. These bars are a delightful twist on traditional cheesecake, adding a seasonal flair that’s bound to impress at any Christmas potluck.
With a smooth, velvety texture and a buttery graham cracker crust, these bars are both easy to make and irresistibly delicious. Ideal for serving 4-6 people, these Eggnog Cheesecake Bars are perfect for sharing with family and friends.
The recipe involves a few simple steps and a short list of ingredients, making it an accessible dessert option for both novice and experienced bakers. Whether you’re an eggnog enthusiast or just looking to try something new, this recipe will add a touch of holiday magic to your dessert spread.
Ingredients:
- 1 cup graham cracker crumbs
- 2 tablespoons granulated sugar
- 1/4 cup unsalted butter, melted
- 16 oz cream cheese, softened
- 1/2 cup granulated sugar
- 2 large eggs
- 1/2 cup eggnog
- 1 teaspoon vanilla extract
- 1/2 teaspoon ground nutmeg
- 1 tablespoon all-purpose flour
Instructions:
1. Preheat the Oven: Begin by preheating your oven to 325°F (165°C). This guarantees that the oven is at the right temperature when you’re ready to bake the cheesecake bars.
2. Prepare the Crust: In a medium bowl, combine the graham cracker crumbs, 2 tablespoons of sugar, and melted butter. Mix until the crumbs are evenly coated and resemble wet sand. Press the mixture firmly into the bottom of an 8×8-inch baking dish to form an even layer. Set aside.
3. Make the Cheesecake Filling: In a large mixing bowl, beat the softened cream cheese with a hand mixer until smooth and creamy. Gradually add the 1/2 cup of sugar, beating until well combined.
Add the eggs one at a time, mixing well after each addition. Pour in the eggnog and vanilla extract, and sprinkle in the ground nutmeg and flour. Beat until the mixture is smooth and all ingredients are well incorporated.
4. Assemble and Bake: Pour the cheesecake filling over the prepared crust, spreading it evenly with a spatula. Place the baking dish in the preheated oven and bake for 35-40 minutes, or until the edges are set and the center has a slight jiggle.
5. Cool and Chill: Remove the bars from the oven and allow them to cool at room temperature for about 30 minutes. Then, transfer them to the refrigerator and chill for at least 2 hours, or until completely set.
6. Slice and Serve: Once chilled, slice the cheesecake into bars using a sharp knife. For clean edges, wipe the knife with a damp cloth between cuts. Serve the bars straight from the fridge for the best texture and flavor.
Extra Tips:
When making Eggnog Cheesecake Bars, verify that the cream cheese is completely softened before mixing to prevent lumps in the filling. Using room temperature ingredients will help the cheesecake blend smoothly.
Additionally, to avoid cracks in the cheesecake, don’t overbake and remember that a slight jiggle in the center is normal; the bars will firm up as they cool. If you want to add a decorative touch, consider sprinkling a little extra nutmeg on top before serving or topping with whipped cream for added indulgence.