

There’s nothing quite like starting a slow morning with a cozy, sweet breakfast that feels like a warm hug. Picture waking up to the comforting aroma of cinnamon rolls or the sight of fluffy blueberry pancakes. Each bite invites you to savor the moment. From the indulgence of stuffed French toast to the simple pleasure of maple donut muffins, these recipes offer comfort and satisfaction. Ready to explore more delicious ways to make your mornings special?
Cozy Cinnamon Roll Recipe
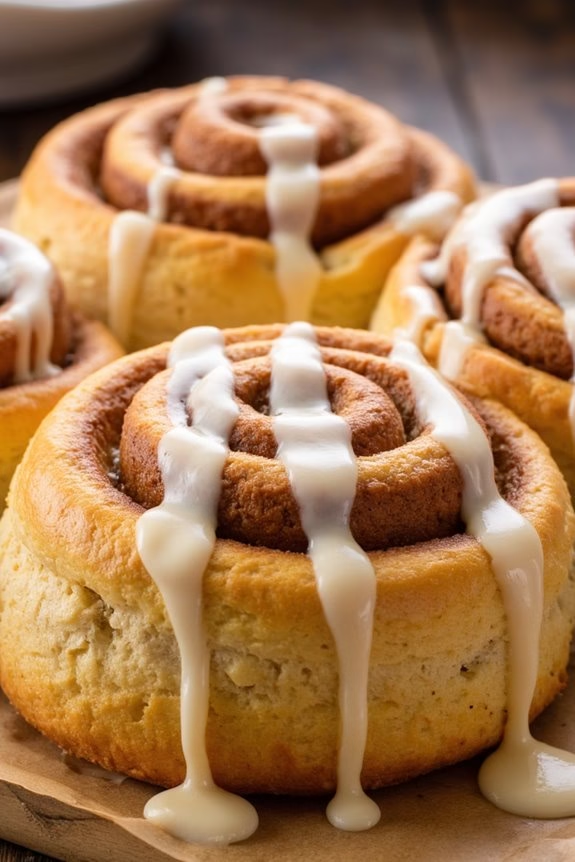
There’s nothing quite like the aroma of freshly baked cinnamon rolls wafting through your home on a cozy morning. These warm, gooey rolls are perfect for breakfast or brunch, providing a sweet start to your day. The combination of soft, pillowy dough, a buttery cinnamon-sugar filling, and a rich cream cheese glaze makes this recipe irresistible and a definite family favorite.
Whether you’re a seasoned baker or a beginner, these cinnamon rolls are simple enough to make from scratch and will undoubtedly impress anyone lucky enough to taste them.
This Cozy Cinnamon Roll Recipe yields a batch of 12 rolls, serving 4-6 people. The dough is lovingly prepared with a few basic ingredients, then rolled out and filled with a delightful cinnamon-sugar mixture. After baking until golden brown, the rolls are topped with a creamy glaze that perfectly complements their sweet and spicy flavor.
Gather your ingredients and follow the steps below to create your own batch of these delightful treats.
Ingredients (Serves 4-6):
- 4 cups all-purpose flour
- 1 packet (2 1/4 tsp) active dry yeast
- 1 cup warm milk (110°F)
- 1/3 cup granulated sugar
- 1/3 cup unsalted butter, melted
- 1/2 teaspoon salt
- 2 large eggs
For the filling:
- 3/4 cup brown sugar
- 2 tablespoons ground cinnamon
- 1/3 cup unsalted butter, softened
For the glaze:
- 4 oz cream cheese, softened
- 1/4 cup unsalted butter, softened
- 1 1/2 cups powdered sugar
- 1/2 teaspoon vanilla extract
- 2 tablespoons milk
Cooking Instructions:
- Prepare the Dough: In a large mixing bowl, dissolve the yeast in warm milk. Add the sugar, melted butter, salt, and eggs. Mix well. Gradually add the flour, stirring until the dough begins to form. Knead the dough on a floured surface for about 5-7 minutes until smooth and elastic.
- Let the Dough Rise: Place the dough in a lightly greased bowl, cover with a damp cloth, and let it rise in a warm place for about 1 hour or until doubled in size.
- Prepare the Filling: In a small bowl, mix together the brown sugar and cinnamon. Set aside.
- Roll Out the Dough: Once the dough has risen, punch it down and roll it out on a floured surface into a 16×12 inch rectangle. Spread the softened butter over the surface, then sprinkle evenly with the cinnamon-sugar mixture.
- Shape the Rolls: Starting from a long edge, tightly roll the dough into a log. Cut the log into 12 equal slices and place them in a greased 9×13 inch baking dish.
- Second Rise: Cover the rolls with a damp cloth and let them rise for about 30 minutes, until nearly doubled in size.
- Bake the Rolls: Preheat your oven to 375°F (190°C). Bake the rolls for 20-25 minutes, or until they’re golden brown and cooked through.
- Prepare the Glaze: While the rolls are baking, prepare the glaze by beating together the cream cheese, butter, powdered sugar, vanilla extract, and milk until smooth and creamy.
- Glaze the Rolls: Once the rolls are out of the oven, let them cool slightly before spreading the cream cheese glaze over the top.
Extra Tips:
To guarantee your cinnamon rolls are perfectly soft and fluffy, be mindful of the dough’s consistency—it should be slightly sticky but manageable. If the dough feels too sticky, add a little more flour, a tablespoon at a time.
Additionally, make sure your yeast is fresh and active for the best rise. You can make these rolls ahead of time by preparing them up to the second rise, then refrigerating them overnight. In the morning, allow them to come to room temperature and rise again before baking.
Enjoy these delicious rolls fresh out of the oven for the ultimate cozy breakfast experience!
Fluffy Blueberry Pancakes
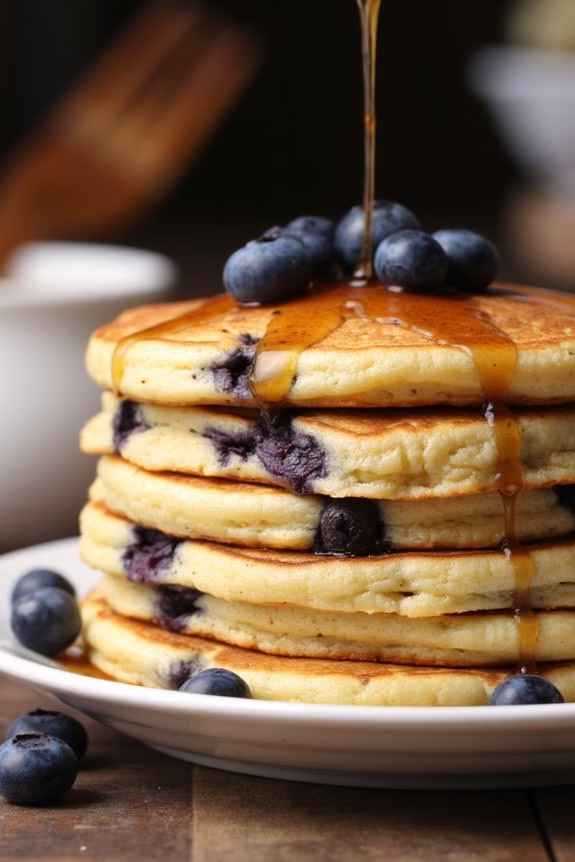
Fluffy Blueberry Pancakes are a delightful way to start your morning, providing a sweet and satisfying breakfast that feels like an indulgence. These pancakes are light and airy, with juicy blueberries adding bursts of flavor in every bite. Perfect for a weekend brunch or a cozy family breakfast, these pancakes are sure to become a favorite in your household.
The key to their fluffiness is a combination of proper mixing and cooking techniques, along with using fresh, high-quality ingredients.
To make a batch of Fluffy Blueberry Pancakes that serves 4-6 people, you’ll start by preparing the batter with simple pantry staples. The addition of blueberries not only enhances the flavor but also adds a pop of color, making them visually appealing as well.
Whether you serve them with maple syrup, a dollop of whipped cream, or a dusting of powdered sugar, these pancakes are sure to be a hit. Let’s plunge into the ingredients and the step-by-step process to create these delicious pancakes.
Ingredients:
- 2 cups all-purpose flour
- 2 tablespoons granulated sugar
- 2 teaspoons baking powder
- 1/2 teaspoon baking soda
- 1/2 teaspoon salt
- 2 large eggs
- 2 cups buttermilk
- 1/4 cup unsalted butter, melted
- 1 teaspoon vanilla extract
- 1 1/2 cups fresh blueberries
- Additional butter or oil for cooking
Instructions:
- Prepare the Dry Ingredients: In a large mixing bowl, combine the flour, sugar, baking powder, baking soda, and salt. Whisk these dry ingredients together until well combined.
- Mix the Wet Ingredients: In a separate bowl, beat the eggs, then add the buttermilk, melted butter, and vanilla extract. Whisk together until the mixture is smooth and uniform.
- Combine Wet and Dry Mixtures: Pour the wet ingredients into the dry ingredients. Gently stir until just combined. The batter should be slightly lumpy, which is okay. Overmixing can lead to tough pancakes, so be sure to stop mixing once the dry ingredients are moistened.
- Fold in the Blueberries: Carefully fold in the fresh blueberries, making sure they’re evenly distributed throughout the batter. Be gentle to avoid crushing the berries.
- Preheat and Prepare the Cooking Surface: Heat a non-stick skillet or griddle over medium heat. Lightly grease the surface with butter or oil to prevent sticking and to add flavor.
- Cook the Pancakes: Pour approximately 1/4 cup of batter onto the skillet for each pancake. Cook until bubbles form on the surface and the edges start to look set, about 2-3 minutes. Flip the pancakes and cook for another 2-3 minutes until golden brown.
- Serve Hot: Remove the pancakes from the skillet and keep them warm while you cook the remaining batter. Serve the pancakes hot with your choice of toppings.
Extra Tips:
To guarantee the fluffiest pancakes, use room temperature ingredients, as this helps the batter to mix more evenly. If fresh blueberries aren’t available, you can use frozen ones, but be sure to thaw and drain them completely to prevent excess moisture in the batter.
Additionally, if you prefer a sweeter pancake, you can increase the sugar slightly. Finally, resist the temptation to press down on the pancakes with your spatula while cooking, as this can deflate them and reduce their fluffiness.
Enjoy your Fluffy Blueberry Pancakes with family and friends for a perfect start to the day!
Classic Belgian Waffles With a Chocolate Twist
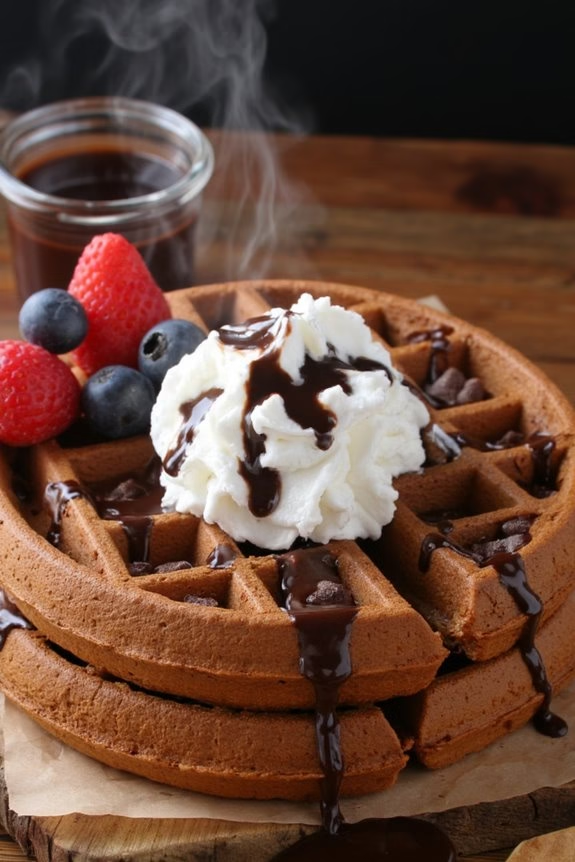
Start your morning with a delightful treat that combines the classic taste of Belgian waffles with the rich, indulgent flavor of chocolate. These waffles are crispy on the outside, fluffy on the inside, and have a subtle chocolatey undertone that complements the sweetness perfectly.
Whether you’re planning a special breakfast or just want to surprise your family with something different, these chocolate-infused Belgian waffles are bound to become a favorite.
The secret to achieving the ideal texture lies in the batter—it’s all about striking the right balance between wet and dry ingredients, while the addition of cocoa powder and chocolate chips elevates the waffles to a whole new level.
Serve them with whipped cream, fresh berries, or even a drizzle of chocolate syrup for an extra touch of decadence. These waffles aren’t only simple to make but also a delightful way to start any day.
Ingredients for 4-6 servings:
- 2 cups all-purpose flour
- 1/4 cup cocoa powder
- 2 tablespoons granulated sugar
- 1 tablespoon baking powder
- 1/2 teaspoon salt
- 2 large eggs
- 2 cups whole milk
- 1/2 cup unsalted butter, melted and slightly cooled
- 1 teaspoon vanilla extract
- 1/2 cup semi-sweet chocolate chips
- Cooking spray or additional melted butter for the waffle iron
Cooking Instructions:
1. Preheat the Waffle Iron: Before you begin preparing the batter, preheat your waffle iron according to the manufacturer’s instructions. This guarantees the waffles cook evenly and develop a crisp exterior.
2. Mix Dry Ingredients: In a large mixing bowl, combine the all-purpose flour, cocoa powder, granulated sugar, baking powder, and salt. Whisk these ingredients together until they’re well combined and free of lumps.
3. Prepare Wet Ingredients: In a separate bowl, whisk together the eggs, milk, melted butter, and vanilla extract until smooth and uniform. Confirm the melted butter isn’t too hot, as this could cook the eggs.
4. Combine Mixtures: Gradually pour the wet mixture into the dry ingredients, stirring gently with a spatula or wooden spoon. Be careful not to overmix; a few lumps in the batter are perfectly fine.
Fold in the chocolate chips until they’re evenly distributed.
5. Cook the Waffles: Lightly coat the waffle iron with cooking spray or brush with melted butter. Pour the batter onto the preheated waffle iron, using about 1/2 to 3/4 cup per waffle, depending on the size of your iron.
Close the lid and cook until the waffles are crisp and golden brown, approximately 3-5 minutes.
6. Serve: Carefully remove the waffles from the waffle iron and serve immediately with your choice of toppings such as whipped cream, fresh berries, or chocolate syrup.
Extra Tips:
For the best results, make sure all your ingredients are at room temperature before you start, particularly the eggs and milk. This helps the batter mix smoothly and guarantees even cooking.
If you prefer a richer chocolate flavor, you can increase the cocoa powder by a tablespoon or add a handful of dark chocolate chips.
To keep the waffles warm while cooking the rest of the batch, place them in a preheated oven at 200°F (93°C) on a wire rack to maintain their crispiness.
Enjoy these waffles fresh, as they tend to lose their crisp texture if stored for too long.
Decadent Stuffed French Toast
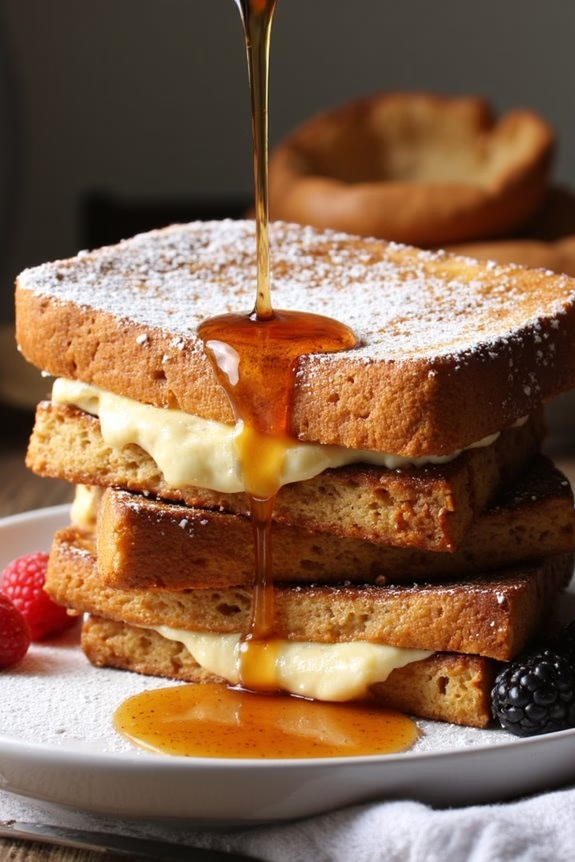
Indulge in the sumptuous delight of Decadent Stuffed French Toast, a breakfast treat that elevates your usual morning fare into a gourmet experience. This recipe combines thick slices of brioche bread, filled with a luscious cream cheese and fruit spread, then dipped in a rich egg custard and cooked to golden perfection.
Whether it’s a special occasion or simply a cozy weekend morning, this dish promises to bring warmth and joy to your breakfast table. The balance of creamy, fruity filling with the crispy, buttery exterior of the French toast provides a delightful contrast in textures and flavors.
Prepared for a serving size of 4-6 people, it’s perfect for a family breakfast or brunch gathering with friends. Serve it with a dusting of powdered sugar, a drizzle of maple syrup, and perhaps a few fresh berries for a complete and satisfying meal.
Ingredients:
- 8 slices of brioche bread
- 1 cup cream cheese, softened
- 1/2 cup strawberry preserves (or your preferred fruit preserves)
- 4 large eggs
- 1 cup whole milk
- 1 tablespoon vanilla extract
- 1 teaspoon ground cinnamon
- 1/4 teaspoon salt
- 4 tablespoons unsalted butter
- Powdered sugar, for serving
- Maple syrup, for serving
- Fresh berries, for garnish (optional)
Instructions:
- Prepare the Filling: In a medium bowl, combine the softened cream cheese and strawberry preserves. Mix until well blended and smooth. Spread a generous layer of the cream cheese mixture onto four slices of brioche bread.
- Assemble the Sandwiches: Top each spread slice with another slice of brioche bread to form sandwiches.
- Prepare the Custard: In a large mixing bowl, whisk together the eggs, whole milk, vanilla extract, ground cinnamon, and salt until fully combined.
- Dip the Sandwiches: Dip each sandwich into the egg mixture, making sure both sides are well coated. Allow the bread to soak up some of the custard for about 30 seconds on each side.
- Cook the French Toast: Heat 2 tablespoons of unsalted butter in a large skillet over medium heat. Once the butter is melted and sizzling, carefully place the sandwiches into the skillet. Cook for 3-4 minutes on each side, or until the French toast is golden brown and crispy.
- Repeat and Serve: If necessary, add more butter to the skillet and repeat the cooking process with the remaining sandwiches. Once cooked, transfer the French toast to a serving platter.
- Garnish and Enjoy: Dust the French toast with powdered sugar and serve with maple syrup. Garnish with fresh berries if desired. Enjoy immediately while warm.
Extra Tips:
For an extra flavor boost, consider adding a dash of nutmeg to the custard mixture or substituting almond extract for vanilla. If you prefer a different fruit flavor, feel free to swap the strawberry preserves for blueberry, raspberry, or apricot.
To prevent the sandwiches from becoming soggy, ascertain that the skillet is adequately heated before adding the French toast, and avoid overcrowding the pan. Leftovers can be stored in the refrigerator and reheated in a toaster oven for a quick and easy breakfast the next day.
Maple Donut Muffins
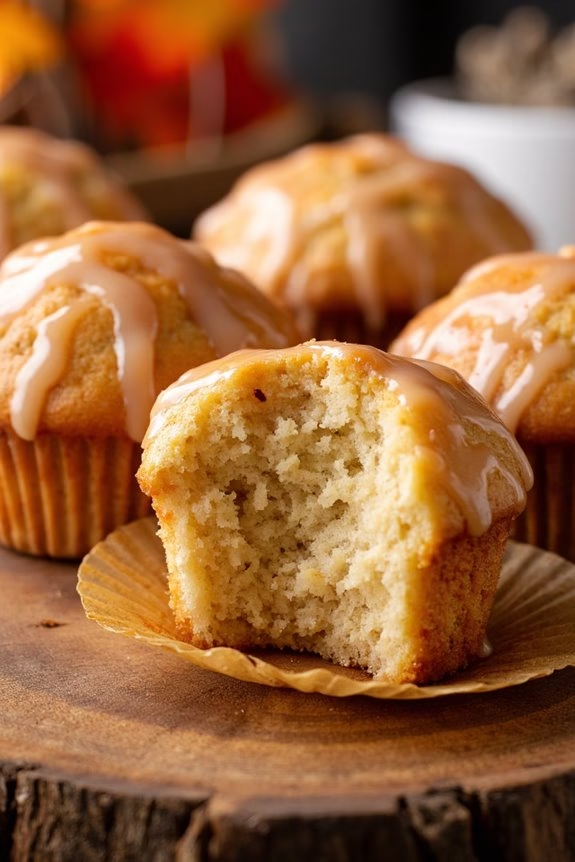
Maple Donut Muffins are the perfect breakfast treat, combining the delicious flavors of a classic donut with the comforting texture of a muffin. These delightful muffins are infused with the rich sweetness of maple syrup, offering a warm and inviting aroma as they bake. The combination of a tender crumb and a sweet maple glaze makes these muffins an irresistible choice for a cozy breakfast or brunch gathering.
Perfect for serving 4-6 people, these Maple Donut Muffins are both fun to make and enjoy. They bring a touch of indulgence to any morning, making them a delightful start to your day. Whether you’re hosting a weekend brunch or simply want to surprise your family with a special breakfast, these muffins are sure to please. With simple ingredients and easy-to-follow instructions, you’ll have these tasty treats ready in no time.
Ingredients:
- 2 cups all-purpose flour
- 1 tablespoon baking powder
- 1/2 teaspoon salt
- 1/2 cup granulated sugar
- 1/2 cup unsalted butter, melted
- 1/2 cup milk
- 1/2 cup maple syrup
- 2 large eggs
- 1 teaspoon vanilla extract
- 1 teaspoon ground cinnamon
For the Maple Glaze:
- 1 cup powdered sugar
- 3 tablespoons maple syrup
- 1-2 tablespoons milk (as needed for consistency)
Instructions:
- Preheat and Prepare: Preheat your oven to 375°F (190°C). Line a 12-cup muffin tin with paper liners or lightly grease with cooking spray to prevent sticking.
- Mix Dry Ingredients: In a large mixing bowl, combine the flour, baking powder, salt, granulated sugar, and ground cinnamon. Whisk them together until evenly mixed.
- Combine Wet Ingredients: In another bowl, whisk together the melted butter, milk, maple syrup, eggs, and vanilla extract until smooth.
- Combine Mixtures: Gradually add the wet ingredients to the dry ingredients, stirring gently until just combined. Be careful not to overmix, as this can make the muffins dense.
- Fill Muffin Tin: Divide the batter evenly among the prepared muffin cups, filling each about 2/3 full.
- Bake: Place the muffin tin in the preheated oven and bake for 18-20 minutes, or until a toothpick inserted into the center of a muffin comes out clean. Allow the muffins to cool in the pan for 5 minutes before transferring them to a wire rack.
- Prepare the Glaze: While the muffins are cooling, prepare the maple glaze by combining the powdered sugar and maple syrup in a small bowl. Add milk, one tablespoon at a time, until the glaze reaches your desired consistency.
- Glaze the Muffins: Once the muffins are cool, drizzle the maple glaze over the top of each muffin. Allow the glaze to set before serving.
Extra Tips:
When making Maple Donut Muffins, verify that all your ingredients are at room temperature to help them mix more easily and evenly. If you prefer a stronger maple flavor, consider using a darker grade of maple syrup.
For added texture, you can sprinkle some chopped nuts or cinnamon sugar on top of the glaze before it sets. Finally, store any leftover muffins in an airtight container to keep them fresh for up to three days. Enjoy your cozy breakfast treat!
Gooey Chocolate Chip Banana Bread

Gooey Chocolate Chip Banana Bread is the perfect way to start your day with a touch of sweetness and comfort. This delightful recipe combines the rich flavors of ripe bananas with the indulgent taste of chocolate chips, creating a moist and decadent bread that’s perfect for breakfast or a mid-day snack.
The gooey texture of the chocolate, combined with the soft crumb of the banana bread, makes for an irresistible treat that’s sure to please both kids and adults alike.
This recipe is designed to serve 4-6 people, making it ideal for a family breakfast or a small gathering. The preparation is straightforward, requiring simple ingredients that you likely already have in your pantry. With just a little mixing and baking, you’ll have a warm, inviting loaf that fills your kitchen with the comforting aroma of bananas and chocolate.
Ingredients:
- 3 ripe bananas, mashed
- 1/3 cup melted butter
- 3/4 cup sugar
- 1 egg, beaten
- 1 teaspoon vanilla extract
- 1 teaspoon baking soda
- Pinch of salt
- 1 1/2 cups all-purpose flour
- 1 cup chocolate chips
Cooking Instructions:
- Preheat and Prepare: Preheat your oven to 350°F (175°C). Grease a 9×5 inch loaf pan with butter or non-stick spray to guarantee the banana bread doesn’t stick.
- Mix Wet Ingredients: In a large mixing bowl, combine the mashed bananas with the melted butter. Stir in the sugar, beaten egg, and vanilla extract until everything is well incorporated.
- Combine Dry Ingredients: In a separate bowl, mix the baking soda and salt into the all-purpose flour. Gradually add this dry mixture to the wet ingredients, stirring just until combined. Be careful not to overmix as this can make the bread dense.
- Fold in Chocolate Chips: Gently fold the chocolate chips into the batter, making sure they’re evenly distributed throughout the mix.
- Pour and Bake: Pour the batter into the prepared loaf pan, smoothing the top with a spatula. Place the pan in the preheated oven and bake for 50-60 minutes, or until a toothpick inserted into the center of the loaf comes out clean.
- Cool and Serve: Allow the banana bread to cool in the pan for about 10 minutes, then transfer it to a wire rack to cool completely. Slice and serve warm or at room temperature.
Extra Tips:
For an extra gooey chocolate experience, consider adding a handful of chopped nuts, like walnuts or pecans, to the batter for added texture.
If you prefer a less sweet bread, you can reduce the amount of sugar to 1/2 cup without compromising the flavor. Remember, the ripeness of your bananas is key; the riper they are, the sweeter your bread will be.
Finally, if you’re short on time, muffins can be made from this batter by adjusting the baking time to approximately 20-25 minutes. Enjoy this delightful treat with a cup of coffee or tea for a truly cozy morning.
Homemade Raspberry Scones
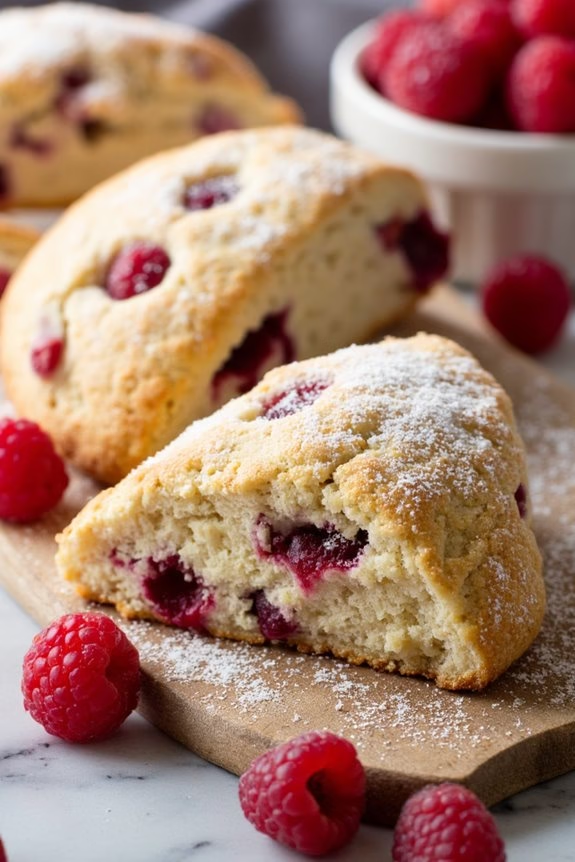
There’s nothing quite like the aroma of freshly baked scones to start your day. Homemade Raspberry Scones aren’t only delicious but also a delightful treat that’s surprisingly easy to make. With a tender crumb and a hint of sweetness from juicy raspberries, these scones provide the perfect combination of flavors for a cozy breakfast.
The beauty of this recipe is its simplicity, relying on fresh ingredients to create a baked good that feels indulgent yet homely. These scones are perfect for a weekend breakfast or brunch, offering a touch of elegance without requiring hours in the kitchen.
The key to achieving the perfect scone texture is in the balance of ingredients and careful mixing to avoid overworking the dough. Once baked, the scones are buttery and light, with bursts of tangy raspberry in every bite. Serve them warm, ideally with a dollop of clotted cream or a pat of butter, and a piping hot cup of tea or coffee to round out the experience.
Ingredients (Serves 4-6)
- 2 cups all-purpose flour
- 1/3 cup granulated sugar
- 1 tablespoon baking powder
- 1/2 teaspoon salt
- 1/2 cup unsalted butter, cold and cubed
- 1 cup fresh raspberries
- 1/2 cup heavy cream
- 1 teaspoon vanilla extract
- 1 large egg
- Zest of 1 lemon
Cooking Instructions
- Preheat the Oven: Start by preheating your oven to 400°F (200°C). Line a baking sheet with parchment paper to guarantee the scones don’t stick.
- Mix Dry Ingredients: In a large bowl, whisk together the flour, sugar, baking powder, and salt until well combined.
- Incorporate Butter: Add the cold, cubed butter to the dry ingredients. Using a pastry cutter or your fingers, work the butter into the flour mixture until it resembles coarse crumbs. This step is essential for creating flaky scones.
- Add Raspberries: Gently fold the raspberries into the flour and butter mixture, being careful not to crush them.
- Combine Wet Ingredients: In a separate bowl, whisk together the heavy cream, vanilla extract, egg, and lemon zest.
- Form the Dough: Pour the wet ingredients into the dry mixture. Use a spatula to gently mix until a dough begins to form. Be cautious not to overmix; the dough should be slightly crumbly.
- Shape the Scones: Transfer the dough onto a lightly floured surface. Gently knead it a few times to bring it together, then shape it into a disk about 1-inch thick. Cut the disk into 8 wedges.
- Bake the Scones: Place the wedges on the prepared baking sheet, leaving space between each scone. Bake in the preheated oven for 15-20 minutes, or until the scones are golden brown on the edges.
- Cool and Serve: Allow the scones to cool on a wire rack for a few minutes before serving. Enjoy them warm with your choice of toppings.
Extra Tips
When making Raspberry Scones, it’s important to use cold butter to achieve the desired flakiness. If fresh raspberries aren’t available, frozen raspberries can be used; just add them directly to the mixture without thawing to prevent them from becoming too mushy.
Additionally, if you find the dough too sticky to handle, lightly flour your hands and work surface to make shaping easier. For added sweetness, consider sprinkling a bit of sugar on top of the scones before baking.
Sweet Ricotta Crepes With Berries

Sweet Ricotta Crepes With Berries are a delightful way to start your morning with a touch of indulgence. These crepes are incredibly thin and light, offering a perfect canvas for the creamy, subtly sweet ricotta filling that pairs beautifully with a medley of fresh berries. The combination of flavors and textures makes for a breakfast that feels special yet is surprisingly simple to prepare.
Whether you’re hosting a brunch or just treating yourself to a leisurely morning, these crepes are sure to impress.
Crepes are a classic French dish, and their versatility allows them to be filled with an array of ingredients. In this recipe, we use a mixture of fresh ricotta cheese, a hint of lemon zest, and a sprinkle of powdered sugar for a filling that’s both creamy and invigorating. Topped with a vibrant assortment of berries and a drizzle of maple syrup or honey, these crepes offer a burst of flavor in every bite.
Preparing Sweet Ricotta Crepes With Berries isn’t just about the end result but also about the joy of making something from scratch that’s both delicious and beautiful.
Ingredients (Serves 4-6)
- For the Crepes:
- 1 cup all-purpose flour
- 2 tablespoons sugar
- 1/4 teaspoon salt
- 3 large eggs
- 1 1/2 cups milk
- 2 tablespoons unsalted butter, melted
- 1 teaspoon vanilla extract
- For the Ricotta Filling:
- 1 cup ricotta cheese
- 2 tablespoons powdered sugar
- 1 teaspoon lemon zest
- For the Topping:
- 1 cup mixed fresh berries (such as strawberries, blueberries, raspberries)
- Powdered sugar, for dusting
- Maple syrup or honey, for drizzling
Cooking Instructions
1. Prepare the Crepe Batter: In a large mixing bowl, whisk together the flour, sugar, and salt. In a separate bowl, beat the eggs, then gradually whisk in the milk, melted butter, and vanilla extract.
Slowly add the wet ingredients to the dry ingredients, whisking continuously until you have a smooth batter. Let the batter rest for at least 30 minutes to allow the flour to absorb the liquid, guaranteeing tender crepes.
2. Cook the Crepes: Heat a non-stick skillet or crepe pan over medium heat. Once hot, lightly grease the pan with butter.
Pour about 1/4 cup of batter into the pan, tilting it in a circular motion to evenly coat the bottom. Cook for about 1-2 minutes until the edges begin to lift and the bottom is lightly golden. Flip and cook for another 30 seconds.
Transfer the crepe to a plate and cover with a kitchen towel to keep warm. Repeat with the remaining batter.
3. Prepare the Ricotta Filling: In a small bowl, mix together the ricotta cheese, powdered sugar, and lemon zest until smooth and creamy.
4. Assemble the Crepes: Place a crepe on a flat surface. Spread approximately 2 tablespoons of the ricotta filling over one half of the crepe.
Fold the crepe into quarters or roll it up, depending on your preference.
5. Serve the Crepes: Arrange the filled crepes on a serving platter. Top with fresh berries, dust with powdered sugar, and drizzle with maple syrup or honey. Serve immediately while warm.
Extra Tips
To achieve perfect crepes, make sure your pan is well-heated before adding the batter; a too-cool pan will cause the crepes to stick, while a too-hot pan will brown them too quickly.
If you’re making crepes for a larger crowd, keep the cooked ones warm in a low oven until you’re ready to serve. Feel free to customize the ricotta filling by adding different flavors, such as a splash of vanilla extract or a sprinkle of cinnamon.
Also, consider using seasonal fruits for the topping to add variety and vitality to your dish.
Buttery Almond Croissants
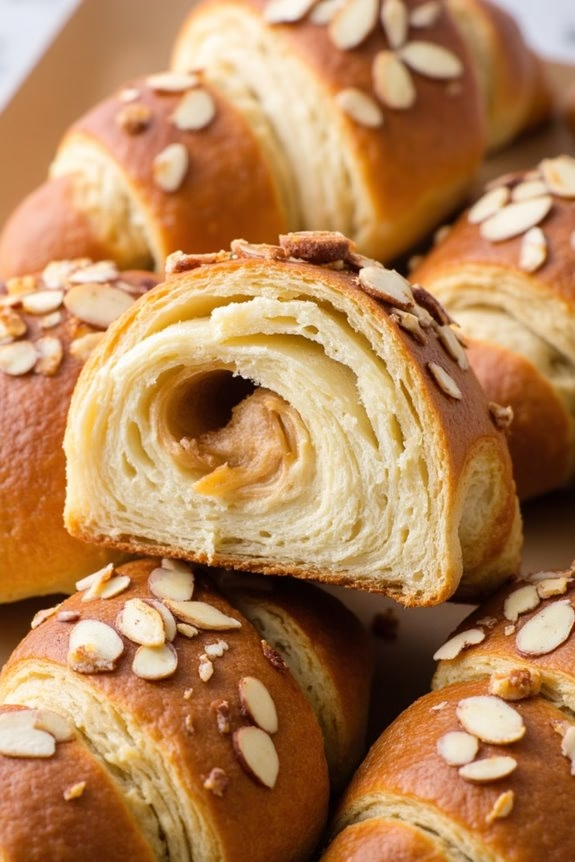
Buttery Almond Croissants are a delightful treat that can elevate any breakfast table. These flaky, buttery pastries are filled with a sweet almond paste and topped with crunchy almond slices, creating a perfect balance of textures and flavors. The process of making these croissants can be a rewarding experience as you watch simple ingredients transform into a luxurious breakfast delight that feels like a special indulgence. Perfect for a weekend brunch or a cozy morning at home, these croissants will surely impress your family and friends.
Creating Buttery Almond Croissants from scratch involves making a laminated dough, which is the key to achieving their characteristic flaky texture. The process involves carefully folding and rolling butter into the dough to create multiple layers. While it may seem intimidating at first, breaking down the steps and taking your time with the process is the secret to success.
The almond filling, made with almond flour, sugar, and butter, adds a rich, nutty flavor that complements the buttery pastry perfectly. With patience and attention to detail, you’ll create croissants that rival those from a French bakery.
Ingredients for 4-6 servings:
- 2 cups all-purpose flour
- 1/4 cup granulated sugar
- 1 tsp salt
- 1 tbsp active dry yeast
- 3/4 cup warm milk
- 1 cup unsalted butter, cold
- 1 cup almond flour
- 1/2 cup powdered sugar
- 1 large egg
- 1 tsp vanilla extract
- 1/4 cup sliced almonds
- 1 egg, beaten (for egg wash)
Instructions:
- Prepare the Dough: In a large bowl, mix the flour, sugar, salt, and yeast. Gradually add the warm milk and stir until a dough forms. Knead for about 5 minutes until smooth. Cover and let it rise in a warm place for about an hour or until doubled in size.
- Make the Butter Block: Place the cold butter between two sheets of parchment paper. Using a rolling pin, pound the butter into a rectangle about 1/2 inch thick. Refrigerate while the dough rises.
- Laminate the Dough: Roll the dough into a rectangle slightly larger than the butter block. Place the butter block in the center and fold the dough over it, sealing the edges. Roll the dough out to about 1/4 inch thickness, then fold it into thirds like a letter. Chill for 30 minutes.
- Repeat the Lamination: Roll out, fold, and chill the dough two more times, for a total of three laminations. This creates the flaky layers.
- Prepare the Almond Filling: Mix the almond flour, powdered sugar, large egg, and vanilla extract until smooth. Set aside.
- Shape the Croissants: Roll the dough into a large rectangle and cut into triangles. Place a small spoonful of almond filling at the base of each triangle and roll up tightly. Shape into crescent shapes and place on a baking sheet.
- Proof the Croissants: Cover and let the croissants rise in a warm place for about 45 minutes until puffy.
- Add Toppings: Preheat the oven to 375°F (190°C). Brush the croissants with beaten egg and sprinkle sliced almonds over the top.
- Bake: Bake in the preheated oven for 15-20 minutes or until golden brown. Allow to cool slightly before serving.
Extra Tips:
Ensure your butter is cold throughout the lamination process to prevent it from melting into the dough, which is essential for achieving the desired flakiness. If the dough becomes too warm at any point, chill it for a while before proceeding.
For an extra touch, you can dust the finished croissants with powdered sugar before serving. Finally, practice makes perfect; don’t be discouraged if your first batch isn’t bakery-perfect. With each attempt, your technique and confidence will improve.
Warm Apple Crumble Oatmeal
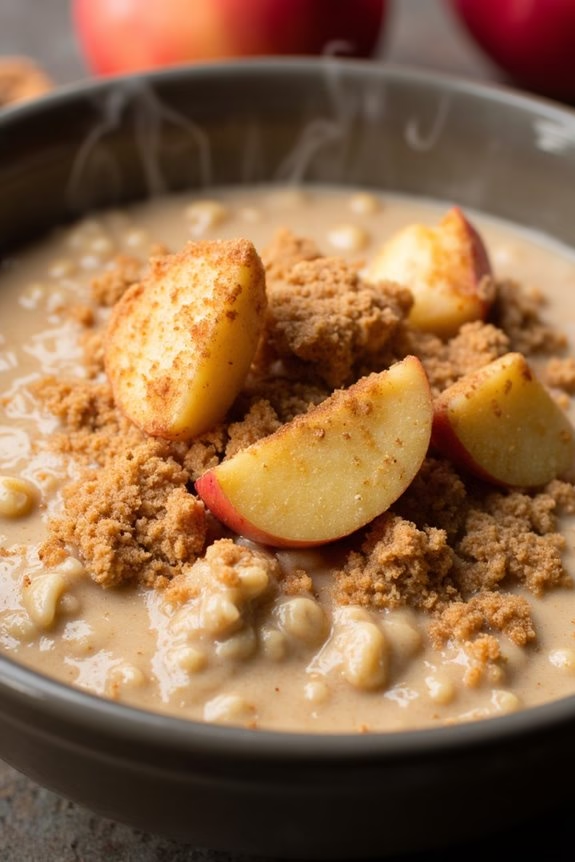
Warm Apple Crumble Oatmeal is the perfect breakfast choice for those chilly mornings when you crave something hearty and comforting. Imagine the aroma of cinnamon and baked apples filling your kitchen as you prepare this cozy dish. This recipe combines the creamy texture of oatmeal with the sweet, spiced flavors of a classic apple crumble, making it a satisfying start to your day.
Whether you’re serving it to your family or enjoying it solo, this oatmeal is sure to become a breakfast favorite. The dish isn’t only delicious but also packed with nutrients. Oats provide a good source of fiber and energy, while apples are rich in vitamins and antioxidants.
The crumble topping adds a delightful crunch and a bit of indulgence with its buttery and sugary notes. This recipe serves 4-6 people, making it ideal for a family breakfast or brunch gathering. So, gather your ingredients and get ready to create this heartwarming morning treat.
Ingredients:
- 2 cups rolled oats
- 4 cups milk or water
- 2 large apples, peeled, cored, and chopped
- 1/3 cup brown sugar
- 1 tablespoon cinnamon
- 1/2 teaspoon nutmeg
- 1/4 teaspoon salt
- 1 tablespoon lemon juice
- 1 teaspoon vanilla extract
- 1/4 cup butter, softened
- 1/3 cup all-purpose flour
- 1/3 cup rolled oats (for crumble)
- 1/4 cup brown sugar (for crumble)
- 1/4 teaspoon cinnamon (for crumble)
Instructions:
- Prepare the Apples: In a medium saucepan, combine the chopped apples, 1/3 cup brown sugar, 1 tablespoon cinnamon, nutmeg, lemon juice, and a pinch of salt. Cook over medium heat for about 5-7 minutes until the apples are tender and caramelized. Stir occasionally to prevent sticking.
- Cook the Oatmeal: In a large pot, bring 4 cups of milk or water to a gentle boil. Add the 2 cups of rolled oats and a pinch of salt. Reduce the heat to low and simmer, stirring occasionally, for about 10-15 minutes until the oats are cooked and creamy. Stir in the vanilla extract once the oatmeal reaches the desired consistency.
- Make the Crumble Topping: In a small bowl, combine the softened butter, flour, 1/3 cup rolled oats, 1/4 cup brown sugar, and 1/4 teaspoon cinnamon. Mix with your fingers or a fork until the mixture resembles coarse crumbs.
- Assemble the Oatmeal: Divide the cooked oatmeal among serving bowls. Top each bowl with a generous spoonful of the cooked apple mixture.
- Add the Crumble: Sprinkle the crumble mixture over the top of the apple-topped oatmeal bowls. You can either serve it as is or place the bowls under a broiler for 1-2 minutes to crisp up the crumble topping slightly.
- Serve and Enjoy: Serve the Warm Apple Crumble Oatmeal immediately, while it’s warm and comforting. Optionally, add a drizzle of maple syrup or a dollop of yogurt for extra richness.
Extra Tips:
For an added flavor twist, consider using a mix of apple varieties to create a balance of sweet and tart flavors. If you prefer a creamier oatmeal, use whole milk instead of water.
You can also incorporate nuts such as walnuts or pecans into the crumble topping for a nuttier taste and added texture. Adjust the sweetness to your preference by varying the amount of brown sugar.
Finally, if you have leftovers, store them in an airtight container in the refrigerator and reheat gently with a splash of milk or water to restore the creamy consistency.
Yogurt Parfait With Honey Drizzle
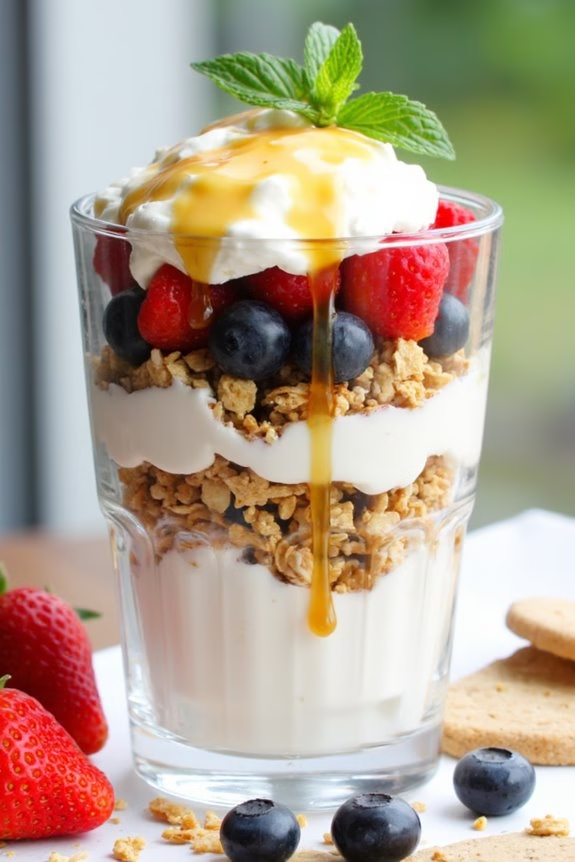
Start your morning with a delightful and nutritious Yogurt Parfait with Honey Drizzle. This dish combines the creamy richness of yogurt with the natural sweetness of honey, layered with fresh fruits and crunchy granola. The parfait isn’t only visually appealing but also packed with essential nutrients, making it a perfect breakfast choice for families looking to enjoy a healthy start to their day.
By layering ingredients in clear glasses, you create a stunning presentation that’s as pleasing to the eye as it’s to the palate. Ideal for serving 4-6 people, this yogurt parfait is a versatile dish that can be customized to suit individual tastes. You can mix and match fruits based on what’s in season or what you have on hand, making it a great option for any time of the year.
Its simplicity in preparation allows for a quick assembly, yet it remains impressive for brunch gatherings or a cozy family breakfast. The honey drizzle adds a touch of sweetness that perfectly complements the tartness of the yogurt and the fresh flavor of the fruits.
Ingredients (Serves 4-6):
- 4 cups plain Greek yogurt
- 2 cups granola
- 2 cups mixed fresh berries (such as strawberries, blueberries, and raspberries)
- 1/2 cup honey
- 1 teaspoon vanilla extract (optional)
- Fresh mint leaves for garnish (optional)
Cooking Instructions:
1. Prepare the Yogurt Base:
In a mixing bowl, combine the Greek yogurt with vanilla extract if using. Stir well to make sure the vanilla is evenly distributed, enhancing the flavor of the yogurt.
2. Layer the Parfait:
Take 4-6 clear glasses or jars for serving. Start by adding a generous spoonful of yogurt at the bottom of each glass. Follow this by a layer of granola, making sure it spreads evenly.
3. Add the Fruits:
On top of the granola, add a layer of mixed fresh berries. You can mix the berries beforehand or layer them separately for a more colorful presentation.
4. Repeat the Layers:
Continue layering with another spoonful of yogurt, followed by more granola and another layer of berries. Repeat this process until the glasses are filled, ending with a final layer of yogurt on top.
5. Drizzle with Honey:
Warm the honey slightly in a microwave or on the stovetop to make it easier to drizzle. Pour a small amount of honey over the top layer of yogurt in each glass, allowing it to flow down the sides for a beautiful effect.
6. Garnish and Serve:
If desired, garnish with fresh mint leaves for a pop of color and a touch of freshness. Serve immediately to enjoy the crunchy texture of the granola before it softens.
Extra Tips:
When assembling your yogurt parfaits, consider chilling the glasses beforehand to keep the parfait cold and invigorating. For added texture, you can sprinkle some nuts or seeds between the layers.
If you prefer a sweeter parfait, consider using flavored yogurt or adding a bit of maple syrup along with the honey. Additionally, for a more tropical twist, pineapple or mango can be added to the fruit mix.
Remember to adjust the layers based on the size of your serving glasses to make sure each bite has a balanced taste of all the ingredients.