
Planning a Christmas potluck is such a delightful way to celebrate the season with loved ones. The table comes alive with dishes like succulent Herb-Roasted Turkey and a glistening Honey-Glazed Baked Ham. Each dish brings its own charm, from the elegance of Classic Beef Wellington to the comforting Creamy Chicken Alfredo Bake. Are you curious about other crowd favorites? Let’s explore these delicious recipes together.
Succulent Herb-Roasted Turkey
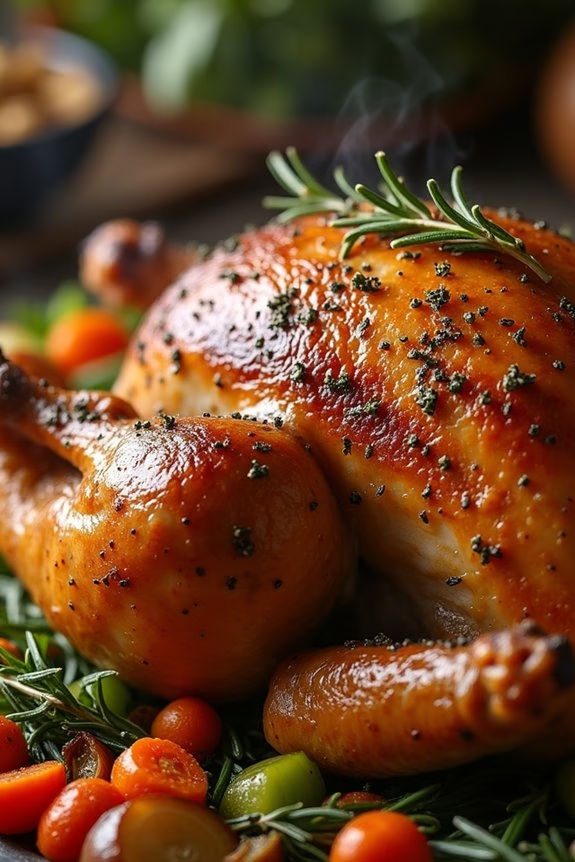
Preparing a succulent herb-roasted turkey is a perfect way to bring family and friends together during the festive Christmas season. This recipe combines a medley of fresh herbs and aromatic spices to create a juicy, flavorful bird that will be the centerpiece of your potluck gathering. By using a blend of rosemary, thyme, sage, and garlic, this turkey not only smells divine but also boasts a depth of flavor that complements traditional holiday sides beautifully.
Whether you’re hosting a cozy get-together or a grand feast, this herb-roasted turkey is sure to impress your guests with its tender meat and crispy, golden skin. Selecting a turkey between 10-12 pounds is ideal for serving 4-6 people, guaranteeing everyone enjoys a generous helping. The preparation involves marinating the turkey in a herb-infused butter mixture, allowing the flavors to penetrate deep into the meat.
Roasting the turkey at a consistent temperature will enhance its natural juices, assuring each slice is succulent and bursting with flavor. Follow the detailed steps below to create a show-stopping centerpiece for your Christmas potluck.
Ingredients (Serves 4-6):
- 1 whole turkey, 10-12 pounds
- 1 cup unsalted butter, softened
- 2 tablespoons olive oil
- 1 tablespoon salt
- 1 tablespoon black pepper
- 1 bunch fresh rosemary
- 1 bunch fresh thyme
- 1 bunch fresh sage
- 1 lemon, halved
- 1 garlic bulb, halved
- 2 onions, quartered
- 4 carrots, peeled and halved
- 4 celery stalks, halved
- 2 cups chicken broth
Cooking Instructions:
- Prepare the Herb Butter: In a medium bowl, combine the softened butter, olive oil, salt, pepper, and finely chopped rosemary, thyme, and sage. Mix until well incorporated to form a smooth herb butter.
- Prepare the Turkey: Preheat your oven to 325°F (165°C). Remove the turkey giblets and pat the turkey dry with paper towels. Gently loosen the skin over the breast meat with your fingers, being careful not to tear it.
- Season the Turkey: Spread the herb butter generously under the skin and over the entire turkey, guaranteeing even coverage. Place the lemon halves, garlic bulb, and a few sprigs of each herb inside the cavity for added flavor.
- Arrange Vegetables: In a large roasting pan, place the quartered onions, carrots, and celery to create a bed for the turkey. These won’t only infuse flavor but also keep the turkey elevated for even cooking.
- Roast the Turkey: Place the turkey breast-side up on the vegetable bed in the roasting pan. Pour the chicken broth into the pan to keep the turkey moist during cooking. Cover loosely with aluminum foil.
- Cook the Turkey: Roast in the preheated oven, basting occasionally with the pan juices. Remove the foil during the last hour of cooking to allow the skin to crisp up. The turkey is done when a meat thermometer reads 165°F (74°C) in the thickest part of the thigh.
- Rest and Carve: Once cooked, remove the turkey from the oven and let it rest for at least 20 minutes before carving. This allows the juices to redistribute, guaranteeing each slice is juicy and flavorful.
Extra Tips:
For the best results, prepare the herb butter a day in advance and refrigerate, allowing the flavors to meld. If you’re short on time, you can also prepare the turkey the night before and let it marinate in the refrigerator.
Always guarantee your turkey is completely thawed before cooking, as this will promote even roasting. Additionally, consider using a roasting rack if available, as it helps air circulate around the turkey, leading to even more crispy skin.
Finally, don’t discard the pan drippings—they make an excellent base for a rich, flavorful gravy.
Honey-Glazed Baked Ham
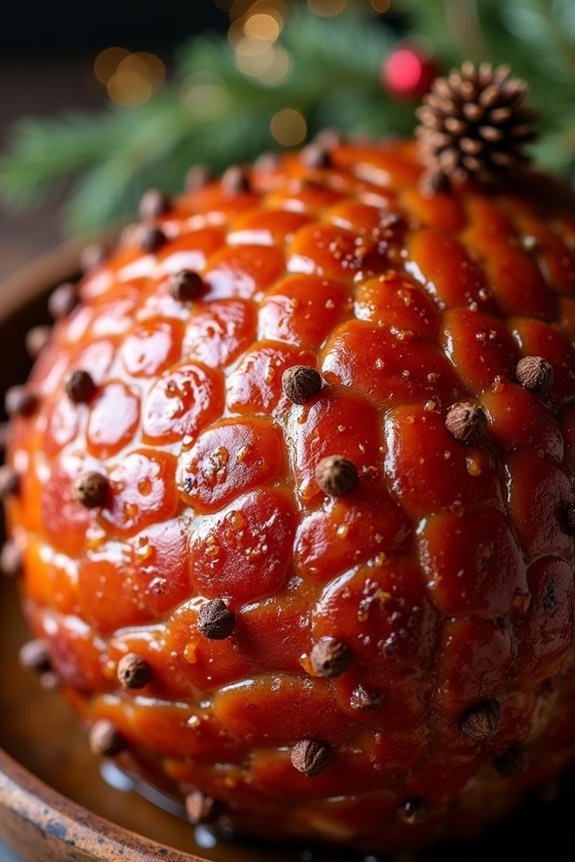
A honey-glazed baked ham is a classic and delightful centerpiece for any Christmas potluck. Its sweet and savory flavor profile, combined with its juicy and tender texture, makes it a crowd-pleaser. This dish isn’t only delicious but also stunningly beautiful, with its golden-brown glaze that shimmers and entices.
Whether you’re hosting a family gathering or contributing to a festive potluck, this honey-glazed baked ham is certain to impress guests and leave them asking for seconds.
Preparing this dish is surprisingly simple, yet it delivers a taste that feels luxurious and celebratory. The key to a perfect honey-glazed ham is a balance of flavors in the glaze, which enhances the natural sweetness of the ham. By baking it slowly, the ham absorbs these flavors, resulting in a succulent and flavorful dish.
This recipe serves 4-6 people, making it ideal for an intimate gathering or as part of a larger spread.
Ingredients:
- 1 (4-5 pound) fully cooked bone-in ham
- 1 cup honey
- 1/2 cup brown sugar
- 1/4 cup Dijon mustard
- 1/4 cup apple cider vinegar
- 1 teaspoon ground cloves
- 1/2 teaspoon ground cinnamon
- 1/2 teaspoon black pepper
- 1/4 teaspoon ground ginger
- Whole cloves (optional, for decoration)
Cooking Instructions:
- Preheat the Oven: Preheat your oven to 325°F (163°C). This low temperature guarantees that the ham cooks evenly and stays moist.
- Prepare the Ham: Place the ham in a roasting pan or baking dish. If desired, score the surface of the ham in a diamond pattern about 1/4 inch deep, and insert whole cloves into the intersections for added flavor and decoration.
- Make the Glaze: In a medium saucepan, combine honey, brown sugar, Dijon mustard, apple cider vinegar, ground cloves, cinnamon, black pepper, and ginger. Place the saucepan over medium heat and stir until the sugar has dissolved and the mixture is smooth and slightly thickened.
- Apply the Glaze: Generously brush the glaze over the entire surface of the ham, making sure it’s well coated. Reserve some glaze for basting during the baking process.
- Bake the Ham: Cover the ham loosely with aluminum foil to prevent the glaze from burning. Place the ham in the preheated oven and bake for 1.5 to 2 hours, or until the internal temperature reaches 140°F (60°C). Baste the ham with the reserved glaze every 30 minutes.
- Caramelize the Glaze: In the last 15-20 minutes of cooking, remove the foil to allow the glaze to caramelize and form a beautiful crust. Keep a close eye on it to prevent burning.
- Rest and Serve: Once cooked, remove the ham from the oven and let it rest for 10-15 minutes before carving. This allows the juices to redistribute, making sure each slice is juicy and flavorful.
Extra Tips:
For added flavor, consider marinating the ham overnight in the glaze before baking. This allows the flavors to penetrate deeper into the meat.
If you prefer a thicker glaze, simmer it for a longer period until it reaches your desired consistency. Additionally, save any leftover ham for sandwiches or to add to soups and salads, making it a versatile dish that keeps giving.
Classic Beef Wellington
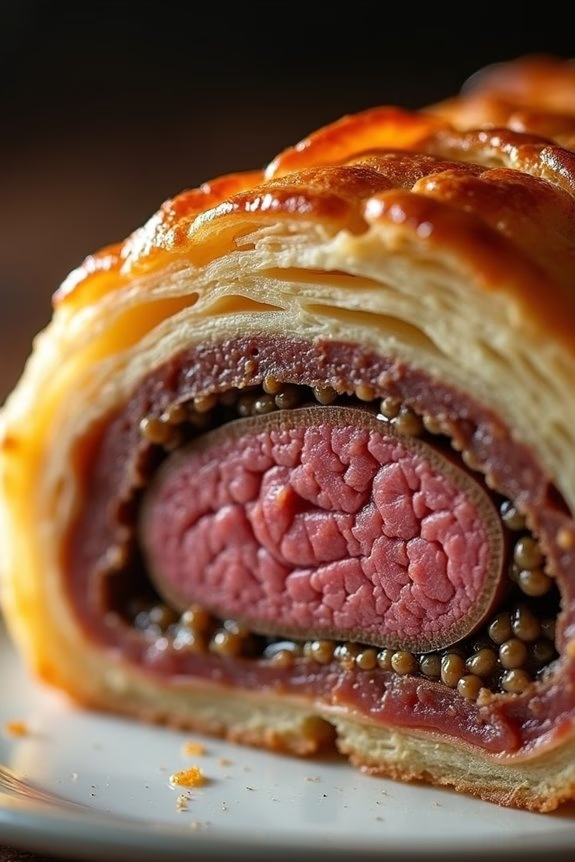
Beef Wellington is an elegant and classic dish that combines the richness of beef tenderloin with the savory flavors of mushroom duxelles, all wrapped in a delicate pastry crust. This dish is perfect for a Christmas potluck, offering a show-stopping centerpiece that’s sure to impress your family and friends. The key to a successful Beef Wellington lies in the careful preparation of each component, guaranteeing that they complement each other harmoniously when brought together.
A perfectly cooked Beef Wellington boasts tender, juicy beef encased in a crisp, golden-brown pastry. The mushroom duxelles, a finely chopped mixture of mushrooms, onions, shallots, and herbs, adds depth and earthiness to the dish. The addition of prosciutto or Parma ham not only enhances the flavor but also helps keep the pastry from becoming soggy. By following the steps outlined below, you can create a Beef Wellington that’s worthy of any holiday celebration.
Ingredients (Serves 4-6):
- 2 pounds beef tenderloin
- Salt and freshly ground black pepper
- 2 tablespoons olive oil
- 2 tablespoons Dijon mustard
- 1 pound mushrooms, finely chopped
- 2 tablespoons butter
- 2 shallots, finely chopped
- 2 cloves garlic, minced
- 1 tablespoon fresh thyme leaves
- 12 slices prosciutto
- 1 package puff pastry (thawed if frozen)
- 1 egg, beaten
- Flour, for dusting
Cooking Instructions:
- Prepare the Beef: Season the beef tenderloin generously with salt and pepper. Heat olive oil in a large skillet over medium-high heat. Sear the beef on all sides until browned, about 2-3 minutes per side. Remove from heat and allow to cool slightly. Brush the beef with Dijon mustard.
- Make the Mushroom Duxelles: In the same skillet, melt butter over medium heat. Add the finely chopped mushrooms, shallots, and garlic. Cook until the mixture is dry and the mushrooms are browned, about 10-15 minutes. Stir in the fresh thyme and season with salt and pepper. Set aside to cool.
- Wrap the Beef: Lay out a large piece of plastic wrap on a flat surface. Arrange the prosciutto slices on the plastic wrap, slightly overlapping. Spread the mushroom duxelles evenly over the prosciutto. Place the seared beef tenderloin on top and roll it tightly using the plastic wrap, guaranteeing the prosciutto and mushrooms envelop the beef completely. Twist the ends of the plastic wrap to seal it tightly and refrigerate for 20 minutes.
- Prepare the Pastry: Preheat your oven to 400°F (200°C). Roll out the puff pastry on a lightly floured surface to a size that will wrap around the beef. Unwrap the beef from the plastic and place it on the pastry. Brush the edges of the pastry with the beaten egg and fold it over the beef, sealing the edges tightly. Trim off any excess pastry.
- Bake the Wellington: Place the wrapped beef seam-side down on a baking sheet lined with parchment paper. Brush the entire pastry with the remaining beaten egg. Use a sharp knife to score the top lightly, creating a decorative pattern if desired. Bake in the preheated oven for 25-30 minutes, or until the pastry is golden brown and crisp.
- Rest and Serve: Allow the Beef Wellington to rest for 10 minutes before slicing. This helps the juices redistribute for a more flavorful dish. Slice and serve warm.
Extra Tips:
For best results, verify the beef is chilled after searing and before wrapping in pastry to prevent overcooking. Chilling the beef also helps the pastry stay crisp and not soggy.
When working with puff pastry, keep it cool and work quickly to prevent it from becoming too soft. If you have time, prepare the mushroom duxelles a day ahead to enhance the flavors further.
Finally, use a meat thermometer to check that the beef reaches an internal temperature of 125°F (51°C) for medium-rare, adjusting the cooking time as necessary based on your preference.
Savory Stuffed Pork Loin
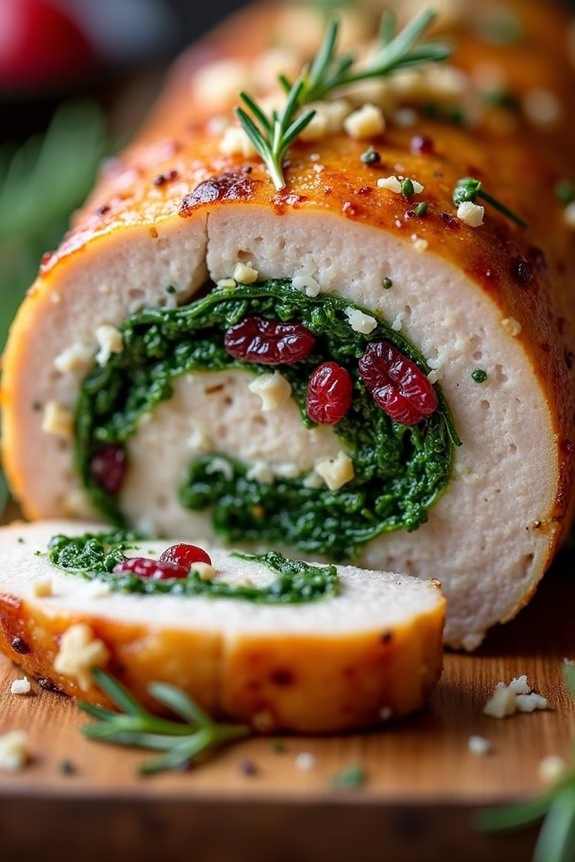
Savory Stuffed Pork Loin is a show-stopping centerpiece perfect for a Christmas potluck. This dish combines tender pork loin with a delectable stuffing of herbs, cheese, and vegetables, creating a harmonious blend of flavors that will impress your guests. The filling guarantees that the pork remains juicy and flavorful, while the exterior roasts to a perfect golden-brown. This recipe isn’t only delicious but also relatively easy to prepare, making it a great option for both novice and experienced cooks looking to contribute something memorable to the holiday table.
The key to a successful stuffed pork loin lies in the balance of flavors and textures within the stuffing. With a combination of aromatic herbs, savory cheese, and sweet dried cranberries, each bite offers a delightful mix that complements the mild flavor of the pork. This recipe is designed to serve 4-6 people, making it an ideal dish to share in a festive gathering. The stuffing can be adjusted to personal preference, allowing you to customize the dish to suit your taste or to incorporate seasonal ingredients.
Ingredients:
- 1 (2-3 pound) boneless pork loin
- 1 cup fresh spinach, chopped
- 1/2 cup breadcrumbs
- 1/2 cup grated Parmesan cheese
- 1/4 cup dried cranberries
- 1/4 cup chopped walnuts
- 2 garlic cloves, minced
- 1 tablespoon fresh rosemary, chopped
- 1 tablespoon fresh thyme, chopped
- Salt and pepper to taste
- 2 tablespoons olive oil
- 1/2 cup chicken broth
Cooking Instructions:
- Preheat the Oven: Preheat your oven to 375°F (190°C) to guarantee it’s ready for roasting by the time your pork loin is prepped.
- Prepare the Pork Loin: Using a sharp knife, carefully butterfly the pork loin. This means you should cut it lengthwise, opening it up like a book, without cutting all the way through. This creates a flat, even surface for the stuffing.
- Make the Stuffing: In a mixing bowl, combine the chopped spinach, breadcrumbs, Parmesan cheese, dried cranberries, walnuts, garlic, rosemary, and thyme. Season with salt and pepper to taste, then mix well to combine all ingredients.
- Stuff the Pork Loin: Spread the stuffing mixture evenly over the opened pork loin, leaving a small border around the edges to prevent the stuffing from spilling out when rolled.
- Roll and Secure: Gently roll the pork loin back into its original shape, encasing the stuffing inside. Secure the roll with kitchen twine at 1-inch intervals to guarantee it holds its shape while cooking.
- Sear the Pork Loin: Heat olive oil in a large oven-safe skillet over medium-high heat. Sear the pork loin on all sides until golden brown, about 2-3 minutes per side. This helps to lock in the juices and adds a nice crust.
- Roast the Pork Loin: Pour the chicken broth into the skillet around the pork loin. Transfer the skillet to the preheated oven and roast for 45-55 minutes, or until the internal temperature of the pork reaches 145°F (63°C).
- Rest and Serve: Remove the pork loin from the oven and let it rest for 10 minutes. This allows the juices to redistribute throughout the meat. Slice and serve warm.
Extra Tips:
For an added layer of flavor, consider marinating the pork loin overnight in a mixture of olive oil, lemon juice, garlic, and herbs before stuffing it.
When selecting a pork loin, opt for one with a bit of marbling, as this will enhance the flavor and tenderness of the final dish.
If you don’t have kitchen twine, toothpicks can be used to secure the roll temporarily.
Additionally, feel free to experiment with different types of cheese or nuts in the stuffing to suit your taste preferences.
Creamy Chicken Alfredo Bake

Creamy Chicken Alfredo Bake is a delightful twist on a classic Italian favorite, perfect for a Christmas potluck or any gathering. This dish combines tender pieces of chicken with a rich, creamy Alfredo sauce, all layered over perfectly cooked pasta and topped with a generous layer of melted cheese. It’s a comforting meal that will warm your guests’ hearts and satisfy their appetites.
The creamy sauce and the gooey cheese create an irresistible combination that makes this dish a standout on any holiday table. The beauty of this Creamy Chicken Alfredo Bake lies in its simplicity and the capability to prepare it ahead of time. This makes it an excellent choice for potlucks, where you can simply pop it in the oven to reheat before serving.
The dish is versatile, allowing for customization with added vegetables or different types of cheese, catering to personal preferences and dietary needs. With its creamy texture and savory flavors, this dish is sure to become a staple in your holiday recipe collection.
Ingredients (Serves 4-6):
- 2 cups cooked chicken breast, shredded or diced
- 12 ounces penne or fettuccine pasta
- 2 cups heavy cream
- 1 cup grated Parmesan cheese
- 2 cups shredded mozzarella cheese
- 4 tablespoons unsalted butter
- 3 cloves garlic, minced
- Salt and pepper to taste
- 1 tablespoon olive oil
- 1 teaspoon Italian seasoning
- Fresh parsley, chopped for garnish (optional)
Cooking Instructions:
- Preheat and Prepare: Preheat your oven to 350°F (175°C). Grease a 9×13 inch baking dish with olive oil to prevent sticking.
- Cook the Pasta: In a large pot of salted boiling water, cook the pasta until al dente, according to package instructions. Drain and set aside.
- Make the Alfredo Sauce: In a large skillet over medium heat, melt the butter. Add minced garlic and sauté for about 1 minute until fragrant. Pour in the heavy cream, stirring continuously. Allow the mixture to simmer for 3-4 minutes.
- Add Cheese and Seasoning: Gradually whisk in the Parmesan cheese until the sauce is smooth and creamy. Season with salt, pepper, and Italian seasoning. Stir well to combine.
- Combine Ingredients: Add the cooked pasta and chicken to the sauce, stirring to guarantee everything is well coated. If the sauce is too thick, add a little reserved pasta water to reach the desired consistency.
- Assemble the Bake: Transfer the pasta and sauce mixture into the prepared baking dish. Evenly sprinkle the shredded mozzarella cheese over the top.
- Bake: Place the dish in the preheated oven and bake for 20-25 minutes, or until the cheese is melted and bubbly with a golden crust.
- Garnish and Serve: Remove from oven and let it cool for a few minutes. Garnish with freshly chopped parsley if desired before serving.
Extra Tips: For an extra kick of flavor, consider adding a pinch of red pepper flakes or a sprinkle of nutmeg to the Alfredo sauce. If you prefer a healthier version, substitute half of the heavy cream with milk or a non-dairy alternative.
Additionally, you can mix in vegetables such as spinach, broccoli, or mushrooms to add color and nutrients. Remember, the key to this dish is the creamy sauce, so make sure your cheese is fully melted and the sauce is smooth before combining with the pasta. Enjoy your delicious Creamy Chicken Alfredo Bake as a comforting centerpiece of your holiday meal!
Flavorful Vegetable Lasagna
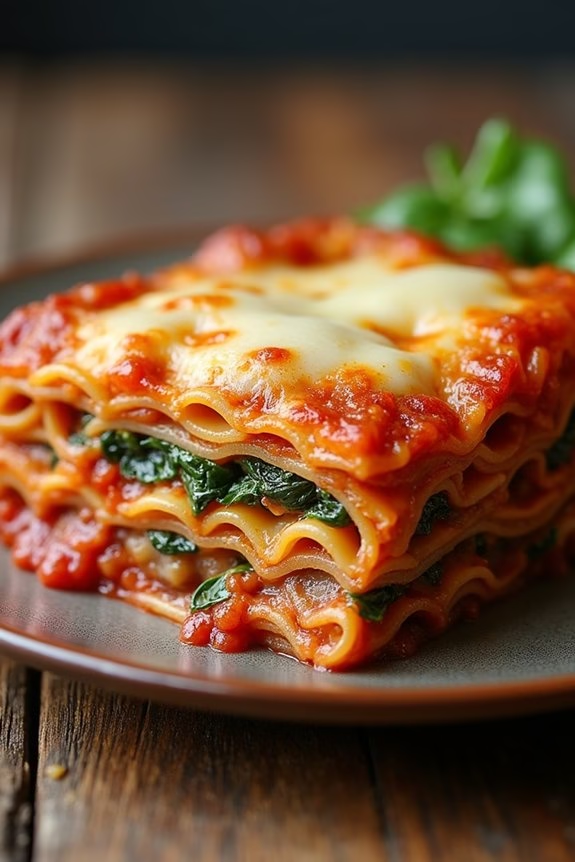
This Flavorful Vegetable Lasagna is a delicious and comforting dish perfect for any Christmas potluck. It’s a hearty and satisfying meal that combines layers of tender pasta, rich tomato sauce, creamy cheese, and an abundance of fresh vegetables.
This dish isn’t only delicious but also a great way to incorporate a variety of vegetables into your holiday meal. The combination of flavors and textures will leave your guests asking for seconds.
Ideal for a serving size of 4-6 people, this recipe is both vegetarian-friendly and a hit with meat lovers alike. The preparation involves making a homemade tomato sauce, sautéing fresh vegetables, and assembling the lasagna with layers of ricotta cheese and mozzarella.
The end result is a beautifully baked lasagna that’s golden on top and bubbling with cheesy, flavorful goodness.
Ingredients:
- 9 lasagna noodles
- 2 tablespoons olive oil
- 1 onion, diced
- 2 cloves garlic, minced
- 1 red bell pepper, chopped
- 1 zucchini, sliced
- 1 cup mushrooms, sliced
- 2 cups spinach leaves
- 1 teaspoon dried oregano
- 1 teaspoon dried basil
- Salt and pepper, to taste
- 3 cups marinara sauce
- 2 cups ricotta cheese
- 1 egg
- 3 cups shredded mozzarella cheese
- 1 cup grated Parmesan cheese
Cooking Instructions:
1. Prepare the Lasagna Noodles: Cook the lasagna noodles according to package instructions. Drain and set aside.
2. Sauté the Vegetables: In a large skillet, heat olive oil over medium heat. Add the diced onion and minced garlic, sautéing until translucent. Add the chopped red bell pepper, sliced zucchini, and mushrooms. Cook for about 5 minutes until the vegetables are tender. Stir in the spinach leaves until wilted. Season with dried oregano, basil, salt, and pepper. Remove from heat.
3. Mix the Ricotta Cheese: In a medium bowl, combine the ricotta cheese with one egg. Mix well and set aside.
4. Assemble the Lasagna: Preheat your oven to 375°F (190°C). Spread a thin layer of marinara sauce on the bottom of a 9×13-inch baking dish. Place a layer of lasagna noodles over the sauce. Spread half of the ricotta mixture over the noodles, followed by half of the sautéed vegetables. Add a layer of marinara sauce and sprinkle with mozzarella cheese.
Repeat the layers, ending with a final layer of noodles, marinara sauce, and remaining mozzarella cheese. Sprinkle the top with Parmesan cheese.
5. Bake the Lasagna: Cover the baking dish with aluminum foil and bake in the preheated oven for 25 minutes. Remove the foil and bake for an additional 15 minutes, or until the cheese is golden and bubbly. Let the lasagna cool for 10 minutes before serving.
Extra Tips:
For the best results, allow the lasagna to rest for at least 10 minutes before cutting and serving. This resting time helps the layers set, making it easier to serve clean slices.
Feel free to customize the vegetables based on your preference or what’s in season. You can also add a pinch of red pepper flakes for a little heat or use a combination of cheeses for added depth of flavor.
For a gluten-free option, use gluten-free lasagna noodles. Enjoy this Flavorful Vegetable Lasagna as a delicious centerpiece at your Christmas potluck!
Hearty Lamb Stew

Indulge in the warmth and comfort of a Hearty Lamb Stew, perfect for a Christmas potluck gathering. This stew is a rich and robust dish that combines tender pieces of lamb with a medley of vegetables, all simmered together in a savory broth. The aromatic herbs and spices infuse the stew with deep flavors that will delight your guests and leave them craving for more.
Whether you’re hosting a festive dinner or attending a potluck, this hearty stew is sure to be a crowd-pleaser.
Preparing a Hearty Lamb Stew requires a bit of patience, as the flavors develop beautifully over a slow cooking process. Allow yourself to enjoy the process of creating a dish that isn’t only delicious but also a warm embrace in a bowl. The end result is a stew that’s perfect for serving 4-6 people, making it an ideal choice for sharing during the holiday season.
Ingredients (serving size: 4-6 people)
- 2 pounds of lamb shoulder, cut into 1-inch cubes
- 2 tablespoons olive oil
- 1 large onion, diced
- 3 cloves garlic, minced
- 2 carrots, peeled and sliced
- 2 celery stalks, sliced
- 2 potatoes, peeled and diced
- 1 cup of red wine
- 4 cups beef broth
- 2 tablespoons tomato paste
- 1 teaspoon dried thyme
- 1 teaspoon dried rosemary
- 2 bay leaves
- Salt and pepper, to taste
- Fresh parsley, chopped (for garnish)
Cooking Instructions
- Prepare the Lamb: Begin by patting the lamb cubes dry with paper towels. Season them generously with salt and pepper. This step helps in browning the meat properly.
- Brown the Lamb: Heat the olive oil in a large pot or Dutch oven over medium-high heat. Add the lamb cubes in batches, careful not to overcrowd the pot, and brown them on all sides. Once browned, remove the lamb and set it aside.
- Sauté the Vegetables: In the same pot, add the diced onion, minced garlic, sliced carrots, and celery. Sauté for about 5 minutes until the vegetables are softened and the onions are translucent.
- Deglaze the Pot: Pour in the red wine, scraping the bottom of the pot to release any browned bits. This deglazing process adds depth to the stew’s flavor.
- Combine Ingredients: Return the browned lamb to the pot. Stir in the tomato paste, dried thyme, dried rosemary, and bay leaves. Mix well to coat the meat and vegetables.
- Add Broth and Simmer: Pour in the beef broth and bring the mixture to a boil. Reduce the heat to low, cover the pot, and let it simmer for about 1.5 to 2 hours, or until the lamb is tender.
- Add Potatoes: About 30 minutes before the stew is done, add the diced potatoes to the pot. Continue to simmer until the potatoes are fork-tender.
- Adjust Seasoning: Taste the stew and adjust the seasoning with additional salt and pepper if needed.
- Serve: Ladle the stew into bowls, garnish with fresh parsley, and serve hot.
Extra Tips
For an even richer flavor, prepare the stew a day in advance and allow it to rest overnight in the refrigerator. This resting time allows the flavors to meld together beautifully.
When reheating, do so gently on the stove over low heat. Additionally, consider using a slow cooker for a more hands-off approach, allowing the lamb to cook slowly and tenderize perfectly.
Remember to remove the bay leaves before serving as they aren’t meant to be consumed. Enjoy your festive gathering with this heartwarming dish!
Festive Cranberry-Orange Glazed Chicken
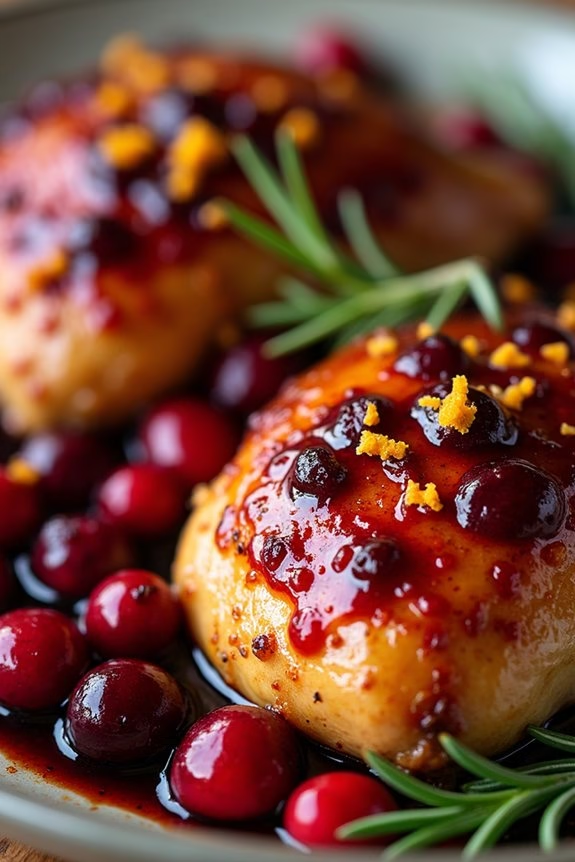
Festive Cranberry-Orange Glazed Chicken is the perfect dish to bring a burst of holiday cheer to your Christmas potluck. This recipe combines the tartness of cranberries with the sweet citrus notes of orange, creating a glaze that beautifully complements the savory chicken. The result is a delectable main course that will surely impress your family and friends.
Whether you’re hosting or attending a potluck, this dish will be a standout addition to the festive table. The combination of the glaze’s vibrant color and the succulent chicken makes for a visually appealing dish, while the flavors create a harmonious balance that pleases the palate.
The recipe is simple to make, yet sophisticated enough to make your Christmas gathering feel extra special. Serve it with a side of roasted vegetables or a fresh green salad to complete the meal. Here’s how to make Festive Cranberry-Orange Glazed Chicken for a serving size of 4-6 people.
Ingredients:
- 4-6 chicken breasts or thighs
- 1 cup fresh or frozen cranberries
- 1/2 cup orange juice
- Zest of 1 orange
- 1/2 cup honey
- 1 tablespoon balsamic vinegar
- 1 teaspoon ground cinnamon
- 1/2 teaspoon ground ginger
- Salt and pepper to taste
- 2 tablespoons olive oil
- Optional: Fresh rosemary for garnish
Cooking Instructions:
- Preheat the Oven: Start by preheating your oven to 375°F (190°C). This guarantees that the chicken cooks evenly and the glaze caramelizes perfectly.
- Prepare the Glaze: In a medium saucepan over medium heat, combine the cranberries, orange juice, orange zest, honey, balsamic vinegar, cinnamon, and ginger. Stir the mixture well and bring it to a simmer. Allow it to cook for about 10 minutes, or until the cranberries have burst and the sauce has thickened slightly. Set aside.
- Season the Chicken: Pat the chicken breasts or thighs dry with paper towels. Season them with salt and pepper on both sides.
- Sear the Chicken: In a large oven-safe skillet, heat the olive oil over medium-high heat. Once hot, add the chicken and sear for about 3-4 minutes on each side, until golden brown. This step helps to lock in the juices and enhances the flavor.
- Add the Glaze: Pour the cranberry-orange glaze over the seared chicken in the skillet, making sure each piece is well coated.
- Bake the Chicken: Transfer the skillet to the preheated oven and bake for 20-25 minutes, or until the chicken is cooked through and reaches an internal temperature of 165°F (74°C).
- Rest and Serve: Remove the skillet from the oven and let the chicken rest for a few minutes. Garnish with fresh rosemary if desired, and serve warm.
Extra Tips:
For an added depth of flavor, you can marinate the chicken in a bit of orange juice and zest for an hour before cooking. This will infuse the meat with a subtle citrus flavor.
Additionally, if you prefer a thicker glaze, continue simmering the sauce until it reaches your desired consistency before adding it to the chicken. Finally, to save time, you can prepare the glaze a day in advance and store it in the refrigerator until you’re ready to use it.
Traditional Shepherd’s Pie

Traditional Shepherd’s Pie is a classic comfort food that’s perfect for a Christmas potluck. This dish features a savory meat filling topped with a creamy layer of mashed potatoes, baked to golden perfection. It’s a hearty meal that brings a touch of warmth and nostalgia to any gathering.
Originating from the UK, Shepherd’s Pie is traditionally made with lamb, though variations with beef or even vegetarian versions have become popular over time.
This recipe is designed to serve 4-6 people, making it an ideal choice for a small family dinner or a contribution to a larger holiday spread. The combination of tender lamb, rich gravy, and fluffy potatoes creates a satisfying dish that will surely impress your guests.
Whether you’re new to making Shepherd’s Pie or a seasoned cook, this recipe offers a straightforward approach to creating this beloved dish.
Ingredients:
- 1 1/2 pounds ground lamb
- 1 onion, finely chopped
- 2 carrots, diced
- 2 cloves garlic, minced
- 1 cup frozen peas
- 2 tablespoons tomato paste
- 1 cup beef or lamb broth
- 1 teaspoon Worcestershire sauce
- 2 tablespoons olive oil
- Salt and pepper, to taste
- 1 tablespoon fresh thyme leaves
- 1 tablespoon fresh parsley, chopped
- 3 pounds potatoes, peeled and quartered
- 1/2 cup milk
- 4 tablespoons butter
- 1/2 cup grated cheddar cheese
Cooking Instructions:
- Prepare the Meat Filling: In a large skillet, heat olive oil over medium heat. Add the chopped onion, diced carrots, and minced garlic, and sauté until the vegetables are soft, about 5 minutes. Add the ground lamb and cook until browned, breaking it up with a spoon as it cooks.
- Simmer the Sauce: Stir in the tomato paste, beef or lamb broth, Worcestershire sauce, thyme, salt, and pepper. Bring the mixture to a simmer and let it cook for about 10 minutes, or until the sauce has thickened. Stir in the frozen peas and remove from heat.
- Cook the Potatoes: While the filling is simmering, place the potatoes in a large pot and cover with water. Bring to a boil and cook until the potatoes are tender, about 15-20 minutes. Drain and return the potatoes to the pot.
- Mash the Potatoes: Add the butter and milk to the potatoes. Mash until smooth and creamy. Season with salt and pepper to taste.
- Assemble the Pie: Preheat the oven to 400°F (200°C). Spread the meat filling evenly in a baking dish. Top with the mashed potatoes, smoothing them out with a spatula. Sprinkle the grated cheddar cheese over the top.
- Bake: Place the dish in the preheated oven and bake for 25-30 minutes, or until the top is golden brown and the edges are bubbling. Remove from oven and let cool slightly before serving.
Extra Tips: For an extra rich and creamy topping, consider adding a little cream cheese or sour cream to the mashed potatoes. If you prefer a crispy top, broil the pie for an additional 2-3 minutes at the end of baking, keeping a close eye to prevent burning.
For a vegetarian version, replace the lamb with lentils or a plant-based meat substitute, and use vegetable broth instead.
Spinach and Ricotta Stuffed Shells
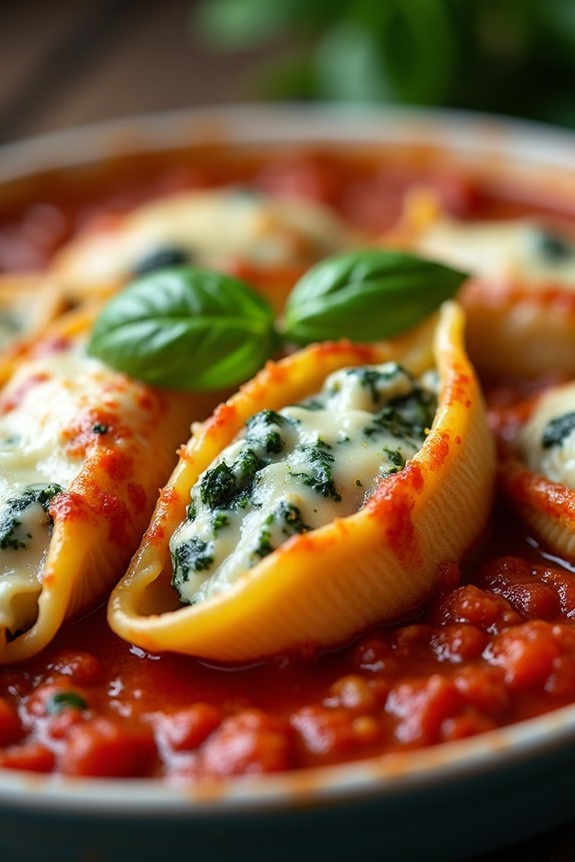
Spinach and Ricotta Stuffed Shells are a delightful and hearty dish perfect for holiday gatherings, especially a festive Christmas potluck. This dish combines the rich, creamy flavors of ricotta cheese with the nutritious goodness of spinach, all nestled within tender pasta shells and topped with tangy marinara sauce and melted mozzarella cheese. Not only is it a crowd-pleaser, but it also brings a touch of elegance to any meal spread.
Whether you’re serving vegetarians or just looking to add a meatless option to your holiday table, these stuffed shells are bound to be a hit.
Preparing Spinach and Ricotta Stuffed Shells is a straightforward process that allows you to get creative with your presentation while enjoying the classic Italian flavors. The recipe requires minimal ingredients, making it both budget-friendly and easy to prepare.
The key to this dish is guaranteeing that the filling is creamy and well-seasoned, while the shells are perfectly cooked to a soft, yet sturdy texture. Once baked, the golden layer of cheese on top adds a delightful finish, making this dish both visually appealing and delicious.
Ingredients (serves 4-6 people):
- 20 jumbo pasta shells
- 2 cups ricotta cheese
- 1 cup cooked spinach, drained and chopped
- 1/2 cup grated Parmesan cheese
- 1 large egg
- 1 teaspoon garlic powder
- 1 teaspoon Italian seasoning
- Salt and pepper to taste
- 2 cups marinara sauce
- 1 1/2 cups shredded mozzarella cheese
- Fresh basil leaves for garnish (optional)
Cooking Instructions:
- Preheat and Prepare: Preheat your oven to 375°F (190°C). Lightly grease a 9×13 inch baking dish with olive oil or non-stick spray.
- Cook the Pasta Shells: Bring a large pot of salted water to a boil. Add the jumbo pasta shells and cook them for about 8-10 minutes or until they’re al dente. Drain the shells and rinse them under cold water to stop the cooking process. Set them aside on a clean towel.
- Prepare the Filling: In a large mixing bowl, combine ricotta cheese, cooked spinach, Parmesan cheese, egg, garlic powder, Italian seasoning, salt, and pepper. Mix until all ingredients are well incorporated and the filling is smooth.
- Stuff the Shells: Using a spoon or a piping bag, fill each cooked pasta shell with the ricotta and spinach mixture. Be generous with the filling, but avoid overstuffing to prevent tearing the shells.
- Assemble the Dish: Spread 1/2 cup of marinara sauce over the bottom of the prepared baking dish. Arrange the filled shells in the dish in a single layer. Pour the remaining marinara sauce over the top of the shells.
- Add Cheese and Bake: Sprinkle shredded mozzarella cheese evenly over the top of the sauce-covered shells. Cover the dish with aluminum foil and bake in the preheated oven for 25 minutes. Remove the foil and bake for an additional 10 minutes, or until the cheese is bubbly and lightly golden brown.
- Garnish and Serve: Once done, remove the dish from the oven and let it cool for a few minutes. Garnish with fresh basil leaves if desired. Serve warm and enjoy the rich flavors.
Extra Tips:
For best results, verify the spinach is thoroughly drained to avoid excess moisture in the filling, which can make the dish watery. Feel free to experiment by adding mushrooms or sun-dried tomatoes to the filling for extra flavor.
If you prefer a spicier kick, add a pinch of red pepper flakes to the marinara sauce. Additionally, you can prepare the dish a day in advance and refrigerate it, then bake just before serving, making it an ideal option for stress-free holiday cooking.
Mushroom and Thyme Risotto
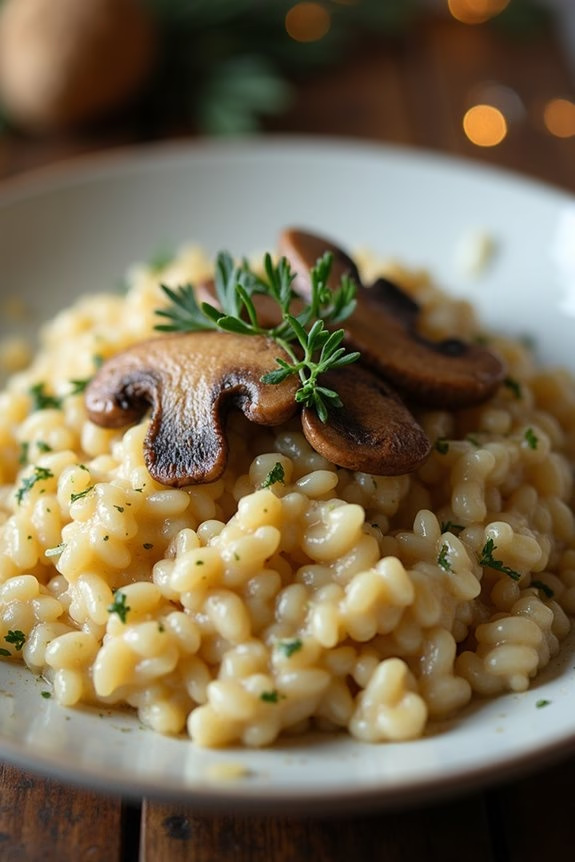
Mushroom and Thyme Risotto is a creamy and flavorful dish that makes a perfect addition to any Christmas potluck. Its rich and earthy taste, combined with the aromatic notes of thyme, will surely delight your guests. The creamy texture of the arborio rice absorbs the flavors of mushrooms and thyme, creating a comforting and satisfying dish. This risotto is the perfect balance of flavors and textures, making it a standout dish on any holiday table.
Ideal for serving 4-6 people, this recipe is both elegant and easy to prepare. With simple, fresh ingredients, you can create this delicious dish that highlights the natural flavors of mushrooms and the subtle fragrance of thyme. Whether you’re a seasoned cook or new to risotto, this recipe guides you through each step to achieve a perfectly cooked risotto that will impress your family and friends.
Ingredients for 4-6 Servings:
- 1 ½ cups arborio rice
- 1 pound mushrooms (such as cremini or button), sliced
- 1 onion, finely chopped
- 2 cloves garlic, minced
- 4 cups vegetable or chicken broth
- 1 cup dry white wine
- 2 tablespoons olive oil
- 2 tablespoons butter
- 1 teaspoon fresh thyme leaves
- ½ cup grated Parmesan cheese
- Salt and pepper to taste
- Fresh parsley, chopped (optional, for garnish)
Cooking Instructions:
- Prepare the Broth: In a saucepan, heat the vegetable or chicken broth over low heat. Keep it warm but not boiling while you prepare the risotto.
- Cook the Mushrooms: In a large skillet, heat 1 tablespoon of olive oil and 1 tablespoon of butter over medium heat. Add the sliced mushrooms and a pinch of salt, and sauté until they’re browned and tender, about 5-7 minutes. Remove the mushrooms from the skillet and set aside.
- Sauté the Aromatics: In the same skillet, add the remaining tablespoon of olive oil. Add the chopped onion and cook until translucent, about 3-4 minutes. Stir in the minced garlic and cook for an additional minute until fragrant.
- Toasting the Rice: Add the arborio rice to the skillet with the onions and garlic, stirring to coat the rice with the oil. Cook for 2-3 minutes until the edges of the rice grains become translucent.
- Deglaze with Wine: Pour in the white wine and stir constantly until the wine is absorbed by the rice.
- Adding Broth Gradually: Begin adding the warm broth, one ladleful at a time, stirring frequently. Allow the liquid to be absorbed before adding more. Continue this process until the rice is creamy and al dente, about 18-20 minutes.
- Incorporate Mushrooms and Seasonings: Once the rice is cooked, stir in the cooked mushrooms and fresh thyme leaves. Cook for another 2-3 minutes to combine flavors.
- Finishing Touches: Remove the skillet from the heat and stir in the remaining tablespoon of butter and the grated Parmesan cheese. Season with salt and pepper to taste.
- Serve: Garnish with chopped fresh parsley if desired, and serve immediately while hot.
Extra Tips:
When making risotto, patience is key. Stirring constantly helps release the starches in the rice, resulting in a creamy texture. It’s important to add the broth gradually and allow each ladleful to be absorbed before adding the next. Using warm broth ensures the cooking process continues smoothly.
If you find the risotto is getting too thick before the rice is fully cooked, you can add a bit more broth or water. Finally, don’t rush the final step of incorporating butter and cheese; it adds richness and depth to the dish. Enjoy your Mushroom and Thyme Risotto as a cozy and delightful addition to your Christmas feast!
Tender Slow-Cooked Brisket
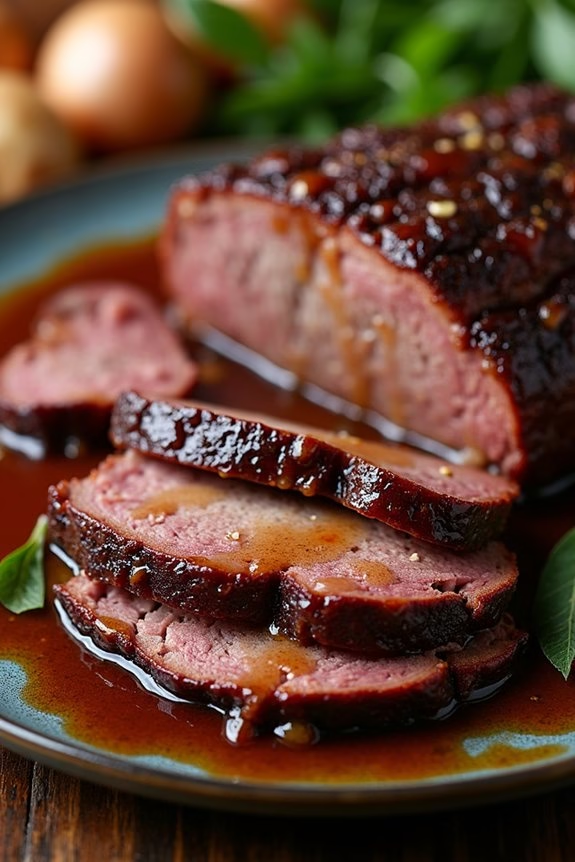
This holiday season, serve your guests a hearty and comforting dish with this Tender Slow-Cooked Brisket recipe. Perfect for a Christmas potluck, this brisket is cooked to perfection over several hours, resulting in a melt-in-your-mouth texture that’s packed with rich flavors.
The slow-cooking method allows the flavors to develop fully, making it a standout entrée for your festive gathering. Brisket, a cut of beef from the breast or lower chest, is known for its toughness, but when cooked slowly and with care, it transforms into a tender, juicy, and flavorful centerpiece.
The secret to a delectable brisket lies in the combination of spices and aromatics used to season the meat, as well as the low and slow cooking process. This recipe combines simple pantry staples with fresh ingredients to create a savory, slightly sweet, and deeply flavorful dish.
Whether you’re hosting the potluck or attending as a guest, this brisket is sure to impress and satisfy all who’ve the pleasure of tasting it.
Ingredients for 4-6 servings:
- 4-5 pounds of beef brisket
- 2 tablespoons olive oil
- 1 large onion, sliced
- 4 cloves garlic, minced
- 1 cup beef broth
- 1 cup red wine
- 3 tablespoons tomato paste
- 2 tablespoons Worcestershire sauce
- 2 tablespoons brown sugar
- 1 teaspoon smoked paprika
- 1 teaspoon dried thyme
- 1 teaspoon salt
- 1/2 teaspoon black pepper
- 2 bay leaves
Cooking Instructions:
1. Preparation: Begin by patting the brisket dry with paper towels. This will help in achieving a nice sear on the meat. Season the brisket on both sides with salt and black pepper, ensuring an even coating.
2. Searing the Brisket: In a large skillet or Dutch oven, heat the olive oil over medium-high heat. Once hot, add the brisket and sear it for about 4-5 minutes on each side until it develops a deep brown crust. Remove the brisket and set aside.
3. Sautéing Aromatics: In the same skillet, add the sliced onions and minced garlic. Sauté them for about 3-4 minutes, or until the onions are soft and translucent. This will add depth to the flavor of the brisket.
4. Building the Sauce: Stir in the tomato paste, letting it cook for an additional minute to enhance its sweetness. Then, pour in the beef broth and red wine, scraping up any browned bits from the bottom of the skillet.
Add the Worcestershire sauce, brown sugar, smoked paprika, thyme, and bay leaves. Stir well to combine.
5. Slow Cooking: Return the brisket to the skillet, nestling it into the sauce. Bring the mixture to a simmer, then reduce the heat to low. Cover and cook for 3-4 hours, or until the brisket is tender and easily pulled apart with a fork.
Alternatively, you can transfer all the ingredients to a slow cooker and cook on low for 6-8 hours.
6. Resting and Slicing: Once cooked, let the brisket rest for about 15 minutes before slicing. This allows the juices to redistribute, ensuring each slice is moist and flavorful. Slice the brisket against the grain for the most tender bites.
Extra Tips:
For an even more flavorful brisket, consider marinating the meat overnight with the spices and aromatics. This step can make a significant difference in the overall taste of the dish.
Additionally, if you find the sauce too thin at the end of cooking, remove the brisket and let the sauce simmer uncovered for a few minutes to thicken.
To serve, pair the brisket with mashed potatoes or roasted vegetables to complete the meal. Remember, patience is key with this dish, so resist the urge to rush the cooking process for the best results.
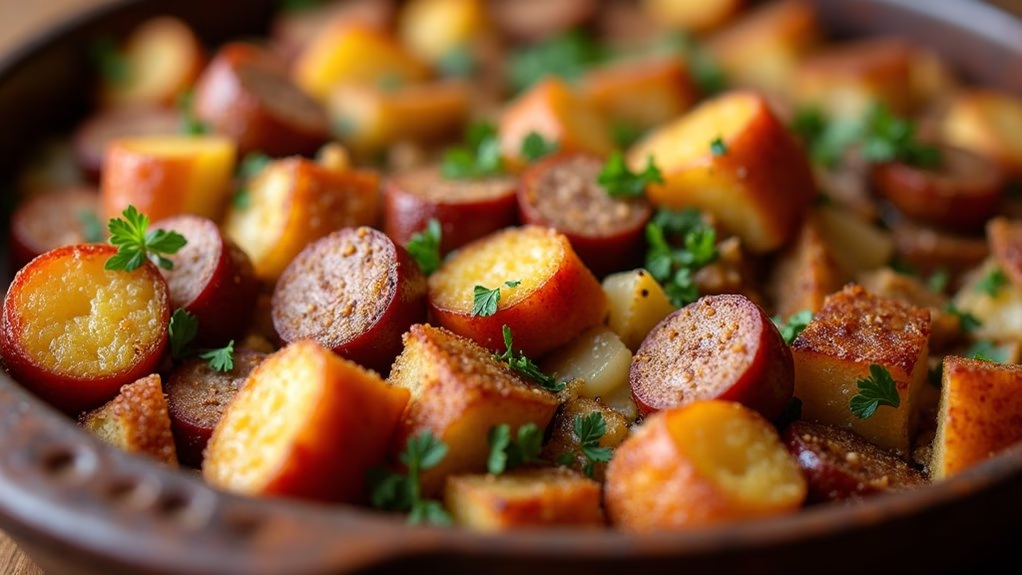
Spiced Apple and Sausage Stuffing
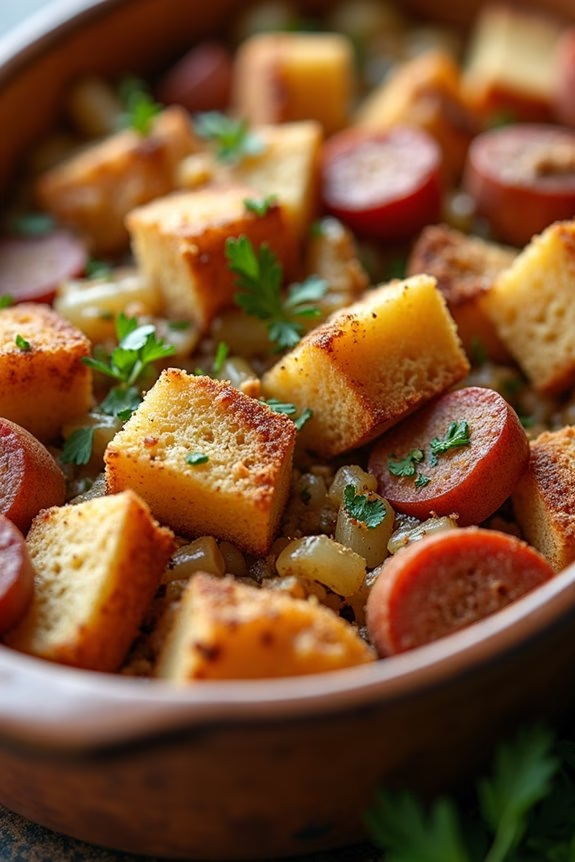
Spiced Apple and Sausage Stuffing is a delightful twist on a classic holiday side dish that combines the savory richness of sausage with the sweet tartness of apples. This dish is perfect for a Christmas potluck, offering a harmonious blend of flavors that’s certain to impress your guests.
The aromatic spices, fresh herbs, and crunchy texture of the bread cubes create a stuffing that’s both satisfying and memorable. This recipe is designed to serve 4-6 people, making it ideal for a small holiday gathering. The combination of apples and sausage provides a unique balance of sweet and savory, while the addition of spices like cinnamon and nutmeg adds warmth and depth.
This dish can be prepared in advance and baked just before serving, making it a convenient and delicious option for your festive feast.
Ingredients (Serves 4-6):
- 1 pound Italian sausage, casing removed
- 2 tablespoons unsalted butter
- 1 large onion, diced
- 2 stalks celery, diced
- 2 Granny Smith apples, peeled, cored, and chopped
- 2 cloves garlic, minced
- 1 teaspoon ground cinnamon
- 1/2 teaspoon ground nutmeg
- 1 teaspoon dried sage
- 1 teaspoon dried thyme
- 1/2 cup chicken broth
- 1/4 cup fresh parsley, chopped
- 8 cups cubed bread (preferably day-old or stale)
- Salt and pepper to taste
Cooking Instructions:
- Preheat the Oven: Begin by preheating your oven to 350°F (175°C). This will guarantee that your stuffing bakes evenly.
- Cook the Sausage: In a large skillet over medium heat, cook the Italian sausage until browned and fully cooked, breaking it up into small pieces with a wooden spoon. Remove the sausage from the skillet and set it aside on a paper towel-lined plate to drain any excess fat.
- Sauté Vegetables and Apples: In the same skillet, add the unsalted butter. Once melted, add the diced onion and celery. Sauté for about 5 minutes until the vegetables are soft and translucent. Add the chopped apples and minced garlic, and continue to cook for another 3 minutes.
- Add Spices and Herbs: Stir in the ground cinnamon, nutmeg, sage, and thyme, allowing the spices to become fragrant, about 1 minute. This will enhance the flavor of the stuffing.
- Combine Ingredients: In a large mixing bowl, combine the cooked sausage, sautéed vegetables, and apples. Add the cubed bread and gently toss to combine all ingredients.
- Moisten the Mixture: Pour the chicken broth over the bread mixture, stirring until the bread is evenly moistened. If the mixture seems dry, add a bit more broth. Add the chopped parsley and season with salt and pepper to taste.
- Bake the Stuffing: Transfer the mixture to a greased baking dish. Cover the dish with aluminum foil and bake for 25 minutes. After 25 minutes, remove the foil and continue baking for an additional 10-15 minutes, or until the top is golden brown and crispy.
Extra Tips:
For best results, use day-old or slightly stale bread, as it will absorb the flavors better without becoming mushy. If you only have fresh bread, you can cube it and dry it out in the oven at a low temperature for about 15 minutes.
Additionally, feel free to experiment with different types of bread, such as sourdough or whole wheat, to add different textures and flavors to your stuffing. If you prefer a vegetarian version, simply omit the sausage and use vegetable broth instead of chicken broth.