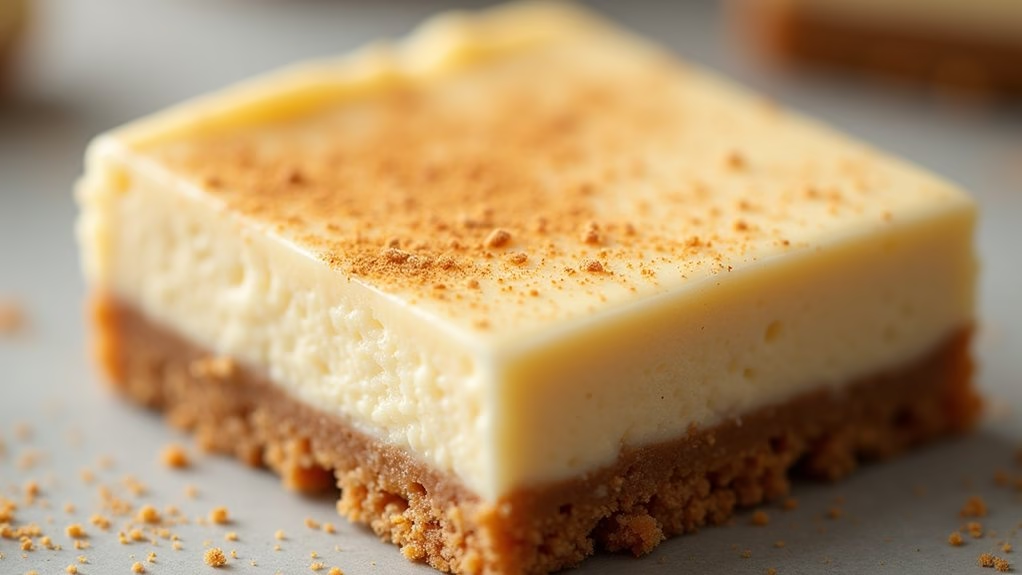
When it comes to Christmas potlucks, I love dishes that disappear in the blink of an eye. Watching guests gather around a beautifully glazed spiral ham or helping themselves to creamy garlic mashed potatoes brings so much joy. And let’s not forget about the irresistible sweet treats like gingerbread spiced cookies and cranberry orange bundt cake. These festive favorites are always a hit. Let’s explore them together!
Festive Cranberry Brie Bites
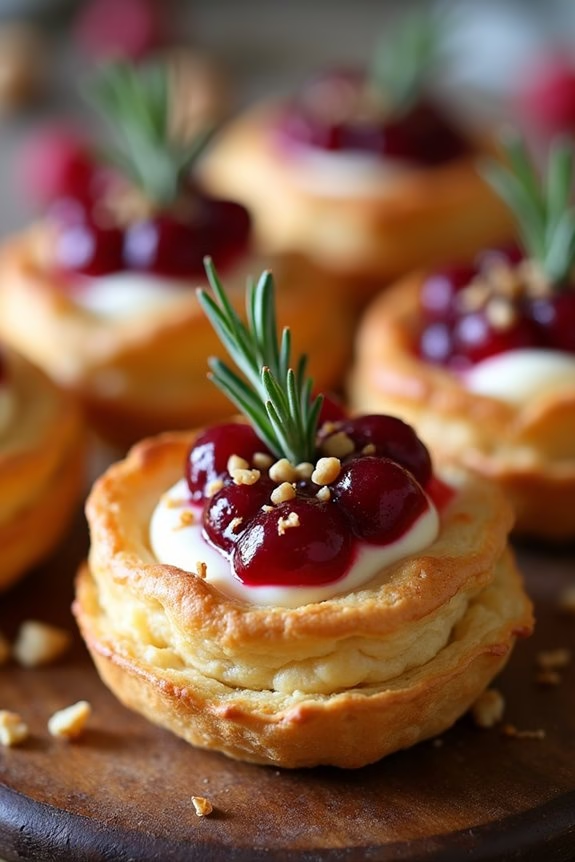
Bring a touch of elegance and a burst of festive flavor to your holiday gatherings with these delightful Festive Cranberry Brie Bites. Perfect for a Christmas potluck, these little appetizers combine the creamy richness of Brie cheese with the tart sweetness of cranberry sauce, all encased in a flaky puff pastry.
They’re not only delicious but also visually stunning, making them a surefire hit on any holiday table. These bites are quick to prepare and bake, allowing you to spend more time enjoying the festivities with your loved ones.
Whether you’re a seasoned host or trying your hand at holiday entertaining for the first time, these Cranberry Brie Bites are a fantastic choice. They require minimal ingredients and preparation, yet deliver maximum flavor and appeal.
Serve them as an appetizer or a snack, and watch them disappear in no time. This recipe yields enough for 4-6 people, making it ideal for small gatherings or as part of a larger holiday spread.
Ingredients for 4-6 people:
- 1 sheet of puff pastry, thawed
- 8 ounces of Brie cheese, cut into small cubes
- 1/2 cup of cranberry sauce (homemade or store-bought)
- 1/4 cup of chopped pecans or walnuts
- Fresh rosemary sprigs, for garnish (optional)
Cooking Instructions:
- Preheat the Oven: Start by preheating your oven to 375°F (190°C). This guarantees that your puff pastry will bake evenly and achieve that perfect golden-brown color.
- Prepare the Puff Pastry: Roll out the thawed puff pastry sheet on a lightly floured surface to smooth out any creases. Using a sharp knife or a pizza cutter, divide the pastry into 12 equal squares.
- Assemble the Bites: Place each puff pastry square into the cups of a mini muffin tin. Gently press the pastry down to form a small cup. Into each cup, place a cube of Brie cheese, followed by a spoonful of cranberry sauce. Sprinkle with chopped pecans or walnuts for added texture and flavor.
- Bake: Transfer the muffin tin to the preheated oven and bake for 15-20 minutes, or until the puff pastry is golden brown and crispy, and the cheese has melted beautifully.
- Garnish and Serve: Remove the bites from the oven and let them cool slightly before removing them from the muffin tin. Garnish with fresh rosemary sprigs if desired, and serve warm.
Extra Tips:
For an extra layer of flavor, consider adding a sprinkle of sea salt or a dash of cracked black pepper over the cranberry sauce before baking. If you’re using homemade cranberry sauce, feel free to experiment with flavors by adding a pinch of cinnamon or orange zest.
These bites are best served warm but can be reheated in the oven at a low temperature if needed. Enjoy the compliments from your guests, and don’t be surprised if these become a holiday staple!
Classic Deviled Eggs With a Twist
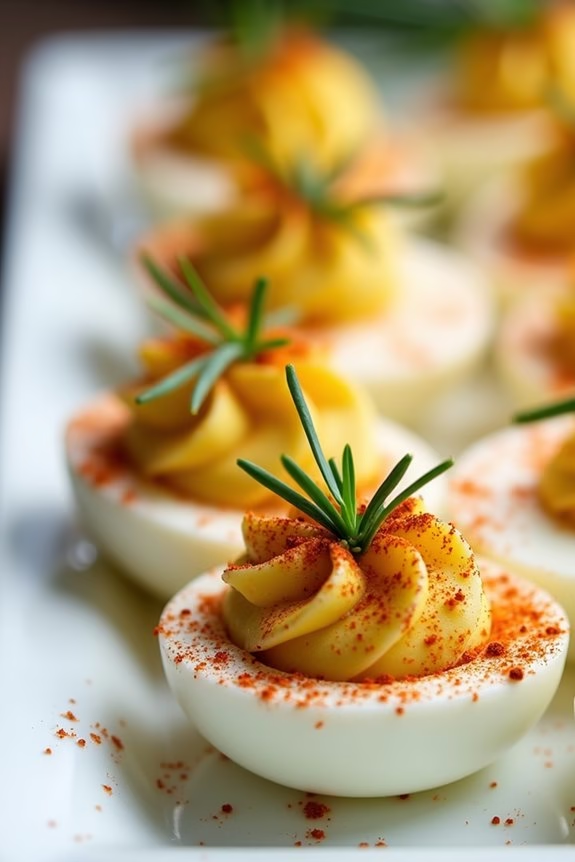
Deviled eggs are a staple at any holiday gathering, and this version adds a creative spin to the traditional recipe. By incorporating a blend of rich and tangy flavors, these classic deviled eggs with a twist will leave your guests coming back for more. The addition of unexpected ingredients not only elevates the taste but also adds a burst of color to your Christmas potluck spread, guaranteeing your dish stands out among the rest.
Perfect for serving 4 to 6 people, these deviled eggs are easy to prepare and require minimal ingredients, making them an ideal choice for both novice and experienced cooks. The creamy and zesty filling is piped into perfectly hard-boiled egg whites and garnished with a hint of spice, offering a delightful contrast in texture and taste. Whether you’re hosting a festive gathering or attending a potluck, these deviled eggs are sure to be a hit.
Ingredients:
- 6 large eggs
- 3 tablespoons mayonnaise
- 1 teaspoon Dijon mustard
- 1 teaspoon apple cider vinegar
- 1/4 teaspoon salt
- 1/4 teaspoon black pepper
- 1/4 teaspoon smoked paprika
- 1 tablespoon finely chopped fresh chives
- 1 tablespoon diced pickled jalapeños
- Paprika or smoked paprika for garnish
- Fresh chives for garnish
Instructions:
- Boil the Eggs: Place the eggs in a single layer in a saucepan and cover them with cold water by about an inch. Bring the water to a rolling boil over medium-high heat. Once boiling, remove the saucepan from heat, cover it with a lid, and let the eggs sit for 10 minutes.
- Cool and Peel the Eggs: After the eggs have rested, transfer them to a bowl of ice water to cool for about 5 minutes. This helps stop the cooking process and makes peeling easier. Once cooled, gently peel the eggs under running water to remove the shells.
- Prepare the Filling: Slice the eggs in half lengthwise and carefully remove the yolks, placing them in a medium-sized bowl. Set the egg whites aside on a serving platter. Use a fork to mash the yolks until smooth.
- Mix the Filling: Add mayonnaise, Dijon mustard, apple cider vinegar, salt, black pepper, smoked paprika, chopped chives, and diced pickled jalapeños to the mashed yolks. Mix until the ingredients are well combined and the filling is smooth.
- Fill the Egg Whites: Spoon the yolk mixture into a piping bag fitted with a star tip or use a plastic bag with the corner snipped off. Pipe the filling into the hollowed egg whites, mounding slightly.
- Garnish and Serve: For a final touch, lightly sprinkle the tops of the filled eggs with a bit of paprika or smoked paprika. Add a small piece of fresh chive on each egg for a burst of color and flavor. Chill in the refrigerator for at least 30 minutes before serving to allow the flavors to meld.
Extra Tips: When boiling the eggs, verify they’re in a single layer to promote even cooking. Fresh eggs can be harder to peel, so using eggs that are a few days old is recommended. If you prefer a spicier twist, increase the amount of diced pickled jalapeños or add a dash of hot sauce to the yolk mixture. Always taste the yolk filling before piping to adjust seasoning to your preference.
Honey-Glazed Spiral Ham
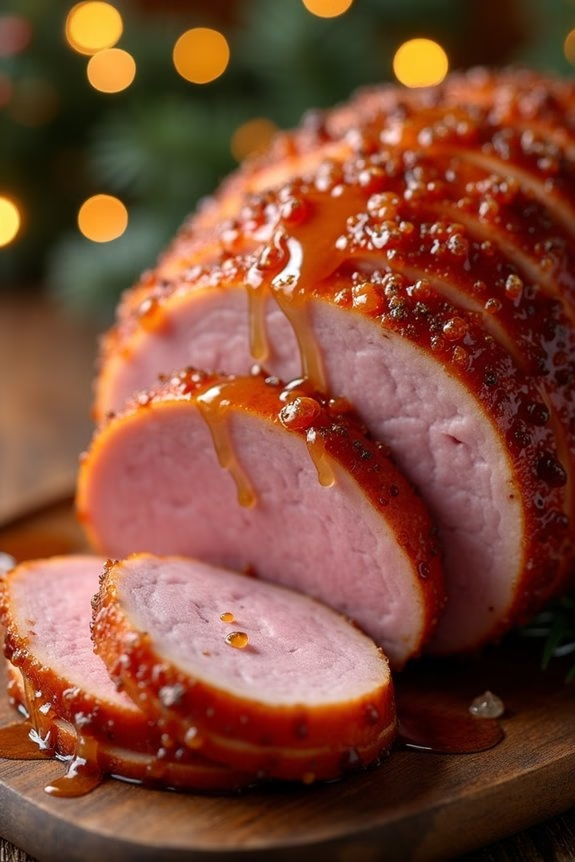
The Honey-Glazed Spiral Ham is a classic centerpiece for any Christmas potluck, offering a delicious combination of savory and sweet flavors. This enticing dish isn’t only visually impressive but also incredibly easy to prepare, making it a favorite among home cooks. The spiral-cut ham allows the honey glaze to penetrate between each slice, guaranteeing every bite is tender and flavorful. This recipe is perfect for serving 4-6 people, providing generous portions that will leave your guests satisfied and enthusiastic for more.
The rich and sticky glaze is made from a combination of honey, brown sugar, Dijon mustard, and a hint of cloves, which caramelizes beautifully in the oven. The aroma of the baking ham will fill your home with the comforting scents of the holiday season. Whether you’re hosting a large gathering or a more intimate celebration, this Honey-Glazed Spiral Ham is sure to be a hit. Serve it alongside your favorite side dishes for a complete festive feast.
Ingredients for 4-6 People:
- 1 (3-4 pound) spiral-cut ham
- 1 cup honey
- 1/2 cup brown sugar
- 2 tablespoons Dijon mustard
- 1/4 teaspoon ground cloves
Cooking Instructions:
- Preheat the Oven: Begin by preheating your oven to 325°F (165°C). This moderate temperature will guarantee that the ham heats evenly and the glaze caramelizes perfectly.
- Prepare the Glaze: In a medium saucepan over low heat, combine the honey, brown sugar, Dijon mustard, and ground cloves. Stir continuously until the sugar has dissolved and the ingredients are well combined. This should take about 2-3 minutes. Remove the glaze from heat and set it aside.
- Prepare the Ham: Place the spiral-cut ham in a roasting pan, cut side down. This positioning helps retain moisture during the cooking process. Pour about half of the prepared glaze over the ham, making sure to get some of the glaze between the slices for maximum flavor infusion.
- Bake the Ham: Cover the roasting pan with aluminum foil, sealing the edges to keep the ham moist. Bake the ham in the preheated oven for 45 minutes.
- Apply Additional Glaze: After 45 minutes, remove the foil and baste the ham with the remaining glaze. Return the ham to the oven, uncovered, and bake for an additional 15-20 minutes. This will allow the glaze to caramelize and form a beautiful crust.
- Rest and Serve: Once the ham is done, remove it from the oven and let it rest for 10 minutes before slicing. This resting period allows the juices to redistribute, guaranteeing each slice is juicy and flavorful.
Extra Tips:
For an even more flavorful dish, consider adding a splash of orange juice or a bit of zest to the glaze for a citrusy twist. If you prefer a smoky flavor, you can incorporate a tablespoon of liquid smoke into the glaze mixture.
To prevent the ham from drying out, make sure it’s well-covered with foil during the initial baking period. Additionally, make sure to periodically check the ham’s internal temperature with a meat thermometer; it should reach at least 140°F (60°C) to guarantee it’s fully heated.
This dish pairs beautifully with side dishes like roasted vegetables, mashed potatoes, or a fresh green salad, rounding out your Christmas potluck menu.
Creamy Garlic Mashed Potatoes
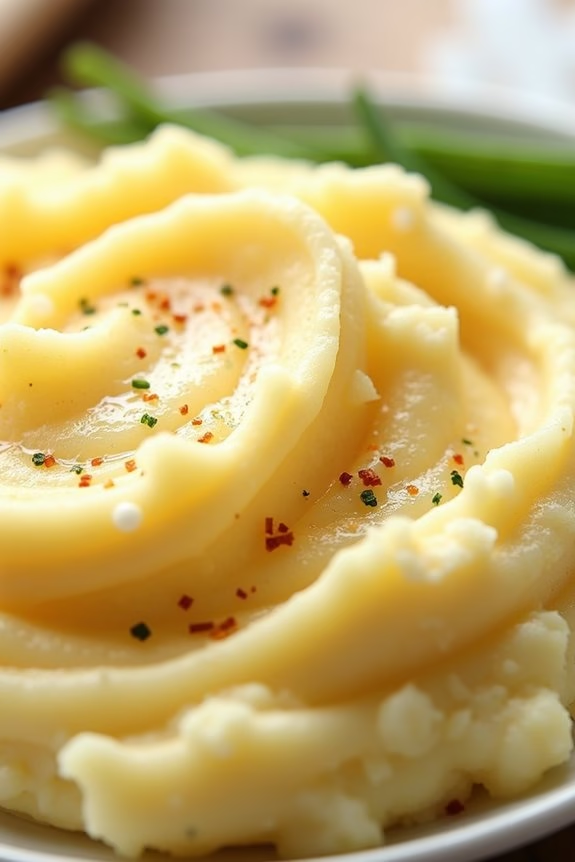
Creamy Garlic Mashed Potatoes are a classic and comforting side dish perfect for any Christmas potluck. These potatoes are rich in flavor, thanks to the addition of roasted garlic and a creamy blend of butter, cream, and milk. The smooth, velvety texture pairs wonderfully with a variety of main courses, making them a versatile and crowd-pleasing option for your holiday table.
The key to achieving the perfect mashed potatoes lies in selecting the right type of potato and incorporating the right amount of seasoning and creaminess. Yukon Gold potatoes are an excellent choice, as they provide a buttery taste and smooth texture. Roasting the garlic enhances its flavor, adding a subtle sweetness and depth to the dish. Follow this recipe to create a delightful side dish that will have your guests coming back for seconds.
Ingredients (serving size: 4-6 people):
- 3 pounds Yukon Gold potatoes
- 1 whole head of garlic
- 1/2 cup unsalted butter
- 3/4 cup heavy cream
- 1/2 cup whole milk
- Salt, to taste
- Pepper, to taste
- Fresh chives, chopped (optional for garnish)
Cooking Instructions:
- Prepare the Garlic: Preheat your oven to 400°F (200°C). Cut off the top of the garlic head to expose the cloves. Drizzle with olive oil, wrap in aluminum foil, and roast in the oven for about 30-40 minutes until the cloves are tender and golden. Allow it to cool slightly, then squeeze the cloves out of their skins into a small bowl and mash them with a fork.
- Boil the Potatoes: While the garlic is roasting, peel and cut the potatoes into evenly sized chunks. Place them in a large pot and cover with cold water. Add a pinch of salt and bring to a boil. Reduce the heat and simmer for 15-20 minutes or until the potatoes are fork-tender.
- Mash the Potatoes: Drain the potatoes and return them to the pot. Add the roasted garlic, butter, heavy cream, and milk. Using a potato masher or electric mixer, mash the potatoes until smooth and creamy. Season with salt and pepper to taste.
- Adjust the Consistency: If the mashed potatoes are too thick, add a little more milk until the desired consistency is reached. Be careful not to overmix, as this can make the potatoes gummy.
- Serve: Transfer the creamy garlic mashed potatoes to a serving dish. Garnish with chopped fresh chives if desired and serve hot.
Extra Tips: For extra flavor, consider adding a dash of nutmeg or a sprinkle of Parmesan cheese to the mashed potatoes. If you prefer a chunkier texture, mash the potatoes less thoroughly. To keep the mashed potatoes warm until serving, place them in a heatproof bowl over a pot of simmering water, stirring occasionally. This helps maintain their creamy texture without drying out.
Cheesy Broccoli Casserole
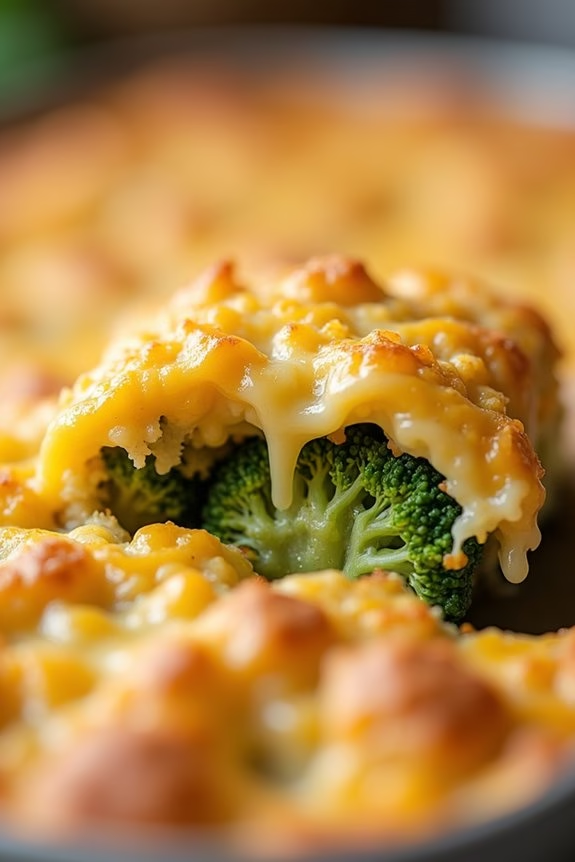
Cheesy Broccoli Casserole is a delightful dish that combines the comforting flavors of cheese with the wholesome goodness of broccoli. This dish is perfect for a Christmas potluck, as it brings a touch of warmth and homeliness to the table, making everyone feel at ease and ready to dig in.
The combination of cheese and broccoli is a classic one that never fails to please, and this casserole version elevates it to a new level with its creamy and savory notes. Whether you’re a fan of cheesy dishes or looking for a way to get your greens in, this casserole is a win-win on all fronts.
The beauty of this dish lies in its simplicity and the way it comes together in just a few steps. It’s an ideal choice for a busy holiday season when you want to impress your guests without spending endless hours in the kitchen.
With just a handful of ingredients and minimal prep time, you can create a cheesy, bubbly casserole that will have everyone coming back for seconds. Plus, it’s a versatile dish that pairs well with a variety of other Christmas dishes, making it a fantastic addition to any potluck spread.
Ingredients (Serves 4-6):
- 4 cups broccoli florets
- 2 cups shredded cheddar cheese
- 1 cup sour cream
- 1 can (10.5 oz) cream of mushroom soup
- 1/2 cup crushed Ritz crackers
- 1/4 cup melted butter
- 1/4 cup chopped onion
- 1/4 teaspoon salt
- 1/4 teaspoon black pepper
Cooking Instructions:
- Preheat the Oven: Start by preheating your oven to 350°F (175°C). This step guarantees that your casserole will cook evenly once placed inside.
- Prepare Broccoli: Steam the broccoli florets until they’re tender but still vibrant green, about 5 minutes. Once done, drain and set aside.
- Mix Ingredients: In a large mixing bowl, combine the sour cream, cream of mushroom soup, chopped onion, salt, and black pepper. Stir until all the ingredients are well incorporated.
- Combine and Layer: Add the steamed broccoli and 1 1/2 cups of the shredded cheddar cheese to the mixing bowl. Stir to combine, making sure the broccoli is evenly coated with the mixture.
- Transfer to Baking Dish: Pour the broccoli and cheese mixture into a greased 9×13 inch baking dish, spreading it out evenly.
- Top with Cheese and Crackers: Sprinkle the remaining 1/2 cup of shredded cheddar cheese over the top of the casserole. Then, evenly distribute the crushed Ritz crackers over the cheese. Drizzle the melted butter over the cracker topping.
- Bake: Place the casserole in the preheated oven and bake for 25-30 minutes, or until the top is golden brown and the cheese is bubbly.
- Cool and Serve: Remove the casserole from the oven and let it cool for a few minutes before serving. This will help the dish set and make it easier to serve.
Extra Tips:
For added flavor, consider tossing in some cooked bacon bits or sliced almonds into the broccoli mixture before baking. If you prefer a spicier kick, a pinch of cayenne pepper or red pepper flakes can be mixed in with the soup and sour cream.
To guarantee your casserole remains creamy, make sure not to overcook the broccoli during steaming. If you’re preparing this dish ahead of time, you can assemble it and refrigerate it until you’re ready to bake, just allow for a few extra minutes of baking time if baking from cold.
Herb-Roasted Root Vegetables
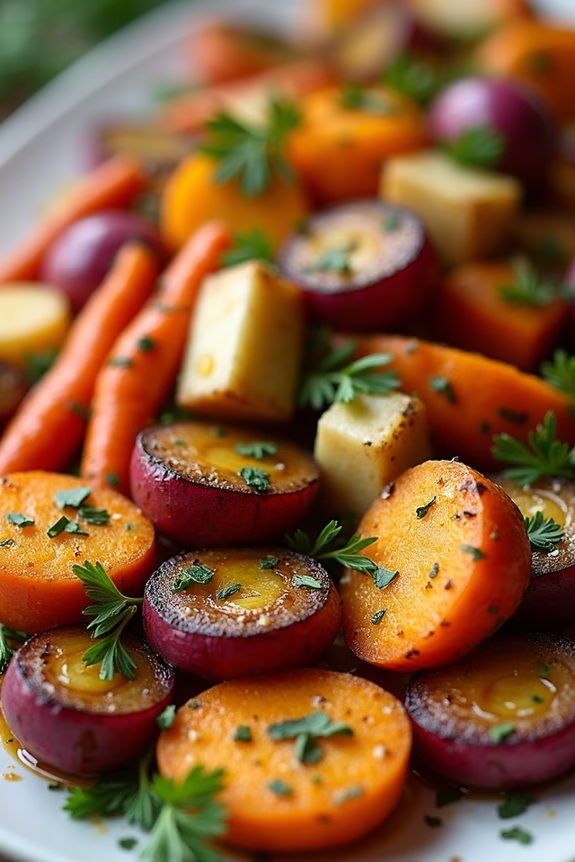
Herb-roasted root vegetables are a vibrant and delicious addition to any Christmas potluck table. They bring a hearty and colorful array to your meal, combining the earthy flavors of root vegetables with fragrant herbs. This dish isn’t only visually appealing but also packed with nutrients, making it a perfect complement to richer holiday dishes.
Roasting brings out the natural sweetness of the vegetables, while the herbs add a fresh and aromatic touch that elevates the overall flavor profile. This recipe is perfect for serving 4-6 people, making it an ideal contribution to a festive gathering. The preparation is simple, yet the results are impressive.
By using a combination of carrots, parsnips, sweet potatoes, and other available root vegetables, you can create a medley that suits your personal taste or whatever’s fresh and in season. The herbs can also be tailored to your liking, though a classic mix of rosemary, thyme, and parsley works beautifully.
Ingredients:
- 4 large carrots
- 3 parsnips
- 2 medium sweet potatoes
- 1 large red onion
- 3 tablespoons olive oil
- 2 tablespoons fresh rosemary, chopped
- 2 tablespoons fresh thyme, chopped
- Salt and pepper to taste
- Fresh parsley for garnish
Instructions:
- Preheat the Oven: Set your oven to 400°F (200°C) to guarantee it reaches the correct temperature for roasting.
- Prepare the Vegetables: Peel the carrots, parsnips, and sweet potatoes. Cut them into evenly sized pieces, approximately 1-inch chunks, to guarantee they cook evenly. Peel the red onion and cut it into wedges.
- Season the Vegetables: In a large mixing bowl, combine the chopped vegetables. Drizzle with olive oil and sprinkle with chopped rosemary and thyme. Season with salt and pepper. Toss until all the vegetables are well coated with the oil and herbs.
- Arrange on a Baking Sheet: Spread the seasoned vegetables in a single layer on a large baking sheet. Make sure they aren’t overcrowded to allow for proper roasting and even cooking.
- Roast in the Oven: Place the baking sheet in the preheated oven. Roast for about 35-40 minutes, or until the vegetables are tender and golden brown, tossing them halfway through the cooking time to guarantee even roasting.
- Serve: Once roasted, remove the vegetables from the oven. Transfer them to a serving platter and garnish with fresh parsley before serving warm.
Extra Tips: When cutting the vegetables, try to keep the pieces similar in size to guarantee they cook at the same rate. Feel free to experiment with other herbs like sage or oregano for a different flavor twist.
If you prefer a touch of sweetness, consider adding a drizzle of honey or maple syrup before roasting. Finally, when roasting, it’s essential the vegetables are spread out in a single layer, as overcrowding can cause them to steam rather than roast, which affects the texture and flavor.
Savory Sausage Stuffing

Savory Sausage Stuffing is a hearty and flavorful dish perfect for any Christmas potluck. This classic recipe combines the rich flavors of sausage with aromatic herbs and spices, creating a delightful side dish that pairs beautifully with turkey, ham, or any festive main course. The combination of crusty bread, seasoned sausage, and a medley of vegetables makes this stuffing a comforting favorite that will leave your guests asking for seconds.
The key to a great sausage stuffing lies in the balance of textures and flavors. By using a mix of fresh and dried herbs, you can enhance the natural flavors of the sausage and vegetables. This recipe is designed to serve 4-6 people, making it an ideal choice for a small gathering. Whether you’re hosting a holiday dinner or attending a potluck, this Savory Sausage Stuffing will surely impress and satisfy your guests.
Ingredients (serves 4-6):
- 1 pound Italian sausage (mild or spicy, based on preference)
- 1 large onion, diced
- 2 celery stalks, diced
- 1 red bell pepper, diced
- 3 cloves garlic, minced
- 8 cups cubed crusty bread (such as French or sourdough)
- 2 cups chicken or vegetable broth
- 1/4 cup chopped fresh parsley
- 1 tablespoon fresh sage, chopped
- 1 teaspoon dried thyme
- 1 teaspoon salt
- 1/2 teaspoon black pepper
- 2 tablespoons unsalted butter, melted
Cooking Instructions:
- Prepare the Ingredients: Preheat your oven to 350°F (175°C). Begin by cubing the bread and laying it out on a baking sheet. Toast in the oven for about 10 minutes or until the cubes are slightly crispy. This helps the bread absorb the flavors without becoming too soggy.
- Cook the Sausage: In a large skillet over medium heat, cook the sausage until it’s browned and fully cooked through. Break it into smaller pieces as it cooks. Once done, remove the sausage from the skillet and set aside.
- Sauté the Vegetables: Using the same skillet, add the diced onion, celery, and red bell pepper. Sauté the vegetables in the rendered sausage fat until they become tender, about 5-7 minutes. Add the minced garlic and sauté for an additional minute.
- Combine Ingredients: In a large mixing bowl, combine the toasted bread cubes, cooked sausage, and sautéed vegetables. Add the chopped parsley, sage, thyme, salt, and pepper. Mix well to combine all the ingredients evenly.
- Moisten the Stuffing: Gradually pour in the chicken or vegetable broth while stirring the mixture to confirm it’s evenly moistened. The stuffing should be moist but not soggy.
- Bake the Stuffing: Transfer the mixture into a greased baking dish. Drizzle the melted butter over the top to add richness and help with browning. Cover the dish with foil and bake in the preheated oven for 20 minutes. Remove the foil and bake for an additional 10-15 minutes or until the top is golden brown.
Extra Tips:
For an added depth of flavor, you can deglaze the skillet with a splash of white wine after sautéing the vegetables. If you prefer a vegetarian option, simply omit the sausage and add a variety of mushrooms for a hearty alternative.
Make sure to taste the stuffing mixture before baking to adjust the seasoning to your preference. Additionally, using day-old bread enhances the texture and flavor of the stuffing, making it an even more delicious dish to enjoy during your Christmas gathering.
Maple Pecan Sweet Potato Casserole

Maple Pecan Sweet Potato Casserole is the perfect holiday side dish that combines the natural sweetness of sweet potatoes with the rich, caramel-like flavors of maple syrup and crunchy pecans. This dish is a comforting blend of textures and tastes, making it a hit at any Christmas potluck.
The creamy sweet potatoes provide a smooth base, while the pecans add a delightful crunch, and the maple syrup infuses the dish with warmth and a hint of festive flair. Ideal for serving 4-6 people, this casserole isn’t only delicious but also relatively simple to prepare.
With just a few staple ingredients and easy-to-follow steps, you can have this dish ready in no time. Whether you’re a seasoned cook or a beginner, you’ll find this recipe approachable and rewarding. The result is a dish that looks as beautiful as it tastes, making it a memorable addition to your Christmas feast.
Ingredients:
- 4 large sweet potatoes
- 1/2 cup unsalted butter, melted
- 1/3 cup maple syrup
- 1/4 cup milk
- 1 teaspoon vanilla extract
- 1/2 teaspoon ground cinnamon
- 1/4 teaspoon salt
- 1 cup chopped pecans
- 1/2 cup brown sugar
Instructions:
- Preheat the Oven: Begin by preheating your oven to 350°F (175°C). This guarantees that the oven is at the right temperature when you’re ready to bake the casserole.
- Prepare the Sweet Potatoes: Peel the sweet potatoes and cut them into large chunks. Place them in a large pot and cover with water. Bring the water to a boil over medium-high heat, then reduce the heat and let it simmer until the sweet potatoes are tender, about 15-20 minutes. Drain and let them cool slightly.
- Mash the Sweet Potatoes: Transfer the cooked sweet potatoes to a large mixing bowl. Use a potato masher or an electric mixer to mash the sweet potatoes until smooth.
- Mix the Ingredients: Add the melted butter, maple syrup, milk, vanilla extract, cinnamon, and salt to the mashed sweet potatoes. Stir until all the ingredients are well combined and the mixture is smooth and creamy.
- Prepare the Topping: In a small bowl, mix together the chopped pecans and brown sugar. This will create a sweet and crunchy topping for the casserole.
- Assemble the Casserole: Spread the sweet potato mixture evenly into a greased baking dish. Sprinkle the pecan and brown sugar mixture evenly over the top.
- Bake the Casserole: Place the baking dish in the preheated oven and bake for about 25-30 minutes, or until the topping is golden brown and the casserole is heated through.
- Serve: Remove the casserole from the oven and let it cool slightly before serving. This dish can be served warm or at room temperature.
Extra Tips: For added flavor, consider adding a pinch of nutmeg to the sweet potato mixture. If you prefer a less sweet dish, you can reduce the amount of brown sugar in the topping.
To save time, you can prepare the sweet potato mixture a day in advance and store it in the refrigerator. When you’re ready to bake, simply add the topping and place it in the oven. This dish pairs beautifully with other holiday classics, such as roast turkey or ham, and can even be made vegan by substituting the butter with a plant-based alternative and using non-dairy milk.
Gingerbread Spiced Cookies

Nothing says holiday cheer quite like the warm aroma of gingerbread wafting through the kitchen. These gingerbread spiced cookies are a classic treat for Christmas potlucks, offering a delightful burst of spices and molasses in every bite. Perfect for sharing with friends and family, these cookies aren’t only easy to make but are also a fun activity to get everyone involved in the baking process.
Whether you choose to decorate them with icing or enjoy them plain, these cookies are bound to bring a smile to anyone who tries them. The secret to these cookies is the perfect blend of spices that give them their signature gingerbread flavor. Cinnamon, ginger, cloves, and nutmeg come together to create a taste that’s quintessentially festive.
When combined with rich molasses and brown sugar, these cookies develop a deep, complex flavor that pairs beautifully with a warm cup of cocoa or cider. Plus, their charming shape and design options make them a delightful addition to any holiday dessert table.
Ingredients for 4-6 people:
- 3 cups all-purpose flour
- 3/4 cup packed brown sugar
- 3/4 cup unsalted butter, softened
- 1/2 cup molasses
- 1 large egg
- 1 teaspoon baking soda
- 1 tablespoon ground ginger
- 1 tablespoon ground cinnamon
- 1/2 teaspoon ground cloves
- 1/2 teaspoon ground nutmeg
- 1/2 teaspoon salt
- Icing and decorative sugars (optional)
Cooking Instructions:
- Preheat the Oven: Begin by preheating your oven to 350°F (175°C). This guarantees the cookies bake evenly.
- Prepare the Dough: In a large mixing bowl, cream together the softened butter and brown sugar until light and fluffy. Add in the molasses and egg, mixing until fully combined.
- Mix Dry Ingredients: In a separate bowl, whisk together the flour, baking soda, ginger, cinnamon, cloves, nutmeg, and salt. Gradually add this dry mixture to the wet ingredients, stirring until a soft dough forms.
- Chill the Dough: Wrap the dough in plastic wrap and refrigerate for at least 1 hour. Chilling helps the dough firm up, making it easier to roll and cut out.
- Roll and Cut: On a lightly floured surface, roll out the dough to about 1/4 inch thickness. Use cookie cutters to cut out desired shapes and place them on a baking sheet lined with parchment paper.
- Bake the Cookies: Bake in the preheated oven for 8-10 minutes, or until the edges are firm. Remove from oven and let cool on the baking sheet for a few minutes before transferring to a wire rack to cool completely.
- Decorate (Optional): Once the cookies are completely cooled, decorate with icing and decorative sugars if desired.
Extra Tips:
For best results, verify your butter is at room temperature before beginning, as this will help achieve the perfect creamy texture when mixing with sugar. If the dough is too sticky after chilling, you can add a little more flour when rolling it out.
To prevent the cookies from sticking to the cutters, dip the cutters in flour before each use. Finally, remember that the cookies will continue to cook slightly on the baking sheet after being removed from the oven, so avoid overbaking them for a soft, chewy texture.
Chocolate Peppermint Bark
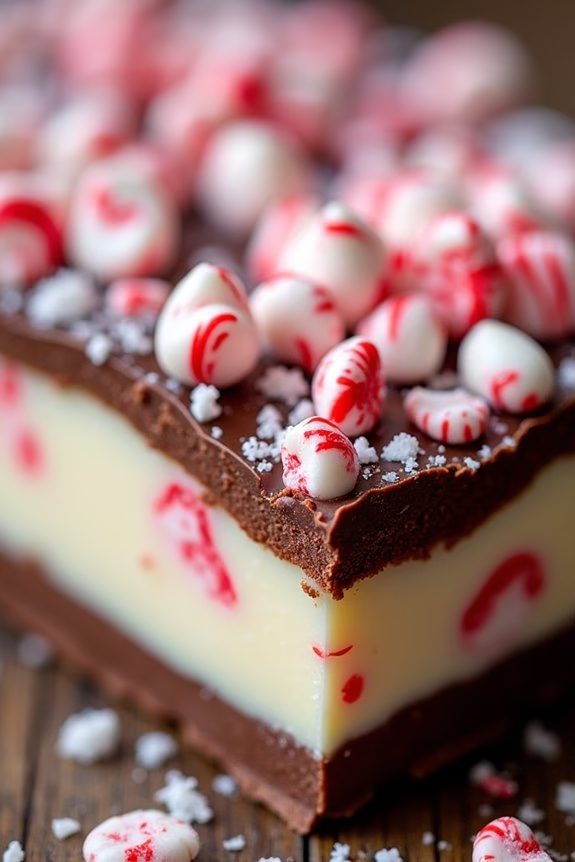
Chocolate Peppermint Bark is a festive and delicious treat that’s perfect for the holiday season. This delightful dessert combines the rich creaminess of chocolate with the invigorating crunch of peppermint, making it a favorite at Christmas potlucks.
Its simple yet elegant presentation makes it not only a joy to eat but also a beautiful addition to any holiday dessert spread. Whether you’re an experienced chef or a beginner in the kitchen, this recipe is straightforward and quick to prepare, guaranteeing you have more time to enjoy the festivities.
This recipe yields enough bark for a serving size of 4-6 people, making it ideal for small gatherings or as a personal treat to enjoy throughout the holiday season. With its harmonious blend of flavors and ease of preparation, Chocolate Peppermint Bark is sure to become a cherished holiday tradition in your home.
Gather your ingredients, follow the steps, and prepare to indulge in this holiday classic.
Ingredients:
- 12 oz semi-sweet chocolate chips
- 12 oz white chocolate chips
- 1/2 teaspoon peppermint extract
- 1/2 cup crushed candy canes or peppermint candies
- 1/4 teaspoon salt
Instructions:
- Prepare Baking Sheet:
- Line a baking sheet with parchment paper, guaranteeing that the edges are covered. This will prevent the chocolate from sticking and make it easier to remove once set.
- Melt Semi-Sweet Chocolate:
- In a microwave-safe bowl, melt the semi-sweet chocolate chips in the microwave in 30-second intervals, stirring between each interval until smooth. Alternatively, you can melt the chocolate using a double boiler on the stove.
- Spread Chocolate Layer:
- Pour the melted semi-sweet chocolate onto the prepared baking sheet. Use a spatula to spread it evenly into a thin layer. Set aside to cool slightly.
- Melt White Chocolate:
- In another microwave-safe bowl, melt the white chocolate chips in the same manner as the semi-sweet chocolate, in 30-second intervals until smooth. Stir in the peppermint extract and salt once melted.
- Spread White Chocolate Layer:
- Pour the melted white chocolate over the semi-sweet chocolate layer. Use a spatula to spread evenly, guaranteeing it covers the first layer completely.
- Add Peppermint Topping:
- Sprinkle the crushed candy canes or peppermint candies over the top of the white chocolate layer while it’s still warm. Gently press them down with the spatula to guarantee they stick.
- Chill and Set:
- Place the baking sheet in the refrigerator for about 1 hour or until set and firm. Once hardened, break the bark into pieces of your desired size.
- Serve:
- Serve the Chocolate Peppermint Bark as a treat at your Christmas potluck or package it in decorative bags for a festive homemade gift.
Extra Tips:
For the best results, use high-quality chocolate chips, as they’ll melt more smoothly and have a richer flavor. If you prefer a less minty bark, reduce the amount of peppermint extract or candy canes.
You can also get creative with your toppings by adding nuts or dried fruits for additional texture and flavor. Store the bark in an airtight container in a cool place to maintain its freshness and prevent the chocolate from melting.
Cranberry Orange Bundt Cake

Cranberry Orange Bundt Cake is a delightful and festive dessert perfect for any Christmas potluck. This cake combines the tartness of fresh cranberries with the zesty flavor of oranges, creating a moist and flavorful treat that’s sure to impress your guests.
The Bundt shape adds an elegant touch, making it not only delicious but also visually appealing on any holiday dessert table. The recipe is designed to serve 4-6 people, making it an ideal choice for a small gathering or as one of the multiple desserts at a larger event.
The cake is easy to prepare and can be made in advance, allowing you to focus on other aspects of your holiday festivities. Enjoy the sweet and tangy taste of this Cranberry Orange Bundt Cake, a perfect addition to your Christmas potluck spread.
Ingredients:
- 1 3/4 cups all-purpose flour
- 1 teaspoon baking powder
- 1/2 teaspoon baking soda
- 1/2 teaspoon salt
- 1/2 cup unsalted butter, softened
- 1 cup granulated sugar
- 2 large eggs
- 1 teaspoon vanilla extract
- Zest of 1 orange
- 1/2 cup fresh orange juice
- 1/2 cup sour cream
- 1 cup fresh cranberries
- 1/2 cup powdered sugar (for glaze)
- 2-3 tablespoons fresh orange juice (for glaze)
Instructions:
- Preheat the Oven: Begin by preheating your oven to 350°F (175°C). Grease and flour a Bundt pan to prevent the cake from sticking.
- Mix Dry Ingredients: In a medium bowl, whisk together the flour, baking powder, baking soda, and salt. Set aside.
- Cream Butter and Sugar: In a large mixing bowl, beat the softened butter and granulated sugar together until light and fluffy, about 3-4 minutes.
- Add Eggs and Flavoring: Add the eggs one at a time, beating well after each addition. Mix in the vanilla extract and orange zest.
- Combine Wet and Dry Ingredients: Gradually add the dry ingredient mixture to the butter mixture, alternating with the fresh orange juice and sour cream. Begin and end with the dry ingredients. Mix until just combined.
- Fold in Cranberries: Gently fold in the fresh cranberries, ensuring they’re evenly distributed throughout the batter.
- Bake the Cake: Pour the batter into the prepared Bundt pan. Smooth the top and bake in the preheated oven for 40-45 minutes, or until a toothpick inserted into the center of the cake comes out clean.
- Cool and Glaze: Allow the cake to cool in the pan for 10 minutes before transferring it to a wire rack to cool completely. Once cooled, mix the powdered sugar with 2-3 tablespoons of fresh orange juice to make a glaze. Drizzle over the cooled cake.
Extra Tips:
For best results, use fresh cranberries as they provide the perfect tartness to complement the sweet and citrusy flavors of the cake. If fresh cranberries aren’t available, you can use frozen ones, but don’t thaw them before adding to the batter.
To enhance the orange flavor, consider adding a bit of orange extract along with the vanilla. This cake can be made a day in advance; just keep it covered at room temperature.
If you prefer, you can sprinkle some additional cranberries and orange zest on top of the glaze for added decoration.
Eggnog Cheesecake Bars
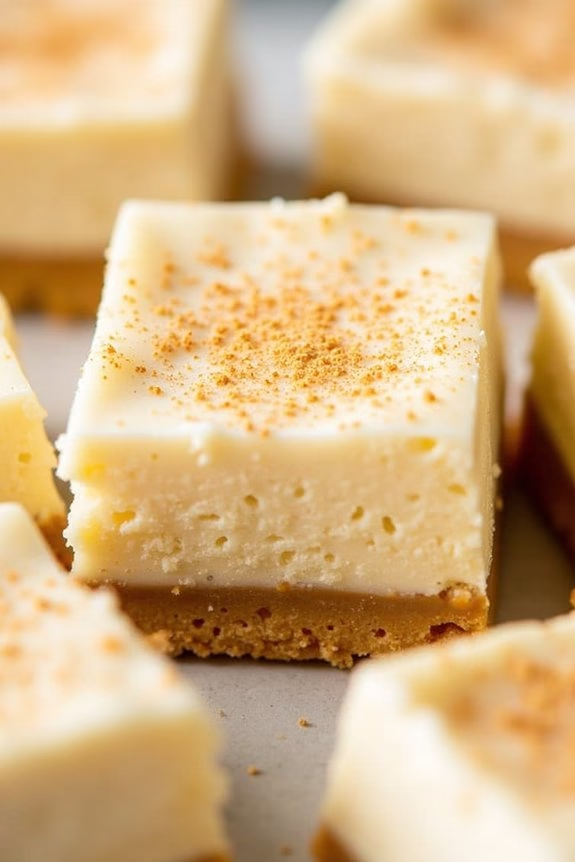
Eggnog Cheesecake Bars are an irresistible holiday treat that combines the creamy richness of cheesecake with the festive flavors of eggnog. These bars are perfect for a Christmas potluck, offering a deliciously sweet and spiced dessert that will surely impress your friends and family.
The smooth, creamy texture of the cheesecake pairs beautifully with the warm, spicy notes of nutmeg and cinnamon, creating a dessert that’s both indulgent and comforting.
To create these delightful bars, you’ll start with a simple crust made from crushed graham crackers, providing a buttery and slightly crunchy base that complements the creamy filling. The cheesecake layer is infused with eggnog and a hint of rum extract, capturing the essence of the holiday season.
These bars aren’t only delicious but also easy to cut into servings, making them an ideal choice for a gathering. Plus, they’re easy to make ahead of time, so you can focus on enjoying the festivities.
Ingredients for Eggnog Cheesecake Bars (serves 4-6):
- 1 1/2 cups graham cracker crumbs
- 1/2 cup unsalted butter, melted
- 2 tablespoons granulated sugar
- 16 ounces cream cheese, softened
- 3/4 cup granulated sugar
- 2 tablespoons all-purpose flour
- 2/3 cup eggnog
- 2 large eggs
- 1 teaspoon rum extract
- 1/2 teaspoon ground nutmeg
- 1/4 teaspoon ground cinnamon
- Whipped cream (for topping, optional)
- Additional nutmeg (for garnish, optional)
Cooking Instructions:
1. Preheat Oven: Preheat your oven to 325°F (163°C). Prepare a 9×9 inch baking pan by lining it with parchment paper or lightly greasing it to prevent sticking.
2. Make the Crust: In a medium bowl, combine the graham cracker crumbs, melted butter, and 2 tablespoons of sugar. Mix until the crumbs are fully coated with butter and the mixture resembles wet sand.
Press this mixture into the bottom of the prepared baking pan, guaranteeing an even layer. Bake for 10 minutes, then set aside to cool slightly.
3. Prepare the Cheesecake Filling: In a large mixing bowl, beat the softened cream cheese until smooth. Add in 3/4 cup of sugar and flour, and mix until well combined.
Pour in the eggnog and beat until the mixture is smooth and creamy. Add the eggs one at a time, mixing well after each addition. Stir in the rum extract, nutmeg, and cinnamon until fully incorporated.
4. Assemble and Bake: Pour the cheesecake mixture over the cooled crust in the baking pan, spreading it evenly with a spatula. Place the pan in the preheated oven and bake for 35-40 minutes, or until the center is set and the edges are lightly golden.
Remove from the oven and let it cool to room temperature, then refrigerate for at least 2 hours to set completely.
5. Serve: Once chilled and set, cut the cheesecake into bars. Top with whipped cream and a sprinkle of nutmeg if desired. Serve chilled and enjoy the festive flavors.
Extra Tips:
For best results, verify that all ingredients, particularly the cream cheese and eggs, are at room temperature before starting. This will help achieve a smooth, creamy texture in your cheesecake.
Additionally, if you prefer a stronger eggnog flavor, consider adding a bit more eggnog or an extra dash of nutmeg. Letting the cheesecake bars chill thoroughly is vital for easy slicing and best flavor, so plan to make these at least a few hours ahead of serving time.

