

With the holiday season just around the corner, I’m on the hunt for simple yet delightful snacks to share at our festive gatherings. Finger foods are always a hit, keeping things light and fun. Picture the joy on your guests’ faces as they enjoy mini Caprese skewers or cranberry brie bites. These recipes are sure to make you the star of the potluck, offering a feast for both the eyes and taste buds. Ready to explore these tasty treasures?
Mini Caprese Skewers
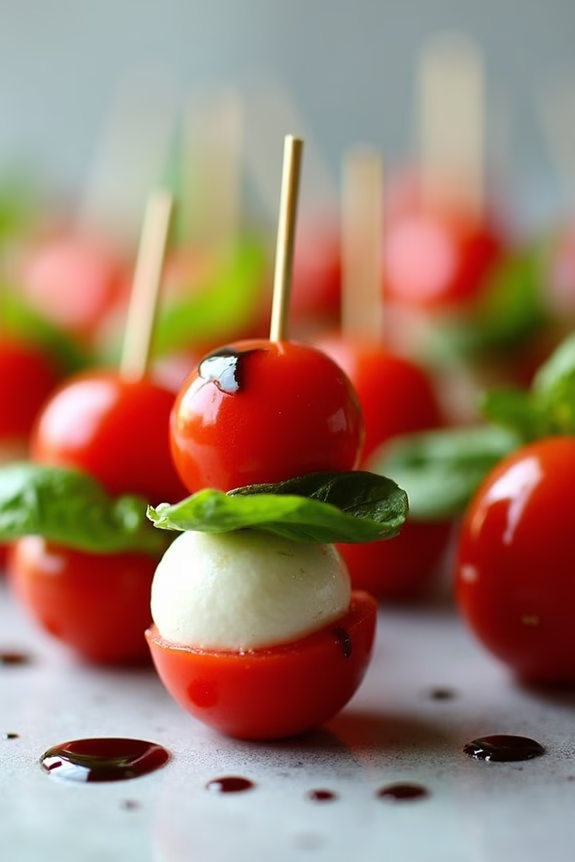
Mini Caprese Skewers are a delightful and invigorating finger food option perfect for a Christmas potluck. Inspired by the classic Italian Caprese salad, these skewers are as beautiful as they’re delicious. With layers of fresh mozzarella, cherry tomatoes, and basil leaves, each bite is a burst of flavor that’s sure to impress your guests.
These skewers aren’t only easy to assemble but also add a vibrant touch to any holiday spread, making them a go-to appetizer for festive gatherings. Ideal for serving 4-6 people, Mini Caprese Skewers offer a healthy and colorful addition to your potluck menu.
The combination of juicy tomatoes, creamy mozzarella, and aromatic basil leaves drizzled with balsamic glaze creates a delightful contrast of flavors and textures. They’re convenient to eat by hand, making them an excellent choice for mingling guests. Plus, with minimal ingredients and preparation time, you’ll have more time to enjoy the festivities.
Ingredients (serving size: 4-6 people):
- 24 cherry tomatoes
- 24 small fresh mozzarella balls (bocconcini)
- 24 fresh basil leaves
- 2 tablespoons extra virgin olive oil
- Salt and freshly ground black pepper, to taste
- Balsamic glaze for drizzling
- 24 small skewers or toothpicks
Cooking Instructions:
- Prepare the Ingredients: Rinse the cherry tomatoes and basil leaves under cold water and pat them dry with a clean kitchen towel. Drain the mozzarella balls from the liquid they’re stored in.
- Assemble the Skewers: On each skewer or toothpick, thread one cherry tomato, followed by a basil leaf, and then a mozzarella ball. Repeat this sequence until all ingredients are used, ensuring each skewer has one of each ingredient.
- Season the Skewers: Arrange the skewers on a serving platter. Drizzle them with extra virgin olive oil and season with a light sprinkle of salt and freshly ground black pepper to taste.
- Add the Finishing Touch: Just before serving, drizzle the skewers with balsamic glaze to enhance the flavors and add a touch of sweetness.
Extra Tips: When choosing ingredients for Mini Caprese Skewers, opt for ripe cherry tomatoes and fresh basil for the best flavor. If you can’t find small mozzarella balls, you can cut larger mozzarella pieces into bite-sized cubes.
The balsamic glaze can be made from scratch by reducing balsamic vinegar over low heat until it thickens or purchased ready-made from most grocery stores. These skewers are best served fresh, so prepare them shortly before your event to maintain their vibrant appearance and taste.
Cranberry Brie Bites
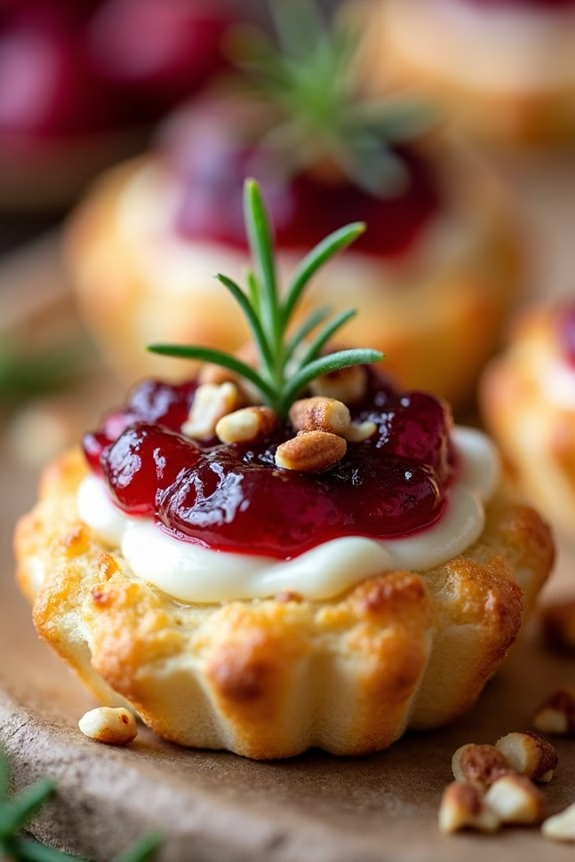
Cranberry Brie Bites are a delightful and festive finger food that makes a perfect addition to any Christmas potluck. These bite-sized treats aren’t only easy to prepare but also pack a punch of flavor with their combination of creamy brie cheese and tangy cranberry sauce. The buttery, flaky pastry adds a delightful crunch, making them irresistible to guests of all ages.
Whether you’re hosting a holiday gathering or attending one, these Cranberry Brie Bites are bound to be a hit and a conversation starter. Ideal for serving 4-6 people, this recipe requires minimal ingredients and preparation time, allowing you to focus on other holiday activities.
The key to this dish is using high-quality brie cheese and a flavorful cranberry sauce. You can make your own cranberry sauce or use a store-bought version for convenience. The pastry can be store-bought puff pastry or phyllo dough, depending on your preference for texture. These bites can be prepared in advance and baked just before serving, guaranteeing they’re warm and gooey when they hit the table.
Ingredients:
- 1 sheet of puff pastry, thawed
- 1/2 cup cranberry sauce
- 8 ounces brie cheese, rind removed
- 1/4 cup chopped pecans (optional)
- Fresh rosemary sprigs for garnish (optional)
Instructions:
- Preheat the Oven: Preheat your oven to 375°F (190°C). Line a baking sheet with parchment paper for easy cleanup.
- Prepare the Pastry: Roll out the thawed puff pastry sheet on a lightly floured surface. Cut the pastry into 24 equal squares using a sharp knife or pizza cutter.
- Assemble the Bites: Place each pastry square into the cups of a mini muffin tin, gently pressing down to form a small cup. Make sure the corners are slightly hanging over the edges.
- Add the Cheese: Cut the brie cheese into small cubes, about 1/2 inch each. Place a cube of brie into each pastry cup.
- Top with Cranberry Sauce: Spoon about 1 teaspoon of cranberry sauce over the brie in each cup, making sure the cheese is mostly covered.
- Optional Additions: If desired, sprinkle chopped pecans over the cranberry sauce for added crunch and flavor.
- Bake the Bites: Transfer the muffin tin to the preheated oven and bake for about 15-18 minutes, or until the pastry is golden brown and the cheese is bubbly.
- Garnish and Serve: Remove the bites from the oven and let them cool for a few minutes before removing them from the muffin tin. Garnish with fresh rosemary sprigs if using, and serve warm.
Extra Tips:
For the best results, verify that your puff pastry is properly thawed but still cold when you begin working with it, as this will help maintain its flaky texture. If you’re making your own cranberry sauce, consider adding a hint of orange zest for an extra burst of holiday flavor.
Keep an eye on the bites as they bake to prevent the cheese from overflowing and burning. If you prefer a sweeter touch, you can drizzle a bit of honey over the top of each bite before serving. These Cranberry Brie Bites are best served warm, so if you’re preparing them in advance, simply reheat them in the oven for a few minutes before serving.
Parmesan Herb Puff Pastry Straws
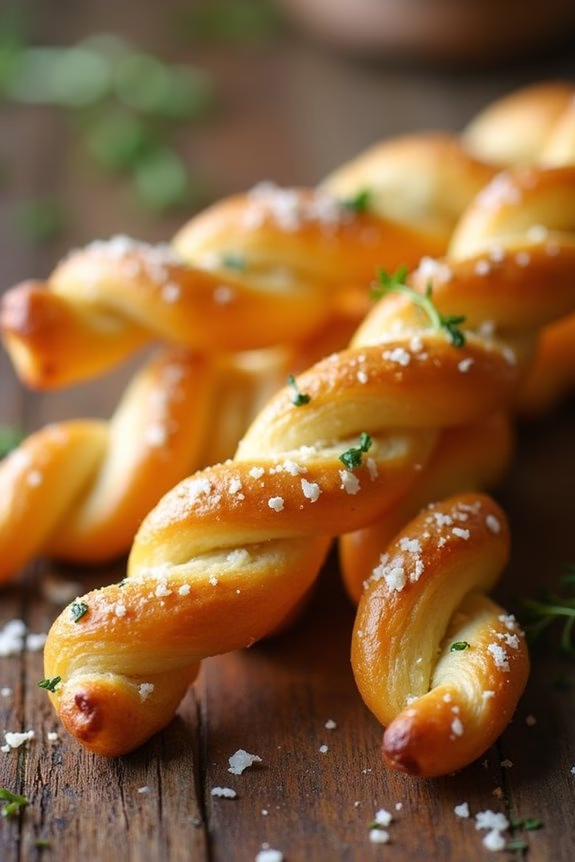
Parmesan Herb Puff Pastry Straws are a delightful addition to any Christmas potluck, offering a blend of savory flavors wrapped in a crisp and flaky pastry.
These straws are perfect for entertaining because they’re easy to make and can be served either warm or at room temperature, making them versatile for any gathering. With the rich taste of Parmesan cheese combined with aromatic herbs, these straws are bound to be a hit among guests, providing a delicious finger food option that pairs well with a variety of holiday drinks.
Preparing the Parmesan Herb Puff Pastry Straws involves only a few simple steps, making it an ideal recipe for both beginner and experienced cooks. The process begins with ready-made puff pastry, which is then topped with a mixture of grated Parmesan and fresh herbs.
Once baked to golden perfection, these straws are irresistibly crispy and flavorful. This recipe serves 4-6 people, making it a great choice for small to medium-sized gatherings.
Ingredients:
- 1 sheet of puff pastry (thawed if frozen)
- 1 cup grated Parmesan cheese
- 1 tablespoon fresh thyme leaves
- 1 tablespoon fresh rosemary, finely chopped
- 1 egg (beaten)
- Salt and pepper to taste
Instructions:
- Preheat the oven: Begin by preheating your oven to 400°F (200°C). Line a baking sheet with parchment paper to prevent sticking.
- Prepare the puff pastry: Roll out the puff pastry sheet on a lightly floured surface until it’s about 1/8 inch thick. This will guarantee that the pastry becomes thin and crispy during baking.
- Mix the herbs and cheese: In a small bowl, combine the grated Parmesan cheese, thyme leaves, and chopped rosemary. Add a pinch of salt and pepper to taste, then mix well.
- Assemble the straws: Brush the surface of the rolled-out puff pastry with the beaten egg. Evenly sprinkle the Parmesan and herb mixture over the entire sheet of pastry.
- Cut and twist the pastry: Using a sharp knife or a pizza cutter, cut the pastry into strips about 1/2 inch wide. Gently twist each strip to form a spiral shape before placing it onto the prepared baking sheet.
- Bake the straws: Place the baking sheet in the preheated oven and bake for 12-15 minutes or until the puff pastry straws are golden brown and crispy.
- Cool and serve: Allow the straws to cool slightly on the baking sheet before transferring them to a serving platter. Serve them warm or at room temperature.
Extra Tips:
For the best results, verify your puff pastry is well-chilled before rolling it out to prevent it from becoming too sticky.
If you find the pastry difficult to work with, pop it back in the refrigerator for a few minutes to firm up. Additionally, feel free to experiment with different herbs or add a pinch of chili flakes for a bit of heat.
Stuffed Mushrooms With Garlic and Herbs

Stuffed Mushrooms With Garlic and Herbs are a delightful addition to any Christmas potluck, offering a burst of flavor in each bite-sized treat. These savory appetizers are perfect for a festive gathering, combining the earthy taste of mushrooms with a rich, herby filling.
They’re easy to prepare, guaranteeing you spend less time in the kitchen and more time enjoying the company of friends and family. The filling, composed of garlic, herbs, and cheese, creates a harmonious blend that perfectly complements the tender mushroom caps.
This recipe is ideal for serving 4-6 people, making it a great choice for smaller get-togethers or to contribute to a larger potluck spread. The combination of ingredients not only delivers on taste but also fills the room with a warm and inviting aroma.
Whether you’re a seasoned cook or a novice in the kitchen, these stuffed mushrooms are simple to prepare and will certainly be a crowd-pleaser at your holiday celebration.
Ingredients:
- 18-24 large white button mushrooms
- 3 tablespoons olive oil, divided
- 2 cloves garlic, minced
- 1/4 cup finely chopped parsley
- 1/4 cup finely chopped fresh basil
- 1/4 cup grated Parmesan cheese
- 1/2 cup breadcrumbs
- Salt and pepper, to taste
- 1/4 cup cream cheese, softened
Instructions:
- Prepare the Mushrooms: Begin by preheating your oven to 375°F (190°C). Clean the mushrooms with a damp paper towel to remove any dirt. Carefully remove the stems and set them aside, as they’ll be used in the filling. Place the mushroom caps on a baking sheet, cavity side up, and drizzle with 1 tablespoon of olive oil. Season with a pinch of salt and pepper.
- Make the Filling: Finely chop the reserved mushroom stems. In a skillet over medium heat, add the remaining 2 tablespoons of olive oil. Sauté the garlic until fragrant, about 1 minute. Add the chopped mushroom stems and cook for 4-5 minutes until softened. Remove from heat and let cool slightly.
- Combine the Ingredients: In a mixing bowl, combine the sautéed mushroom stems and garlic, parsley, basil, Parmesan cheese, breadcrumbs, and cream cheese. Mix well until all ingredients are thoroughly combined. Season with salt and pepper to taste.
- Stuff the Mushrooms: Using a small spoon, carefully fill each mushroom cap with the prepared filling, pressing gently to guarantee they’re well-packed.
- Bake the Mushrooms: Place the stuffed mushrooms back on the baking sheet and bake in the preheated oven for 15-20 minutes, or until the tops are golden brown and the mushrooms are tender.
- Serve: Once baked, remove from the oven and let cool for a few minutes before transferring to a serving platter. Serve warm and enjoy!
Extra Tips:
For a variation in flavor, consider adding chopped nuts, such as walnuts or pine nuts, to the filling for added texture and taste. If you prefer a spicier kick, a pinch of red pepper flakes can be included in the filling mixture.
Additionally, make sure that the cream cheese is softened before mixing to achieve a smooth and cohesive filling. These stuffed mushrooms can also be prepared in advance; simply assemble them and store in the refrigerator until you’re ready to bake.
Prosciutto-Wrapped Asparagus
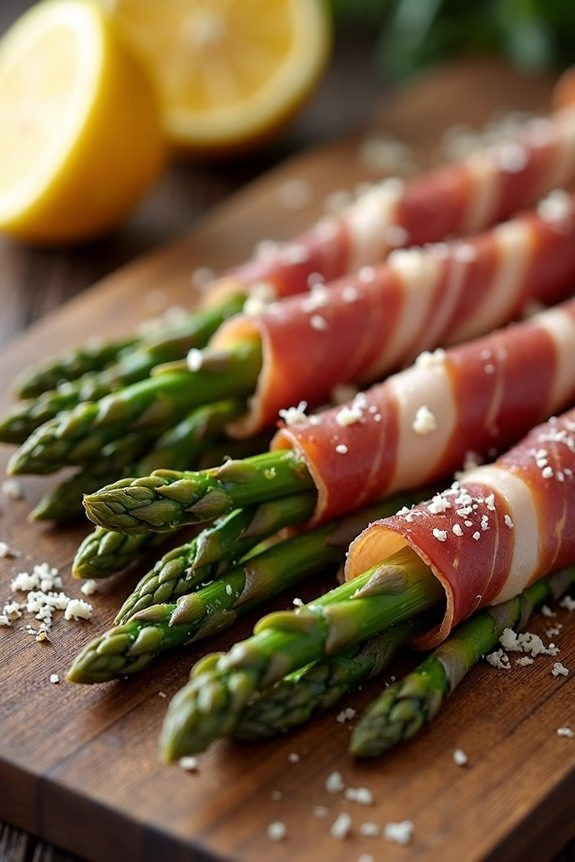
Prosciutto-wrapped asparagus is a delightful and easy-to-prepare dish that makes for an elegant appetizer at any Christmas potluck. The combination of tender asparagus spears and the savory, salty prosciutto creates a flavor profile that’s both sophisticated and universally appealing.
This dish not only looks festive and appetizing but is also a breeze to assemble, making it an ideal choice for busy holiday gatherings.
This recipe serves 4-6 people and requires minimal ingredients, yet delivers maximum flavor and presentation. Whether you’re an experienced cook or a beginner, you’ll find this dish straightforward to prepare. The key is in choosing fresh asparagus and high-quality prosciutto, which will elevate the overall taste and texture.
Perfect for sharing, these prosciutto-wrapped asparagus spears are sure to be a hit at your holiday table.
Ingredients:
- 1 pound fresh asparagus
- 8 ounces thinly sliced prosciutto
- 1 tablespoon olive oil
- Salt and pepper to taste
- Optional: grated Parmesan cheese for garnish
- Optional: lemon wedges for serving
Instructions:
- Preheat the Oven: Start by preheating your oven to 400°F (200°C). This guarantees that the asparagus and prosciutto will cook evenly and achieve the desired crispness.
- Prepare the Asparagus: Wash the asparagus under cold water and trim the woody ends. You can do this by bending each spear until it naturally snaps, which will remove the tough part.
- Wrap with Prosciutto: Take a slice of prosciutto and wrap it tightly around each asparagus spear, starting just below the tip and working your way down towards the base. Repeat this process for all asparagus spears.
- Arrange on Baking Sheet: Place the wrapped asparagus spears on a baking sheet lined with parchment paper. Drizzle them lightly with olive oil and season with salt and pepper to taste.
- Bake: Bake in the preheated oven for 12-15 minutes or until the prosciutto is crispy and the asparagus is tender. Keep an eye on them to prevent burning.
- Serve: Once cooked, remove from the oven and let them cool slightly. If desired, sprinkle with grated Parmesan cheese and serve with lemon wedges on the side for an extra burst of flavor.
Extra Tips:
For best results, choose asparagus that’s bright green and firm, as this indicates freshness. If you prefer a more intense flavor, consider adding a sprinkle of garlic powder or a dash of balsamic glaze before baking.
For a touch of color and added taste, you can also mix in some cherry tomatoes on the baking sheet. Remember, the key to this dish isn’t to overcook the asparagus, as you want it to maintain a slight crunch for the perfect texture contrast with the crispy prosciutto.
Enjoy these delicious finger foods at your next Christmas potluck, and watch them disappear in no time!
Spinach and Feta Phyllo Cups
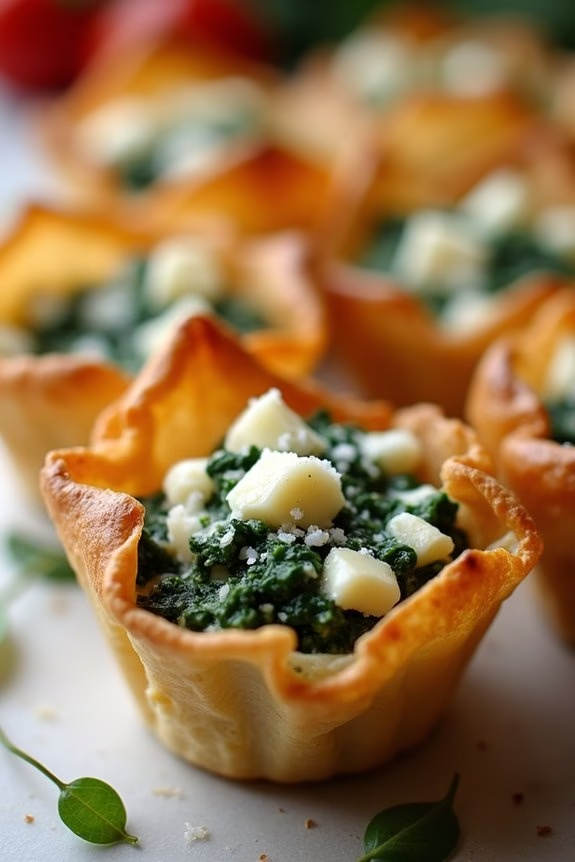
Spinach and Feta Phyllo Cups are a delightful and elegant appetizer perfect for a Christmas potluck. These bite-sized wonders bring together the classic combination of spinach and feta cheese, wrapped in a crisp, buttery phyllo pastry. The savory filling contrasts beautifully with the light, flaky cups, making them irresistible to guests.
Not only are they delicious, but they also add a touch of sophistication to any holiday gathering with minimal effort. This dish is an excellent choice for a potluck because it’s easy to prepare in advance and can be served at room temperature, allowing you to focus on enjoying the festivities.
The phyllo cups can be pre-baked and filled shortly before serving, guaranteeing they remain crisp. The creamy, cheesy filling is rich and flavorful, making these phyllo cups a memorable addition to your holiday spread. With this recipe, you’ll have a crowd-pleasing appetizer that highlights the festive flavors of the season.
Ingredients for 4-6 servings:
- 1 package (15 sheets) of phyllo dough
- 1/4 cup melted butter
- 1 cup fresh spinach, chopped
- 1/2 cup feta cheese, crumbled
- 1/4 cup ricotta cheese
- 1/4 cup grated Parmesan cheese
- 1 egg
- 1 clove garlic, minced
- Salt and pepper to taste
Cooking Instructions:
- Preheat the Oven: Begin by preheating your oven to 375°F (190°C). This guarantees your phyllo cups cook evenly and become perfectly golden brown.
- Prepare the Phyllo Dough: Carefully unroll the phyllo dough and cover it with a damp cloth to prevent drying out. Take one sheet of phyllo and brush it lightly with melted butter. Place another sheet on top and repeat the process until you have a stack of 5 buttered sheets.
- Cut and Shape the Phyllo Cups: Using a sharp knife or a pizza cutter, cut the stacked phyllo sheets into 12 equal squares. Gently press each square into the cups of a mini muffin tin, ensuring they form little cups.
- Prepare the Filling: In a medium bowl, combine the chopped spinach, feta cheese, ricotta cheese, Parmesan cheese, egg, minced garlic, salt, and pepper. Mix well until fully blended.
- Fill the Phyllo Cups: Spoon about a tablespoon of the spinach and feta mixture into each phyllo cup, filling them generously but not overflowing.
- Bake the Cups: Place the muffin tin in the preheated oven and bake for 15-20 minutes, or until the phyllo is golden brown and the filling is set.
- Cool and Serve: Allow the phyllo cups to cool slightly in the tin before transferring them to a serving platter. Serve warm or at room temperature.
Extra Tips:
To save time on the day of your potluck, you can prepare the filling a day in advance and store it in the refrigerator. Additionally, if you want to keep the phyllo extra crispy, bake the cups without filling and store them in an airtight container.
Fill and bake them with the mixture just before serving. If you don’t have a mini muffin tin, you can also use regular muffin tins; just cut the phyllo into larger squares. Remember to handle phyllo dough with care, as it’s delicate and can tear easily.
Sweet and Spicy Meatballs
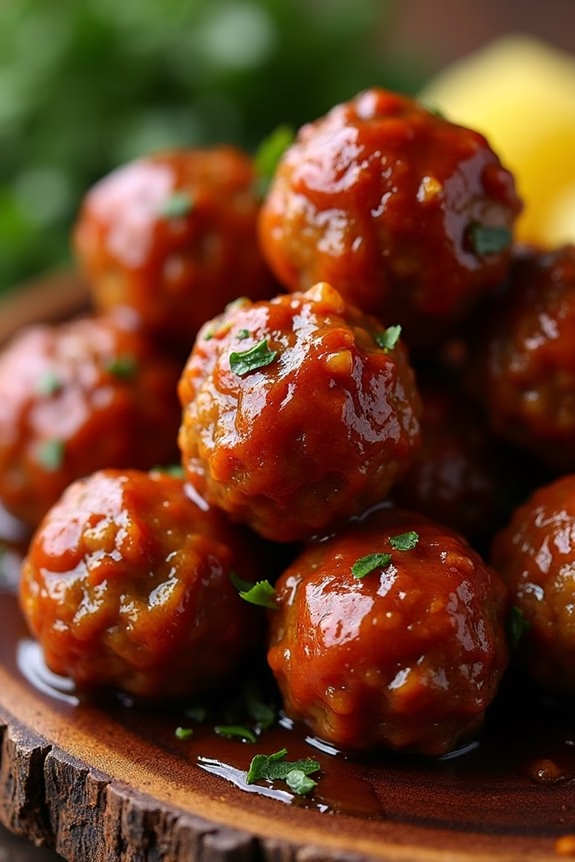
Transform your Christmas potluck with these delectable Sweet and Spicy Meatballs that are sure to be a hit. These meatballs strike the perfect balance between sweet and spicy flavors, making them an irresistible finger food that guests will continuously reach for. The recipe is designed to cater to 4-6 people, guaranteeing everyone has a chance to indulge in these savory bites.
The combination of tender meatballs and a rich, flavorful sauce creates a delightful experience for the taste buds. The sweetness from brown sugar and pineapple juice contrasts beautifully with the zing from chili sauce and red pepper flakes, creating a harmony of flavors. This dish is simple to prepare and perfect for any festive gathering, assuring your spot as the go-to host for scrumptious appetizers.
Ingredients for 4-6 Servings:
- 1 pound ground beef
- 1/2 cup breadcrumbs
- 1/4 cup milk
- 1 large egg
- 1/4 cup finely chopped onion
- 2 cloves garlic, minced
- 1 teaspoon salt
- 1/2 teaspoon black pepper
- 1 cup chili sauce
- 1 cup pineapple juice
- 1/2 cup brown sugar
- 1 tablespoon soy sauce
- 1 tablespoon apple cider vinegar
- 1/2 teaspoon red pepper flakes
Cooking Instructions:
- Preheat the Oven: Start by preheating your oven to 375°F (190°C). This guarantees that the meatballs cook evenly.
- Prepare the Meatball Mixture: In a large mixing bowl, combine ground beef, breadcrumbs, milk, egg, onion, garlic, salt, and black pepper. Mix until all ingredients are well incorporated.
- Shape the Meatballs: With the mixture ready, form it into 1-inch meatballs. You should get about 20-24 meatballs, depending on the size.
- Bake the Meatballs: Place the meatballs on a baking sheet lined with parchment paper. Bake in the preheated oven for 20-25 minutes, or until they’re cooked through and browned on the outside.
- Prepare the Sauce: While the meatballs are baking, prepare the sauce. In a medium saucepan, combine chili sauce, pineapple juice, brown sugar, soy sauce, apple cider vinegar, and red pepper flakes. Bring the mixture to a simmer over medium heat, stirring occasionally.
- Combine Meatballs with Sauce: Once the meatballs are done, transfer them to the saucepan with the simmering sauce. Gently stir to coat the meatballs with the sauce. Allow them to simmer for an additional 10 minutes to absorb the flavors.
- Serve: Transfer the meatballs to a serving platter. You can use toothpicks to make them easier to handle and serve as finger food.
Extra Tips:
For an added depth of flavor, consider browning the meatballs in a skillet before baking. This step enhances the texture and taste.
If you’re preparing this dish ahead of time, you can make the meatballs and sauce separately and combine them just before serving.
If the sauce becomes too thick while simmering, feel free to add a little water or extra pineapple juice to reach your desired consistency.
For a bit more heat, you can increase the amount of red pepper flakes or add a splash of hot sauce to the mix.
Cheesy Bacon Ranch Pull-Apart Bread

Cheesy Bacon Ranch Pull-Apart Bread is a crowd-pleasing appetizer perfect for any Christmas potluck. This dish combines the irresistible flavors of gooey melted cheese, crispy bacon, and zesty ranch seasoning, all encased in a warm, crusty loaf of bread. The pull-apart nature of this recipe makes it easy for guests to enjoy, as they can simply grab a piece and savor the delightful combination of textures and tastes.
Ideal for sharing, this dish not only satisfies but also adds a festive flair to your holiday spread. The beauty of Cheesy Bacon Ranch Pull-Apart Bread lies in its simplicity and the capacity to prepare it ahead of time. With just a few ingredients, you can create a scrumptious dish that complements any potluck menu.
The preparation is straightforward, and the result is a delicious, cheesy indulgence that will have everyone coming back for more. Whether you’re hosting or attending a Christmas potluck, this recipe is sure to impress and become a staple in your holiday gatherings.
Ingredients (serving size for 4-6 people):
- 1 large loaf of sourdough or Italian bread
- 1 cup shredded mozzarella cheese
- 1 cup shredded cheddar cheese
- 1/2 cup cooked and crumbled bacon
- 1/4 cup melted butter
- 1 packet (1 oz) ranch dressing mix
- 2 tablespoons chopped fresh parsley (optional)
- 1/4 cup sliced green onions (optional)
Cooking Instructions:
- Preheat and Prepare: Preheat your oven to 350°F (175°C). Place the loaf of bread on a cutting board and, using a sharp bread knife, make diagonal cuts in the bread approximately 1 inch apart, being careful not to slice all the way through the bottom crust.
- Stuff the Bread: Gently separate the cuts in the bread with your fingers and stuff each crevice with a mix of shredded mozzarella and cheddar cheese, followed by the crumbled bacon. Confirm the fillings are evenly distributed throughout the loaf for a consistent taste in every bite.
- Prepare the Butter Mixture: In a small bowl, combine the melted butter with the ranch dressing mix. Stir until the mix is fully dissolved and well-blended.
- Drizzle and Wrap: Drizzle the butter mixture evenly over the stuffed bread, allowing it to seep into the cuts. If desired, sprinkle chopped parsley and sliced green onions over the top for added flavor and color. Wrap the entire loaf tightly in aluminum foil.
- Bake: Place the wrapped loaf on a baking sheet and bake in the preheated oven for 15 minutes. After 15 minutes, carefully unwrap the foil and return the bread to the oven for an additional 10 minutes, or until the cheese is fully melted and bubbly.
- Serve: Remove from the oven and let the bread cool for a few minutes before transferring to a serving platter. Serve warm, allowing guests to pull apart pieces of the cheesy, bacon-filled bread.
Extra Tips: For an extra crispy top, you can broil the bread for the last 2-3 minutes of baking, but keep a close eye to prevent burning. This dish can be prepared a day ahead and stored in the refrigerator; just increase the baking time by a few minutes to confirm it’s heated through. Feel free to experiment with different cheeses or add additional ingredients like chopped jalapeños for a spicy kick.
Cranberry Pecan Cheese Ball
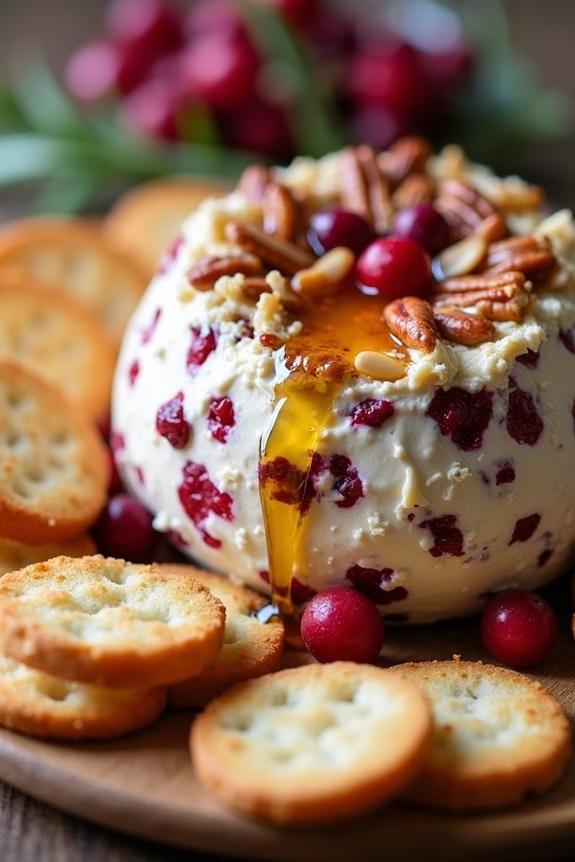
The Cranberry Pecan Cheese Ball is a delightful addition to any Christmas potluck, offering a perfect blend of creamy, crunchy, and sweet flavors that are sure to impress your guests. This recipe combines tangy cream cheese with the sweetness of dried cranberries and the nutty crunch of pecans, creating an irresistible appetizer. Crafted to serve 4-6 people, this cheese ball isn’t only easy to prepare but also adds a festive touch to your holiday table.
This cheese ball can be served with crackers, sliced baguette, or fresh vegetables, making it a versatile option for your holiday spread. It’s a dish that can be made ahead of time, allowing you to enjoy the festivities without worrying about last-minute preparations. With its vibrant appearance and rich flavor profile, this Cranberry Pecan Cheese Ball is bound to become a holiday favorite among your family and friends.
Ingredients (serving size: 4-6 people):
- 8 oz cream cheese, softened
- 1 cup shredded sharp cheddar cheese
- 1/2 cup dried cranberries, chopped
- 1/2 cup pecans, chopped
- 1/4 cup green onions, finely chopped
- 1 teaspoon garlic powder
- 1/2 teaspoon black pepper
- 1/4 teaspoon salt
- 1 tablespoon honey
- Crackers or sliced baguette for serving
Cooking Instructions:
- Prepare the Base: In a medium-sized mixing bowl, combine the softened cream cheese and shredded cheddar cheese. Mix them together using a hand mixer or a spatula until well blended and creamy.
- Add Flavorings: Add the chopped dried cranberries, pecans, green onions, garlic powder, black pepper, and salt to the cheese mixture. Stir the ingredients until they’re evenly distributed throughout the cheese.
- Shape the Cheese Ball: Lay out a piece of plastic wrap on a flat surface. Transfer the cheese mixture onto the plastic wrap. Gather the edges of the plastic wrap and shape the mixture into a ball. Make sure the ball is tightly packed to help it hold its shape.
- Chill the Cheese Ball: Place the wrapped cheese ball in the refrigerator for at least 1-2 hours, or until it’s firm. Chilling allows the flavors to meld together and the ball to set properly.
- Finish with Honey: Just before serving, unwrap the cheese ball and drizzle the top with honey for an added touch of sweetness. Use a spoon or a small offset spatula to spread the honey evenly over the top.
- Serve: Place the cheese ball on a serving platter surrounded by crackers or sliced baguette. Encourage guests to spread the cheese onto their chosen accompaniment.
Extra Tips:
For a more vibrant presentation, consider rolling the cheese ball in additional chopped pecans and cranberries before serving. If you prefer a spicier kick, add a pinch of cayenne pepper or chopped jalapenos to the cheese mixture.
This dish can be made up to two days in advance; simply store the cheese ball in the refrigerator and bring it to room temperature before serving to enhance its creamy texture.
Sausage-Stuffed Mini Peppers
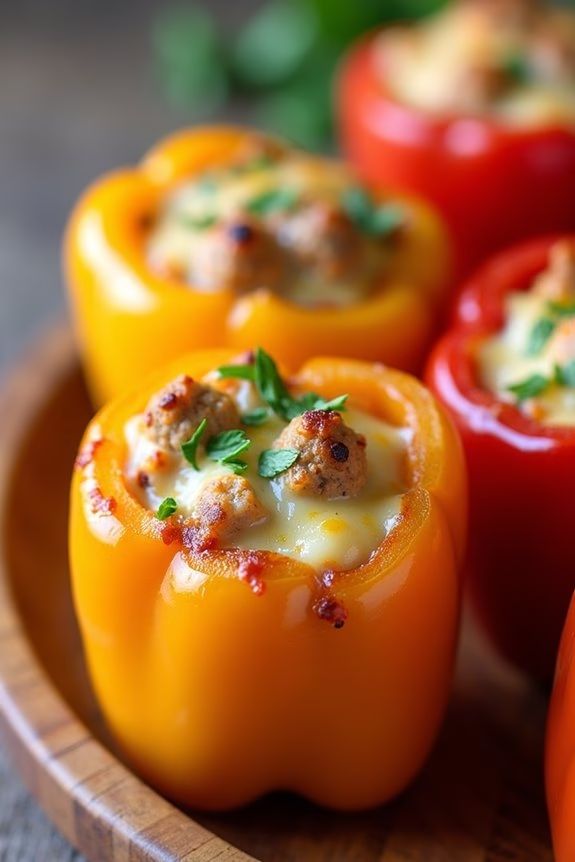
Sausage-Stuffed Mini Peppers are a delightful and colorful addition to any Christmas potluck. These bite-sized appetizers aren’t only visually appealing with their vibrant colors but also pack a punch of flavor that will have your guests reaching for seconds. The combination of savory sausage, creamy cheese, and fresh herbs stuffed into sweet mini bell peppers creates a delicious harmony of flavors that perfectly complements the festive atmosphere.
Perfectly suited for a gathering of 4-6 people, these little morsels are easy to prepare and can be made ahead of time, allowing you to focus on other holiday preparations. Whether served warm from the oven or at room temperature, Sausage-Stuffed Mini Peppers are sure to be a hit with both kids and adults alike. The recipe is versatile, allowing for substitutions and adaptations to suit various dietary preferences or ingredient availability.
Ingredients (for 4-6 servings):
- 16-20 mini bell peppers
- 1 pound ground sausage (mild or spicy, as preferred)
- 1 cup cream cheese, softened
- 1 cup shredded mozzarella cheese
- 2 tablespoons fresh parsley, chopped
- 1 teaspoon garlic powder
- 1/2 teaspoon onion powder
- Salt and pepper to taste
- Olive oil for drizzling
Cooking Instructions:
- Prepare the Peppers: Preheat your oven to 375°F (190°C). Wash the mini bell peppers thoroughly and pat them dry with a towel. Slice each pepper in half lengthwise and remove the seeds and membranes to create a hollow space for the stuffing.
- Cook the Sausage: In a skillet over medium heat, cook the ground sausage until browned and fully cooked through, breaking it up into small crumbles with a spoon. Drain any excess grease and set the cooked sausage aside to cool slightly.
- Make the Filling: In a large mixing bowl, combine the cooked sausage, cream cheese, shredded mozzarella, chopped parsley, garlic powder, onion powder, salt, and pepper. Mix until all ingredients are well incorporated and the mixture is creamy.
- Stuff the Peppers: Using a spoon or piping bag, fill each pepper half with the sausage and cheese mixture, pressing lightly to guarantee the filling is compact.
- Bake the Peppers: Arrange the stuffed peppers on a baking sheet lined with parchment paper. Lightly drizzle olive oil over the peppers to enhance browning. Bake in the preheated oven for 15-20 minutes, or until the cheese is melted and bubbly, and the peppers are tender.
- Serve: Allow the peppers to cool for a few minutes before transferring them to a serving platter. Garnish with additional fresh parsley if desired and serve warm or at room temperature.
Extra Tips:
For a spicy twist, consider using hot Italian sausage or adding a pinch of red pepper flakes to the filling mixture. If you prefer a vegetarian version, substitute the sausage with a plant-based meat alternative or diced mushrooms for a similar texture.
Additionally, these stuffed peppers can be prepared a day in advance and stored in the refrigerator; simply reheat them in the oven before serving to save time on the day of your event.
Smoked Salmon Cucumber Bites
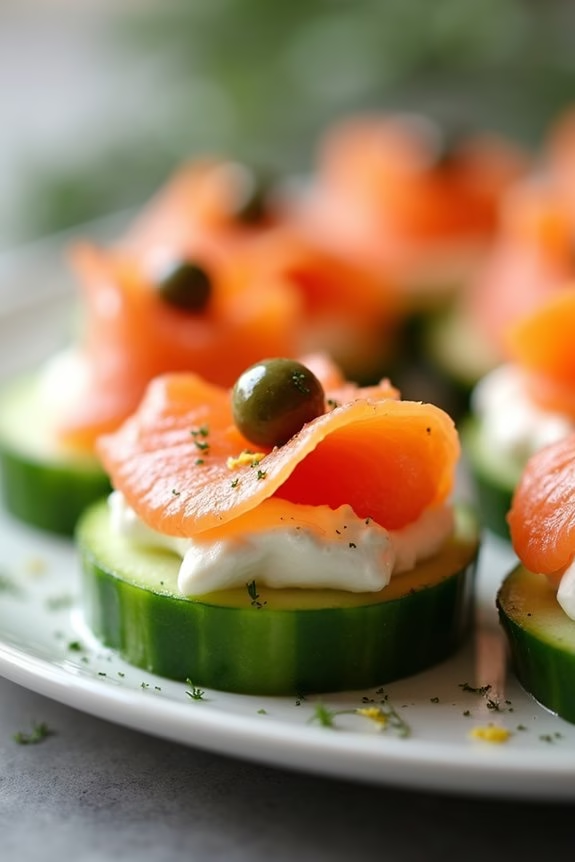
Smoked Salmon Cucumber Bites are a delightful and elegant finger food option perfect for any Christmas potluck gathering. These bite-sized treats aren’t only visually appealing but also pack a punch of flavor, combining the rich taste of smoked salmon with the invigorating crunch of cucumber.
They’re light, easy to assemble, and can be made ahead of time, making them an ideal choice for busy hosts looking to impress their guests without spending hours in the kitchen. The combination of creamy cheese, fresh dill, and a hint of lemon zest enhances the natural flavors of the salmon, creating a harmonious balance that will have your guests reaching for more.
Perfect for both casual and formal events, these cucumber bites cater to a range of palates and dietary preferences, including those looking for gluten-free options. With minimal ingredients and a straightforward assembly process, Smoked Salmon Cucumber Bites are a surefire way to add a touch of sophistication to your holiday spread.
Ingredients for 4-6 servings:
- 2 large cucumbers
- 8 ounces smoked salmon
- 4 ounces cream cheese, softened
- 1 tablespoon fresh dill, finely chopped
- 1 tablespoon lemon juice
- Zest of 1 lemon
- Salt and pepper to taste
- Optional: capers for garnish
Instructions:
- Prepare the Cucumbers: Wash the cucumbers thoroughly and pat them dry with a paper towel. Using a sharp knife, slice the cucumbers into 1/4-inch thick rounds. Aim for uniform slices to guarantee even presentation and ease of eating.
- Make the Cream Cheese Mixture: In a small bowl, combine the softened cream cheese, fresh dill, lemon juice, and lemon zest. Mix until smooth and well incorporated. Season the mixture with salt and pepper to taste. This mixture will serve as the creamy base for your bites.
- Assemble the Bites: Lay out the cucumber slices on a serving platter. Using a small spoon or piping bag, dollop a small amount of the cream cheese mixture onto each cucumber slice. Top each with a small piece of smoked salmon, artfully arranged to add visual appeal.
- Garnish and Serve: If using, gently place a caper on top of each salmon piece for an added burst of flavor. Serve immediately, or cover and refrigerate for up to an hour before your event. This will allow the flavors to meld together beautifully.
Extra Tips:
For the best results, choose fresh, firm cucumbers to guarantee a crisp texture. Always taste your cream cheese mixture and adjust the seasoning as needed before assembling.
If you prefer, you can substitute the cream cheese with a lighter cheese option, such as Neufchâtel, for a healthier alternative. Remember that these bites are best served fresh, so plan your preparation accordingly to maintain their vibrant appearance and flavor.
Chocolate-Covered Pretzel Rods

Chocolate-covered pretzel rods are the perfect blend of sweet and salty, making them an irresistible treat for any Christmas potluck. Not only are they incredibly easy to make, but they also add a festive touch to your holiday spread. The combination of smooth, rich chocolate coating with the crunchy, salty pretzel core provides a delightful contrast that’s certain to satisfy any sweet tooth.
They’re also highly customizable, allowing you to add various toppings such as sprinkles, crushed candy canes, or nuts to suit your preferences. These delectable treats are ideal for serving at gatherings as they’re easy to grab and enjoy without the need for utensils. Plus, they can be made in advance, saving you time on the day of your event.
With a serving size suitable for 4-6 people, this recipe is perfect for a small group, but can easily be scaled up for larger parties. Whether you’re hosting or attending a potluck, chocolate-covered pretzel rods are sure to be a hit.
Ingredients (Serving Size: 4-6 people):
- 12 pretzel rods
- 1 cup of semi-sweet chocolate chips
- 1 cup of white chocolate chips
- Assorted toppings: sprinkles, crushed candy canes, chopped nuts
Instructions:
- Prepare Your Workspace: Start by lining a baking sheet with parchment paper to prevent the chocolate from sticking. This will also make it easier to transfer the pretzels to the refrigerator later.
- Melt the Chocolate: In a microwave-safe bowl, melt the semi-sweet chocolate chips in 30-second intervals, stirring in between, until smooth. Repeat the process with the white chocolate chips in a separate bowl. Confirm both chocolates are melted thoroughly without burning.
- Dip the Pretzels: Hold a pretzel rod over one of the bowls and spoon the melted chocolate over it, covering about two-thirds of the pretzel. Allow any excess chocolate to drip off back into the bowl.
- Add Toppings: Immediately after coating the pretzel, sprinkle your chosen toppings over the chocolate before it sets. This can include festive sprinkles, crushed candy canes, or chopped nuts. Be creative and have fun with it!
- Set the Pretzels: Place the chocolate-covered pretzels on the prepared baking sheet. Once all the pretzels are coated and topped, transfer the baking sheet to the refrigerator. Let them chill for about 20 minutes, or until the chocolate is completely set.
- Serving and Storage: Once the chocolate is firm, the pretzel rods are ready to serve. If not serving immediately, store them in an airtight container at room temperature or in the refrigerator for longer freshness.
Extra Tips:
When melting chocolate, make sure to stir it frequently to prevent it from seizing or burning. If the chocolate becomes too thick, you can add a teaspoon of vegetable shortening or coconut oil to help achieve a smoother consistency.
For a more festive presentation, consider using colored melting wafers in red and green to add a holiday flair. Finally, make sure your toppings are ready to go before you start dipping, as the chocolate can harden quickly. Enjoy creating these delightful treats and spreading some holiday cheer!
Gingerbread Cookie Truffles

Gingerbread Cookie Truffles are a delightful treat perfect for any Christmas potluck gathering. These bite-sized delights combine the warm, spicy flavors of gingerbread cookies with a creamy, rich filling, all wrapped in a smooth chocolate coating. They’re a crowd-pleaser that adds a touch of festive cheer to any dessert table.
The best part is, they’re incredibly easy to make and require no baking, which means you can whip them up in no time and focus on other holiday preparations.
These truffles aren’t only delicious but also versatile. You can make them in advance and store them in the fridge, making them a perfect option for holiday planning. Whether you’re hosting or attending a Christmas potluck, these Gingerbread Cookie Truffles are sure to impress.
With a serving size of 4-6 people, this recipe is ideal for small gatherings, but it can easily be doubled or tripled if you’re expecting a larger group.
Ingredients:
- 1 1/2 cups gingerbread cookies, crushed
- 4 oz cream cheese, softened
- 1 tsp ground cinnamon
- 1/2 tsp ground ginger
- 1/4 tsp ground nutmeg
- 8 oz white chocolate, melted
- 2 oz dark chocolate, melted
- Sprinkles or crushed gingerbread cookies for garnish (optional)
Instructions:
- Prepare the Gingerbread Cookie Mixture: In a large bowl, combine the crushed gingerbread cookies, softened cream cheese, ground cinnamon, ground ginger, and ground nutmeg. Mix until all ingredients are well combined and the mixture is smooth and holds together when pressed.
- Shape the Truffles: Using a small cookie scoop or your hands, form the mixture into small balls, about 1 inch in diameter. Place them on a baking sheet lined with parchment paper. Once all the balls are formed, place the baking sheet in the refrigerator for about 30 minutes to allow the truffles to firm up.
- Coat the Truffles: Melt the white chocolate in a microwave-safe bowl or using a double boiler until smooth. Dip each truffle into the melted white chocolate, confirming it’s fully coated. Use a fork to remove the truffle, allowing any excess chocolate to drip off, and place it back onto the parchment-lined baking sheet.
- Add Garnishes: While the chocolate is still wet, sprinkle each truffle with sprinkles or crushed gingerbread cookies, if desired. This adds a decorative touch and additional flavor to the truffles.
- Drizzle with Dark Chocolate: Melt the dark chocolate and use a piping bag or a spoon to drizzle it over the white chocolate coated truffles for an elegant finish.
- Chill and Serve: Allow the truffles to set in the refrigerator for at least 1 hour before serving. This will guarantee the chocolate coating is firm and ready to be enjoyed.
Extra Tips: To ascertain your truffles are perfectly round, you can roll them between your palms to smooth out any rough edges before chilling. If the chocolate begins to harden while coating the truffles, simply reheat it gently.
You can also experiment with different coatings, such as milk chocolate or dark chocolate, if you prefer a less sweet alternative to white chocolate. Additionally, for a more pronounced ginger flavor, increase the amount of ground ginger in the mixture. Enjoy your Gingerbread Cookie Truffles as a delightful addition to your Christmas potluck!