Hosting a Christmas potluck for the first time can be nerve-wracking, but those delicious appetizers really set the tone for a festive gathering. The Cranberry Brie Bites were an absolute crowd-pleaser, with their creamy and tangy flavors making everyone smile. Each appetizer brought its own story, like the Festive Caprese Skewers, which lit up the table with fresh and vibrant colors. If you’re planning a holiday party and want to start with a bang, these appetizer recipes are sure to impress. Ready to discover more?
Cranberry Brie Bites

Cranberry Brie Bites are a delightful and festive appetizer that’s perfect for holiday gatherings. These bite-sized treats combine the creamy richness of Brie cheese with the tartness of cranberry sauce, all encased in a flaky pastry shell. They aren’t only easy to make but also visually appealing, making them a fantastic addition to any Christmas potluck menu. Your guests will love the combination of textures and flavors, and you’ll love how simple they’re to prepare.
Ideal for serving a group of 4-6 people, these Cranberry Brie Bites can be prepared in advance and popped into the oven just before the guests arrive. The balance of sweet, tart, and creamy flavors, along with the buttery puff pastry, makes them irresistible. Whether you’re hosting a gathering or attending one, these bites are sure to become a holiday favorite.
Ingredients (Serves 4-6):
- 1 sheet of puff pastry, thawed
- 8 ounces Brie cheese, rind removed and cut into small cubes
- 1/2 cup cranberry sauce (homemade or store-bought)
- 1/4 cup chopped pecans (optional)
- Fresh rosemary sprigs, for garnish
- Flour, for dusting
- Cooking spray or melted butter, for greasing
Instructions:
- Preheat the Oven: Start by preheating your oven to 375°F (190°C). This will guarantee that the oven reaches the right temperature by the time you’re ready to bake the bites.
- Prepare the Puff Pastry: Lightly dust your work surface with flour. Roll out the puff pastry to smooth out any creases. Cut the pastry into 2-inch squares using a sharp knife or a pizza cutter.
- Assemble the Bites: Grease a mini muffin tin with cooking spray or melted butter. Place a square of puff pastry into each muffin cup, gently pressing it down to form a little cup.
- Fill with Brie and Cranberry: Place a cube of Brie cheese into each pastry cup. Top with about a teaspoon of cranberry sauce. Optionally, sprinkle some chopped pecans on top of the cranberry sauce for added crunch.
- Bake: Place the muffin tin in the preheated oven and bake for 12-15 minutes, or until the pastry is golden brown and the cheese is bubbly.
- Garnish and Serve: Remove the bites from the oven and let them cool for a few minutes. Garnish each bite with a small sprig of fresh rosemary before serving warm.
Extra Tips: When working with puff pastry, it’s important to keep it as cold as possible before baking to guarantee that it puffs up properly. If the pastry becomes too warm while you’re assembling the bites, consider placing the muffin tin in the refrigerator for a few minutes before baking.
Additionally, you can customize these bites by substituting the cranberry sauce with your favorite jam or preserves, such as raspberry or apricot, for a different flavor profile. Enjoy your festive appetizer!
Festive Caprese Skewers

Bring a burst of color and flavor to your Christmas potluck with Festive Caprese Skewers. This simple yet elegant appetizer is perfect for adding a touch of sophistication to your holiday spread. With the classic combination of fresh mozzarella, ripe cherry tomatoes, and fragrant basil leaves, each skewer is a delightful bite-sized treat. Drizzled with balsamic glaze, these skewers offer a harmonious blend of flavors that are sure to impress your guests.
Ideal for gatherings of 4-6 people, these Festive Caprese Skewers aren’t only visually appealing but also incredibly easy to prepare. They require minimal ingredients and no cooking, making them a stress-free addition to your holiday menu. Whether you’re hosting a large party or a small family dinner, these skewers are sure to be a hit with everyone.
Ingredients (Serves 4-6):
- 24 cherry tomatoes
- 24 small fresh mozzarella balls (bocconcini)
- 24 fresh basil leaves
- 2 tablespoons extra-virgin olive oil
- Salt and freshly ground black pepper, to taste
- 2 tablespoons balsamic glaze
- 24 wooden skewers or toothpicks
Instructions:
- Prepare Ingredients: Wash the cherry tomatoes and basil leaves thoroughly. Pat them dry with a paper towel to remove any excess moisture. Make sure the mozzarella balls are drained if they’re packed in liquid.
- Assemble Skewers: Take a wooden skewer or toothpick and start by threading one cherry tomato onto it, followed by a basil leaf, and a mozzarella ball. Repeat the sequence until all skewers are assembled, ensuring each skewer has an equal number of each ingredient for uniformity.
- Seasoning: Arrange the skewers on a serving platter. Drizzle them with extra-virgin olive oil, making sure each skewer gets a light coating. Sprinkle with salt and freshly ground black pepper to enhance the flavors.
- Add the Finishing Touch: Just before serving, drizzle the balsamic glaze over the skewers. This adds a tangy sweetness that complements the fresh ingredients perfectly.
- Serve: Present the skewers on a festive platter for a beautiful display. Encourage guests to pick them up by the skewer and enjoy the flavors in one delicious bite.
Extra Tips:
For a more traditional Caprese flavor, consider using a high-quality balsamic vinegar instead of balsamic glaze, but be cautious with the amount to avoid overpowering the other flavors.
If you prefer a bit of a kick, sprinkle some crushed red pepper flakes over the skewers for an added spice.
Make sure to assemble the skewers shortly before serving to maintain the freshness and vibrant colors of the ingredients. If you need to prepare them in advance, store them in the refrigerator and drizzle with balsamic glaze right before serving to keep them looking their best.
Spinach and Artichoke Dip
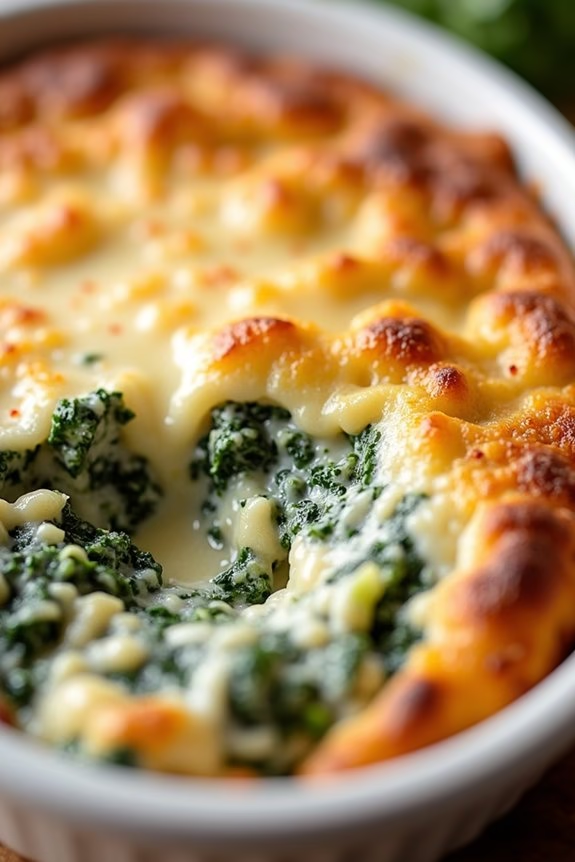
Spinach and Artichoke Dip is a classic appetizer that’s perfect for any festive gathering, especially a Christmas potluck. Known for its rich and creamy texture, this dip combines the earthy flavors of spinach with the tangy notes of artichoke hearts, all enveloped in a warm, cheesy base.
It’s a crowd-pleaser that pairs beautifully with an assortment of dippers like toasted bread, tortilla chips, or fresh vegetables, making it a versatile addition to any appetizer spread.
Preparing Spinach and Artichoke Dip isn’t only simple but also allows for some flexibility in adapting the recipe to suit personal preferences. This dish can be made ahead of time and baked just before serving, which is perfect for those busy holiday schedules.
Whether you’re a seasoned cook or a beginner, this recipe is straightforward and guarantees a delicious outcome. Below are the ingredients and step-by-step instructions to create this delightful dish for a serving size of 4-6 people.
Ingredients:
- 1 cup frozen spinach, thawed and drained
- 1 cup canned artichoke hearts, drained and chopped
- 1 cup cream cheese, softened
- ½ cup sour cream
- ½ cup mayonnaise
- 1 cup grated Parmesan cheese
- 1 cup shredded mozzarella cheese
- 2 cloves garlic, minced
- ½ teaspoon salt
- ¼ teaspoon black pepper
- ¼ teaspoon red pepper flakes (optional)
Cooking Instructions:
- Preheat the Oven: Start by preheating your oven to 350°F (175°C). This guarantees that the oven is at the right temperature by the time you finish preparing the dip.
- Prepare the Spinach: Thaw the frozen spinach and squeeze out as much excess water as possible. You can use a clean kitchen towel or paper towels for this step to confirm the spinach is dry, which prevents the dip from becoming watery.
- Mix the Base Ingredients: In a large mixing bowl, combine the softened cream cheese, sour cream, and mayonnaise. Use a hand mixer or a whisk to blend these ingredients until they’re smooth and creamy.
- Add the Flavorings: Stir in the grated Parmesan cheese, chopped artichoke hearts, drained spinach, minced garlic, salt, black pepper, and red pepper flakes (if using). Mix well to confirm all ingredients are evenly distributed.
- Incorporate the Mozzarella: Fold in the shredded mozzarella cheese, ensuring it’s spread throughout the mixture. This cheese will give the dip its gooey texture when baked.
- Transfer to Baking Dish: Spoon the mixture into a baking dish or an oven-proof serving dish. Smooth the top with a spatula for an even bake.
- Bake the Dip: Place the dish in the preheated oven and bake for about 25-30 minutes, or until the top is golden brown and the dip is bubbling around the edges.
- Serve: Remove the dip from the oven and let it cool for a few minutes before serving. Serve with your choice of dippers such as sliced baguette, pita chips, or fresh vegetables.
Extra Tips:
For a more flavorful dip, consider adding some freshly chopped herbs such as parsley or basil. If you prefer a spicier version, increase the amount of red pepper flakes or add a dash of hot sauce to the mixture.
This dip can be made a day in advance and stored in the refrigerator; just bring it to room temperature before baking. Alternatively, you can bake it directly from the fridge but may need to add a few extra minutes to the baking time.
Enjoy your creamy, savory Spinach and Artichoke Dip with friends and family this holiday season!
Sausage-Stuffed Mushrooms

Sausage-Stuffed Mushrooms are a delightful and savory appetizer that will be a hit at any Christmas potluck. These bite-sized treats are packed with flavor, combining the earthiness of mushrooms with the savory goodness of sausage and a touch of creaminess from cheese. Perfectly suited for festive gatherings, these stuffed mushrooms aren’t only easy to make but also a crowd-pleaser, making them an ideal choice for your holiday spread.
The beauty of Sausage-Stuffed Mushrooms lies in their versatility. They can be prepared ahead of time and quickly baked just before serving, allowing you to focus on other holiday preparations. The combination of herbs, spices, and melted cheese creates an irresistible aroma and taste that will have your guests asking for more.
Whether you’re hosting a large party or a small gathering, these mushrooms are sure to impress.
Ingredients (Serves 4-6):
- 20 large white or cremini mushrooms
- 1/2 pound Italian sausage, casings removed
- 1/4 cup breadcrumbs
- 1/4 cup grated Parmesan cheese
- 2 tablespoons cream cheese, softened
- 2 cloves garlic, minced
- 1 tablespoon fresh parsley, chopped
- 1/2 teaspoon dried oregano
- Salt and pepper to taste
- 2 tablespoons olive oil
Cooking Instructions:
- Prepare the Mushrooms: Preheat your oven to 375°F (190°C). Carefully clean the mushrooms with a damp cloth to remove any dirt. Remove the stems and set them aside. Place the mushroom caps on a baking sheet, rounded side down.
- Prepare the Filling: In a skillet over medium heat, add the olive oil and sausage. Cook, breaking up the sausage into small pieces, until it’s browned and cooked through. Drain any excess fat.
- Mix the Ingredients: Chop the reserved mushroom stems finely. In a mixing bowl, combine the cooked sausage, chopped mushroom stems, breadcrumbs, Parmesan cheese, cream cheese, garlic, parsley, oregano, salt, and pepper. Mix thoroughly until all ingredients are well combined.
- Stuff the Mushrooms: Using a small spoon, fill each mushroom cap generously with the sausage mixture. Press the filling slightly to ascertain it stays in place.
- Bake the Mushrooms: Arrange the stuffed mushrooms back onto the baking sheet. Place them in the preheated oven and bake for 20-25 minutes, or until the tops are golden brown and the mushrooms are tender.
- Serve and Enjoy: Once done, remove the mushrooms from the oven and let them cool slightly before serving. Garnish with additional chopped parsley if desired.
Extra Tips:
For best results, choose mushrooms that are uniform in size for even cooking. If you prefer a spicier kick, consider using hot Italian sausage in the filling.
The stuffed mushrooms can also be assembled a day in advance and stored in the refrigerator, covered, until ready to bake. Just add an extra 5 minutes to the baking time if they’re chilled.
Finally, feel free to experiment with different cheeses or add a sprinkle of red pepper flakes for added heat.
Holiday Cheese Ball
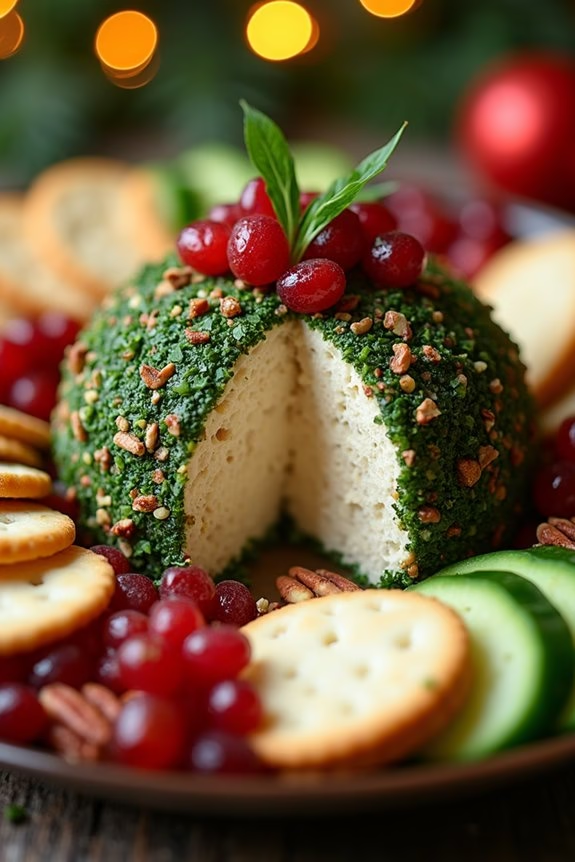
The Holiday Cheese Ball is a delightful appetizer that’s perfect for your Christmas potluck. This festive dish combines creamy cheese with a mix of savory and sweet ingredients, making it a crowd-pleaser for guests of all ages. Not only is it delicious, but it’s also incredibly easy to prepare, allowing you to enjoy the festivities without spending too much time in the kitchen.
The Holiday Cheese Ball can be served with an assortment of crackers, sliced vegetables, or even fresh bread, making it a versatile addition to your holiday spread. This recipe is designed to serve 4-6 people, guaranteeing there’s plenty to go around. The combination of flavors in this cheese ball is sure to be a hit, and it’s a wonderful way to start your Christmas gathering.
With its festive appearance, this cheese ball will look as good as it tastes, adding a touch of holiday cheer to your table. Whether you’re hosting a potluck or attending one, this dish is sure to impress.
Ingredients:
- 16 ounces cream cheese, softened
- 1 cup shredded cheddar cheese
- 1/4 cup chopped green onions
- 1/4 cup dried cranberries, chopped
- 1/4 cup chopped pecans
- 1 tablespoon Worcestershire sauce
- 1 teaspoon garlic powder
- 1/2 teaspoon onion powder
- 1/4 teaspoon black pepper
- 1/4 cup chopped fresh parsley
Instructions:
- Prepare the Base: In a large mixing bowl, combine the softened cream cheese and shredded cheddar cheese. Use a hand mixer or a sturdy spatula to blend them together until smooth and well combined.
- Add Flavors: Stir in the chopped green onions, dried cranberries, chopped pecans, Worcestershire sauce, garlic powder, onion powder, and black pepper. Mix everything thoroughly so that all ingredients are evenly distributed throughout the cheese mixture.
- Shape the Cheese Ball: Once mixed, place the cheese mixture onto a piece of plastic wrap. Gather the wrap around the cheese and gently shape it into a ball. Confirm the cheese ball is compact and holds together well. Refrigerate it for at least 2 hours, or overnight for better flavor development.
- Prepare the Coating: Just before serving, combine the chopped parsley with a little bit of extra chopped pecans and dried cranberries if desired. Roll the chilled cheese ball in the mixture, pressing gently to guarantee the coating sticks well.
- Serve: Place the finished cheese ball onto a serving plate and surround it with a variety of crackers, sliced vegetables, or bread pieces. Allow it to sit at room temperature for about 15-20 minutes before serving to soften slightly.
Extra Tips:
When making the Holiday Cheese Ball, confirm that the cream cheese is properly softened for easy mixing and a smooth texture. Feel free to customize the coating according to your preference; you can add crushed nuts, seeds, or even bacon bits for a different flavor profile.
If you prefer a spicier kick, consider adding a dash of hot sauce or finely chopped jalapeños to the mix. Finally, remember to chill the cheese ball long enough to allow the flavors to meld together, which enhances the overall taste.
Pigs in a Blanket Wreath

Pigs in a Blanket Wreath is a delightful and festive appetizer that’s perfect for a Christmas potluck. Its visually appealing presentation resembles a holiday wreath, making it an eye-catching centerpiece for any table. This dish combines the classic flavor of pigs in a blanket with the elegance of a decorative wreath, creating a fun and tasty treat that guests of all ages will enjoy.
The flaky, buttery crescent dough wrapped around juicy little sausages is irresistible, and the festive shape will surely spark holiday cheer.
Creating a Pigs in a Blanket Wreath is both simple and enjoyable, making it an ideal recipe for cooks of all skill levels. The key to this dish is arranging the pigs in a blanket in a circular pattern to mimic the appearance of a wreath. With minimal ingredients and preparation time, this appetizer can be easily assembled and baked in under an hour. Perfect for serving 4-6 people, this recipe is sure to be a hit at your next holiday gathering.
Ingredients
- 2 cans of refrigerated crescent roll dough
- 24 mini sausages
- 1 egg, beaten
- 1 tablespoon of poppy seeds
- 1 tablespoon of sesame seeds
- 1 tablespoon of dried rosemary
- 1 tablespoon of dried thyme
- 1 cup of your favorite dipping sauce (such as mustard or ketchup)
Cooking Instructions
- Preheat the Oven: Start by preheating your oven to 375°F (190°C) to guarantee it’s hot enough to bake the dough evenly.
- Prepare the Dough: Unroll the crescent roll dough and separate each can into 12 triangles, giving you a total of 24 triangles.
- Wrap the Sausages: Place one mini sausage at the wide end of each triangle and roll towards the point, wrapping the dough around the sausage. Confirm the dough is securely wrapped around each sausage.
- Arrange the Wreath: On a large baking sheet lined with parchment paper, arrange the wrapped sausages in a circle, with the pointed ends facing the center to create a wreath shape. Make sure the sausages are touching to confirm they bake together.
- Egg Wash and Season: Brush the entire wreath with the beaten egg to give it a golden color when baked. Sprinkle the poppy seeds, sesame seeds, rosemary, and thyme evenly over the top for added flavor and decoration.
- Bake the Wreath: Place the baking sheet in the preheated oven and bake for about 20-25 minutes, or until the dough is golden brown and fully cooked.
- Serve: Once baked, let the wreath cool slightly before transferring it to a serving platter. Place a small bowl of your favorite dipping sauce in the center of the wreath for easy access.
Extra Tips
For an even more festive touch, you can garnish the finished wreath with sprigs of fresh rosemary or thyme to mimic the look of a traditional holiday wreath.
If you prefer a spicier kick, consider using jalapeño sausages or adding a dash of cayenne pepper to the egg wash before brushing it on the dough.
Additionally, using a pizza cutter can make slicing the dough triangles quick and easy. Make sure to keep an eye on the baking time as ovens may vary; once the wreath is golden brown, it’s ready to enjoy!
Mini Quiche Tarts

Mini Quiche Tarts are the perfect appetizer for any Christmas potluck. These bite-sized delights aren’t only visually appealing but also packed with flavor, making them a hit among guests. With a flaky crust and a creamy, savory filling, they offer a delightful combination of textures and tastes.
Mini Quiche Tarts are versatile, allowing you to incorporate a variety of fillings to suit different palates, whether it’s a classic blend of bacon and cheese or a vegetarian option with spinach and feta.
Preparing Mini Quiche Tarts is a straightforward process, making them an ideal choice for both novice and experienced cooks. You can prepare them in advance and simply reheat them before serving, which is incredibly convenient during the busy holiday season.
These tarts not only add a touch of elegance to your spread but also guarantee that your guests have something delicious to nibble on while the main dishes are being prepared.
Ingredients (Serves 4-6):
- 1 sheet of puff pastry, thawed
- 4 large eggs
- 1 cup heavy cream
- 1/2 cup shredded cheddar cheese
- 1/3 cup cooked bacon, crumbled
- 1/4 cup chopped spinach
- 1/4 cup diced red bell pepper
- Salt and pepper to taste
- 1 tablespoon chopped fresh chives
Cooking Instructions:
- Preheat Oven: Preheat your oven to 375°F (190°C). This guarantees that it reaches the right temperature for baking the pastry evenly.
- Prepare Pastry: Roll out the puff pastry sheet on a lightly floured surface. Using a round cutter, cut out circles to fit into a mini muffin tin. Gently press the pastry circles into the muffin cups, ensuring the edges are slightly above the rim.
- Prepare Filling: In a mixing bowl, whisk together the eggs and heavy cream until smooth. Stir in the cheddar cheese, crumbled bacon, chopped spinach, diced red bell pepper, salt, and pepper.
- Fill the Tarts: Spoon the egg mixture into each pastry-lined muffin cup until they’re about three-quarters full. Be careful not to overfill, as the filling will expand slightly during baking.
- Bake: Place the muffin tin in the preheated oven and bake for 18-20 minutes, or until the filling is set and the pastry is golden brown. Use a toothpick to check if the filling is cooked through.
- Cool and Serve: Once done, remove the tarts from the oven and let them cool in the tin for about 5 minutes. Carefully remove the tarts from the tin and garnish with chopped fresh chives before serving.
Extra Tips:
For additional flavor, consider adding a pinch of nutmeg to the egg mixture, which complements the creamy filling beautifully. If you prefer a different cheese, such as Gruyère or Swiss, feel free to substitute.
Additionally, you can experiment with other fillings like mushrooms, onions, or even smoked salmon for a gourmet touch. These tarts can be made a day in advance and stored in the refrigerator, then reheated in a low oven before serving, making them convenient for holiday gatherings.
Roasted Red Pepper Hummus
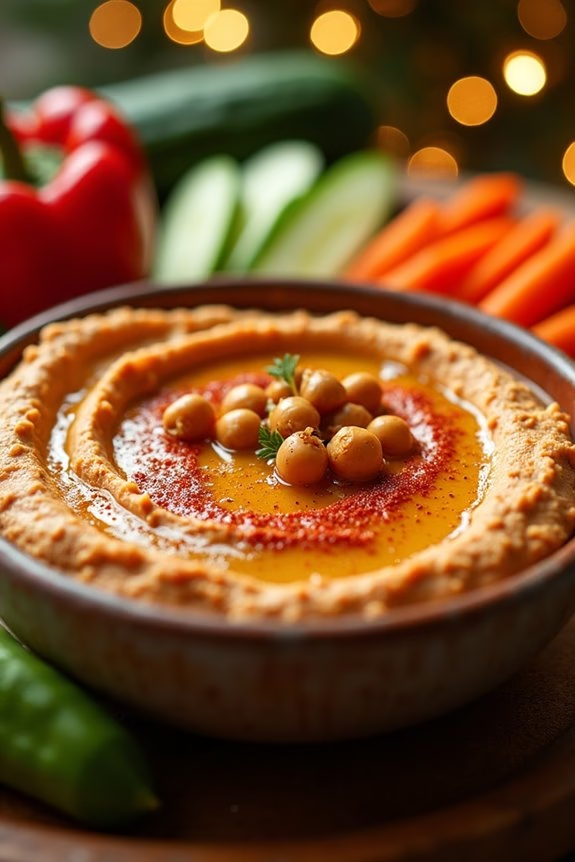
Roasted Red Pepper Hummus is a delightful twist on the classic hummus recipe, perfect for any Christmas potluck. This flavorful appetizer combines the creamy texture of traditional hummus with the sweet, smoky notes of roasted red peppers. It’s a vibrant and visually appealing dish that will be a hit at your holiday gathering.
Whether served with pita bread, veggie sticks, or crackers, this hummus is bound to please a crowd and add a festive touch to the appetizer spread. The recipe isn’t only delicious but also quick and easy to prepare, making it ideal for busy holiday hosts.
By using canned chickpeas and jarred roasted red peppers, you can considerably cut down on prep time without sacrificing flavor. The combination of garlic, lemon juice, and tahini creates a rich and tangy base, while the roasted red peppers add depth and sweetness. This recipe yields enough to serve 4-6 people, making it perfect for small to medium-sized gatherings.
Ingredients:
- 1 can (15 oz) chickpeas, drained and rinsed
- 1/2 cup jarred roasted red peppers, drained
- 1/4 cup tahini
- 2 tablespoons lemon juice
- 2 cloves garlic, minced
- 1/2 teaspoon ground cumin
- 1/4 teaspoon smoked paprika
- 2 tablespoons olive oil
- Salt to taste
- 2-3 tablespoons water (as needed)
Instructions:
- Prepare Ingredients: Begin by opening the can of chickpeas. Drain and rinse them thoroughly under cold water. Drain the roasted red peppers and set them aside.
- Combine Base Ingredients: In a food processor, combine the drained chickpeas, roasted red peppers, tahini, lemon juice, minced garlic, ground cumin, and smoked paprika. Blend until the mixture is mostly smooth.
- Adjust Texture: With the food processor running, slowly drizzle in the olive oil. Continue blending until the mixture is creamy. If the hummus is too thick, add 2-3 tablespoons of water, one tablespoon at a time, until you reach the desired consistency.
- Season to Taste: Taste the hummus and add salt as needed. Blend again briefly to guarantee the salt is evenly distributed.
- Serve: Transfer the hummus to a serving bowl. You can garnish with a sprinkle of smoked paprika or a drizzle of olive oil for extra flavor and presentation. Serve with pita bread, vegetable sticks, or crackers.
Extra Tips:
For a more intense roasted flavor, consider roasting your red peppers at home. Simply char them over an open flame or roast in the oven until the skin is blackened. Let them cool, then peel off the skin before use.
Additionally, if you prefer a spicier hummus, you can add a pinch of cayenne pepper or a dash of hot sauce. This recipe can be made a day in advance and stored in the refrigerator, allowing the flavors to meld beautifully. Just be sure to let it reach room temperature before serving for the best texture and taste.
Prosciutto-Wrapped Asparagus

Prosciutto-Wrapped Asparagus is a delightful and elegant appetizer that’s perfect for a Christmas potluck. This dish combines the fresh, crisp taste of asparagus with the rich, savory flavor of prosciutto. The balance of textures and flavors makes it a crowd-pleaser that isn’t only easy to prepare but also visually appealing.
Whether you’re hosting or attending a holiday gathering, this appetizer will surely impress your guests. The preparation is straightforward and requires minimal ingredients, yet the result is nothing short of gourmet.
The asparagus is first blanched to retain its vibrant green color and crisp-tender texture. It’s then wrapped in thin slices of prosciutto, which adds a salty, umami punch. Finally, a short bake in the oven melds the flavors together, guaranteeing every bite is irresistible. This recipe serves 4-6 people, making it an ideal starter for intimate gatherings.
Ingredients for 4-6 servings:
- 1 pound of fresh asparagus, trimmed
- 12 thin slices of prosciutto
- 2 tablespoons olive oil
- Salt and pepper to taste
- 1 tablespoon lemon juice (optional)
Cooking Instructions:
- Prepare the Asparagus: Start by washing and trimming the asparagus. Remove the tough, woody ends by holding each spear and snapping it naturally; they’ll break at the right point.
- Blanch the Asparagus: Bring a large pot of salted water to a boil. Add the asparagus and blanch for about 2-3 minutes until they’re bright green and tender-crisp. Immediately transfer them to a bowl of ice water to stop the cooking process. Drain and pat dry.
- Wrap with Prosciutto: Take a slice of prosciutto and wrap it around each asparagus spear, starting at the bottom and spiraling up to cover most of the asparagus stem. Continue until all spears are wrapped.
- Bake the Asparagus: Preheat your oven to 400°F (200°C). Place the wrapped asparagus on a baking sheet lined with parchment paper. Drizzle with olive oil and season with a little salt and pepper. Bake for 10-12 minutes or until the prosciutto is crisp and the asparagus is tender.
- Serve: Remove from the oven and, if desired, drizzle with a touch of lemon juice for added brightness before serving warm.
Extra Tips:
For the best results, choose asparagus spears that are of uniform thickness to promote even cooking. If you prefer a more caramelized flavor, you can broil the asparagus for the last minute of cooking, but watch them closely to prevent burning.
Additionally, consider experimenting with different herbs or spices, such as garlic powder or rosemary, to customize the flavor to your liking. This dish is best served warm, but it can also be enjoyed at room temperature.
Sweet and Spicy Meatballs
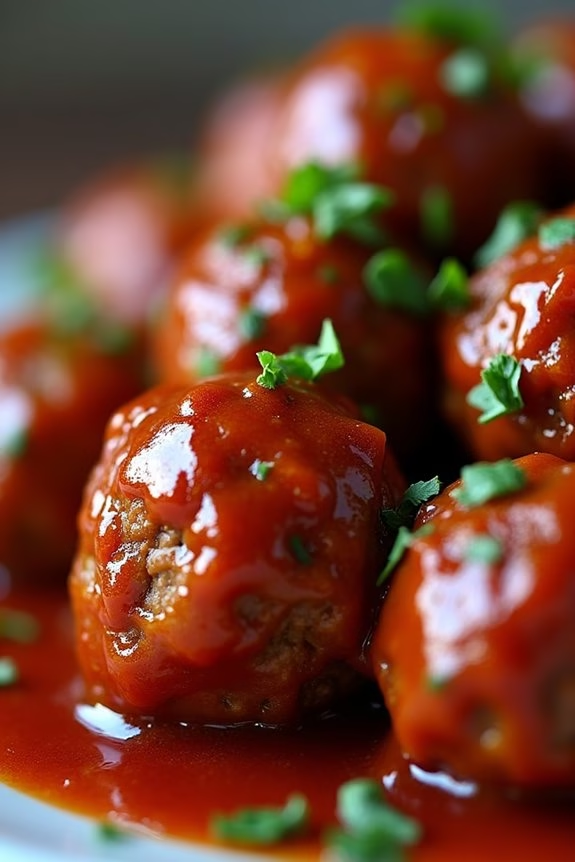
Christmas potlucks are a delightful opportunity to share and enjoy a variety of dishes with friends and family. One of the standout appetizers that perfectly combines flavors for such an occasion is Sweet and Spicy Meatballs. These meatballs are a harmonious blend of savory, sweet, and spicy elements, making them an instant hit at any gathering.
Whether served as a standalone appetizer or part of a larger spread, they’re certain to bring festive joy to your holiday table. The beauty of Sweet and Spicy Meatballs lies in their simplicity and universal appeal. With a base of tender, juicy meatballs coated in a sticky sauce that balances sweetness with a subtle kick of heat, they offer a flavor profile that pleases a wide range of palates.
Best of all, they can be prepared in advance, allowing you to spend more time enjoying the festivities and less time in the kitchen. Ideal for serving 4-6 people, this recipe is both practical and delicious.
Ingredients:
- 1 pound ground beef
- 1/2 cup bread crumbs
- 1/4 cup milk
- 1 large egg
- 1/4 cup chopped onion
- 2 cloves garlic, minced
- 1 teaspoon salt
- 1/2 teaspoon black pepper
- 1/2 teaspoon red pepper flakes
- 1 cup grape jelly
- 1 cup chili sauce
- 1 tablespoon soy sauce
- 1 tablespoon Worcestershire sauce
Instructions:
- Prepare the Meatballs: In a large mixing bowl, combine the ground beef, bread crumbs, milk, egg, chopped onion, minced garlic, salt, black pepper, and red pepper flakes. Use your hands or a spoon to mix until all ingredients are well incorporated.
- Shape the Meatballs: Roll the mixture into small, uniform meatballs, about 1 inch in diameter. This will guarantee they cook evenly. Place the meatballs on a baking sheet lined with parchment paper.
- Cook the Meatballs: Preheat your oven to 400°F (200°C). Once heated, bake the meatballs for 15-20 minutes or until they’re browned and cooked through. Remove from the oven and set aside.
- Prepare the Sauce: In a large saucepan, combine grape jelly, chili sauce, soy sauce, and Worcestershire sauce. Stir over medium heat until the jelly has completely dissolved and the sauce is smooth.
- Combine and Simmer: Gently add the cooked meatballs to the sauce in the saucepan. Stir to confirm each meatball is thoroughly coated. Reduce the heat to low and let them simmer for about 10-15 minutes, allowing the flavors to meld together.
- Serve: Transfer to a serving dish and serve warm. They’re perfect as a toothpick appetizer or alongside a holiday spread.
Extra Tips:
For the best flavor, consider making the meatballs a day in advance and letting them sit in the refrigerator overnight. This allows the flavors to deepen and results in a more robust taste.
Additionally, if you prefer a milder dish, you can adjust the amount of red pepper flakes or opt for a sweeter chili sauce. When serving, garnish with fresh herbs like parsley or chives for a pop of color and added freshness.
Deviled Egg Snowmen

Looking for a delightful and festive appetizer for your Christmas potluck? Deviled Egg Snowmen aren’t only adorable but also incredibly tasty. These charming little appetizers are sure to be a hit with both kids and adults alike. The creamy, flavorful filling of the deviled eggs is complemented by their playful snowman decoration, making them a perfect addition to your holiday table.
Plus, they’re relatively easy to prepare, guaranteeing you can spend more time celebrating and less time in the kitchen.
The base of this dish is the classic deviled egg, which is dressed up for the holiday season with a few creative touches. By using a few simple garnishes, you can transform ordinary deviled eggs into festive snowmen with hats, eyes, and noses. The eggs are filled with a delicious mixture of egg yolk, mayonnaise, mustard, and a touch of spice, providing a rich and creamy texture that pairs perfectly with the crunchy and colorful decorations.
With just a little effort, you can create a memorable and fun appetizer that will leave your guests in awe.
Ingredients (Serves 4-6):
- 6 large eggs
- 3 tablespoons mayonnaise
- 1 teaspoon Dijon mustard
- 1 teaspoon white vinegar
- Salt and pepper to taste
- 12 black olives (for eyes and buttons)
- 1 small carrot (for noses)
- 6 small cherry tomatoes or radishes (for hats)
- Fresh parsley or dill (for scarves)
Cooking Instructions:
- Boil the Eggs: Place the eggs in a pot and cover them with cold water. Bring to a boil over medium-high heat. Once boiling, remove the pot from heat, cover, and let sit for 10-12 minutes. Transfer the eggs to an ice bath to cool completely. Once cooled, peel the eggs carefully.
- Prepare the Filling: Cut each egg in half lengthwise and remove the yolks, placing them in a medium bowl. Arrange the egg whites on a serving platter. Mash the yolks with a fork until smooth, then mix in the mayonnaise, Dijon mustard, and white vinegar. Season with salt and pepper to taste.
- Fill the Eggs: Spoon or pipe the yolk mixture back into the hollowed egg whites, creating a small mound in each.
- Assemble the Snowmen: Slice a small piece off the bottom of each egg half so they stand upright. Stack a filled egg half on top of another to create the snowman body. Use a toothpick to secure if necessary.
- Decorate: Slice the olives into small pieces for eyes and buttons. Cut small triangles from the carrot to make noses. Use sliced cherry tomatoes or radishes for hats, securing them with a toothpick if needed. Arrange parsley or dill around the snowman’s neck as a scarf.
- Serve: Place the finished snowmen on a serving platter and refrigerate until ready to serve.
Extra Tips:
When boiling the eggs, adding a teaspoon of baking soda to the water can make peeling easier. Confirm the yolk mixture is smooth for a more uniform filling; using a food processor can help achieve this.
For a fun twist, experiment with different herbs for the scarf or add paprika to the yolk mixture for an extra kick. These snowmen are best served the same day they’re made to guarantee freshness and visual appeal.
Smoked Salmon Crostini

Smoked Salmon Crostini is a sophisticated and delightful appetizer that’s perfect for a Christmas potluck or any festive gathering. The combination of creamy dill spread, savory smoked salmon, and crispy crostini creates a harmonious blend of flavors and textures that will tantalize your taste buds. This easy-to-make appetizer not only looks elegant but also delivers a gourmet experience that’s guaranteed to impress your guests.
With just a few quality ingredients and minimal preparation time, Smoked Salmon Crostini can be whipped up effortlessly, allowing you to focus on enjoying the company of your friends and family.
Crostini, which translates to “little toasts” in Italian, serve as the perfect crunchy base for a variety of toppings. In this recipe, we top them with a luscious cream cheese and dill mixture, then layer on delicate slices of smoked salmon. The addition of capers, red onion, and a hint of lemon zest enhances the savory profile, making each bite a delightful burst of flavor.
This recipe serves 4-6 people, making it ideal for small gatherings or as part of a larger spread of appetizers.
Ingredients (serves 4-6):
- 1 French baguette, sliced into 1/2 inch rounds
- 8 oz cream cheese, softened
- 2 tablespoons fresh dill, chopped
- 1 tablespoon lemon juice
- Zest of 1 lemon
- 200 grams smoked salmon, thinly sliced
- 1/4 cup capers
- 1/4 red onion, finely sliced
- Olive oil
- Salt and pepper to taste
Instructions:
- Prepare the Crostini: Preheat your oven to 375°F (190°C). Arrange the baguette slices on a baking sheet in a single layer. Brush each slice lightly with olive oil and season with a pinch of salt and pepper. Bake in the preheated oven for 8-10 minutes, or until the crostini are golden brown and crisp. Remove from the oven and let them cool.
- Make the Cream Cheese Spread: In a medium bowl, combine the softened cream cheese, chopped dill, lemon juice, and lemon zest. Mix until smooth and well combined. Taste and adjust the seasoning with salt and pepper if necessary.
- Assemble the Crostini: Once the crostini have cooled, spread a generous layer of the cream cheese mixture on each slice. Top with a slice of smoked salmon, allowing it to drape elegantly over the edges.
- Add Garnishes: Scatter a few capers over the salmon, and add a couple of slices of red onion. For a finishing touch, you can sprinkle a little extra dill and a touch more lemon zest on top.
- Serve: Arrange the smoked salmon crostini on a platter and serve immediately. They’re best enjoyed fresh to keep the crostini crisp.
Extra Tips:
For the best flavor, use high-quality smoked salmon, as it’s the star ingredient in this dish. You can prepare the cream cheese spread in advance and store it in the refrigerator for up to two days, saving time on the day of your event.
If you prefer, you can add a dash of horseradish to the cream cheese mixture for an extra kick. Finally, make sure to slice the baguette evenly to guarantee each crostini is perfectly crisp and easy to handle.
Gingerbread Spiced Nuts
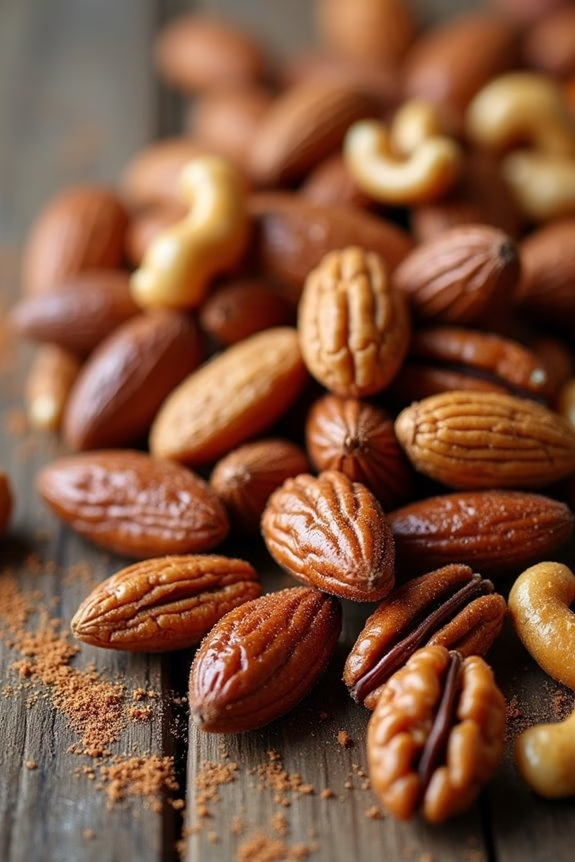
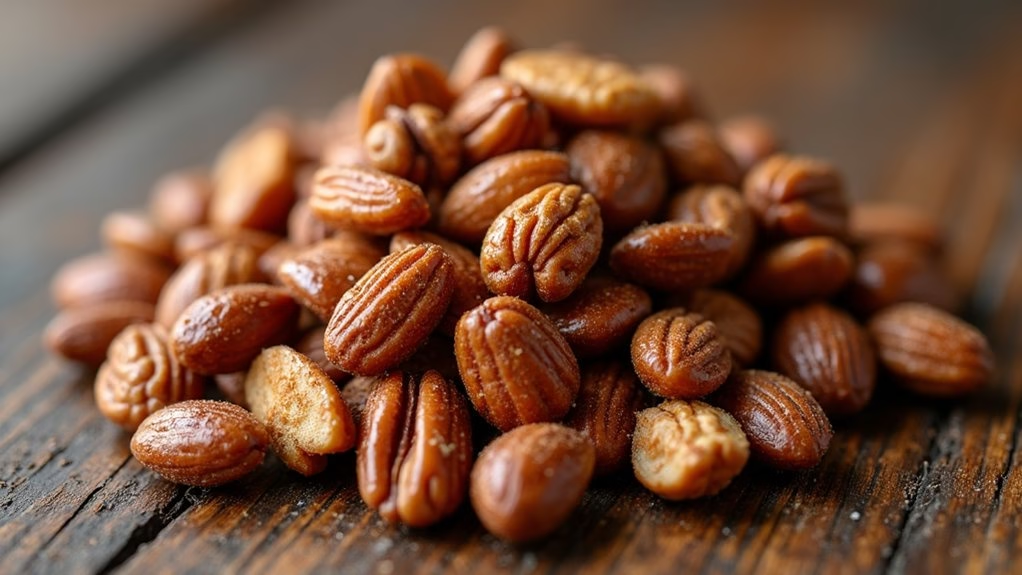
Gingerbread Spiced Nuts are the perfect festive treat for your Christmas potluck. These nuts are a delightful combination of sweet and spicy flavors, infused with the warm, comforting spices typically found in gingerbread. The crunchy texture and aromatic spices make them an irresistible snack that will have your guests reaching for more.
Not only are they delicious, but they’re also incredibly easy to prepare, making them an ideal choice for holiday gatherings. These spiced nuts are versatile and can be served as a standalone snack or as part of a larger appetizer spread. They can be prepared ahead of time and stored, allowing you to focus on other holiday preparations.
The recipe below provides a serving size for 4-6 people, guaranteeing there’s plenty to go around. Gather your ingredients, and let’s get started on making these delightful Gingerbread Spiced Nuts.
Ingredients (Serves 4-6):
- 2 cups mixed nuts (such as almonds, walnuts, pecans, and cashews)
- 3 tablespoons unsalted butter
- 1/4 cup brown sugar
- 1 tablespoon molasses
- 1 teaspoon ground cinnamon
- 1/2 teaspoon ground ginger
- 1/4 teaspoon ground nutmeg
- 1/4 teaspoon ground cloves
- 1/4 teaspoon salt
- 1 tablespoon water
Cooking Instructions:
- Preheat the Oven: Begin by preheating your oven to 350°F (175°C). This will make certain that it’s ready for roasting the nuts, which helps to enhance their flavor and texture.
- Melt the Butter: In a small saucepan over low heat, melt the unsalted butter. Once melted, add the brown sugar, molasses, water, cinnamon, ginger, nutmeg, cloves, and salt. Stir continuously until the sugar has dissolved, and the mixture is smooth and well combined.
- Coat the Nuts: Place the mixed nuts in a large mixing bowl. Pour the spiced butter mixture over the nuts and toss until they’re evenly coated. Make sure every nut is covered with the spiced mixture to guarantee even flavor distribution.
- Roast the Nuts: Line a baking sheet with parchment paper or a silicone baking mat. Spread the coated nuts in a single layer on the prepared sheet. Roast in the preheated oven for 15-20 minutes, stirring halfway through, until the nuts are golden brown and fragrant.
- Cool and Serve: Remove the nuts from the oven and allow them to cool completely on the baking sheet. As they cool, they’ll become crisp. Once cooled, transfer the nuts to a serving bowl or an airtight container if you’re storing them for later.
Extra Tips:
For the best results, use fresh, high-quality nuts, as they’ll have better flavor and texture. You can adjust the spice levels to your preference or add a pinch of cayenne pepper for a bit of heat.
Be careful not to overbake the nuts, as they can quickly turn from roasted to burnt. These nuts can be made a few days in advance and stored in an airtight container at room temperature, making them a convenient option for holiday planning.
Enjoy your Gingerbread Spiced Nuts as a festive, flavorful treat!

