
The holiday season is upon us, and my kitchen is ready for some festive flair. I love the idea of cranberry brie bites with gooey cheese and golden puff pastry, setting the perfect mood for my gatherings. Mini Caprese skewers add such vibrant colors to the table, making everything feel merry and bright. These easy and elegant appetizers are sure to impress my guests and keep them coming back for more. Let’s make this holiday season deliciously memorable with these delightful finger foods.
Cranberry Brie Bites
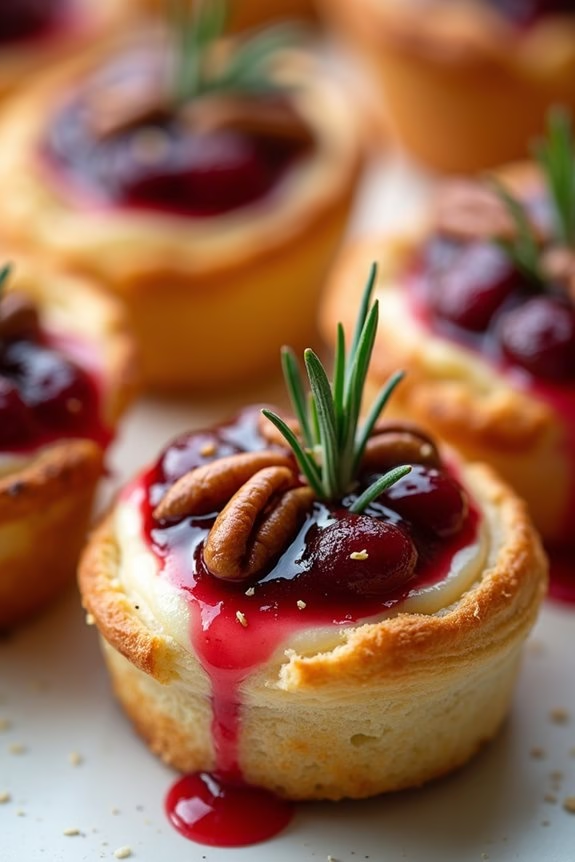
Cranberry Brie Bites are a delightful and elegant appetizer perfect for your holiday gatherings. These bite-sized treats combine the creamy texture of brie cheese with the tart sweetness of cranberry sauce, all nestled in a flaky puff pastry shell. They aren’t only easy to prepare but also offer a sophisticated flavor profile that guests will love.
The combination of textures and flavors makes these bites a standout on any festive table, guaranteeing they disappear as quickly as you can serve them.
These Cranberry Brie Bites are ideal for serving 4-6 people, making them a great choice for intimate gatherings or as part of a larger spread. The simplicity of the ingredients and ease of preparation mean you can spend less time in the kitchen and more time enjoying the company of your loved ones.
Whether you’re hosting a Christmas party or just looking for a special treat to share, these bites are sure to impress with their festive flair and delectable taste.
Ingredients for 4-6 People
- 1 sheet of puff pastry, thawed
- 8 oz of Brie cheese, cut into small cubes
- 1/2 cup of cranberry sauce
- 1/4 cup of chopped pecans (optional)
- Fresh rosemary or thyme sprigs for garnish (optional)
Cooking Instructions
- Preheat the Oven: Set your oven to 375°F (190°C) to make sure it reaches the right temperature by the time your bites are ready to cook.
- Prepare the Puff Pastry: On a lightly floured surface, roll out the puff pastry sheet to smooth any creases. Cut the sheet into 12 equal squares. You can use a sharp knife or a pizza cutter for this task.
- Arrange Pastry in Muffin Tin: Place each square of puff pastry into the wells of a mini muffin tin, pressing gently to form a cup shape. Make sure the corners of the pastry squares stick out slightly over the edge of each muffin cup.
- Add the Brie: Place a cube of Brie cheese into each pastry cup. The cheese will melt and bubble as it bakes, so make sure it’s centered in the cup.
- Add Cranberry Sauce: Spoon about a teaspoon of cranberry sauce over each piece of Brie. If using whole berry cranberry sauce, stir it well before spooning to make sure of even consistency.
- Add Optional Toppings: Sprinkle a few chopped pecans over the cranberry sauce for added crunch and flavor, if desired.
- Bake: Place the muffin tin in the preheated oven and bake for 15-18 minutes, or until the pastry is golden brown and the cheese is bubbling.
- Cool and Garnish: Once baked, remove the bites from the oven and let them cool for a few minutes in the tin before transferring them to a serving platter. Garnish each bite with a small sprig of fresh rosemary or thyme for an aromatic touch.
Extra Tips
For best results, make sure that the puff pastry is kept cold until you’re ready to use it, as this helps achieve the perfect flaky texture.
If you’re preparing these bites in advance, you can assemble them and store them covered in the fridge for up to a day before baking. Just remember to bring them to room temperature before placing them in the oven to make sure of even cooking.
Additionally, feel free to experiment with different toppings or add-ins, such as a sprinkle of cinnamon or a dash of balsamic glaze, to tailor the bites to your taste preferences.
Mini Caprese Skewers

Mini Caprese Skewers are a delightful and visually appealing appetizer perfect for Christmas gatherings. This Italian-inspired finger food combines the classic flavors of fresh mozzarella, ripe cherry tomatoes, and fragrant basil leaves, all drizzled with a balsamic glaze.
These skewers aren’t only easy to prepare but also provide a fresh and vibrant contrast to the heavier dishes typically found during holiday feasts. Their bite-sized nature makes them ideal for guests to enjoy while mingling and celebrating.
The beauty of Mini Caprese Skewers lies in their simplicity and the quality of the ingredients. By selecting the freshest produce and high-quality mozzarella, you can guarantee that each skewer bursts with flavor. The balsamic glaze adds a slight sweetness and tang, complementing the creaminess of the cheese and the juiciness of the tomatoes.
Whether you’re hosting a large party or an intimate family gathering, these skewers are sure to be a hit.
Ingredients for 4-6 servings:
- 20 cherry tomatoes
- 20 small fresh mozzarella balls (bocconcini)
- 20 fresh basil leaves
- Salt and freshly ground black pepper, to taste
- 1/4 cup balsamic glaze
- 20 wooden skewers or toothpicks
Cooking Instructions:
- Prepare the Ingredients: Begin by washing the cherry tomatoes and basil leaves under cold running water. Drain them well and pat dry with a paper towel. Open the packaging of fresh mozzarella balls and drain any excess liquid.
- Assemble the Skewers: Take a skewer or toothpick and start by threading one cherry tomato onto it. Follow with a fresh basil leaf, then a mozzarella ball. Repeat this sequence one more time, guaranteeing each skewer has two of each ingredient. Repeat the process until all the skewers are assembled.
- Season the Skewers: Once assembled, lay the skewers on a serving platter. Lightly sprinkle them with salt and freshly ground black pepper for added flavor.
- Drizzle with Balsamic Glaze: Using a spoon or a squeeze bottle, drizzle the balsamic glaze over the assembled skewers. Be generous with the glaze to guarantee each skewer is coated with its delicious sweetness.
- Serve Immediately: Serve the Mini Caprese Skewers immediately to guarantee the freshness of the ingredients. They can be served as is or accompanied by a small dipping bowl of extra balsamic glaze.
Extra Tips:
For the best flavor, make sure to use high-quality, fresh ingredients. If fresh mozzarella isn’t available, you can substitute with a good quality mozzarella cut into small cubes.
Additionally, if you prefer a more intense balsamic flavor, you can create your own balsamic reduction by simmering balsamic vinegar until it thickens. These skewers can be prepared a few hours in advance; just store them in the refrigerator and drizzle with balsamic glaze just before serving to keep them looking fresh and vibrant.
Smoked Salmon Cucumber Bites
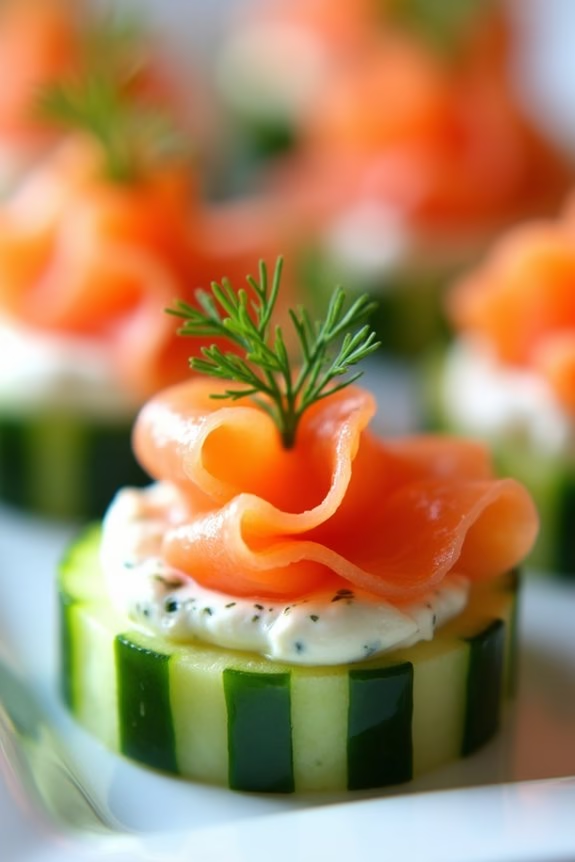
Smoked Salmon Cucumber Bites are an elegant and delicious appetizer perfect for Christmas gatherings. These tasty morsels combine the rich, savory flavor of smoked salmon with the invigorating crunch of cucumber, all topped off with a creamy dill spread.
They aren’t only visually appealing but also easy to assemble, making them an ideal choice for hosts looking to impress their guests without too much hassle in the kitchen. Perfect for serving 4-6 people, these bites bring a touch of sophistication to any holiday party.
The combination of flavors and textures makes them a standout appetizer that will keep your guests reaching for more. Whether you’re hosting a large family gathering or an intimate dinner, Smoked Salmon Cucumber Bites are sure to be a hit.
Ingredients:
- 2 medium cucumbers
- 8 ounces smoked salmon
- 8 ounces cream cheese, softened
- 2 tablespoons fresh dill, finely chopped
- 1 tablespoon lemon juice
- Salt and pepper to taste
- Fresh dill sprigs for garnish (optional)
Cooking Instructions:
- Prepare the Cucumbers: Wash the cucumbers thoroughly under cold water. Using a vegetable peeler, remove alternating strips of the cucumber skin to create a striped effect. Slice the cucumbers into 1/2-inch thick rounds and set them aside on a platter.
- Make the Dill Spread: In a medium mixing bowl, combine the softened cream cheese, finely chopped fresh dill, lemon juice, salt, and pepper. Use a hand mixer or a wooden spoon to mix until the spread is smooth and well combined.
- Assemble the Bites: Take a small spoonful of the dill spread and place it on top of each cucumber slice. Aim for a small mound of spread that will hold the smoked salmon in place.
- Add the Smoked Salmon: Cut the smoked salmon into small pieces that will fit nicely on top of the cucumber slices. Lay a piece of smoked salmon over the dill spread on each cucumber slice.
- Garnish and Serve: If desired, top each bite with a small sprig of fresh dill for added flavor and visual appeal. Arrange the Smoked Salmon Cucumber Bites neatly on a serving platter and serve immediately.
Extra Tips:
For the best flavor, choose high-quality smoked salmon, as it’s the star of this dish. You can prepare the dill spread a day in advance to save time, but it’s best to assemble the bites shortly before serving to keep the cucumbers crisp.
If you’re looking to add a bit more zing, consider adding a sprinkle of capers or a dash of horseradish to the cream cheese mixture. These bites are versatile and can be easily customized to suit your taste preferences.
Stuffed Mushrooms With Garlic and Herbs
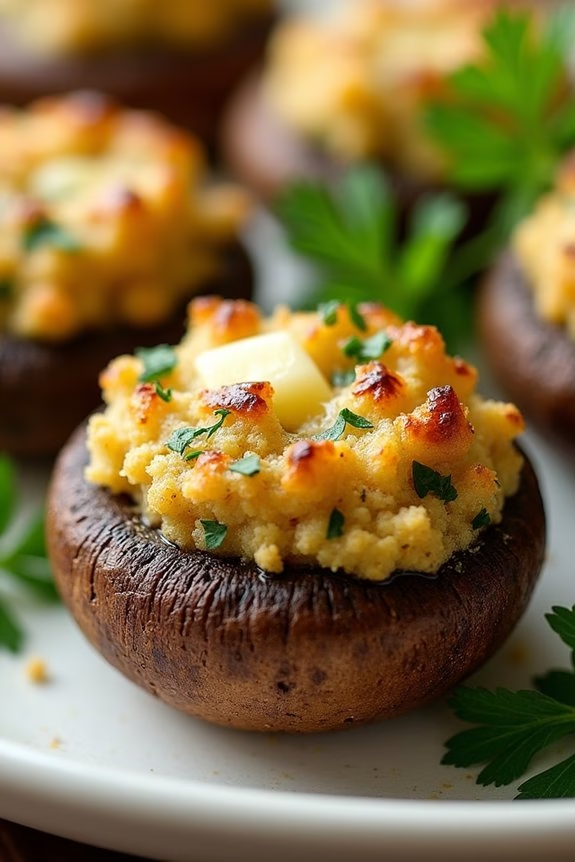
Stuffed Mushrooms With Garlic and Herbs are a delightful addition to any Christmas gathering, providing a burst of flavor in every bite. These bite-sized appetizers are perfect for mingling guests, allowing them to enjoy a delicious treat without needing utensils. The combination of earthy mushrooms, aromatic garlic, and fresh herbs creates a savory filling that’s both satisfying and easy to prepare.
Whether you’re hosting a large party or an intimate gathering, these stuffed mushrooms are an excellent choice for your holiday menu. The beauty of this recipe lies in its simplicity and versatility. You can prepare these stuffed mushrooms ahead of time, freeing you up to enjoy the festivities with your guests.
The filling can be customized to your liking, adding different cheeses, nuts, or even a touch of spice to suit your taste. With minimal ingredients and straightforward preparation, Stuffed Mushrooms With Garlic and Herbs are certain to become a staple in your holiday appetizer repertoire.
Ingredients for 4-6 servings:
- 24 medium-sized button mushrooms
- 2 tablespoons olive oil
- 3 cloves garlic, minced
- 1/4 cup finely chopped fresh parsley
- 1/4 cup finely chopped fresh chives
- 1/2 cup breadcrumbs
- 1/2 cup grated Parmesan cheese
- Salt and pepper to taste
- 2 tablespoons butter, melted
Cooking Instructions:
- Prepare the Mushrooms: Preheat your oven to 375°F (190°C). Clean the mushrooms by gently wiping them with a damp cloth. Carefully remove the stems from the mushrooms and set the caps aside. Finely chop the stems.
- Sauté the Filling: In a skillet over medium heat, add olive oil. Once heated, add the minced garlic and chopped mushroom stems. Sauté for about 3-4 minutes until the stems are tender and the garlic is fragrant.
- Mix the Filling: In a mixing bowl, combine the sautéed mushroom stems and garlic with chopped parsley, chives, breadcrumbs, Parmesan cheese, salt, and pepper. Stir until well combined.
- Stuff the Mushrooms: Place the mushroom caps on a baking sheet. Use a spoon to fill each cap generously with the prepared filling, pressing down lightly to make sure it stays in place.
- Bake: Drizzle the melted butter over the stuffed mushrooms to add richness and help with browning. Bake in the preheated oven for 15-20 minutes, or until the tops are golden brown and the mushrooms are cooked through.
- Serve: Allow the mushrooms to cool for a few minutes before serving. Arrange them on a platter and garnish with additional parsley for a festive touch.
Extra Tips:
To enhance the flavor, consider adding a splash of white wine to the sautéed mushroom stems and garlic. This will add depth and complexity to the filling. If you prefer a spicier kick, a pinch of red pepper flakes can be incorporated into the mixture.
Additionally, experimenting with different types of mushrooms, such as cremini or portobello, can offer a unique twist to the dish. Remember to taste the filling before stuffing the mushrooms to adjust the seasoning as needed. Enjoy these stuffed mushrooms warm for the best flavor and texture.
Prosciutto-Wrapped Asparagus
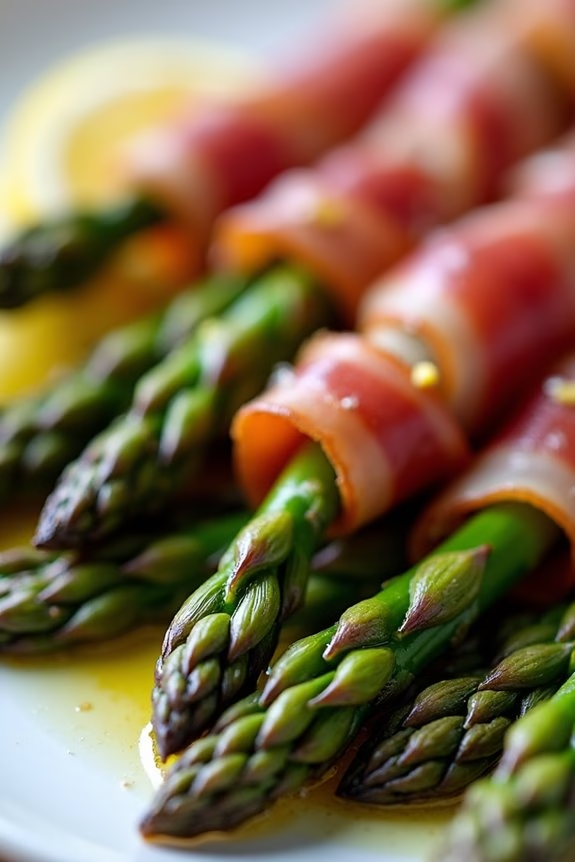
Prosciutto-Wrapped Asparagus is a delicious and elegant appetizer that’s perfect for any Christmas gathering. This finger food combines the crispness of fresh asparagus with the savory, salty flavors of prosciutto, making it a crowd-pleaser at parties.
Not only is it visually appealing, but it also offers a delightful contrast of textures and flavors that will tantalize your taste buds. Whether you’re hosting a holiday dinner or attending a potluck, these bite-sized treats are certain to impress your guests.
The beauty of this dish lies not only in its simplicity but also in its versatility. You can easily prepare it ahead of time, allowing you more freedom to enjoy the festivities with your loved ones.
With just a few key ingredients and minimal preparation, Prosciutto-Wrapped Asparagus is an easy yet sophisticated addition to your holiday menu. Serve them with a dip of your choice, or simply enjoy them on their own – either way, they’re bound to be a hit.
Ingredients (Serves 4-6 people):
- 1 pound of fresh asparagus, trimmed
- 12 slices of prosciutto
- 2 tablespoons olive oil
- Salt and pepper to taste
- 1 lemon, zested
Cooking Instructions:
- Preheat the oven: Start by preheating your oven to 400°F (200°C). This will confirm that it’s hot enough to crisp the prosciutto and cook the asparagus properly.
- Prepare the asparagus: Wash and trim the asparagus spears, removing the tough, woody ends. Pat them dry with a paper towel to confirm the prosciutto will adhere properly.
- Wrap the asparagus: Take a slice of prosciutto and wrap it tightly around each asparagus spear, starting at the bottom and working your way to the top. Make sure the prosciutto is snug but not overlapping too much, so it crisps up nicely.
- Arrange on a baking sheet: Place the wrapped asparagus on a baking sheet lined with parchment paper or a silicone baking mat, confirming they’re evenly spaced and not touching each other.
- Season and drizzle: Lightly drizzle the wrapped asparagus with olive oil, and season with a pinch of salt and pepper. Be cautious with the salt, as prosciutto is already quite salty.
- Bake: Place the baking sheet in the preheated oven and bake for 15-20 minutes or until the prosciutto is crispy and the asparagus is tender.
- Garnish: Once done, remove from the oven and sprinkle lemon zest over the asparagus for a fresh burst of flavor.
Extra Tips:
When selecting your asparagus, opt for spears that are medium-thick, as they’ll hold up better during baking without becoming too soft.
If you prefer a more caramelized flavor, you can add a touch of balsamic glaze before serving. For an added touch of indulgence, consider sprinkling some grated Parmesan cheese over the asparagus as soon as it comes out of the oven.
Finally, if you’re making these in advance, you can wrap the asparagus and store them in the fridge, baking them just before serving to confirm they’re fresh and crispy.
Spinach and Feta Puff Pastry Pinwheels

Spinach and Feta Puff Pastry Pinwheels are a delightful and elegant appetizer that will impress your guests at any Christmas gathering. These savory pinwheels are made by layering a creamy spinach and feta mixture onto flaky puff pastry, then rolling and slicing them into beautiful spirals.
They’re perfect for parties because they can be prepared ahead of time and baked just before serving, guaranteeing they’re warm and fresh for your guests. The combination of spinach and feta offers a delicious, slightly tangy flavor that pairs perfectly with the buttery pastry.
This recipe serves 4-6 people and is both simple and quick to make, requiring only a few ingredients. The vibrant green of the spinach and the white of the feta create a festive appearance that will stand out on any holiday table. Whether you’re hosting a large party or a small family gathering, these Spinach and Feta Puff Pastry Pinwheels are sure to be a hit with everyone.
Ingredients:
- 1 sheet of puff pastry, thawed
- 1 cup fresh spinach, chopped
- 1/2 cup feta cheese, crumbled
- 1 egg, beaten
- 1 tablespoon olive oil
- 1 garlic clove, minced
- Salt and pepper to taste
Instructions:
1. Preheat the Oven and Prepare Baking Sheet:
Preheat your oven to 400°F (200°C). Line a baking sheet with parchment paper to prevent sticking and guarantee even baking.
2. Prepare the Spinach Mixture:
In a medium skillet, heat the olive oil over medium heat. Add the minced garlic and sauté for about 1 minute until fragrant. Add the chopped spinach and cook until it wilts, about 2-3 minutes. Remove from heat and let it cool slightly.
3. Combine Spinach and Feta:
In a mixing bowl, combine the cooked spinach mixture with the crumbled feta cheese. Season with salt and pepper to taste, and mix until the ingredients are well incorporated.
4. Roll Out the Puff Pastry:
On a lightly floured surface, roll out the puff pastry sheet into a rectangle about 12×10 inches in size. Guarantee the pastry is smooth and even.
5. Spread the Filling:
Evenly spread the spinach and feta mixture over the entire surface of the puff pastry, leaving about a 1/2-inch border on all sides.
6. Roll and Slice:
Starting from one of the longer sides, tightly roll the pastry into a log. Use a sharp knife to slice the log into 1-inch thick pinwheels.
7. Brush with Egg Wash:
Place the pinwheels on the prepared baking sheet, leaving some space between each one. Brush the tops and sides with the beaten egg to give them a golden, glossy finish when baked.
8. Bake:
Bake in the preheated oven for 15-20 minutes, or until the pinwheels are golden brown and puffed up. Remove from the oven and let them cool slightly before serving.
Extra Tips:
To guarantee that your Spinach and Feta Puff Pastry Pinwheels are perfectly cooked, make sure the puff pastry is kept cold until you’re ready to roll it out, as this helps it puff up nicely in the oven.
You can make the spinach and feta filling ahead of time and store it in the refrigerator until you’re ready to assemble the pinwheels. If you prefer a richer flavor, consider adding a sprinkle of nutmeg or a dash of lemon zest to the spinach mixture.
These pinwheels are best served warm, so try to bake them just before your guests arrive.
Bacon-Wrapped Dates

Bacon-Wrapped Dates are a delightful and savory-sweet appetizer perfect for your Christmas festivities. The combination of the salty bacon, sweet dates, and creamy filling creates a mouthwatering bite-sized treat that’s guaranteed to impress your guests.
This appetizer isn’t only delicious but also incredibly easy to prepare, making it an ideal choice for holiday gatherings when you want to minimize time in the kitchen without sacrificing taste.
These delectable morsels are perfect for serving a crowd, as they can be prepared in advance and cooked just before your guests arrive. The recipe yields enough to serve 4-6 people, making it a great choice for smaller parties or as part of a larger spread of appetizers.
Whether you’re hosting a cozy family dinner or a festive holiday party, Bacon-Wrapped Dates will be a hit with everyone.
Ingredients (Serves 4-6):
- 18 large Medjool dates
- 18 whole almonds (optional)
- 9 slices of bacon, cut in half
- 1/2 cup cream cheese or goat cheese
- Toothpicks
Cooking Instructions:
- Preparation of Dates: Preheat your oven to 375°F (190°C). Begin by preparing the Medjool dates. Use a small sharp knife to make a lengthwise slit in each date and remove the pit. If you want an extra crunch, insert an almond into the center of each date.
- Filling the Dates: Using a small spoon or piping bag, stuff each date with about a teaspoon of cream cheese or goat cheese. Be careful not to overfill, as you need to be able to close the date around the filling.
- Wrapping with Bacon: Take a half-slice of bacon and wrap it tightly around each stuffed date. Secure the bacon with a toothpick to confirm it stays in place while cooking.
- Baking: Place the bacon-wrapped dates on a baking sheet lined with parchment paper or a silicone baking mat. Bake in the preheated oven for 15-20 minutes, or until the bacon is crispy and golden brown. Turn the dates halfway through cooking to confirm even crisping.
- Serving: Remove the dates from the oven and let them cool slightly before serving. Transfer them to a serving platter and enjoy them warm.
Extra Tips:
For an added layer of flavor, consider brushing the bacon with a bit of maple syrup or balsamic glaze before wrapping the dates. This will give them a lovely caramelized finish.
If you want to prepare these appetizers ahead of time, you can stuff and wrap the dates, then store them in the refrigerator for up to 24 hours before baking. Just make sure to bring them to room temperature before placing them in the oven to confirm even cooking.
Deviled Eggs With a Twist
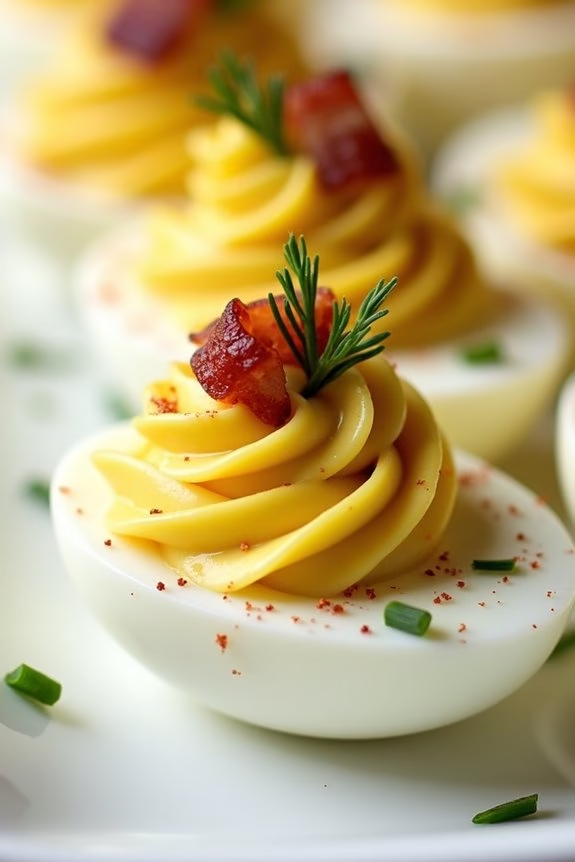
Deviled eggs are a classic appetizer that never fails to please at any gathering. This holiday season, why not add a bit of flair to this traditional dish with a unique twist? By incorporating unexpected ingredients and flavors, you can create a festive version of deviled eggs that won’t only look stunning on your Christmas table but also delight your guests with every bite.
This recipe offers a delightful blend of creamy yolks, tangy mustard, and a hint of spice, topped with crispy bacon and fresh herbs for added texture and flavor. Perfect for a serving size of 4-6 people, this easy-to-make recipe is a time-saver, allowing you to focus on other holiday preparations.
The combination of classic flavors with a surprising twist will guarantee this dish stands out among your Christmas finger food offerings. Whether you’re hosting a large family gathering or a cozy get-together with friends, these deviled eggs are sure to become a new holiday favorite.
Ingredients:
- 6 large eggs
- 3 tablespoons mayonnaise
- 1 teaspoon Dijon mustard
- 1 teaspoon apple cider vinegar
- 1/4 teaspoon smoked paprika
- Salt and black pepper to taste
- 2 strips of bacon, cooked and crumbled
- 2 tablespoons chopped chives
- 1 tablespoon pickled jalapeños, finely diced (optional)
- 1 tablespoon fresh dill, chopped (for garnish)
Cooking Instructions:
- Boil the Eggs: Place the eggs in a single layer in a saucepan and cover with water. Bring to a boil over medium-high heat. Once boiling, cover the saucepan and remove it from the heat. Let the eggs sit for 10-12 minutes to fully cook.
- Cool and Peel: After 10-12 minutes, transfer the eggs to a bowl of ice water to cool them quickly and stop the cooking process. Once cooled, gently peel the eggs under running water to remove the shells.
- Prepare the Yolks: Slice each egg in half lengthwise and carefully remove the yolks. Place the yolks in a bowl and set the egg whites aside on a serving platter.
- Make the Filling: Mash the yolks with a fork until smooth. Add mayonnaise, Dijon mustard, apple cider vinegar, smoked paprika, salt, and black pepper. Mix until creamy and well combined. Stir in the pickled jalapeños if you want to add a spicy kick to the deviled eggs.
- Fill the Egg Whites: Spoon or pipe the yolk mixture back into the egg white halves. Use a piping bag or a plastic bag with the corner snipped off for a more elegant presentation.
- Garnish: Top each filled egg with crumbled bacon and chopped chives. Sprinkle with additional smoked paprika if desired. Finish with a sprig of fresh dill for a festive touch.
Extra Tips:
For perfectly peeled eggs, use eggs that are at least a week old, as fresher eggs tend to be more difficult to peel. If you’re looking to save time, consider preparing the filling a day in advance and storing it in the refrigerator. Assemble the eggs shortly before serving to guarantee they taste fresh and maintain their texture.
If you’re not a fan of spicy flavors, feel free to omit the jalapeños or replace them with a milder ingredient like sweet pickles.
Mini Cheese Ball Bites
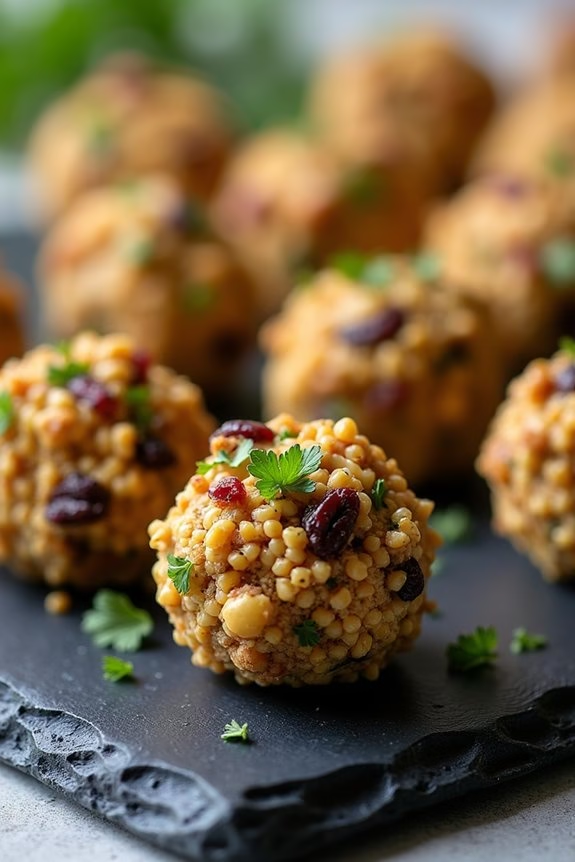
Mini Cheese Ball Bites are a delightful and festive appetizer perfect for your Christmas celebrations. These bite-sized treats aren’t only easy to make but also packed with flavor, making them a favorite among guests.
They’re versatile and can be customized with your choice of herbs, nuts, and spices, allowing you to cater to various taste preferences. Whether you’re hosting a large get-together or an intimate family dinner, these mini cheese ball bites will surely impress.
The key to these delicious bites is the combination of creamy cheese, crunchy coatings, and a burst of flavor from the herbs and spices. You can prepare them in advance, which makes them the perfect choice for stress-free holiday entertaining.
Served with toothpicks or on a platter, these cheese balls are a convenient finger food that adds a touch of elegance to your appetizer spread. Here’s a simple recipe to create these scrumptious treats for 4-6 people.
Ingredients:
- 8 oz cream cheese, softened
- 1 cup sharp cheddar cheese, grated
- 1 tablespoon ranch seasoning mix
- 1/2 cup chopped pecans
- 1/4 cup chopped fresh parsley
- 1/4 cup chopped dried cranberries
- 1/4 teaspoon garlic powder
- 1/4 teaspoon onion powder
- Salt and pepper to taste
Cooking Instructions:
1. Prepare the Cheese Mixture: In a mixing bowl, combine the softened cream cheese, grated cheddar cheese, and ranch seasoning mix. Mix well until the ingredients are thoroughly combined and smooth.
Add in the garlic powder, onion powder, salt, and pepper, and mix again to incorporate the spices evenly.
2. Shape the Cheese Balls: Using a tablespoon, scoop out portions of the cheese mixture and roll them into small balls with your hands. Each ball should be about 1 inch in diameter.
Once all the cheese mixture is used, place the balls on a baking sheet lined with parchment paper.
3. Prepare the Coating: In a separate shallow dish, mix together the chopped pecans, parsley, and dried cranberries. Confirm the mixture is evenly distributed to provide a consistent coating for each cheese ball.
4. Coat the Cheese Balls: Roll each cheese ball in the pecan, parsley, and cranberry mixture, pressing gently to make sure the coating sticks to the surface.
Make sure each ball is fully covered for maximum flavor and visual appeal.
5. Chill and Serve: Place the coated cheese balls in the refrigerator for at least 1 hour to firm up. This will also help the flavors to meld together.
Serve chilled with toothpicks for easy handling.
Extra Tips:
To enhance the flavor, consider adding a dash of hot sauce or a sprinkle of paprika to the cheese mixture for a subtle kick.
If you prefer a milder taste, swap out the sharp cheddar with a milder cheese such as mozzarella or Monterey Jack. Additionally, these cheese balls can be made a day in advance and stored in an airtight container in the refrigerator, saving you time on the day of your event.
Feel free to experiment with different coatings, such as crushed pretzels or sesame seeds, to suit your guests’ preferences.
Spicy Shrimp Cocktail
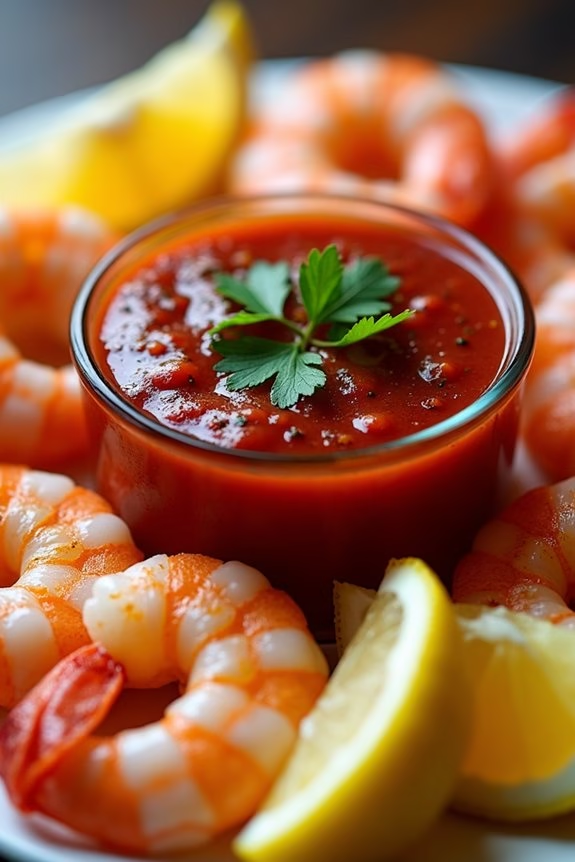
Whether you serve it as part of a buffet or as a passed hors d’oeuvre, the Spicy Shrimp Cocktail is both sophisticated and satisfying. The key to this dish lies in the quality of the shrimp and the balance of flavors in the cocktail sauce. The shrimp should be fresh and firm, while the sauce should have the perfect combination of heat, tanginess, and sweetness. This dish serves 4-6 people, making it an ideal choice for a small gathering or as part of a larger selection of finger foods.
Ingredients:
- 24 large shrimp, peeled and deveined
- 1 tablespoon olive oil
- Salt and pepper to taste
- 1 cup ketchup
- 2 tablespoons horseradish
- 1 tablespoon lemon juice
- 1 teaspoon hot sauce (adjust based on preference)
- 1 teaspoon Worcestershire sauce
- 1 tablespoon chopped fresh parsley (for garnish)
- Lemon wedges (for serving)
Instructions:
- Prepare the Shrimp: Rinse the shrimp under cold water and pat them dry with a paper towel. Place them in a bowl and drizzle with olive oil, then season with salt and pepper. Toss to guarantee the shrimp are evenly coated.
- Cook the Shrimp: Heat a large skillet over medium-high heat. Once hot, add the shrimp in a single layer. Cook for 2-3 minutes on each side, or until the shrimp turn pink and opaque. Remove from heat and let them cool.
- Make the Cocktail Sauce: In a medium bowl, combine the ketchup, horseradish, lemon juice, hot sauce, and Worcestershire sauce. Mix well until all ingredients are fully incorporated. Adjust the seasoning to taste, adding more hot sauce if you prefer extra heat.
- Serve: Arrange the cooked shrimp on a platter around a bowl of the spicy cocktail sauce. Garnish with chopped parsley and serve with lemon wedges on the side for a fresh burst of citrus.
Extra Tips:
For maximum flavor, consider marinating the shrimp in a little lemon juice and garlic for 15 minutes before cooking.
You can also grill the shrimp if you prefer a smoky flavor.
When making the cocktail sauce, start with a smaller amount of hot sauce and gradually increase it to suit your heat preference.
If you’re preparing this dish in advance, store the cooked shrimp and cocktail sauce separately in the refrigerator, and assemble just before serving to maintain the shrimp’s texture and freshness.
Pesto and Sun-Dried Tomato Crostini
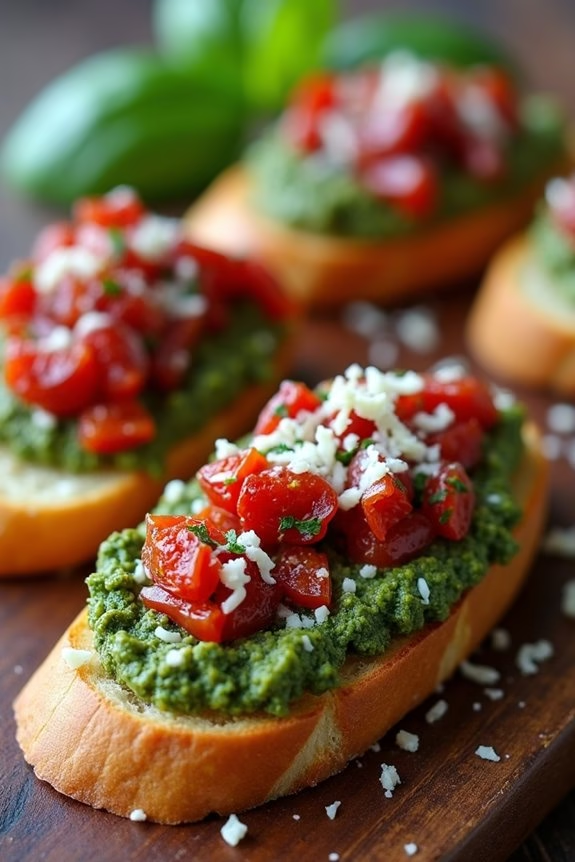
Pesto and Sun-Dried Tomato Crostini is a delightful appetizer that perfectly blends the rich flavors of basil pesto with the tangy sweetness of sun-dried tomatoes atop crispy baguette slices. This dish isn’t only visually appealing but also bursts with flavor in every bite, making it an ideal finger food for Christmas gatherings.
The combination of creamy pesto and chewy sun-dried tomatoes against the crunchy bread provides a satisfying and savory experience that your guests will love.
This recipe is designed for a serving size of 4-6 people, making it great for small gatherings or as part of a larger spread of appetizers. The preparation is simple and can be done in advance, allowing you to spend more time enjoying the festivities with your guests. With just a few ingredients and straightforward steps, you’ll have a delightful appetizer ready in no time.
Ingredients:
- 1 baguette, sliced into 1/2 inch thick rounds
- 1 cup basil pesto
- 1/2 cup sun-dried tomatoes, finely chopped
- 1/2 cup grated Parmesan cheese
- 2 tablespoons olive oil
- Salt and pepper to taste
- Fresh basil leaves for garnish (optional)
Instructions:
- Preheat the Oven: Begin by preheating your oven to 375°F (190°C). This will guarantee the baguette slices become perfectly crispy.
- Prepare the Baguette Slices: Arrange the baguette slices on a baking sheet. Brush each slice lightly with olive oil on both sides. This will help them toast evenly and add flavor.
- Toast the Baguette: Place the baking sheet in the preheated oven and bake for about 6-8 minutes, or until the slices are golden brown and crispy. Keep an eye on them to prevent burning.
- Assemble the Crostini: Once the bread is toasted, remove the slices from the oven and let them cool slightly. Spread approximately one tablespoon of basil pesto onto each slice.
- Add the Sun-Dried Tomatoes: Evenly distribute the finely chopped sun-dried tomatoes over the pesto layer on each baguette slice.
- Sprinkle Cheese: Sprinkle a generous amount of grated Parmesan cheese over the top of the sun-dried tomatoes.
- Final Toast: Place the crostini back in the oven for an additional 2-3 minutes, just enough to melt the cheese slightly and warm the toppings.
- Garnish and Serve: Remove from the oven, let them cool slightly, and then garnish with fresh basil leaves if desired. Serve immediately for the best taste and texture.
Extra Tips:
When preparing Pesto and Sun-Dried Tomato Crostini, consider using a high-quality baguette for best texture and flavor.
If you prefer a lighter taste, you can use less sun-dried tomato or mix it with fresh tomatoes for a fresher twist. To save time, you can prepare the toppings in advance and assemble the crostini just before serving.
Additionally, experimenting with different types of pesto, such as sun-dried tomato pesto or arugula pesto, can add a unique flavor profile to the dish. For an added crunch, consider toasting some pine nuts and sprinkling them on top before serving.
Sweet and Spicy Meatballs
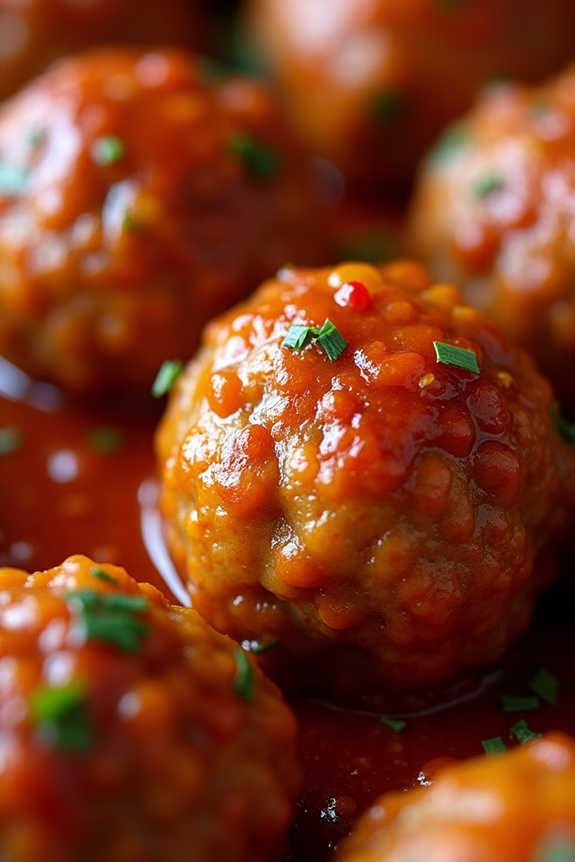
Sweet and Spicy Meatballs are a delightful addition to any Christmas celebration. These flavorful appetizers are perfect for mingling guests and are sure to become a crowd favorite. The combination of sweetness with a hint of spice creates a tantalizing taste that will have everyone coming back for seconds.
Whether you’re hosting a large gathering or a small family get-together, these meatballs are easy to prepare and can be made in advance, giving you more time to enjoy the festivities.
The secret to these mouthwatering meatballs lies in the sauce—a perfect balance of savory and sweet with a touch of heat. The meatballs themselves are tender and juicy, absorbing all the flavors of the sauce as they simmer to perfection. Serve them with toothpicks for easy eating, and watch as your guests devour them with delight.
Here’s how you can make Sweet and Spicy Meatballs for a serving size of 4-6 people.
Ingredients:
- 1 pound ground beef
- 1/2 cup breadcrumbs
- 1/4 cup milk
- 1 egg
- 2 cloves garlic, minced
- 1/2 teaspoon salt
- 1/4 teaspoon black pepper
- 1 tablespoon vegetable oil
- 1/2 cup ketchup
- 1/4 cup brown sugar
- 2 tablespoons soy sauce
- 1 tablespoon apple cider vinegar
- 1 teaspoon chili powder
- 1/2 teaspoon red pepper flakes
Cooking Instructions:
- Prepare the Meatballs: In a large bowl, combine the ground beef, breadcrumbs, milk, egg, minced garlic, salt, and black pepper. Mix well using your hands or a spoon until all ingredients are evenly incorporated.
- Form the Meatballs: Roll the mixture into small balls, about 1 inch in diameter, and place them on a plate. This should yield approximately 20-24 meatballs.
- Cook the Meatballs: Heat the vegetable oil in a large skillet over medium heat. Add the meatballs in batches, ensuring not to overcrowd the pan. Cook for about 5-7 minutes, turning occasionally, until they’re browned on all sides. Remove the meatballs from the skillet and set aside.
- Make the Sauce: In the same skillet, combine the ketchup, brown sugar, soy sauce, apple cider vinegar, chili powder, and red pepper flakes. Stir well and let the sauce come to a simmer.
- Simmer the Meatballs: Return the meatballs to the skillet, ensuring they’re fully coated with the sauce. Reduce the heat to low, cover the skillet, and let the meatballs simmer for 15-20 minutes, stirring occasionally, until the sauce thickens and the meatballs are cooked through.
- Serve: Once the meatballs are cooked, transfer them to a serving platter. Insert toothpicks into each meatball for easy serving, and enjoy!
Extra Tips:
For an even richer flavor, prepare the meatballs a day in advance and let them sit in the refrigerator overnight. This allows the flavors to meld together beautifully.
If you’re looking to make the dish spicier, feel free to add more red pepper flakes or a splash of hot sauce. Additionally, these meatballs can be kept warm in a slow cooker on a low setting, making them an ideal choice for parties where guests can serve themselves at their leisure.
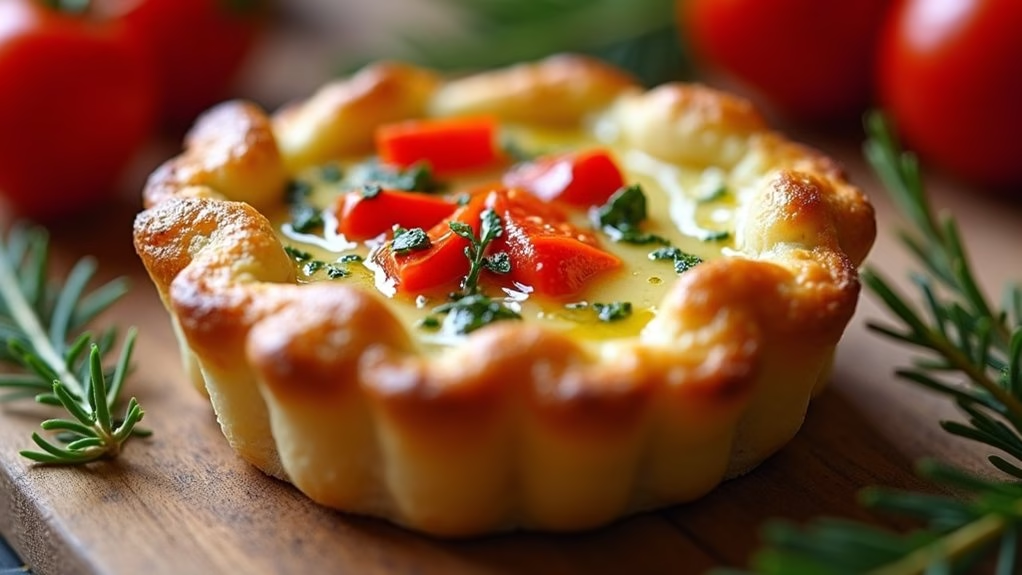
Roasted Red Pepper and Goat Cheese Tartlets
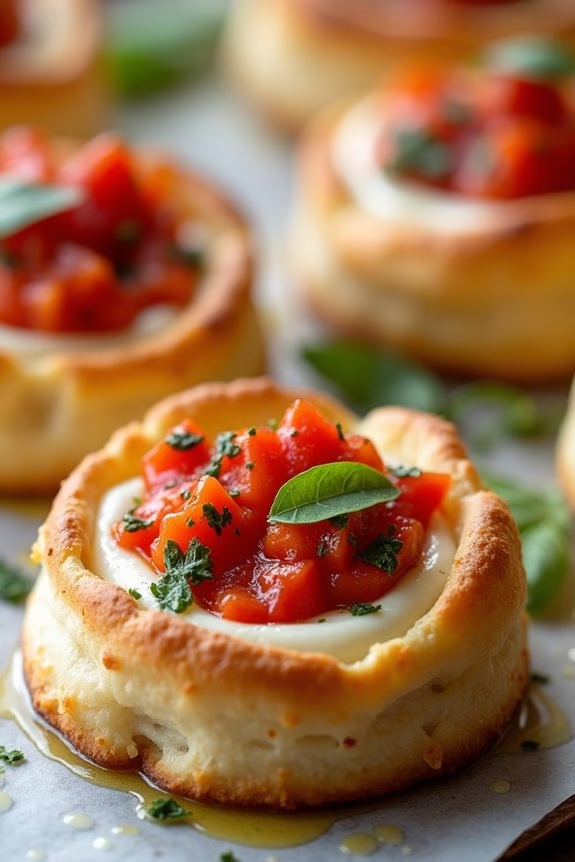
Roasted Red Pepper and Goat Cheese Tartlets are a delightful addition to any holiday gathering, especially during the Christmas season. These elegant tartlets combine the creamy tanginess of goat cheese with the sweet, smoky flavors of roasted red peppers, all nestled in a buttery pastry shell. Perfect as a finger food appetizer, they’re easy to prepare and offer a sophisticated touch to your festive spread.
Whether you’re hosting a small family get-together or a larger celebration, these tartlets will certainly impress your guests and add a burst of color to your table.
The balance of flavors in these tartlets is simply divine. The creaminess of the goat cheese pairs beautifully with the subtle sweetness of the roasted red peppers, while a hint of garlic and fresh herbs enhances the overall taste.
These tartlets can be served warm or at room temperature, making them a versatile choice for any party setting. Plus, the compact size of the tartlets makes them easy for guests to enjoy while mingling. Here’s how you can make Roasted Red Pepper and Goat Cheese Tartlets for a serving size of 4-6 people.
Ingredients:
- 1 sheet of puff pastry, thawed
- 4 ounces of goat cheese, softened
- 1/2 cup roasted red peppers, chopped
- 1 clove garlic, minced
- 1 tablespoon fresh basil, chopped
- 1 tablespoon fresh parsley, chopped
- Salt and pepper, to taste
- Olive oil, for brushing
Cooking Instructions:
- Prepare the Puff Pastry: Preheat your oven to 400°F (200°C). Roll out the thawed puff pastry sheet on a lightly floured surface to smooth out any creases. Using a round cookie cutter or a glass, cut the pastry into circles about 3 inches in diameter. Place the pastry circles on a baking sheet lined with parchment paper.
- Prepare the Filling: In a medium bowl, combine the softened goat cheese, chopped roasted red peppers, minced garlic, chopped basil, and chopped parsley. Mix well until all the ingredients are evenly distributed. Season with salt and pepper to taste.
- Assemble the Tartlets: Spoon a small amount of the goat cheese mixture onto the center of each pastry circle, leaving a small border around the edges. Gently fold or crimp the edges of the pastry to form a slight rim around the filling.
- Bake the Tartlets: Brush the edges of the pastry with a small amount of olive oil to promote browning. Bake in the preheated oven for 12-15 minutes, or until the pastry is golden brown and puffed. Remove from the oven and let cool slightly before serving.
Extra Tips:
For an extra touch of flavor, you can sprinkle a pinch of red pepper flakes over the goat cheese mixture before baking for a hint of heat.
If you prefer a vegetarian version, confirm your puff pastry is free of animal fats. These tartlets can be prepped a few hours in advance and baked just before serving, which is particularly helpful when hosting a large gathering.
Additionally, you can experiment with different herbs or add a drizzle of balsamic glaze on top for extra depth of flavor.