
As I started planning my Christmas Eve dinner, I envisioned a magical table filled with delicious dishes that delight the senses. A Cranberry-Glazed Roast Turkey will be the star of the show, with Garlic Herb Prime Rib as a delectable partner. On the side, Truffle Mashed Potatoes will offer creamy goodness. A Pomegranate and Orange Salad will bring a burst of color and freshness. And for dessert, an Eggnog Cheesecake will be the perfect sweet ending. Ready to explore these festive recipes?
Cranberry-Glazed Roast Turkey
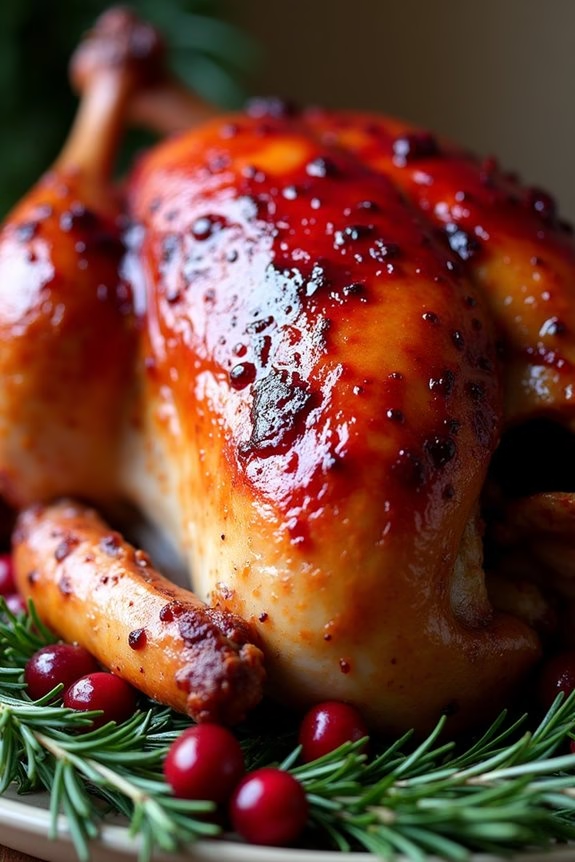
Christmas Eve is a special time for family and friends to gather around the dinner table and enjoy a magnificent feast. One of the most festive and flavorful dishes you can serve is a Cranberry-Glazed Roast Turkey. This dish combines the traditional taste of turkey with the sweet and tangy essence of cranberry, creating a beautiful centerpiece that’s both delicious and visually stunning.
The tart cranberry glaze not only enhances the turkey’s flavor but also gives it a gorgeous glossy finish, perfect for a holiday celebration.
Roasting a turkey to perfection can be a challenging task, but with the right recipe and a little patience, you’ll be able to impress your guests with a juicy and flavorful bird. This recipe is designed for a serving size of 4-6 people, making it ideal for an intimate holiday gathering.
By following the steps carefully, you’ll guarantee that the turkey is cooked evenly, with a crispy skin and tender meat. Let’s explore the ingredients and instructions for making a Cranberry-Glazed Roast Turkey that will become a beloved part of your Christmas Eve tradition.
Ingredients:
- 1 whole turkey (10-12 pounds)
- Salt and freshly ground black pepper
- 1 tablespoon olive oil
- 1 cup cranberry sauce (homemade or store-bought)
- 1/4 cup honey
- 2 tablespoons soy sauce
- 1 tablespoon balsamic vinegar
- 1 teaspoon ground cinnamon
- 1 teaspoon dried thyme
- 1/4 cup unsalted butter, melted
- 1 lemon, halved
- Fresh rosemary sprigs (for garnish)
- Fresh cranberries (for garnish)
Instructions:
- Preparation: Preheat your oven to 325°F (165°C). Remove the turkey from the refrigerator and let it sit at room temperature for about 30 minutes. Remove the giblets and pat the turkey dry with paper towels. Season the cavity with salt and black pepper.
- Season the Turkey: Rub the olive oil all over the turkey, then season generously with salt and black pepper. Squeeze the lemon halves over the turkey and place them inside the cavity.
- Make the Cranberry Glaze: In a small saucepan, combine the cranberry sauce, honey, soy sauce, balsamic vinegar, cinnamon, and thyme. Heat over medium heat until the mixture is smooth and well combined, then remove from heat.
- Roast the Turkey: Place the turkey breast-side up on a rack in a roasting pan. Brush the turkey with the melted butter, then roast in the preheated oven. Baste the turkey with its juices every 30 minutes.
- Apply the Glaze: About 45 minutes before the turkey is done (internal temperature should reach 165°F in the thickest part of the thigh), start brushing the cranberry glaze over the turkey every 15 minutes until the turkey is completely cooked.
- Rest and Serve: Once the turkey is done, remove it from the oven and let it rest for at least 20 minutes before carving. This allows the juices to redistribute throughout the meat. Garnish with fresh rosemary sprigs and cranberries before serving.
Extra Tips:
When preparing a Cranberry-Glazed Roast Turkey, it’s essential to use a meat thermometer to verify the turkey is cooked to the proper temperature, which should be 165°F (74°C) in the thickest part of the thigh. This will prevent the turkey from being undercooked or overcooked.
Additionally, if you find that the turkey is browning too quickly, you can tent it with aluminum foil to prevent the skin from burning while allowing it to continue cooking evenly.
Remember to let the turkey rest before carving, as this step is key to achieving juicy slices of meat. Enjoy your festive feast!
Garlic Herb Prime Rib
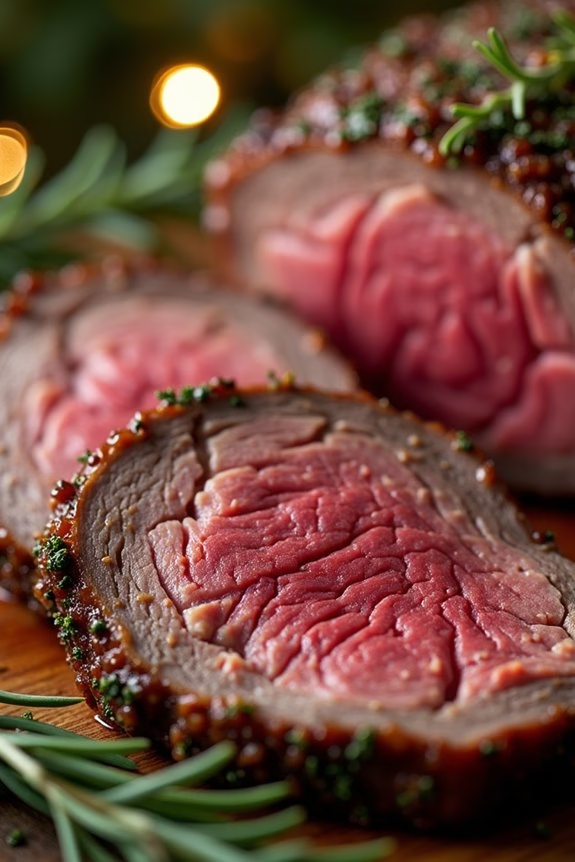
Garlic Herb Prime Rib is a classic and elegant main dish that’s perfect for a Christmas Eve dinner. This recipe highlights the succulent flavors of a beautifully roasted prime rib, infused with a fragrant blend of garlic and fresh herbs. The dish is sure to impress your family and guests with its tender, juicy meat and crispy, flavorful crust.
Whether you’re an experienced cook or a novice, this recipe is straightforward and will guide you through creating a memorable holiday meal.
The key to a perfect prime rib is in the seasoning and cooking process. A blend of garlic, herbs, and butter creates a savory crust that enhances the rich flavor of the beef. Roasting it at the right temperature guarantees the meat remains tender and juicy. This recipe serves 4-6 people, making it ideal for an intimate family gathering or a small holiday party.
Ingredients (Serves 4-6):
- 1 (4-5 pounds) prime rib roast, bone-in
- 4 cloves garlic, minced
- 1/4 cup fresh rosemary, chopped
- 1/4 cup fresh thyme, chopped
- 1/4 cup fresh parsley, chopped
- 1/4 cup unsalted butter, softened
- 2 tablespoons olive oil
- 1 tablespoon salt
- 1 teaspoon black pepper
Cooking Instructions:
- Prepare the Prime Rib: Remove the prime rib from the refrigerator and let it sit at room temperature for about 1 hour to guarantee even cooking. Pat the meat dry with paper towels to remove excess moisture.
- Make the Herb Butter Mixture: In a bowl, mix the softened butter, minced garlic, chopped rosemary, thyme, parsley, olive oil, salt, and pepper until well combined.
- Season the Meat: Rub the herb butter mixture generously all over the prime rib, making sure that every part is evenly coated. Make sure to cover all the nooks and crannies for maximum flavor.
- Preheat the Oven: Preheat your oven to 450°F (230°C). This high temperature will help to sear the outside of the meat, creating a delicious crust.
- Roast the Prime Rib: Place the seasoned prime rib on a roasting rack in a roasting pan, bone side down. Roast at 450°F for 20 minutes, then reduce the oven temperature to 325°F (160°C) and continue roasting for approximately 1.5 to 2 hours, or until the internal temperature reaches 130°F (54°C) for medium-rare.
- Rest the Meat: Once cooked, remove the prime rib from the oven and let it rest for at least 20 minutes before carving. This allows the juices to redistribute, guaranteeing the meat is juicy and tender.
- Carve and Serve: Carve the prime rib into slices and serve it with the pan juices or your favorite sauce.
Extra Tips:
For best results, always use a meat thermometer to check the internal temperature of the prime rib to guarantee it’s cooked to your desired level of doneness. Remember that the meat will continue to cook slightly after being removed from the oven, so it’s best to take it out when it’s a few degrees below your target temperature.
Additionally, letting the meat rest is vital for achieving a tender and flavorful prime rib. Adjust the seasoning to your taste, and feel free to add other herbs or spices that you enjoy.
Honey Balsamic Roasted Brussels Sprouts
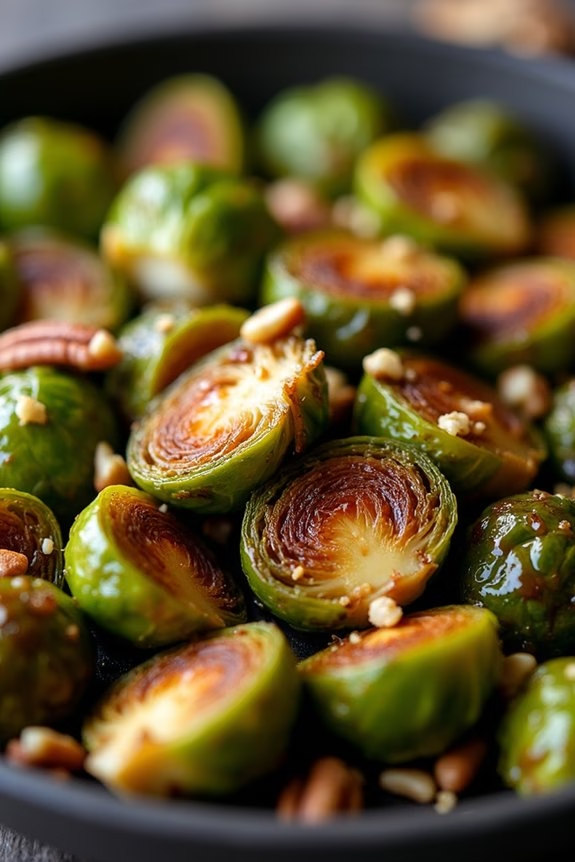
Christmas Eve is a time for family gatherings, celebrations, and delicious meals. One of the standout side dishes that you can serve at your holiday dinner is Honey Balsamic Roasted Brussels Sprouts. This recipe features the rich, caramelized flavors of balsamic vinegar and honey, which perfectly complement the nutty taste of roasted Brussels sprouts.
Not only is this dish easy to prepare, but it also adds a vibrant green color and a touch of elegance to your Christmas Eve table. Brussels sprouts, when roasted, take on a delightful crispy texture and a subtle sweetness, which is beautifully enhanced by the honey and balsamic glaze. The dish can be served alongside a variety of main courses, making it a versatile addition to your holiday menu.
Whether you’re a seasoned chef or a novice cook, this recipe is straightforward and guaranteed to be a crowd-pleaser, leaving your guests asking for seconds.
Ingredients (Serves 4-6):
- 2 pounds Brussels sprouts
- 3 tablespoons olive oil
- 1 teaspoon salt
- 1/2 teaspoon black pepper
- 3 tablespoons balsamic vinegar
- 2 tablespoons honey
- Optional: 1/4 cup chopped walnuts or pecans for garnish
Cooking Instructions:
- Preheat the Oven: Begin by preheating your oven to 425°F (220°C). This high temperature is critical for roasting the Brussels sprouts to achieve a crispy texture.
- Prepare the Brussels Sprouts: Trim the ends of the Brussels sprouts and remove any yellow or damaged outer leaves. Slice each sprout in half lengthwise to guarantee even cooking.
- Season the Sprouts: In a large mixing bowl, toss the halved Brussels sprouts with olive oil, salt, and black pepper until they’re evenly coated.
- Arrange on Baking Sheet: Spread the seasoned Brussels sprouts in a single layer on a baking sheet. For best results, use parchment paper to prevent sticking and facilitate easy cleanup.
- Roast the Sprouts: Place the baking sheet in the preheated oven and roast for 20-25 minutes, stirring halfway through. The sprouts should be tender and golden brown on the edges.
- Prepare the Glaze: While the Brussels sprouts are roasting, combine balsamic vinegar and honey in a small saucepan over low heat. Stir occasionally until the mixture thickens slightly, about 5 minutes.
- Combine and Serve: Once the Brussels sprouts are roasted, remove them from the oven and drizzle with the honey balsamic glaze. Toss to coat evenly. Garnish with chopped walnuts or pecans if desired. Serve immediately.
Extra Tips:
For an extra layer of flavor, consider adding a sprinkle of red pepper flakes to the honey balsamic glaze for a hint of spice. If you prefer a sweeter taste, you can adjust the amount of honey to suit your preference.
Additionally, make sure not to overcrowd the baking sheet; giving each sprout space will help them roast evenly and become crisp. If you have any leftovers, they can easily be reheated in the oven the next day. Enjoy your festive and flavorful Honey Balsamic Roasted Brussels Sprouts this Christmas Eve!
Maple Dijon Glazed Ham
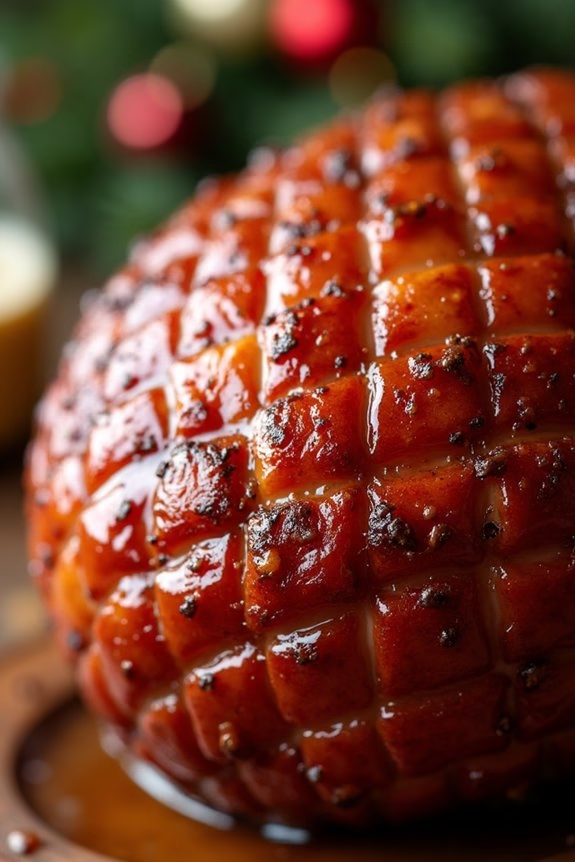
Maple Dijon Glazed Ham is a perfect centerpiece for your Christmas Eve dinner, offering a delightful combination of sweet and tangy flavors that are certain to impress your guests. The maple syrup provides a rich sweetness, while the Dijon mustard adds a subtle kick, creating a beautifully balanced glaze. This recipe is simple to prepare yet yields an incredibly flavorful and succulent ham that will be the star of your festive feast.
Whether you’re hosting a small family gathering or a larger celebration, this dish is designed to serve 4-6 people, making it ideal for intimate occasions. The process involves a few simple steps to guarantee the ham is perfectly cooked and glazed, resulting in a dish that’s both visually appealing and delicious. Follow this recipe to create a memorable Christmas Eve dinner that your loved ones will savor and enjoy.
Ingredients for 4-6 servings:
- 1 fully cooked bone-in ham (about 4-5 pounds)
- 1 cup maple syrup
- 1/4 cup Dijon mustard
- 1/4 cup apple cider vinegar
- 1/2 teaspoon ground cinnamon
- 1/2 teaspoon ground cloves
- 1/2 teaspoon black pepper
- 1/4 teaspoon salt
Cooking Instructions:
- Preheat the Oven: Start by preheating your oven to 325°F (165°C). Make sure the oven rack is positioned in the lower third of the oven to accommodate the size of the ham.
- Prepare the Glaze: In a medium saucepan, combine the maple syrup, Dijon mustard, apple cider vinegar, ground cinnamon, ground cloves, black pepper, and salt. Place the saucepan over medium heat and stir the mixture regularly. Allow it to simmer for about 5 minutes until the glaze thickens slightly.
- Score the Ham: While the glaze is simmering, remove the ham from its packaging and pat it dry with paper towels. Use a sharp knife to score the surface of the ham in a diamond pattern, making shallow cuts about 1/4 inch deep. This will help the glaze to penetrate the ham and enhance the flavor.
- Apply the Glaze: Place the scored ham on a roasting rack set inside a roasting pan. Using a brush or spoon, generously coat the ham with the prepared maple Dijon glaze, making sure it gets into the scored cuts.
- Roast the Ham: Cover the ham loosely with aluminum foil to prevent excessive browning. Place the ham in the preheated oven and roast for about 1 1/2 to 2 hours, or until the internal temperature reaches 140°F (60°C), basting with the glaze every 30 minutes.
- Finish the Glaze: In the last 30 minutes of cooking, remove the foil to allow the glaze to caramelize and create a beautiful, glossy finish on the ham.
- Rest and Serve: Once cooked, remove the ham from the oven and let it rest for about 10-15 minutes before slicing. This resting period allows the juices to redistribute throughout the ham, guaranteeing tender and moist slices.
Extra Tips: For a more intense flavor, you can prepare the glaze a day in advance and let the ham marinate in the glaze overnight in the refrigerator. This dish pairs wonderfully with classic sides like mashed potatoes, roasted vegetables, or a festive salad.
If you prefer a smokier flavor, consider using a smoked ham. Remember to save any leftover ham for sandwiches or to add to soups and stews, as it makes for a delicious addition to many meals beyond Christmas Eve.
Truffle Mashed Potatoes

Truffle Mashed Potatoes are a luxurious twist on the classic comfort food, perfect for a festive Christmas Eve dinner. The rich, earthy flavors of truffle oil elevate the creamy mashed potatoes to a gourmet level, making them a standout side dish for any holiday feast.
Whether you’re hosting a large family gathering or an intimate dinner, these indulgent potatoes will leave a lasting impression on your guests.
The secret to achieving the flawless Truffle Mashed Potatoes lies in the balance of flavors and textures. By using high-quality ingredients and following a few simple steps, you can create a dish that’s both sophisticated and satisfying. This recipe serves 4-6 people, making it an ideal choice for a small to medium-sized holiday celebration.
Ingredients:
- 3 pounds Yukon Gold potatoes
- 1 cup heavy cream
- 1/2 cup unsalted butter
- 2 tablespoons truffle oil
- Salt to taste
- Freshly ground black pepper to taste
- 2 tablespoons chopped fresh chives (optional)
- 1/4 cup grated Parmesan cheese (optional)
Instructions:
- Prepare the potatoes: Peel the Yukon Gold potatoes and cut them into evenly sized chunks. This guarantees they cook evenly and at the same pace.
- Cook the potatoes: Place the potato chunks in a large pot and cover them with cold water. Add a generous pinch of salt to the water. Bring the pot to a boil over medium-high heat, then reduce to a simmer. Cook the potatoes for about 15-20 minutes, or until they’re fork-tender.
- Heat the cream and butter: While the potatoes are cooking, combine the heavy cream and butter in a small saucepan. Heat over low heat until the butter has melted and the mixture is warm. Be careful not to let it boil.
- Mash the potatoes: Drain the cooked potatoes and return them to the pot. Use a potato masher or a ricer to mash the potatoes until smooth. For the creamiest texture, a ricer is recommended.
- Incorporate the cream and butter: Gradually add the warm cream and butter mixture to the mashed potatoes, stirring gently until fully combined. Adjust the consistency to your liking by adding more or less of the mixture.
- Add flavorings: Stir in the truffle oil, salt, and freshly ground black pepper to taste. Mix until the flavors are well distributed throughout the potatoes.
- Optional toppings: If desired, fold in the chopped chives and Parmesan cheese for extra flavor and garnish.
Extra Tips:
When making Truffle Mashed Potatoes, it’s crucial to use high-quality truffle oil, as this will greatly impact the overall taste of the dish.
Yukon Gold potatoes are recommended for their creamy texture, but you can substitute with Russet potatoes if preferred. Additionally, avoid over-mixing the potatoes to prevent them from becoming gluey.
Serve immediately for the best flavor and texture, and consider pairing this dish with roasted meats or a festive holiday roast to complete your Christmas Eve menu.
Christmas Stuffed Squash
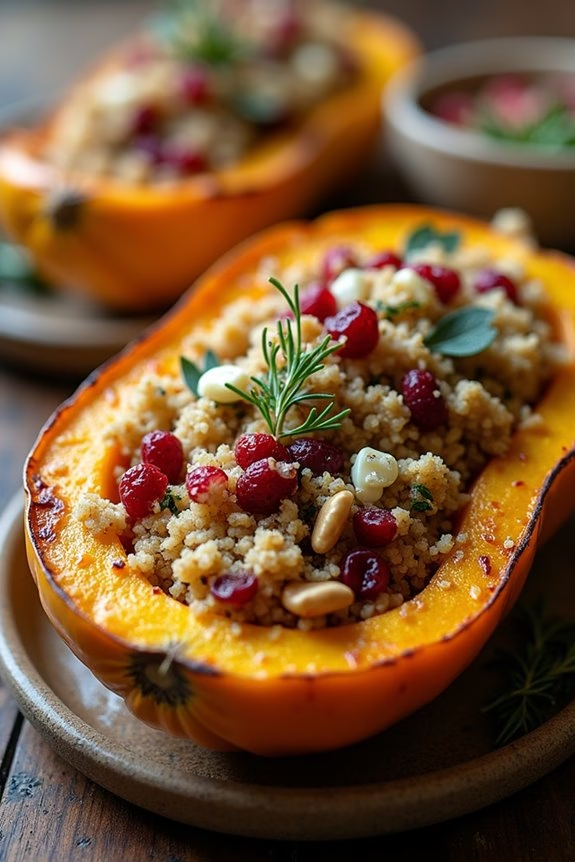
Celebrate this Christmas Eve with a delightful and festive dish that embodies the spirit of the season—Christmas Stuffed Squash. This vibrant and colorful meal not only looks stunning on your holiday table but also delivers a warm and comforting taste that perfectly complements the chilly winter evening.
The sweet and nutty flavor of roasted squash pairs beautifully with a savory mixture of quinoa, cranberries, and herbs, providing a wholesome and satisfying dinner option for everyone to enjoy. Perfect for serving 4-6 people, this Christmas Stuffed Squash recipe is a wonderful way to embrace seasonal ingredients while offering a nutritious and hearty meal.
The stuffing is a delectable combination of textures and flavors, featuring toasted nuts, tangy goat cheese, and aromatic spices that meld together with the soft, roasted squash. Whether you’re looking for a vegetarian main course or a stunning side dish, this recipe is sure to impress your guests and bring a touch of warmth to your Christmas Eve dinner.
Ingredients:
- 3 medium-sized acorn or butternut squashes
- 1 cup quinoa
- 2 cups vegetable broth or water
- 1/2 cup dried cranberries
- 1/3 cup chopped walnuts or pecans
- 1/4 cup crumbled goat cheese (optional)
- 2 tablespoons olive oil
- 1 medium onion, diced
- 2 cloves garlic, minced
- 1 teaspoon dried thyme
- 1 teaspoon dried sage
- Salt and pepper to taste
Cooking Instructions:
- Prepare the Squash: Preheat your oven to 400°F (200°C). Cut each squash in half lengthwise and remove the seeds. Brush the cut sides with olive oil and sprinkle with salt and pepper. Place the squash halves cut side down on a baking sheet and roast in the oven for 30-40 minutes, or until the flesh is tender when pierced with a fork.
- Cook the Quinoa: While the squash is roasting, rinse the quinoa under cold water. In a medium saucepan, bring the vegetable broth or water to a boil. Add the quinoa, reduce the heat to low, cover, and simmer for about 15 minutes, or until the liquid is absorbed and the quinoa is fluffy. Remove from heat and set aside.
- Prepare the Stuffing: In a large skillet, heat the olive oil over medium heat. Add the diced onion and garlic, sautéing until the onion is translucent. Stir in the dried thyme and sage, cooking for an additional minute. Add the cooked quinoa, cranberries, nuts, and goat cheese (if using) to the skillet, mixing well. Season with salt and pepper to taste.
- Stuff the Squash: Once the squash is done roasting, remove it from the oven and carefully turn the halves over. Divide the quinoa mixture evenly among the squash halves, packing it gently with a spoon.
- Bake the Stuffed Squash: Return the stuffed squash to the oven and bake for an additional 10-15 minutes, allowing the flavors to meld and the tops to get slightly golden. Remove from the oven and let cool slightly before serving.
Extra Tips:
When selecting your squash, look for ones that are firm and without blemishes to guarantee they roast evenly. You can prepare the stuffing mixture ahead of time to make the cooking process smoother on Christmas Eve.
Feel free to customize the stuffing by adding your favorite vegetables or spices to match your taste preferences. If you prefer a vegan version, simply omit the goat cheese or substitute it with a vegan cheese option. Enjoy this Christmas Stuffed Squash as a delightful centerpiece for your holiday feast!
Pomegranate and Orange Salad
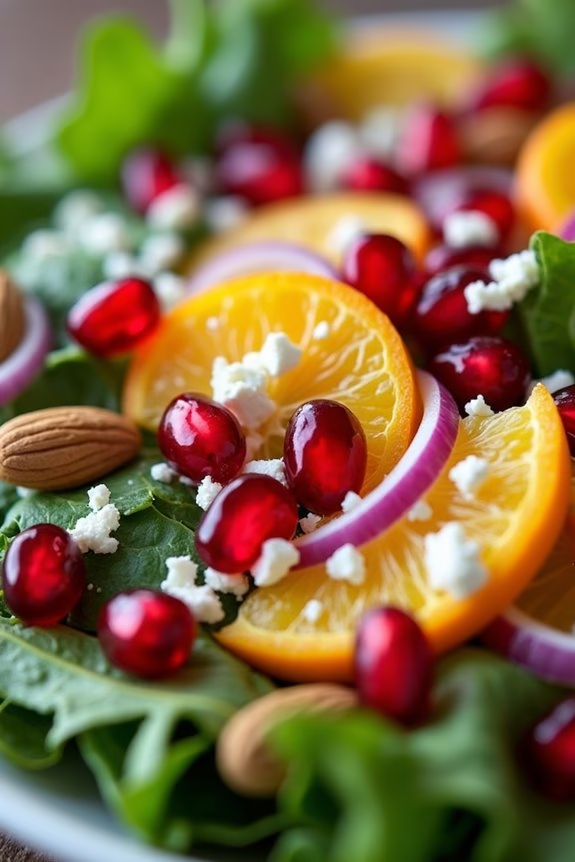
The Pomegranate and Orange Salad is a rejuvenating and vibrant dish perfect for a festive Christmas Eve dinner. This salad combines the juicy sweetness of oranges with the tartness of pomegranate seeds, creating a beautiful burst of flavors and colors that will brighten up any holiday table.
The addition of fresh greens and a light, tangy dressing ties all the elements together, making it a delightful appetizer or side dish to complement your main course. This salad isn’t only a treat for the taste buds but also a visual feast. The ruby-red pomegranate seeds glisten like jewels on a backdrop of crisp greens and vibrant orange segments.
It’s a dish that’s both healthy and elegant, offering a wonderful contrast to the richer, heavier dishes that are typically part of a Christmas Eve spread. Best of all, it’s easy to prepare, allowing you to focus on enjoying the company of your loved ones.
Ingredients (Serves 4-6):
- 2 large navel oranges
- 1 cup pomegranate seeds
- 6 cups mixed salad greens (such as arugula, spinach, and romaine)
- 1/4 cup thinly sliced red onion
- 1/2 cup crumbled feta cheese
- 1/4 cup toasted almonds
- 3 tablespoons olive oil
- 1 tablespoon white wine vinegar
- 1 tablespoon honey
- Salt and pepper to taste
Cooking Instructions:
- Prepare the Oranges: Begin by peeling the oranges. Using a sharp knife, carefully cut away the peel and pith. Once peeled, slice the oranges into thin rounds or segments. Set aside.
- Prepare the Dressing: In a small bowl, combine the olive oil, white wine vinegar, honey, salt, and pepper. Whisk the ingredients together until the dressing is well-blended and emulsified. Taste and adjust seasoning if needed.
- Assemble the Salad: In a large salad bowl, combine the mixed salad greens, sliced red onion, and half of the pomegranate seeds. Drizzle about two-thirds of the dressing over the greens and gently toss to coat.
- Add the Toppings: Arrange the orange slices or segments on top of the greens. Sprinkle the remaining pomegranate seeds, crumbled feta cheese, and toasted almonds evenly over the salad.
- Final Touches: Drizzle the remaining dressing over the salad. Give the salad a gentle toss to make sure all ingredients are evenly distributed and lightly coated with dressing.
- Serve: Transfer the salad to a serving platter or individual plates. Serve immediately to make sure the salad remains crisp and fresh.
Extra Tips: For an extra burst of flavor, consider adding a sprinkle of fresh mint leaves or a dash of lemon zest to the salad. If pomegranates are out of season, you can substitute with dried cranberries or cherries for a similar tartness.
To save time, you can prepare the dressing a day in advance and store it in the refrigerator. Just give it a good shake before using. Additionally, feel free to experiment with different types of nuts or cheese, such as walnuts or goat cheese, to suit your taste preferences.
Lobster Bisque

Lobster Bisque is a rich and creamy soup that’s perfect for Christmas Eve dinner. Known for its luxurious taste and smooth texture, this dish is sure to impress your family and guests. The bisque is made by simmering lobster shells to extract their flavor, then blending the broth with cream and other ingredients to create a velvety consistency.
With its delicate flavors and sophisticated presentation, Lobster Bisque is a wonderful way to celebrate the holiday season.
The preparation of Lobster Bisque requires a bit of time and attention to detail, but the end result is well worth the effort. The key to a great bisque is using fresh lobster and taking the time to prepare a flavorful stock. This recipe serves 4-6 people, making it perfect for a small gathering. Follow the steps carefully to create a dish that will become a memorable part of your holiday tradition.
Ingredients (serves 4-6):
- 4 lobster tails
- 1 tablespoon olive oil
- 1 onion, chopped
- 2 carrots, chopped
- 2 celery stalks, chopped
- 2 cloves garlic, minced
- 1/4 cup tomato paste
- 1 teaspoon thyme
- 1 teaspoon paprika
- 1/2 teaspoon cayenne pepper
- 1/4 cup cognac or brandy
- 4 cups seafood stock
- 1 cup heavy cream
- 2 tablespoons butter
- Salt and pepper to taste
- Chives or parsley for garnish
Cooking Instructions:
- Prepare the Lobster Tails: Begin by boiling the lobster tails in a large pot of salted water for about 5 minutes until they’re bright red. Remove the lobster tails and let them cool. Once cool, remove the meat from the shells and set aside. Save the shells for the stock.
- Make the Stock: In a large pot, heat olive oil over medium heat. Add the chopped onion, carrots, celery, and garlic. Sauté for about 5 minutes until the vegetables are softened. Add the lobster shells and sauté for another 5 minutes.
- Add Flavors: Stir in the tomato paste, thyme, paprika, and cayenne pepper. Cook for another 2 minutes to allow the flavors to meld.
- Deglaze with Cognac: Carefully add the cognac or brandy and let it simmer for a minute to cook off the alcohol, scraping any bits off the bottom of the pot.
- Simmer the Stock: Add the seafood stock to the pot. Bring it to a boil, then reduce the heat and let it simmer for about 30 minutes to allow the flavors to develop.
- Strain the Stock: Once the stock is ready, strain it through a fine mesh sieve into a clean pot or bowl, discarding the solids. Return the strained stock to the pot.
- Blend the Bisque: Using an immersion blender, blend the stock until smooth. Alternatively, you can transfer the stock in batches to a blender and blend until smooth.
- Add Cream and Butter: Stir in the heavy cream and butter. Simmer for another 10 minutes on low heat.
- Season and Serve: Season the bisque with salt and pepper to taste. Add the reserved lobster meat and gently heat through. Serve hot, garnished with chopped chives or parsley.
Extra Tips:
When cooking Lobster Bisque, it’s crucial to use fresh ingredients for the best flavor. If you don’t have access to fresh lobster, frozen tails can be used, but fresh is always preferred.
Be careful when blending hot liquids to avoid splatters. For a richer bisque, you can add a splash of sherry or white wine along with the cognac. Adjust the seasoning according to your taste, and feel free to add a bit more spice if you like a kick.
Enjoy your Lobster Bisque as a starter or main course, and savor the elegance it brings to your holiday table.
Mushroom and Gruyere Tart
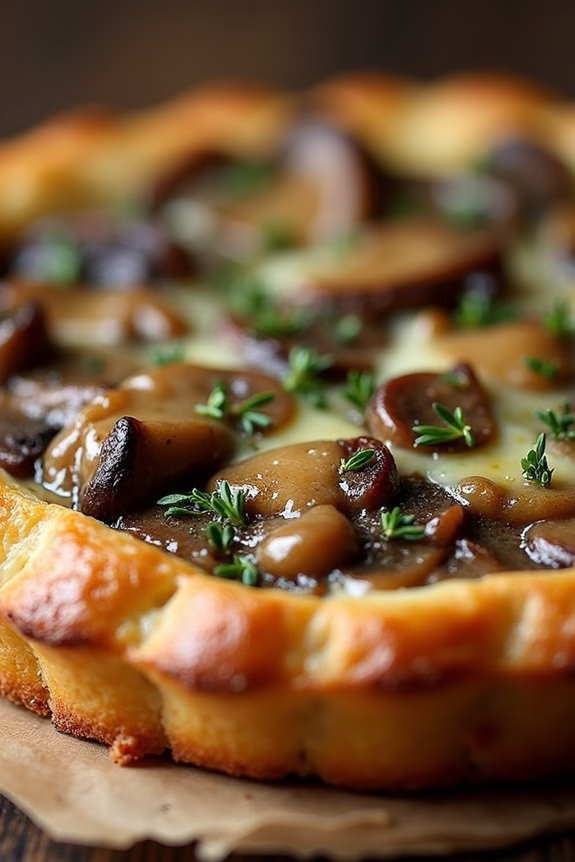
For a delightful and elegant dish to serve during your Christmas Eve dinner, consider preparing a Mushroom and Gruyere Tart. This savory tart combines the earthy flavors of mushrooms with the rich, nutty taste of Gruyere cheese, all encased in a flaky puff pastry.
It’s an ideal appetizer or side dish that will impress your guests with both its taste and presentation. The combination of ingredients creates a harmonious blend of flavors that’s both comforting and sophisticated, making it perfect for a festive occasion.
The process of making a Mushroom and Gruyere Tart isn’t only rewarding but also simpler than you might expect. With a little bit of preparation, you can assemble this delicious dish with ease.
The key is to use fresh mushrooms and high-quality Gruyere cheese to guarantee the best flavors. This recipe is designed to serve 4-6 people, making it a versatile option for your holiday gathering. Whether you’re a seasoned chef or a kitchen novice, this tart will be a delightful addition to your Christmas Eve menu.
Ingredients (serves 4-6):
- 1 sheet of puff pastry, thawed
- 1 tablespoon olive oil
- 1 tablespoon butter
- 1 medium onion, finely chopped
- 2 cloves garlic, minced
- 500g (about 1 pound) mixed mushrooms, sliced
- 1 teaspoon fresh thyme leaves
- Salt and pepper, to taste
- 1 cup Gruyere cheese, grated
- 1 egg, beaten (for egg wash)
Instructions:
- Prepare the Puff Pastry:
- Preheat your oven to 200°C (400°F). Roll out the thawed puff pastry on a lightly floured surface to fit a 9-inch tart pan or a baking sheet. Trim any excess pastry and prick the base all over with a fork. This will prevent it from puffing up excessively during baking.
- Cook the Mushrooms:
- Heat the olive oil and butter in a large skillet over medium heat. Add the chopped onion and cook until it becomes translucent, about 5 minutes. Add the minced garlic and cook for another minute until fragrant.
- Sauté the Mushrooms:
- Add the sliced mushrooms to the skillet. Increase the heat to medium-high and cook until the mushrooms are golden brown and any liquid they release has evaporated, approximately 8-10 minutes. Stir in the fresh thyme leaves and season with salt and pepper to taste.
- Assemble the Tart:
- Spread the cooked mushroom mixture evenly over the prepared puff pastry. Sprinkle the grated Gruyere cheese over the top, guaranteeing an even distribution.
- Bake the Tart:
- Brush the edges of the puff pastry with the beaten egg to give it a golden finish. Place the tart in the preheated oven and bake for 20-25 minutes, or until the pastry is puffed and golden, and the cheese is melted and bubbly.
- Serve:
- Allow the tart to cool slightly before slicing. Serve warm as an appetizer or side dish.
Extra Tips:
To enhance the flavor of your Mushroom and Gruyere Tart, consider adding a splash of white wine to the mushrooms while they cook, which will add depth to the dish.
Additionally, if you prefer a bit of spice, a pinch of red pepper flakes can be added along with the thyme. For a more rustic appearance, you can fold over the edges of the puff pastry slightly to create a freeform tart.
Finally, be sure to let the tart cool slightly before slicing to guarantee clean, neat portions.
Festive Wild Rice Pilaf
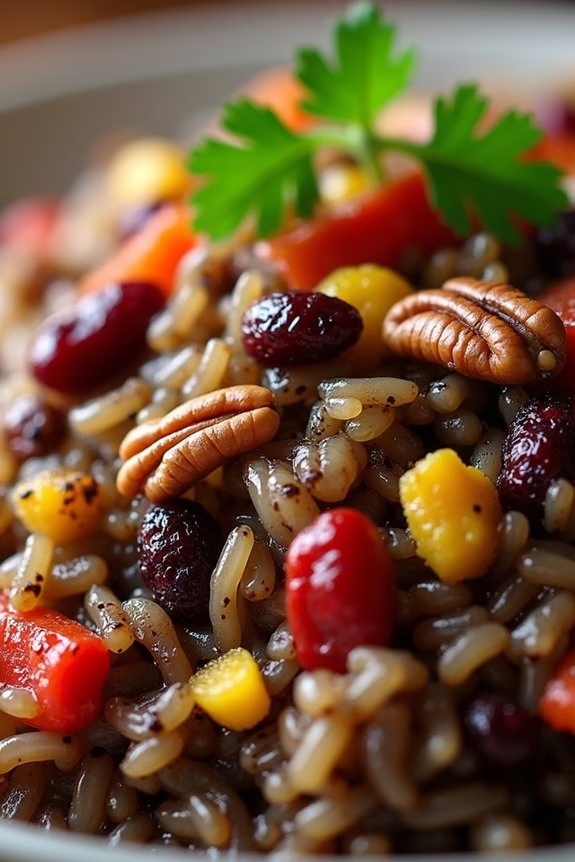
Celebrate Christmas Eve with a delightful Festive Wild Rice Pilaf that’s both nutritious and bursting with flavors. This dish combines the earthy taste of wild rice with the sweetness of dried fruits and a hint of nutty crunch, making it a perfect side for your holiday gathering.
It’s an ideal accompaniment to any main course, offering a colorful and vibrant addition to your festive table. The Festive Wild Rice Pilaf isn’t only delicious but also easy to prepare, allowing you to enjoy more time with your family and friends.
With a bit of preparation, you can have this mouthwatering dish ready to serve in under an hour. The combination of wholesome ingredients such as wild rice, aromatic herbs, and a splash of citrus will add a touch of elegance to your Christmas Eve dinner.
Ingredients (Serves 4-6):
- 1 cup wild rice
- 2 cups vegetable broth
- 1 tablespoon olive oil
- 1 medium onion, chopped
- 1 red bell pepper, diced
- 2 cloves garlic, minced
- 1/2 cup dried cranberries
- 1/2 cup chopped pecans
- 1 teaspoon dried thyme
- 1 teaspoon dried rosemary
- Salt and pepper to taste
- Zest of one orange
- 2 tablespoons fresh parsley, chopped (optional)
Cooking Instructions:
1. Prepare the Wild Rice: Rinse the wild rice under cold water. In a medium saucepan, bring the vegetable broth to a boil. Add the wild rice, reduce the heat to low, cover, and simmer for about 40-45 minutes or until the rice is tender and has absorbed most of the liquid.
Drain any excess liquid and set aside.
2. Sauté the Aromatics: In a large skillet, heat the olive oil over medium heat. Add the chopped onion and red bell pepper, and sauté for about 5-7 minutes, or until the vegetables are softened.
Stir in the minced garlic and cook for an additional minute until fragrant.
3. Combine Ingredients: Add the cooked wild rice to the skillet with the sautéed vegetables. Stir in the dried cranberries, chopped pecans, dried thyme, and dried rosemary.
Season with salt and pepper to taste.
4. Add Citrus and Finish: Stir in the orange zest, mixing well to confirm it’s evenly distributed throughout the pilaf. Cook for another 2-3 minutes, allowing the flavors to meld together.
If using, sprinkle the chopped fresh parsley on top before serving.
Extra Tips:
For added flavor, try toasting the pecans in a dry skillet for a few minutes before adding them to the pilaf. This will enhance their nutty aroma and add a delightful crunch to the dish.
You can also experiment with different dried fruits like apricots or cherries for a unique twist. If you prefer a bit of heat, consider adding a pinch of red pepper flakes to the vegetable sauté.
Remember to taste and adjust the seasoning as needed to suit your preferences. Enjoy your Festive Wild Rice Pilaf as a delightful complement to your holiday feast!
Gingerbread-Spiced Carrots
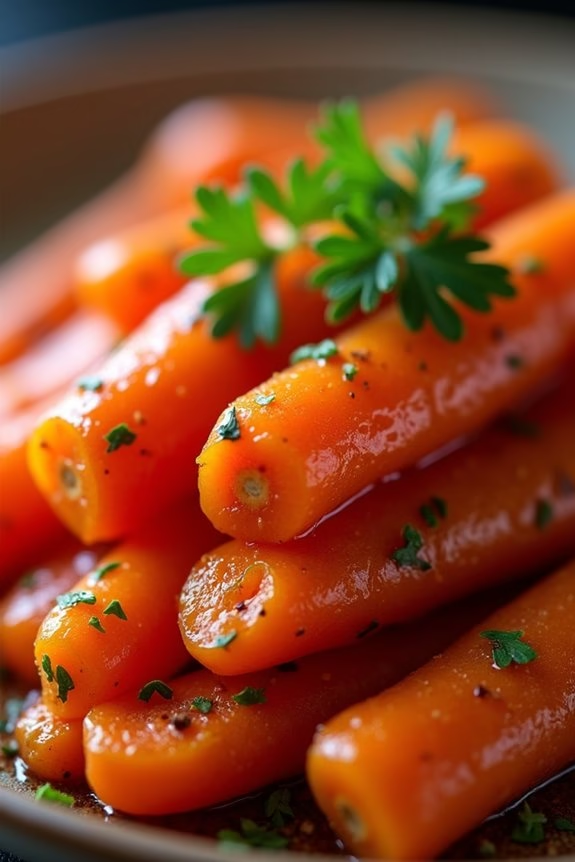
Gingerbread-Spiced Carrots bring a festive twist to your Christmas Eve dinner table. This delightful side dish combines the earthy sweetness of carrots with the warm, fragrant spices reminiscent of gingerbread cookies. Perfect for adding a touch of holiday magic, these carrots are glazed with a blend of spices and a hint of molasses, creating a rich and cozy flavor profile that complements any main dish.
This recipe is designed to serve 4-6 people and is both simple to prepare and impressive to serve. The carrots are first roasted to enhance their natural sweetness, then tossed in a spiced glaze that coats each piece in a glossy layer of holiday cheer. Whether you’re a fan of traditional holiday flavors or looking to try something new, Gingerbread-Spiced Carrots are sure to delight your taste buds and become a new favorite on your Christmas menu.
Ingredients (serves 4-6):
- 2 pounds of carrots, peeled and cut into sticks
- 3 tablespoons of olive oil
- 2 tablespoons of molasses
- 1 teaspoon of ground ginger
- 1 teaspoon of ground cinnamon
- 1/2 teaspoon of ground nutmeg
- 1/4 teaspoon of ground cloves
- 1 tablespoon of brown sugar
- Salt and pepper to taste
- Fresh parsley for garnish (optional)
Instructions:
- Preheat the Oven: Begin by preheating your oven to 400°F (200°C). This will guarantee the carrots roast evenly, achieving a tender texture and enhanced sweetness.
- Prepare the Carrots: Peel the carrots and cut them into uniform sticks, approximately 2-3 inches long. This guarantees even cooking and a pleasing presentation.
- Make the Spice Glaze: In a small bowl, combine the olive oil, molasses, ground ginger, cinnamon, nutmeg, cloves, and brown sugar. Mix well until all the ingredients are thoroughly incorporated into a smooth glaze.
- Season the Carrots: Place the carrot sticks in a large mixing bowl. Pour the spice glaze over the carrots and toss them until they’re evenly coated. Season with salt and pepper to taste.
- Roast the Carrots: Spread the glazed carrots in a single layer on a large baking sheet lined with parchment paper. This prevents sticking and makes for easy cleanup. Roast in the preheated oven for 25-30 minutes, or until the carrots are tender and slightly caramelized.
- Garnish and Serve: Once the carrots are done, remove them from the oven and transfer them to a serving platter. Garnish with freshly chopped parsley for a pop of color and added freshness, if desired. Serve warm.
Extra Tips:
For an added depth of flavor, consider drizzling a small amount of balsamic vinegar over the carrots before serving. This will enhance the sweetness and complement the spices perfectly.
If you’re preparing other dishes simultaneously, these carrots can be roasted ahead of time and reheated just before serving. Also, feel free to adjust the spice levels according to your preference; if you like a spicier kick, a pinch of cayenne pepper can be added to the glaze.
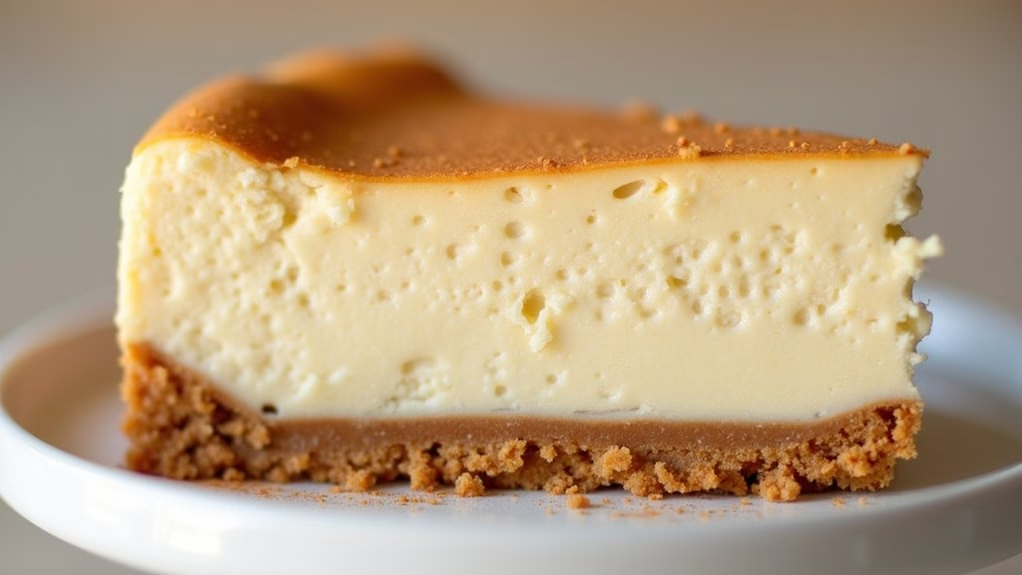
Eggnog Cheesecake With Gingersnap Crust
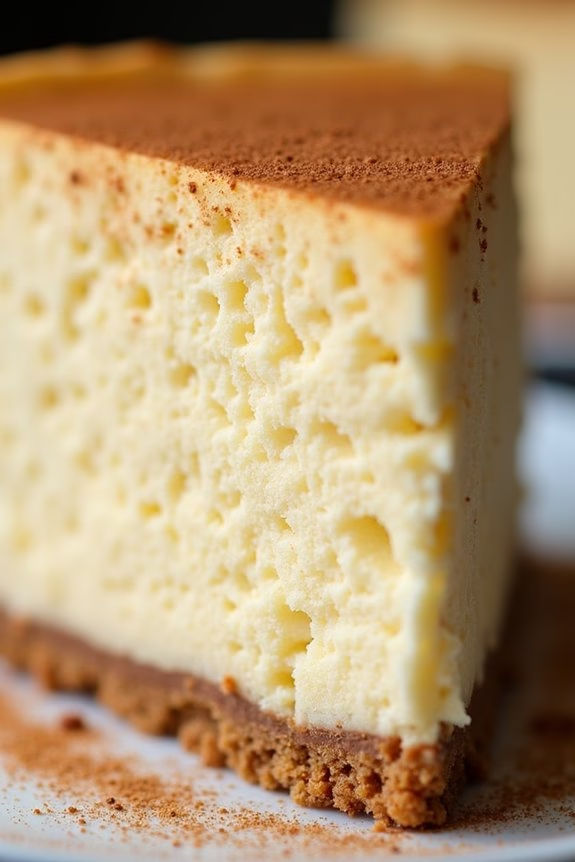
Eggnog Cheesecake With Gingersnap Crust is a decadent and festive dessert perfect for celebrating Christmas Eve. This creamy cheesecake combines the rich flavors of traditional eggnog with a spicy gingersnap crust, creating a harmonious blend of holiday tastes in every bite.
The cheesecake is topped with a sprinkle of nutmeg and cinnamon, adding an extra layer of warmth and spice to this delightful dessert. It’s a showstopping dish that will impress your family and guests, making your holiday dinner truly memorable.
This recipe is designed to serve 4-6 people, making it ideal for a small gathering or as part of a larger dessert spread. The gingersnap crust offers a delightful crunch that complements the smooth, velvety texture of the eggnog-infused cheesecake filling.
Whether you’re an experienced baker or trying something new, this recipe is straightforward and easy to follow, guaranteeing that you can create a delicious and impressive dessert with confidence.
Ingredients (Serves 4-6):
- 1 1/2 cups gingersnap cookie crumbs
- 1/4 cup unsalted butter, melted
- 3 (8-ounce) packages cream cheese, softened
- 1 cup granulated sugar
- 3 tablespoons all-purpose flour
- 1 cup eggnog
- 1 teaspoon vanilla extract
- 1/2 teaspoon ground nutmeg
- 1/2 teaspoon ground cinnamon
- 3 large eggs
Instructions:
1. Prepare the Crust: Preheat your oven to 325°F (163°C). In a medium bowl, mix the gingersnap cookie crumbs with the melted butter until the mixture resembles wet sand. Press the mixture firmly into the bottom of a 9-inch springform pan to form an even crust.
Bake the crust for 10 minutes, then remove from the oven and allow it to cool while you prepare the filling.
2. Make the Cheesecake Filling: In a large mixing bowl, beat the softened cream cheese with an electric mixer until smooth and creamy. Gradually add in the granulated sugar and flour, mixing until well combined.
Pour in the eggnog, vanilla extract, nutmeg, and cinnamon, and continue to beat until the mixture is smooth and all ingredients are fully incorporated.
3. Add the Eggs: Add the eggs one at a time, mixing on low speed after each addition just until combined. Be careful not to overmix, as this can incorporate too much air and affect the texture of the cheesecake.
4. Assemble and Bake: Pour the cheesecake filling over the cooled gingersnap crust, spreading it evenly with a spatula. Place the springform pan on a baking sheet to catch any potential drips.
Bake for 50-60 minutes, or until the center is set but still slightly jiggly. Turn off the oven and crack the oven door open, allowing the cheesecake to cool gradually in the oven for about an hour.
5. Chill the Cheesecake: Once cooled, remove the cheesecake from the oven and refrigerate for at least 4 hours, or overnight, to allow it to set completely. This chilling time is essential for achieving the perfect texture.
6. Serve: Before serving, carefully remove the sides of the springform pan. Garnish the top of the cheesecake with a light dusting of nutmeg and cinnamon for extra flavor and presentation. Slice and serve chilled.
Extra Tips: To guarantee a smooth cheesecake with no cracks, make sure all your ingredients, especially the cream cheese and eggs, are at room temperature before you begin.
If you notice cracks forming while baking, try placing a pan of hot water on a lower rack in the oven to create steam, which can help prevent them. Additionally, you can make this cheesecake a day in advance, as it actually tastes better after it has had time to set and the flavors have melded together.
Enjoy your Christmas Eve with this delightful and festive dessert!