

As a mom who loves making holiday meals special, I understand the challenge of finding dishes that please even the tiniest taste buds. If you’re on the hunt for Christmas dinner recipes that the kids will enjoy, you’re in the right place. I’ve gathered a collection of festive dishes like Mini Christmas Tree Pizzas and Cheesy Reindeer Quesadillas. These recipes are sure to make everyone at the table smile. Let’s explore these kid-approved options together.
Mini Christmas Tree Pizzas

Mini Christmas Tree Pizzas are a delightful and festive way to bring some holiday cheer to your table, especially for the little ones. These adorable pizzas aren’t only fun to make but also delicious to eat, combining the classic flavors of pizza with a whimsical holiday twist. Shaped like Christmas trees, they’re sure to be a hit at any holiday gathering or family dinner.
These Mini Christmas Tree Pizzas are perfect for getting kids involved in the kitchen. They can help with cutting out the tree shapes, spreading the sauce, and decorating with their favorite toppings. It’s a creative and interactive way to celebrate the holiday season, and a great opportunity to spend quality time together as a family.
Ingredients (serves 4-6 people):
- 1 pound pizza dough
- 1 cup pizza sauce
- 2 cups shredded mozzarella cheese
- 1/2 cup sliced pepperoni
- 1/2 cup sliced black olives
- 1/2 cup chopped green bell peppers
- 1/4 cup grated Parmesan cheese
- 1 tablespoon olive oil
- 1 teaspoon dried oregano
- 1 teaspoon garlic powder
- Flour, for dusting
Instructions:
- Preheat the Oven: Start by preheating your oven to 425°F (220°C). While the oven is heating, prepare your workspace by lightly dusting a clean surface with flour to prevent the pizza dough from sticking.
- Prepare the Dough: Roll out the pizza dough to about 1/4 inch thickness. Use a Christmas tree-shaped cookie cutter to cut out tree shapes from the dough. Re-roll the scraps as necessary to maximize the number of trees you can cut out.
- Add the Sauce: Place the tree-shaped dough pieces on a baking sheet lined with parchment paper. Spread a tablespoon of pizza sauce on each tree, leaving a small border around the edges.
- Top with Cheese and Toppings: Sprinkle a generous amount of shredded mozzarella cheese over the sauce. Decorate with pepperoni, black olives, and green bell peppers to resemble ornaments and garlands on the trees.
- Season and Bake: Drizzle a little olive oil over the pizzas and sprinkle with Parmesan cheese, dried oregano, and garlic powder. Bake in the preheated oven for 10-12 minutes or until the cheese is melted and bubbly, and the crust is golden brown.
- Serve and Enjoy: Remove the pizzas from the oven and let them cool for a few minutes before serving. These Mini Christmas Tree Pizzas are best enjoyed warm.
Extra Tips: For an extra crispy crust, consider pre-baking the tree-shaped dough for a few minutes before adding the toppings. You can also customize the toppings to suit your family’s preferences—try adding other vegetables like mushrooms or red bell peppers for more color. If you don’t have a tree-shaped cutter, use a knife to carefully cut out tree shapes freehand. Encourage kids to get creative with their decorations for a unique and personalized pizza.
Cheesy Reindeer Quesadillas
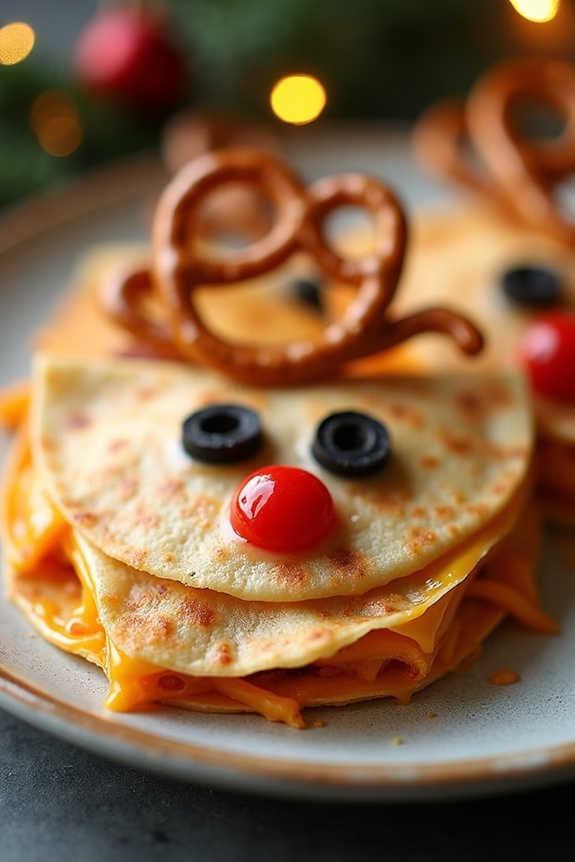
Cheesy Reindeer Quesadillas are a delightful and festive treat that will bring joy to your Christmas dinner table. Perfectly designed for little ones, these fun and tasty quesadillas are shaped like reindeer, complete with pretzel antlers and olive eyes. Not only do they make for a visually appealing dish, but they also offer a delicious combination of gooey cheese and crisp tortillas that kids will love.
Bringing together simplicity and creativity, these quesadillas are a great way to involve children in the kitchen during the holiday season. Making them is an enjoyable activity that can be shared with the whole family, allowing kids to express their creativity while learning basic cooking skills. With their playful presentation and mouthwatering flavor, Cheesy Reindeer Quesadillas are sure to become a holiday favorite.
Ingredients for 4-6 servings:
- 8 medium flour tortillas
- 2 cups shredded cheddar cheese
- 1 cup shredded mozzarella cheese
- 12 black olives, sliced
- 24 mini pretzel twists
- 1 red bell pepper, cut into small circles
- Butter or oil for cooking
- Optional: salsa or sour cream for dipping
Cooking Instructions:
- Prepare the Ingredients: Gather all your ingredients on the kitchen counter. Shred the cheddar and mozzarella cheeses if not already done, slice the olives, and cut the bell pepper into small circles using a small cookie cutter or knife.
- Assemble the Quesadillas: Lay out four tortillas on a flat surface. Spread a layer of cheddar and mozzarella cheese evenly over each tortilla, leaving a small border around the edges.
- Create Reindeer Features: For each tortilla, place two olive slices towards the top to represent the eyes. Position a red bell pepper circle below the eyes for the nose. Use mini pretzel twists to form the antlers by tucking them slightly under the top edge of the tortilla.
- Top with Another Tortilla: Carefully place another tortilla on top of each prepared tortilla, pressing gently to secure the cheeses and toppings in place.
- Cook the Quesadillas: Heat a non-stick skillet over medium heat. Add a small amount of butter or oil to the skillet. Once hot, carefully place one assembled quesadilla into the skillet. Cook for 2-3 minutes on each side, or until the tortillas are golden brown and the cheese has melted.
- Repeat: Remove the cooked quesadilla from the skillet and repeat the cooking process with the remaining quesadillas.
- Serve: Once all quesadillas are cooked, cut each one into half or quarters. Serve warm with optional salsa or sour cream for dipping.
Extra Tips: To make the cooking process smoother, prepare all the ingredients and toppings ahead of time, so assembly is quick and easy. Be creative with the reindeer faces; kids can help personalize their quesadillas with different expressions. If you like a bit of spice, consider adding a sprinkle of chili flakes or jalapeño slices inside the quesadilla for a mild kick. For a healthier alternative, whole wheat tortillas can be used instead of regular flour tortillas.
Santa’s Mac and Cheese Bites
If you’re looking to add a festive touch to your Christmas dinner that will delight the kids, Santa’s Mac and Cheese Bites are the perfect choice. These bite-sized delights aren’t only fun and easy to eat, but they also bring a comforting, cheesy flavor to the table that children love.
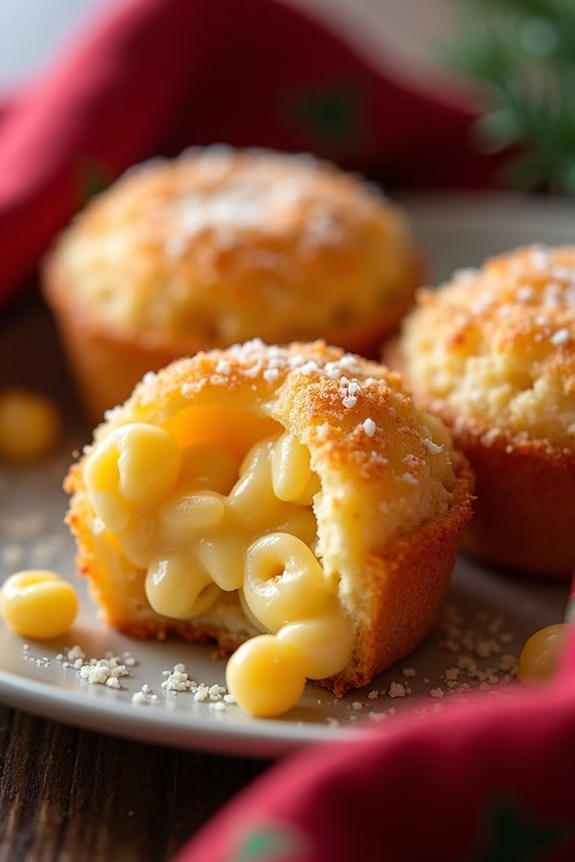
Shaped like little presents, they provide a playful and delicious addition to your holiday menu, making them as much a treat for the eyes as they’re for the taste buds.
This recipe is designed to serve 4-6 people, making it a great choice for family gatherings. The crispy golden crust encases a creamy, cheesy center that’s certain to satisfy. Whether served as an appetizer or a side dish, these Mac and Cheese Bites are bound to be a hit with the younger crowd.
With a few simple ingredients and easy-to-follow steps, you’ll have a dish that’s not only delicious but also quick and fun to prepare.
Ingredients (serving size: 4-6 people):
- 2 cups elbow macaroni
- 2 tablespoons unsalted butter
- 2 tablespoons all-purpose flour
- 1 1/2 cups milk
- 2 cups shredded cheddar cheese
- 1/2 teaspoon salt
- 1/4 teaspoon black pepper
- 1 cup bread crumbs
- 1/4 cup grated Parmesan cheese
- 2 large eggs
- Cooking spray
Instructions:
1. Cook the Macaroni: Begin by cooking the elbow macaroni in a large pot of salted boiling water according to the package instructions. Once cooked, drain the pasta and set it aside.
2. Prepare the Cheese Sauce: In a medium saucepan over medium heat, melt the butter. Once the butter is melted, whisk in the flour, stirring continuously for about 1 minute until a paste forms. Gradually add the milk, whisking continuously to avoid lumps, and cook until the mixture thickens.
Stir in the cheddar cheese, salt, and pepper until the cheese is fully melted and the sauce is smooth.
3. Combine Pasta and Sauce: Add the cooked macaroni to the cheese sauce, mixing well to confirm the pasta is evenly coated with the creamy mixture. Allow it to cool slightly before proceeding to the next step.
4. Form the Bites: Preheat your oven to 375°F (190°C) and lightly grease a mini muffin tin with cooking spray. In a shallow bowl, combine the bread crumbs and Parmesan cheese. In another bowl, beat the eggs.
Form the macaroni and cheese mixture into small balls (about 1 inch in diameter), dip each ball into the beaten eggs, and then roll it in the bread crumb mixture until fully coated.
5. Bake the Bites: Place the coated macaroni balls into the prepared mini muffin tin. Bake in the preheated oven for 15-20 minutes or until the bites are golden brown and crispy on the outside.
Remove from the oven and let cool slightly before serving.
Extra Tips: When forming the macaroni and cheese into balls, it’s helpful to refrigerate the mixture for about 20 minutes to make it easier to handle.
If you’re short on time, you can prepare the macaroni and cheese mixture a day ahead and refrigerate it overnight. Just make sure to let it come to room temperature before forming the balls. Additionally, feel free to experiment with other types of cheese or add-ins like cooked bacon bits or diced ham for extra flavor.
Festive Meatball Skewers
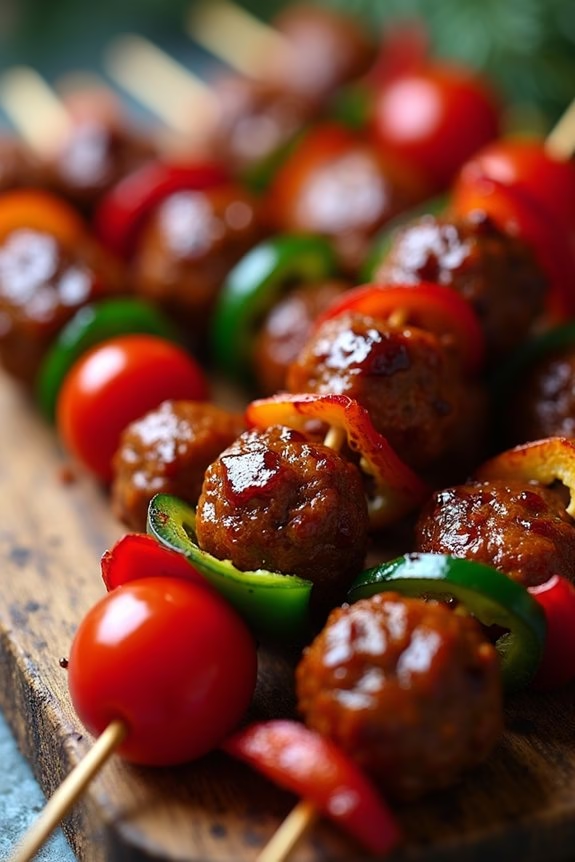
Christmas is a magical time for kids, filled with joy, excitement, and lots of delicious food. One dish that guarantees to captivate their taste buds and imagination is Festive Meatball Skewers. These skewers aren’t only fun to make but also provide a delightful burst of flavors that are perfect for the holiday season. The combination of juicy meatballs, bright vegetables, and a tangy glaze makes this dish a standout on any Christmas dinner table.
Not only are Festive Meatball Skewers appealing to kids’ eyes, but they’re also quite straightforward to prepare. This recipe is a great way to get the little ones involved in the kitchen, allowing them to assist with assembling the skewers. Assembling the ingredients onto the skewers is like creating a piece of art, making the cooking process as enjoyable as the eating experience. Here’s how you can prepare these tasty skewers for a serving size of 4-6 people.
Ingredients:
- 1 pound ground beef or turkey
- 1/2 cup breadcrumbs
- 1/4 cup grated Parmesan cheese
- 1 egg
- 2 cloves garlic, minced
- 1 teaspoon dried oregano
- Salt and pepper to taste
- 1 cup cherry tomatoes
- 1 red bell pepper, cut into 1-inch pieces
- 1 green bell pepper, cut into 1-inch pieces
- 1 red onion, cut into wedges
- 1/2 cup barbecue sauce
- 2 tablespoons honey
- Wooden skewers
Instructions:
- Preheat the oven: Begin by preheating your oven to 400°F (200°C). Line a baking sheet with parchment paper or aluminum foil for easy cleanup.
- Prepare the meatballs: In a large mixing bowl, combine the ground beef or turkey, breadcrumbs, Parmesan cheese, egg, minced garlic, dried oregano, salt, and pepper. Mix thoroughly until all ingredients are well combined.
- Shape the meatballs: Using your hands, shape the mixture into small, evenly-sized meatballs, about 1 inch in diameter. Place them on the prepared baking sheet.
- Bake the meatballs: Bake the meatballs in the preheated oven for about 15-20 minutes, or until they’re cooked through and slightly browned on the outside.
- Prepare the glaze: While the meatballs are baking, mix the barbecue sauce and honey in a small saucepan over medium heat. Stir occasionally until the mixture is heated through and well combined. Remove from heat and set aside.
- Assemble the skewers: Once the meatballs are done, remove them from the oven and allow them to cool slightly. Take a wooden skewer and begin threading a cherry tomato, a piece of red bell pepper, a meatball, a piece of green bell pepper, and a wedge of red onion. Repeat the process until the skewer is filled, leaving some space at the ends for handling.
- Glaze the skewers: Brush the assembled skewers generously with the prepared honey-barbecue glaze. Confirm that each component on the skewer is well coated.
- Final bake: Return the glazed skewers to the oven and bake for an additional 5-7 minutes, allowing the glaze to caramelize slightly and the vegetables to become tender.
Extra Tips:
To prevent the wooden skewers from burning in the oven, soak them in water for at least 30 minutes before assembling the skewers. This dish can also be customized by adding other seasonal vegetables like zucchini or mushrooms, depending on your family’s preferences.
If you prefer a spicier kick, consider adding a pinch of chili flakes to the glaze mixture. These Festive Meatball Skewers can serve as a delightful appetizer or a fun main course, making them a versatile addition to your Christmas dinner spread.
Snowman Mashed Potato Cups

Creating festive and fun meals for kids during the Christmas season can be a delightful experience. Snowman Mashed Potato Cups are a whimsical addition to your holiday dinner table that both children and adults will cherish. These adorable snowman-shaped servings of creamy mashed potatoes not only taste delicious but also add a playful element to your holiday menu.
The simple steps make it easy for kids to get involved in the kitchen, turning meal preparation into a fun family activity. Perfect for a serving size of 4-6 people, these Snowman Mashed Potato Cups are crafted using smooth, buttery mashed potatoes, and decorated with a few simple ingredients to bring the snowman to life.
Whether served as a side dish or a centerpiece for a kid-friendly Christmas meal, these Snowman Mashed Potato Cups will surely bring smiles and warm hearts. Let’s plunge into the ingredients and steps needed to make this charming holiday dish.
Ingredients:
- 6 large potatoes
- 4 tablespoons butter
- 1 cup milk
- Salt to taste
- Pepper to taste
- 1/4 cup grated cheese
- 1/4 cup chopped chives
- 12 black olive slices (for eyes)
- 12 carrot slices (for noses)
- 12 cherry tomatoes (for buttons)
- 1/4 cup peas (for buttons)
Cooking Instructions:
- Prepare the Potatoes: Begin by peeling the potatoes and cutting them into even chunks. This guarantees they cook evenly. Place the potato chunks in a large pot and cover with cold water. Add a pinch of salt to the water and bring to a boil over medium-high heat.
- Cook the Potatoes: Once boiling, reduce the heat to a simmer and cook the potatoes for 15-20 minutes, or until they’re fork-tender. Drain the potatoes thoroughly in a colander.
- Mash the Potatoes: Return the drained potatoes to the pot. Add butter and milk, then mash the potatoes using a potato masher or electric mixer until smooth and creamy. Season with salt and pepper to taste, and stir in the grated cheese for extra flavor.
- Assemble the Snowmen: Preheat your oven to 350°F (175°C). Scoop the mashed potatoes into greased muffin tins, filling each cup to form a dome shape. Use your hands to smooth the tops, creating a snowman head in each cup.
- Decorate the Snowmen: Use olive slices for the eyes, carrot slices for the noses, and cherry tomatoes for the buttons. Place peas around the cherry tomatoes for additional buttons. Sprinkle chopped chives on top to simulate a wintery effect.
- Bake the Snowmen: Place the muffin tin in the preheated oven and bake for 10-15 minutes until the tops are slightly golden and the cheese has melted.
- Serve and Enjoy: Allow the Snowman Mashed Potato Cups to cool slightly before carefully removing them from the muffin tin. Serve warm and watch the delight on your kids’ faces!
Extra Tips:
When preparing Snowman Mashed Potato Cups, verify the mashed potatoes are smooth and slightly firm so they hold their shape well in the muffin tin. If your mixture seems too runny, allow it to cool slightly, which will help firm it up.
For a more colorful display, consider using different colored vegetables for decorations. Additionally, if you want to prepare these ahead of time, you can assemble the snowmen and refrigerate them until you’re ready to bake, making holiday meal preparation a breeze!
Holiday Chicken Tenders
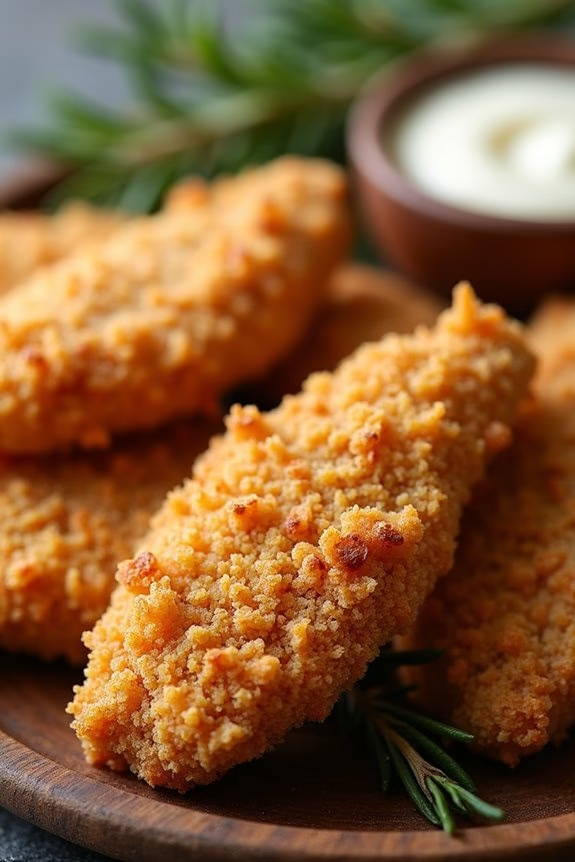
When it comes to Christmas dinner recipes for kids, Holiday Chicken Tenders are a delightful choice that will surely bring joy to the table. These tenders are crispy, flavorful, and perfect for little hands to enjoy. The holiday twist comes from a subtle blend of seasonal spices that elevate the classic chicken tenders, making them a festive dish.
Whether served as a main course or a fun appetizer, these tenders are bound to be a hit with both kids and adults alike. Creating the perfect Holiday Chicken Tenders involves a balance of texture and taste. The chicken is coated in a seasoned breadcrumb mixture that provides a satisfying crunch, while the meat remains juicy and tender inside.
This recipe is simple enough for a holiday dinner, yet special enough to be memorable. Here’s how you can make this delightful dish for a serving size of 4-6 people.
Ingredients:
- 1.5 pounds of chicken tenderloins
- 1 cup all-purpose flour
- 1 teaspoon salt
- 1/2 teaspoon black pepper
- 2 teaspoons garlic powder
- 2 teaspoons onion powder
- 1 teaspoon paprika
- 1 teaspoon dried thyme
- 1 teaspoon dried rosemary
- 2 large eggs
- 1 tablespoon milk
- 2 cups seasoned breadcrumbs
- 1/2 cup grated Parmesan cheese
- Vegetable oil for frying
Instructions:
- Prepare the Chicken: Start by patting the chicken tenderloins dry with paper towels. This helps the coating stick better and guarantees a crispy texture.
- Set Up Coating Stations: In a shallow dish, combine the flour, salt, pepper, garlic powder, onion powder, paprika, thyme, and rosemary. In another bowl, whisk together the eggs and milk. In a third dish, mix the breadcrumbs and Parmesan cheese.
- Coat the Chicken: Dredge each chicken tenderloin in the flour mixture, shaking off any excess. Then dip it into the egg mixture, making sure it’s completely coated. Finally, press the chicken into the breadcrumb mixture, covering it thoroughly.
- Heat the Oil: Pour about 1 inch of vegetable oil into a large skillet and heat it over medium-high heat. The oil is ready when a small piece of bread dropped into it sizzles immediately.
- Fry the Chicken: Carefully place the coated chicken tenders into the hot oil, cooking them in batches to avoid overcrowding. Fry each side for about 3-4 minutes until golden brown and cooked through.
- Drain and Serve: Once cooked, remove the chicken tenders from the oil and drain them on paper towels. Serve them hot with your favorite dipping sauce.
Extra Tips:
For a healthier version, you can bake the chicken tenders instead of frying them. Preheat the oven to 400°F (200°C) and place the coated chicken on a baking sheet lined with parchment paper. Lightly spray the tenders with cooking spray and bake for 15-20 minutes, flipping halfway through, until they’re cooked through and crispy.
Additionally, you can add a holiday touch by incorporating a bit of nutmeg or cinnamon into the breadcrumb mixture for a warm, festive flavor.
Christmas Veggie Pinwheels
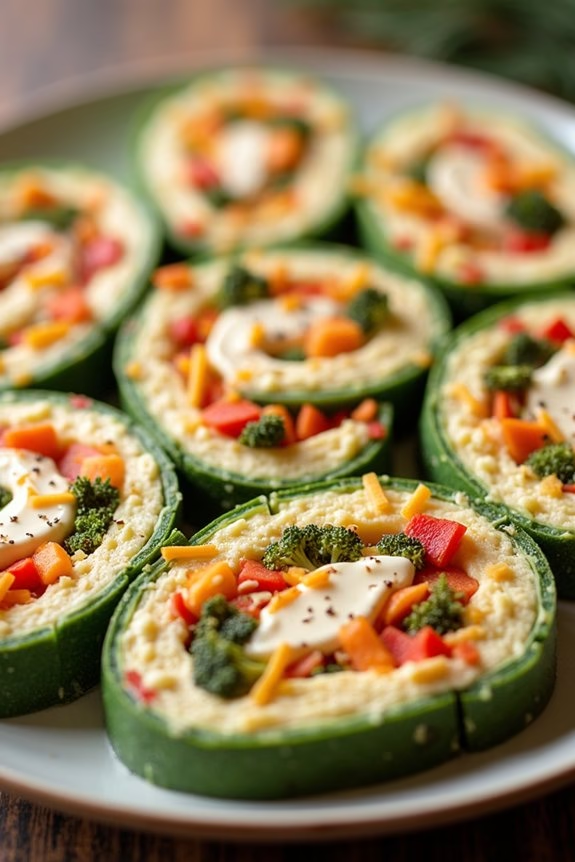
Christmas is the perfect time to get creative in the kitchen with your kids, and these Christmas Veggie Pinwheels are a delightful way to do just that! Not only are they colorful and fun to make, but they also offer a healthy bite amidst the usual holiday treats.
These pinwheels are perfect as an appetizer or a fun addition to your holiday spread, and they’re sure to be a hit with both kids and adults alike. The festive look of the pinwheels, thanks to the vibrant veggies, makes them a fantastic way to promote kids to eat their greens during the holiday season.
The beauty of Christmas Veggie Pinwheels is in their simplicity and versatility. You can use a variety of veggies, cheeses, and spreads, allowing you and your kids to customize them to your taste preferences. The preparation process is quick and easy, making it an ideal recipe for little hands to help with.
They’re a great way to involve children in the holiday cooking process and to instill an appreciation for healthy eating. Best of all, these pinwheels can be prepared in advance, freeing up more time to spend with your family during the festivities.
Ingredients for 4-6 People:
- 4 large flour tortillas (spinach or tomato-flavored for extra color)
- 1 cup cream cheese, softened
- 1/2 cup sour cream
- 1 red bell pepper, finely chopped
- 1 green bell pepper, finely chopped
- 1/2 cup shredded carrots
- 1/2 cup chopped broccoli florets
- 1/2 cup shredded cheddar cheese
- 1 tablespoon ranch dressing mix
- Salt and pepper to taste
Cooking Instructions:
- Prepare the Spread: In a medium bowl, combine the softened cream cheese, sour cream, and ranch dressing mix. Stir until the mixture is smooth and well-blended. This will serve as the flavorful base for your pinwheels.
- Add the Veggies: Stir in the chopped red and green bell peppers, shredded carrots, chopped broccoli, and shredded cheddar cheese into the cream cheese mixture. Mix thoroughly to confirm the veggies are evenly distributed throughout the spread.
- Assemble the Pinwheels: Lay out the flour tortillas on a clean working surface. Divide the veggie-cream cheese mixture evenly among the tortillas, spreading it out in a thin, even layer, leaving about a 1/2 inch border around the edges.
- Roll the Tortillas: Starting from one edge, carefully roll the tortilla tightly into a log. Try to roll it as tightly as possible to confirm the pinwheels hold together when sliced.
- Chill the Rolls: Wrap each rolled tortilla in plastic wrap and refrigerate for at least 1 hour. This helps the rolls set and makes them easier to slice.
- Slice and Serve: After chilling, unwrap the rolls and slice each one into 1-inch pinwheels. Arrange them on a platter, and they’re ready to serve!
Extra Tips:
For the best results, make sure that the cream cheese is fully softened before mixing; this will make it easier to blend with the other ingredients.
Feel free to get creative with the veggies; cucumbers, spinach, or shredded lettuce can be great additions. To make these pinwheels even more festive, use spinach and tomato-flavored tortillas for a red and green holiday effect.
Cranberry and Apple Stuffed Turkey Sliders
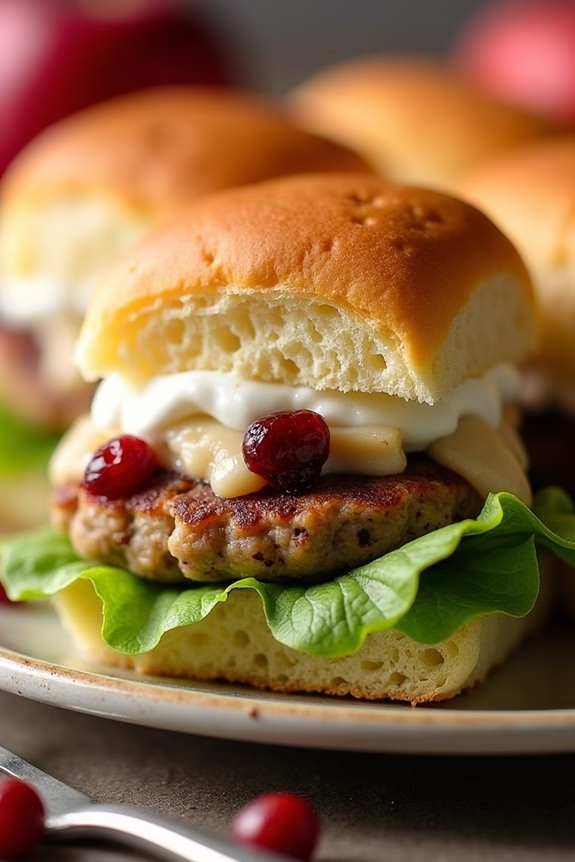
Cranberry and Apple Stuffed Turkey Sliders are the perfect festive dish for your Christmas dinner, especially when catering to the younger crowd. These sliders offer a delightful combination of sweet and savory flavors, making them not only delicious but also an exciting way to introduce kids to traditional holiday ingredients. The tender turkey patties are infused with the tangy goodness of cranberries and the subtle sweetness of apples, creating a miniature feast in every bite.
These sliders aren’t only fun to eat but also straightforward to prepare, making them an excellent option for a busy holiday kitchen. The cranberry and apple stuffing adds a revitalizing twist that brightens the flavors of the turkey, guaranteeing a memorable and tasty experience for the little ones. Serve them with a side of your favorite holiday vegetables or a simple green salad for a complete meal that’s sure to be a hit at the kids’ table.
Ingredients (Serves 4-6)
- 1 pound ground turkey
- 1/2 cup dried cranberries, chopped
- 1/2 cup apple, finely diced
- 1/4 cup breadcrumbs
- 1 egg
- 1 tablespoon fresh sage, chopped
- 1 teaspoon salt
- 1/2 teaspoon black pepper
- 1 tablespoon olive oil
- 6 slider buns
- Lettuce leaves
- Mayonnaise (optional)
Cooking Instructions
- Prepare the Turkey Mixture: In a large mixing bowl, combine the ground turkey, chopped cranberries, diced apple, breadcrumbs, egg, fresh sage, salt, and black pepper. Mix well until all ingredients are evenly incorporated. This mixture will be the base for your turkey patties, with the cranberries and apples providing bursts of flavor.
- Shape the Patties: Divide the mixture into 6 equal portions. Shape each portion into a small patty, roughly the size of your slider buns. Confirm the patties are uniform in size to guarantee even cooking.
- Cook the Patties: Heat the olive oil in a large skillet over medium heat. Add the turkey patties and cook for about 4-5 minutes per side, or until they’re fully cooked and golden brown. The internal temperature should reach 165°F (75°C) to confirm they’re safe to eat.
- Assemble the Sliders: Once the patties are cooked, let them rest for a couple of minutes. Meanwhile, lightly toast the slider buns. Place a lettuce leaf on the bottom half of each bun, followed by a turkey patty. Top with a dollop of mayonnaise, if desired, and finish with the top half of the bun.
- Serve: Arrange the sliders on a platter and serve warm. These sliders can be enjoyed on their own or paired with a simple side dish for a complete meal.
Extra Tips
When preparing Cranberry and Apple Stuffed Turkey Sliders, it’s important to finely chop the cranberries and apples so they integrate well into the turkey mixture. This guarantees that each bite is filled with flavor without overwhelming the patty’s structure.
If you want to add an extra festive touch, consider adding a hint of nutmeg or cinnamon to the mixture for a more aromatic profile. Additionally, if you’re making these ahead of time, you can keep the cooked patties warm in an oven set to low heat until you’re ready to serve. This guarantees they remain juicy and flavorful.
Sweet Potato Christmas Stars
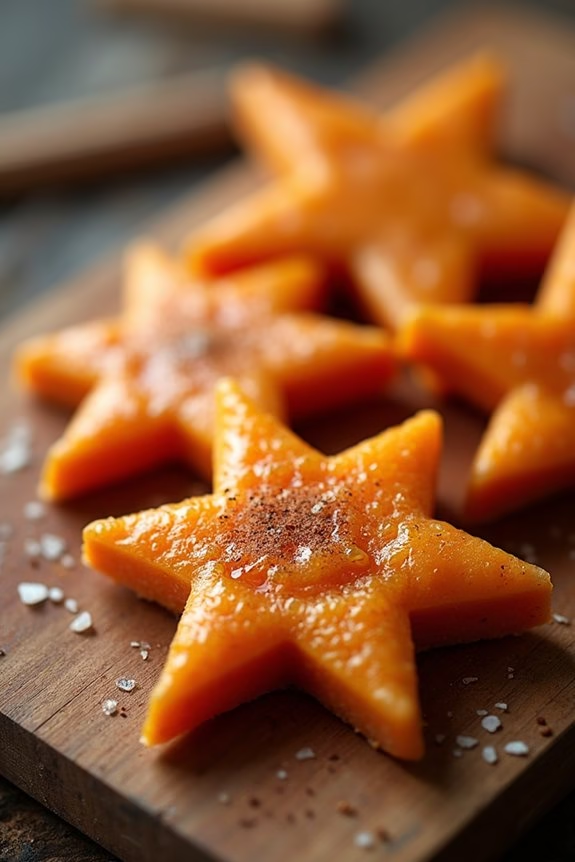
Sweet Potato Christmas Stars add a festive touch to your holiday dinner while also being a fun and nutritious option for kids. This delightful dish transforms ordinary sweet potatoes into star-shaped treats that are both visually appealing and delicious. Packed with vitamins and a hint of natural sweetness, these stars are sure to be a hit with children and adults alike.
Whether served as a side dish or a snack, they bring a cheerful, holiday-themed twist to your table. The preparation of Sweet Potato Christmas Stars is simple and engaging, making it a perfect activity to involve kids in the kitchen. The process includes cutting the sweet potatoes into star shapes, which can be a fun opportunity for children to use cookie cutters and express their creativity.
Once baked to golden perfection, these stars can be enjoyed on their own or paired with a dipping sauce of your choice. Let’s plunge into the recipe to create these delightful stars for a serving size of 4-6 people.
Ingredients:
- 4 large sweet potatoes
- 2 tablespoons olive oil
- 1 teaspoon ground cinnamon
- 1 teaspoon salt
- 1/2 teaspoon black pepper
- Optional: honey or maple syrup for drizzling
Instructions:
- Preheat the Oven: Begin by preheating your oven to 400°F (200°C) to make certain it’s ready for baking once the sweet potatoes are prepared.
- Prepare the Sweet Potatoes: Peel the sweet potatoes and slice them into 1/4-inch thick rounds. Using a star-shaped cookie cutter, cut out star shapes from each round. This step is perfect for kids to help with, as they can have fun creating the stars.
- Season the Stars: In a large bowl, gently toss the sweet potato stars with olive oil, cinnamon, salt, and black pepper. Make sure each star is evenly coated with the seasoning for consistent flavor.
- Arrange on Baking Sheet: Line a baking sheet with parchment paper and arrange the sweet potato stars in a single layer. Ensure they aren’t overlapping to promote even cooking.
- Bake the Stars: Place the baking sheet in the preheated oven and bake for 20-25 minutes, flipping the stars halfway through the cooking time. They should be golden brown and tender when done.
- Serve and Enjoy: Once baked, remove the sweet potato stars from the oven and let them cool slightly. For a sweeter touch, drizzle with honey or maple syrup before serving.
Extra Tips:
When cutting the sweet potatoes, try using a variety of star-shaped cookie cutters to create stars of different sizes for added visual interest.
If you want to experiment with flavors, consider adding a dash of nutmeg or a sprinkle of brown sugar to the seasoning mix.
Also, make sure to keep an eye on the stars during baking, as oven temperatures can vary, and you want to avoid overcooking them.
Finally, storing any leftovers in an airtight container in the refrigerator will keep them fresh for up to two days.
Rudolph’s Carrot Fries
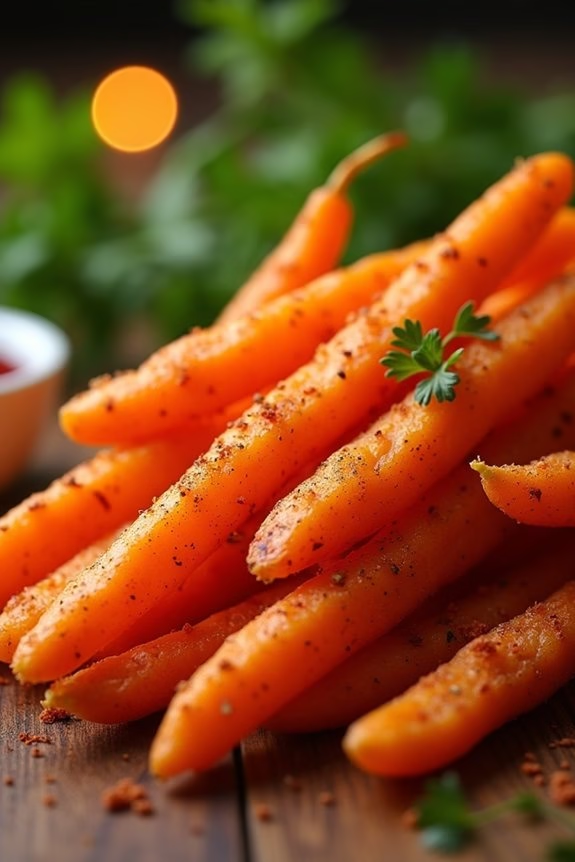
Rudolph’s Carrot Fries are a fun and festive way to add a healthy twist to Christmas dinner, especially for the little ones. These carrot fries aren’t only delicious and nutritious but also incredibly easy to prepare, making them a perfect side dish or snack for kids during the holiday season.
The bright orange color of the carrots will remind children of Rudolph’s famous nose, adding an element of fun and excitement to the meal. Carrots are naturally sweet, and when baked, they become even sweeter and crispier, making them a delightful treat for kids.
This recipe for Rudolph’s Carrot Fries is designed to serve 4-6 people, guaranteeing there’s enough to go around for the whole family. Whether your children are picky eaters or enthusiastic foodies, these carrot fries are sure to be a hit at your Christmas table.
Ingredients (for 4-6 servings):
- 6 large carrots
- 2 tablespoons olive oil
- 1 teaspoon salt
- 1/2 teaspoon black pepper
- 1 teaspoon garlic powder
- 1 teaspoon paprika
- 1 tablespoon chopped fresh parsley (optional)
- Ketchup or your favorite dipping sauce (optional)
Cooking Instructions:
- Preheat the Oven: Begin by preheating your oven to 425°F (220°C). This temperature will help the carrot fries cook evenly and develop a crispy exterior.
- Prepare the Carrots: Wash and peel the carrots. Cut each carrot into thin strips, resembling the shape of traditional fries. Try to keep them similar in size to guarantee even cooking.
- Season the Carrots: Place the carrot strips in a large bowl. Drizzle the olive oil over them, then add the salt, black pepper, garlic powder, and paprika. Toss the carrots thoroughly to guarantee each piece is evenly coated with the seasoning.
- Bake the Fries: Line a baking sheet with parchment paper to prevent sticking. Spread the seasoned carrot strips in a single layer on the baking sheet. Bake in the preheated oven for about 20-25 minutes, turning them halfway through, until they’re tender and slightly crispy.
- Garnish and Serve: Once the carrot fries are baked to perfection, remove them from the oven and let them cool slightly. If desired, sprinkle fresh parsley over the fries for a pop of color and added flavor. Serve warm with ketchup or your favorite dipping sauce on the side.
Extra Tips:
To guarantee the fries are crispy, avoid overcrowding the baking sheet. If necessary, use two baking sheets to give the carrots enough space to roast properly.
Additionally, you can experiment with different seasonings to suit your child’s taste. For a sweeter version, try adding a sprinkle of cinnamon and a drizzle of honey before baking. Remember, the key to perfect carrot fries is cutting them evenly, so they cook at the same rate and achieve that delightful crispiness.
Holiday Pasta With Cheese Sauce
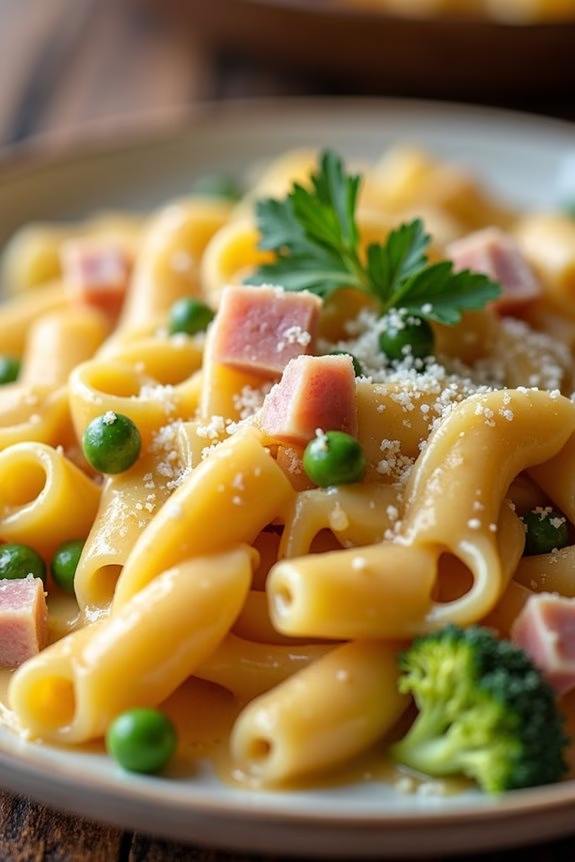
Creating a festive atmosphere during the holiday season isn’t just about decorations and presents; it’s also about the food we share with our loved ones. One dish that can bring smiles to both adults and children alike is a comforting Holiday Pasta with Cheese Sauce. This simple yet delicious recipe is perfect for kids and can easily become a staple at your Christmas dinner table. The creamy cheese sauce paired with perfectly cooked pasta is sure to delight even the pickiest of eaters.
This recipe is designed to serve 4-6 people and is straightforward enough for kids to assist with. It’s a great way to get the little ones involved in the kitchen during the holiday season. The cheese sauce is rich and creamy, with a hint of nutmeg to bring out the festive flavors. You can even add a touch of color by mixing in some blanched vegetables or ham to give it a more holiday appeal.
Ingredients (serving size: 4-6 people):
- 1 pound (16 oz) of pasta (such as penne or macaroni)
- 2 cups of shredded cheddar cheese
- 1 cup of grated Parmesan cheese
- 2 cups of whole milk
- 2 tablespoons of unsalted butter
- 2 tablespoons of all-purpose flour
- 1/2 teaspoon of salt
- 1/4 teaspoon of ground black pepper
- 1/4 teaspoon of ground nutmeg
- Optional: 1 cup of blanched broccoli or peas
- Optional: 1/2 cup of diced cooked ham
Cooking Instructions:
- Cook the Pasta: Begin by bringing a large pot of salted water to a boil. Add the pasta and cook according to the package instructions until al dente. Once cooked, drain the pasta and set it aside.
- Prepare the Cheese Sauce: In a medium saucepan, melt the butter over medium heat. Add the flour and whisk continuously for about 1-2 minutes until the mixture is smooth and bubbly, forming a roux.
- Incorporate the Milk: Gradually add the milk to the roux, whisking constantly to prevent lumps from forming. Continue to cook and stir until the mixture thickens, which should take about 5-7 minutes.
- Add the Cheese: Reduce the heat to low and gradually add the cheddar and Parmesan cheeses to the milk mixture, stirring until the cheese is completely melted and the sauce is smooth.
- Season the Sauce: Stir in the salt, pepper, and nutmeg. Taste and adjust the seasoning if necessary.
- Combine the Pasta and Sauce: In a large serving bowl, combine the cooked pasta with the cheese sauce. If using, gently fold in the blanched vegetables or diced ham to add color and flavor.
- Serve: Serve the pasta immediately while it’s warm and creamy, garnishing with additional Parmesan cheese if desired.
Extra Tips:
When preparing the cheese sauce, be sure to keep the heat at a medium to low setting to prevent the cheese from curdling or burning. It’s also important to whisk continuously when adding the milk to guarantee a smooth texture.
For a fun twist, you can let the kids choose their favorite pasta shapes or add their preferred veggies to make the dish more personalized. If you want to prepare ahead, the cheese sauce can be made in advance and stored in the refrigerator for up to two days. Just reheat gently before combining with the pasta.
Gingerbread Pancakes With Maple Syrup
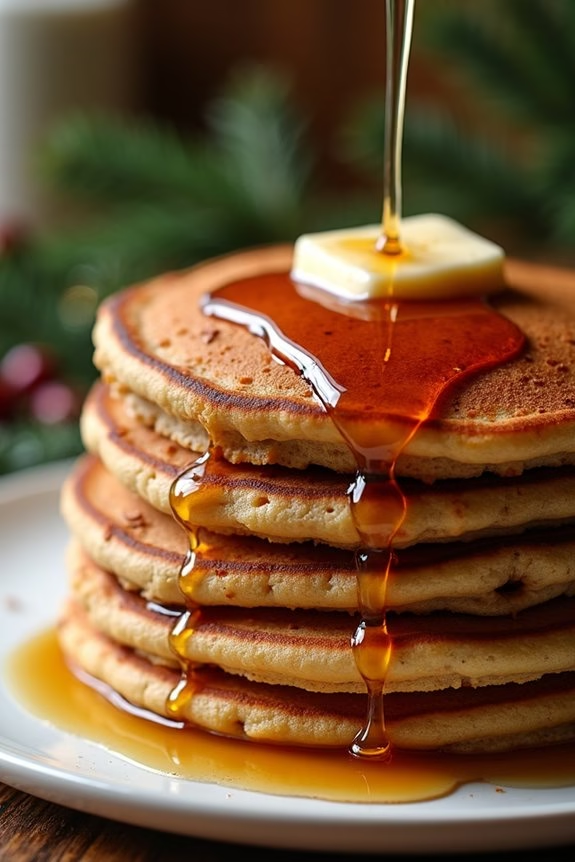
Gingerbread Pancakes With Maple Syrup are a delightful twist on traditional pancakes, perfect for bringing festive cheer to your Christmas morning. These pancakes are infused with the warm and cozy spices of gingerbread, offering a comforting and aromatic experience. With their fluffy texture and rich flavor, they pair perfectly with maple syrup, making them a hit among both children and adults alike.
Whether you’re looking to start a new holiday tradition or simply want to treat your kids to a special breakfast, these pancakes are bound to become a family favorite. Not only do Gingerbread Pancakes With Maple Syrup taste fantastic, but they’re also easy to make, guaranteeing a stress-free cooking experience even amidst the holiday hustle and bustle.
The combination of ingredients like cinnamon, ginger, and molasses creates a deliciously spiced batter that cooks up into light and airy pancakes. Served with a generous drizzle of maple syrup, these pancakes offer the perfect balance of sweetness and spice. Ready in just a few steps, this recipe will have you serving up a memorable breakfast that will delight your little ones and set the tone for a joyful day.
Ingredients for 4-6 servings:
- 2 cups all-purpose flour
- 2 tablespoons granulated sugar
- 2 teaspoons baking powder
- 1 teaspoon baking soda
- 1 teaspoon ground cinnamon
- 1 teaspoon ground ginger
- 1/2 teaspoon ground nutmeg
- 1/2 teaspoon salt
- 1 1/2 cups buttermilk
- 2 large eggs
- 1/4 cup molasses
- 1/4 cup unsalted butter, melted
- 1 teaspoon vanilla extract
- Maple syrup, for serving
Cooking Instructions:
- Prepare the Dry Ingredients: In a large mixing bowl, whisk together the flour, sugar, baking powder, baking soda, cinnamon, ginger, nutmeg, and salt. Confirm that all dry ingredients are thoroughly combined to prevent lumps in the batter.
- Mix the Wet Ingredients: In a separate bowl, combine the buttermilk, eggs, molasses, melted butter, and vanilla extract. Whisk these ingredients together until they’re well incorporated and smooth.
- Combine Wet and Dry Ingredients: Slowly pour the wet ingredients into the dry ingredients, stirring gently until just combined. Be careful not to overmix the batter; a few lumps are okay. Overmixing can result in tough pancakes.
- Preheat and Grease the Skillet: Heat a non-stick skillet or griddle over medium heat. Lightly grease it with butter or cooking spray to prevent the pancakes from sticking.
- Cook the Pancakes: Pour about 1/4 cup of batter onto the skillet for each pancake. Cook until bubbles form on the surface and the edges look set, approximately 2-3 minutes. Flip the pancakes and cook for an additional 1-2 minutes, or until golden brown and cooked through.
- Serve: Remove pancakes from the skillet and keep warm in a low oven until all pancakes are cooked. Serve warm with a generous drizzle of maple syrup.
Extra Tips:
For an extra festive touch, you can sprinkle the pancakes with powdered sugar or serve them with a dollop of whipped cream. If you want to add some texture, consider mixing in a handful of chocolate chips or chopped nuts into the batter.
When cooking, confirm your skillet isn’t too hot to prevent burning the pancakes; adjust the heat as necessary. Also, make sure your molasses is fresh and not expired for the best flavor. Enjoy these pancakes fresh and warm for the best taste and experience.
Chocolate Peppermint Ice Cream Sandwiches

Christmas is a time for joy, family gatherings, and indulging in festive treats. If you’re looking for a delightful dessert that will light up the faces of kids and adults alike, Chocolate Peppermint Ice Cream Sandwiches are the perfect choice.
These sandwiches combine the rich, deep flavors of chocolate cookies with the invigorating, minty coolness of peppermint ice cream, creating a heavenly contrast that’s both satisfying and festive. Not only are they delicious, but they’re also easy to make, making them a great activity for kids to join in on the holiday fun.
This dessert is ideal for holiday parties or family dinners, providing a sweet end to your Christmas meal. Kids will love assembling the sandwiches and rolling them in colorful sprinkles or crushed candy canes for a little extra holiday magic. Plus, they can be made ahead of time and stored in the freezer until you’re ready to serve, guaranteeing you have one less thing to worry about during holiday preparations.
Here’s everything you’ll need to make Chocolate Peppermint Ice Cream Sandwiches for a serving size of 4-6 people.
Ingredients
- 1 cup all-purpose flour
- 1/2 cup unsweetened cocoa powder
- 1/2 teaspoon baking soda
- 1/4 teaspoon salt
- 1/2 cup unsalted butter, softened
- 1/2 cup granulated sugar
- 1/4 cup packed brown sugar
- 1 large egg
- 1 teaspoon vanilla extract
- 1 quart peppermint ice cream
- 1/2 cup crushed candy canes or peppermint candies
- Optional: red and green sprinkles for decoration
Instructions
1. Prepare the Cookie Dough: Preheat your oven to 350°F (175°C). In a medium bowl, whisk together the flour, cocoa powder, baking soda, and salt. In a separate large bowl, beat the softened butter with both sugars using an electric mixer until the mixture is light and fluffy.
Add the egg and vanilla extract, and beat until well combined. Gradually add the dry ingredients to the wet ingredients, mixing until just combined.
2. Shape and Bake Cookies: Roll the dough into tablespoon-sized balls and place them on a baking sheet lined with parchment paper, spacing them about 2 inches apart. Flatten each ball slightly with your fingers.
Bake for 8-10 minutes, or until the edges are set. Remove the cookies from the oven and let them cool on the baking sheet for 5 minutes before transferring them to a wire rack to cool completely.
3. Assemble the Ice Cream Sandwiches: Once your cookies are completely cooled, take the peppermint ice cream out of the freezer to soften slightly. Using an ice cream scoop, place a generous scoop of ice cream on the flat side of one cookie.
Top with another cookie, flat side down, pressing gently to spread the ice cream to the edges.
4. Decorate the Sandwiches: Roll the edges of the ice cream sandwiches in crushed candy canes or peppermint candies. For extra flair, you can also use red and green sprinkles.
This step is perfect for kids to help with and adds a festive touch.
5. Freeze Before Serving: Place the assembled sandwiches on a baking sheet and freeze for at least 1 hour before serving. This step will guarantee the ice cream is firm and the sandwiches hold together when eaten.
Extra Tips
To make your Chocolate Peppermint Ice Cream Sandwiches even more special, consider using homemade peppermint ice cream if time allows.
Also, when rolling and shaping the cookie dough, try to make each ball as uniform as possible for consistent sandwich sizes. If you need to store these sandwiches for an extended period, wrap each one individually in plastic wrap and keep them in an airtight container in the freezer.
This will help maintain their freshness and prevent freezer burn. Enjoy your festive holiday treat!