The holiday season is upon us, and I’ve gathered 13 Christmas dinner recipes that will wow your guests while keeping things stress-free in the kitchen. Think of an herb-crusted prime rib that’s both luxurious and straightforward, or a honey-glazed ham that takes center stage with ease. My dinner table wouldn’t be complete without balsamic roasted Brussels sprouts and creamy garlic mashed potatoes. Are you ready to elevate your festive meal into something truly special? Let’s explore the secrets behind these effortless dishes together.
Herb-Crusted Prime Rib
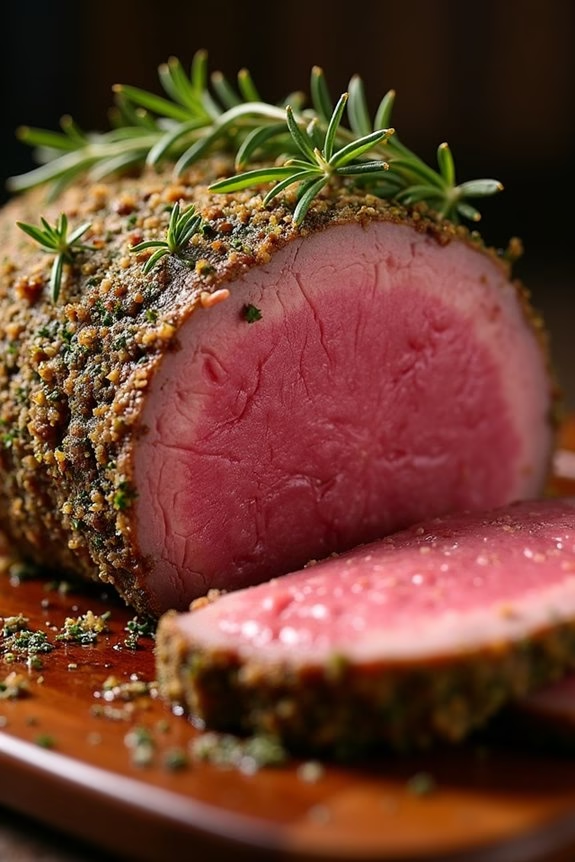
Indulge in a luxurious and festive meal with this Herb-Crusted Prime Rib, perfect for your Christmas dinner table. This recipe combines the rich, succulent flavor of a prime rib roast with a fragrant blend of fresh herbs, creating a mouthwatering crust that enhances the natural taste of the meat.
The prime rib is often considered the pinnacle of beef cuts for special occasions, and when cooked to perfection, it delivers a tender and juicy center with a crispy, flavorful exterior. This recipe is designed to serve 4-6 people, making it an ideal choice for an intimate holiday gathering.
The herb crust is made using fresh rosemary, thyme, and parsley, blended with garlic and olive oil to form a paste that infuses the roast with robust flavors. Whether you’re a seasoned cook or a culinary novice, follow these steps to create an unforgettable centerpiece for your Christmas feast.
Ingredients (Serves 4-6):
- 1 bone-in prime rib roast (about 4-5 pounds)
- 3 tablespoons olive oil
- 4 cloves garlic, minced
- 2 tablespoons fresh rosemary, chopped
- 2 tablespoons fresh thyme, chopped
- 2 tablespoons fresh parsley, chopped
- 2 teaspoons salt
- 1 teaspoon black pepper
Cooking Instructions:
- Prepare the Roast: Take the prime rib roast out of the refrigerator and let it sit at room temperature for about 1 hour. This helps the meat cook more evenly.
- Preheat the Oven: Preheat your oven to 450°F (232°C). Adjust the oven rack to the lower third position to accommodate the size of the roast.
- Make the Herb Paste: In a small bowl, mix together the olive oil, minced garlic, chopped rosemary, thyme, parsley, salt, and pepper until well combined. This will form a thick herb paste.
- Apply the Herb Crust: Pat the prime rib dry with paper towels. Rub the herb paste generously over the entire surface of the roast, ensuring it’s evenly coated.
- Roast the Prime Rib: Place the roast bone-side down in a roasting pan. Insert a meat thermometer into the thickest part of the roast, ensuring it doesn’t touch the bone. Roast in the preheated oven for 20 minutes to develop a crust.
- Adjust the Oven Temperature: After 20 minutes, reduce the oven temperature to 325°F (163°C). Continue roasting until the thermometer reads 120°F (49°C) for medium-rare, approximately 1.5-2 hours, depending on the size of the roast.
- Rest the Meat: Once the desired temperature is reached, remove the roast from the oven and transfer it to a cutting board. Tent it loosely with aluminum foil and let it rest for at least 20 minutes. This allows the juices to redistribute throughout the meat.
- Carve and Serve: Carefully carve the prime rib into slices and serve immediately. Pair with your favorite side dishes for a complete Christmas dinner.
Extra Tips:
For the best results, purchase a high-quality prime rib from a trusted butcher. If you’re aiming for a different level of doneness, adjust the final internal temperature accordingly—130°F (54°C) for medium and 140°F (60°C) for medium-well.
Always use a meat thermometer for accurate results, and remember that the meat will continue to cook slightly while resting. For added flavor, consider adding a splash of red wine or beef broth to the roasting pan during the final stages of cooking, which can also be used to make a simple pan sauce.
Honey-Glazed Ham

For many, Christmas dinner is incomplete without a succulent, flavorful ham taking center stage on the dinner table. This Honey-Glazed Ham recipe promises to deliver a moist, tender ham with a sweet and sticky glaze that will delight your taste buds and impress your guests. The combination of honey, brown sugar, and spices creates a perfect balance of sweet and savory, guaranteeing each slice is as delicious as the last.
This recipe serves 4-6 people, making it ideal for a family gathering or a small holiday celebration. The preparation is straightforward, requiring only a few simple ingredients to create a dish that’s bursting with flavor. The key to a perfect honey-glazed ham is in the careful application of the glaze and the slow roasting process, which allows the flavors to fully infuse the meat, resulting in a holiday dish that’s both classic and memorable.
Ingredients:
- 1 (4-5 pound) fully cooked bone-in ham
- 1 cup honey
- 1 cup brown sugar
- 1/4 cup Dijon mustard
- 1/4 cup apple cider vinegar
- 1/2 teaspoon ground cinnamon
- 1/4 teaspoon ground cloves
- 1/4 teaspoon ground nutmeg
- 1/4 teaspoon ground ginger
Cooking Instructions:
- Preheat the Oven: Start by preheating your oven to 325°F (165°C). This guarantees the ham cooks evenly throughout.
- Prepare the Glaze: In a medium saucepan over medium heat, combine the honey, brown sugar, Dijon mustard, apple cider vinegar, ground cinnamon, ground cloves, ground nutmeg, and ground ginger. Stir the mixture continuously until the sugar has completely dissolved, and the glaze is smooth. Remove from heat and set aside.
- Prepare the Ham: Place the ham on a roasting rack set inside a roasting pan. Score the surface of the ham in a diamond pattern, making shallow cuts about 1/4 inch deep. This allows the glaze to penetrate and flavor the meat.
- Glaze the Ham: Generously brush a portion of the prepared glaze over the ham, ensuring it’s well coated.
- Roast the Ham: Place the ham in the preheated oven and bake for approximately 1.5 to 2 hours, or until the internal temperature reaches 140°F (60°C). Baste the ham with additional glaze every 30 minutes to build up a rich, caramelized exterior.
- Rest and Serve: Once cooked, remove the ham from the oven and allow it to rest for about 10 minutes before carving. This resting period guarantees the juices redistribute, making every slice juicy and tender.
Extra Tips:
When preparing this Honey-Glazed Ham, consider using a spiral-cut ham for even more convenience and ease of serving.
If you prefer a thicker glaze, you can simmer the glaze on the stove for a few extra minutes to allow it to thicken further.
Additionally, the leftover ham is perfect for sandwiches or adding to other festive dishes, so don’t hesitate to save any extras for later use.
Finally, adjusting the spices to your taste can personalize the glaze, making it your own special holiday recipe.
Citrus and Herb Roasted Turkey
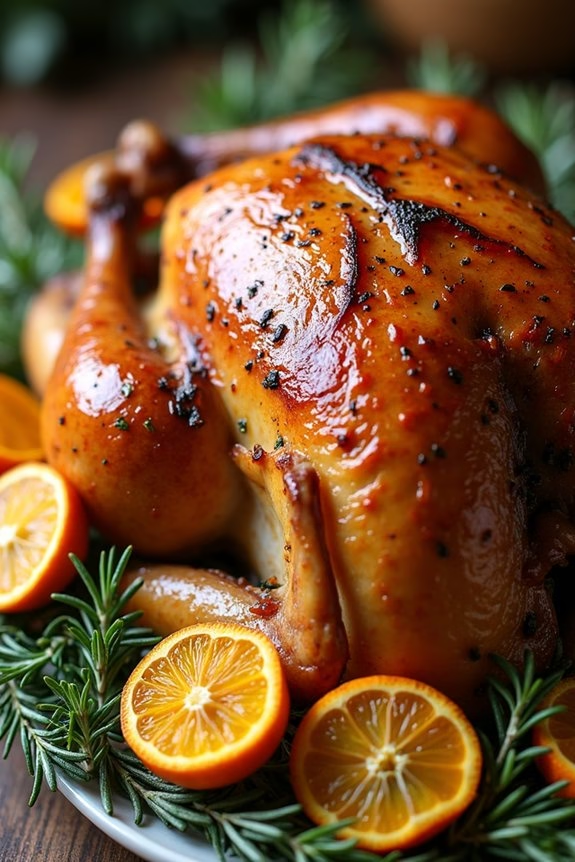
Citrus and Herb Roasted Turkey is a delightful centerpiece for any Christmas dinner, offering a fresh twist on the traditional roasted turkey. The combination of citrus fruits and aromatic herbs infuses the turkey with a burst of flavor and a tantalizing aroma that makes it irresistibly succulent.
This recipe combines the zesty notes of oranges and lemons with the earthy richness of rosemary, thyme, and sage, creating a beautifully balanced dish that’s sure to impress your family and friends.
Preparing a Citrus and Herb Roasted Turkey involves a few simple steps that guarantee the bird is perfectly cooked and bursting with flavor. This recipe is designed to serve 4-6 people, making it ideal for a cozy holiday gathering. By following these instructions, you’ll achieve a juicy and tender turkey with a crisp, golden skin that will be the highlight of your festive table.
Ingredients:
- 1 whole turkey (10-12 pounds)
- 2 oranges, quartered
- 2 lemons, quartered
- 1 bunch fresh rosemary
- 1 bunch fresh thyme
- 1 bunch fresh sage
- 1/4 cup olive oil
- 1/4 cup unsalted butter, melted
- 4 cloves garlic, minced
- Salt and pepper to taste
Cooking Instructions:
- Preheat the oven: Start by preheating your oven to 325°F (165°C). This guarantees the turkey cooks evenly and thoroughly.
- Prepare the turkey: Rinse the turkey under cold water and pat dry with paper towels. Remove any giblets from the cavity and set aside for another use or discard.
- Season the turkey: Place the turkey on a roasting rack in a large roasting pan. Season the cavity generously with salt and pepper, then stuff it with half of the quartered oranges, lemons, and herbs.
- Create the herb mixture: In a small bowl, mix together the olive oil, melted butter, minced garlic, and remaining herbs. Rub this mixture all over the turkey, making sure it covers the skin and gets into the crevices.
- Add citrus to the pan: Arrange the remaining oranges and lemons around the turkey in the roasting pan. This will help infuse more citrus flavor during roasting.
- Roast the turkey: Place the turkey in the preheated oven and roast for about 3 to 3.5 hours, or until a meat thermometer inserted into the thickest part of the thigh reads 165°F (74°C). Baste the turkey with pan juices every 30 minutes to keep it moist.
- Rest the turkey: Once fully cooked, remove the turkey from the oven and let it rest for at least 20 minutes before carving. This allows the juices to redistribute, keeping the meat juicy.
- Carve and serve: Carve the turkey and serve it with the roasted citrus slices and herbs from the pan for added flavor and presentation.
Extra Tips:
For best results, make sure to bring the turkey to room temperature before roasting, as this promotes even cooking. If you find the skin browning too quickly, tent the turkey with aluminum foil to prevent it from burning.
Additionally, using a meat thermometer is essential to confirm the turkey is cooked to perfection without being overdone. Finally, consider saving the pan drippings to make a delicious gravy that complements the citrus and herb flavors beautifully.
Balsamic Roasted Brussels Sprouts

Balsamic Roasted Brussels Sprouts are a delightful and savory addition to any Christmas dinner spread, offering a perfect blend of sweet and tangy flavors that complement the rich, hearty dishes typically served during the holiday season. This recipe transforms humble Brussels sprouts into a mouthwatering side dish by roasting them until they’re crisp on the outside and tender on the inside, all while being coated in a luscious balsamic glaze.
Whether you’re serving a traditional turkey dinner or a vegetarian feast, these Balsamic Roasted Brussels Sprouts are sure to become a family favorite.
The key to achieving perfectly roasted Brussels sprouts lies in the balance of flavors and textures. By combining the natural earthiness of the sprouts with the sweetness of balsamic vinegar and a hint of garlic, this dish provides a complex yet harmonious taste experience.
Additionally, roasting enhances the natural sugars in the vegetables, creating a caramelized exterior that’s both appealing to the eyes and satisfying to the palate. This recipe serves 4-6 people and is an excellent choice for those looking to add a nutritious and elegant touch to their holiday table.
Ingredients for 4-6 servings:
- 1 1/2 pounds Brussels sprouts, trimmed and halved
- 3 tablespoons olive oil
- 3 tablespoons balsamic vinegar
- 2 tablespoons honey
- 2 cloves garlic, minced
- Salt and pepper to taste
- 1/4 cup chopped walnuts (optional)
- 1/4 cup dried cranberries (optional)
Instructions:
- Preheat the Oven: Start by preheating your oven to 400°F (200°C). This high temperature is essential for getting the Brussels sprouts crispy and caramelized.
- Prepare the Brussels Sprouts: Trim the ends of the Brussels sprouts and remove any discolored outer leaves. Cut each sprout in half lengthwise to guarantee even cooking.
- Make the Balsamic Glaze: In a small mixing bowl, combine the olive oil, balsamic vinegar, honey, and minced garlic. Whisk together until the mixture is well combined and smooth.
- Season the Brussels Sprouts: Place the prepared Brussels sprouts in a large mixing bowl. Pour the balsamic glaze over the sprouts and toss until they’re evenly coated. Season with salt and pepper to taste.
- Roast the Brussels Sprouts: Spread the coated Brussels sprouts in a single layer on a baking sheet. Make sure they aren’t overcrowded, as this will help them roast rather than steam. Place in the preheated oven and roast for 20-25 minutes, stirring halfway through, until they’re golden brown and tender.
- Add Optional Ingredients: If using, sprinkle the chopped walnuts and dried cranberries over the Brussels sprouts during the final 5 minutes of roasting. This will allow the walnuts to toast slightly and the cranberries to warm up.
- Serve: Remove the Brussels sprouts from the oven and transfer them to a serving platter. They’re best served warm and can be garnished with additional balsamic glaze if desired.
Extra Tips:
For an added depth of flavor, try using aged balsamic vinegar, which will have a richer and more complex taste. If you prefer a spicier dish, consider adding a pinch of red pepper flakes to the balsamic glaze.
Additionally, to guarantee even roasting, make sure that the Brussels sprouts are of similar size. If you have larger sprouts, consider quartering them instead of halving. Finally, this dish can be prepared in advance and reheated gently in the oven just before serving, making it a convenient option for busy holiday cooking schedules.
Garlic Mashed Potatoes
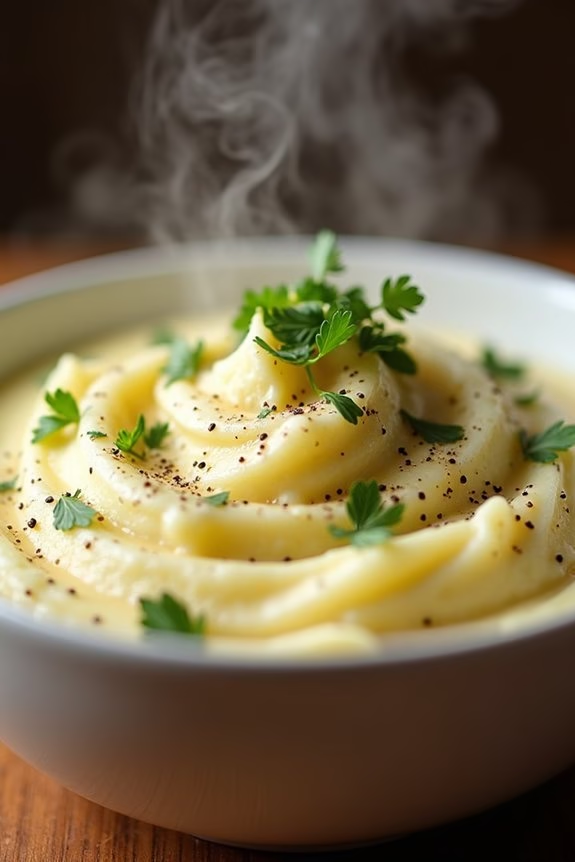
Garlic Mashed Potatoes are a classic side dish perfect for any holiday gathering, especially Christmas dinner. This creamy, buttery dish is infused with the rich flavor of garlic, making it a favorite among guests.
Whether paired with roasted turkey, glazed ham, or beef roast, garlic mashed potatoes complement the main course with their smooth texture and savory taste. Preparing these potatoes is a simple yet rewarding process that results in a comfort food everyone will love.
The secret to the perfect garlic mashed potatoes lies in balancing the ingredients to achieve the desired creaminess and flavor. By using fresh, high-quality potatoes and garlic, you can guarantee that the dish is both flavorful and delightful.
The addition of butter and cream further enhances the texture, creating a smooth and luscious consistency. This recipe serves 4-6 people, making it ideal for a family gathering or an intimate festive dinner.
Ingredients for Garlic Mashed Potatoes (Serves 4-6):
- 2 pounds of Yukon Gold potatoes
- 4 cloves of garlic
- 1 cup of heavy cream
- 1/2 cup of unsalted butter
- Salt to taste
- Freshly ground black pepper to taste
- Fresh parsley for garnish (optional)
Cooking Instructions:
- Prepare the Potatoes: Peel the Yukon Gold potatoes and cut them into evenly sized chunks. This guarantees they cook at the same rate and makes mashing easier.
- Cook the Potatoes and Garlic: Place the potato chunks and whole garlic cloves in a large pot. Fill with enough cold water to cover the potatoes by about an inch. Add a generous pinch of salt to the water. Bring to a boil over medium-high heat, then reduce to a simmer. Cook until the potatoes are fork-tender, about 15-20 minutes.
- Drain and Dry the Potatoes: Once the potatoes are tender, drain them in a colander. Return the potatoes and garlic to the hot pot and let them sit for a minute to allow any excess moisture to evaporate.
- Mash the Potatoes: Using a potato masher, begin mashing the potatoes and garlic directly in the pot. This allows the heat from the pot to keep the mixture warm.
- Add Butter and Cream: Gradually add the unsalted butter and heavy cream to the mashed potatoes. Stir continuously while adding to guarantee a smooth consistency. Season with salt and freshly ground black pepper to taste.
- Adjust Consistency: If the potatoes are too thick, add more cream in small increments until the desired consistency is reached. If too thin, mash in an additional boiled potato.
- Serve: Transfer the mashed potatoes to a serving bowl. Garnish with fresh parsley, if desired, and serve hot.
Extra Tips:
For a more intense garlic flavor, you can roast the garlic cloves before adding them to the potatoes. Simply wrap the unpeeled cloves in aluminum foil with a drizzle of olive oil and roast at 400°F (200°C) for about 30-35 minutes, until soft.
Squeeze the roasted garlic out of its skin and mash with the potatoes. Additionally, guarantee that both the butter and cream are at room temperature or slightly warmed to help them incorporate more smoothly into the potatoes.
Avoid over-mashing, as this can make the potatoes gluey. Enjoy your delicious Garlic Mashed Potatoes as a perfect side dish for your Christmas dinner!
Cranberry Orange Relish
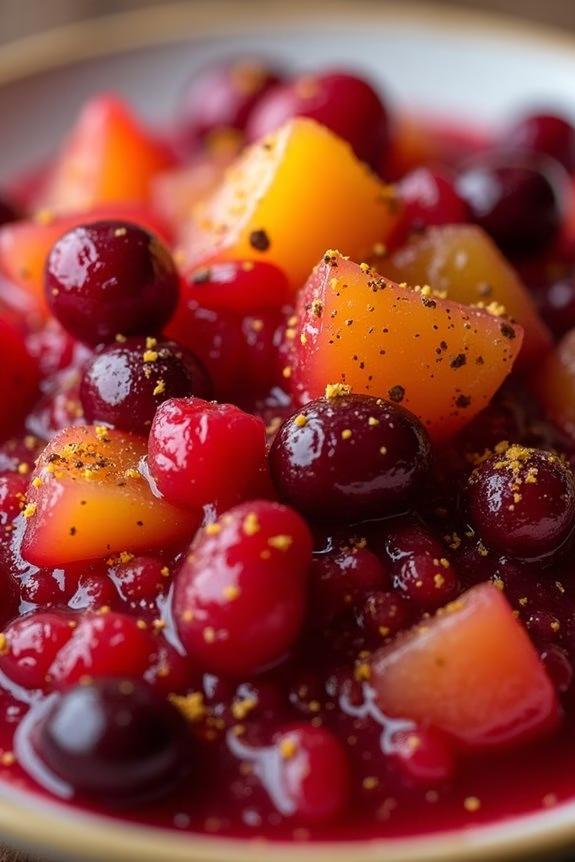
Cranberry Orange Relish is a vibrant and tangy side dish that perfectly complements any Christmas dinner. This dish combines the tartness of cranberries with the citrusy sweetness of oranges, creating a revitalizing flavor profile that balances rich holiday entrees. The relish isn’t only delicious but also incredibly easy to make, requiring no cooking and just a bit of chopping and mixing.
It’s a wonderful addition to your festive table, offering a pop of color and a burst of fresh flavors. Made with simple ingredients, this Cranberry Orange Relish can be prepared in advance, allowing the flavors to meld together beautifully. The natural sweetness of the oranges along with a touch of sugar helps to mellow the cranberries’ tartness, while a hint of zest adds an aromatic note.
It’s a versatile dish that can be served alongside turkey, ham, or even as a topping for desserts. This recipe makes enough relish to serve 4-6 people, making it perfect for family gatherings or holiday parties.
Ingredients for 4-6 Servings:
- 12 ounces fresh cranberries
- 2 medium oranges
- 1 cup granulated sugar
- 1 tablespoon orange zest
- 1/4 teaspoon ground cinnamon
Cooking Instructions:
- Prepare the Oranges: Peel the oranges and remove any seeds. Chop the oranges into small pieces. It’s important to remove as much of the white pith as possible since it can add bitterness to the relish.
- Blend the Cranberries and Oranges: Place the cranberries and chopped oranges into a food processor. Pulse the mixture a few times until the cranberries and oranges are finely chopped but not pureed. Be careful not to over-process; you want the relish to have a bit of texture.
- Add Sugar and Zest: Transfer the chopped mixture to a mixing bowl. Stir in the granulated sugar, orange zest, and ground cinnamon. Mix until all ingredients are well combined.
- Chill the Relish: Cover the bowl with plastic wrap and refrigerate the relish for at least 2 hours, or overnight if possible. This allows the flavors to meld together and the sugar to dissolve fully.
- Serve: Before serving, give the relish a good stir. Taste and adjust the sweetness if necessary by adding a little more sugar to suit your preference.
Extra Tips:
For an added twist, consider incorporating a small amount of finely chopped nuts, such as pecans or walnuts, for a crunchy texture. If you prefer a less sweet relish, start with 3/4 cup of sugar and adjust to taste.
You can also add a splash of Grand Marnier or Cointreau for a more sophisticated flavor. Verify your cranberries are fresh and firm for the best results, as soft or old cranberries can affect the taste and texture of the relish.
Maple Glazed Carrots
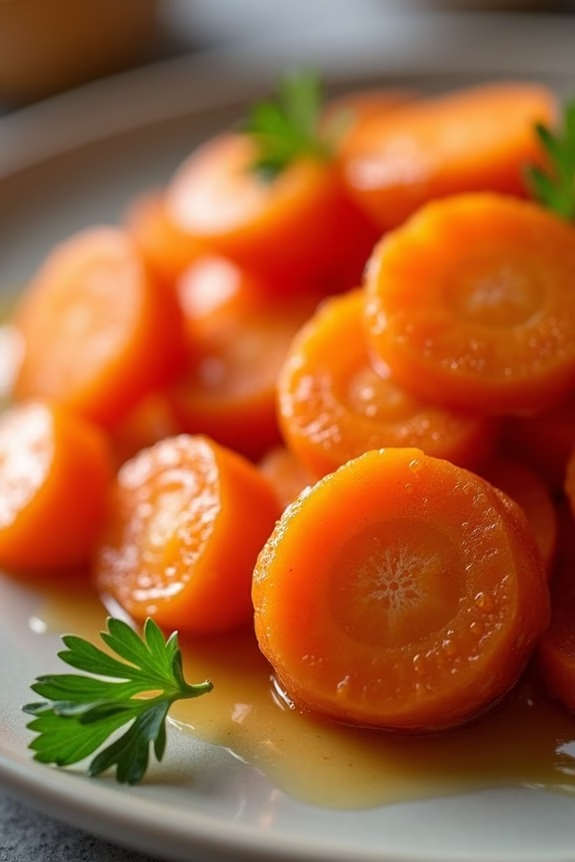
Maple Glazed Carrots are a delightful and elegant side dish perfect for your Christmas dinner. This dish combines the natural sweetness of carrots with the rich, caramelized flavor of maple syrup, creating a harmonious blend that complements any festive meal.
The glossy glaze not only enhances the carrots’ vibrant color but also adds a subtle sweetness that’s certain to be a hit with your family and guests. Whether you’re hosting a big gathering or having a cozy family dinner, these Maple Glazed Carrots will add a touch of elegance and taste to your holiday table.
The dish is simple to prepare and requires minimal ingredients, making it a convenient choice for a busy holiday schedule. The natural sweetness of the carrots is accentuated by the maple syrup, while a hint of butter and seasoning brings out a savory balance.
This recipe serves 4-6 people, making it an ideal side for a moderate-sized Christmas dinner. With a few easy steps, you can have this dish ready in no time, allowing you to focus on enjoying the holiday with your loved ones.
Ingredients:
- 2 pounds of carrots, peeled and cut into 1/4-inch thick rounds
- 3 tablespoons of unsalted butter
- 1/4 cup of pure maple syrup
- 1/4 teaspoon of salt
- 1/4 teaspoon of black pepper
- 1 tablespoon of chopped fresh parsley (optional for garnish)
Cooking Instructions:
- Prepare the Carrots: Begin by washing and peeling the carrots. Slice them into 1/4-inch thick rounds to guarantee they cook evenly.
- Melt the Butter: In a large skillet over medium heat, melt the unsalted butter. Make sure the butter doesn’t brown; it should melt to a clear liquid.
- Add Carrots: Once the butter is melted, add the sliced carrots to the skillet. Stir the carrots to coat them evenly with the butter for about 2-3 minutes.
- Maple Syrup Addition: Pour the maple syrup over the carrots, stirring well to assure all pieces are coated with the syrup, allowing the flavors to meld.
- Season and Simmer: Sprinkle the salt and black pepper over the mixture. Reduce the heat to low, cover the skillet, and let the carrots simmer for about 10-15 minutes. Stir occasionally until the carrots are tender and the glaze has thickened.
- Finishing Touches: Once the carrots are tender and the glaze is glossy, remove the skillet from the heat. If desired, sprinkle with fresh parsley for a pop of color and freshness before serving.
Extra Tips: When making Maple Glazed Carrots, it’s important to monitor the heat closely to prevent the maple syrup from burning, as it can quickly go from caramelized to scorched.
If you prefer your carrots with a bit more bite, reduce the simmering time slightly. You can also experiment with additional spices such as cinnamon or nutmeg for an extra layer of holiday flavor. For a vegan version, substitute the butter with a plant-based alternative. Enjoy the process and make adjustments as needed to suit your taste preferences.
Parmesan and Herb Stuffed Mushrooms
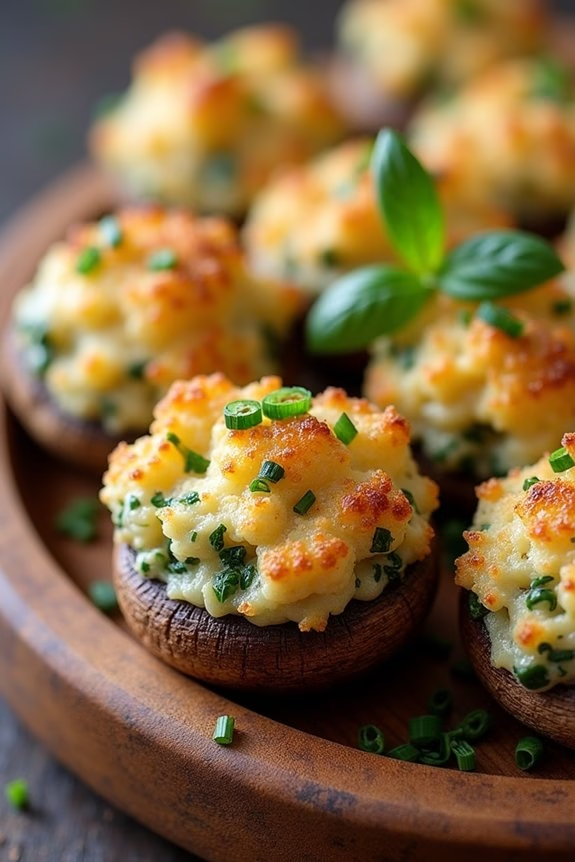
Parmesan and Herb Stuffed Mushrooms are an elegant and flavorful appetizer perfect for your Christmas dinner. These bite-sized delights are packed with a savory blend of parmesan cheese and fresh herbs, offering a burst of flavor in every mouthful.
They’re easy to prepare and guaranteed to impress your guests with their rich taste and sophisticated presentation. The key to making these stuffed mushrooms irresistible is the combination of creamy cheese and aromatic herbs, which perfectly complement the earthy flavor of the mushrooms.
This dish serves 4-6 people, making it a wonderful addition to a festive feast. Whether you’re hosting a large gathering or a cozy family dinner, these stuffed mushrooms are a must-try dish that will have everyone reaching for seconds.
Ingredients:
- 24 large white or cremini mushrooms
- 1 cup grated parmesan cheese
- 1 cup breadcrumbs
- 2 cloves garlic, minced
- 1/4 cup fresh parsley, finely chopped
- 1/4 cup fresh basil, finely chopped
- 1/4 cup fresh chives, finely chopped
- 1/4 cup olive oil
- Salt and pepper to taste
- 2 tablespoons butter, melted
Instructions:
- Preheat the Oven: Start by preheating your oven to 375°F (190°C). This guarantees that your mushrooms will cook evenly and develop a lovely golden brown color.
- Prepare the Mushrooms: Clean the mushrooms with a damp paper towel to remove any dirt. Remove the stems and set them aside. Place the mushroom caps on a baking sheet lined with parchment paper.
- Make the Filling: In a large bowl, mix together the parmesan cheese, breadcrumbs, minced garlic, parsley, basil, chives, olive oil, salt, and pepper. Chop the reserved mushroom stems finely and add them to the mixture. Mix well until all ingredients are combined.
- Stuff the Mushrooms: Using a small spoon, fill each mushroom cap with the prepared filling. Press gently to make sure the filling is compact and evenly distributed.
- Bake the Mushrooms: Drizzle the melted butter over the top of the stuffed mushrooms. Place the baking sheet in the preheated oven and bake for 20-25 minutes, or until the tops are golden brown and the mushrooms are tender.
- Serve: Once cooked, remove the mushrooms from the oven and let them cool slightly before serving. Arrange them on a platter and garnish with extra herbs if desired.
Extra Tips:
For the best results, choose mushrooms that are uniform in size to guarantee even cooking. If you prefer a spicier kick, consider adding a pinch of red pepper flakes to the filling.
To prevent the mushrooms from becoming soggy, avoid washing them under running water; instead, wipe them with a damp cloth. These stuffed mushrooms can be made ahead of time and stored in the refrigerator, then baked just before serving for a stress-free holiday appetizer.
Classic French Onion Soup
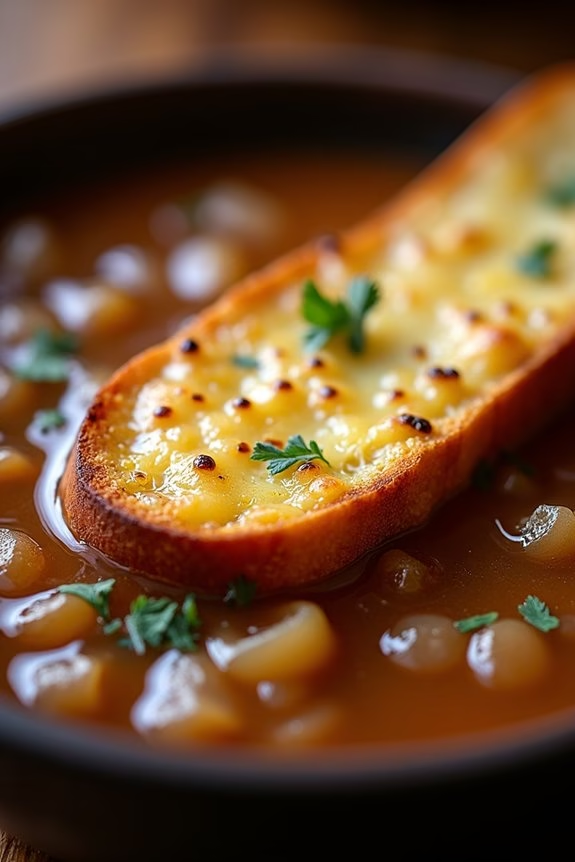
Warm up your winter evenings with the rich and comforting flavors of Classic French Onion Soup. This timeless dish boasts deeply caramelized onions simmered in a savory beef broth, topped with crusty bread and gooey melted cheese. Perfect as a starter or a standalone meal, this soup is sure to bring the festive spirit to your Christmas dinner table.
Whether you’re hosting a grand gathering or enjoying an intimate family meal, French Onion Soup is an elegant yet hearty choice that everyone will love.
The key to a perfect French Onion Soup lies in the patient caramelization of onions, which brings out their natural sweetness and depth of flavor. This recipe serves 4-6 people, making it an ideal choice for a small group. As the soup simmers, the aromas will fill your kitchen with the essence of French cuisine, inviting your guests to gather and savor the warmth of the holidays.
Follow this recipe to achieve an authentic taste that will transport you to a cozy bistro in Paris.
Ingredients for 4-6 servings:
- 6 large onions, thinly sliced
- 3 tablespoons unsalted butter
- 2 tablespoons olive oil
- 1 teaspoon sugar
- 1 teaspoon salt
- 1/2 teaspoon fresh ground black pepper
- 2 cloves garlic, minced
- 8 cups beef broth
- 1/2 cup dry white wine
- 2 bay leaves
- 1 tablespoon fresh thyme leaves
- 1 baguette, sliced
- 2 cups grated Gruyère cheese
Cooking Instructions:
- Caramelize the Onions: In a large pot or Dutch oven, melt the butter with the olive oil over medium heat. Add the sliced onions, sugar, salt, and pepper. Cook, stirring occasionally, for about 30-40 minutes until the onions are deeply caramelized and golden brown. Be patient and adjust the heat as necessary to avoid burning.
- Add Garlic and Deglaze: Stir in the minced garlic and cook for an additional 1-2 minutes until fragrant. Pour in the white wine, scraping the bottom of the pot to deglaze and incorporate the browned bits, which add depth to the flavor.
- Simmer the Soup: Add the beef broth, bay leaves, and thyme to the pot. Bring the mixture to a simmer, cover, and let it cook for about 30 minutes to allow the flavors to meld together. Stir occasionally and remove the bay leaves before serving.
- Prepare the Bread Topping: While the soup is simmering, preheat your oven to 400°F (200°C). Arrange the baguette slices on a baking sheet and bake for 5-7 minutes until they’re toasted and golden brown.
- Assemble and Broil: Ladle the soup into oven-safe bowls, placing a toasted baguette slice on top of each bowl. Generously sprinkle the grated Gruyère cheese over the bread. Place the bowls on a baking sheet and broil in the oven for 3-5 minutes until the cheese is bubbly and golden.
- Serve: Carefully remove the soup bowls from the oven and serve hot. Enjoy the rich, savory broth and the delightful combination of melted cheese and crispy bread.
Extra Tips:
For an extra layer of flavor, consider using a mix of yellow and sweet onions, as they provide a lovely contrast in taste. If you don’t have Gruyère cheese on hand, Swiss cheese or a combination of Swiss and Parmesan can work well.
Make sure to use oven-safe bowls for broiling, and always handle them with care due to the heat. Adjust the seasoning to your taste and feel free to garnish with additional thyme or parsley for a fresh touch.
This soup can be made a day ahead and reheated, which often enhances the flavors, making it a convenient option for holiday meal prep.
Spinach and Ricotta Stuffed Shells
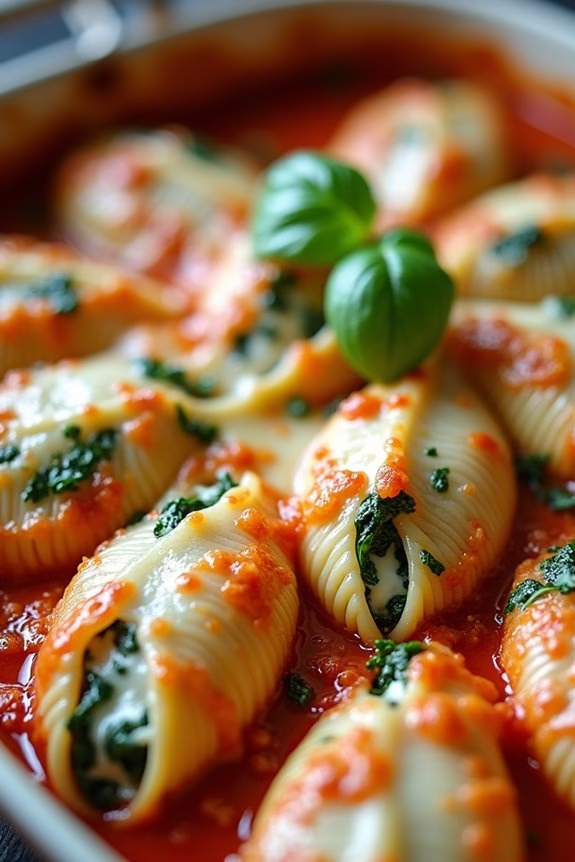
Spinach and Ricotta Stuffed Shells is a delightful and hearty dish perfect for a Christmas dinner. This recipe combines the creamy goodness of ricotta cheese with the healthy richness of spinach, all encased in large pasta shells and baked to perfection with a generous layer of marinara sauce and melted mozzarella on top. The combination of flavors and textures makes it a crowd-pleaser that can be enjoyed by both vegetarians and non-vegetarians alike.
It’s a dish that not only satisfies the palate but also provides a comforting warmth, perfect for the holiday season. This dish isn’t only delicious but also quite easy to prepare, making it a great choice for a festive gathering. The process involves stuffing cooked pasta shells with a savory mixture of ricotta cheese, spinach, and seasonings, then baking them in a rich tomato sauce until bubbly and golden.
The result is a beautiful tray of stuffed shells that are both visually appealing and incredibly tasty. This recipe serves 4-6 people, making it ideal for a family meal or a small holiday gathering.
Ingredients:
- 20-24 jumbo pasta shells
- 15 oz ricotta cheese
- 2 cups fresh spinach, chopped
- 1 cup grated mozzarella cheese
- 1/2 cup grated Parmesan cheese
- 1 large egg
- 2 cups marinara sauce
- 1 teaspoon garlic powder
- 1 teaspoon onion powder
- 1/2 teaspoon salt
- 1/4 teaspoon black pepper
- 1 tablespoon olive oil
- Fresh basil leaves for garnish (optional)
Cooking Instructions:
- Preheat the Oven: Preheat your oven to 375°F (190°C) to prepare for baking the shells.
- Cook the Pasta Shells: In a large pot, bring salted water to a boil. Add the jumbo pasta shells and cook until al dente, following the package instructions. Drain the shells and rinse them with cold water to stop the cooking process. Set aside.
- Prepare the Ricotta Filling: In a large mixing bowl, combine the ricotta cheese, chopped spinach, half of the grated mozzarella cheese, the grated Parmesan cheese, egg, garlic powder, onion powder, salt, and black pepper. Mix well until all ingredients are thoroughly combined.
- Stuff the Shells: Carefully fill each cooked pasta shell with the ricotta and spinach mixture. Use a spoon to ascertain each shell is adequately filled but not overstuffed.
- Prepare the Baking Dish: Spread 1 cup of marinara sauce evenly over the bottom of a baking dish. Arrange the stuffed shells on top of the sauce in a single layer.
- Add the Sauce and Cheese: Pour the remaining marinara sauce over the stuffed shells, ensuring all shells are covered. Sprinkle the remaining mozzarella cheese evenly over the top.
- Bake the Shells: Cover the baking dish with aluminum foil and place it in the preheated oven. Bake for 25 minutes. Remove the foil and bake for an additional 10-15 minutes, or until the cheese is melted and bubbly.
- Serve: Remove the baking dish from the oven and let it cool for a few minutes. Garnish with fresh basil leaves if desired before serving.
Extra Tips:
When preparing Spinach and Ricotta Stuffed Shells, ascertain that the pasta shells are cooked to an al dente texture to prevent them from becoming too soft during baking. If using frozen spinach, make sure to thaw and drain it completely to avoid excess moisture in the filling.
For added flavor, consider mixing in a pinch of nutmeg into the ricotta filling, as it complements the spinach beautifully. Additionally, feel free to adjust the cheese quantities to suit your taste preferences, and don’t hesitate to experiment with different types of cheese for a unique twist.
Warm Butternut Squash Salad
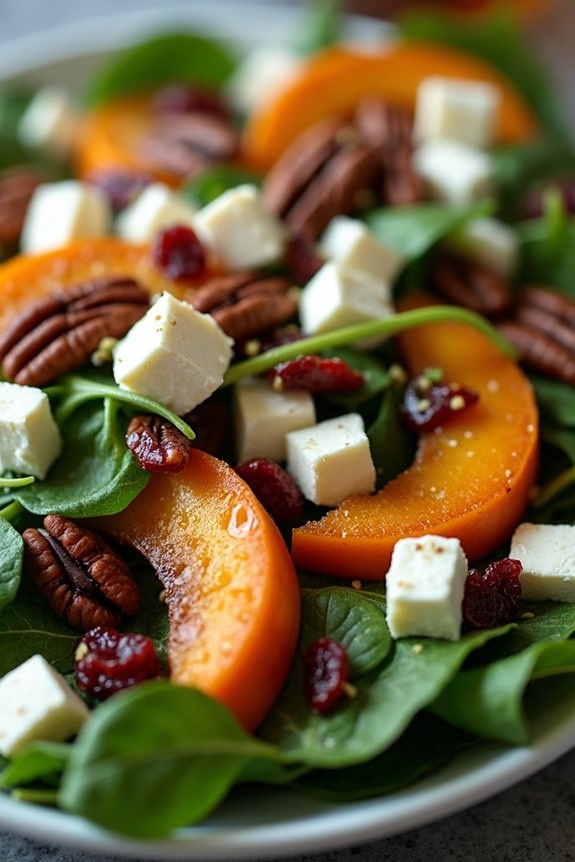
Warm Butternut Squash Salad is the perfect festive dish to add a colorful and nutritious flair to your Christmas dinner table. This salad features the earthy sweetness of roasted butternut squash, combined with the tangy flavors of feta cheese and the crunch of toasted pecans.
It’s a delightful blend of textures and flavors that will complement any holiday spread while also offering a lighter, healthier option amidst the usual Christmas fare. The warmth of the roasted squash contrasts beautifully with the fresh greens, making it a comforting yet invigorating side dish.
This salad isn’t only delicious but also incredibly easy to prepare, making it an excellent choice for holiday gatherings when time is of the essence. The key is to roast the butternut squash until it reaches caramelized perfection, bringing out its natural sweetness.
The salad is then tossed with a simple vinaigrette, guaranteeing that each bite is bursting with flavor. Whether you’re hosting a large family dinner or an intimate gathering, Warm Butternut Squash Salad is sure to be a hit with your guests.
Ingredients (Serves 4-6):
- 1 large butternut squash, peeled and diced
- 2 tablespoons olive oil
- Salt and pepper to taste
- 1/2 cup pecans, toasted
- 4 cups mixed salad greens (e.g., arugula, baby spinach)
- 1/2 cup crumbled feta cheese
- 1/4 cup dried cranberries
- 1/4 cup balsamic vinaigrette
Cooking Instructions:
- Preheat the Oven: Start by preheating your oven to 400°F (200°C). This will guarantee that the squash cooks evenly and caramelizes beautifully.
- Prepare the Butternut Squash: Peel the butternut squash and cut it into 1-inch cubes. Place the cubes on a baking sheet lined with parchment paper.
- Season and Roast: Drizzle the squash cubes with olive oil and season with salt and pepper. Toss them to make certain they’re evenly coated. Roast in the preheated oven for 25-30 minutes, or until they’re golden and tender, stirring halfway through.
- Toast the Pecans: While the squash is roasting, place the pecans in a dry skillet over medium heat. Toast them for about 5 minutes, stirring frequently until they’re fragrant and slightly browned. Remove from the heat and set aside.
- Assemble the Salad: In a large salad bowl, combine the mixed greens, roasted butternut squash, toasted pecans, crumbled feta cheese, and dried cranberries.
- Dress the Salad: Drizzle the balsamic vinaigrette over the salad and toss gently to combine all the ingredients.
- Serve Warm: Once everything is well combined, serve the salad immediately while the squash is still warm, enhancing the comforting feel of the dish.
Extra Tips:
For an added layer of flavor, consider adding a sprinkle of cinnamon or nutmeg to the butternut squash before roasting. This will enhance its natural sweetness and add a festive touch to the dish.
If you prefer a bit more crunch, add some sliced red onions or thinly sliced apples for extra texture. Finally, if you want to prepare parts of the salad in advance, you can roast the squash and toast the pecans a day ahead, storing them separately until you’re ready to assemble the salad.
Decadent Chocolate Yule Log
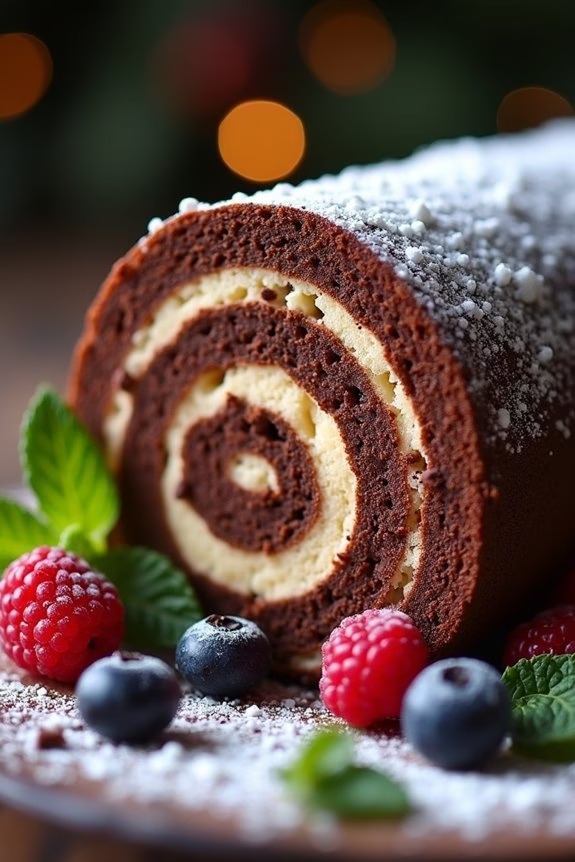
The Decadent Chocolate Yule Log is a classic holiday dessert that brings elegance and delight to any Christmas dinner table. This rich and moist sponge cake, filled with a luscious chocolate cream and rolled to resemble a traditional yule log, is sure to impress your guests both in taste and presentation.
The delicate balance of flavors, combined with its beautiful appearance, makes it a festive favorite that can be enjoyed by all. Ideal for serving 4-6 people, this recipe guarantees that each guest at your Christmas gathering is treated to a generous slice of indulgence.
Whether you’re a seasoned baker or trying your hand at creating this iconic dessert for the first time, the steps below will guide you through the process of making a Decadent Chocolate Yule Log that looks as good as it tastes.
Ingredients:
- 1 cup all-purpose flour
- 1/3 cup unsweetened cocoa powder
- 1 teaspoon baking powder
- 1/4 teaspoon salt
- 4 large eggs
- 3/4 cup granulated sugar
- 1 teaspoon vanilla extract
- 1/3 cup milk
- 1 cup heavy cream
- 2 tablespoons powdered sugar
- 1/2 cup dark chocolate, finely chopped
- 1 tablespoon butter
- Powdered sugar for dusting
- Fresh berries and mint leaves for garnish (optional)
Instructions:
- Prepare the Baking Sheet: Preheat your oven to 350°F (175°C). Line a 15 x 10-inch jelly roll pan with parchment paper, ensuring there’s an overhang on the sides for easy removal.
- Mix Dry Ingredients: In a medium bowl, sift together the flour, cocoa powder, baking powder, and salt. Set aside.
- Beat Eggs and Sugar: In a large mixing bowl, beat the eggs and granulated sugar on high speed until thick and pale, about 5 minutes. Add the vanilla extract and mix until just combined.
- Combine Mixtures: Gently fold the dry ingredients into the egg mixture in three additions, alternating with the milk. Be careful not to overmix, as you want to maintain the airiness of the batter.
- Bake the Cake: Pour the batter into the prepared pan and spread evenly with a spatula. Bake for 12-15 minutes, or until the cake springs back when lightly pressed in the center.
- Roll the Cake: While the cake is still warm, dust the top lightly with powdered sugar. Using the parchment paper, carefully roll the cake from one short side to the other. Let it cool completely in the rolled shape.
- Prepare the Filling: In a saucepan over low heat, melt the chopped dark chocolate and butter together until smooth. Set aside to cool slightly. In a separate bowl, whip the heavy cream and powdered sugar until stiff peaks form. Gently fold the melted chocolate into the whipped cream.
- Fill the Cake: Unroll the cooled cake and spread the chocolate cream filling evenly over the surface. Roll the cake back up without the parchment paper, sealing the seam at the bottom.
- Finish and Garnish: Place the rolled cake seam-side down on a serving platter. Dust with more powdered sugar and, if desired, decorate with fresh berries and mint leaves for a festive touch.
Extra Tips:
For the best results, make sure all your ingredients are at room temperature before you start baking. This helps everything blend together more smoothly and evenly.
When rolling the cake, do it carefully and slowly to avoid cracking. If cracks do appear, don’t worry too much—they can be covered up with the chocolate cream filling or by dusting with plenty of powdered sugar.
Finally, consider making the yule log a day in advance to allow the flavors to meld together beautifully overnight in the refrigerator, enhancing its taste even further.
Spiced Mulled Wine

There’s nothing quite like a cup of spiced mulled wine to warm your spirits during the festive season. This traditional holiday drink is infused with rich, aromatic spices and citrusy notes that make it a favorite at Christmas gatherings.
The warmth and depth of flavors in spiced mulled wine evoke a sense of nostalgia and comfort, making it perfect for cozy evenings by the fire or as a welcoming treat for holiday guests.
Creating a perfect batch of spiced mulled wine is both simple and rewarding. The key is to balance the sweetness and spice, allowing the flavors to meld together beautifully. This recipe serves 4-6 people and is sure to become a staple in your holiday celebrations.
Ingredients:
- 1 bottle (750 ml) of red wine (Merlot or Cabernet Sauvignon)
- 1/4 cup brandy
- 1/4 cup honey or sugar
- 1 orange, sliced
- 1 lemon, sliced
- 6 whole cloves
- 3 cinnamon sticks
- 2 star anise
- 1 teaspoon whole allspice
- 1 vanilla pod, split
- 1/4 teaspoon grated nutmeg
Instructions:
- Prepare the Spices: Begin by gathering all your spices. Using whole spices will give a more robust flavor than ground spices. Place the cloves, cinnamon sticks, star anise, allspice, and nutmeg into a large saucepan or pot.
- Add Citrus and Wine: Slice the orange and lemon into rounds, removing any seeds. Add these to the pot along with the spices. Pour in the bottle of red wine, ensuring the wine covers all the ingredients.
- Sweeten and Enhance: Add the honey (or sugar) and brandy to the mixture. Stir gently to combine the ingredients, ensuring the honey or sugar dissolves completely.
- Heat the Mixture: Place the pot on low heat. Warm the mixture gently, making sure it doesn’t come to a boil. Let it simmer for about 20-30 minutes. This allows the spices to infuse into the wine without evaporating the alcohol content.
- Taste and Adjust: After simmering, taste the mulled wine. Adjust sweetness if needed by adding more honey or sugar. If you prefer a stronger spice flavor, allow it to simmer a bit longer, but be cautious not to overheat.
- Strain and Serve: Once the desired flavor is achieved, strain the mulled wine to remove the spices and citrus slices. Serve warm in heatproof glasses or mugs, garnishing with a slice of orange or a cinnamon stick if desired.
Extra Tips:
For the best results, choose a wine that you enjoy drinking on its own, as its flavors will be enhanced by the spices.
If you prefer a non-alcoholic version, you can substitute the red wine with a combination of grape juice and apple cider, adjusting the sweetness to taste.

