

As the holiday season approaches, I’ve been dreaming up the perfect Christmas dinner spread that will keep all our guests smiling. Think classic roasted turkey or honey-glazed ham taking center stage, with irresistible sides like cheesy scalloped potatoes and green bean almondine. There’s a delicious vegetarian mushroom Wellington and baked salmon option, too. And let’s not forget the sweet aroma of maple-glazed carrots to finish things off. Ready to make your holiday gathering truly special?
Classic Roasted Turkey With Herb Stuffing

Preparing a Classic Roasted Turkey with Herb Stuffing is the perfect way to impress your guests during the festive season. This dish is an iconic centerpiece for any Christmas dinner, combining the succulent flavor of turkey with the aromatic essence of fresh herbs. The herb stuffing adds a delightful mix of savory and aromatic notes, enhancing the flavor of the turkey and making it a memorable meal for everyone at the table.
Whether you’re cooking for a small gathering or a larger crowd, this recipe is designed to serve 4-6 people, guaranteeing that everyone gets to enjoy the juicy tenderness of the turkey and the rich, herbaceous stuffing. While the process requires some time and attention, the result is a beautifully golden, roasted turkey paired with a stuffing that’s moist and flavorful. This dish is assured to bring warmth and joy to your festive celebrations.
Ingredients for 4-6 servings:
- 1 whole turkey (10-12 pounds)
- 1/2 cup unsalted butter, softened
- 2 tablespoons olive oil
- Salt and freshly ground black pepper
- 1 onion, quartered
- 1 lemon, halved
- 1 bunch fresh thyme
- 1 bunch fresh rosemary
- 1 bunch fresh sage
For the Herb Stuffing:
- 1 loaf of day-old bread, cubed
- 1/2 cup unsalted butter
- 1 onion, chopped
- 2 stalks celery, chopped
- 1 tablespoon fresh thyme, chopped
- 1 tablespoon fresh rosemary, chopped
- 1 tablespoon fresh sage, chopped
- 1/2 teaspoon salt
- 1/2 teaspoon black pepper
- 1 cup chicken broth
Cooking Instructions:
- Prepare the Turkey: Preheat your oven to 325°F (165°C). Remove the giblets from the turkey and pat it dry with paper towels. Rub the turkey all over with the softened butter, then drizzle with olive oil. Season generously with salt and pepper, both inside and out.
- Stuff the Turkey: Fill the cavity of the turkey with the quartered onion, halved lemon, and half of the fresh herbs. This will infuse the turkey with a wonderful aroma as it roasts.
- Make the Herb Stuffing: In a large skillet, melt the butter over medium heat. Add the chopped onion and celery, sautéing until soft. Stir in the chopped thyme, rosemary, sage, salt, and pepper. Add the cubed bread and toss to combine. Pour in the chicken broth, stirring until the bread is moistened but not soggy.
- Stuff and Roast: Spoon the stuffing into a baking dish and cover with foil. Place the stuffed turkey on a rack in a roasting pan. Tie the legs together with kitchen twine and tuck the wings under the body. Roast the turkey in the oven for about 3 to 3.5 hours, or until the internal temperature reaches 165°F (74°C) when measured in the thickest part of the thigh.
- Rest and Serve: Once cooked, remove the turkey from the oven and let it rest for at least 20 minutes before carving. This allows the juices to redistribute, keeping the meat tender. Meanwhile, bake the stuffing in the oven at 350°F (175°C) for 30 minutes, or until golden and crispy on top.
Extra Tips:
When preparing this recipe, it’s important to ascertain the turkey is completely thawed before roasting, which can take several days in the refrigerator.
Always use a meat thermometer for accuracy, as the cooking time can vary based on oven efficiency and turkey size. For a crispier skin, baste the turkey with pan drippings every hour. If the turkey browns too quickly, cover it with foil to prevent burning.
Finally, let the turkey rest before carving to maintain its juiciness and flavor.
Honey-Glazed Ham With Pineapple Rings
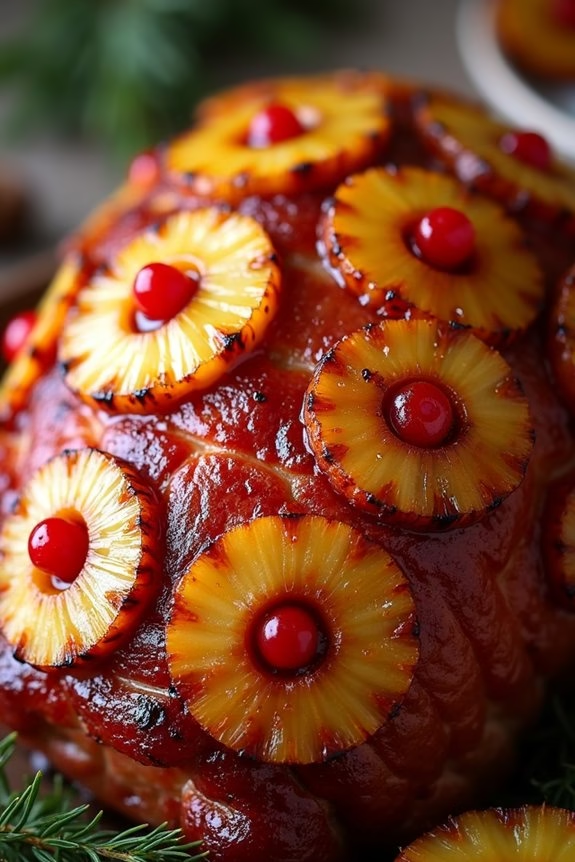
The Honey-Glazed Ham with Pineapple Rings is a classic festive dish that brings a delightful combination of sweet and savory flavors to your Christmas dinner table. Perfect for serving a crowd, this recipe showcases a beautifully glazed ham adorned with juicy pineapple rings, making it a centerpiece that not only tastes amazing but also looks stunning.
The combination of honey and pineapple creates a caramelized exterior on the ham that’s irresistibly delicious and bound to impress your guests.
This recipe is designed to serve 4-6 people, making it ideal for a smaller gathering or as part of a larger buffet spread. The preparation is straightforward, allowing you to focus on enjoying the festivities. Whether you’re a seasoned cook or a beginner, this Honey-Glazed Ham with Pineapple Rings is a wonderful addition to your Christmas menu that will leave everyone asking for seconds.
Ingredients for 4-6 servings:
- 1 (3-4 pound) fully cooked, bone-in ham
- 1/2 cup honey
- 1/2 cup brown sugar
- 1/4 cup Dijon mustard
- 1/4 cup pineapple juice
- 1 teaspoon ground cloves
- 1 can (20 ounces) pineapple rings, drained
- Toothpicks
- Maraschino cherries (optional)
Cooking Instructions:
- Preheat the Oven: Begin by preheating your oven to 325°F (160°C). This guarantees that your ham will cook evenly throughout.
- Prepare the Glaze: In a medium saucepan, combine honey, brown sugar, Dijon mustard, pineapple juice, and ground cloves. Stir the mixture over medium heat until the sugar dissolves and the ingredients are well combined. Once done, set the glaze aside to cool slightly.
- Score the Ham: Place the ham on a large roasting pan. Using a sharp knife, score the surface of the ham in a diamond pattern, making sure not to cut too deep. This will allow the glaze to penetrate the meat for enhanced flavor.
- Apply the Glaze: Generously brush the prepared glaze over the entire surface of the ham, making sure it gets into the scored cuts. Reserve some glaze for later basting.
- Decorate with Pineapple Rings: Arrange the pineapple rings over the glazed ham, securing each piece with a toothpick. If desired, place a maraschino cherry in the center of each pineapple ring for a festive touch.
- Roast the Ham: Place the ham in the preheated oven and roast for approximately 1.5 to 2 hours, basting with additional glaze every 30 minutes. The ham should reach an internal temperature of 140°F (60°C) when done.
- Rest and Serve: Once cooked, remove the ham from the oven and let it rest for 10-15 minutes before carving. This allows the juices to redistribute, guaranteeing a moist and flavorful dish.
Extra Tips:
To enhance the flavor, consider marinating the ham in the glaze overnight in the refrigerator. This allows the flavors to penetrate deeper into the meat.
When roasting, if the ham begins to brown too quickly, loosely cover it with aluminum foil to prevent burning. Additionally, for a more decorative presentation, use whole cloves to stud the intersections of the scored lines on the ham.
These small touches can elevate the overall appearance and taste of your Honey-Glazed Ham with Pineapple Rings, making it a memorable dish for your Christmas dinner.
Prime Rib With Garlic Herb Butter

Prime Rib With Garlic Herb Butter is a sumptuous dish that’s perfect for impressing a crowd during your Christmas dinner. This classic holiday favorite is known for its succulent, juicy meat that’s infused with a rich garlic herb butter, offering a depth of flavor that’s both aromatic and savory.
The key to a perfect prime rib lies in selecting a high-quality cut and guaranteeing it’s cooked to perfection, with a beautifully crusted exterior and a tender, pink interior. Ideal for a serving size of 4-6 people, this recipe will guide you through the process of preparing and cooking prime rib to achieve a restaurant-quality result in the comfort of your home.
Whether you’re a seasoned chef or a novice cook, this detailed recipe will help you create a memorable Christmas dinner centerpiece that’s sure to delight your guests.
Ingredients:
- 1 (4-5 pounds) bone-in prime rib roast
- 1/2 cup unsalted butter, softened
- 6 cloves garlic, minced
- 2 tablespoons fresh rosemary, minced
- 2 tablespoons fresh thyme, minced
- 2 tablespoons fresh parsley, minced
- 1 tablespoon salt
- 1 teaspoon black pepper
- 1 teaspoon onion powder
Cooking Instructions:
- Preparation: Remove the prime rib from the refrigerator and let it sit at room temperature for about 1-2 hours before cooking. This step guarantees even cooking.
- Preheat the Oven: Preheat your oven to 450°F (232°C). This high temperature will help create a delicious crust on the outside of the roast.
- Prepare the Garlic Herb Butter: In a medium bowl, combine the softened butter, minced garlic, rosemary, thyme, parsley, salt, black pepper, and onion powder. Mix until well combined.
- Season the Prime Rib: Pat the prime rib dry with paper towels to remove any excess moisture. Rub the garlic herb butter mixture all over the roast, guaranteeing it’s evenly coated on all sides.
- Roasting: Place the prime rib on a roasting rack set inside a large roasting pan. Insert a meat thermometer into the thickest part of the meat. Roast in the preheated oven for 20 minutes at 450°F (232°C) to develop a crust.
- Reduce the Temperature: Lower the oven temperature to 325°F (163°C) and continue roasting until the thermometer registers your desired level of doneness (about 120°F for rare, 130°F for medium-rare, or 140°F for medium).
- Rest the Roast: Remove the prime rib from the oven and transfer it to a cutting board. Tent with foil and let it rest for 20-30 minutes before carving. This allows the juices to redistribute throughout the meat, making it more flavorful and tender.
- Carving and Serving: Slice the prime rib against the grain into desired thickness and serve with your favorite sides.
Extra Tips:
When cooking a prime rib, investing in a good quality meat thermometer is essential to guarantee you achieve the desired level of doneness.
Always let the roast rest after cooking to prevent the juices from escaping when you cut into it. For added flavor, you can prepare the garlic herb butter a day in advance to let the flavors meld.
Finally, if you prefer a crisper crust, finish the roast by broiling it for a minute or two just before serving.
Baked Salmon With Lemon Dill Sauce
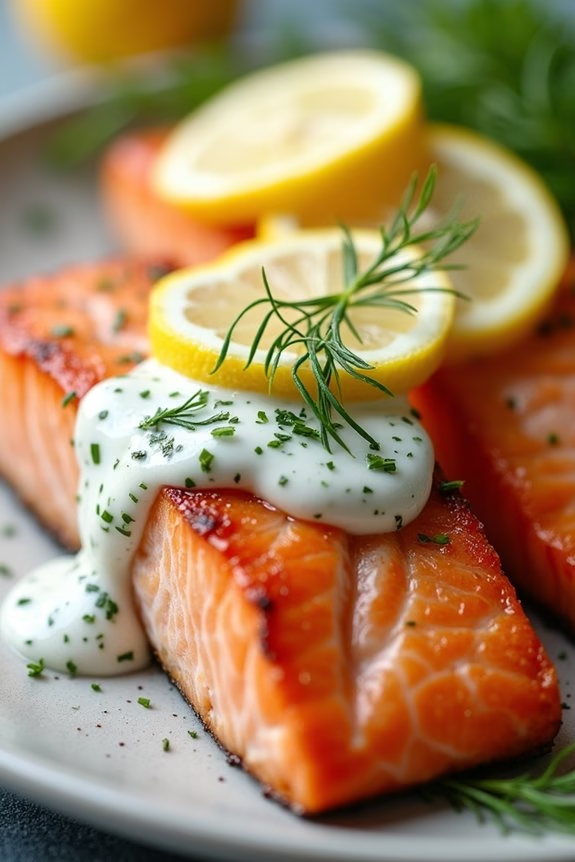
Baked Salmon With Lemon Dill Sauce is a delightful dish that combines the rich, tender flavors of salmon with the fresh, zesty notes of lemon and dill. This recipe is perfect for a Christmas dinner where you want to impress your guests with a dish that’s not only delicious but also healthy and visually appealing.
The succulent salmon fillets are baked to perfection and topped with a creamy lemon dill sauce that elevates the entire meal. It’s a wonderful addition to any festive table and is sure to be a crowd-pleaser.
This recipe is designed to serve 4-6 people, making it ideal for a family gathering or a small holiday party. It’s a straightforward dish that doesn’t require extensive preparation, allowing you to spend more time with your guests and less time in the kitchen.
The combination of flavors in the lemon dill sauce complements the rich taste of the salmon, creating a harmonious balance that’s both invigorating and satisfying. Whether you’re a seasoned cook or a beginner, this recipe is easy to follow and guarantees a delicious result.
Ingredients (Serving Size: 4-6 people):
- 4-6 salmon fillets (about 6 oz each)
- Salt and pepper, to taste
- 2 tablespoons olive oil
- 1 lemon, sliced
- 3 tablespoons fresh dill, chopped
- 1 cup sour cream
- 1 tablespoon lemon juice
- 1 garlic clove, minced
- 1 teaspoon Dijon mustard
Cooking Instructions:
- Preheat the Oven: Preheat your oven to 375°F (190°C). This guarantees that the salmon cooks evenly and achieves a nice, flaky texture.
- Prepare the Salmon: Pat the salmon fillets dry with paper towels and season both sides with salt and pepper to taste. This helps to enhance the natural flavors of the fish.
- Arrange in Baking Dish: Place the seasoned salmon fillets in a single layer in a baking dish. Drizzle olive oil over the fillets and arrange lemon slices on top of each piece.
- Bake the Salmon: Bake in the preheated oven for 15-20 minutes, or until the salmon is cooked through and flakes easily with a fork. Cooking times may vary slightly depending on the thickness of the fillets.
- Make the Lemon Dill Sauce: While the salmon is baking, prepare the sauce. In a medium bowl, combine the sour cream, chopped dill, lemon juice, minced garlic, and Dijon mustard. Mix well until smooth and creamy.
- Serve: Once the salmon is done baking, remove it from the oven and let it rest for a couple of minutes. Serve the salmon fillets with a generous spoonful of the lemon dill sauce on top.
Extra Tips: When selecting salmon, try to choose fillets that are similar in size to guarantee even cooking. Fresh dill is recommended for the sauce, as it provides a more vibrant flavor compared to dried dill.
If you prefer a spicier kick, consider adding a pinch of cayenne pepper to the sauce. Finally, the sauce can be prepared in advance and stored in the refrigerator for up to two days, making it a convenient option for busy holiday preparations.
Vegetarian Mushroom Wellington

The Vegetarian Mushroom Wellington is a hearty and festive dish that makes a splendid centerpiece for any Christmas dinner. This dish is perfect for those who want a meat-free option that doesn’t skimp on flavor or elegance. The combination of savory mushrooms, earthy herbs, and flaky pastry makes it a delightful choice that will be appreciated by both vegetarians and non-vegetarians alike.
Whether you’re hosting a small gathering or a larger crowd, this recipe will make certain everyone leaves the table satisfied and impressed. This recipe involves wrapping a rich mushroom duxelles in a golden puff pastry, creating a dish that’s just as visually appealing as it’s delicious. The mushrooms are cooked down to a luscious filling, seasoned with garlic, thyme, and a touch of cream for richness.
The puff pastry encases the filling, baking to a crisp and buttery perfection. Serve this Vegetarian Mushroom Wellington with a side of roasted vegetables or a fresh salad for a wholesome holiday meal. This recipe serves 4-6 people, making it an ideal choice for an intimate Christmas gathering.
Ingredients:
- 2 tablespoons olive oil
- 1 large onion, finely chopped
- 3 cloves garlic, minced
- 500g mixed mushrooms, finely chopped
- 1 teaspoon fresh thyme leaves
- 2 tablespoons fresh parsley, chopped
- 1 tablespoon soy sauce
- 1/4 cup cream or coconut cream
- Salt and pepper to taste
- 500g puff pastry, thawed
- 1 egg, beaten (for egg wash)
- Flour for dusting
- 1 tablespoon butter
Cooking Instructions:
- Prepare the Mushroom Filling: Heat olive oil in a large pan over medium heat. Add the chopped onion and sauté for about 5 minutes until translucent. Stir in the garlic and cook for another minute.
- Cook the Mushrooms: Add the finely chopped mushrooms to the pan. Cook for about 10-15 minutes until most of the liquid has evaporated and the mushrooms are browned. Stir occasionally.
- Season the Filling: Stir in the thyme, parsley, soy sauce, and cream. Season with salt and pepper. Cook for another 2-3 minutes until the mixture is thick. Remove from heat and let it cool completely.
- Preheat the Oven: Preheat your oven to 200°C (400°F).
- Prepare the Pastry: On a lightly floured surface, roll out the puff pastry into a rectangle, about 1/4 inch thick. Place the cooled mushroom filling down the center of the pastry.
- Wrap the Wellington: Fold the pastry over the filling, sealing the edges with a bit of beaten egg. Make certain the seam is at the bottom. Use a fork to crimp the edges.
- Decorate and Glaze: Transfer the Wellington to a baking sheet lined with parchment paper. Brush the entire surface with the beaten egg. Use a sharp knife to score the top lightly in a criss-cross pattern.
- Bake: Bake in the preheated oven for 25-30 minutes or until the pastry is golden brown and crispy.
- Serve: Allow to cool slightly before slicing and serving.
Extra Tips:
When making the mushroom filling, make sure it’s well-cooked and sufficiently dry; too much moisture can make the pastry soggy. If you have time, prepare the filling a day ahead to allow the flavors to meld.
Additionally, feel free to experiment with different mushrooms or add a splash of white wine for an extra depth of flavor. To make this dish vegan, substitute the cream with a plant-based option and skip the egg wash, using a little plant-based milk instead.
Cranberry Orange Glazed Pork Tenderloin

Cranberry Orange Glazed Pork Tenderloin is a festive and flavorful main dish that’s perfect for serving at Christmas dinner. This recipe combines the tangy sweetness of cranberries with the bright citrus notes of oranges, creating a glaze that perfectly complements the tender and juicy pork. The harmony of flavors in this dish will delight your guests and make your holiday meal truly memorable.
It’s an ideal choice for a crowd, as it isn’t only delicious but also visually impressive when served. Preparing Cranberry Orange Glazed Pork Tenderloin is a straightforward process that requires minimal effort, allowing you to spend more time with your loved ones during the holiday season.
The sweet and savory glaze is easy to prepare and can be made in advance, making it convenient for a busy Christmas day. Whether you’re hosting a large gathering or a small family dinner, this dish is sure to impress everyone at the table.
Ingredients (Serving Size: 4-6 people):
- 2 pork tenderloins (about 1 pound each)
- 1 cup fresh cranberries
- 1/2 cup orange juice
- Zest of 1 orange
- 1/4 cup honey
- 1/4 cup brown sugar
- 2 tablespoons balsamic vinegar
- 1 teaspoon ground mustard
- 1/2 teaspoon salt
- 1/4 teaspoon black pepper
- 2 tablespoons olive oil
- 1/4 cup water
- Fresh thyme sprigs for garnish (optional)
Cooking Instructions:
- Preheat the Oven: Set your oven to 375°F (190°C) and allow it to preheat while you prepare the tenderloins and glaze.
- Prepare the Glaze: In a medium saucepan, combine the fresh cranberries, orange juice, orange zest, honey, brown sugar, balsamic vinegar, ground mustard, salt, and black pepper. Bring the mixture to a boil over medium heat.
- Simmer the Glaze: Reduce the heat to low and let the mixture simmer for about 10 minutes, or until the cranberries have burst and the sauce has thickened slightly. Stir occasionally to prevent sticking.
- Sear the Tenderloins: In a large oven-safe skillet, heat olive oil over medium-high heat. Season the pork tenderloins with salt and black pepper, then sear them on all sides until they’re browned, about 3-4 minutes per side.
- Add Glaze to Tenderloins: Pour the prepared cranberry orange glaze over the seared pork tenderloins in the skillet. Confirm the tenderloins are well-coated with the glaze.
- Roast in the Oven: Transfer the skillet to the preheated oven and roast for 20-25 minutes, or until the internal temperature of the pork reaches 145°F (63°C).
- Rest and Serve: Remove the skillet from the oven and let the pork rest for 5-10 minutes before slicing. Garnish with fresh thyme sprigs if desired, and serve warm with the remaining glaze drizzled over the slices.
Extra Tips:
For maximum flavor, consider marinating the pork tenderloins in a mixture of olive oil, orange juice, and herbs for a few hours or overnight before cooking. This will help infuse the meat with additional citrus notes.
When searing the pork, confirm the skillet is hot enough to create a good crust on the meat, which helps lock in juices. If you prefer a thicker glaze, you can simmer it longer or add a cornstarch slurry (a mix of cornstarch and water) to achieve your desired consistency.
Finally, always let the pork rest before slicing to confirm it remains moist and succulent.
Roasted Vegetable Platter With Balsamic Drizzle

Roasted Vegetable Platter With Balsamic Drizzle is a delightful and colorful addition to any Christmas dinner spread, perfect for feeding a crowd. This dish combines a variety of seasonal vegetables, roasted to perfection, and finished with a tangy balsamic glaze. Not only does it offer a pop of vibrant colors to your table, but it also provides a healthy and satisfying option for both vegetarians and non-vegetarians alike.
The combination of roasting and balsamic vinegar enhances the natural sweetness of the vegetables, making this dish a crowd-pleaser. Ideal for serving 4-6 people, this Roasted Vegetable Platter is both easy to prepare and customize. You can choose your favorite vegetables or use what’s in season, making it a versatile choice for any gathering.
The balsamic drizzle adds a touch of sophistication and flavor that complements the roasted vegetables beautifully. Whether you’re hosting a large family gathering or an intimate dinner, this dish is sure to impress your guests with its taste and presentation.
Ingredients (serves 4-6 people):
- 2 large carrots, peeled and sliced
- 2 red bell peppers, cut into strips
- 1 large red onion, cut into wedges
- 1 head of broccoli, cut into florets
- 1 zucchini, sliced
- 1 yellow squash, sliced
- 2 tablespoons olive oil
- Salt and pepper to taste
- 1/4 cup balsamic vinegar
- 1 tablespoon honey
- Fresh thyme sprigs for garnish (optional)
Instructions:
- Preheat the Oven: Preheat your oven to 425°F (220°C). This high temperature will help the vegetables roast quickly and develop a nice caramelized exterior.
- Prepare the Vegetables: Wash and cut all vegetables as specified in the ingredients list. Confirm they’re similar in size for even cooking. Place them in a large mixing bowl.
- Season the Vegetables: Drizzle the olive oil over the vegetables and season with salt and pepper. Toss everything together until the vegetables are well-coated with the oil and seasoning.
- Roast the Vegetables: Spread the seasoned vegetables in a single layer on a large baking sheet. Avoid overcrowding the pan to confirm even roasting. Place in the preheated oven and roast for 20-25 minutes, or until the vegetables are tender and slightly caramelized, stirring halfway through.
- Prepare the Balsamic Drizzle: While the vegetables are roasting, combine the balsamic vinegar and honey in a small saucepan. Heat over medium heat until the mixture begins to simmer. Reduce the heat to low and let it simmer for about 5-7 minutes, or until it thickens slightly. Remove from heat and let it cool.
- Assemble the Platter: Once the vegetables are roasted, transfer them to a serving platter. Drizzle the balsamic reduction over the top. Garnish with fresh thyme sprigs if desired.
Extra Tips:
To confirm the best flavor and texture, make sure your vegetables are dry before roasting; any excess moisture can cause them to steam rather than roast. Feel free to swap or add other vegetables such as Brussels sprouts, sweet potatoes, or asparagus depending on your preference or availability.
If you prefer a more tangy balsamic drizzle, you can reduce it further for a thicker consistency. Remember to keep an eye on the balsamic reduction as it can burn easily if left unattended.
Cheesy Scalloped Potatoes
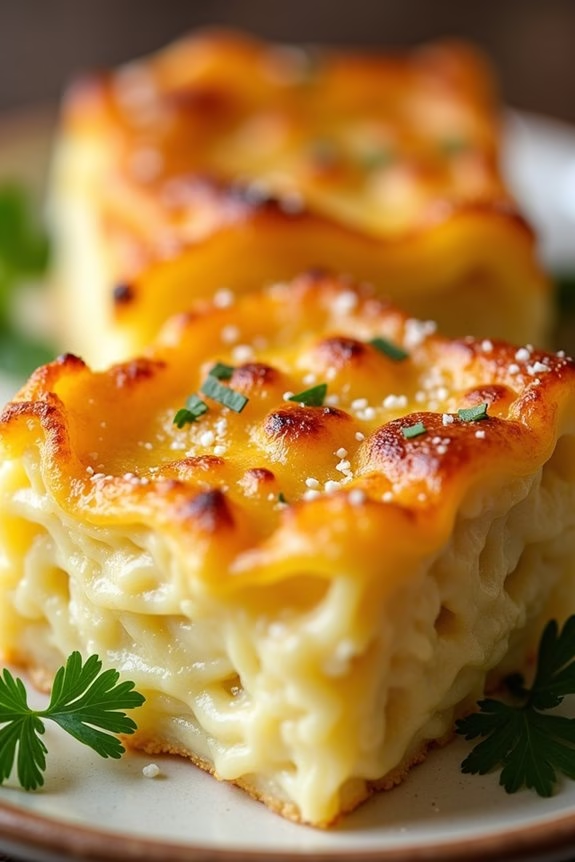
Cheesy Scalloped Potatoes are the ultimate comfort food that perfectly complements any Christmas dinner spread. This dish combines layers of tender potato slices smothered in a rich, creamy cheese sauce, making it a favorite among guests.
Whether you’re hosting a large gathering or a cozy family dinner, these cheesy scalloped potatoes are sure to be a crowd-pleaser. The combination of sharp cheddar and creamy sauce creates a decadent side dish that pairs beautifully with roasted meats, vegetables, and other festive fare.
This recipe serves 4-6 people and is ideal for a holiday feast. The preparation involves slicing potatoes and crafting a velvety cheese sauce that elevates the humble potato to new heights. The dish is baked to perfection, resulting in a golden, bubbly top that entices everyone to dig in.
With its comforting flavors and satisfying texture, Cheesy Scalloped Potatoes are a must-have addition to your Christmas menu.
Ingredients:
- 2 pounds russet potatoes, peeled and thinly sliced
- 2 tablespoons unsalted butter
- 2 tablespoons all-purpose flour
- 2 cups whole milk
- 1 cup heavy cream
- 2 cups shredded sharp cheddar cheese
- 1 teaspoon salt
- 1/2 teaspoon black pepper
- 1/2 teaspoon garlic powder
- 1/4 teaspoon nutmeg
- 1/4 cup grated Parmesan cheese
- 1 tablespoon chopped fresh parsley (optional, for garnish)
Instructions:
- Preheat the Oven: Preheat your oven to 350°F (175°C). Grease a 9×13-inch baking dish with butter or non-stick spray.
- Prepare the Potatoes: Peel and thinly slice the russet potatoes, about 1/8-inch thick. It’s important to keep the slices uniform for even cooking.
- Make the Cheese Sauce: In a medium saucepan, melt the butter over medium heat. Stir in the flour and cook for about 1 minute until it forms a paste. Gradually whisk in the milk and heavy cream, stirring continuously to avoid lumps. Cook until the mixture thickens slightly, about 5 minutes.
- Add Cheese and Seasonings: Remove the saucepan from heat and stir in the shredded cheddar cheese until melted and smooth. Add salt, black pepper, garlic powder, and nutmeg, stirring to combine.
- Layer the Potatoes: Arrange half of the sliced potatoes in the prepared baking dish. Pour half of the cheese sauce over the potatoes, spreading it evenly. Repeat with the remaining potato slices and cheese sauce.
- Top with Parmesan: Sprinkle the grated Parmesan cheese over the top of the layered potatoes.
- Bake: Cover the dish with aluminum foil and bake in the preheated oven for 30 minutes. Remove the foil and bake for an additional 30 minutes, or until the potatoes are tender and the top is golden and bubbly.
- Garnish and Serve: Let the dish cool for a few minutes before garnishing with chopped fresh parsley, if desired. Serve hot alongside your Christmas dinner.
Extra Tips:
For best results, use a mandoline slicer to achieve evenly sliced potatoes, ensuring they cook uniformly. If you prefer a slightly crispy top, broil the dish for a few minutes after baking, keeping a close eye to prevent burning.
Feel free to experiment with different cheese varieties, such as Gruyere or Fontina, for a unique flavor twist. The dish can be prepared a day ahead and refrigerated; simply bake it fresh before serving. Enjoy the rich and creamy goodness of these cheesy scalloped potatoes with your holiday feast!
Green Bean Almondine
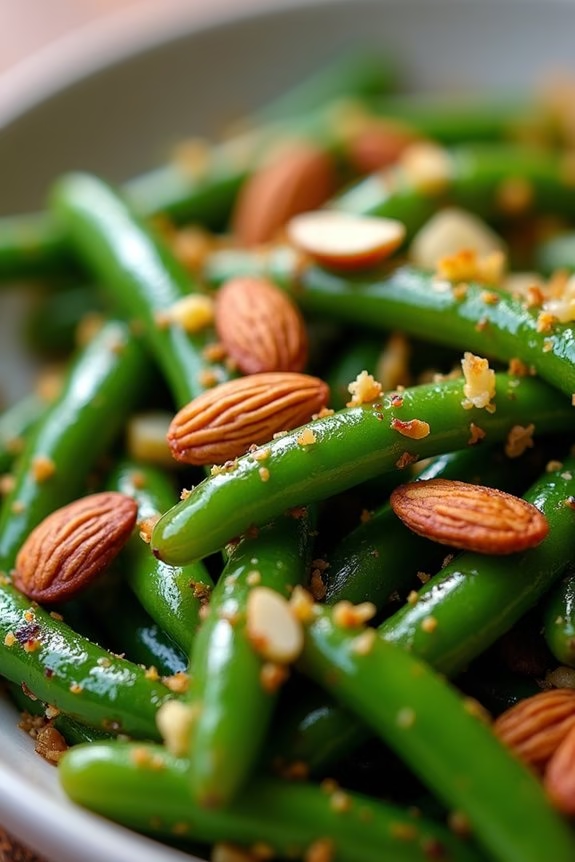
Green Bean Almondine is a classic, elegant side dish that’s perfect for any Christmas dinner spread, especially when you’re catering to a crowd. This dish features tender green beans tossed with toasted almonds and a hint of lemon, offering a delightful combination of flavors and textures.
The simplicity of Green Bean Almondine allows the freshness of the green beans to shine, while the almonds add a rich, nutty crunch. It’s a dish that complements the richness of other holiday favorites, making it a must-have on your festive table.
Preparing Green Bean Almondine for a crowd is straightforward, and the recipe can easily be scaled to accommodate the number of guests. For a serving size of 4-6 people, you can create this dish with minimal ingredients while still delivering maximum flavor. The key is to guarantee the green beans remain crisp-tender and the almonds are perfectly toasted, creating a harmonious balance in each bite.
With this recipe, you’ll have a side dish that stands out and satisfies everyone at your Christmas gathering.
Ingredients (Serving Size: 4-6 people)
- 1 pound fresh green beans, trimmed
- 1/2 cup sliced almonds
- 2 tablespoons unsalted butter
- 2 cloves garlic, minced
- 1 tablespoon freshly squeezed lemon juice
- Salt and pepper to taste
- Lemon zest, for garnish (optional)
Cooking Instructions
- Prepare the Green Beans: Begin by blanching the green beans. Bring a large pot of salted water to a boil. Add the green beans and cook for about 3-4 minutes until they’re bright green and crisp-tender. Immediately transfer them to a bowl of ice water to stop the cooking process. Drain and set aside.
- Toast the Almonds: In a large skillet over medium heat, add the sliced almonds. Toast them for about 3-5 minutes, stirring frequently, until they’re golden brown and fragrant. Be careful not to burn them. Once toasted, remove the almonds from the skillet and set aside.
- Cook the Garlic: In the same skillet, melt the butter over medium heat. Add the minced garlic and sauté for about 1 minute until it becomes fragrant but not browned.
- Combine Ingredients: Add the blanched green beans to the skillet with the garlic butter. Toss to combine and heat through, about 2-3 minutes.
- Add Almonds and Lemon: Return the toasted almonds to the skillet with the green beans. Drizzle with the freshly squeezed lemon juice and season with salt and pepper to taste. Toss everything together to guarantee the beans are well coated.
- Serve: Transfer the Green Bean Almondine to a serving platter. Garnish with lemon zest if desired, and serve immediately.
Extra Tips: To guarantee your Green Bean Almondine remains vibrant and flavorful, avoid overcooking the green beans during the blanching process; they should remain crisp-tender.
Toast the almonds carefully, as they can burn quickly if left unattended. For added flavor, consider adding a pinch of red pepper flakes for a subtle kick. This dish can be made ahead of time by blanching the beans and toasting the almonds in advance, then combining them just before serving to retain their texture and freshness.
Maple-Glazed Carrots With Thyme

Maple-Glazed Carrots With Thyme is a delightful side dish that perfectly complements any Christmas dinner spread, especially when you’re cooking for a crowd. The natural sweetness of the carrots is enhanced with a rich maple glaze, while fresh thyme adds an earthy and aromatic touch. This dish not only tastes fantastic, but it also adds a vibrant splash of color to your holiday table.
Preparing Maple-Glazed Carrots With Thyme is both simple and rewarding, making it an ideal choice for those who want to impress without spending hours in the kitchen. The recipe is designed to serve 4-6 people, guaranteeing that everyone at the table can enjoy these beautifully glazed carrots. Follow the steps below to create a dish that’s sure to become a holiday favorite.
Ingredients for 4-6 servings:
- 2 pounds of carrots, peeled and cut into sticks
- 3 tablespoons of unsalted butter
- 1/4 cup of pure maple syrup
- 1 tablespoon of fresh thyme leaves
- Salt and pepper to taste
Cooking Instructions:
- Prepare the Carrots: Begin by peeling and cutting the carrots into uniform sticks. This guarantees even cooking and an appealing presentation.
- Melt the Butter: In a large skillet over medium heat, melt the unsalted butter. Be careful not to let it brown, as this can alter the flavor of the dish.
- Cook the Carrots: Add the carrot sticks to the skillet, stirring them to coat evenly with the melted butter. Cook for about 8-10 minutes until they start to soften, stirring occasionally to prevent sticking.
- Add the Maple Syrup: Pour the maple syrup over the carrots and continue to cook for another 5-7 minutes. The syrup should begin to caramelize, giving the carrots a beautiful glaze. Stir frequently to guarantee the carrots are well-coated.
- Season and Add Thyme: Sprinkle the fresh thyme leaves over the carrots, then season with salt and pepper to taste. Stir well to incorporate the flavors, and cook for an additional 2-3 minutes.
- Serve: Transfer the glazed carrots to a serving dish. They’re best served warm, allowing the flavors to shine.
Extra Tips:
When preparing Maple-Glazed Carrots With Thyme, it’s important to choose high-quality pure maple syrup for the best flavor. If fresh thyme is unavailable, dried thyme can be used, but reduce the quantity to about 1 teaspoon, as dried herbs are more concentrated.
To save time on Christmas day, you can prep the carrots in advance and store them in the refrigerator until you’re ready to cook. For added flavor, consider garnishing the finished dish with a sprinkle of orange zest or chopped pecans.
Festive Brussel Sprouts With Bacon and Chestnuts

When it comes to Christmas dinner, finding a side dish that’s both festive and crowd-pleasing can be a challenge. Festive Brussel Sprouts With Bacon and Chestnuts are a perfect choice for those who want to add a touch of holiday cheer to their meal. This dish combines the earthiness of Brussels sprouts, the smoky flavor of bacon, and the sweet nuttiness of chestnuts, creating a harmonious blend of flavors and textures that will complement any main course.
Not only is this dish delicious, but it’s also relatively simple to prepare, making it ideal for a Christmas gathering. The key lies in using fresh ingredients, especially the Brussels sprouts and chestnuts, to guarantee that the flavors are vibrant and the dish is as appetizing as possible. With just a few steps and some common kitchen staples, you can transform these humble ingredients into a festive masterpiece that will have your guests reaching for seconds.
Ingredients for 4-6 servings:
- 1 1/2 pounds Brussels sprouts
- 6 ounces bacon, diced
- 1 cup roasted and peeled chestnuts, chopped
- 2 tablespoons olive oil
- 2 tablespoons unsalted butter
- 2 cloves garlic, minced
- Salt and freshly ground black pepper to taste
- 1 tablespoon balsamic vinegar (optional)
Cooking Instructions:
- Prepare the Brussels Sprouts: Start by trimming the Brussels sprouts by removing the outer leaves and cutting off the tough stem. Slice them in half for quicker cooking and a more even roast.
- Cook the Bacon: In a large skillet over medium heat, cook the diced bacon until it becomes crispy. Use a slotted spoon to remove the bacon from the pan and set it aside, leaving the rendered fat in the skillet.
- Sauté the Garlic and Chestnuts: Add the minced garlic to the skillet with the bacon fat and sauté for about 1 minute until fragrant. Then, add the chopped chestnuts and cook for another 2-3 minutes, stirring occasionally.
- Roast the Brussels Sprouts: Preheat your oven to 400°F (200°C). In a large bowl, toss the halved Brussels sprouts with olive oil, salt, and pepper. Spread them in a single layer on a baking sheet and roast for 20-25 minutes, or until they’re tender and golden brown.
- Combine Everything: Once the Brussels sprouts are roasted, transfer them to the skillet with the chestnuts and garlic. Add the cooked bacon and toss everything together over low heat. Stir in the butter and balsamic vinegar, if using, for a touch of acidity and richness.
- Final Touches: Taste the dish and adjust the seasoning with more salt and pepper if needed. Serve warm as a delightful side dish at your Christmas dinner.
Extra Tips:
For an extra crispy texture, you can finish the dish under the broiler for a couple of minutes after combining all the ingredients. Be sure to keep an eye on it to prevent burning.
If fresh chestnuts are unavailable, you can use vacuum-packed or canned chestnuts as a convenient alternative. Additionally, adding a sprinkle of fresh parsley or a handful of pomegranate seeds before serving can enhance the presentation and add a pop of color to the dish.
Traditional Bread Pudding With Vanilla Sauce

Traditional Bread Pudding With Vanilla Sauce is a classic dessert that brings warmth and comfort during the holiday season. This dish is perfect for feeding a crowd, making it an ideal choice for your Christmas dinner. The combination of soft, custardy bread with the rich and creamy vanilla sauce is a match made in heaven, and it’s sure to be a hit with your family and friends.
Bread pudding has been a staple in many cultures, often used as a way to utilize stale bread and transform it into something delicious. This recipe embraces that tradition while adding a luxurious twist with homemade vanilla sauce. The pudding itself is flavored with cinnamon, nutmeg, and vanilla, while the sauce adds an extra layer of sweetness and creaminess. Let’s explore the ingredients and steps needed to create this delightful dessert.
Ingredients (serves 4-6):
- 6 cups of day-old bread, cubed
- 4 cups whole milk
- 4 large eggs
- 1 cup granulated sugar
- 1 teaspoon vanilla extract
- 1 teaspoon ground cinnamon
- 1/2 teaspoon ground nutmeg
- 1/4 teaspoon salt
- 1/2 cup raisins (optional)
- 2 tablespoons unsalted butter, melted
Vanilla Sauce:
- 1 cup heavy cream
- 1/2 cup granulated sugar
- 2 tablespoons unsalted butter
- 1 teaspoon vanilla extract
- 1 tablespoon all-purpose flour
Instructions:
- Preheat the Oven: Start by preheating your oven to 350°F (175°C). Grease a 9×13-inch baking dish with butter or non-stick cooking spray to prevent the pudding from sticking.
- Prepare the Bread: Place the cubed bread in a large mixing bowl. If the bread isn’t stale, you can lightly toast it in the oven for about 5 minutes to dry it out.
- Make the Custard Mixture: In another bowl, whisk together the milk, eggs, sugar, vanilla extract, cinnamon, nutmeg, and salt until well combined.
- Combine Ingredients: Pour the custard mixture over the bread cubes. Add in the raisins if using, and gently mix until the bread is well-coated. Allow it to sit for about 10 minutes so the bread can absorb the liquid.
- Bake the Pudding: Transfer the bread mixture into the prepared baking dish. Drizzle the melted butter over the top. Bake in the preheated oven for 45-50 minutes, or until the top is golden brown and the center is set.
- Prepare the Vanilla Sauce: While the pudding is baking, make the vanilla sauce. In a small saucepan over medium heat, combine the heavy cream, sugar, and butter. Stir continuously until the sugar has dissolved and the mixture is smooth.
- Thicken the Sauce: In a small bowl, mix the flour with a little water to create a slurry. Add this to the saucepan and cook for another 2-3 minutes, stirring constantly, until the sauce thickens. Remove from heat and stir in the vanilla extract.
- Serve: Allow the bread pudding to cool slightly before serving. Slice it into portions and drizzle the warm vanilla sauce over each serving.
Extra Tips:
To achieve the best results, use a sturdy, dense bread like challah or brioche, which will hold up well to the custard. If you prefer a more decadent pudding, substitute some of the whole milk with cream. The raisins add a nice texture and flavor, but if you’re not a fan, you can leave them out or replace them with chocolate chips or nuts.
Always keep an eye on the bread pudding while it’s baking to prevent it from over-browning; if necessary, cover it with foil during the last 10 minutes of baking.