
Waking up to the smell of fresh pastries is something special, especially during the holidays. There’s just something about the aroma of cinnamon sugar swirl bread and orange cranberry scones that feels like a warm hug. Gingerbread muffins add a comforting touch to any festive morning. One Christmas, these delightful pastries turned our breakfast into a memorable moment. Ready to discover more pastries that can make your holiday mornings extra magical?
Cinnamon Sugar Swirl Bread
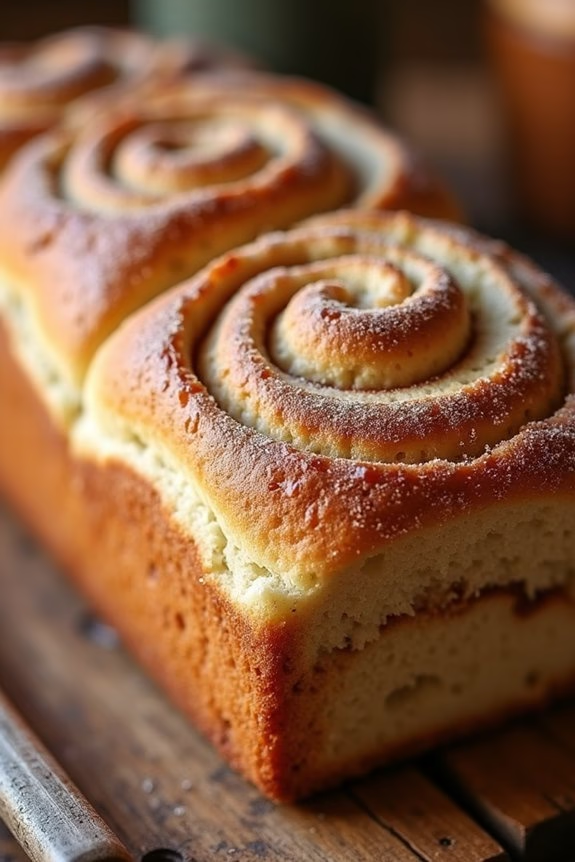
Cinnamon Sugar Swirl Bread is the perfect addition to your Christmas breakfast table, offering a sweet and aromatic treat that’s certain to be a hit with family and friends. This delightful bread combines the classic flavors of cinnamon and sugar in a beautifully swirled loaf, making it as visually appealing as it’s delicious.
With its soft, fluffy texture and rich, buttery taste, Cinnamon Sugar Swirl Bread is a comforting dish that will evoke the warmth and joy of the holiday season. Crafting this scrumptious bread does require a bit of time and patience, but the end result is well worth the effort.
The process involves creating a tender dough, rolling it with a mixture of cinnamon and sugar, and baking it to golden perfection. Whether enjoyed warm from the oven or toasted and slathered with butter, this bread is a versatile treat that can be enjoyed throughout the holidays. It pairs perfectly with a cup of coffee or a glass of milk, making for a satisfying breakfast or indulgent snack.
Ingredients (serves 4-6):
- 4 cups all-purpose flour
- 1/4 cup granulated sugar
- 2 1/4 teaspoons active dry yeast
- 1 teaspoon salt
- 1/2 cup milk
- 1/4 cup water
- 1/4 cup unsalted butter
- 2 large eggs
- 1 teaspoon vanilla extract
- 1/2 cup granulated sugar (for filling)
- 2 tablespoons ground cinnamon
- 2 tablespoons unsalted butter, melted
Cooking Instructions:
- Prepare the Dough: In a large mixing bowl, combine 2 cups of the flour, 1/4 cup sugar, yeast, and salt. In a small saucepan, heat the milk, water, and 1/4 cup butter until warm but not hot. Add the warm liquid to the flour mixture, then add the eggs and vanilla extract. Beat with a mixer on medium speed for about 3 minutes or until smooth.
- Knead the Dough: Gradually add the remaining flour, 1/2 cup at a time, until the dough pulls away from the sides of the bowl. Turn the dough out onto a lightly floured surface and knead for about 6-8 minutes, or until smooth and elastic. Place the dough in a lightly greased bowl, cover, and let rise in a warm place until doubled in size, about 1 to 1.5 hours.
- Prepare the Filling: In a small bowl, mix 1/2 cup sugar and cinnamon together. Set aside.
- Shape the Bread: Once the dough has risen, punch it down and roll it out on a floured surface into a 9×18-inch rectangle. Brush the melted butter over the surface of the dough, then evenly sprinkle the cinnamon-sugar mixture over it.
- Roll and Shape: Starting with the short side, roll the dough up tightly into a log. Pinch the seams to seal. Place the rolled dough seam-side down in a greased 9×5-inch loaf pan. Cover and let rise again until doubled, about 30-45 minutes.
- Bake the Bread: Preheat the oven to 350°F (175°C). Bake the bread in the preheated oven for 30-35 minutes, or until the top is golden brown and the bread sounds hollow when tapped. If the top is browning too quickly, cover with aluminum foil during the last 10 minutes of baking.
- Cool and Serve: Remove the bread from the oven and let it cool in the pan for about 10 minutes before transferring to a wire rack to cool completely. Slice and serve warm or at room temperature.
Extra Tips:
For best results, make sure all your ingredients are at room temperature, especially the eggs and butter. This guarantees a smoother dough and a better rise.
If you find the dough is sticky while kneading, add a little more flour, but be cautious not to add too much as it can make the bread tough. For an extra festive touch, consider adding a handful of raisins or chopped nuts to the filling.
This bread can be made a day ahead and stored in an airtight container; simply reheat slices in a toaster or oven for that fresh-baked warmth.
Orange Cranberry Scones
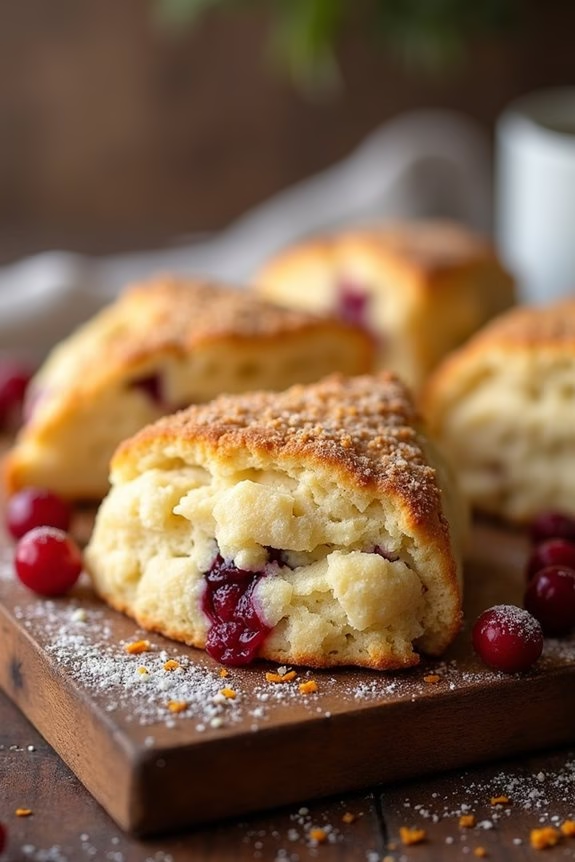
Orange Cranberry Scones are the perfect festive pastry to add to your Christmas breakfast spread. These scones are a delightful balance of sweet and tangy flavors, with fresh cranberries providing a burst of tartness and orange zest offering a revitalizing citrus aroma. The scones are tender on the inside with a slightly crisp exterior, making them an irresistible treat for the holiday morning.
Paired with a warm cup of coffee or tea, they’re certain to bring a touch of holiday magic to your breakfast table.
Creating these scones is both simple and rewarding. The process involves combining basic baking ingredients with the vibrant flavors of orange and cranberry. In just a short amount of time, you’ll have a batch of freshly baked scones that are perfect for sharing with family and friends. This recipe yields 8-12 scones, making it ideal for serving 4-6 people.
Ingredients:
- 2 cups all-purpose flour
- 1/4 cup granulated sugar
- 1 tablespoon baking powder
- 1/2 teaspoon salt
- 1/2 cup unsalted butter, cold and cubed
- 1/2 cup fresh cranberries, roughly chopped
- Zest of 1 orange
- 2/3 cup heavy cream
- 1 large egg
- 1 teaspoon vanilla extract
- 2 tablespoons milk or cream for brushing
- Optional: coarse sugar for sprinkling
Cooking Instructions:
- Preheat Oven and Prepare Baking Sheet: Preheat your oven to 400°F (200°C). Line a baking sheet with parchment paper or a silicone baking mat and set aside.
- Combine Dry Ingredients: In a large mixing bowl, whisk together the flour, sugar, baking powder, and salt until well combined.
- Cut in the Butter: Add the cold, cubed butter to the dry ingredients. Use a pastry cutter or your fingertips to work the butter into the flour mixture until it resembles coarse crumbs with pea-sized pieces.
- Add Cranberries and Orange Zest: Gently fold in the chopped cranberries and orange zest, making sure they’re evenly distributed throughout the mixture.
- Mix Wet Ingredients: In a separate small bowl, whisk together the heavy cream, egg, and vanilla extract until well blended.
- Combine Wet and Dry Ingredients: Pour the wet ingredients into the dry ingredients. Stir with a wooden spoon or spatula until the dough just comes together. Be careful not to overmix; the dough should be slightly crumbly but hold together when pressed.
- Form the Scones: Turn the dough out onto a lightly floured surface. Gently knead the dough a few times to bring it together, then shape it into a circle about 1-inch thick. Use a sharp knife or a bench scraper to cut the circle into 8-12 wedges.
- Prepare for Baking: Arrange the scones on the prepared baking sheet, leaving space between each piece. Brush the tops with milk or cream and sprinkle with coarse sugar if desired.
- Bake the Scones: Place the baking sheet in the preheated oven and bake for 15-20 minutes or until the scones are golden brown on top and a toothpick inserted into the center comes out clean.
- Cool and Serve: Remove the scones from the oven and let them cool on the baking sheet for a few minutes before transferring them to a wire rack to cool completely. Serve warm or at room temperature.
Extra Tips:
For the best texture, make sure your butter is very cold before incorporating it into the flour mixture. If you prefer a sweeter scone, consider adding a glaze made from powdered sugar and orange juice.
To make the scones extra festive, you can also add a handful of chopped nuts such as pecans or almonds. These scones can be stored in an airtight container for up to 2 days, or they can be frozen for longer storage and reheated in the oven before serving.
Enjoy your Orange Cranberry Scones as a delightful treat to complement your Christmas breakfast feast.
Gingerbread Muffins

Gingerbread muffins are the perfect holiday breakfast treat, combining the warm, spicy flavors of ginger, cinnamon, and cloves with the comforting texture of a muffin. They’re excellent for Christmas morning or any winter day when you want to fill your home with the inviting aroma of baked goods.
These muffins aren’t only delicious but also quite simple to prepare, making them a great choice for a festive breakfast or brunch.
The recipe for gingerbread muffins involves a blend of traditional holiday spices and a hint of molasses to achieve that classic gingerbread taste. The muffins are moist and flavorful, best served warm with a little butter or cream cheese.
Whether you’re serving them as part of a larger breakfast spread or enjoying them on their own, these gingerbread muffins will surely become a seasonal favorite.
Ingredients (Serving Size: 4-6 people):
- 2 cups all-purpose flour
- 1 1/2 teaspoons baking soda
- 1/2 teaspoon salt
- 1 tablespoon ground ginger
- 1 teaspoon ground cinnamon
- 1/2 teaspoon ground cloves
- 1/4 teaspoon ground nutmeg
- 1/2 cup unsalted butter, softened
- 1/2 cup packed brown sugar
- 1/2 cup molasses
- 1 large egg
- 1 cup buttermilk
- 1 teaspoon vanilla extract
Cooking Instructions:
- Preheat the Oven: Start by preheating your oven to 350°F (175°C). This guarantees that the oven is at the right temperature by the time your batter is ready.
- Prepare the Muffin Pan: Line a muffin pan with paper liners or lightly grease the pan to prevent the muffins from sticking.
- Mix Dry Ingredients: In a medium bowl, whisk together the flour, baking soda, salt, ginger, cinnamon, cloves, and nutmeg. This will make sure that the spices are evenly distributed throughout the muffins.
- Cream Butter and Sugar: In a large mixing bowl, beat the softened butter and brown sugar together until light and fluffy, about 2-3 minutes. This step is vital for creating a light muffin texture.
- Add Molasses and Egg: Mix in the molasses and then the egg, beating until the mixture is smooth.
- Combine Wet Ingredients: Slowly add the buttermilk and vanilla extract to the wet mixture, mixing until well combined.
- Combine Wet and Dry Ingredients: Gradually add the dry ingredients to the wet ingredients, stirring until just combined. Be careful not to overmix, as this can make the muffins dense.
- Fill Muffin Pan: Divide the batter evenly among the prepared muffin cups, filling each about 2/3 full.
- Bake the Muffins: Bake in the preheated oven for 18-20 minutes, or until a toothpick inserted into the center of a muffin comes out clean.
- Cool and Serve: Allow the muffins to cool in the pan for about 5 minutes before transferring them to a wire rack to cool completely. Serve warm or at room temperature.
Extra Tips:
For an extra festive touch, consider topping your gingerbread muffins with a simple glaze made from powdered sugar and a little milk or water.
You can also sprinkle some coarse sugar on top before baking for added crunch and sweetness.
If you don’t have buttermilk on hand, you can make a quick substitute by adding a tablespoon of lemon juice or white vinegar to a cup of milk and letting it sit for a few minutes.
Finally, these muffins can be made a day ahead and stored in an airtight container, making them a convenient option for busy holiday mornings.
Almond Croissants
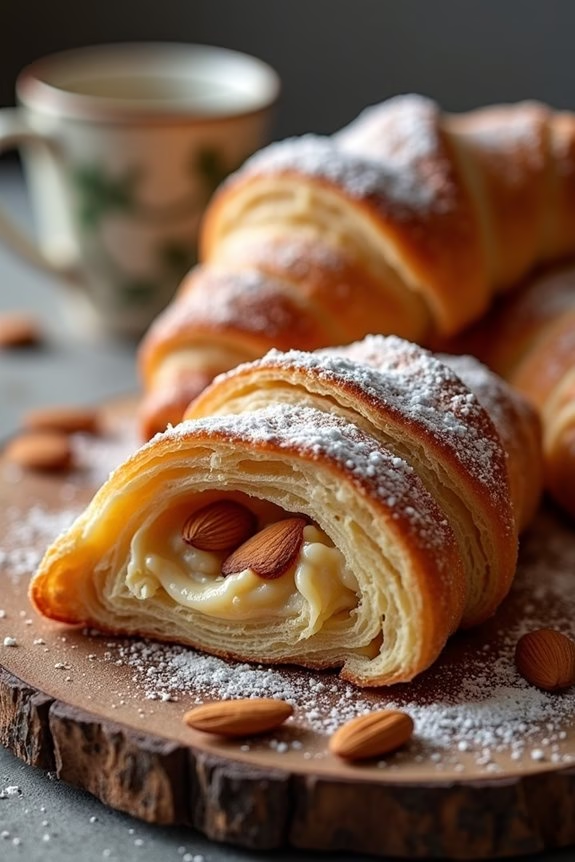
Indulge in the flaky, buttery goodness of homemade Almond Croissants, a perfect addition to your Christmas breakfast spread. These pastries, with their golden-brown crust and rich almond filling, are a delightful treat that combines the sweetness of almonds with the delicate texture of puff pastry.
While the process of making almond croissants from scratch involves several steps, the result is well worth the effort. Whether you’re serving them as a part of a festive brunch or enjoying them as a special morning treat, these croissants are sure to impress family and friends.
Creating Almond Croissants involves preparing a rich almond paste, shaping the pastries, and baking them to perfection. The almond paste, made from ground almonds, sugar, and butter, is nestled inside each croissant, adding a burst of flavor with every bite.
The process requires some patience as the dough needs to be rolled and folded to achieve the desired layers. However, the aroma of freshly baked croissants wafting through your home on Christmas morning will make the time investment worthwhile.
Here’s how you can make Almond Croissants for 4-6 people:
Ingredients:
- 2 sheets of puff pastry
- 1 cup almond flour
- 1/2 cup granulated sugar
- 1/4 cup unsalted butter, softened
- 1 teaspoon almond extract
- 1 egg
- 2 tablespoons all-purpose flour
- 1/4 cup sliced almonds
- 2 tablespoons powdered sugar (for dusting)
Instructions:
- Prepare the Almond Filling: In a medium mixing bowl, combine the almond flour, granulated sugar, softened butter, almond extract, and egg. Mix until you achieve a smooth and creamy almond paste. Set aside.
- Roll Out the Puff Pastry: Lightly flour your work surface and roll out each sheet of puff pastry to remove any folds or creases. Cut each sheet into triangles, aiming for an equal number of pieces from each sheet.
- Fill the Croissants: Place a generous tablespoon of the almond paste at the base of each triangle. Spread it slightly, avoiding the edges to prevent leakage during baking.
- Shape the Croissants: Starting at the base of the triangle, roll each piece of puff pastry towards the tip, gently tucking the ends to form a crescent shape. Place the shaped croissants on a baking sheet lined with parchment paper.
- Add the Almond Topping: Brush the tops of the croissants with a little water to help the sliced almonds adhere. Sprinkle the sliced almonds over each croissant.
- Bake the Croissants: Preheat your oven to 375°F (190°C). Bake the croissants for 20-25 minutes, or until they’re golden brown and flaky.
- Finish and Serve: Once baked, remove the croissants from the oven and let them cool slightly. Dust with powdered sugar before serving.
Extra Tips:
For best results, make sure your puff pastry is cold when you’re working with it to prevent it from becoming sticky. If you have time, you can enhance the flavor of your almond paste by toasting the almond flour lightly before mixing it with the other ingredients.
Additionally, if you prefer a stronger almond flavor, you can add a few drops of almond extract to the filling. Finally, keep an eye on the baking time as ovens may vary; the croissants should be a beautiful golden brown when done.
Enjoy your homemade Almond Croissants with a hot cup of coffee or tea for a truly festive breakfast experience.
Peppermint Chocolate Danish
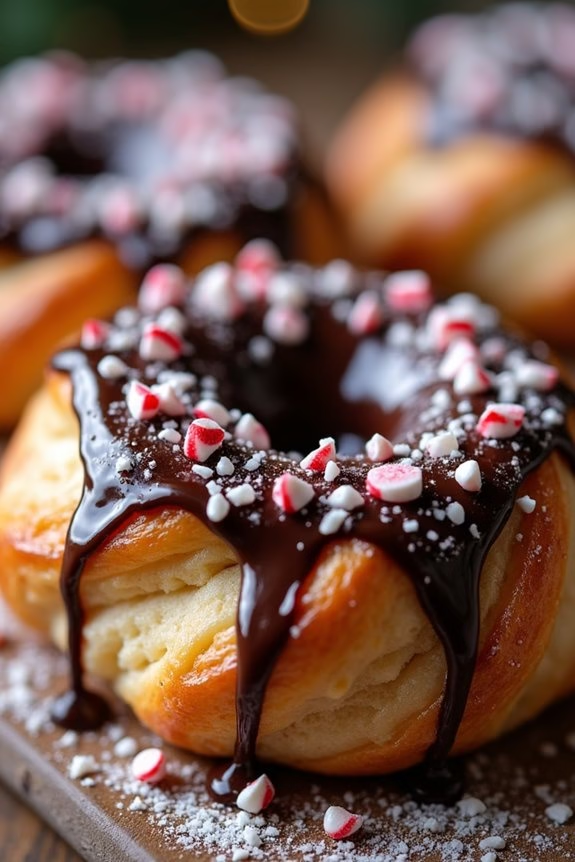
Indulge in the festive flavors of a Peppermint Chocolate Danish this Christmas morning. A delightful pastry that combines the rich taste of chocolate with the invigorating hint of peppermint, this treat is perfect for sharing with family over breakfast. The flaky layers of pastry are filled with a creamy chocolate mixture, accented by the crispness of peppermint candies. Topped with a drizzle of chocolate and a sprinkle of crushed peppermint, this Danish isn’t only a feast for the taste buds but also a visual delight.
This recipe is designed to serve 4-6 people, making it an ideal choice for a small family gathering or a cozy holiday brunch. The preparation is straightforward, allowing even novice bakers to create a stunning dessert with confidence. With just a few simple ingredients and some festive flair, you can whip up a batch of Peppermint Chocolate Danish pastries that will surely become a holiday favorite.
Ingredients:
- 1 sheet of puff pastry, thawed
- 1/2 cup semi-sweet chocolate chips
- 1/4 cup heavy cream
- 1 teaspoon peppermint extract
- 1/4 cup crushed peppermint candies
- 1 egg, beaten
- 1 tablespoon sugar
- 1/4 cup chocolate syrup
Instructions:
- Preheat the Oven: Begin by preheating your oven to 400°F (200°C). This guarantees that the oven is at the right temperature when you’re ready to bake, allowing the pastry to cook evenly and puff up perfectly.
- Prepare the Chocolate Filling: In a small saucepan over low heat, combine the semi-sweet chocolate chips and heavy cream. Stir continuously until the chocolate is completely melted and smooth. Remove from heat and stir in the peppermint extract. Set aside to cool slightly.
- Roll Out the Puff Pastry: On a lightly floured surface, roll out the puff pastry sheet into a large rectangle, about 12×9 inches. This helps guarantee the pastry is thin enough to cook through but still sturdy enough to hold the filling.
- Fill the Pastry: Spread the chocolate mixture evenly over the pastry, leaving a 1-inch border around the edges. Sprinkle half of the crushed peppermint candies over the chocolate.
- Shape the Danish: Starting from one long edge, roll the pastry into a log, ensuring the seam is at the bottom. With a sharp knife, cut the log into 6 equal pieces.
- Prepare for Baking: Place the cut pieces on a parchment-lined baking sheet, spacing them evenly. Brush the tops with beaten egg and sprinkle with sugar to achieve a golden, glossy finish.
- Bake: Bake in the preheated oven for 15-20 minutes, or until the pastries are golden brown and puffed up. Keep an eye on them to prevent over-browning.
- Add Final Touches: Once baked, drizzle the pastries with chocolate syrup and sprinkle the remaining crushed peppermint candies on top. This adds a sweet and festive touch to each Danish.
Extra Tips:
For best results, verify the puff pastry is well-chilled before rolling it out, as this will make it easier to handle and help achieve flakiness.
If you don’t have semi-sweet chocolate chips, you can substitute with milk or dark chocolate, depending on your preference.
When crushing peppermint candies, place them in a sealed plastic bag and use a rolling pin to break them into small pieces. This prevents mess and guarantees uniformity.
If preparing in advance, store the baked Danish in an airtight container at room temperature and drizzle with chocolate syrup just before serving to maintain freshness.
Eggnog Sticky Buns
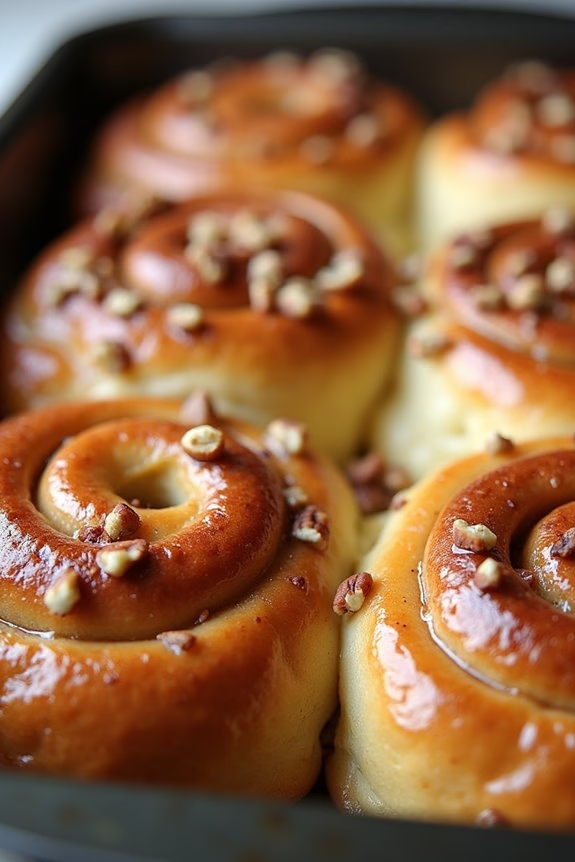
Eggnog Sticky Buns are a delightful twist on the classic sticky buns, infused with the rich and creamy flavors of eggnog. Perfect for a special Christmas breakfast, these buns are sure to impress your family and guests with their warm, spiced aroma and gooey, sweet topping.
The combination of cinnamon, nutmeg, and eggnog creates a festive and indulgent breakfast treat that captures the essence of the holiday season.
These buns are made from a soft, enriched dough that’s rolled with a cinnamon-sugar filling, topped with an eggnog glaze for an extra layer of flavor. The result is a sticky, sweet, and slightly spiced pastry that pairs wonderfully with a hot cup of coffee or cocoa on a chilly Christmas morning.
Whether you’re hosting a holiday brunch or simply want to treat your loved ones to something special, Eggnog Sticky Buns are a perfect choice.
Ingredients (serving size: 4-6 people):
- 1 cup whole milk
- 1/2 cup eggnog
- 1/4 cup unsalted butter, melted
- 3 1/2 cups all-purpose flour
- 1/4 cup granulated sugar
- 1 packet (2 1/4 tsp) active dry yeast
- 1 tsp salt
- 2 large eggs
- 1/2 cup packed brown sugar
- 2 tsp ground cinnamon
- 1/4 tsp ground nutmeg
- 1/2 cup unsalted butter, softened
- 1/4 cup heavy cream
- 1/2 cup chopped pecans (optional)
- 1 cup powdered sugar
- 1/4 cup eggnog (for glaze)
- 1/2 tsp vanilla extract
Cooking Instructions:
- Prepare the Dough: In a small saucepan, heat the milk and eggnog until warm (about 110°F). Remove from heat and stir in the melted butter. In a large mixing bowl, combine the flour, granulated sugar, yeast, and salt. Add the warm milk mixture and eggs to the dry ingredients. Mix until a soft dough forms.
- Knead the Dough: Transfer the dough to a floured surface and knead for about 8-10 minutes, or until it becomes smooth and elastic. Place the dough in a greased bowl, cover with a damp cloth, and let it rise in a warm place for about 1-1.5 hours, or until doubled in size.
- Prepare the Filling: In a small bowl, mix the brown sugar, cinnamon, and nutmeg. Roll out the dough into a rectangle approximately 16×12 inches on a floured surface. Spread the softened butter over the dough, then evenly sprinkle the cinnamon-sugar mixture over the butter.
- Roll and Cut the Buns: Starting from the long edge, tightly roll up the dough into a log. Cut the log into 12 equal pieces and place them in a greased 9×13 inch baking dish. Cover the dish with a cloth and let the buns rise for another 30 minutes.
- Bake the Buns: Preheat your oven to 350°F (175°C). Pour the heavy cream over the risen buns, allowing it to soak in. Bake for 25-30 minutes, or until the buns are golden brown and cooked through.
- Make the Glaze: While the buns are baking, prepare the glaze by whisking together the powdered sugar, eggnog, and vanilla extract until smooth.
- Finish and Serve: Once the buns are out of the oven, allow them to cool slightly before drizzling the eggnog glaze over the top. Sprinkle with chopped pecans if using, and serve warm.
Extra Tips: For best results, make sure your milk and eggnog aren’t too hot when adding them to the yeast, as this can kill the yeast and prevent the dough from rising properly.
If you want to prepare these buns the night before, you can do so by letting the assembled buns rise in the refrigerator overnight. In the morning, take them out, let them come to room temperature, and then proceed with baking.
Additionally, if you’re not a fan of pecans, feel free to omit them or substitute with walnuts or raisins for added texture and flavor.
Pecan Pie Pastry Twists
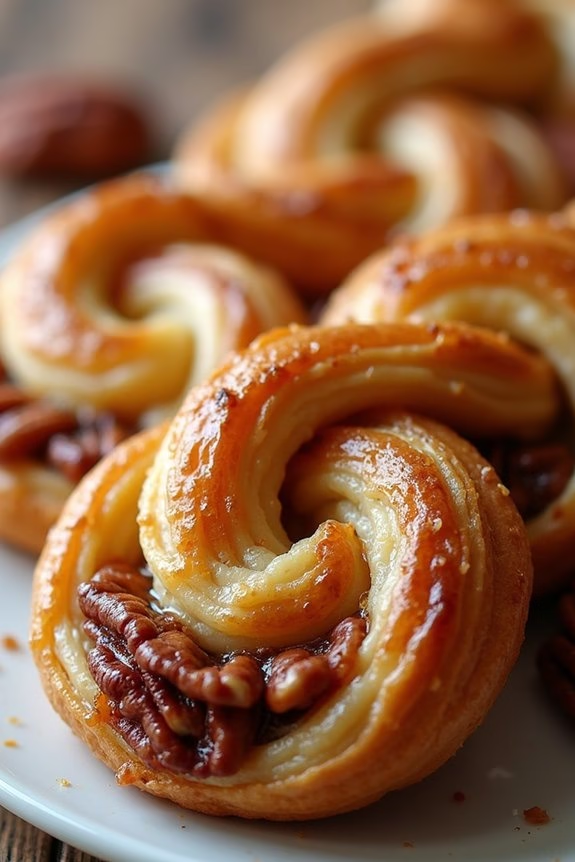
Elevate your Christmas morning with a delightful blend of flaky pastry and rich, nutty filling with these Pecan Pie Pastry Twists.
These twists capture the essence of a classic pecan pie, but with a modern, fun twist that’s perfect for a festive breakfast. The buttery, crispy pastry provides the perfect vessel for the sweet and sticky pecan filling, making each bite a decadent treat that pairs beautifully with a hot cup of coffee or cocoa.
Not only are Pecan Pie Pastry Twists delicious, but they’re also surprisingly simple to prepare, making them a perfect choice for those busy holiday mornings. The twists are made using store-bought puff pastry, which greatly reduces prep time while still delivering a homemade feel.
Whether you’re serving a holiday crowd or just looking to indulge your family with a special breakfast treat, these twists are sure to impress.
Ingredients (Serves 4-6):
- 2 sheets of puff pastry, thawed
- 1 cup pecans, finely chopped
- 1/2 cup brown sugar
- 1/4 cup unsalted butter, melted
- 1 teaspoon vanilla extract
- 1 teaspoon ground cinnamon
- 1/4 teaspoon salt
- 1 egg, beaten (for egg wash)
Cooking Instructions:
- Preheat and Prepare: Preheat your oven to 375°F (190°C). Line a baking sheet with parchment paper to prevent sticking and guarantee even baking.
- Mix the Filling: In a medium bowl, combine the chopped pecans, brown sugar, melted butter, vanilla extract, ground cinnamon, and salt. Mix until all ingredients are well incorporated and the pecans are coated in the buttery sugar mixture.
- Roll Out the Puff Pastry: On a lightly floured surface, roll out each sheet of puff pastry to smooth out any creases. Confirm each sheet is approximately the same size for even twists.
- Spread and Cover: Evenly spread the pecan mixture over one sheet of puff pastry, leaving a small border around the edges. Place the second sheet of puff pastry on top, pressing down gently to seal the edges.
- Cut and Twist: Using a sharp knife or pizza cutter, slice the layered pastry into 1-inch wide strips. Carefully twist each strip several times to create a spiral effect and place them onto the prepared baking sheet, leaving space between each twist.
- Egg Wash: Brush the beaten egg over each twist to give them a golden, glossy finish.
- Bake: Bake in the preheated oven for 15-20 minutes, or until the pastry is puffed and golden brown. Keep an eye on them to prevent over-browning.
- Cool and Serve: Allow the twists to cool slightly before serving. They can be enjoyed warm or at room temperature.
Extra Tips:
For best results, confirm your puff pastry is cold but pliable when you begin working with it; this helps achieve a nice, flaky texture.
If desired, you can prepare the pecan filling a day in advance to save time on Christmas morning. Additionally, consider drizzling the finished twists with a simple glaze made from powdered sugar and milk for an extra touch of sweetness.
These twists are versatile and can be easily adapted with chocolate chips or dried fruit for added flavor variations.
Cardamom Spiced Morning Rolls
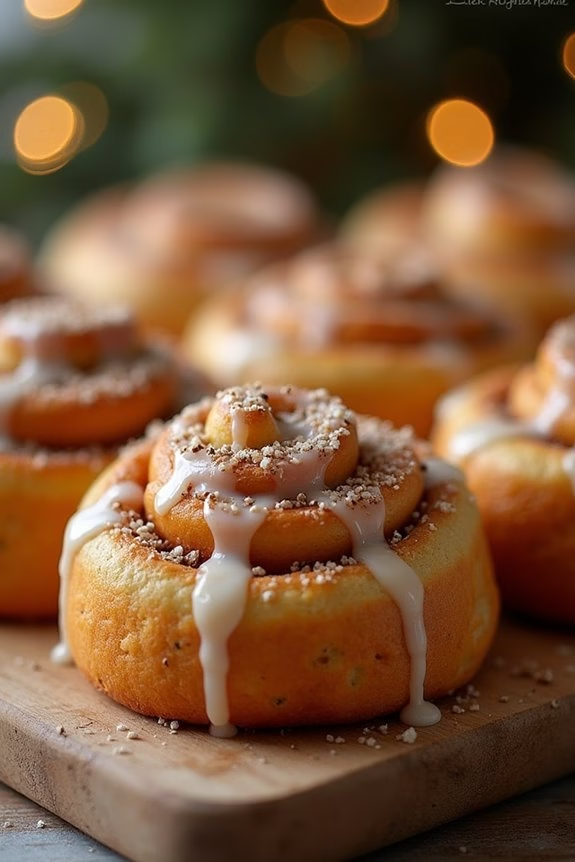
Cardamom Spiced Morning Rolls are a delightful addition to any Christmas breakfast spread, offering a warm and aromatic start to the festivities. These soft, sweet rolls are infused with the exotic flavor of cardamom, creating a unique and inviting aroma that’s bound to fill your kitchen with holiday cheer.
The combination of cardamom and a hint of sweetness from a sugar glaze makes these rolls the perfect treat to enjoy with a cup of hot coffee or cocoa.
The preparation of these rolls involves a simple yeast dough that’s enriched with butter and eggs, guaranteeing a fluffy and tender texture. Once the dough is prepared, it’s rolled out and generously sprinkled with a mixture of sugar and cardamom before being shaped into spirals.
After baking, a drizzle of icing adds a finishing touch to these festive pastries. Whether you’re hosting a brunch or simply enjoying a quiet Christmas morning at home, these Cardamom Spiced Morning Rolls will certainly make the occasion special.
Ingredients (Serves 4-6)
- 3 1/2 cups all-purpose flour
- 1 packet (2 1/4 teaspoons) instant yeast
- 1/4 cup granulated sugar
- 1 teaspoon ground cardamom
- 1/2 teaspoon salt
- 1 cup warm milk (110°F)
- 1/4 cup unsalted butter, melted
- 1 large egg
- 1 teaspoon vanilla extract
For the filling:
- 1/2 cup brown sugar
- 2 teaspoons ground cardamom
- 1/4 cup unsalted butter, softened
For the glaze:
- 1 cup powdered sugar
- 2 tablespoons milk
- 1/2 teaspoon vanilla extract
Cooking Instructions
- Prepare the Dough: In a large mixing bowl, combine the flour, instant yeast, granulated sugar, ground cardamom, and salt. Mix well to distribute the yeast and spices evenly.
- Mix Wet Ingredients: In a separate bowl, mix the warm milk, melted butter, egg, and vanilla extract. Pour this mixture into the dry ingredients and stir until a soft dough forms.
- Knead the Dough: Turn the dough out onto a floured surface and knead for about 5-7 minutes until it becomes smooth and elastic. If the dough is too sticky, add a little more flour, one tablespoon at a time.
- First Rise: Place the kneaded dough in a greased bowl, cover with a clean kitchen towel, and let it rise in a warm, draft-free area for 1-1.5 hours, or until it has doubled in size.
- Prepare the Filling: While the dough is rising, mix the brown sugar and ground cardamom in a small bowl. Set aside.
- Roll Out the Dough: Once the dough has risen, punch it down and roll it out on a lightly floured surface into a rectangle about 12×18 inches.
- Add Filling: Spread the softened butter over the rolled-out dough. Sprinkle the brown sugar and cardamom mixture evenly over the buttered dough.
- Shape the Rolls: Starting from the long edge, roll the dough tightly into a log. Slice the log into 12 equal pieces and place them in a greased 9×13 inch baking dish.
- Second Rise: Cover the baking dish with a towel and let the rolls rise for another 30-45 minutes until they’re puffy.
- Bake: Preheat your oven to 350°F (175°C). Bake the rolls for 25-30 minutes until they’re golden brown and cooked through.
- Prepare the Glaze: While the rolls are baking, whisk together the powdered sugar, milk, and vanilla extract to make a smooth glaze.
- Glaze the Rolls: Once the rolls are out of the oven, let them cool for about 5 minutes, then drizzle the glaze over the warm rolls.
Extra Tips
For best results, verify all ingredients are at room temperature before beginning, as this helps the dough rise more efficiently.
If you prefer a more pronounced cardamom flavor, feel free to adjust the amount of cardamom in the filling to your taste.
Additionally, these rolls can be prepared the night before; simply shape them and let them rise overnight in the refrigerator. In the morning, allow them to come to room temperature before baking.
This method can save you time on a busy Christmas morning, guaranteeing you have fresh, warm pastries ready to enjoy.
Apple Cinnamon Strudel
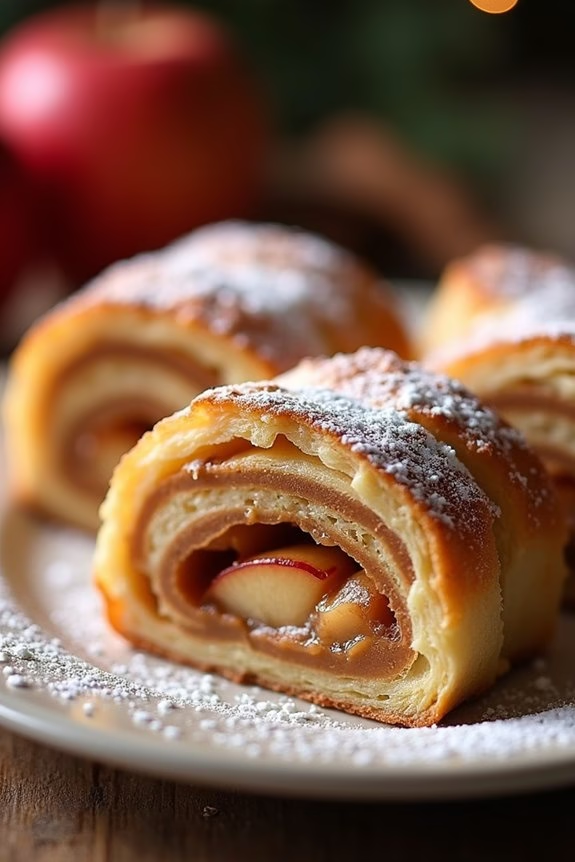
Start your Christmas morning with a delightful Apple Cinnamon Strudel. This warm, flaky pastry filled with sweet apples and aromatic cinnamon is perfect for a festive breakfast. The strudel combines the rich flavors of apples with the comforting scent of cinnamon, creating a dish that’s both elegant and easy to prepare.
Not only does it look beautiful on the breakfast table, but it also fills your home with the cozy aroma of baking spices.
This recipe is designed to serve 4-6 people, making it ideal for a small family gathering or an intimate brunch. The use of ready-made puff pastry makes the preparation of this strudel straightforward, allowing you to spend more time with your loved ones. With juicy apples, a hint of brown sugar, and a touch of nutmeg, this strudel is a surefire way to make your Christmas morning special.
Ingredients:
- 2 sheets of puff pastry, thawed
- 4 large apples, peeled, cored, and thinly sliced
- 1/2 cup brown sugar
- 1 tablespoon ground cinnamon
- 1/2 teaspoon ground nutmeg
- 1 tablespoon lemon juice
- 1/4 cup raisins (optional)
- 1/4 cup chopped walnuts or pecans (optional)
- 1 egg, beaten (for egg wash)
- 2 tablespoons butter, melted
- 1 tablespoon all-purpose flour (for dusting)
- Powdered sugar (for dusting, optional)
Instructions:
1. Preheat the Oven: Begin by preheating your oven to 375°F (190°C). Line a baking sheet with parchment paper to prevent the strudel from sticking.
2. Prepare the Filling: In a large mixing bowl, combine the sliced apples, brown sugar, cinnamon, nutmeg, and lemon juice. If using raisins or nuts, add them to the mixture. Stir until the ingredients are well combined and the apples are evenly coated.
3. Roll Out the Puff Pastry: On a lightly floured surface, roll out each sheet of puff pastry to approximately 12×16 inches. This will make certain the pastry is thin enough to bake evenly and encase the filling.
4. Assemble the Strudel: Place one sheet of puff pastry on the prepared baking sheet. Spread half of the apple mixture down the center of the pastry, leaving about 2 inches on each side. Fold over the sides of the pastry to encase the filling, sealing the edges with a little water if necessary.
Repeat this step with the second sheet of puff pastry and the remaining apple mixture.
5. Brush with Egg Wash: Using a pastry brush, apply a thin layer of beaten egg over the surface of each strudel. This will give the pastry a beautiful golden-brown finish when baked.
6. Bake the Strudel: Transfer the baking sheet to the oven and bake for 30-35 minutes, or until the pastry is golden brown and the apples are tender.
7. Cool and Serve: Allow the strudel to cool for a few minutes before slicing. Dust with powdered sugar if desired, and serve warm.
Extra Tips:
For the best results, make sure your puff pastry is properly thawed before rolling it out. This will make it easier to handle and prevent tearing.
If you prefer a more caramelized filling, sauté the apples with butter and sugar in a skillet before adding them to the pastry. Remember, you can also customize the strudel by adding your favorite dried fruits or nuts for added texture and flavor.
Enjoy your festive breakfast with a cup of coffee or tea for the perfect start to your Christmas morning!
Lemon Glazed Ricotta Cookies

Lemon Glazed Ricotta Cookies are a delightful treat perfect for a festive Christmas breakfast. These soft and moist cookies, infused with the fresh zest of lemon and the creamy texture of ricotta cheese, offer a burst of citrus flavor that pairs beautifully with a warm cup of coffee or tea. The lemon glaze adds an extra layer of sweetness and tang, making these cookies a rejuvenating addition to your holiday morning spread.
Creating these cookies is a simple yet rewarding process. The combination of ingredients results in a dough that bakes into light, fluffy cookies with a subtle hint of lemon in each bite. The ricotta cheese keeps them moist and gives them a unique texture that stands out from traditional cookies. Topped with a shiny lemon glaze, these cookies not only taste delicious but also look beautiful on any breakfast table.
Ingredients for 4-6 servings:
- 2 cups all-purpose flour
- 1 teaspoon baking powder
- 1/2 teaspoon baking soda
- 1/2 teaspoon salt
- 1/2 cup unsalted butter, softened
- 1 cup granulated sugar
- 1 cup ricotta cheese
- 1 large egg
- 1 tablespoon lemon zest
- 1 tablespoon lemon juice
- 1 teaspoon vanilla extract
For the Lemon Glaze:
- 1 cup powdered sugar
- 2 tablespoons lemon juice
- 1 teaspoon lemon zest
Cooking Instructions:
- Preheat the Oven: Start by preheating your oven to 350°F (175°C). Line two baking sheets with parchment paper or silicone baking mats.
- Mix Dry Ingredients: In a medium bowl, whisk together the flour, baking powder, baking soda, and salt. This will guarantee that the baking powder and soda are evenly distributed throughout the flour.
- Cream the Butter and Sugar: In a large bowl, using an electric mixer, beat the softened butter and granulated sugar together until light and fluffy. This should take about 2-3 minutes.
- Add Wet Ingredients: Add the ricotta cheese, egg, lemon zest, lemon juice, and vanilla extract to the butter mixture. Beat until everything is well combined.
- Combine Wet and Dry Ingredients: Gradually add the dry ingredients to the wet ingredients, mixing just until combined. Be careful not to overmix, as this can make the cookies tough.
- Scoop the Dough: Using a tablespoon or small ice cream scoop, drop dough onto the prepared baking sheets, spacing them about 2 inches apart.
- Bake the Cookies: Place the baking sheets in the preheated oven and bake for 13-15 minutes, or until the edges of the cookies are golden brown. Remove from the oven and let them cool on the baking sheets for about 5 minutes before transferring them to a wire rack to cool completely.
- Prepare the Lemon Glaze: In a small bowl, whisk together the powdered sugar, lemon juice, and lemon zest until smooth. The glaze should be thick but pourable.
- Glaze the Cookies: Once the cookies are completely cool, drizzle the lemon glaze over the top of each one. Allow the glaze to set for about 15 minutes before serving.
Extra Tips:
When making Lemon Glazed Ricotta Cookies, be sure to use fresh lemons for the zest and juice, as this will enhance the flavor and aroma of the cookies. If you prefer a stronger lemon flavor, you can add an extra tablespoon of lemon juice to the glaze.
These cookies can be stored in an airtight container at room temperature for up to three days, making them a convenient option for prepping ahead of the busy holiday mornings.
Nutmeg and Vanilla Brioche
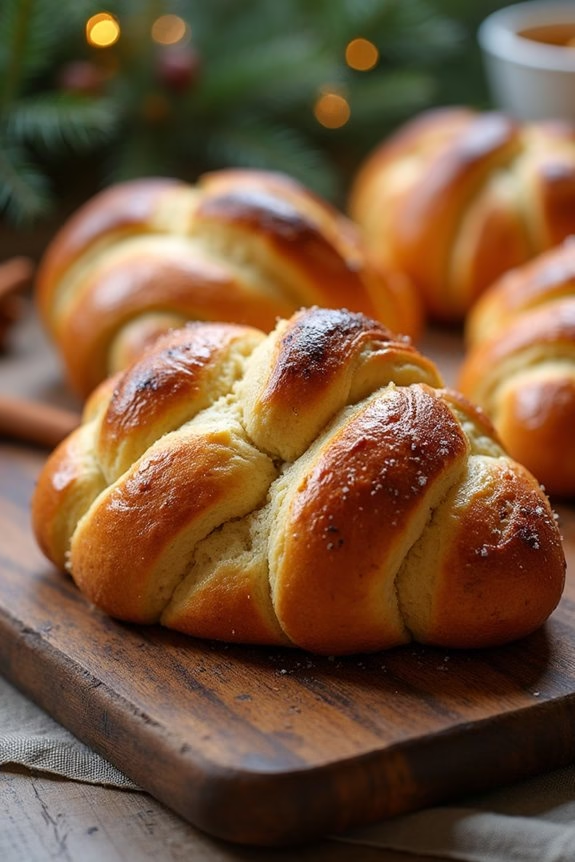
Indulge in the delightful aroma and flavor of Nutmeg and Vanilla Brioche, a perfect choice for your Christmas breakfast. This light and fluffy pastry is enriched with the warm spice of nutmeg and the sweet, inviting scent of vanilla. Its golden crust and tender interior make it a treat that pairs wonderfully with a hot cup of coffee or tea, creating a festive and comforting morning experience.
Perfect for serving 4-6 people, this recipe will guide you through creating a brioche that’s both simple and rewarding. The combination of nutmeg and vanilla adds a unique twist to the classic French bread, making it a standout addition to your Christmas breakfast table. Follow the steps below to bring this delicious pastry to life.
Ingredients:
- 500g all-purpose flour
- 100g granulated sugar
- 2 teaspoons instant yeast
- 1 teaspoon ground nutmeg
- 1/2 teaspoon salt
- 5 large eggs, at room temperature
- 250g unsalted butter, softened
- 1 tablespoon vanilla extract
- 1/4 cup warm milk
- 1 egg yolk (for egg wash)
- 1 tablespoon water (for egg wash)
Instructions:
- Prepare the Dough: In a large mixing bowl, combine the flour, sugar, instant yeast, ground nutmeg, and salt. Mix well to guarantee the ingredients are evenly distributed.
- Add Wet Ingredients: In a separate bowl, beat the eggs and add them to the dry mixture along with the vanilla extract and warm milk. Mix until the dough begins to come together.
- Incorporate Butter: Gradually add the softened butter to the dough, mixing continuously. Knead the dough on a lightly floured surface for about 10 minutes until it becomes smooth and elastic.
- First Rise: Place the dough in a greased bowl, cover it with a damp cloth, and let it rise in a warm place for about 1-2 hours or until it has doubled in size.
- Shape the Brioche: After the first rise, punch down the dough to release excess air. Divide the dough into three equal parts and braid them together. Place the braided dough into a greased loaf pan.
- Second Rise: Cover the loaf pan with a cloth and let the dough rise again for about 45 minutes to an hour until it has doubled in size.
- Preheat and Egg Wash: Preheat your oven to 180°C (350°F). In a small bowl, mix the egg yolk with water to create an egg wash. Brush the top of the brioche with the egg wash for a shiny, golden finish.
- Bake: Bake the brioche in the preheated oven for 30-35 minutes, or until the top is golden brown and the bread sounds hollow when tapped.
- Cool and Serve: Let the brioche cool slightly before removing it from the pan. Slice and serve warm or at room temperature.
Extra Tips:
For the best flavor and texture, make sure all your ingredients are at room temperature before starting. If you have time, allow the dough to rise slowly in the refrigerator overnight after the first rise; this will enhance the flavor.
When kneading the dough, it should be soft but not sticky; adjust with a bit more flour or milk if necessary. Finally, don’t skip the egg wash – it gives the brioche its signature glossy finish.
Enjoy your Nutmeg and Vanilla Brioche as is, or pair it with your favorite holiday jams or butters.
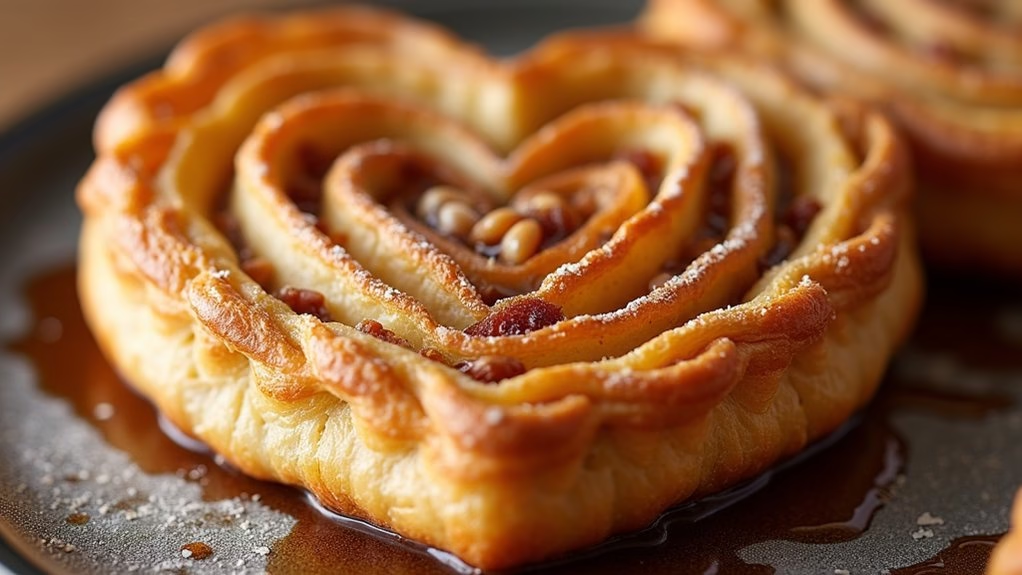
Maple Walnut Palmiers
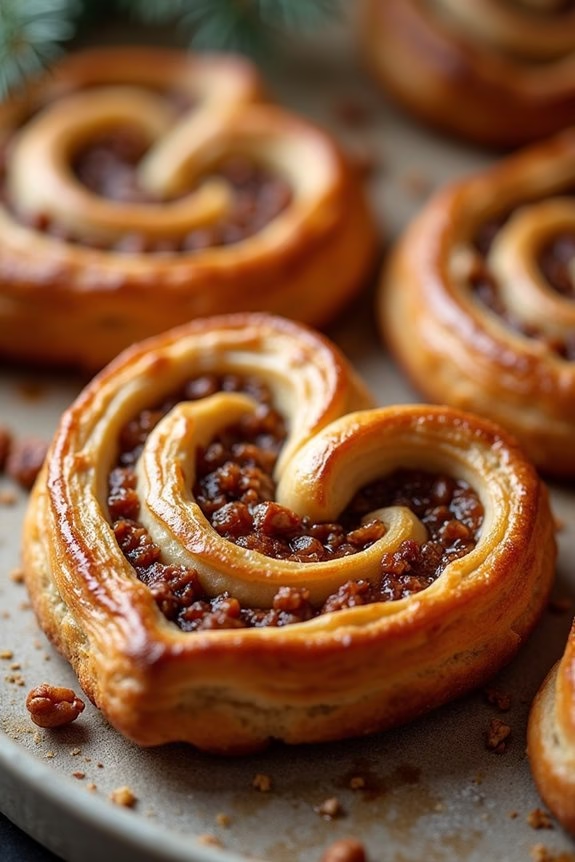
Maple Walnut Palmiers are a delightful addition to your Christmas breakfast table. These elegant pastries aren’t only visually appealing with their distinctive heart shapes, but they also offer a satisfying crunch and a rich, nutty sweetness from the combination of maple syrup and walnuts.
Perfect for serving alongside your morning coffee or as a sweet treat to share with family and friends during the holiday season, these palmiers are surprisingly simple to make yet impressive in presentation.
The recipe requires minimal ingredients and preparation time, making it an excellent choice for a stress-free Christmas morning. Pre-made puff pastry is used as the base, which is then layered with a mixture of chopped walnuts and maple syrup, creating a delicious filling that caramelizes beautifully in the oven.
Once baked, the palmiers are golden brown and have a delightful flaky texture. This recipe serves 4-6 people, providing enough to share among loved ones.
Ingredients:
- 1 sheet of puff pastry, thawed
- 1/2 cup of walnuts, finely chopped
- 1/4 cup of maple syrup
- 1/4 cup of granulated sugar
- 1/4 teaspoon of cinnamon
- A pinch of salt
- Flour for dusting
Instructions:
- Preheat and Prepare: Preheat your oven to 400°F (200°C). Line a baking sheet with parchment paper to prevent sticking and set aside.
- Prepare Puff Pastry: Lightly flour your work surface and roll out the thawed puff pastry sheet into a rectangular shape, approximately 10×12 inches in size.
- Mix Filling: In a small bowl, combine the finely chopped walnuts, maple syrup, granulated sugar, cinnamon, and a pinch of salt. Stir until the mixture is well blended and the walnuts are evenly coated.
- Spread the Filling: Evenly spread the walnut-maple mixture over the rolled-out puff pastry, ensuring that it covers the entire surface.
- Shape the Palmiers: Starting from one of the longer edges, tightly roll the pastry towards the center. Repeat with the opposite edge so that both rolls meet in the middle, creating a double spiral shape.
- Chill the Roll: Place the rolled pastry in the refrigerator for about 15-20 minutes. This will make it easier to slice without losing its shape.
- Slice and Arrange: Once chilled, use a sharp knife to slice the rolled pastry into 1/4-inch thick pieces. Arrange the slices on the prepared baking sheet, leaving enough space between each piece to allow for expansion during baking.
- Bake the Palmiers: Bake in the preheated oven for approximately 12-15 minutes, or until the palmiers are puffed and golden brown.
- Cool and Serve: Remove from the oven and allow to cool slightly on the baking sheet before transferring to a wire rack. Serve warm or at room temperature.
Extra Tips:
For an even more pronounced maple flavor, you can drizzle a little additional maple syrup over the palmiers just before serving.
Be sure to keep an eye on the pastries while they bake, as the sugar can caramelize quickly and may lead to burning if left unchecked.
For easy cleanup, use parchment paper on your baking sheet, as the maple syrup and sugar can become sticky as they cook.
If you prefer a different nut, pecans can be used as an alternative to walnuts, offering a slightly different, yet equally delicious, flavor profile.