
The holiday season is here, and I’m always on the lookout for appetizers that blend style and simplicity. Puff pastry is my go-to ingredient, effortlessly turning basic elements into elegant treats. Picture the smooth brie with tart cranberry or the delightful mix of spinach and feta. These recipes are sure to impress at any gathering. Ready to see how they come together?
Brie and Cranberry Puff Pastry Bites
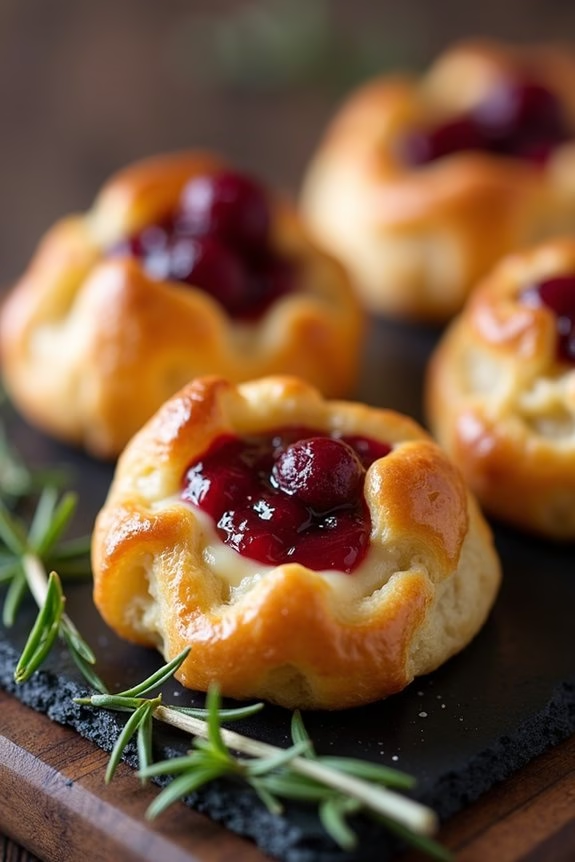
Brie and Cranberry Puff Pastry Bites are the perfect festive appetizer to start your holiday celebrations. These delightful bites combine the rich, creamy flavor of Brie cheese with the sweet and tart taste of cranberry sauce, all encased in a flaky puff pastry shell. They’re easy to make, elegant to serve, and certain to impress your guests with their deliciousness.
Whether you’re hosting a Christmas party or a cozy family gathering, these puff pastry bites will add a touch of gourmet flair to your appetizer spread. The beauty of this dish lies in its simplicity and the harmonious blend of flavors. Brie cheese melts beautifully, becoming gooey and luscious, while the cranberry sauce adds a burst of fruity sweetness that perfectly complements the cheese.
The puff pastry provides a buttery, crispy texture that holds everything together. Preparing these bites in advance will also give you more time to enjoy the festivities with your loved ones. Here’s how to make Brie and Cranberry Puff Pastry Bites for 4-6 people:
Ingredients:
- 1 sheet of puff pastry (thawed if frozen)
- 1 wheel (about 8 oz) of Brie cheese
- 1/2 cup of cranberry sauce
- 1 egg (for egg wash)
- 1 tablespoon of water
- Fresh rosemary or thyme sprigs for garnish (optional)
Instructions:
- Preheat the Oven: Start by preheating your oven to 375°F (190°C). This will guarantee that your puff pastry is baked evenly and achieves a golden, flaky texture.
- Prepare the Puff Pastry: Roll out the thawed puff pastry on a lightly floured surface to smooth out any creases. Cut the sheet into 12 equal squares. You can use a sharp knife or a pizza cutter for this step.
- Prepare the Brie Cheese: Cut the Brie into small squares, about 1 inch in size. You can leave the rind on, as it’s edible and adds extra flavor.
- Assemble the Bites: Place a Brie square in the center of each puff pastry square. Top each piece of Brie with a teaspoon of cranberry sauce.
- Seal the Pastry: Fold the corners of each puff pastry square over the filling, pinching the edges together to seal. This will help keep the cheese and cranberry sauce inside as they bake.
- Prepare the Egg Wash: In a small bowl, beat the egg with a tablespoon of water to create an egg wash. This will give your pastry bites a shiny, golden finish.
- Brush and Bake: Place the assembled bites on a baking sheet lined with parchment paper. Brush each pastry with the egg wash. Bake in the preheated oven for 15-20 minutes, or until the pastry is puffed and golden brown.
- Garnish and Serve: If desired, garnish each puff pastry bite with a small sprig of fresh rosemary or thyme for an extra touch of elegance. Serve warm and enjoy!
Extra Tips: To make these Brie and Cranberry Puff Pastry Bites even more flavorful, consider adding a pinch of chopped nuts, such as pecans or walnuts, on top of the cranberry sauce before sealing the pastry. This will add a delightful crunch to each bite.
If you’re short on time, you can prepare the bites in advance and freeze them before baking. Simply bake them directly from the freezer, adding a few extra minutes to the baking time. Finally, make sure to keep an eye on the oven towards the end of baking, as puff pastry can go from perfectly golden to overly browned quite quickly.
Puff Pastry Sausage Rolls
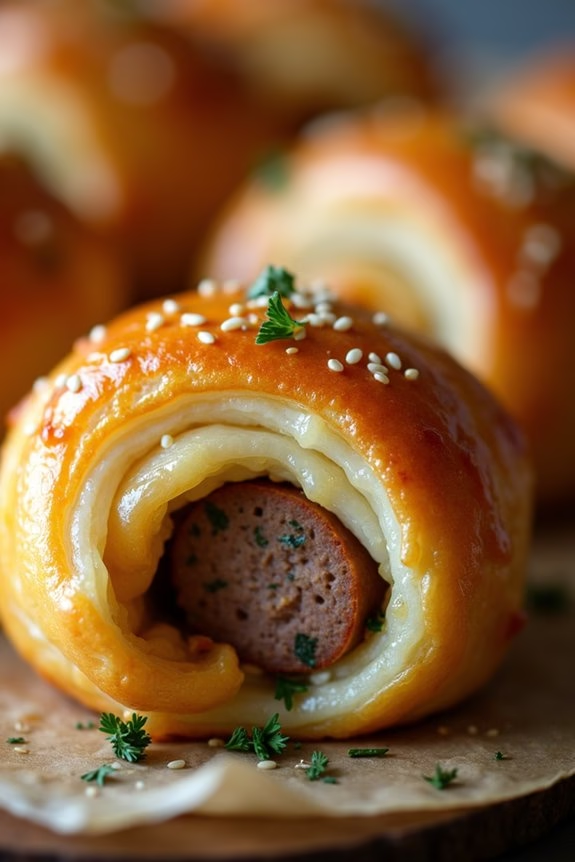
The key to perfect Puff Pastry Sausage Rolls is using high-quality sausage meat and guaranteeing the pastry is golden and crispy. This recipe serves 4-6 people, making it ideal for a small gathering. You can adjust the seasoning and spices to suit your taste, or even experiment with different types of sausages to create your own unique version.
Let’s plunge into the recipe and discover how to make these delightful appetizers.
Ingredients for Puff Pastry Sausage Rolls (Serves 4-6):
- 1 package puff pastry sheets (2 sheets), thawed
- 1 pound sausage meat (pork, chicken, or turkey)
- 1 small onion, finely chopped
- 2 cloves garlic, minced
- 1 tablespoon fresh parsley, chopped
- 1 teaspoon dried thyme
- Salt and pepper to taste
- 1 egg, beaten (for egg wash)
- Sesame seeds or poppy seeds (optional, for topping)
Cooking Instructions:
- Preheat Oven: Preheat your oven to 400°F (200°C) and line a baking sheet with parchment paper to prevent the sausage rolls from sticking.
- Prepare Sausage Filling: In a large mixing bowl, combine the sausage meat, chopped onion, minced garlic, fresh parsley, dried thyme, salt, and pepper. Mix well until all ingredients are thoroughly incorporated.
- Prepare Puff Pastry: Roll out the thawed puff pastry sheets on a lightly floured surface. Cut each sheet into two equal rectangles, resulting in four rectangles.
- Fill and Roll: Divide the sausage mixture into four equal portions. Place a portion of the sausage mixture along one long edge of each rectangle, leaving some space at the edges. Roll the pastry over the sausage filling, sealing the edges by pressing gently with your fingers.
- Cut and Glaze: Cut each roll into smaller pieces, about 2 inches long. Place the sausage rolls seam-side down on the prepared baking sheet. Brush the tops with the beaten egg to give them a golden finish. Sprinkle sesame seeds or poppy seeds on top if desired.
- Bake: Bake in the preheated oven for 20-25 minutes or until the pastry is puffed and golden brown and the sausage is cooked through. Remove from the oven and let cool slightly before serving.
Extra Tips:
For an extra flaky crust, guarantee your puff pastry stays cold until you’re ready to use it. If the pastry becomes too warm and soft, place it in the refrigerator for a few minutes before proceeding.
You can also prepare these sausage rolls in advance and freeze them before baking. Simply bake them straight from the freezer, adding a few extra minutes to the baking time.
Additionally, feel free to customize the filling by adding grated cheese or a pinch of chili flakes for a spicy kick. Enjoy your delicious Puff Pastry Sausage Rolls with your favorite dipping sauces for an added flavor boost!
Spinach and Feta Pinwheels
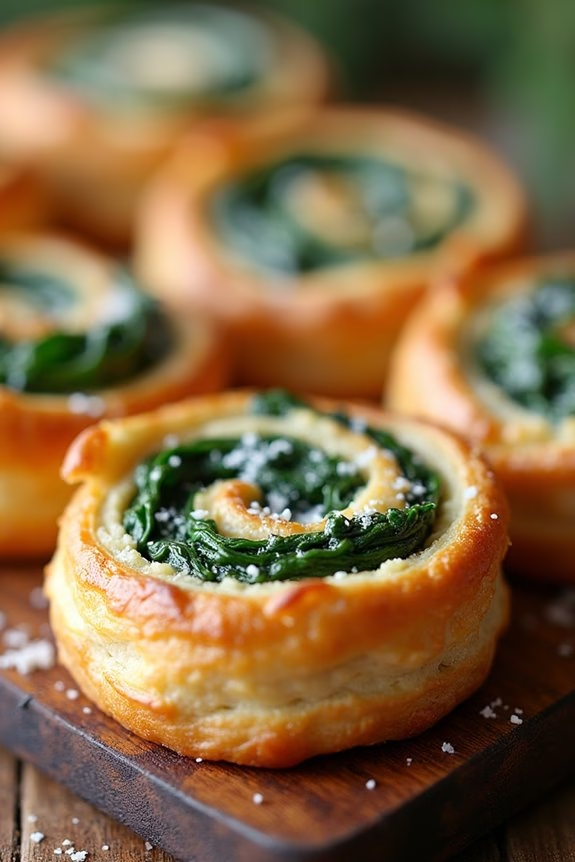
Spinach and Feta Pinwheels are a delightful appetizer that brings a touch of elegance to any Christmas gathering. These pinwheels are a perfect combination of flaky puff pastry, savory spinach, and tangy feta cheese, making them a crowd-pleaser for both young and old alike. They aren’t only delicious but also visually appealing, with their spiral shape showcasing the vibrant colors of the ingredients.
Perfect for serving at holiday parties, these pinwheels can be prepared ahead of time and baked just before guests arrive, making certain they’re fresh and warm.
The beauty of Spinach and Feta Pinwheels lies in their simplicity and versatility. This recipe can be easily adapted to include additional ingredients such as sun-dried tomatoes or olives, depending on your personal preference. Additionally, they’re an excellent option for vegetarians, providing a hearty and satisfying appetizer.
With minimal ingredients and straightforward preparation, these pinwheels are ideal for both novice and experienced cooks looking to impress their guests without spending hours in the kitchen.
Ingredients for 4-6 servings:
- 1 sheet of puff pastry (thawed)
- 1 cup fresh spinach, chopped
- 1/2 cup crumbled feta cheese
- 1/4 cup grated Parmesan cheese
- 1 egg, beaten
- Salt and pepper to taste
Cooking Instructions:
- Preheat the oven to 400°F (200°C). Line a baking sheet with parchment paper to prevent the pinwheels from sticking and make certain even cooking.
- Prepare the filling by combining the chopped spinach, crumbled feta cheese, and grated Parmesan cheese in a bowl. Mix well, and season with salt and pepper to taste.
- Roll out the puff pastry on a lightly floured surface to make certain it doesn’t stick. If necessary, use a rolling pin to flatten it slightly, maintaining a rectangular shape.
- Spread the spinach mixture evenly over the puff pastry, leaving a small border around the edges. This will help when sealing the pastry.
- Roll the pastry tightly from one long edge to the other, creating a log shape. Once rolled, use the beaten egg to brush the edge and seal the log. The egg will help the pastry stick together during baking.
- Slice the log into 1/2-inch (1.25 cm) thick pieces, placing each pinwheel flat on the prepared baking sheet. Be sure to leave some space between each piece to allow for expansion during baking.
- Brush the tops of the pinwheels with the remaining beaten egg to give them a golden, glossy finish.
- Bake in the preheated oven for 15-20 minutes, or until the pinwheels are puffed and golden brown. Once baked, remove from the oven and let them cool slightly before serving.
Extra Tips:
When making Spinach and Feta Pinwheels, make certain the puff pastry is properly thawed but still cold, as this makes it easier to handle and results in a flakier texture.
You can prepare the filling mixture and roll the pastry ahead of time, storing the unbaked pinwheels in the refrigerator for up to a day. This makes it convenient to bake them just before serving, making certain they’re warm and fresh for your guests.
Additionally, consider experimenting with flavors by adding herbs like dill or mint to the filling for an extra aromatic touch.
Smoked Salmon and Cream Cheese Puff Pastry Cups

Smoked Salmon and Cream Cheese Puff Pastry Cups are an elegant and delicious appetizer perfect for any festive occasion, especially during the Christmas season. These bite-sized treats combine the rich flavors of smoked salmon with the creamy tang of cream cheese, all encased in a light and flaky puff pastry shell.
They aren’t only visually appealing but also incredibly easy to make, allowing you to impress your guests without spending hours in the kitchen. The combination of ingredients in these puff pastry cups creates a perfect balance of flavors and textures. The smokiness of the salmon pairs beautifully with the smooth and creamy cheese, while the crisp and buttery pastry provides a satisfying crunch.
These cups can be prepared in advance and served either warm or at room temperature, making them a convenient choice for holiday gatherings. Whether you’re hosting a small family dinner or a large Christmas party, these Smoked Salmon and Cream Cheese Puff Pastry Cups are sure to be a crowd-pleaser.
Ingredients (Serves 4-6):
- 1 sheet of puff pastry, thawed
- 4 oz cream cheese, softened
- 3 oz smoked salmon, thinly sliced
- 2 tablespoons fresh dill, chopped
- 2 tablespoons capers, drained
- 1 tablespoon lemon juice
- 1 egg, beaten (for egg wash)
- Salt and pepper to taste
Instructions:
- Preheat and Prepare Pastry: Preheat your oven to 400°F (200°C). Roll out the puff pastry sheet on a lightly floured surface until it’s about 1/8 inch thick. Cut the pastry into 12 equal squares.
- Shape the Cups: Gently press each square into a muffin tin, making sure the corners are upright and the pastry forms a cup shape. Brush the edges of the pastry with the beaten egg to give them a golden finish once baked.
- Prepare Filling: In a medium bowl, mix the softened cream cheese, lemon juice, and chopped dill until well combined. Season with salt and pepper to your liking.
- Assemble the Cups: Spoon about a teaspoon of the cream cheese mixture into each pastry cup. Top with a small piece of smoked salmon and a few capers.
- Bake: Place the muffin tin in the preheated oven and bake for 15-20 minutes until the pastry is golden brown and puffed. Check for doneness by ensuring the pastry is cooked through and the filling is warm.
- Cool and Serve: Allow the puff pastry cups to cool slightly in the tin before transferring them to a serving platter. Garnish with additional dill if desired and serve warm or at room temperature.
Extra Tips:
To guarantee the puff pastry bakes evenly and maintains its flaky texture, work quickly and keep the dough as cool as possible before baking. You can prepare the cream cheese mixture and cut the pastry in advance, storing them separately until you’re ready to assemble and bake.
If you prefer a more intense flavor, consider adding a touch of horseradish to the cream cheese mixture. Additionally, these puff pastry cups can be made a day ahead and gently reheated in the oven before serving to retain their crispness.
Pesto and Sun-Dried Tomato Palmiers
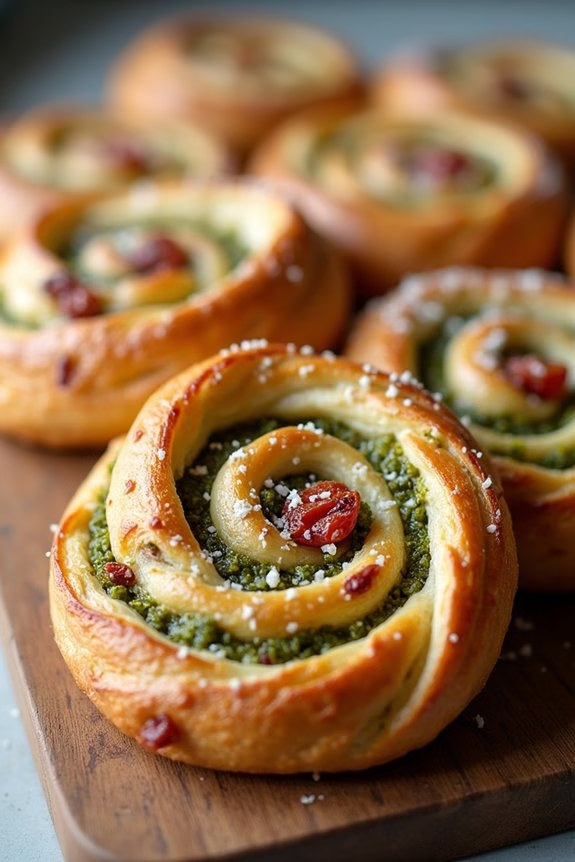
Pesto and Sun-Dried Tomato Palmiers are a delightful appetizer that combines the rich flavors of savory pesto and the intense sweetness of sun-dried tomatoes, all wrapped in a crispy, buttery puff pastry.
These elegant and tasty pastries are perfect for a Christmas gathering, offering a wonderful burst of flavor with every bite. Their distinct spiral shape adds a touch of sophistication to your appetizer spread, making them as visually appealing as they’re delicious.
These palmiers are incredibly easy to make, yet they deliver a complex taste that will impress your guests. The combination of the herby pesto with the tangy sun-dried tomatoes creates a balanced flavor profile that pairs well with a variety of other holiday dishes.
Whether you’re hosting a casual get-together or a formal dinner, these palmiers are a versatile appetizer that fits right in. Here is how you can prepare this delightful dish for 4-6 people.
Ingredients:
- 1 sheet of puff pastry, thawed
- 1/2 cup of pesto
- 1/2 cup of sun-dried tomatoes, finely chopped
- 1/4 cup of grated Parmesan cheese
- 1 egg, beaten
- Flour for dusting
Instructions:
- Preheat the Oven: Begin by preheating your oven to 400°F (200°C). Line a baking sheet with parchment paper to prevent sticking.
- Prepare the Puff Pastry: Lightly dust your work surface with flour. Unroll the puff pastry sheet onto the floured surface. With a rolling pin, gently roll the pastry to smooth out any creases, maintaining its rectangular shape.
- Spread the Pesto: Using a spatula or the back of a spoon, evenly spread the pesto over the entire surface of the puff pastry, leaving about a 1/2-inch border around the edges.
- Add the Sun-Dried Tomatoes: Evenly sprinkle the finely chopped sun-dried tomatoes over the pesto layer. Guarantee they’re distributed uniformly to get a consistent flavor in each bite.
- Sprinkle the Cheese: Scatter the grated Parmesan cheese over the sun-dried tomatoes. This will add a lovely savory note and will help to bind the ingredients together.
- Roll the Pastry: Starting from one of the longer edges, carefully roll the pastry towards the center. Repeat the process from the opposite side until both rolls meet in the middle.
- Chill the Roll: Wrap the rolled pastry in plastic wrap and place it in the refrigerator for about 20 minutes. This will make slicing easier and help the palmiers retain their shape while baking.
- Slice the Palmiers: Remove the chilled pastry from the refrigerator and unwrap. Using a sharp knife, slice the roll into 1/2-inch thick pieces and lay them flat on the prepared baking sheet.
- Brush with Egg Wash: Lightly brush the tops of the palmiers with the beaten egg. This will give them a beautiful golden color when baked.
- Bake: Place the baking sheet in the preheated oven and bake for 15-18 minutes, or until the palmiers are puffed and golden brown.
- Cool and Serve: Allow the palmiers to cool on a wire rack for a few minutes before serving warm.
Extra Tips:
For the best results, make sure the puff pastry is well chilled before slicing. This helps maintain the integrity of the spiral shape.
You can prepare the rolls a day in advance and store them in the refrigerator until you’re ready to bake, which can save time on the day of your event.
Additionally, if you prefer a stronger cheese flavor, consider using other types of cheese like Gruyère or Pecorino Romano. If you want to add a bit of a kick, a sprinkle of red pepper flakes over the pesto can add a subtle heat to contrast with the richness of the pastry.
Caramelized Onion and Goat Cheese Tarts
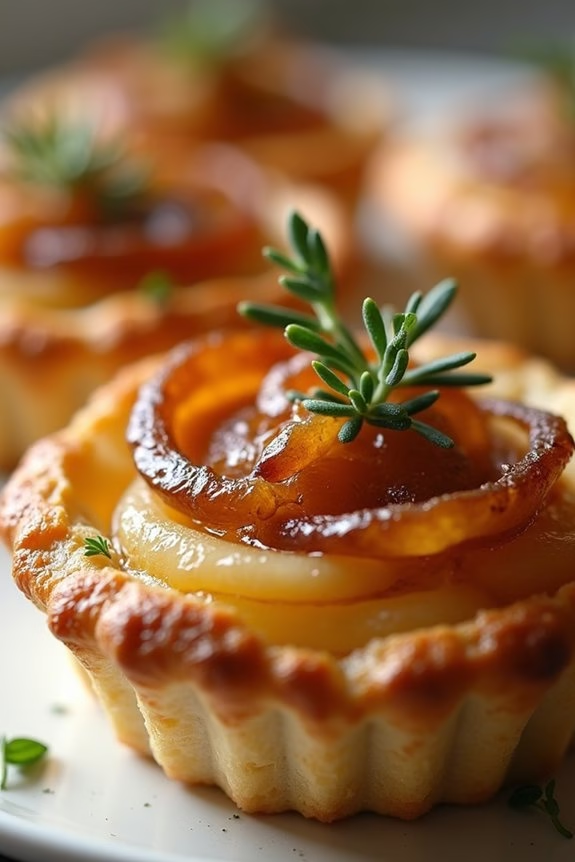
Caramelized Onion and Goat Cheese Tarts are a delightful appetizer that perfectly balances the sweetness of caramelized onions with the tangy creaminess of goat cheese. These tarts are an elegant addition to any Christmas gathering, offering a burst of flavor in every bite. The flaky puff pastry base provides a satisfying crunch, making these tarts a hit with guests.
Whether you’re hosting a large holiday party or an intimate family dinner, these tarts are sure to impress. The beauty of this dish lies in its simplicity and the harmonious combination of ingredients. Caramelizing the onions brings out their natural sugars, which pairs beautifully with the rich goat cheese.
The tarts are easy to prepare and can be made in advance, allowing you to enjoy the festivities without being stuck in the kitchen. With just a few simple steps, you’ll have a gourmet appetizer ready to delight your holiday guests.
Ingredients for 4-6 servings:
- 2 tablespoons olive oil
- 3 large onions, thinly sliced
- 1 tablespoon balsamic vinegar
- Salt and pepper to taste
- 1 sheet puff pastry, thawed
- 5 ounces goat cheese, crumbled
- 1 egg, beaten
- Fresh thyme leaves for garnish
Cooking Instructions:
1. Preheat the Oven: Begin by preheating your oven to 400°F (200°C). This guarantees it’s hot enough to bake the pastry to a perfect golden brown.
2. Caramelize the Onions: Heat the olive oil in a large skillet over medium heat. Add the sliced onions and a pinch of salt. Cook the onions, stirring occasionally, for about 20-25 minutes until they’re soft and golden brown.
Add the balsamic vinegar, stir well, and cook for an additional 2-3 minutes. Remove from heat and let them cool slightly.
3. Prepare the Puff Pastry: On a lightly floured surface, roll out the puff pastry to smooth it out a bit. Cut the pastry into 4-6 equal squares and place them on a baking sheet lined with parchment paper.
4. Assemble the Tarts: Divide the caramelized onions evenly among the puff pastry squares, leaving a small border around the edges. Top each tart with crumbled goat cheese.
5. Brush with Egg Wash: Using a pastry brush, lightly brush the edges of the puff pastry with the beaten egg. This will give the pastry a nice golden color as it bakes.
6. Bake the Tarts: Place the baking sheet in the preheated oven and bake for 15-20 minutes, or until the pastry edges are puffed up and golden brown.
7. Garnish and Serve: Remove the tarts from the oven and let them cool slightly. Garnish with fresh thyme leaves before serving.
Extra Tips:
When caramelizing onions, patience is key. Allow the onions to cook slowly over medium heat to prevent burning and guarantee they develop a deep caramel color.
If you prefer a stronger flavor, try adding a splash of red wine during the final stages of caramelizing. Additionally, you can prepare the caramelized onions a day in advance and store them in the refrigerator, making the assembly on the day of your event quick and easy.
Finally, for a touch of sweetness, consider adding a drizzle of honey over the finished tarts before serving.
Mushroom and Thyme Vol-au-Vents
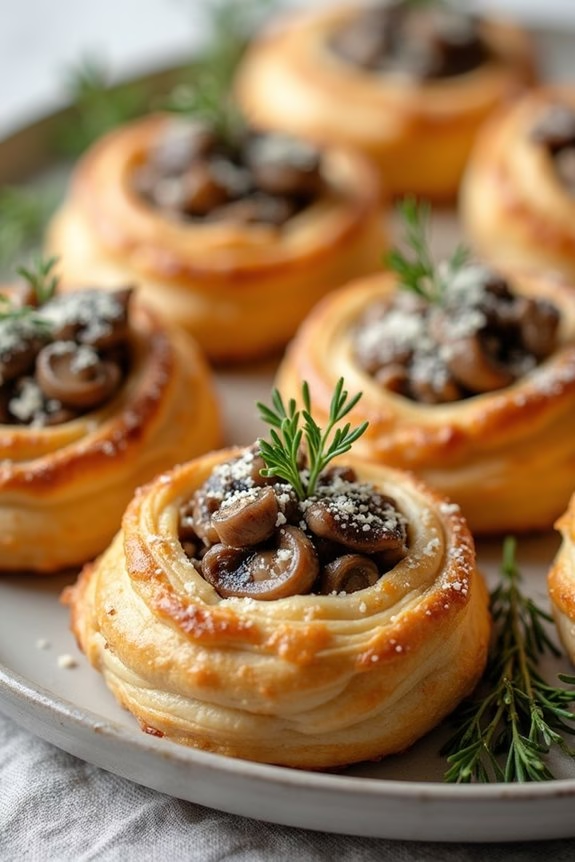
Mushroom and Thyme Vol-au-Vents are a delightful appetizer perfect for a Christmas gathering. The flaky, buttery pastry combined with a rich, creamy mushroom filling makes these bite-sized treats irresistible. Their elegant appearance and exquisite taste will surely impress your guests and set the tone for a festive celebration.
Whether you’re hosting a large holiday party or a cozy family dinner, these vol-au-vents will add a touch of sophistication to your menu. The combination of earthy mushrooms and aromatic thyme creates a well-balanced flavor profile, while the vol-au-vent pastry adds a light and crispy texture.
This dish isn’t only delicious but also quite simple to prepare, making it a great choice for both novice and experienced cooks. The following recipe yields enough for 4-6 people, ensuring that everyone gets to sample these delightful morsels.
Ingredients for 4-6 servings:
- 12 ready-made puff pastry shells (vol-au-vent cases)
- 2 tablespoons olive oil
- 1 medium onion, finely chopped
- 2 cloves garlic, minced
- 250 grams fresh mushrooms, finely chopped
- 1 teaspoon fresh thyme leaves
- 1/4 cup dry white wine
- 1/2 cup heavy cream
- Salt and pepper to taste
- 2 tablespoons grated Parmesan cheese
Cooking Instructions:
- Preheat the Oven: Begin by preheating your oven to 180°C (350°F) to get it ready for the vol-au-vent cases.
- Prepare the Pastry Shells: Place the ready-made puff pastry shells on a baking sheet. Bake them in the preheated oven for 10-12 minutes, or until they’re golden brown and fully puffed. Remove from the oven and set aside to cool slightly.
- Cook the Onion and Garlic: While the shells are baking, heat the olive oil in a large skillet over medium heat. Add the chopped onion and cook for about 3-4 minutes until it becomes translucent. Stir in the minced garlic and cook for an additional minute.
- Sauté the Mushrooms: Add the finely chopped mushrooms to the skillet. Cook them for about 5-7 minutes, or until they release their juices and start to brown. This will enhance their flavor and texture.
- Add Wine and Thyme: Pour in the dry white wine and sprinkle in the fresh thyme leaves. Allow the mixture to simmer until most of the liquid has evaporated, about 3 minutes.
- Incorporate the Cream: Reduce the heat to low and stir in the heavy cream. Cook the mixture for an additional 2-3 minutes, or until it thickens slightly. Season with salt and pepper to taste.
- Fill the Pastry Shells: Spoon the mushroom mixture into the prepared vol-au-vent cases, ensuring each one is generously filled. Sprinkle a little grated Parmesan cheese on top of each filled shell.
- Finish Baking: Return the filled vol-au-vents to the oven for another 5 minutes, just until the cheese is melted and bubbly.
Extra Tips:
For best results, use a variety of mushrooms such as button, cremini, and shiitake to add depth of flavor to the filling. If you prefer a richer taste, substitute the white wine with a splash of Marsala or Madeira wine.
Additionally, you can prepare the mushroom filling a day in advance and store it in the refrigerator, allowing the flavors to meld. Simply reheat the mixture before filling the pastry shells. This dish is best served warm, so try to time the baking of the filled vol-au-vents close to when you plan to serve them.
Prosciutto and Fig Puff Pastry Twists
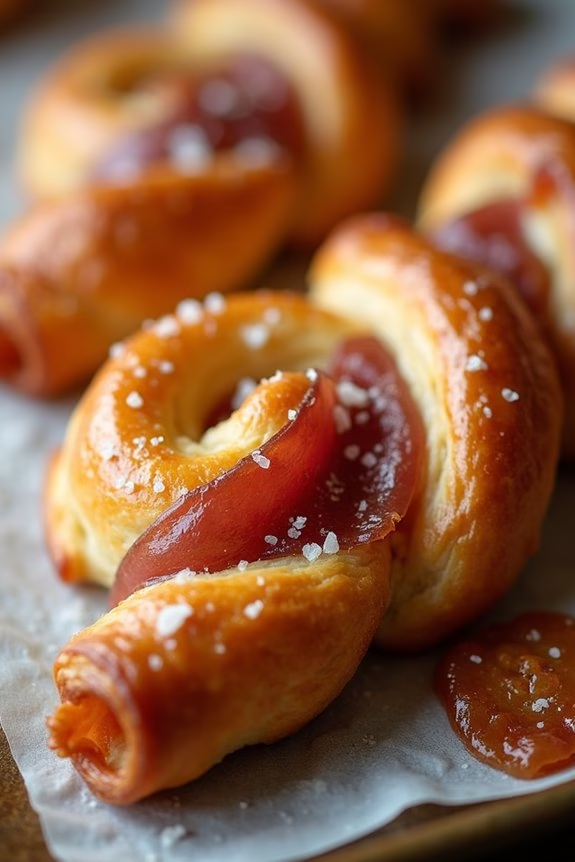
Prosciutto and Fig Puff Pastry Twists are a delightful and sophisticated appetizer that perfectly blends sweet and savory flavors. These twists are an ideal addition to any Christmas gathering, offering a unique taste that will impress your guests. The combination of buttery puff pastry, salty prosciutto, and sweet fig jam creates a mouthwatering treat that’s both easy to make and elegant to serve.
The crispy texture of the pastry complements the tender prosciutto and the smooth fig jam, making these twists irresistible. Preparing these twists requires minimal ingredients and just a bit of time, making them a fantastic option for holiday parties. The recipe is designed for a serving size of 4-6 people, guaranteeing that everyone at your table gets a taste of this delicious appetizer.
Whether you’re hosting a large Christmas celebration or enjoying a quiet evening with family, Prosciutto and Fig Puff Pastry Twists are sure to be a hit.
Ingredients for 4-6 servings:
- 1 sheet of puff pastry, thawed
- 1/3 cup fig jam
- 6-8 slices of prosciutto
- 1 egg, beaten (for egg wash)
- Flour, for dusting
- Sea salt, for sprinkling (optional)
Instructions:
- Preheat the Oven: Start by preheating your oven to 400°F (200°C). Line a baking sheet with parchment paper to prevent sticking.
- Prepare the Puff Pastry: Lightly dust a clean surface with flour. Roll out the puff pastry sheet to a rectangle approximately 12×10 inches. This will guarantee the pastry is thin enough to bake to a crisp texture.
- Spread the Fig Jam: Evenly spread the fig jam over the entire surface of the puff pastry. Make sure to cover all corners and edges to make certain every twist is flavorful.
- Layer the Prosciutto: Lay the slices of prosciutto over the fig jam, overlapping as needed to cover the entire pastry. The prosciutto adds a savory element and complements the sweetness of the fig jam.
- Cut and Twist: Using a sharp knife or pizza cutter, slice the pastry into strips about 1 inch wide. Twist each strip gently and place them on the prepared baking sheet, leaving some space between each twist.
- Apply Egg Wash: Brush the twists with the beaten egg. This will give them a golden, glossy finish once baked.
- Bake: Place the baking sheet in the oven and bake for 15-20 minutes, or until the twists are puffed and golden brown. Keep an eye on them to prevent burning.
- Cool and Serve: Once baked, remove from the oven and let them cool slightly on a wire rack. Sprinkle with sea salt if desired for an extra touch of flavor. Serve warm or at room temperature.
Extra Tips:
For a more pronounced flavor, you can add a sprinkle of fresh rosemary or thyme before baking. These herbs pair well with the sweet and savory elements of the dish.
Make sure your puff pastry is well-thawed but still cold when you work with it, as this will help it rise and become flaky during baking. If you prefer a sharper contrast, a thin layer of goat cheese can be added under the prosciutto before twisting.
Finally, these twists can be prepared ahead of time and stored in the refrigerator; just bake them fresh right before serving for the best taste and texture.
Blue Cheese and Walnut Tartlets
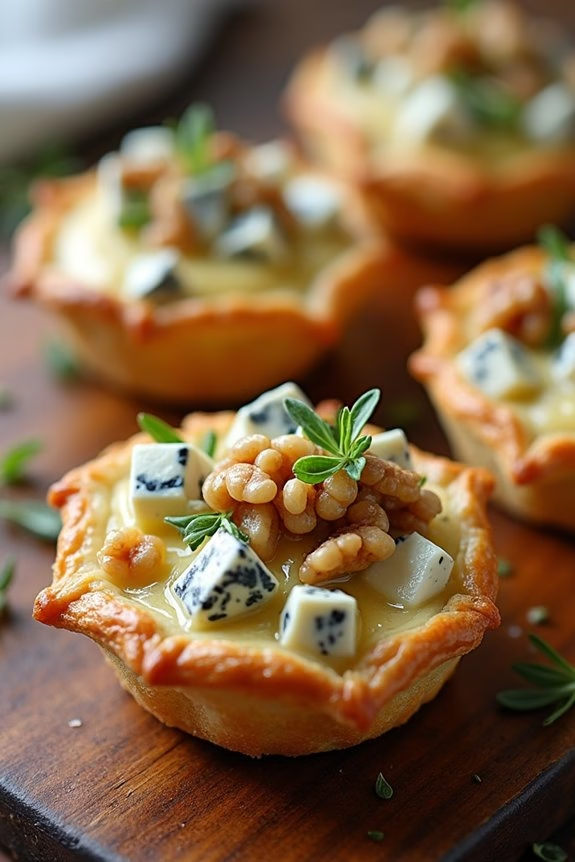
The Blue Cheese and Walnut Tartlets are a delightful addition to any Christmas appetizer spread. These tartlets offer a perfect balance of rich and tangy blue cheese combined with the earthy flavor of walnuts, all encased in a buttery tart shell. The combination creates a sophisticated yet comforting flavor profile that pleases a variety of palates.
Ideal for serving at festive gatherings, these tartlets aren’t only delicious but also visually appealing, making them a standout on any holiday table.
Preparing these tartlets is a straightforward process, allowing you to focus on enjoying the holiday festivities. The key is to use quality ingredients to guarantee the best flavor and texture. These tartlets can be made ahead of time and gently reheated before serving, making them a convenient option for entertaining.
Whether you’re hosting an intimate gathering or a larger celebration, the Blue Cheese and Walnut Tartlets are sure to impress your guests with their gourmet flair.
Ingredients (serving size: 4-6 people):
- 1 sheet of puff pastry
- 150g blue cheese, crumbled
- 1/2 cup walnuts, roughly chopped
- 1/4 cup heavy cream
- 1 egg
- 1 tablespoon honey
- 1 tablespoon fresh thyme leaves
- Salt and pepper to taste
- Extra walnuts and thyme for garnish (optional)
Cooking Instructions:
- Preheat the Oven: Preheat your oven to 200°C (400°F). This guarantees that it reaches the right temperature for baking the tartlets evenly.
- Prepare the Puff Pastry: Roll out the puff pastry sheet on a lightly floured surface. Cut the pastry into 12 equal squares, about 3 inches on each side. Gently press each square into a muffin tin, forming little tart shells.
- Make the Filling: In a mixing bowl, combine the crumbled blue cheese, chopped walnuts, heavy cream, egg, honey, and thyme leaves. Mix well until all the ingredients are incorporated. Season with salt and pepper to taste.
- Fill the Tartlets: Spoon the blue cheese and walnut mixture into each prepared pastry shell, filling them nearly to the top. Guarantee the filling is evenly distributed among all tartlets.
- Bake the Tartlets: Place the muffin tin in the preheated oven and bake for 15-20 minutes, or until the pastry is golden brown and the filling is set. Keep an eye on the tartlets to prevent over-browning.
- Garnish and Serve: Once baked, remove the tartlets from the muffin tin and let them cool slightly on a wire rack. Garnish with extra walnuts and thyme leaves if desired. Serve warm.
Extra Tips:
When making Blue Cheese and Walnut Tartlets, consider using a high-quality blue cheese for the best flavor. Gorgonzola, Roquefort, or Stilton are excellent choices.
If you prefer a milder flavor, you can mix in a bit of cream cheese with the blue cheese. To save time, the filling can be prepared a day ahead and stored in the refrigerator until you’re ready to assemble the tartlets.
Additionally, if you don’t have a muffin tin, you can use small tart pans or even a regular baking sheet, adjusting the shape of the pastry accordingly. Enjoy these tartlets with a glass of white wine or champagne for a festive touch.
Pear and Brie Puff Pastry Squares
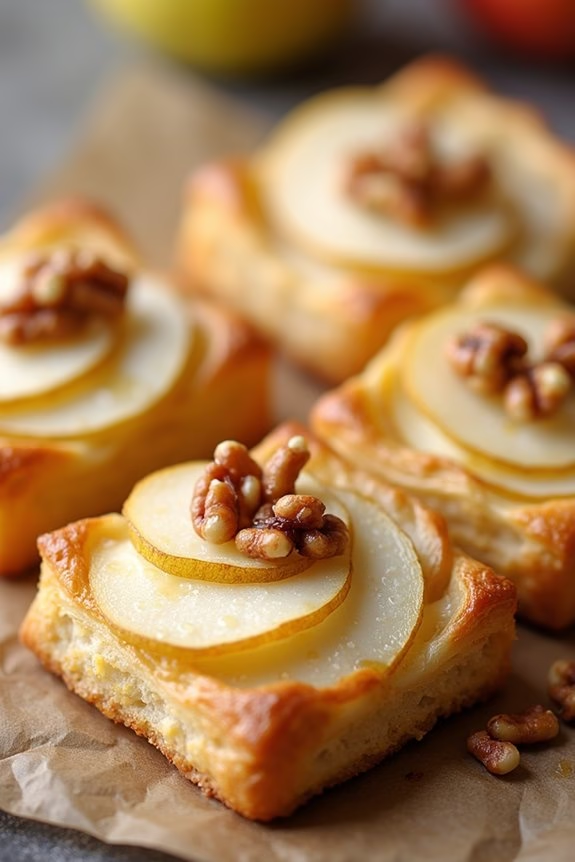
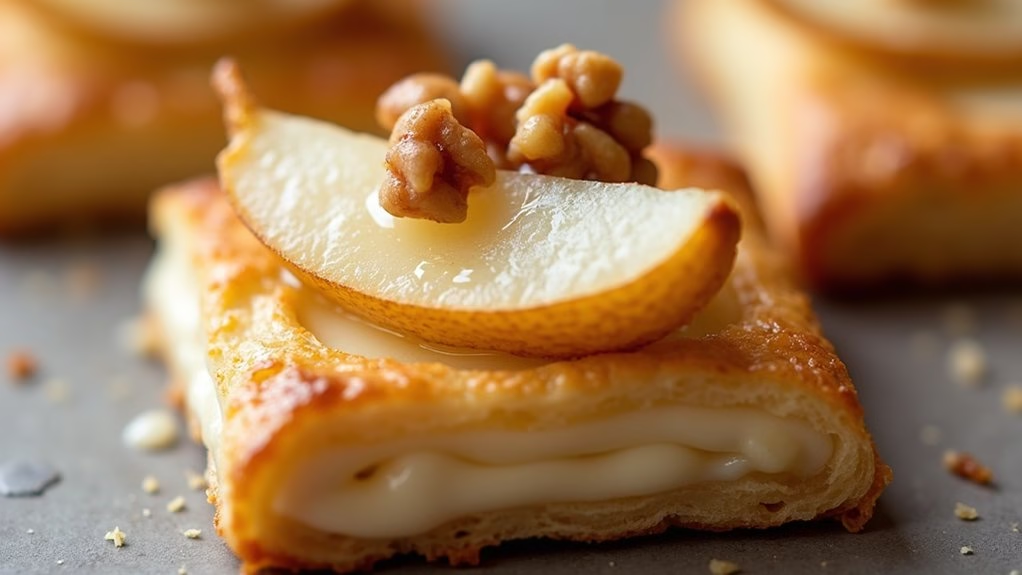
The holiday season is a time for delicious and festive foods, and these Pear and Brie Puff Pastry Squares are the perfect appetizer to impress your guests. Combining the creamy texture of brie cheese with the subtle sweetness of ripe pears, all nestled in a flaky puff pastry, these squares are a delightful blend of flavors and textures.
Simple to prepare yet elegant in presentation, they make a wonderful addition to any Christmas gathering. These savory-sweet bites are both sophisticated and comforting, offering a unique twist on traditional holiday appetizers. The combination of buttery pastry, rich cheese, and juicy pears is sure to be a crowd-pleaser, making it an ideal choice for entertaining.
Whether you’re hosting a large party or a small family dinner, these Pear and Brie Puff Pastry Squares will add a touch of gourmet flair to your menu.
Ingredients (Serves 4-6):
- 1 sheet of puff pastry (thawed if frozen)
- 1 ripe pear
- 100g brie cheese
- 1 tablespoon honey
- 1 tablespoon chopped walnuts
- 1 egg (for egg wash)
- Flour (for dusting)
Cooking Instructions:
- Preheat and Prepare Puff Pastry: Preheat your oven to 400°F (200°C). Lightly dust your work surface with flour and roll out the puff pastry sheet. Cut the pastry into 12 equal squares, placing them on a baking sheet lined with parchment paper.
- Prepare the Toppings: Slice the pear thinly and set aside. Cut the brie into small slices, guaranteeing you have enough for each puff pastry square.
- Assemble the Squares: Place a slice of brie in the center of each puff pastry square. Lay a slice of pear on top of the brie. Drizzle a small amount of honey over the pear and cheese.
- Add the Finishing Touch: Sprinkle a few chopped walnuts over each square for added texture and flavor.
- Apply Egg Wash: In a small bowl, beat the egg and brush the edges of each pastry square with the egg wash. This will help give your pastries a golden-brown finish.
- Bake: Place the baking sheet in the oven and bake for 15-20 minutes, or until the pastry is puffed and golden. Keep an eye on them to guarantee they don’t burn.
- Serve: Remove from the oven and allow to cool slightly before serving. These are best enjoyed warm.
Extra Tips:
For the best results, verify your puff pastry is well-chilled before using, as this helps it rise better in the oven. If you prefer a stronger flavor, consider adding a pinch of freshly cracked black pepper or a few thyme leaves on top of each square before baking.
Remember to use ripe but firm pears to avoid them becoming mushy during baking. If you’re preparing these in advance, you can assemble the squares and keep them refrigerated for an hour before baking.