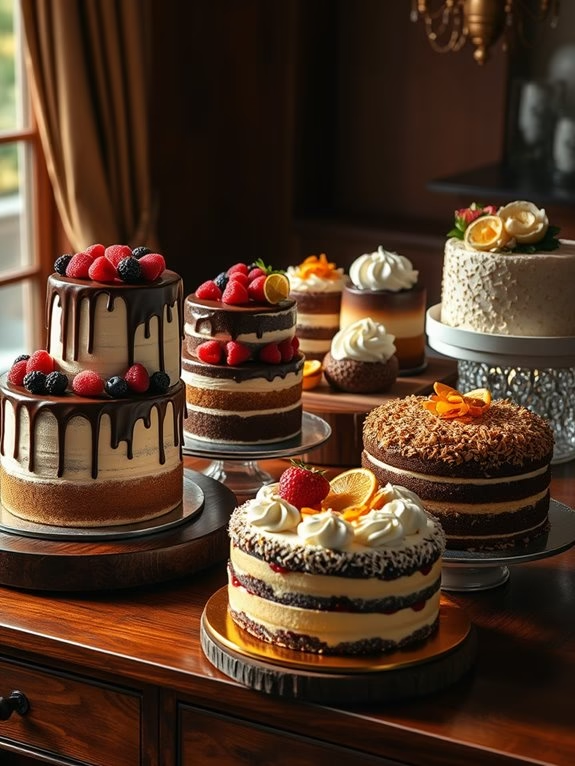
When it comes to cake, I’m always on the lookout for recipes that are as beautiful as they are delicious.
Picture a Classic Chocolate Cake with glossy ganache gracefully flowing down the sides or the vibrant layers of a Red Velvet Perfection.
Each cake on this list has its unique charm, from the zesty notes of a Lemon Drizzle Delight to the rich, nutty warmth of a Spiced Apple Bundt.
What makes a cake truly exceptional?
Let’s delve into the flavors and textures that elevate these desserts to the next level.

Classic Chocolate Cake
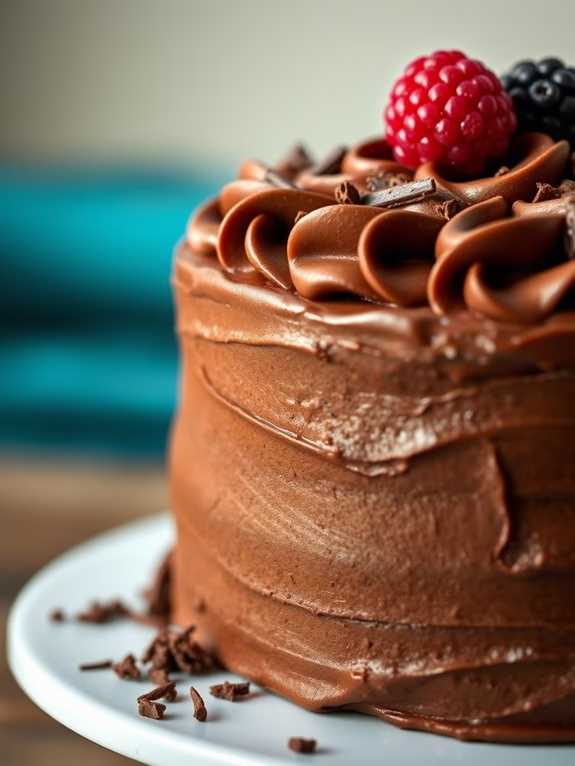
Classic Chocolate Cake Recipe
Indulge in the rich and decadent flavors of a classic chocolate cake that’s sure to satisfy any chocolate lover’s cravings. This timeless dessert, with its moist, tender crumb and luscious chocolate frosting, is perfect for birthdays, celebrations, or simply when you need a comforting treat.
Whether you’re an experienced baker or a novice in the kitchen, this recipe is straightforward and rewarding, resulting in a show-stopping cake that everyone will adore. The secret to this cake’s incredible texture and flavor lies in the balance of high-quality cocoa powder and the use of buttermilk, which adds a slight tang and keeps the crumb moist.
The layers are filled and covered with a rich chocolate buttercream, creating a harmonious blend of flavors and textures in every bite. Gather your ingredients and prepare to create a chocolate masterpiece that serves 4-6 people, perfect for a small gathering or for indulging over a few days.
Ingredients:
- 1 and 3/4 cups all-purpose flour
- 3/4 cup unsweetened cocoa powder
- 2 cups granulated sugar
- 1 and 1/2 teaspoons baking powder
- 1 and 1/2 teaspoons baking soda
- 1 teaspoon salt
- 2 large eggs
- 1 cup buttermilk
- 1/2 cup vegetable oil
- 2 teaspoons vanilla extract
- 1 cup boiling water
For the Chocolate Buttercream:
- 1 cup unsalted butter, softened
- 3 and 1/2 cups powdered sugar
- 1/2 cup unsweetened cocoa powder
- 1/2 cup heavy cream
- 2 teaspoons vanilla extract
- 1/4 teaspoon salt
Instructions:
- Preheat and Prepare: Preheat your oven to 350°F (175°C). Grease and flour two 9-inch round cake pans, then line the bottoms with parchment paper for easy removal.
- Mix Dry Ingredients: In a large mixing bowl, sift together the flour, cocoa powder, sugar, baking powder, baking soda, and salt. This guarantees even distribution of the leavening agents and cocoa.
- Combine Wet Ingredients: In another bowl, whisk together the eggs, buttermilk, vegetable oil, and vanilla extract until well combined.
- Combine Wet and Dry: Gradually add the wet ingredients to the dry ingredients, mixing on medium speed until just combined.
- Incorporate Boiling Water: Slowly add the boiling water to the batter, mixing on low speed. The batter will be thin, but this is normal and guarantees a moist cake.
- Bake the Cakes: Divide the batter evenly between the prepared pans. Bake for 30-35 minutes, or until a toothpick inserted into the center comes out clean. Allow cakes to cool in the pans for 10 minutes, then turn out onto wire racks to cool completely.
- Prepare the Buttercream: In a large bowl, beat the softened butter until creamy. Gradually add the powdered sugar and cocoa powder, beating until combined. Add the heavy cream, vanilla extract, and salt, then beat on high speed for 3-4 minutes until fluffy.
- Assemble the Cake: Once the cakes are completely cool, place one layer on a serving plate. Spread a layer of buttercream on top, then place the second cake layer on top. Use the remaining buttercream to frost the top and sides of the cake.
- Decorate (Optional): For an added touch, decorate with chocolate shavings, sprinkles, or berries.
Extra Tips:
For the best results, verify all your ingredients are at room temperature before starting, especially the eggs and butter. This will help the ingredients combine more smoothly and lead to a better texture in the cake.
When adding the boiling water, do it slowly to prevent splattering and to guarantee the batter remains smooth. Finally, if you want to enhance the chocolate flavor, consider adding a teaspoon of espresso powder to the batter; it won’t taste like coffee but will deepen the chocolate notes.
Enjoy your classic chocolate cake with a cold glass of milk or a scoop of vanilla ice cream for an extra special treat.
Red Velvet Perfection
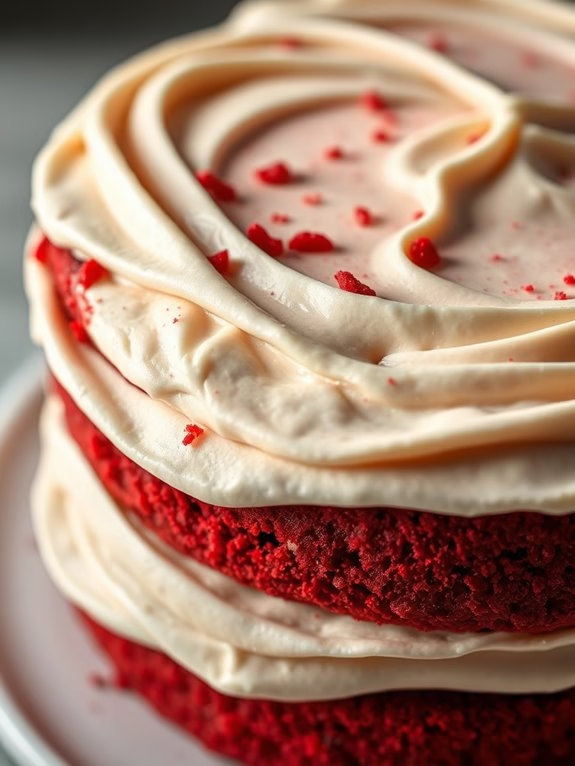
Red Velvet Perfection
There’s something truly special about a classic Red Velvet Cake. With its striking deep red hue and irresistibly moist texture, it’s a dessert that never fails to impress. The secret to its charm lies in the perfect balance of flavors – a subtle hint of cocoa, a slight tang from buttermilk, and the creamy richness of cream cheese frosting.
This quintessential cake is a staple for festive occasions, but with this flawless recipe, you can bring a touch of elegance to any gathering.
Creating a Red Velvet Cake that lives up to its name requires attention to detail and a few key ingredients that contribute to its unique taste and texture. This recipe will guide you through every step, ensuring that the cake emerges from the oven with a tender crumb and a vivid color.
Whether you’re celebrating a birthday, anniversary, or simply indulging in a weekend treat, this Red Velvet Perfection recipe is sure to delight both the eyes and the taste buds of your guests.
Ingredients (Serves 4-6):
- 2 1/2 cups all-purpose flour
- 1 1/2 cups granulated sugar
- 1 teaspoon baking soda
- 1 teaspoon salt
- 1 teaspoon cocoa powder
- 1 1/2 cups vegetable oil
- 1 cup buttermilk, room temperature
- 2 large eggs, room temperature
[DIRECTIONS]:
Lemon Drizzle Delight
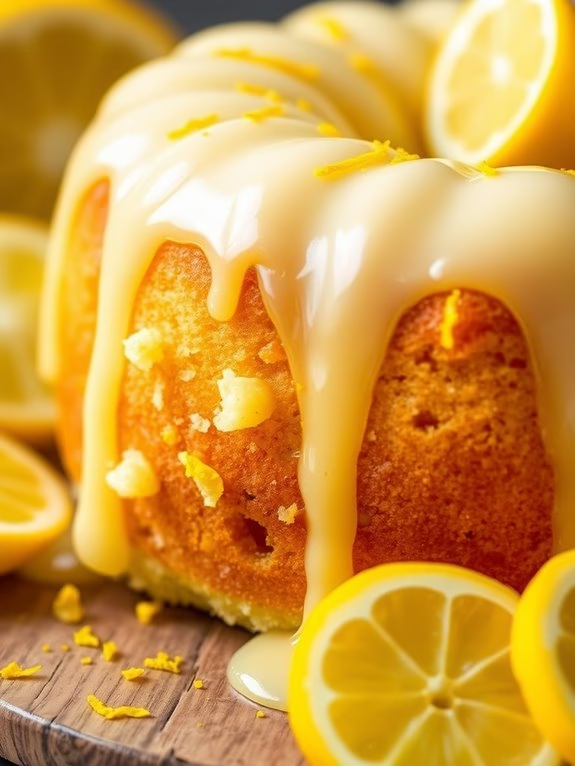
Lemon Drizzle Delight
Indulge in a tantalizing slice of Lemon Drizzle Delight, a zesty and moist cake that balances sweetness with the invigorating tang of fresh lemons. Perfect for any occasion, this delightful cake is a crowd-pleaser with its light texture and flavorful citrus glaze.
Whether you’re hosting a tea party or simply craving a sweet treat, this recipe is sure to impress with its simple yet elegant presentation.
The magic of Lemon Drizzle Delight lies in its combination of rich, buttery cake infused with the aromatic zest and juice of lemons, topped with a glossy, tangy glaze that soaks into the cake, creating an irresistible burst of flavor with every bite.
Follow this easy recipe to create a delicious cake that serves 4-6 people, ideal for sharing with family and friends.
Ingredients (Serves 4-6)
- 1 cup unsalted butter, softened
- 1 cup granulated sugar
- 4 large eggs
- 2 cups all-purpose flour
- 1 tablespoon baking powder
- 1/2 teaspoon salt
- Zest of 2 lemons
- Juice of 2 lemons
- 1/2 cup milk
For the Lemon Glaze:
- 1/2 cup confectioners’ sugar
- Juice of 1 lemon
Cooking Instructions
- Preheat and Prepare: Preheat your oven to 350°F (175°C). Grease and line a 9-inch round cake pan with parchment paper to prevent sticking.
- Cream Butter and Sugar: In a large mixing bowl, cream together the softened butter and granulated sugar until light and fluffy. This should take about 3-4 minutes with an electric mixer.
- Add Eggs: Add the eggs one at a time, beating well after each addition. This guarantees the batter remains smooth and emulsified.
- Combine Dry Ingredients: In a separate bowl, sift together the flour, baking powder, and salt. This will help distribute the baking powder evenly throughout the batter.
- Mix Wet Ingredients: Add the lemon zest and juice to the milk, stirring to combine.
- Combine Wet and Dry Ingredients: Gradually add the dry ingredients to the creamed mixture, alternating with the milk mixture. Begin and end with the dry ingredients, mixing until just combined.
- Pour and Bake: Pour the batter into the prepared cake pan, smoothing the top with a spatula. Bake in the preheated oven for 30-35 minutes or until a toothpick inserted into the center comes out clean.
- Prepare the Lemon Glaze: While the cake is baking, prepare the glaze by whisking together the confectioners’ sugar and lemon juice until smooth.
- Cool and Drizzle: Once the cake is baked, allow it to cool in the pan for 10 minutes. Then transfer it to a wire rack. While still warm, drizzle the lemon glaze over the top, allowing it to soak into the cake.
Extra Tips
For the best results, use fresh lemons for both the zest and juice, as they impart a more vibrant flavor compared to bottled lemon juice.
To achieve a smooth glaze, verify there are no lumps in the confectioners’ sugar by sifting it before mixing. If you prefer a more pronounced lemon flavor, you can add an extra tablespoon of lemon juice to the batter or incorporate finely chopped lemon zest into the glaze.
Additionally, this cake pairs beautifully with a dollop of whipped cream or a scoop of vanilla ice cream for an extra touch of indulgence.
Carrot Cake Supreme
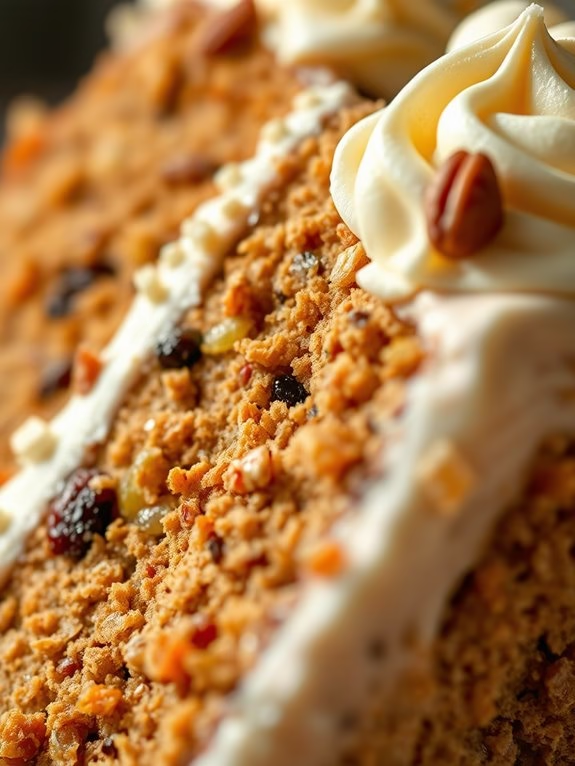
Carrot Cake Supreme is a delectable dessert that combines the rich flavors of fresh carrots with the warm spices of cinnamon and nutmeg. This cake, perfect for any occasion, is known for its moist texture and the delightful crunch of nuts and sweetness from raisins. Topped with a smooth cream cheese frosting, Carrot Cake Supreme is a showstopper dessert that’s assured to impress your friends and family.
Whether you’re an experienced baker or a novice in the kitchen, this recipe is straightforward and yields a cake that’s both visually appealing and deliciously satisfying.
The origins of carrot cake date back to medieval times when sweeteners were scarce, and carrots, which are naturally sweet, were used as a substitute. Over the years, the recipe has evolved, and today, Carrot Cake Supreme is celebrated for its balance of flavors and textures. The addition of pineapple in this recipe adds a tropical twist, enhancing the cake’s overall moistness and sweetness.
Perfect for a serving size of 4-6 people, this Carrot Cake Supreme is ideal for intimate gatherings, guaranteeing everyone gets a generous slice.
Ingredients:
- 2 cups all-purpose flour
- 2 teaspoons baking soda
- 1/2 teaspoon salt
- 2 teaspoons ground cinnamon
- 1/2 teaspoon ground nutmeg
- 1 cup granulated sugar
- 1 cup brown sugar, packed
- 1 cup vegetable oil
- 4 large eggs
- 2 teaspoons vanilla extract
- 3 cups grated carrots
- 1 cup crushed pineapple, drained
- 1 cup chopped walnuts or pecans
- 1/2 cup raisins
- 1 cup unsalted butter, softened (for frosting)
- 16 ounces cream cheese, softened (for frosting)
- 4 cups powdered sugar (for frosting)
- 2 teaspoons vanilla extract (for frosting)
Instructions:
- Preheat the Oven: Begin by preheating your oven to 350°F (175°C). Grease and flour two 9-inch round cake pans to prevent the cake from sticking.
- Mix Dry Ingredients: In a large bowl, whisk together the flour, baking soda, salt, cinnamon, and nutmeg. Confirm that the dry ingredients are well combined to avoid clumping.
- Prepare Wet Ingredients: In a separate bowl, beat together the granulated sugar, brown sugar, and vegetable oil until well blended. Add the eggs one at a time, beating well after each addition. Stir in the vanilla extract.
- Combine Ingredients: Gradually add the dry ingredient mixture to the wet ingredients, mixing until just combined. Don’t overmix to keep the cake light and fluffy.
- Add Carrots and Other Mix-ins: Fold in the grated carrots, crushed pineapple, chopped nuts, and raisins until evenly distributed throughout the batter.
- Bake the Cake: Divide the batter evenly between the prepared cake pans. Bake for 30-35 minutes, or until a toothpick inserted into the center of the cakes comes out clean. Allow the cakes to cool in the pans for 10 minutes before transferring them to a wire rack to cool completely.
- Prepare the Frosting: While the cake is cooling, prepare the cream cheese frosting. In a large bowl, beat the softened butter and cream cheese together until smooth. Gradually add the powdered sugar and vanilla extract, beating until the frosting is creamy and thick.
- Assemble the Cake: Once the cake layers have cooled completely, spread a layer of frosting on top of one cake layer. Place the second layer on top, and frost the top and sides of the cake evenly.
- Serve and Enjoy: Allow the cake to set in the refrigerator for at least 30 minutes before serving to confirm the frosting firms up. Slice and enjoy your Carrot Cake Supreme!
Extra Tips:
To achieve the best texture for your Carrot Cake Supreme, be sure to grate the carrots finely. This will help them incorporate more easily into the batter, resulting in a smoother cake.
If you prefer a less sweet cake, you can reduce the amount of sugar used in the frosting. Additionally, feel free to experiment with different types of nuts or add a handful of shredded coconut for an extra layer of flavor.
Vanilla Bean Bliss
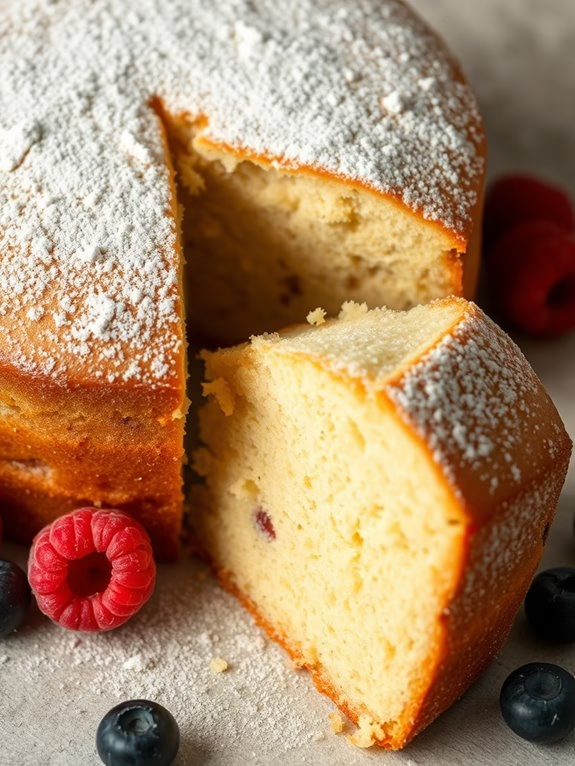
Vanilla Bean Bliss is a delightful cake recipe that brings out the pure and natural essence of vanilla. This cake is perfect for any occasion, whether it’s a birthday celebration, an afternoon tea gathering, or simply a sweet indulgence at the end of the day. The use of real vanilla beans elevates the flavor profile, offering a rich and aromatic experience that’s incomparable to artificial extracts.
The cake is moist and fluffy, providing a melt-in-your-mouth texture that will leave you and your guests craving for more. The beauty of Vanilla Bean Bliss lies in its simplicity; it allows the vanilla to shine through without overpowering with unnecessary ingredients. This recipe is designed to cater to a serving size of 4-6 people, making it ideal for small gatherings or a family treat.
The cake’s versatility also means you can pair it with a variety of toppings or frostings, such as fresh berries, whipped cream, or a simple vanilla glaze, to enhance its flavor even further. Let’s explore the ingredients and the step-by-step instructions to create this heavenly dessert.
Ingredients (serving size: 4-6 people):
- 1 ¾ cups all-purpose flour
- 1 ½ teaspoons baking powder
- ½ teaspoon baking soda
- ½ teaspoon salt
- ½ cup unsalted butter, softened
- 1 cup granulated sugar
- 2 large eggs
- 1 vanilla bean, seeds scraped
- 1 teaspoon pure vanilla extract
- ¾ cup whole milk
- ¼ cup sour cream
Instructions:
- Preheat Your Oven: Begin by preheating your oven to 350°F (175°C). Grease and flour a 9-inch round cake pan to guarantee the cake doesn’t stick.
- Mix Dry Ingredients: In a medium-sized bowl, whisk together the all-purpose flour, baking powder, baking soda, and salt. Set this mixture aside, as it will be combined with the wet ingredients later.
- Cream Butter and Sugar: In a large mixing bowl, use an electric mixer to beat the softened butter and granulated sugar together until light and fluffy. This process should take about 3-4 minutes.
- Add Eggs and Vanilla: Add the eggs, one at a time, beating well after each addition. Then, add the vanilla bean seeds and vanilla extract, mixing until everything is well combined.
- Combine Wet and Dry Ingredients: Gradually add the dry ingredients to the creamed mixture, alternating with the milk and sour cream. Begin and end with the dry ingredients. Mix until just combined, being careful not to overmix.
- Pour and Bake: Pour the batter into the prepared cake pan, smoothing the top with a spatula. Bake in the preheated oven for 25-30 minutes, or until a toothpick inserted into the center of the cake comes out clean.
- Cool the Cake: Once baked, remove the cake from the oven and let it cool in the pan for about 10 minutes. Then, transfer it to a wire rack to cool completely before serving or frosting.
Extra Tips:
When preparing Vanilla Bean Bliss, make sure all your ingredients are at room temperature, as this helps them blend more smoothly and results in a better texture for the cake.
If you don’t have access to a vanilla bean, you can substitute with an additional teaspoon of vanilla extract, although the flavor might be less intense. For a decorative touch, consider dusting the cooled cake with powdered sugar or adding a light glaze made from confectioners’ sugar and milk.
Rich Black Forest
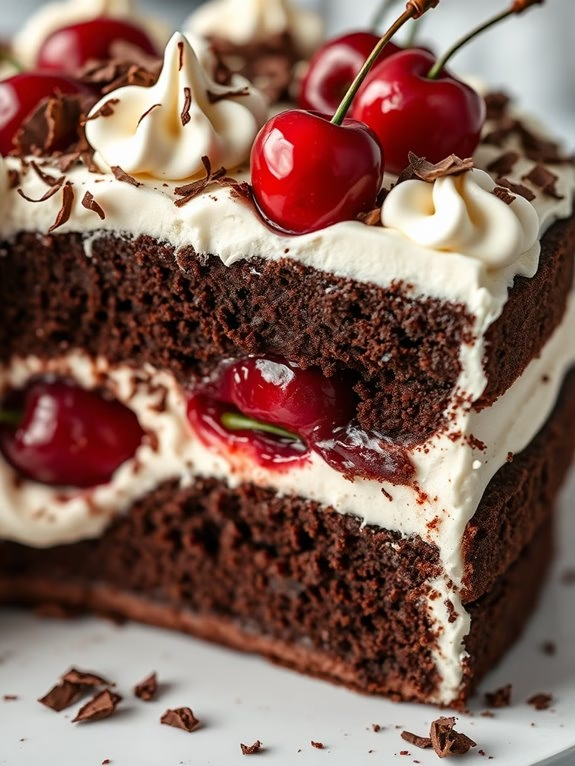
Rich Black Forest Cake Recipe
The Rich Black Forest Cake is a classic German dessert known for its layers of chocolate sponge cake, whipped cream, and cherries. Originating from the Black Forest region in Germany, this cake has become a beloved treat worldwide. Its combination of flavors and textures makes it an indulgent dessert perfect for any celebration or special occasion.
The moist chocolate cake layers are complemented by the sweetness of the cherries and the lightness of the whipped cream, creating a harmonious balance that’s hard to resist. Making a Rich Black Forest Cake can be a rewarding baking project, allowing you to create a show-stopping dessert at home.
This recipe serves 4-6 people, making it perfect for a small gathering or family dessert. The key to a successful Black Forest Cake is in the quality of the ingredients and the precision in each step of the preparation. Follow this recipe to create a delicious and impressive cake that will be the highlight of your dessert table.
Ingredients:
- 1 cup all-purpose flour
- 1/2 cup unsweetened cocoa powder
- 1 teaspoon baking powder
- 1/2 teaspoon baking soda
- 1/4 teaspoon salt
- 3/4 cup granulated sugar
- 1/2 cup unsalted butter, softened
- 2 large eggs
- 1 teaspoon vanilla extract
- 1/2 cup whole milk
- 1 cup heavy cream
- 2 tablespoons powdered sugar
- 1 teaspoon vanilla extract
- 1 jar (about 20 oz) of morello cherries, drained and juice reserved
- 2 tablespoons kirsch (cherry brandy), optional
- Chocolate shavings, for garnish
Cooking Instructions:
- Preheat the Oven: Start by preheating your oven to 350°F (175°C). Grease and flour two 8-inch round cake pans to prevent the cakes from sticking.
- Mix Dry Ingredients: In a medium bowl, sift together the flour, cocoa powder, baking powder, baking soda, and salt. This will guarantee even distribution of the leavening agents in the cake batter.
- Cream Butter and Sugar: In a large mixing bowl, beat the softened butter and granulated sugar together until light and fluffy. This should take about 3-5 minutes using an electric mixer on medium speed.
- Add Eggs and Vanilla: Add the eggs one at a time to the butter-sugar mixture, beating well after each addition. Stir in the vanilla extract until fully incorporated.
- Combine with Dry Ingredients: Gradually add the dry ingredients to the wet mixture, alternating with the milk. Begin and end with the dry ingredients, mixing until just combined. Avoid overmixing to maintain the cake’s tenderness.
- Bake the Cakes: Divide the batter evenly between the prepared cake pans. Bake in the preheated oven for 20-25 minutes or until a toothpick inserted into the center comes out clean. Allow the cakes to cool in the pans for about 10 minutes before transferring them to a wire rack to cool completely.
- Prepare the Whipped Cream: In a chilled mixing bowl, whip the heavy cream with powdered sugar and vanilla extract until soft peaks form. Be careful not to overwhip, as this can lead to a grainy texture.
- Assemble the Cake: If using kirsch, gently mix it with the reserved cherry juice. Place one cake layer on a serving plate and brush with some cherry juice mixture. Spread a layer of whipped cream over the cake and top with half of the cherries.
- Add Second Layer: Place the second cake layer on top, brush with more cherry juice, and spread another layer of whipped cream over the top and sides of the cake. Decorate with the remaining cherries and chocolate shavings.
- Chill Before Serving: Refrigerate the cake for at least an hour before serving to allow the flavors to meld and the whipped cream to set.
Extra Tips:
For the best results, use high-quality dark cocoa powder and fresh, ripe cherries when they’re in season, as they’ll enhance the flavor of the cake. If fresh cherries aren’t available, jarred morello cherries are a great alternative.
When making the whipped cream, verify your bowl and beaters are cold for peak volume. Finally, for a more intense cherry flavor, don’t skip the kirsch, but if you prefer a non-alcoholic version, simply omit it.
Moist Banana Layer
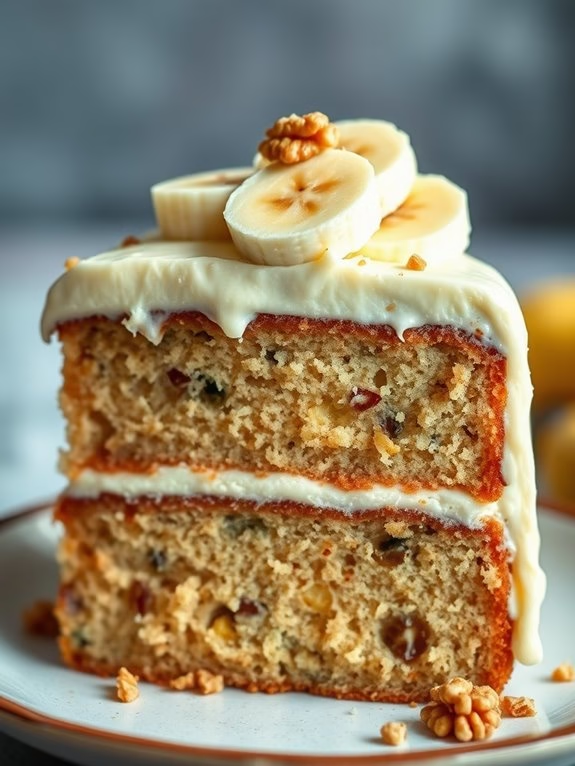
Moist Banana Layer Cake
Indulge in the delightful taste of a Moist Banana Layer Cake, an ideal treat for any occasion. This cake is perfect for banana lovers, featuring rich and moist layers infused with the natural sweetness of ripe bananas. The cake’s texture is perfectly tender and fluffy, making it hard to resist a second slice.
Whether you’re baking for a birthday, a casual family get-together, or just because, this cake is sure to impress with its delicious flavor and beautiful presentation.
The secret to its moistness lies in the combination of ripe bananas and a few key ingredients that enhance the cake’s rich texture. Paired with a creamy frosting of your choice, such as cream cheese or vanilla buttercream, this banana cake becomes a showstopper on any dessert table.
Best of all, it’s simple to make, allowing even novice bakers to enjoy the process and the result. Follow this recipe to create a luscious banana layer cake that serves 4-6 people.
Ingredients:
- 1 ½ cups all-purpose flour
- 1 teaspoon baking soda
- ¼ teaspoon salt
- ½ cup unsalted butter, softened
- 1 cup granulated sugar
- 2 large eggs
- 1 teaspoon vanilla extract
- ½ cup buttermilk
- 3 ripe bananas, mashed
- ½ cup chopped walnuts (optional)
- Frosting of your choice (e.g., cream cheese or vanilla buttercream)
Cooking Instructions:
- Preheat and Prepare Pans: Begin by preheating your oven to 350°F (175°C). Grease and flour two 8-inch round cake pans to prevent sticking.
- Mix Dry Ingredients: In a medium bowl, whisk together the all-purpose flour, baking soda, and salt. Set aside.
- Cream Butter and Sugar: In a large mixing bowl, cream the softened butter and granulated sugar until light and fluffy, about 2-3 minutes. You can use a hand mixer or stand mixer for this step.
- Add Eggs and Vanilla: Beat in the eggs one at a time, making sure each is fully incorporated before adding the next. Stir in the vanilla extract.
- Combine Wet Ingredients: Add the mashed bananas to the butter mixture, mixing until well combined. Then, gradually add the buttermilk, alternating with the dry ingredients, and mix until just combined.
- Fold in Nuts: If using, gently fold in the chopped walnuts with a spatula until evenly distributed throughout the batter.
- Pour and Bake: Divide the batter evenly between the prepared cake pans. Smooth the tops with a spatula and bake in the preheated oven for 25-30 minutes, or until a toothpick inserted into the center comes out clean.
- Cool and Frost: Allow the cakes to cool in the pans for about 10 minutes before transferring them to a wire rack to cool completely. Once cooled, frost with your choice of frosting and assemble the layers.
Extra Tips:
For the best flavor, confirm your bananas are very ripe, with brown spots on the peel, as this enhances the sweetness of the cake.
If you prefer a nut-free cake, you can omit the walnuts without affecting the cake’s moistness.
When frosting, make sure the cake layers are completely cool to prevent the frosting from melting.
For added flair, garnish the cake with sliced bananas or a sprinkle of nuts on top. Enjoy your deliciously moist banana layer cake with family and friends!
Coconut Cream Dream
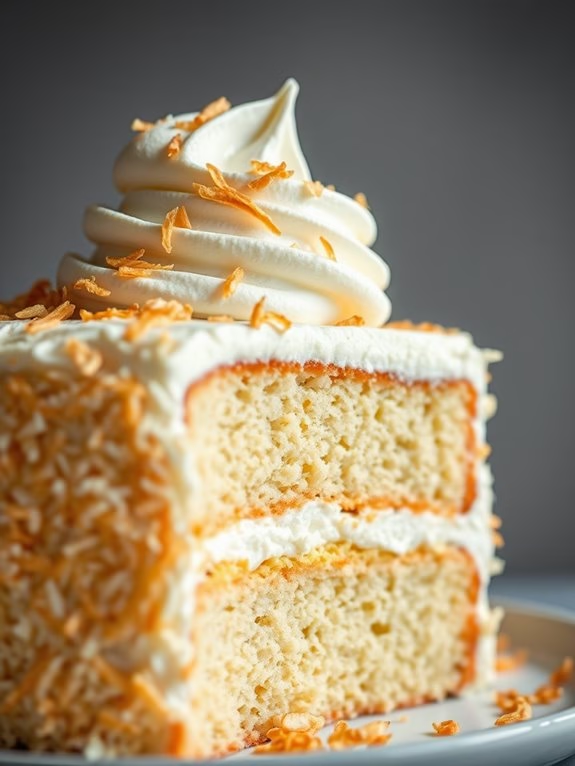
Coconut Cream Dream is a luscious and indulgent cake that marries the tropical flavor of coconut with the rich, creamy texture of a classic cream-filled dessert. This delightful cake is perfect for those who appreciate the subtle sweetness of coconut combined with a dreamy, creamy filling that simply melts in your mouth.
Whether you’re celebrating a special occasion or just treating yourself to a slice of paradise, this cake promises to transport you to a sun-soaked island with every bite.
The Coconut Cream Dream cake isn’t only a feast for your taste buds but also a delight to prepare. With its moist coconut-infused layers and a luxurious coconut cream filling, it creates a perfect harmony of flavors and textures.
Topped with whipped cream and garnished with shredded coconut, this cake is a showstopper that will impress your family and friends. Follow the simple instructions below to create this heavenly dessert for 4-6 people.
Ingredients:
- 1 ½ cups all-purpose flour
- 1 teaspoon baking powder
- ½ teaspoon baking soda
- ¼ teaspoon salt
- ½ cup unsalted butter, softened
- 1 cup granulated sugar
- 2 large eggs
- 1 teaspoon vanilla extract
- 1 teaspoon coconut extract
- 1 cup canned coconut milk
- 1 cup sweetened shredded coconut
For the Coconut Cream Filling:
- 1 cup heavy cream
- ½ cup coconut milk
- ¼ cup granulated sugar
- 1 teaspoon coconut extract
- 2 tablespoons cornstarch
For Topping:
- 1 cup heavy whipping cream
- 2 tablespoons powdered sugar
- ½ cup sweetened shredded coconut, toasted
Cooking Instructions:
- Preheat and Prepare Pans: Preheat your oven to 350°F (175°C). Grease and flour two 8-inch round cake pans, then line the bottoms with parchment paper.
- Mix Dry Ingredients: In a medium-sized bowl, whisk together the flour, baking powder, baking soda, and salt. Set aside.
- Cream Butter and Sugar: In a large bowl, beat the softened butter and sugar together until light and fluffy, about 3-4 minutes using an electric mixer.
- Add Eggs and Extracts: Add the eggs one at a time, beating well after each addition. Mix in the vanilla and coconut extracts.
- Combine Wet and Dry Ingredients: Gradually add the dry ingredients to the butter mixture, alternating with the coconut milk, beginning and ending with the dry ingredients. Mix until just combined. Fold in the shredded coconut.
- Bake the Cake: Divide the batter evenly between the prepared pans. Bake for 25-30 minutes, or until a toothpick inserted into the center comes out clean. Cool the cakes in the pans for 10 minutes, then turn them out onto a wire rack to cool completely.
- Prepare Coconut Cream Filling: In a saucepan over medium heat, whisk together the heavy cream, coconut milk, sugar, coconut extract, and cornstarch until the mixture thickens and comes to a gentle boil. Remove from heat and let it cool slightly.
- Assemble the Cake: Once the cakes are completely cooled, spread the coconut cream filling evenly over one cake layer. Place the second cake layer on top.
- Whip the Topping: Beat the heavy whipping cream and powdered sugar in a mixing bowl until stiff peaks form. Spread the whipped cream over the top and sides of the cake.
- Garnish: Sprinkle the toasted shredded coconut over the top of the cake for garnish.
Extra Tips:
Toasting the shredded coconut for the topping enhances its flavor and adds a lovely crunch, so don’t skip this step.
Confirm all your ingredients, especially the butter, are at room temperature before you start mixing, as this helps create a smooth batter.
When spreading the coconut cream filling, make sure the cake layers are completely cool to prevent the filling from melting.
Finally, the cake can be made a day in advance – simply keep it refrigerated and add the whipped cream topping just before serving for the freshest taste.
Tiramisu Temptation
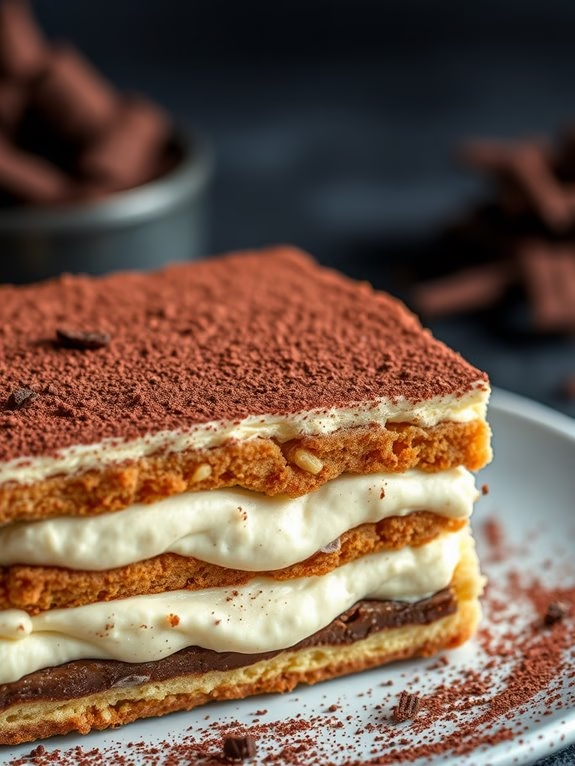
Tiramisu is an Italian delight that has captured the hearts of dessert enthusiasts around the globe. Known for its layered texture and rich flavors, Tiramisu combines the boldness of coffee with the smoothness of mascarpone cheese for a truly indulgent treat. The name itself, which translates to “pick me up” in Italian, hints at the delightful experience awaiting those who indulge in this classic dessert.
Whether enjoyed at the end of a meal or as a sweet craving satisfier, Tiramisu never fails to impress.
Creating the perfect Tiramisu requires balancing its key ingredients to achieve the ideal harmony of flavor and texture. This recipe is designed to serve 4-6 people, making it perfect for a small gathering or a family dessert night. With each bite, you’ll experience the creamy layers and the subtle coffee essence that make Tiramisu a timeless favorite. Follow the instructions carefully to obtain a dessert that’s both authentic and delicious.
Ingredients (Serves 4-6):
- 3 large eggs, separated
- 1 cup granulated sugar, divided
- 1 cup mascarpone cheese (about 8 ounces)
- 1 cup heavy cream
- 1 cup strong brewed espresso, cooled
- 2 tablespoons coffee liqueur (optional)
- 24-30 ladyfinger biscuits
- Unsweetened cocoa powder, for dusting
- Dark chocolate shavings (optional)
Cooking Instructions:
- Prepare the Egg Mixture: In a medium-sized bowl, whisk the egg yolks with 3/4 cup of the sugar until the mixture is pale and creamy. This should take about 3-5 minutes. Once done, gently fold in the mascarpone cheese until fully incorporated and smooth.
- Whip the Cream: In a separate bowl, beat the heavy cream until it forms stiff peaks. Carefully fold the whipped cream into the mascarpone mixture, taking care not to deflate the cream. This will create a light and airy filling.
- Make the Coffee Mixture: In a shallow dish, combine the brewed espresso and coffee liqueur (if using). Stir in the remaining 1/4 cup of sugar until dissolved. This will be used to soak the ladyfingers, infusing them with that signature coffee flavor.
- Assemble the Tiramisu: Quickly dip each ladyfinger into the coffee mixture, making sure they’re well-coated but not soggy. Line the bottom of a 9×9-inch dish with a layer of soaked ladyfingers. Spread half of the mascarpone mixture over the ladyfingers, smoothing it out with a spatula.
- Layer Again: Repeat the process with another layer of soaked ladyfingers, followed by the remaining mascarpone mixture. Smooth the top layer with a spatula for an even finish.
- Chill the Dessert: Cover the dish with plastic wrap and refrigerate for at least 4 hours, or ideally overnight. This chilling time allows the flavors to meld and the dessert to set properly.
- Finish with Cocoa and Chocolate: Before serving, dust the Tiramisu generously with unsweetened cocoa powder. For an extra touch of decadence, add a sprinkle of dark chocolate shavings on top.
Extra Tips:
For the best results, verify that the coffee used is strong and aromatic to impart a deep flavor to the ladyfingers. If possible, use fresh mascarpone for a creamier texture.
The Tiramisu can be prepared a day in advance, which not only enhances the flavor but also makes it a convenient option for entertaining. If you prefer a non-alcoholic version, simply omit the coffee liqueur.
Finally, when assembling, work quickly with the ladyfingers as they tend to become soggy if left in the coffee mixture for too long.
Berry Cheesecake Fusion
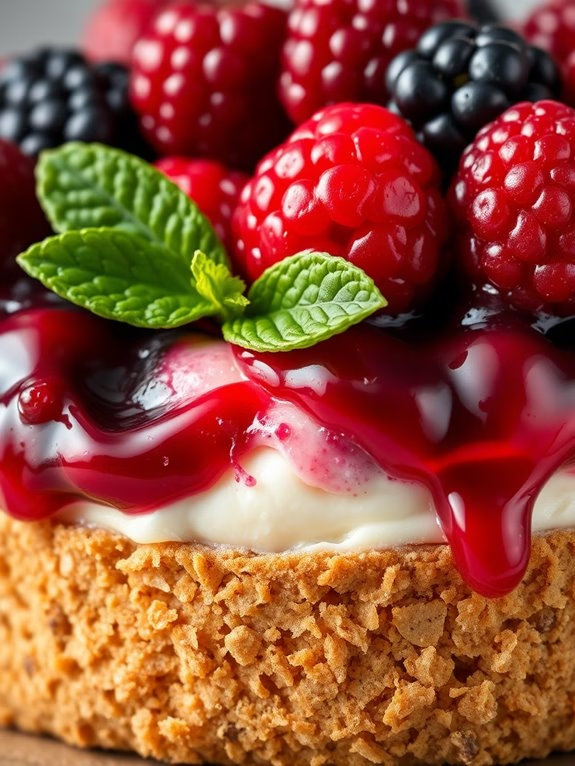
Berry Cheesecake Fusion
Indulge in the delightful blend of creamy cheesecake with the invigorating burst of berries in this Berry Cheesecake Fusion. This dessert combines the rich texture of a classic cheesecake with the vibrant flavors of fresh berries, creating a harmonious fusion that will impress both family and guests alike. Perfect for a special occasion or simply as a sweet treat, this recipe is designed to serve 4-6 people, guaranteeing everyone gets a generous slice of this heavenly dessert.
The Berry Cheesecake Fusion features a buttery graham cracker crust, a smooth and velvety cheesecake filling, and a luscious berry topping that adds a touch of color and a burst of flavor. The contrast between the creamy filling and the tangy berries creates an unforgettable experience for your taste buds.
Whether you’re a seasoned baker or a novice in the kitchen, this recipe is straightforward and easy to follow, allowing you to create a stunning dessert that looks as good as it tastes.
Ingredients for Berry Cheesecake Fusion (Serves 4-6):
- 1 1/2 cups graham cracker crumbs
- 1/4 cup granulated sugar
- 1/2 cup unsalted butter, melted
- 16 oz cream cheese, softened
- 2/3 cup granulated sugar
- 2 large eggs
- 1 teaspoon vanilla extract
- 1 cup sour cream
- 1 cup mixed berries (such as strawberries, blueberries, and raspberries)
- 2 tablespoons berry jam or preserve
- Fresh mint leaves for garnish (optional)
Cooking Instructions:
- Preheat and Prepare the Pan: Preheat your oven to 325°F (160°C). Grease a 9-inch springform pan with butter, making sure the sides are well-coated to prevent sticking.
- Make the Crust: In a medium bowl, combine the graham cracker crumbs and 1/4 cup sugar. Pour in the melted butter and mix until the crumbs are evenly coated. Press the mixture firmly into the bottom of the prepared pan to form an even crust. Bake for 10 minutes, then remove from the oven and let it cool.
- Prepare the Cheesecake Filling: In a large mixing bowl, beat the softened cream cheese and 2/3 cup sugar together until smooth and creamy. Add the eggs one at a time, beating well after each addition. Stir in the vanilla extract and sour cream until the mixture is smooth and well combined.
- Assemble the Cheesecake: Pour the cheesecake filling over the cooled crust, spreading it evenly with a spatula. Gently tap the pan on the counter to remove any air bubbles.
- Bake the Cheesecake: Place the cheesecake in the preheated oven and bake for 40-45 minutes, or until the edges are set and the center is slightly jiggly. Turn off the oven, crack the door open, and let the cheesecake cool in the oven for about an hour.
- Prepare the Berry Topping: While the cheesecake cools, in a small saucepan, gently heat the berry jam until it’s slightly runny. Remove from heat and toss the mixed berries in the jam, making sure they’re well coated.
- Add the Berry Topping: Once the cheesecake is cool, remove it from the pan and transfer it to a serving platter. Spoon the berry topping over the cheesecake, spreading it evenly across the surface.
- Chill and Serve: Refrigerate the cheesecake for at least 2 hours or until thoroughly chilled. Before serving, garnish with fresh mint leaves if desired.
Extra Tips:
For the best results, make sure your cream cheese is at room temperature before starting, as this will help create a smooth filling without lumps.
If you prefer a thicker crust, you can increase the amount of graham cracker crumbs and butter slightly. Additionally, if fresh berries aren’t available, frozen berries can be used; just make sure they’re thawed and drained well before using.
Finally, for an added burst of citrus, consider adding a tablespoon of lemon zest to the cheesecake filling for an invigorating twist.
Flourless Chocolate Torte
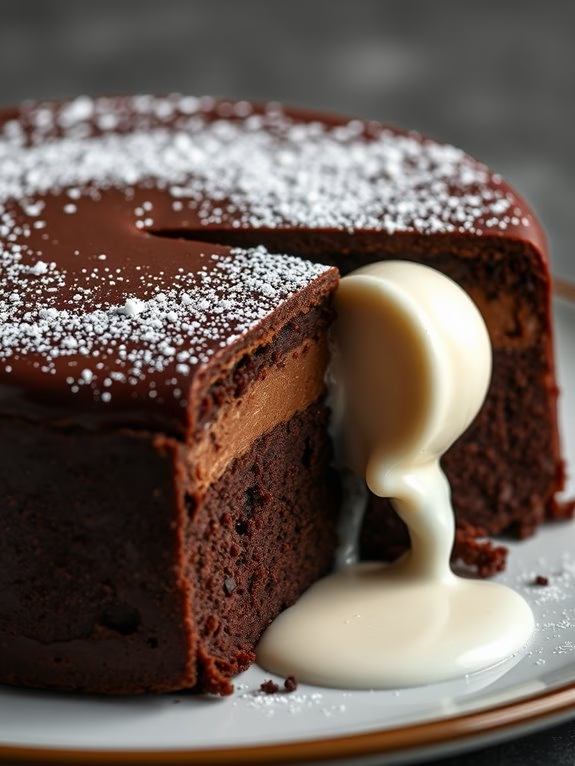
Flourless Chocolate Torte is a decadent dessert that’s rich in flavor and has a velvety texture. This cake is perfect for those who are looking for a gluten-free option without compromising on taste. The absence of flour allows the chocolate flavor to shine through, making it a favorite among chocolate lovers.
It’s a wonderful dessert to serve on special occasions or for an indulgent treat. This torte is surprisingly simple to make and requires only a handful of ingredients. The key to achieving the perfect texture lies in the quality of the chocolate used and the method of preparation.
The result is a dense, fudgy cake with a smooth, almost creamy interior that melts in your mouth. Pair it with a dollop of whipped cream or a scoop of vanilla ice cream for the ultimate dessert experience.
Ingredients (Serves 4-6)
- 1 cup unsalted butter
- 8 ounces bittersweet or semisweet chocolate, chopped
- 1 1/4 cups granulated sugar
- 6 large eggs
- 1/2 cup unsweetened cocoa powder
- 1 teaspoon vanilla extract
- 1/4 teaspoon salt
Cooking Instructions
- Preheat the Oven: Start by preheating your oven to 350°F (175°C). Prepare a 9-inch round cake pan by greasing it with butter and lining the bottom with parchment paper.
- Melt the Chocolate and Butter: In a medium saucepan over low heat, melt the unsalted butter and chopped chocolate together. Stir continuously until the mixture is smooth and fully combined. Remove from heat and let it cool slightly.
- Mix in Sugar and Eggs: In a large mixing bowl, combine the granulated sugar and eggs. Beat them together using an electric mixer on medium speed until the mixture becomes pale and thick, about 5 minutes.
- Combine Ingredients: Gently fold the melted chocolate mixture into the egg mixture. Add the vanilla extract and salt, stirring until well incorporated.
- Add Cocoa Powder: Sift the unsweetened cocoa powder over the mixture and fold it in gently using a spatula until no streaks remain.
- Bake the Torte: Pour the batter into the prepared cake pan, smoothing the top with a spatula. Bake in the preheated oven for 25-30 minutes, or until the edges are set but the center still looks slightly moist.
- Cool the Cake: Allow the torte to cool in the pan on a wire rack for about 10 minutes. Then, invert it onto a serving plate, removing the parchment paper carefully.
- Serve: Once cooled completely, dust the top with a little extra cocoa powder or powdered sugar before serving.
Extra Tips
When making a Flourless Chocolate Torte, the quality of the chocolate is essential, so choose a high-quality bittersweet or semisweet chocolate for the best results.
Be sure not to overbake the torte; it should have a slightly soft center when removed from the oven, as it will continue to set as it cools. This torte can be made a day in advance and stored in the refrigerator, which enhances the flavors. Allow it to come to room temperature before serving for the best experience.
Spiced Apple Bundt
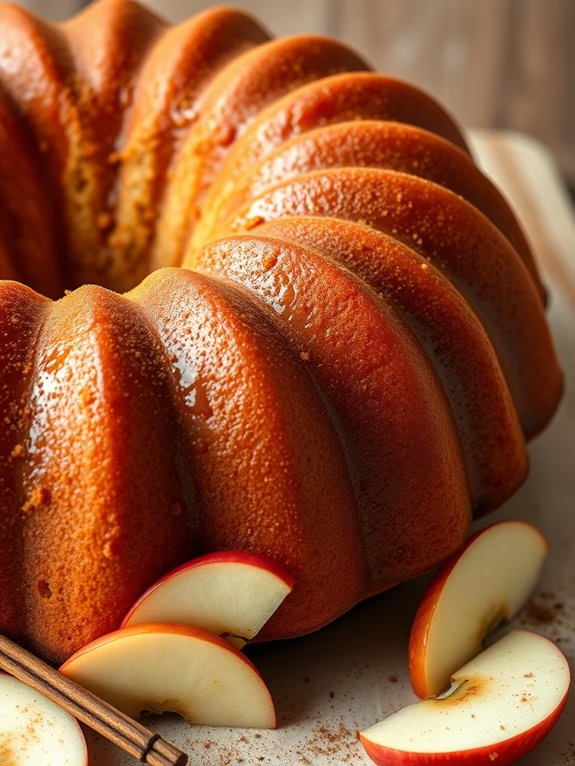
Spiced Apple Bundt cake is a delightful dessert that combines the warm, cozy flavors of autumn spices with the natural sweetness of apples. This cake is perfect for a family gathering or a weekend treat, and its moist, tender crumb pairs beautifully with a hot cup of coffee or tea.
The bundt shape adds an elegant touch to the presentation, making it not only delicious but also visually appealing. With an aromatic blend of cinnamon, nutmeg, and cloves, this cake is sure to fill your kitchen with an inviting fragrance.
This recipe serves 4-6 people and is ideal for those who enjoy a touch of spice in their desserts. The Spiced Apple Bundt is made with fresh apples, which provide a burst of flavor and a pleasant texture. The spices are perfectly balanced, giving the cake a rich depth without being overwhelming.
Whether enjoyed on its own or with a dollop of whipped cream, this cake is bound to become a favorite in your home.
Ingredients
- 2 1/2 cups all-purpose flour
- 1 1/2 teaspoons baking powder
- 1/2 teaspoon baking soda
- 1 teaspoon salt
- 1 teaspoon ground cinnamon
- 1/2 teaspoon ground nutmeg
- 1/4 teaspoon ground cloves
- 1/2 cup unsalted butter, softened
- 1 cup granulated sugar
- 1/2 cup brown sugar, packed
- 3 large eggs
- 1 teaspoon vanilla extract
- 1 cup buttermilk
- 2 cups peeled and chopped apples (such as Granny Smith or Honeycrisp)
Cooking Instructions
- Preheat the Oven: Begin by preheating your oven to 350°F (175°C). Grease and flour a bundt pan thoroughly to guarantee easy removal of the cake once baked.
- Mix Dry Ingredients: In a medium-sized bowl, whisk together the flour, baking powder, baking soda, salt, cinnamon, nutmeg, and cloves. Set this mixture aside for later use.
- Cream the Butter and Sugars: In a large bowl, use an electric mixer to cream the softened butter with the granulated sugar and brown sugar until the mixture is light and fluffy, about 3-5 minutes.
- Add Eggs and Vanilla: Beat in the eggs one at a time, confirming each is fully incorporated before adding the next. Mix in the vanilla extract until well combined.
- Combine Wet and Dry Ingredients: Gradually add the dry ingredients to the wet mixture, alternating with the buttermilk. Start and end with the dry ingredients. Mix until just combined to prevent overworking the batter.
- Fold in Apples: Gently fold the chopped apples into the batter using a spatula, making sure they’re evenly distributed throughout the mixture.
- Transfer to Pan and Bake: Pour the batter into the prepared bundt pan, smoothing the top with a spatula. Bake in the preheated oven for 45-50 minutes, or until a toothpick inserted into the center of the cake comes out clean.
- Cool and Serve: Allow the cake to cool in the pan for about 15 minutes, then carefully invert it onto a wire rack to cool completely. Once cooled, slice and serve as desired.
Extra Tips
For the best results, choose apples that are firm and slightly tart, such as Granny Smith or Honeycrisp, to balance the sweetness of the cake.
If you prefer a glazed finish, you can drizzle a simple icing made of powdered sugar and milk over the cooled cake. Additionally, confirm your bundt pan is well-greased and floured to prevent sticking, and consider using a silicone bundt pan for easier removal.
Enjoy the cake within a couple of days for peak freshness.

