
Welcome to a flavorful journey through Indian cuisine that perfectly balances nutrition and taste. If you’re looking to spice up your meal routine with delicious and healthy options, you’ve come to the right place. From the cozy comfort of Masoor Dal With Spinach to the tantalizing flavors of Grilled Tandoori Chicken, these recipes are sure to inspire. Get ready to transform your everyday cooking with these vibrant dishes. Let’s explore these culinary delights together.
Masoor Dal With Spinach
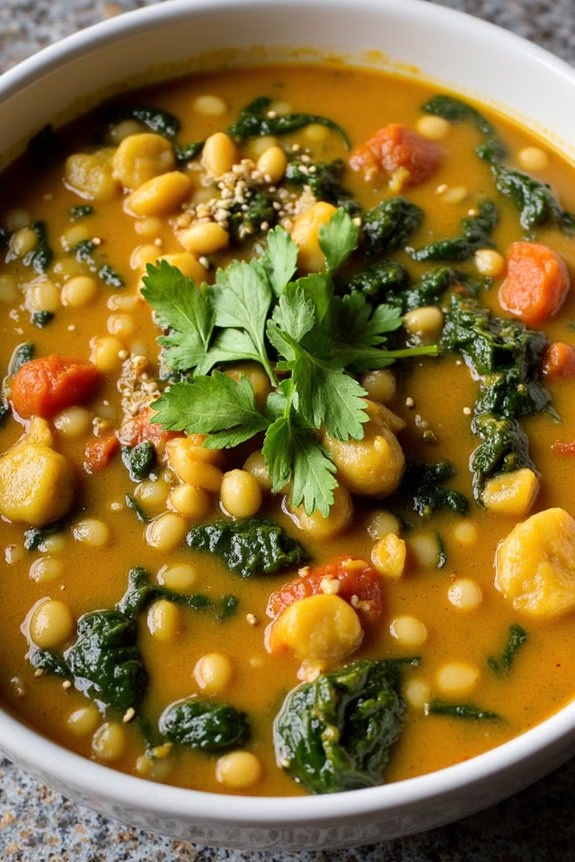
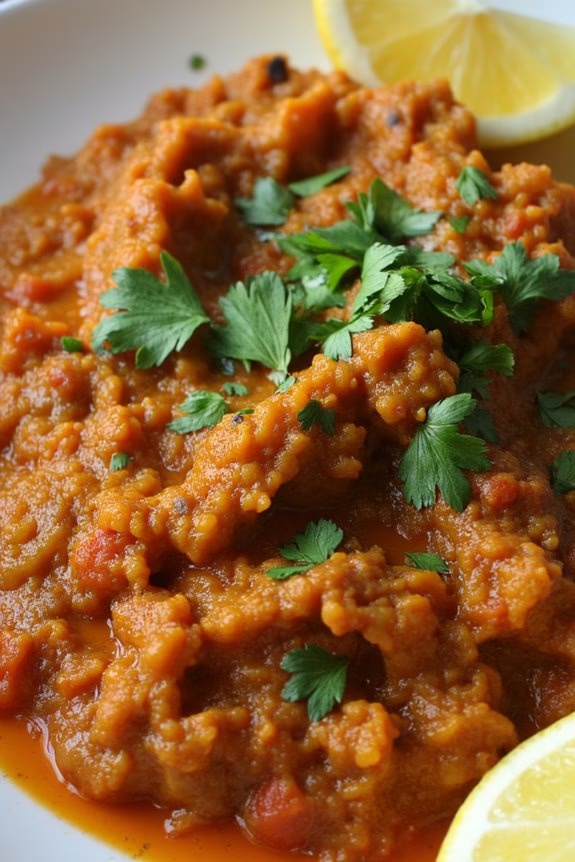
Masoor Dal With Spinach is a delightful and nutritious dish that combines the rich flavors of lentils with the earthy goodness of spinach. This dish isn’t only high in protein and iron but also packed with essential vitamins and minerals, making it a perfect addition to any balanced diet.
The smooth texture of the cooked dal pairs beautifully with the tender leaves of spinach, creating a harmonious blend of taste and health benefits. It’s a staple in many Indian households due to its simplicity, quick cooking time, and the ability to pair well with both rice and breads like roti or naan.
The dish is traditionally seasoned with aromatic spices such as cumin, turmeric, and garlic, which enhance its flavor profile while contributing to its health-promoting properties. The addition of fresh tomatoes and a hint of lemon juice provides a subtle tang that brightens the entire dish.
Whether you’re looking to try something new or seeking comfort in a bowl of hearty dal, Masoor Dal With Spinach is sure to satisfy your cravings while nourishing your body.
Ingredients for 4-6 servings:
- 1 cup masoor dal (red lentils)
- 2 cups fresh spinach, chopped
- 1 tablespoon ghee or vegetable oil
- 1 teaspoon cumin seeds
- 1 medium onion, finely chopped
- 2 cloves garlic, minced
- 1-inch piece of ginger, grated
- 2 medium tomatoes, chopped
- 1 teaspoon turmeric powder
- 1 teaspoon red chili powder (optional)
- Salt to taste
- 4 cups water
- 1 tablespoon lemon juice
- Fresh coriander leaves for garnish
Cooking Instructions:
- Rinse the Lentils: Start by rinsing the masoor dal under cold water until the water runs clear. This removes excess starch and any impurities. Set aside.
- Cook the Lentils: In a large pot, combine the rinsed lentils with 4 cups of water, turmeric powder, and salt. Bring it to a boil over medium heat. Reduce the heat to low, cover the pot, and let the lentils simmer for about 15-20 minutes or until they become soft and mushy. Stir occasionally and remove any foam that forms on the surface.
- Prepare the Seasoning: While the lentils are cooking, heat the ghee or oil in a separate pan over medium heat. Add the cumin seeds and let them sizzle for a few seconds until they become aromatic.
- Sauté Aromatics: Add the chopped onions to the pan and sauté them until they turn golden brown. Stir in the minced garlic and grated ginger, cooking for another minute until their raw smell disappears.
- Cook the Tomatoes: Add the chopped tomatoes to the onion mixture and cook until they soften, which should take about 5 minutes. Add the red chili powder at this stage if using.
- Combine Ingredients: Once the tomatoes are cooked, transfer this mixture into the pot with the cooked lentils. Stir well to combine all the flavors.
- Add Spinach: Stir in the chopped spinach and let it cook for 3-4 minutes until the leaves wilt and blend into the dal.
- Finish and Serve: Turn off the heat and stir in the lemon juice for a fresh, tangy kick. Garnish with fresh coriander leaves and serve hot with rice or flatbread.
Extra Tips:
For a richer flavor, you can dry roast the cumin seeds before adding them to the oil. If you prefer a spicier dal, you can increase the amount of red chili powder or add green chilies.
To save time, a pressure cooker can be used to cook the lentils faster, usually just two whistles are enough. Always adjust the seasoning according to your taste and remember to add the lemon juice only after turning off the heat to preserve its freshness.
Enjoy your Masoor Dal With Spinach as part of a balanced and healthy meal.
Grilled Tandoori Chicken
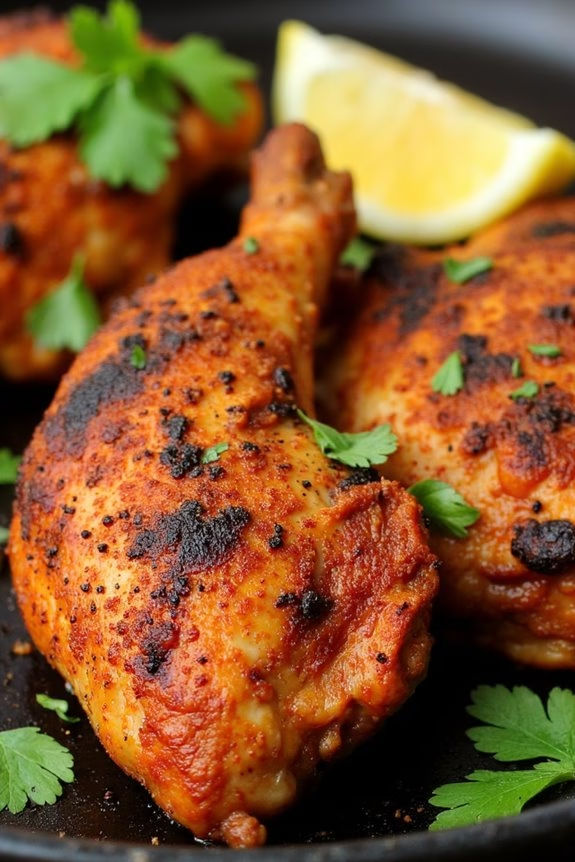
Grilled Tandoori Chicken is a classic Indian dish that offers a perfect blend of spices and flavors, making it a popular choice for those seeking a balanced and healthy meal. This dish features pieces of chicken marinated in a mixture of yogurt and aromatic spices, which are then grilled to perfection. The combination of the smoky char from the grill and the spicy, tangy marinade results in a mouth-watering experience that’s both satisfying and nutritious.
Perfect for a family gathering or a casual dinner, Grilled Tandoori Chicken is sure to delight everyone at the table with its rich flavors and health benefits.
The origins of Tandoori Chicken trace back to the Indian subcontinent, where it has been enjoyed for generations. Traditionally cooked in a tandoor, a cylindrical clay oven, this dish is now often prepared on a grill or in a conventional oven to make it accessible for home cooks. The use of yogurt in the marinade not only adds a tangy taste but also helps tenderize the chicken, guaranteeing it remains juicy and succulent.
Let’s explore the recipe for Grilled Tandoori Chicken that serves 4-6 people.
Ingredients:
- 4-6 chicken thighs or drumsticks
- 1 cup plain yogurt
- 2 tablespoons lemon juice
- 2 tablespoons vegetable oil
- 3 teaspoons garam masala
- 2 teaspoons ground cumin
- 2 teaspoons ground coriander
- 1 1/2 teaspoons paprika
- 1 teaspoon turmeric
- 1 teaspoon salt
- 1 teaspoon ground black pepper
- 1 inch piece of fresh ginger, grated
- 3 cloves garlic, minced
- Fresh cilantro for garnish
- Lemon wedges for serving
Cooking Instructions:
- Prepare the Chicken: Begin by cleaning the chicken thighs or drumsticks and patting them dry with paper towels. Make 2-3 deep cuts in each piece to allow the marinade to penetrate deeply, allowing maximum flavor absorption.
- Make the Marinade: In a large bowl, combine the plain yogurt, lemon juice, vegetable oil, garam masala, ground cumin, ground coriander, paprika, turmeric, salt, pepper, grated ginger, and minced garlic. Mix well until the spices are fully integrated into the yogurt, creating a smooth marinade.
- Marinate the Chicken: Add the prepared chicken pieces to the bowl, making sure each piece is thoroughly coated with the marinade. Cover the bowl with plastic wrap and refrigerate for at least 4 hours, or overnight for best results. This step is essential for flavor development and tenderizing the chicken.
- Preheat the Grill: When ready to cook, preheat your grill to medium-high heat. If using a charcoal grill, make sure the coals are evenly distributed to provide consistent heat.
- Grill the Chicken: Remove the chicken from the marinade, allowing any excess to drip off. Place the chicken on the grill and cook for about 6-8 minutes on each side, or until the internal temperature reaches 165°F (75°C) and the chicken is nicely charred.
- Rest and Serve: Once cooked, remove the chicken from the grill and let it rest for a few minutes. This allows the juices to redistribute, keeping the chicken tender. Garnish with fresh cilantro and serve with lemon wedges on the side for an extra burst of flavor.
Extra Tips: For an authentic smoky flavor, consider adding a few pieces of soaked wood chips to your grill. This will mimic the traditional tandoor cooking method. If you don’t have access to a grill, you can also bake the marinated chicken in a preheated oven at 400°F (200°C) for 25-30 minutes, then broil for an additional 5 minutes to achieve a charred effect.
Adjust the spice levels to your preference, and feel free to experiment with additional spices for a personalized touch.
Chickpea and Quinoa Salad
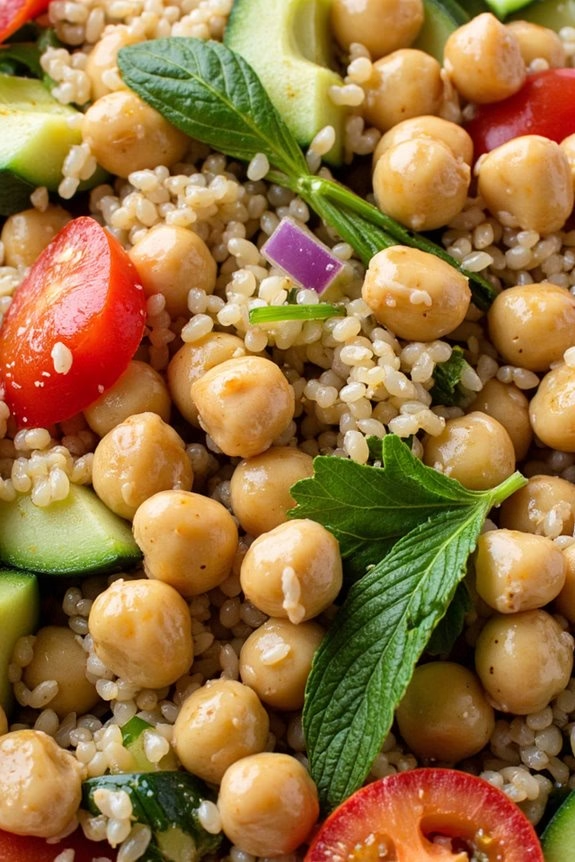
Chickpea and Quinoa Salad is a vibrant and nutritious dish that perfectly embodies the essence of balanced healthy Indian recipes. This salad combines protein-rich chickpeas and quinoa with an array of fresh vegetables and aromatic spices to create a wholesome meal that’s both satisfying and delicious.
Whether you’re looking for a light lunch or a hearty side dish, this salad is a versatile addition to any meal and can be easily customized to suit your taste preferences. Ideal for serving 4-6 people, this salad isn’t only easy to prepare but also packed with essential nutrients.
The combination of chickpeas and quinoa provides a complete protein, while the fresh vegetables add a burst of vitamins and minerals. The zesty dressing, infused with Indian spices, brings all the ingredients together, making it a flavorful and nourishing choice for those who love to eat healthy without compromising on taste.
Ingredients:
- 1 cup quinoa
- 2 cups water
- 1 can (15 oz) chickpeas, drained and rinsed
- 1 medium cucumber, diced
- 1 large tomato, diced
- 1 red bell pepper, diced
- 1 small red onion, finely chopped
- 1/4 cup fresh cilantro, chopped
- 1/4 cup fresh mint, chopped
- 1/4 cup extra virgin olive oil
- 2 tablespoons lemon juice
- 1 teaspoon cumin powder
- 1/2 teaspoon coriander powder
- Salt to taste
- Black pepper to taste
Instructions:
1. Cook the Quinoa: Rinse the quinoa under cold water to remove any bitterness. In a medium saucepan, combine the quinoa and water. Bring to a boil over medium-high heat.
Once boiling, reduce the heat to low, cover, and let simmer for about 15 minutes or until the quinoa is cooked and has absorbed all the water. Fluff the quinoa with a fork and set aside to cool.
2. Prepare the Chickpeas: While the quinoa is cooking, drain and rinse the chickpeas thoroughly under cold water. This step guarantees that the chickpeas are clean and ready to be mixed into the salad.
3. Chop the Vegetables: Dice the cucumber, tomato, red bell pepper, and red onion. Chop the cilantro and mint leaves finely. Confirm all vegetables are evenly sized for a consistent texture throughout the salad.
4. Make the Dressing: In a small bowl, whisk together the olive oil, lemon juice, cumin powder, coriander powder, salt, and black pepper. Adjust the seasoning to your taste.
5. Assemble the Salad: In a large mixing bowl, combine the cooked quinoa, chickpeas, diced vegetables, cilantro, and mint. Pour the dressing over the salad and toss gently to make sure everything is well coated.
6. Chill and Serve: Let the salad rest in the refrigerator for at least 30 minutes before serving. This allows the flavors to meld together beautifully. Serve chilled and enjoy!
Extra Tips:
For added texture and flavor, consider including additional ingredients like roasted peanuts or sunflower seeds. You can also add a touch of sweetness by mixing in some diced mango or apple.
If you prefer a spicier salad, feel free to add finely chopped green chilies or a dash of red chili flakes. Remember, the key to a perfect salad is balance, so adjust the seasoning and ingredients to suit your personal taste preferences.
Baingan Bharta (Smoky Eggplant Mash)
The key to a perfect Baingan Bharta lies in the roasting of the eggplants, which gives the dish its signature smoky flavor. Once roasted, the eggplants are peeled, mashed, and cooked with onions, tomatoes, and a blend of spices. The result is a flavorful and comforting dish that’s both satisfying and easy to prepare. Here’s how you can make Baingan Bharta for 4-6 people.
Ingredients for Baingan Bharta (serves 4-6):
- 2 large eggplants
- 2 tablespoons vegetable oil
- 1 large onion, finely chopped
- 2 tomatoes, finely chopped
- 1 tablespoon ginger-garlic paste
- 2 green chilies, finely chopped
- 1 teaspoon cumin seeds
- 1/2 teaspoon turmeric powder
- 1 teaspoon red chili powder
- 1 teaspoon garam masala
- Salt to taste
- Fresh coriander leaves, chopped (for garnish)
- Lemon wedges (optional, for serving)
Instructions:
- Roast the Eggplants: Begin by washing the eggplants and patting them dry. Make small slits on the surface and roast them directly over an open flame or in the oven at 375°F (190°C) until they’re tender and the skin is charred. Turn occasionally to guarantee even roasting. This should take about 15-20 minutes.
- Cool and Peel: Allow the roasted eggplants to cool. Once cooled, peel off the charred skin and mash the flesh with a fork until smooth. Set aside.
- Prepare the Base: Heat oil in a pan over medium heat. Add cumin seeds and allow them to splutter. Add chopped onions and sauté until they turn golden brown.
- Add Aromatics: Stir in the ginger-garlic paste and green chilies, cooking for 2-3 minutes until the raw smell disappears.
- Cook with Tomatoes: Add the chopped tomatoes and cook until they soften and the oil begins to separate from the mixture.
- Spice it Up: Stir in turmeric powder, red chili powder, and salt. Mix well to combine and cook for another 2 minutes.
- Combine with Eggplant: Add the mashed eggplant to the pan and mix well with the onion-tomato mixture. Cook for 5-7 minutes, stirring occasionally.
- Finish with Garam Masala: Sprinkle garam masala over the mixture and stir well. Cook for an additional 2 minutes to let the flavors meld together.
- Garnish and Serve: Remove from heat and garnish with fresh coriander leaves. Serve hot with lemon wedges on the side, if using.
Extra Tips:
For the best smoky flavor, roast the eggplants over an open flame, as this method imparts a deeper smokiness than oven roasting. If you prefer a milder dish, adjust the quantity of green chilies and red chili powder.
Always taste and adjust the seasoning before serving. For added richness, you can drizzle a little bit of ghee over the Baingan Bharta just before serving. Enjoy this dish fresh as it tastes best when hot and freshly prepared.
Methi Thepla (Fenugreek Flatbread)
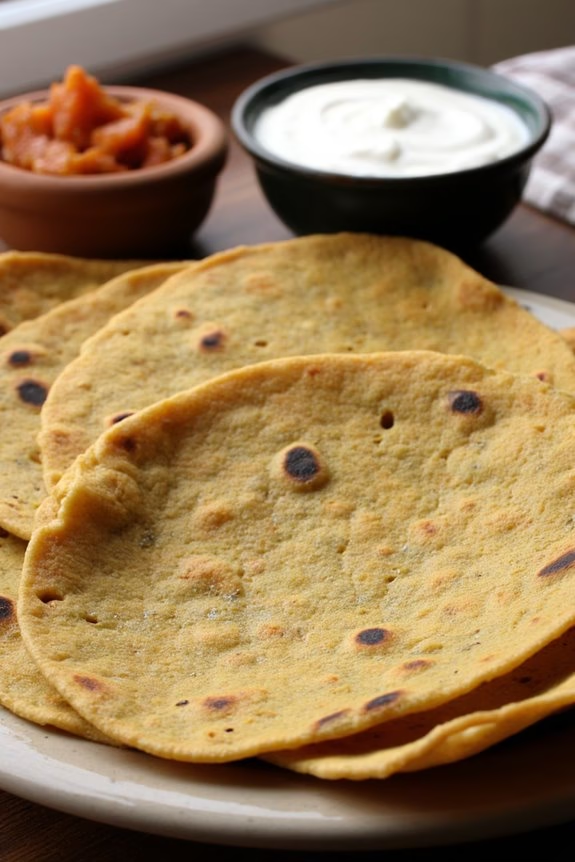
Methi Thepla is a traditional Indian flatbread made with fresh fenugreek leaves, whole wheat flour, and a blend of spices. It’s a popular dish from the state of Gujarat, known for its nutritional benefits and delicious taste. The presence of fenugreek leaves not only adds a unique flavor but also boosts the nutritional profile of the dish, making it rich in iron, fiber, and essential vitamins.
This versatile flatbread can be enjoyed at any time of the day, whether it’s for breakfast, lunch, or as a snack, often accompanied by yogurt, pickle, or a cup of tea. Thepla is particularly loved for its long shelf life, making it a great option for travel-friendly meals or lunchboxes. It’s a fantastic way to incorporate greens into your meal plan, especially for those who are looking to add more plant-based foods to their diet.
The spices used in the recipe, such as turmeric and cumin, not only enhance the taste but also provide additional health benefits. Easy to prepare and packed with flavors, Methi Thepla is a delightful recipe that caters to both taste and health.
Ingredients (Serving Size: 4-6 people):
- 2 cups whole wheat flour
- 1 cup fresh fenugreek leaves, finely chopped
- 2 tablespoons gram flour (besan)
- 1 teaspoon turmeric powder
- 1 teaspoon cumin powder
- 1 teaspoon red chili powder
- Salt to taste
- 2 tablespoons yogurt
- 2 tablespoons oil (plus extra for cooking)
- Water as needed
Cooking Instructions:
- Prepare the Dough: In a large mixing bowl, combine whole wheat flour, gram flour, turmeric powder, cumin powder, red chili powder, and salt. Mix well to guarantee the spices are evenly distributed.
- Add Fenugreek Leaves and Yogurt: Add the finely chopped fenugreek leaves and yogurt to the flour mixture. Mix until the leaves and yogurt are well incorporated into the flour.
- Knead the Dough: Gradually add water, a little at a time, and knead the mixture into a smooth, pliable dough. Add 2 tablespoons of oil and knead again to make the dough soft and elastic. Cover the dough with a damp cloth and let it rest for about 15-20 minutes.
- Divide the Dough: After resting, divide the dough into small equal portions, roughly the size of a golf ball. Roll each portion into a smooth ball.
- Roll the Theplas: On a lightly floured surface, take one dough ball and roll it out into a thin, round disc using a rolling pin. Aim for a diameter of about 6-7 inches. Repeat the process with the remaining dough balls.
- Cook the Theplas: Heat a non-stick tawa or skillet over medium heat. Place one rolled thepla on the hot tawa. Cook for about 30 seconds or until you see small bubbles form on the surface.
- Flip and Cook: Flip the thepla and apply a small amount of oil on the cooked side. Press gently with a spatula and cook the other side until golden brown spots appear. Flip again, apply oil on the other side, and cook until both sides are golden and cooked through.
- Serve Hot: Remove the cooked thepla from the tawa and keep it warm by wrapping it in a clean kitchen towel. Repeat the process with the remaining theplas. Serve hot with yogurt and pickle.
Extra Tips:
When making Methi Thepla, confirm that the fenugreek leaves are fresh and washed thoroughly to remove any dirt or grit. You can adjust the level of spices according to your taste preferences, adding more or less chili powder as desired.
If fresh fenugreek leaves aren’t available, dried fenugreek leaves (kasuri methi) can be used as a substitute, though the flavor will be slightly different. The dough should be soft but not sticky, so adjust the water quantity accordingly while kneading.
To keep the theplas soft for longer, you might want to use a little extra oil during cooking. Enjoy the theplas with a side of yogurt or your favorite pickle for a complete meal experience.
Aloo Gobi (Potato and Cauliflower Curry)
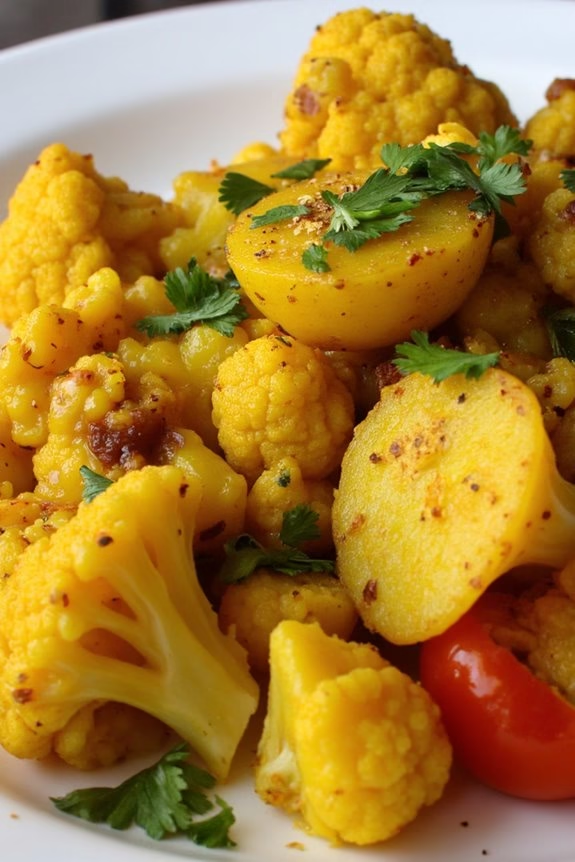
Aloo Gobi, a classic and beloved Indian dish, is a perfect example of how simple ingredients can come together to create a flavorful and satisfying meal. This dish combines potatoes and cauliflower with a blend of spices, resulting in a deliciously aromatic curry that’s both nourishing and comforting.
Aloo Gobi is versatile and can be enjoyed as a main dish or as a side, paired with rice or Indian bread like naan or roti. Rich in vitamins and minerals, this vegetarian dish offers a healthy balance of carbohydrates and fiber, making it an excellent choice for those seeking a nutritious meal.
The spices not only add depth of flavor but also offer various health benefits, such as aiding digestion and boosting immunity. Whether you’re new to Indian cuisine or a seasoned cook, this Aloo Gobi recipe is straightforward and rewarding, perfect for a cozy family dinner or a gathering with friends.
Ingredients for 4-6 servings:
- 3 tablespoons vegetable oil
- 1 teaspoon cumin seeds
- 1 medium onion, finely chopped
- 2 cloves garlic, minced
- 1-inch piece ginger, grated
- 2 medium potatoes, peeled and cubed
- 1 medium cauliflower, cut into florets
- 2 medium tomatoes, chopped
- 1 teaspoon turmeric powder
- 1 teaspoon ground coriander
- 1 teaspoon ground cumin
- 1/2 teaspoon red chili powder
- Salt to taste
- 1/2 cup water
- Fresh cilantro leaves, chopped (for garnish)
- Lemon wedges (optional)
Cooking Instructions:
- Heat the Oil: In a large pan over medium heat, add the vegetable oil. Once hot, add the cumin seeds and allow them to sizzle for about 30 seconds until fragrant.
- Sauté Aromatics: Add the chopped onion to the pan and sauté for 2-3 minutes until they become translucent. Stir in the minced garlic and grated ginger, cooking for another minute until the mixture is aromatic.
- Cook the Vegetables: Add the cubed potatoes and cauliflower florets to the pan. Stir them well with the onion mixture, making certain they’re well coated with the oil and spices.
- Add Tomatoes and Spices: Mix in the chopped tomatoes, turmeric powder, ground coriander, ground cumin, red chili powder, and salt. Stir everything together, allowing the tomatoes to soften and the spices to coat the vegetables evenly.
- Simmer the Curry: Pour in the water and stir. Cover the pan with a lid and let the curry simmer on low heat for about 20-25 minutes, or until the potatoes and cauliflower are tender. Stir occasionally to prevent sticking.
- Final Touches: Once the vegetables are cooked through, remove the lid and cook for an additional 5 minutes to let any excess moisture evaporate. Adjust salt to taste and remove from heat.
- Serve: Garnish with fresh cilantro leaves and serve hot with lemon wedges on the side, if desired.
Extra Tips:
To guarantee your Aloo Gobi has the perfect texture, make sure the potatoes and cauliflower are cut into similar-sized pieces so they cook evenly. If you prefer a spicier dish, you can increase the amount of red chili powder or add a chopped green chili along with the onions.
Additionally, for a richer flavor, consider adding a pinch of garam masala towards the end of cooking. Remember to keep stirring occasionally to avoid burning the spices, and always taste and adjust seasoning before serving.
Moong Dal Chilla (Lentil Pancakes)
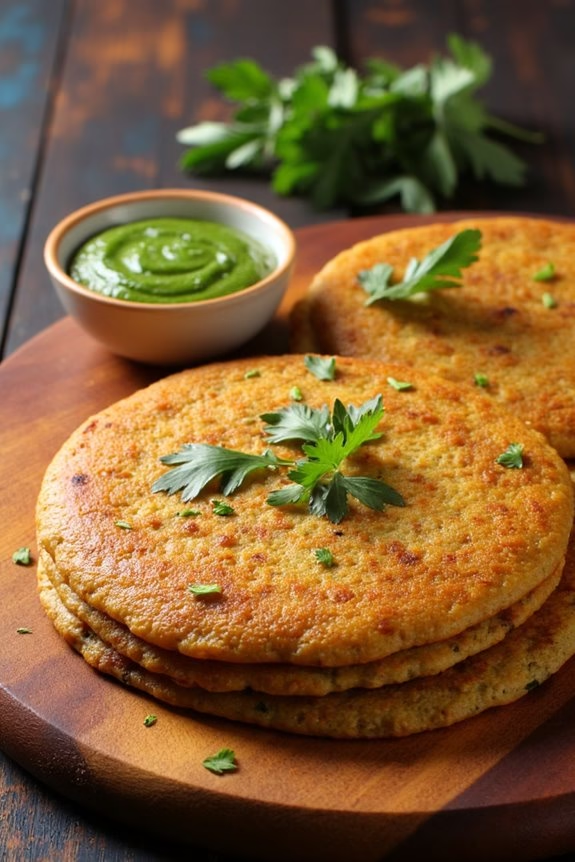
Moong Dal Chilla, also known as Lentil Pancakes, is a savory and nutritious dish originating from India, perfect for breakfast or a light meal. Made from moong dal, these pancakes aren’t only rich in protein but also incredibly flavorful due to a blend of traditional Indian spices. The batter is quick and easy to prepare, making it a great option for those who are looking to enjoy a healthy meal without spending too much time in the kitchen.
The dish is versatile and can be customized with various vegetables, making it a great way to incorporate more greens into your diet. Moong Dal Chilla is often enjoyed with a side of chutney or yogurt, enhancing its taste and providing a balanced meal. Its crispy exterior and soft interior make it a delightful treat for both adults and children. This recipe serves 4-6 people, making it ideal for family gatherings or meal prepping for the week.
Ingredients:
- 1 cup split yellow moong dal (soaked for 2-3 hours)
- 1/2 cup water
- 1 teaspoon cumin seeds
- 1/2 teaspoon turmeric powder
- 1/2 teaspoon red chili powder
- Salt to taste
- 1/4 cup finely chopped onions
- 1/4 cup grated carrots
- 1/4 cup chopped coriander leaves
- 2 green chilies, finely chopped
- 1/2 inch ginger, grated
- Oil for cooking
Cooking Instructions:
- Prepare the Batter: Drain the soaked moong dal and transfer it to a blender. Add 1/2 cup water and blend until you achieve a smooth batter. The consistency should be similar to pancake batter, neither too thick nor too runny.
- Add Spices: Pour the batter into a mixing bowl. Add cumin seeds, turmeric powder, red chili powder, and salt. Mix well to make sure all spices are evenly distributed in the batter.
- Incorporate Vegetables: To the batter, add chopped onions, grated carrots, chopped coriander leaves, green chilies, and grated ginger. Mix thoroughly to combine all ingredients.
- Heat the Pan: Place a non-stick pan or griddle over medium heat. Add a few drops of oil and spread it evenly using a spatula or a brush.
- Cook the Chillas: Pour a ladleful of batter onto the heated pan and spread it gently into a circle. Cook for 2-3 minutes on one side, or until the edges start to lift, and the bottom is golden brown.
- Flip and Cook: Drizzle a little oil around the edges and on top of the chilla. Flip it using a spatula and cook the other side for another 2-3 minutes until golden and crispy.
- Serve: Transfer the cooked chilla onto a plate and continue the process with the remaining batter. Serve hot with a side of green chutney or yogurt.
Extra Tips:
For best results, verify the moong dal is soaked adequately as this helps in achieving a smooth batter. Adjust the water quantity to get the right batter consistency, as too much water will make it difficult to spread, while too little may result in thick pancakes.
You can also experiment with other vegetables like spinach or bell peppers for added flavor and nutrition. Always cook on medium heat to make sure the chillas are cooked thoroughly and evenly.
Palak Paneer (Spinach and Cottage Cheese)
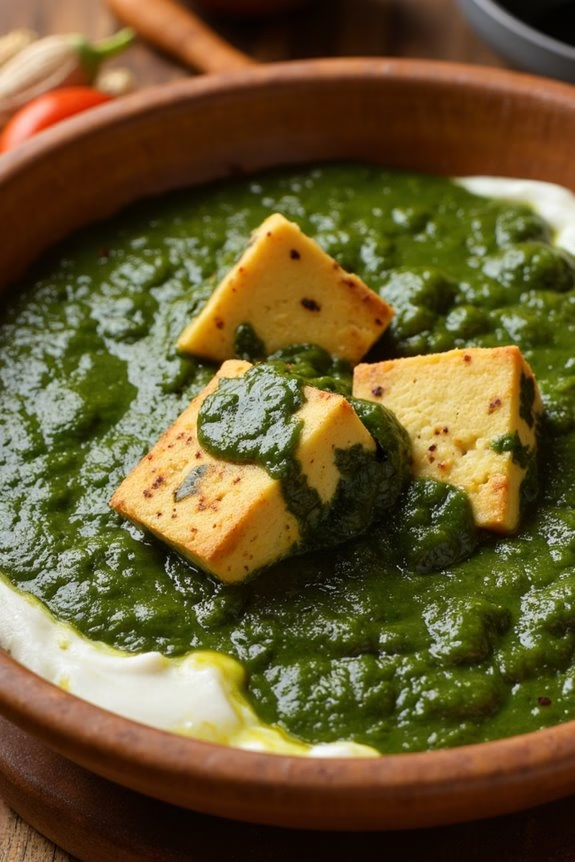
Palak Paneer is a classic and delightful Indian dish that combines the earthy flavors of spinach with the rich, creamy texture of paneer (cottage cheese). It’s a nutritious and flavorful dish that’s rich in iron, protein, and other essential nutrients, making it a perfect meal for those who are health-conscious but don’t want to compromise on taste.
The vibrant green spinach gravy envelops soft, succulent cubes of paneer, creating a harmonious blend of flavors and textures. This dish is a favorite in many Indian households and is often enjoyed with warm naan, roti, or rice.
This balanced and healthy recipe is perfect for a family meal or a special occasion. It’s easy to prepare and can be made in under an hour. Not only does Palak Paneer offer a delicious taste, but it also provides a good source of vitamins and minerals necessary for maintaining a healthy diet.
Whether you’re a seasoned cook or a beginner in Indian cuisine, this recipe will guide you through creating an authentic and satisfying dish that can be enjoyed by all.
Ingredients (for 4-6 servings):
- 500 grams fresh spinach leaves
- 200 grams paneer, cut into cubes
- 2 tablespoons ghee or vegetable oil
- 1 large onion, finely chopped
- 2 tomatoes, pureed
- 1 tablespoon ginger-garlic paste
- 2-3 green chilies, finely chopped
- 1 teaspoon cumin seeds
- 1/2 teaspoon turmeric powder
- 1 teaspoon garam masala
- 1/2 teaspoon red chili powder
- Salt to taste
- 2 tablespoons cream (optional)
- Water as needed
Cooking Instructions:
1. Prepare the Spinach: Begin by washing the spinach leaves thoroughly to remove any dirt. Boil the spinach in a pot of water for about 2-3 minutes, until wilted. Drain and immediately transfer the spinach to a bowl of ice-cold water to preserve its vibrant green color.
After a few minutes, drain again and blend the spinach into a smooth puree. Set aside.
2. Fry the Paneer: In a pan, heat a tablespoon of ghee or oil. Add the paneer cubes and fry them on medium heat until they’re golden brown on all sides. Remove the paneer from the pan and place it on a plate lined with paper towels to absorb excess oil.
3. Sauté the Aromatics: In the same pan, add a little more ghee or oil if needed. Add cumin seeds and allow them to splutter. Add the chopped onions and sauté until they turn golden brown.
Stir in the ginger-garlic paste and green chilies, and cook for another 2 minutes until the raw smell disappears.
4. Make the Base Gravy: Add the tomato puree to the pan and cook until the oil starts to separate from the mixture. Add turmeric powder, red chili powder, and salt. Stir and cook for 2-3 minutes until the spices are well combined with the tomatoes.
5. Combine Spinach and Paneer: Pour the spinach puree into the pan and mix well with the tomato-onion mixture. Add water as necessary to reach the desired consistency. Let it simmer for about 5 minutes.
Add garam masala and stir in the fried paneer cubes. Let it cook for another 2-3 minutes, allowing the paneer to absorb the flavors.
6. Finish with Cream: If desired, stir in the cream for a richer texture, and cook for an additional minute. Adjust salt and spices to taste.
7. Serve: Remove from heat and serve hot with your choice of naan, roti, or rice.
Extra Tips:
For a healthier version of Palak Paneer, you can grill or lightly sauté the paneer instead of deep-frying it. You may also replace cream with yogurt for a lighter dish.
When blending the spinach, confirm it’s smooth to create a creamy consistency in the gravy. Be mindful of the salt as paneer can sometimes be salty. Adjust the spice level according to your preference by varying the amount of green and red chilies.
Enjoy your homemade Palak Paneer with a squeeze of lemon juice for an extra zest!
Lemon Rice With Vegetables
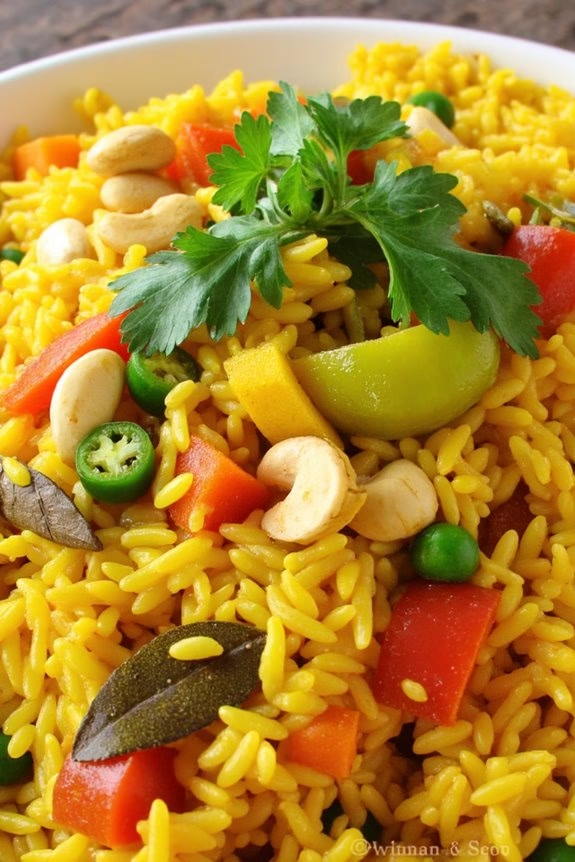
This recipe is incredibly versatile and can be customized with your favorite vegetables or whatever you have on hand. The essential ingredients include mustard seeds, turmeric, and curry leaves, which infuse the rice with a distinct aroma and flavor.
Whether you’re a seasoned cook or a beginner, this Lemon Rice With Vegetables recipe will guide you through creating a tasty dish that serves 4-6 people.
Ingredients:
- 3 cups cooked basmati rice
- 1 cup mixed vegetables (carrots, peas, bell peppers, etc.), chopped
- 2 tablespoons oil (vegetable or coconut)
- 1 teaspoon mustard seeds
- 1 teaspoon cumin seeds
- 1/2 teaspoon turmeric powder
- 10-12 curry leaves
- 2 green chilies, slit
- 1/4 cup peanuts or cashews
- 1/4 teaspoon asafoetida (hing)
- Juice of 2 lemons
- Salt to taste
- Fresh coriander leaves, chopped (for garnish)
Instructions:
- Prepare the Rice: If you haven’t already, cook the basmati rice according to package instructions and allow it to cool completely. This helps in preventing the rice from becoming mushy later on.
- Heat the Oil: In a large pan, heat the oil over medium heat. Add the mustard seeds and cumin seeds, allowing them to splutter and release their aroma.
- Add Aromatics: Stir in the curry leaves, green chilies, and asafoetida. Saute for about 30 seconds until the curry leaves become crispy and the spices are fragrant.
- Toast the Nuts: Add the peanuts or cashews to the pan. Stir continuously and toast them until they’re golden brown, enhancing their nutty flavor.
- Cook the Vegetables: Add the chopped mixed vegetables to the pan. Stir well and cook for 5-7 minutes until they’re slightly tender but still retain a bit of crunch.
- Mix in Spices: Add the turmeric powder and salt to the vegetable mixture, stirring to coat the vegetables evenly with the spices.
- Combine Rice and Lemon: Gently fold in the cooled rice, ensuring the grains are well mixed with the vegetable and spice blend. Pour in the lemon juice and mix thoroughly to distribute the tangy flavor throughout the dish.
- Garnish and Serve: Once everything is well combined and heated through, turn off the heat. Garnish with freshly chopped coriander leaves and serve hot.
Extra Tips:
When making Lemon Rice With Vegetables, it’s vital to use cold, day-old rice for the best texture. Freshly cooked rice can become too sticky and clump together.
Additionally, feel free to adjust the level of spiciness by altering the amount of green chilies to suit your taste preferences. For added protein, you can include some cooked chickpeas or tofu.
Enjoy this dish on its own or pair it with a side of yogurt or raita for a complete meal.
Rajma (Kidney Bean Curry)
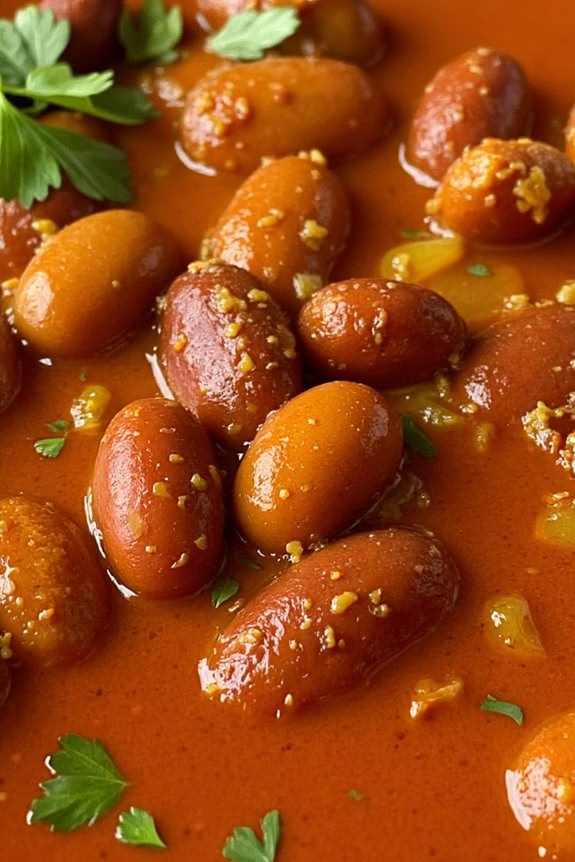
Rajma, also known as Kidney Bean Curry, is a classic North Indian dish that has captured the hearts of many with its rich, creamy texture and robust flavor. This nutritious dish isn’t only a staple in Indian households but is also loved for its simplicity and comfort. Perfectly complemented by steamed rice or hot rotis, Rajma is a wholesome meal that’s both satisfying and nourishing.
Traditionally, kidney beans are simmered in a spicy tomato-onion gravy, infused with a medley of spices, creating a hearty and flavorful curry. To achieve the perfect Rajma, it’s important to use high-quality kidney beans and the right blend of spices, which brings out the dish’s authentic taste.
The preparation begins with soaking the kidney beans overnight, making sure they become soft and easy to digest. Cooking the beans until they’re tender is key to achieving the desired creaminess in the curry. Once the beans are cooked, they’re simmered in a well-spiced gravy made from fresh ingredients, allowing the flavors to meld beautifully. This recipe serves 4-6 people, making it ideal for a family meal or a gathering with friends.
Ingredients:
- 2 cups dried kidney beans
- 3 tablespoons oil
- 1 large onion, finely chopped
- 3 medium tomatoes, pureed
- 2 teaspoons ginger-garlic paste
- 1 teaspoon cumin seeds
- 2 teaspoons coriander powder
- 1 teaspoon cumin powder
- 1 teaspoon red chili powder
- 1/2 teaspoon turmeric powder
- 1 teaspoon garam masala
- Salt to taste
- 4 cups water
- Fresh cilantro, chopped (for garnish)
- 1 tablespoon lemon juice (optional)
Cooking Instructions:
- Preparation: Rinse the kidney beans thoroughly and soak them in water overnight or for at least 8 hours. This helps in softening the beans and reduces cooking time.
- Cooking the Beans: Drain the soaked beans and transfer them to a pressure cooker. Add 4 cups of water and a pinch of salt. Pressure cook for about 20-25 minutes or until the beans are soft. If using a regular pot, simmer the beans until they’re tender, adding more water if necessary.
- Preparing the Gravy: In a large pan, heat oil over medium heat. Add cumin seeds and let them splutter. Add the chopped onions and sauté until they turn golden brown.
- Adding the Spices: Stir in the ginger-garlic paste and sauté for an additional minute until the raw smell disappears. Add the tomato puree, followed by coriander powder, cumin powder, red chili powder, and turmeric powder. Cook the mixture until the oil starts to separate from the masala.
- Combining Beans and Gravy: Add the cooked kidney beans along with their cooking liquid to the pan. Stir well to combine with the tomato-onion mixture. Adjust salt as needed.
- Simmering: Allow the curry to simmer on low heat for 20-25 minutes, stirring occasionally. This helps the beans absorb the flavors of the spices and the gravy to thicken.
- Finishing Touches: Stir in garam masala and lemon juice if using. Garnish with fresh cilantro before serving. Serve hot with steamed rice or bread.
Extra Tips: For an even creamier texture, mash some of the kidney beans with the back of a spoon during the simmering process. If you prefer a slightly tangy flavor, you can add a little more lemon juice or a splash of tamarind paste. Always taste the seasoning before serving and adjust according to your preference. To save time, you can use canned kidney beans, but make sure to rinse them thoroughly before use.
Tofu Tikka Skewers
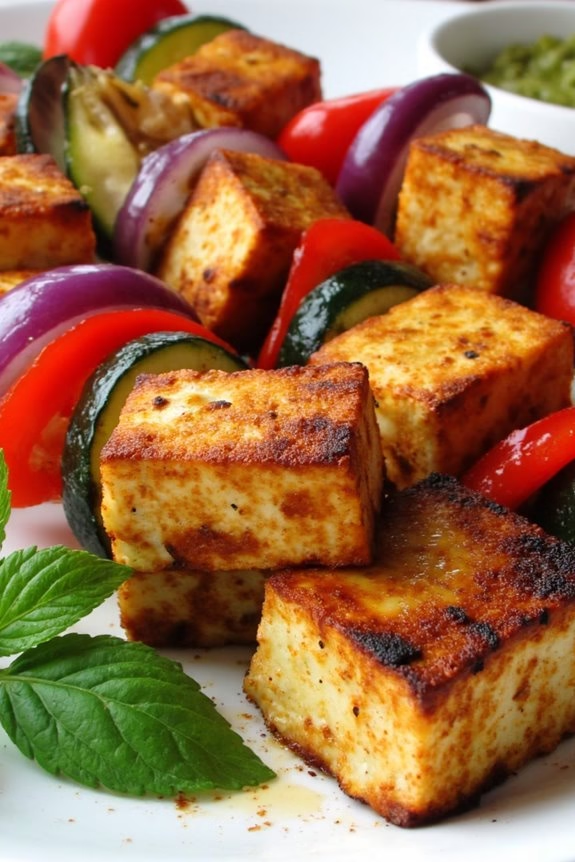
Tofu Tikka Skewers are a delicious and nutritious way to enjoy Indian cuisine while maintaining a balanced diet. This plant-based dish combines chunks of marinated tofu with a mix of colorful vegetables, all threaded onto skewers and grilled to perfection. The tofu is infused with a blend of aromatic spices and yogurt, creating a savory and slightly tangy flavor profile that pairs wonderfully with the charred edges from grilling.
These skewers aren’t only a great source of protein but also rich in vitamins and minerals, making them an excellent choice for a healthy meal. Perfect for a family dinner or a gathering with friends, Tofu Tikka Skewers can be served as a main dish or an appetizer. They’re versatile, easy to prepare, and can be customized with your favorite vegetables.
Whether you’re a seasoned cook or a beginner in the kitchen, this recipe will guide you through the process of making these flavorful skewers. Serve them with a side of mint chutney or a fresh salad to create a complete, satisfying meal that everyone will love.
Ingredients for 4-6 servings:
- 400g firm tofu, cut into 1-inch cubes
- 1 cup plain yogurt (dairy or non-dairy)
- 2 tablespoons lemon juice
- 2 tablespoons vegetable oil
- 1 tablespoon ginger-garlic paste
- 1 teaspoon ground cumin
- 1 teaspoon ground coriander
- 1 teaspoon garam masala
- 1/2 teaspoon turmeric powder
- 1/2 teaspoon red chili powder
- Salt to taste
- 1 bell pepper, cut into 1-inch pieces
- 1 red onion, cut into 1-inch pieces
- 1 zucchini, sliced into 1/2-inch rounds
- Skewers (wooden or metal)
Cooking Instructions:
- Prepare the Marinade: In a large mixing bowl, combine the yogurt, lemon juice, vegetable oil, ginger-garlic paste, ground cumin, ground coriander, garam masala, turmeric powder, red chili powder, and salt. Mix well until all the spices are evenly incorporated into the yogurt.
- Marinate the Tofu: Add the tofu cubes to the marinade, making sure each piece is well coated. Cover the bowl and let it marinate in the refrigerator for at least 1 hour, or overnight for deeper flavors.
- Prepare the Vegetables: While the tofu is marinating, prepare the vegetables by cutting them into the specified sizes. This guarantees even cooking and a balanced presentation on the skewers.
- Assemble the Skewers: If you’re using wooden skewers, soak them in water for about 30 minutes to prevent burning. Thread the marinated tofu cubes and vegetables onto the skewers, alternating between the different vegetables and tofu for a colorful arrangement.
- Preheat the Grill: Preheat your grill to medium-high heat. If you’re using an oven, preheat it to 400°F (200°C) and line a baking tray with parchment paper.
- Grill the Skewers: Place the skewers on the grill and cook for about 10-15 minutes, turning occasionally, until the tofu is cooked through and the vegetables are slightly charred. If using an oven, bake the skewers for 15-20 minutes, turning halfway, until they’re golden and cooked through.
- Serve: Remove the skewers from the grill or oven and let them cool slightly before serving. Pair them with mint chutney or a fresh salad for a complete meal experience.
Extra Tips:
For the best flavor, allow the tofu to marinate overnight. This gives the tofu ample time to absorb the spices, resulting in a more pronounced taste. If you’re short on time, even a quick 30-minute marinade will still yield delicious results.
Additionally, feel free to customize the vegetable selection based on what’s in season or your personal preferences. Just make sure that the pieces are cut uniformly for even cooking. Finally, if you’re looking for a smoky flavor, a charcoal grill works wonderfully, but an oven or stovetop grill pan will also do the trick.
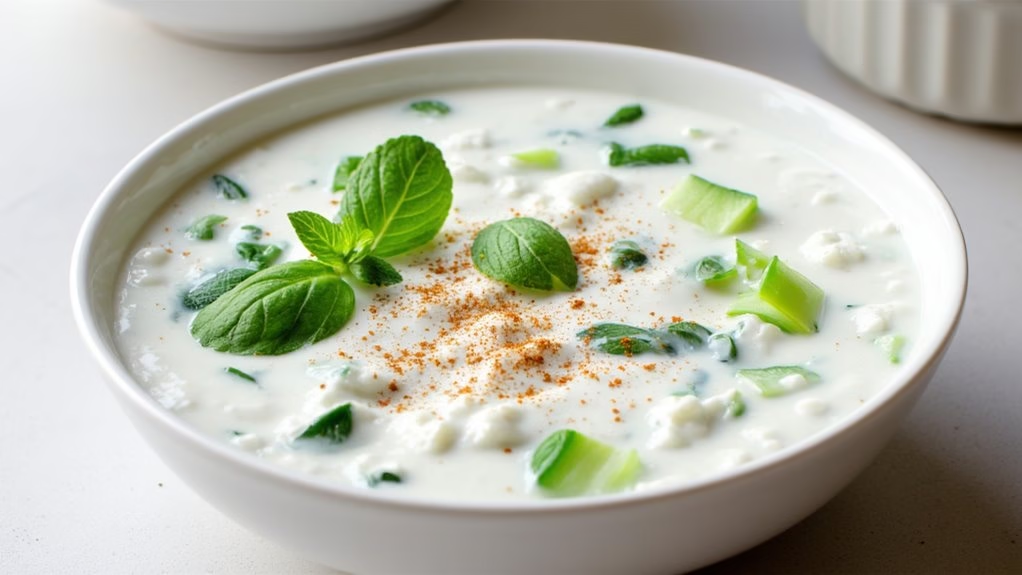
Cucumber and Mint Raita
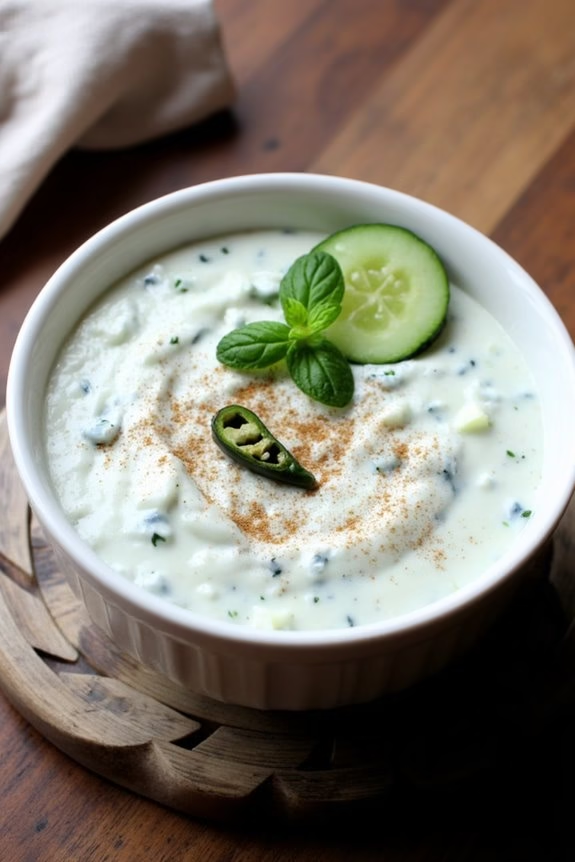
Cucumber and Mint Raita is a revitalizing and cooling side dish that perfectly complements spicy Indian curries and biryanis. This yogurt-based accompaniment isn’t only delicious but also packed with nutrients, making it a healthy addition to any meal. The combination of cucumber and mint provides a cooling effect, which is particularly beneficial during hot weather or when eating spicy foods.
The creamy texture of yogurt coupled with the crunch of cucumbers and the aromatic freshness of mint makes this dish a delightful treat. This raita isn’t just a simple side dish; it can also be enjoyed as a dip or a light snack. It’s incredibly easy to make and requires minimal ingredients, making it an ideal choice for quick preparation.
The flavors meld together beautifully, offering a harmonious balance of tanginess from the yogurt and subtle sweetness from cucumbers, enhanced by the invigorating aroma of mint. Here’s how you can prepare Cucumber and Mint Raita for 4-6 people:
Ingredients:
- 2 cups plain yogurt
- 2 medium cucumbers, peeled and finely diced
- 1/2 cup fresh mint leaves, finely chopped
- 1 teaspoon roasted cumin powder
- Salt to taste
- 1/2 teaspoon black pepper
- 1 tablespoon lemon juice
- Optional: 1 green chili, finely chopped
Cooking Instructions:
- Prepare the Yogurt Base: In a large mixing bowl, whisk the plain yogurt until it’s smooth and creamy. This step guarantees that the yogurt has a uniform texture, which is essential for a good raita.
- Add the Cucumbers: Peel and finely dice the cucumbers, then add them to the yogurt. Stir well to combine. The cucumbers should be fresh and crunchy to give the raita a pleasant texture.
- Incorporate the Mint: Chop the fresh mint leaves finely and add them to the yogurt mixture. Mix it thoroughly to guarantee that the mint is evenly distributed throughout the raita, imparting its fresh flavor.
- Season the Raita: Add the roasted cumin powder, salt, and black pepper to the mixture. Stir well to blend all the spices into the yogurt. The roasted cumin powder adds a rich, earthy flavor that complements the mint and cucumber.
- Add Lemon Juice: Squeeze in the lemon juice and mix well. The lemon juice provides a subtle tanginess that enhances the overall flavor of the raita.
- Optional Spice: If you prefer a bit of heat, finely chop a green chili and add it to the raita. Mix thoroughly to incorporate the chili evenly.
- Chill Before Serving: Cover the bowl and refrigerate the raita for at least 30 minutes before serving. Chilling allows the flavors to meld together and enhances the revitalizing quality of the dish.
Extra Tips:
For the best results, use full-fat yogurt as it gives the raita a richer and creamier texture. If you prefer a lighter version, you can use low-fat yogurt, but it might be less creamy.
Always use fresh mint and cucumbers for the most vibrant flavor. Adjust the seasoning according to your taste preference, and feel free to experiment with additional herbs like cilantro for a different twist.
This raita can be stored in an airtight container in the refrigerator for up to 2 days, but it’s best consumed fresh.