
There’s something truly magical about starting the day with a hearty and flavorful Indian breakfast. From the crispy dosas I love to make on weekends to the comforting poha that’s perfect for busy mornings, these dishes hold a special place in our hearts. Each recipe tells a story, a blend of tradition and taste. Curious about the vibrant tapestry of flavors waiting to transform your mornings? Let’s explore these beloved family favorites together.
Dosa: The South Indian Delight

Dosa is a beloved South Indian breakfast dish that has made its way into kitchens and dining tables across the world. Known for its crisp texture and delightful taste, dosa is fundamentally a type of pancake made from fermented rice and urad dal (black gram). Its versatility allows it to be enjoyed plain or filled with a variety of delicious fillings, such as spiced potatoes, making it a staple in many Indian households.
This recipe will guide you through the process of making the perfect dosa, guaranteeing you can bring the authentic taste of South India right to your table. The secret to a good dosa lies in the fermentation process, which not only enhances its flavor but also makes it healthier and easier to digest.
With a few basic ingredients and some patience, you can create this delightful dish at home. This recipe serves 4-6 people, making it perfect for family breakfasts or brunches with friends. Whether you’re a seasoned cook or a beginner, follow these steps to experience the joy of making and eating homemade dosa.
Ingredients for Dosa (Serves 4-6):
- 2 cups rice (preferably parboiled rice)
- 1/2 cup urad dal (split black gram)
- 1/2 teaspoon fenugreek seeds
- Salt to taste
- Water as needed
- Oil or ghee for cooking
Cooking Instructions:
- Preparation of Ingredients:
- Rinse and soak the rice and fenugreek seeds together in a large bowl for at least 6 hours or overnight. In a separate bowl, rinse and soak the urad dal for the same amount of time.
- Grinding the Batter:
- Drain the urad dal and grind it to a smooth and fluffy batter using a blender or wet grinder, adding water gradually. Transfer to a large mixing bowl.
- Next, drain the rice and fenugreek seeds and grind them to a smooth batter, adding water as needed. Combine the rice batter with the urad dal batter, mixing thoroughly.
- Fermentation:
- Add salt to taste and mix the batter well. Cover the bowl with a lid and let it ferment in a warm place for 8-12 hours or until it has doubled in volume and has a slightly sour aroma.
- Cooking the Dosa:
- Once the batter is fermented, stir it gently. Heat a non-stick pan or a cast-iron skillet over medium heat. Lightly grease it with oil or ghee.
- Pour a ladleful of batter onto the center of the pan and quickly spread it in a circular motion using the back of the ladle to form a thin, even layer.
- Drizzle a few drops of oil or ghee around the edges of the dosa. Cook until the edges start to lift and the surface turns golden brown.
- Carefully flip the dosa and cook for another minute. Remove from the pan and serve hot with chutney or sambar.
- Repeat:
- Repeat the process with the remaining batter, adjusting the heat as needed to guarantee even cooking.
Extra Tips:
To achieve the perfect dosa, verify that your batter is well-fermented. The fermentation process can be influenced by the ambient temperature; if you live in a cooler climate, consider placing the batter in a warm oven or near a heat source.
Consistency is key, so the batter should be neither too thick nor too runny. Practice spreading the batter evenly on the pan to get a thin, crispy dosa. If you find the dosa sticking to the pan, verify it’s well-greased and adjust the heat accordingly.
Enjoy your homemade dosa with a side of coconut chutney or tangy sambar for an authentic South Indian experience.
Poha: A Maharashtrian Staple

Poha, a cherished breakfast dish from the western Indian state of Maharashtra, is a delightful concoction of flattened rice, spices, and vegetables. It isn’t only quick and easy to prepare but also light on the stomach, making it an ideal choice for a morning meal.
The beauty of Poha lies in its simplicity and the ability to be customized with various toppings like peanuts, freshly grated coconut, or sev (crispy noodles), catering to individual tastes.
This dish is particularly popular due to its nutritional value, as it’s rich in carbohydrates, iron, and fiber. Poha is also known for its versatility, with variations found across different regions of India. However, the Maharashtrian version is distinct for its use of mustard seeds, curry leaves, and a hint of lemon juice that adds a revitalizing tanginess.
Below is a step-by-step guide to preparing this beloved breakfast for a serving size of 4-6 people.
Ingredients for Poha (serving size: 4-6 people):
- 2 cups thick poha (flattened rice)
- 1 tablespoon oil
- 1 teaspoon mustard seeds
- 1 teaspoon cumin seeds
- 1/4 teaspoon asafoetida (hing)
- 10-12 curry leaves
- 2 medium onions, finely chopped
- 2 green chilies, finely chopped
- 1/2 teaspoon turmeric powder
- Salt to taste
- 1 tablespoon sugar
- 1/2 cup roasted peanuts
- 2 tablespoons lemon juice
- 2 tablespoons fresh coriander leaves, chopped
- Optional: freshly grated coconut and sev for garnish
Cooking Instructions:
- Prepare the Poha: Begin by rinsing the poha in a colander under running water. Gently toss the poha to confirm that every grain is moistened. Let it sit in the colander to drain excess water completely and set aside.
- Heat the Oil: In a large pan, heat the oil over medium heat. Add the mustard seeds and let them splutter. Follow with cumin seeds, asafoetida, and curry leaves. Stir for a few seconds to release the flavors.
- Sauté the Onions and Chilies: Add the chopped onions and green chilies to the pan. Cook until the onions turn translucent, stirring occasionally to prevent them from burning.
- Add Turmeric and Salt: Sprinkle turmeric powder and salt over the onions. Stir well to coat the onions uniformly with the spices.
- Mix in the Poha: Gently fold in the rinsed poha, making sure to mix it thoroughly with the onion mixture. Add sugar and roasted peanuts, and continue to mix until the poha is evenly colored and heated through.
- Finish with Lemon and Coriander: Turn off the heat and add lemon juice and chopped coriander leaves. Give the poha a final toss to incorporate the flavors.
- Serve and Garnish: Serve the poha hot, optionally garnished with freshly grated coconut and sev for an added crunch and flavor.
Extra Tips:
When preparing poha, verify that the flattened rice is neither too dry nor too soggy; it should be just moistened enough to absorb flavors without becoming mushy.
If you prefer a spicier version, adjust the number of green chilies according to your taste. Poha can also be enhanced with the addition of vegetables like peas or potatoes for added texture and nutrition.
To maintain the crunchiness of the peanuts, add them towards the end of the cooking process. Enjoy this versatile dish with a side of yogurt or a cup of chai for a complete breakfast experience.
Idli: Soft and Steamed Goodness

Idli is a beloved South Indian breakfast dish characterized by its light, fluffy texture and subtle tangy flavor. This soft and steamed delicacy has won hearts worldwide, not only for its taste but also for its nutritional value. Made from a fermented batter of rice and urad dal (black gram), idlis are a healthy, gluten-free option that fits well into various diets. This traditional dish is often served with chutneys and sambar, making it a wholesome and satisfying meal to kickstart the day.
The secret to making perfect idlis lies in the fermentation process, which gives them their distinct sour flavor and fluffy texture. The fermentation process is essential as it enhances the nutritional profile of the dish, making it rich in vitamins and minerals. Preparing idli batter requires some patience and planning, but the results are truly worth the effort. Here’s how you can make soft and delicious idlis for 4-6 people.
Ingredients:
- 2 cups parboiled rice
- 1 cup urad dal (split black gram)
- 1 teaspoon fenugreek seeds (optional)
- Salt to taste
- Water as needed
- Oil for greasing
Instructions:
- Rinse and Soak: Begin by thoroughly rinsing the parboiled rice and urad dal separately. If using fenugreek seeds, add them to the urad dal. Soak the rice and urad dal in water for at least 4-6 hours or overnight for best results.
- Grind the Batter: Drain the water from the urad dal and blend it into a smooth, fluffy consistency using minimal water. Similarly, grind the rice into a smooth batter, slightly coarse in texture. Combine both batters in a large mixing bowl.
- Ferment the Batter: Add salt to the combined batter and mix well. Cover the bowl with a lid and allow the batter to ferment overnight or for 8-12 hours in a warm place until it doubles in volume and becomes light and airy.
- Prepare the Steamer: Grease idli moulds with a little oil to prevent sticking. Fill a large pot or idli steamer with water and bring it to a boil.
- Steam the Idlis: Pour the fermented batter into the greased idli moulds, filling them about three-quarters full. Carefully place the moulds in the steamer and cover with a lid. Steam the idlis for 10-15 minutes on medium-high heat until a toothpick inserted comes out clean.
- Serve: Allow the idlis to cool slightly before carefully removing them from the moulds using a spoon. Serve hot with coconut chutney and sambar for a complete breakfast experience.
Extra Tips:
For the fermentation process to work effectively, make sure that the batter is kept in a warm environment. During colder months, you can place the batter in a pre-warmed oven or near a warm appliance.
If you’re short on time, adding a pinch of baking soda to the batter right before steaming can help achieve fluffier idlis. Additionally, if you’re using hard water, consider using filtered water for soaking and grinding, as it can affect the fermentation process.
Paratha: The Stuffed Flatbread

Paratha is a beloved staple in Indian households, known for its deliciously flaky layers and mouthwatering fillings. This stuffed flatbread can be enjoyed at any time of the day, but it holds a special place in the breakfast menu. Originating from the northern regions of India, parathas are both versatile and filling, offering a perfect blend of textures and flavors.
The beauty of the paratha lies in its ability to be customized to one’s liking, with a variety of different fillings ranging from spiced potatoes to paneer, radish, or even sweet options like jaggery and coconut.
While making parathas may seem intimidating at first, with a bit of practice, you’ll find that it’s a rewarding process that yields delicious results. The key to a perfect paratha lies in its dough and filling balance, as well as the technique of rolling and cooking. Once mastered, you’ll be able to whip up a batch of these delightful stuffed flatbreads in no time, ready to be served with yogurt, pickles, or a simple cup of chai.
Below is a recipe for a classic Aloo Paratha, stuffed with a flavorful potato mixture.
Ingredients (serving size: 4-6 people):
- 2 cups whole wheat flour
- 1 teaspoon salt
- Water (as needed)
- 4 medium-sized potatoes, boiled and mashed
- 1 teaspoon cumin seeds
- 1 teaspoon coriander powder
- 1 teaspoon red chili powder
- 2 green chilies, finely chopped
- 1 tablespoon ginger, grated
- 2 tablespoons fresh coriander leaves, chopped
- Salt to taste
- Ghee or oil for cooking
Cooking Instructions:
- Prepare the Dough: In a large mixing bowl, combine the whole wheat flour and salt. Gradually add water, mixing with your hand to form a soft, pliable dough. Knead the dough for about 5-7 minutes until smooth. Cover with a damp cloth and set aside for 20 minutes to rest.
- Prepare the Filling: In another bowl, combine the mashed potatoes, cumin seeds, coriander powder, red chili powder, green chilies, ginger, coriander leaves, and salt. Mix well to guarantee the spices are evenly distributed throughout the potatoes.
- Divide the Dough: After the dough has rested, divide it into equal-sized balls, approximately the size of a golf ball. Flatten each ball slightly and set aside.
- Roll the Parathas: Take one dough ball and roll it out into a small disc on a floured surface. Place a spoonful of the potato filling in the center of the disc. Gather the edges of the dough and pinch them together to seal the filling inside. Gently flatten the filled ball and roll it out again into a round paratha, about 6-7 inches in diameter.
- Cook the Paratha: Heat a skillet or tawa over medium heat. Place the rolled-out paratha on the hot skillet. Cook for about 1-2 minutes until bubbles start to form on the surface. Flip the paratha and apply ghee or oil on the cooked side. Cook the other side for another 1-2 minutes, applying ghee or oil, until both sides are golden brown and crispy.
- Repeat: Continue the process with the remaining dough and filling, stacking the cooked parathas in a clean, dry kitchen towel to keep them warm.
Extra Tips: When rolling out the parathas, guarantee that the filling is sealed well inside the dough to prevent it from leaking out during cooking. If the filling does start to escape, sprinkle a little flour on the affected area and gently roll again.
To prevent sticking, dust the rolling surface and the paratha with flour as needed. Adjust the spice levels in the filling to suit your taste, and feel free to experiment with different fillings to create your own signature paratha.
Upma: A Semolina Special

Upma: A Semolina Special is a savory and satisfying Indian breakfast dish that traces its origins to the southern regions of India. Known for its simplicity and delightful burst of flavors, Upma is an ideal breakfast meal that’s quick to prepare and provides a nourishing start to the day.
Made primarily with semolina (also known as rava or suji), it’s complemented by a medley of vegetables and aromatic spices that bring out the authentic Indian taste. Whether you’re looking for a light breakfast or a hearty brunch, Upma is both versatile and adaptable to your taste preferences.
The beauty of Upma lies in its ability to be customized with a variety of ingredients, allowing you to add your favorite vegetables or adjust the spice levels to suit your palate. This dish can be enjoyed on its own or paired with coconut chutney or a dash of lime for an extra zing.
Its fluffy texture and savory flavors make it a staple in many Indian households, offering a warm and comforting meal that can be whipped up in no time. Let’s plunge into the recipe for this delightful dish, perfect for serving 4-6 people.
Ingredients:
- 1 cup semolina (rava or suji)
- 2 tablespoons ghee or oil
- 1 teaspoon mustard seeds
- 1 teaspoon cumin seeds
- 2 tablespoons chana dal (split chickpeas)
- 2 tablespoons urad dal (split black gram)
- 1 medium onion, finely chopped
- 1-2 green chilies, slit
- 1-inch piece of ginger, grated
- 10-12 curry leaves
- 1/2 cup carrots, finely chopped
- 1/2 cup peas
- 1/2 cup beans, finely chopped
- 2-3 cups water
- Salt to taste
- 2 tablespoons fresh coriander leaves, chopped
- Lemon wedges, for serving
Cooking Instructions:
- Roast the Semolina: Start by dry roasting the semolina in a pan over medium heat until it turns a light golden brown and gives off a nutty aroma, about 5-7 minutes. Stir continuously to guarantee even roasting. Once done, transfer to a bowl and set aside.
- Prepare the Tempering: In the same pan, heat ghee or oil. Add mustard seeds and let them splutter. Then add cumin seeds, chana dal, and urad dal. Sauté until the dals turn golden brown.
- Sauté the Aromatics: Add chopped onions, green chilies, grated ginger, and curry leaves to the pan. Sauté until the onions turn translucent.
- Cook the Vegetables: Add the chopped carrots, peas, and beans to the pan. Sauté for a couple of minutes, then add about 2-3 cups of water and salt to taste. Bring the mixture to a boil.
- Incorporate the Semolina: Gradually add the roasted semolina to the boiling water, stirring continuously to avoid lumps. Reduce the heat to low and cover the pan. Allow the Upma to cook for about 5-6 minutes, until the semolina absorbs all the water and reaches a soft and fluffy consistency.
- Garnish and Serve: Once cooked, turn off the heat and let the Upma sit for a few minutes. Garnish with fresh coriander leaves and a squeeze of lemon juice. Serve hot with lemon wedges on the side.
Extra Tips:
For the best results, confirm that the semolina is roasted to the right degree; this prevents it from becoming sticky when mixed with water.
Adjust the amount of water based on the desired consistency of your Upma – use more water for a softer texture. You can add other vegetables like bell peppers or tomatoes for added flavor and nutrition.
If you prefer a richer taste, consider using a mixture of ghee and oil. Finally, serve the Upma immediately to enjoy its texture and flavors at their peak.
Chole Bhature: A Punjabi Feast

Chole Bhature is a classic Punjabi dish that has won the hearts of many with its rich, spicy, and flavorful character. This popular North Indian breakfast dish consists of two main components: Chole, which is a spicy chickpea curry, and Bhature, which are deep-fried, fluffy bread made from maida flour. The combination of these two creates a delightful meal that’s often enjoyed with pickles, onions, and a glass of lassi.
Originating from the Punjab region, Chole Bhature has become a staple in Indian households and is often served during special occasions and festivals. The dish requires a bit of preparation, but the effort is well worth it as the aromatic spices and the hearty chickpeas come together to create a rich, comforting curry.
The Bhature, when fried to perfection, is crispy on the outside and soft on the inside, making it the perfect accompaniment to the flavorful chickpeas. Whether you’re hosting a brunch or simply want to treat yourself to a traditional Indian breakfast, Chole Bhature is sure to satisfy your taste buds and leave you longing for more.
Ingredients (Serves 4-6):
For the Chole:
- 2 cups chickpeas (soaked overnight)
- 2 tablespoons oil
- 1 teaspoon cumin seeds
- 2 onions, finely chopped
- 2 tomatoes, pureed
- 1 tablespoon ginger-garlic paste
- 2-3 green chilies, chopped
- 1 teaspoon turmeric powder
- 2 teaspoons coriander powder
- 1 teaspoon cumin powder
- 1 teaspoon garam masala
- 1 teaspoon red chili powder
- Salt to taste
- Fresh coriander leaves for garnish
For the Bhature:
- 3 cups maida (all-purpose flour)
- 1/2 cup yogurt
- 1 teaspoon baking powder
- 1/2 teaspoon baking soda
- 1 tablespoon oil
- Salt to taste
- Water as needed
- Oil for deep frying
Cooking Instructions:
For the Chole:
- Prepare the Chickpeas: Drain the soaked chickpeas and cook them in a pressure cooker with 4 cups of water and a little salt. Cook until they’re soft, which usually takes about 3-4 whistles. Set aside.
- Start the Masala: Heat 2 tablespoons of oil in a pan. Add cumin seeds and let them splutter. Then add the chopped onions and sauté until golden brown.
- Add Aromatics: Stir in the ginger-garlic paste and green chilies, and sauté for another 2 minutes until the raw smell disappears.
- Introduce the Tomatoes: Add the pureed tomatoes to the pan, along with turmeric powder, coriander powder, cumin powder, red chili powder, and salt. Cook until the oil separates from the masala.
- Combine with Chickpeas: Add the cooked chickpeas to the masala and mix well. Add a little water if needed to achieve the desired consistency. Let it simmer for about 10-15 minutes.
- Finish with Spices: Add garam masala and adjust salt if necessary. Stir well and garnish with fresh coriander leaves before serving.
For the Bhature:
- Prepare the Dough: In a large bowl, combine maida, baking powder, baking soda, and salt. Add yogurt and oil, and mix well.
- Knead the Dough: Gradually add water to form a soft and smooth dough. Knead for about 5-7 minutes. Cover with a damp cloth and let it rest for at least 1-2 hours.
- Shape the Bhature: Divide the dough into equal portions and roll each portion into a ball. Flatten each ball with a rolling pin into a round disc.
- Fry the Bhature: Heat oil in a deep frying pan. Once hot, gently slide one rolled disc at a time into the oil. Fry until golden brown and puffed, turning once. Drain on paper towels.
Extra Tips:
For a richer flavor, consider adding a tea bag while cooking the chickpeas to enhance their color and taste. Verify that the oil is hot enough before frying the Bhature; otherwise, they may not puff properly.
If you prefer a spicier Chole, adjust the amount of green chilies and red chili powder according to your taste. Finally, always serve Chole Bhature hot for the best texture and flavor, accompanied by sliced onions and lemon wedges for an extra zing.
Aloo Puri: The Comforting Combo

Aloo Puri is a classic Indian breakfast dish that pairs crispy, puffed puris with a spicy and flavorful potato curry (aloo). This delightful combination is a favorite for many, offering a fulfilling and comforting meal to start the day. The puris are made with unleavened dough, which, when fried, puff up into golden, crispy discs. The aloo curry is seasoned with a variety of spices, providing a robust taste that perfectly complements the puris.
This meal is often enjoyed in Indian households, especially during weekends or festive occasions. It’s easy to prepare and can be made with ingredients typically found in most kitchens. Whether you’re new to Indian cuisine or a seasoned cook, Aloo Puri is a must-try recipe that brings the authentic flavors of India to your breakfast table. Follow the recipe below to make this delightful dish for a serving size of 4-6 people.
Ingredients
For the Puri:
- 2 cups whole wheat flour
- 1 tsp salt
- Water (as needed)
- Oil (for deep frying)
For the Aloo Curry:
- 5 medium-sized potatoes, boiled and peeled
- 2 tablespoons oil
- 1 teaspoon cumin seeds
- 1 teaspoon mustard seeds
- 1 medium onion, finely chopped
- 1 teaspoon ginger-garlic paste
- 2 tomatoes, chopped
- 1-2 green chilies, chopped
- 1 teaspoon turmeric powder
- 1 teaspoon red chili powder
- 1 teaspoon coriander powder
- Salt to taste
- A handful of fresh coriander leaves, chopped
- 2 cups water
Cooking Instructions
To Make the Puri:
- Prepare the Dough: In a large mixing bowl, combine the whole wheat flour and salt. Gradually add water and knead into a smooth, firm dough. Cover with a damp cloth and let it rest for 15-20 minutes.
- Shape the Puris: Divide the dough into small lemon-sized balls. Roll each ball into a circular shape, about 4 inches in diameter.
- Fry the Puris: Heat oil in a deep frying pan over medium-high heat. Once the oil is hot, carefully slide in one puri. Press gently with a slotted spoon until it puffs up. Flip and fry until golden brown. Remove and drain on paper towels. Repeat with remaining dough.
To Make the Aloo Curry:
- Prepare the Masala Base: Heat oil in a pan. Add cumin seeds and mustard seeds. When they start to splutter, add the chopped onions and sauté until golden brown.
- Add Aromatics: Stir in the ginger-garlic paste and chopped green chilies. Sauté for 2 minutes until the raw smell disappears.
- Cook the Tomatoes: Add the chopped tomatoes and cook until they become soft and the oil starts to separate.
- Spice it Up: Add turmeric, red chili powder, coriander powder, and salt. Mix well.
- Add Potatoes: Break the boiled potatoes into chunks and add to the pan. Mix to coat with the spices.
- Simmer: Add water, stir, and bring the curry to a boil. Reduce the heat and let it simmer for 10 minutes, allowing the flavors to meld.
- Finish with Fresh Herbs: Garnish with chopped coriander leaves before serving.
Extra Tips
- For softer puris, ascertain the dough isn’t too stiff. A slightly soft dough makes puris that puff up well.
- Fry the puris at the right temperature. If the oil is too hot, the puris will brown too quickly without cooking through; too cold, and they’ll absorb excess oil.
- Adjust the spice levels in the aloo curry according to your taste. You can add more green chilies for extra heat or reduce the red chili powder for a milder version.
- The aloo curry can be prepared a day in advance and reheated, allowing the flavors to deepen overnight.
Suji Ka Halwa: The Sweet Treat

Suji Ka Halwa, also known as Semolina Pudding, is a delightful Indian dessert that’s often enjoyed as a breakfast treat or a festive offering. Its rich, buttery texture and the aromatic essence of cardamom make it an irresistible dish that evokes warmth and comfort.
Traditionally prepared during festivals and special occasions, Suji Ka Halwa holds a special place in Indian households for its simplicity and delectable flavor. The combination of ghee, sugar, and semolina creates a dish that’s both sweet and savory, satisfying the palate with every bite.
This dish isn’t only a feast for the taste buds but also a visual delight. With the golden hue of roasted semolina and the garnish of crunchy nuts and raisins, Suji Ka Halwa is a joy to behold. Its preparation is straightforward, requiring only a few ingredients that are typically found in any Indian kitchen.
Whether you’re preparing it for a family breakfast or as a dessert for guests, Suji Ka Halwa is sure to leave a lasting impression. Here’s how you can make this delightful dish for 4-6 servings.
Ingredients:
- 1 cup semolina (suji)
- 1 cup sugar
- 1/2 cup ghee
- 4 cups water
- 1/4 cup mixed nuts (cashews, almonds)
- 1/4 cup raisins
- 1/4 teaspoon cardamom powder
- A pinch of saffron strands (optional)
Cooking Instructions:
- Roast the Semolina: In a deep, heavy-bottomed pan, heat the ghee over medium heat. Add the semolina and roast it, stirring continuously for about 7-10 minutes, until it turns golden brown and releases a nutty aroma. Confirm that the semolina is roasted evenly to prevent it from burning.
- Boil the Water: In a separate saucepan, bring 4 cups of water to a boil. This step is essential, as adding cold water to the roasted semolina can result in lumps.
- Mix Water and Semolina: Carefully pour the boiling water into the roasted semolina, stirring continuously to avoid any lumps from forming. Be cautious as the mixture will bubble vigorously.
- Add Sugar and Flavorings: Once the water is fully absorbed, add the sugar and continue to stir. The addition of sugar will make the halwa slightly liquid again, so continue to cook until it thickens. Add cardamom powder and saffron strands to enhance the aroma and flavor.
- Incorporate Nuts and Raisins: In a small frying pan, lightly toast the mixed nuts and raisins in a bit of ghee. Add them to the halwa, reserving a few for garnish. Stir well to combine.
- Final Touches: Cook the halwa for another 2-3 minutes, until it reaches the desired consistency. The halwa should be soft yet firm enough to hold its shape. Remove from heat and let it sit for a few minutes before serving.
Extra Tips:
To achieve a perfect Suji Ka Halwa, confirm that the semolina is roasted properly, as this is key to developing the dish’s characteristic flavor and texture.
Adjust the sugar according to your taste preference, and feel free to experiment with different nuts and dried fruits for added texture and flavor. If you like, you can add a few drops of rose water or kewra essence for a floral aroma.
Remember to be cautious when adding boiling water to the semolina, and always stir continuously to prevent lumps from forming.
Pesarattu: The Green Gram Pancake

Pesarattu, also known as Green Gram Pancake, is a beloved breakfast dish hailing from the southern region of India, particularly Andhra Pradesh. This nutrient-rich pancake is made primarily from green gram (mung beans) and is perfectly complemented by a variety of chutneys, making it a delicious and wholesome start to the day.
Pesarattu isn’t only packed with protein and fiber but is also gluten-free, making it a healthy choice for all. Its crispy texture and savory flavor make it an irresistible treat that’s both satisfying and fulfilling.
The preparation of Pesarattu is straightforward, yet it demands a bit of planning as the green gram needs to be soaked overnight. This soaking process is essential as it softens the beans, making them easier to blend into a smooth batter. Traditionally, Pesarattu is served with ginger chutney, but it can also be paired with coconut chutney or a spicy tomato chutney to add an extra layer of flavor.
Whether you’re preparing a leisurely weekend breakfast or looking for a quick, nutritious meal during the week, Pesarattu is a versatile dish that fits the bill perfectly.
Ingredients (serving size: 4-6 people):
- 2 cups green gram (mung beans)
- 1/4 cup rice (optional, for added crispness)
- 1-inch piece of ginger
- 2-3 green chilies
- 1 teaspoon cumin seeds
- Salt to taste
- Water, as needed
- 1/2 cup chopped onions
- 1/4 cup chopped coriander leaves
- Oil, for cooking
Cooking Instructions:
- Soak the Ingredients: Begin by rinsing the green gram and rice (if using) under cold water. Place them in a large bowl and cover with water. Let them soak overnight or for at least 6-8 hours to soften.
- Prepare the Batter: After soaking, drain the water from the green gram and rice. Transfer them to a blender. Add ginger, green chilies, cumin seeds, and salt. Gradually add water while blending until you achieve a smooth, pouring consistency batter. The batter should be similar to pancake batter.
- Prepare the Toppings: Mix the chopped onions and coriander leaves in a small bowl. This mixture will be used to sprinkle on top of the Pesarattu while cooking.
- Heat the Pan: Place a non-stick skillet or tawa on medium heat. Once hot, drizzle a small amount of oil and spread it evenly with a paper towel or cloth.
- Cook the Pesarattu: Pour a ladleful of batter onto the skillet and spread it in a circular motion to form a thin pancake. Sprinkle a small amount of the onion-coriander mixture on top. Drizzle a little oil around the edges and on top of the pancake.
- Cook Until Crisp: Cook the Pesarattu on medium flame until the edges start to lift and it becomes golden brown and crisp. Flip it over and cook for another minute on the other side.
- Serve Hot: Once cooked, remove the Pesarattu from the skillet and serve immediately with your choice of chutney.
Extra Tips:
To guarantee the Pesarattu turns out crispy, make sure the batter isn’t too thick. Adjust the consistency by adding water gradually. The rice is optional but does contribute to the crispiness, so consider including it if you prefer a crispier texture.
If you find the batter too spicy, reduce the number of green chilies accordingly. Always verify that the pan is hot before pouring the batter to prevent sticking and achieve the desired crispiness. Finally, enjoy the Pesarattu fresh off the skillet for the best taste and texture.
Misal Pav: The Spicy Street Food

Misal Pav is a popular street food from Maharashtra, India, known for its flavorful and spicy profile. This dish is a delightful combination of misal, a spicy curry made from sprouted moth beans, and pav, which are soft bread rolls. Misal Pav is widely enjoyed as a breakfast item, but its tantalizing taste makes it a favorite for any meal of the day.
The dish is a vibrant medley of textures and flavors, served hot with a garnish of farsan (a crispy snack mix), onions, and coriander, and accompanied by a squeeze of lemon juice. The heart of Misal Pav lies in its masala, which is a rich and spicy blend of spices that bring out the depth of flavors in the sprouts.
Preparing Misal Pav requires some time, especially for sprouting the beans, but the end result is a savory and satisfying dish that’s sure to please any spice lover. Serving Misal Pav with fresh pav or bread rolls enhances the experience, providing a perfect balance between the spicy misal and the soft, buttery bread. This recipe will help you create a delicious Misal Pav for 4-6 people to enjoy.
Ingredients for Misal Pav (Serves 4-6):
- 2 cups sprouted moth beans (matki)
- 2 tablespoons oil
- 1 teaspoon mustard seeds
- 1 teaspoon cumin seeds
- 1 onion, finely chopped
- 1 tomato, finely chopped
- 1 teaspoon ginger-garlic paste
- 2 teaspoons red chili powder
- 1 teaspoon turmeric powder
- 2 teaspoons goda masala (or garam masala)
- Salt to taste
- 4 cups water
- 1 cup mixed farsan (for garnish)
- 1/2 cup chopped coriander leaves (for garnish)
- 1/2 cup finely chopped onions (for garnish)
- Lemon wedges (for serving)
- 8-12 pav (Indian bread rolls)
Cooking Instructions:
- Prepare the Sprouts: Begin by rinsing the sprouted moth beans thoroughly. In a pot, add the sprouts and cover them with water. Bring to a boil and then simmer until the sprouts are cooked but still firm, about 10-15 minutes. Drain and set aside.
- Make the Masala Base: Heat oil in a large pan over medium heat. Add mustard seeds and cumin seeds, allowing them to splutter. Add the finely chopped onions and sauté until they turn golden brown.
- Add Aromatics: Stir in the ginger-garlic paste and sauté for another minute until the raw smell disappears. Add chopped tomatoes and cook until they become soft and mushy.
- Spice It Up: Add red chili powder, turmeric powder, and goda masala to the pan. Stir well to combine and let the spices cook for a couple of minutes to release their aromas.
- Simmer the Curry: Add the cooked sprouts to the masala mixture. Pour in 4 cups of water, season with salt, and bring to a boil. Lower the heat and let the curry simmer for about 15-20 minutes, allowing the flavors to meld together.
- Assemble the Misal Pav: Once the curry is ready, ladle it into bowls. Top it with a generous handful of mixed farsan, chopped onions, and coriander leaves. Serve hot with pav on the side and lemon wedges for squeezing over the top.
Extra Tips:
To enhance the flavor of your Misal Pav, consider preparing the sprouts a day in advance. This allows them to sprout fully, adding a delightful crunch to the dish.
If you can’t find goda masala, garam masala can be used as a substitute, though the flavor profile may slightly differ. Additionally, adjust the spice level to your preference by varying the amount of red chili powder.
When serving, ascertain the pav is lightly toasted with butter for an authentic street food experience.
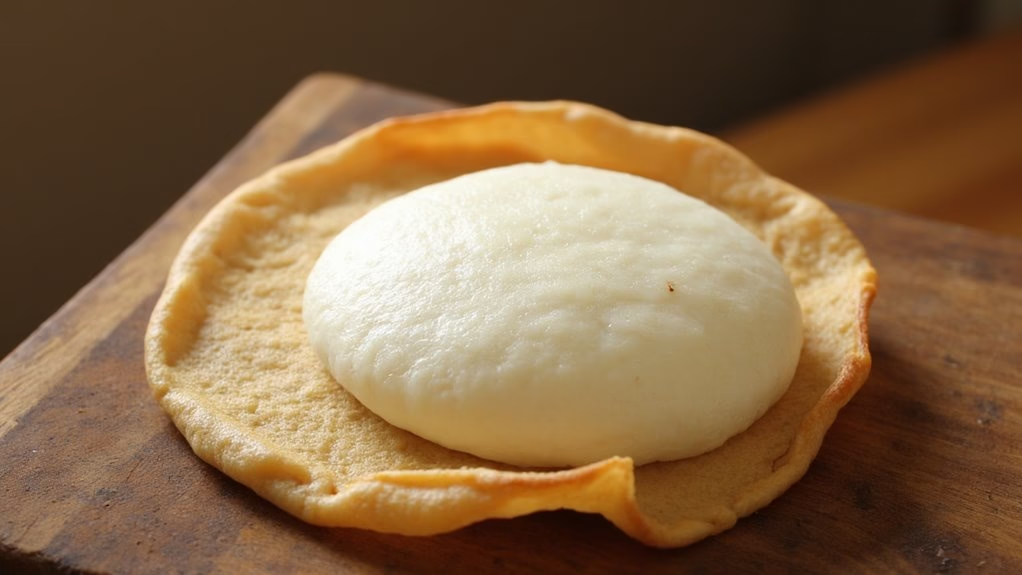
Appam: The Kerala Breakfast Favorite

Appam, a delightful and wholesome breakfast dish, is a traditional favorite in Kerala, India. These lacy, bowl-shaped pancakes are typically made from fermented rice batter and coconut milk, offering a light and slightly sour taste that pairs beautifully with a variety of curries or stews.
Appam is cherished for its soft, spongy center and crispy edges, making it an irresistible choice for a morning meal. Its simplicity and versatility allow it to be savored with both savory and sweet accompaniments, making it a staple in many Kerala households.
The preparation of Appam requires some planning due to the fermentation process, but the results are well worth the wait. The dish is naturally gluten-free and can be made vegan by using plant-based milk if desired. The fermentation gives Appam its characteristic flavor and texture, making it a unique culinary experience.
Whether served with a spicy vegetable stew, rich chicken curry, or just a drizzle of coconut milk, Appam is a dish that fills both the stomach and the heart.
Ingredients for Appam (Serves 4-6):
- 2 cups raw rice (preferably idli rice)
- 1/2 cup cooked rice
- 1 cup grated coconut (fresh or frozen)
- 1 teaspoon active dry yeast
- 1 tablespoon sugar
- 1/2 teaspoon salt
- Water, as needed
- Oil, for greasing the pan
Cooking Instructions:
- Rinse and Soak Rice: Begin by rinsing the raw rice thoroughly in water. Once clean, soak it in water for about 4-6 hours. This will soften the rice, making it easier to grind into a smooth batter.
- Prepare the Batter: Drain the soaked rice and transfer it to a blender. Add the cooked rice and grated coconut. Gradually add water and blend until you achieve a smooth batter. The consistency should be similar to that of pancake batter, neither too thick nor too thin.
- Activate the Yeast: In a small bowl, dissolve the sugar in 1/4 cup of warm water. Sprinkle the active dry yeast over it and let it sit for about 10 minutes until it becomes frothy. This step is vital for fermenting the batter.
- Ferment the Batter: Pour the yeast mixture into the rice batter, and mix well. Cover the bowl with a lid or a cloth and let it ferment in a warm place for 8-10 hours or overnight. The batter will rise and become bubbly, indicating it’s ready for cooking.
- Prepare for Cooking: Before making the appams, add salt to the fermented batter and mix gently. The batter is now ready to be cooked.
- Cook the Appam: Heat an appam pan (or a non-stick skillet with high sides) over medium heat. Lightly grease the pan with oil. Pour a ladleful of batter into the pan and gently swirl it around to form a thin layer with thicker edges. Cover the pan with a lid and cook for about 2-3 minutes until the edges turn golden brown and the center is cooked through.
- Serve: Carefully remove the cooked appam from the pan using a spatula. Repeat the process with the remaining batter. Serve the appam hot with your choice of curry or stew.
Extra Tips:
For best results, verify the rice batter is ground smoothly to achieve the right texture. If you’re in a colder climate, finding a warm spot for fermentation is key; a pre-warmed oven can be a good place to let the batter rise.
If the batter seems too thick after fermentation, you can adjust the consistency by adding a little water. For variations, you can add a splash of coconut milk to the batter before cooking for an extra creamy appam. Enjoy experimenting with different accompaniments to discover your favorite way to savor this Kerala classic.