As a passionate host, I can confidently say that chicken appetizers are always a crowd favorite at any gathering.
Picture a table filled with an array of irresistible bite-sized treats, like creamy Buffalo chicken dip and crispy chicken tenders.
Don’t forget about the mini quesadillas bursting with juicy chicken or a vibrant platter of BBQ chicken nachos!
For those who love a little twist, chicken satay skewers with spicy peanut sauce are sure to impress, while health-conscious guests will adore the fresh chicken lettuce wraps.
These easy-to-make, delicious options will have your guests buzzing with excitement, ready to enjoy every tasty bite!
Buffalo Chicken Dip
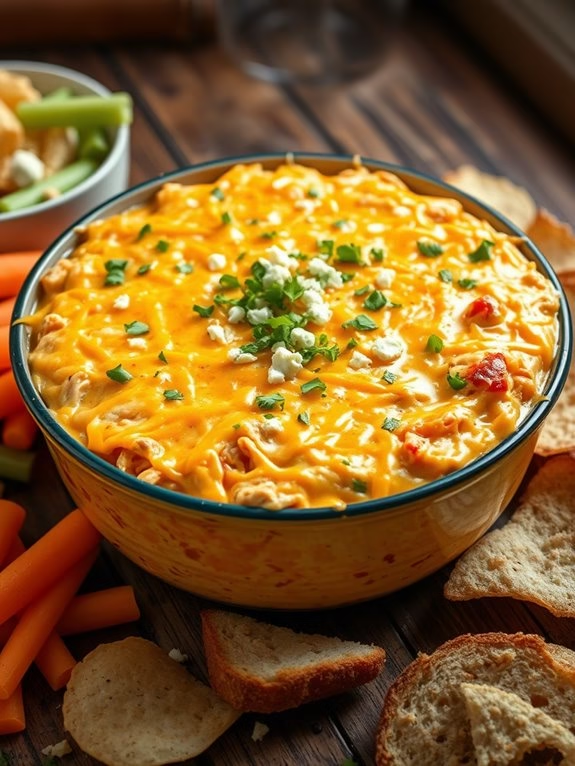
Buffalo Chicken Dip is a crowd-pleasing appetizer, perfect for game nights, backyard barbecues, or any gathering where you want to serve something a little spicy and incredibly delicious.
It’s a creamy, cheesy dip packed with the flavors of buffalo chicken wings, without the mess. The beauty of this dish is that it can be served hot or cold, and it’s easy to make in large quantities, making it an ideal option for feeding a crowd.
This Buffalo Chicken Dip recipe is a versatile one. You can adjust the heat level according to your guests’ preferences, and even add more cheese if you’d like. It pairs perfectly with a variety of dippers, from celery sticks and carrot sticks, to tortilla chips and crusty bread.
Here’s how to make Buffalo Chicken Dip for a serving size of 4-6 people.
Ingredients:
- 2 cups shredded cooked chicken
- 1 package (8 ounces) cream cheese, softened
- 1/2 cup buffalo wing sauce
- 1/2 cup ranch or blue cheese dressing
- 1/2 cup shredded cheddar cheese
- 1/2 cup shredded mozzarella cheese
- 1/2 cup crumbled blue cheese (optional)
- 1/4 cup chopped fresh parsley for garnish (optional)
Cooking Instructions:
- Preheat your oven to 350 degrees F (175 degrees C). While the oven is heating, shred the cooked chicken and set it aside.
- In a medium-sized bowl, mix together the softened cream cheese, buffalo wing sauce, and ranch or blue cheese dressing until well combined.
- Add the shredded chicken to the cream cheese mixture and stir until the chicken is fully coated.
- Spread the chicken and cheese mixture evenly into a 1-quart baking dish.
- Sprinkle the shredded cheddar and mozzarella cheeses evenly over the top of the chicken mixture.
- Bake in the preheated oven for 20-25 minutes, or until the cheese is bubbly and slightly browned.
- If using, sprinkle the crumbled blue cheese and chopped parsley over the top of the dip for extra flavor and presentation.
- Allow the dip to cool for a few minutes before serving with your choice of dippers.
Remember not to rush the baking process, as it takes time for the flavors to meld together and for the cheese to reach its maximum gooeyness.
For a spicier kick, feel free to add more buffalo sauce or even a sprinkle of red pepper flakes. Whether you’re hosting a large gathering or just a small get-together, this Buffalo Chicken Dip is sure to be a hit with your guests. Enjoy the party!
Mini Chicken Quesadillas
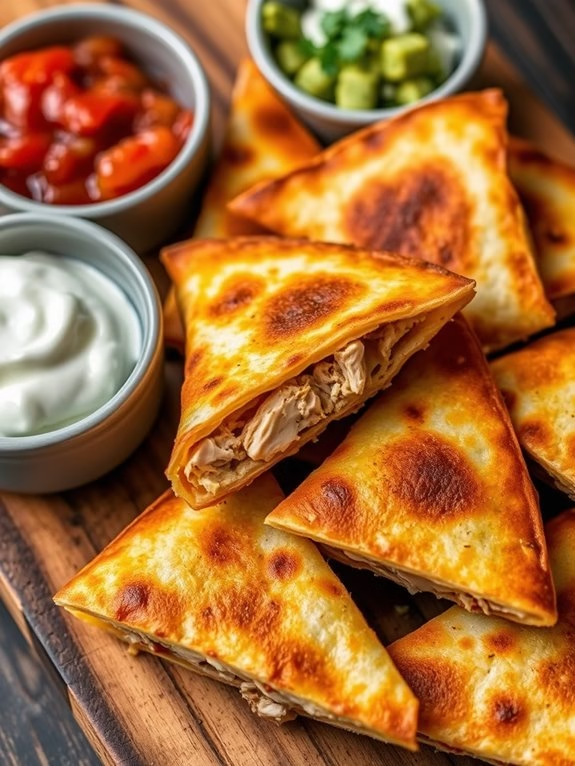
When it comes to feeding a crowd, mini chicken quesadillas are a sure winner. These bite-sized treats are packed with flavor and are easy to prepare, making them the perfect appetizer for any event. Whether it’s a family gathering, a party with friends, or a casual get-together, these mini chicken quesadillas are sure to be a hit. The combination of tender chicken, melted cheese, and crisp tortillas is irresistible, and the addition of spices gives it a nice kick.
Moreover, mini chicken quesadillas are quite versatile. You can serve them with different dips, such as salsa, guacamole, or sour cream, and you can add other ingredients like beans, corn, or peppers to the filling. They can be prepared in advance and reheated when needed, saving you time and stress. So, let’s plunge into the recipe!
Ingredients:
- 2 chicken breasts
- 12 mini tortillas
- 2 cups of shredded cheese (cheddar or Monterey Jack)
- 1 small onion, finely chopped
- 2 cloves of garlic, minced
- 1 teaspoon of cumin
- 1 teaspoon of chili powder
- 1 tablespoon of vegetable oil
- Salt and pepper to taste
- Salsa, guacamole, and sour cream for serving
Instructions:
- Start by cooking the chicken. Heat the oil in a pan over medium heat. Add the onion and garlic and sauté until they’re soft and fragrant.
- Add the chicken breasts to the pan. Season with cumin, chili powder, salt, and pepper. Cook until the chicken is no longer pink in the middle, about 6-8 minutes on each side.
- Once the chicken is cooked, remove it from the pan and let it cool. Then, shred it using two forks.
- Lay out the mini tortillas on a clean surface. Divide the shredded chicken and cheese evenly among the tortillas, placing them on one half of each tortilla.
- Fold the tortillas in half over the filling, pressing gently to seal them.
- Heat a large non-stick pan over medium heat. Cook the quesadillas in batches, flipping once, until they’re golden brown and the cheese is melted, about 3 minutes on each side.
- Cut the quesadillas into halves or quarters, if desired, and serve with salsa, guacamole, and sour cream.
Tips:
Remember to let the cooked chicken cool before shredding it, as this will make the process easier and prevent you from burning your fingers.
Also, be careful not to overfill the quesadillas, as the filling can spill out and make the tortillas soggy.
Finally, when cooking the quesadillas, make sure the pan is hot enough before adding them. This will help to get a nice, crispy exterior.
Enjoy your mini chicken quesadillas!
Chicken Satay Skewers
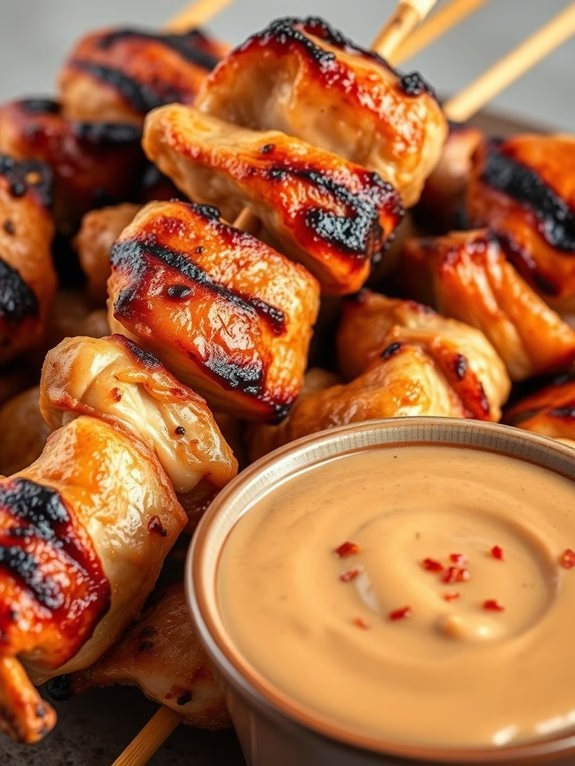
Chicken Satay Skewers are the perfect appetizer for any large gathering. This popular Asian dish isn’t only easy to make but also packed full of flavor. The juicy and tender chicken pieces, marinated in a blend of spices and skewered on bamboo sticks, are grilled to perfection, providing a mouthwatering aroma that’s sure to draw a crowd.
Served with a creamy and spicy peanut sauce, these skewers are guaranteed to be a hit.
One of the beauties of Chicken Satay Skewers is its versatility. It can be adapted to fit any dietary preference or restriction. You can use chicken breasts or thighs depending upon your preference. The peanut sauce can also be adjusted to suit your taste. The key is to let the chicken marinate for at least an hour for the flavors to fully develop.
Ingredients:
- 500 grams of chicken breasts or thighs
- 1/2 cup of soy sauce
- 2 cloves of garlic, minced
- 1 tablespoon of ginger, grated
- 1 tablespoon of brown sugar
- 1 teaspoon of turmeric powder
- 1 teaspoon of ground coriander
- 2 tablespoons of vegetable oil
- 12 bamboo skewers, soaked in water
- Salt to taste
For the peanut sauce:
- 1/2 cup of peanut butter
- 1/4 cup of water
- 1 tablespoon of soy sauce
- 1 tablespoon of lime juice
- 1 teaspoon of brown sugar
- 1 teaspoon of chili flakes
Cooking Instructions:
- Start by cutting the chicken into thin, uniform strips. This will help them cook evenly on the grill.
- In a large bowl, combine the soy sauce, minced garlic, grated ginger, brown sugar, turmeric, coriander, vegetable oil, and salt. Add the chicken strips and toss until well coated. Cover and let marinate for at least an hour or overnight in the refrigerator.
- Preheat your grill or grill pan to medium heat.
- Thread the chicken strips onto the soaked bamboo skewers.
- Grill the skewers for about 3-5 minutes on each side, or until the chicken is fully cooked and has nice grill marks.
- While the chicken is grilling, make the peanut sauce. In a small saucepan, combine the peanut butter, water, soy sauce, lime juice, brown sugar, and chili flakes. Stir over medium heat until the sauce is smooth and heated through.
- Serve the finished skewers with the warm peanut sauce on the side for dipping.
Extra Tips:
To ascertain your skewers don’t burn on the grill, soak the bamboo skewers in water for at least 30 minutes before use. This will prevent them from catching fire.
If you’re using a grill pan, make sure it’s well-oiled to prevent the chicken from sticking.
Finally, remember that marinating the chicken for a longer time will result in more flavorful skewers, so if you have the time, let it marinate overnight.
Spicy Chicken Wings
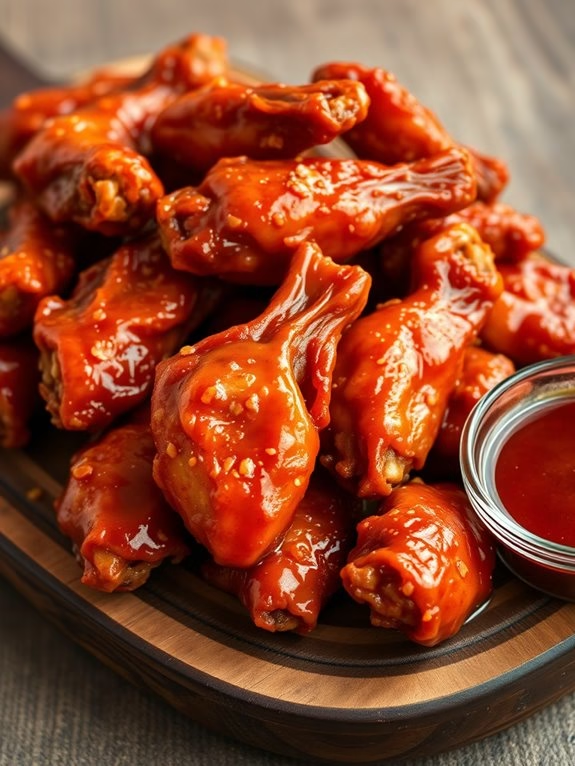
There’s nothing quite like a platter of spicy chicken wings to get the party started. This quintessential appetizer is a crowd-pleaser that offers a burst of flavors in every bite. This recipe is based on traditional buffalo wings but with a twist. Each wing is coated with a spicy and tangy sauce that brings out the natural flavor of the chicken. It’s a dish that’s easy to prepare in large quantities, making it an ideal choice for a gathering or party.
The beauty of this recipe lies in its simplicity. With a handful of ingredients and a few easy steps, you can have a plate of delicious spicy chicken wings ready to serve. The key to achieving the perfect balance of flavors lies in the sauce. It’s a blend of hot sauce, butter, garlic, and other seasonings that infuse the chicken wings with a flavorful kick.
Ingredients:
- 24 chicken wings
- 1 cup all-purpose flour
- 1 teaspoon salt
- 1/2 teaspoon black pepper
- 1/2 teaspoon cayenne pepper
- 1 teaspoon garlic powder
- 1/2 cup hot sauce
- 1/2 cup melted butter
- 2 cloves minced garlic
- 1 tablespoon honey
- 1 tablespoon soy sauce
- Vegetable oil for frying
Instructions:
- Start by cleaning the chicken wings and patting them dry with a kitchen towel. This will remove any excess moisture and help the flour coating to adhere better.
- Mix together the flour, salt, black pepper, cayenne pepper, and garlic powder in a large bowl. Coat each chicken wing evenly with this flour mixture.
- Heat the vegetable oil in a deep fryer or large pot to a temperature of 375°F (190°C). Carefully drop the chicken wings into the oil and fry until they’re crispy and golden brown. This should take about 10-12 minutes.
- While the chicken wings are frying, prepare the sauce. In a saucepan over medium heat, combine the hot sauce, melted butter, minced garlic, honey, and soy sauce. Stir until the ingredients are well combined and the sauce is heated through.
- Once the chicken wings are done, drain them on a paper towel to remove excess oil. Toss the wings in the prepared sauce until they’re well coated.
- Serve the spicy chicken wings hot, with extra sauce on the side for dipping.
When preparing these spicy chicken wings, it’s important to remember a few key tips. First, make sure the oil is at the right temperature before you start frying. If it’s too hot, the wings will burn on the outside before they’re cooked through. If it’s not hot enough, they’ll absorb too much oil and become greasy.
Also, don’t crowd the pot when frying the wings. Fry them in batches if necessary, to guarantee they cook evenly. Finally, serve the wings immediately after coating them in sauce to enjoy the perfect combination of crispy skin and juicy, flavorful meat.
Chicken and Cheese Sliders
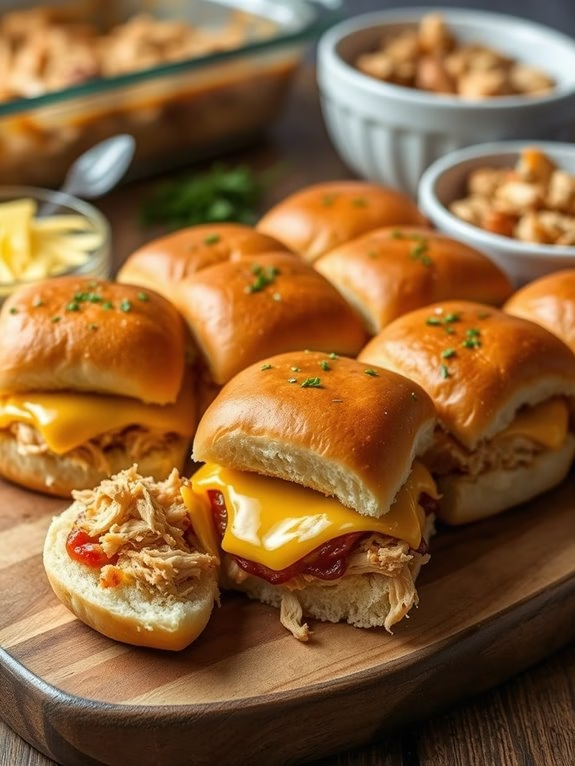
When hosting a party or social gathering, having a variety of appetizers to satisfy your guests is a must. Chicken and cheese sliders are a surefire way to do just that. These bite-sized sandwiches are packed with flavor and are easy to assemble, making them the perfect go-to dish for any crowd.
The key to making tasty chicken and cheese sliders lies in the balance of flavors. The succulent chicken, creamy cheese, and tangy sauce all come together to create a delicious burst of flavor in every bite. This recipe serves 4-6 people and can easily be doubled or tripled for larger crowds.
Ingredients:
- 2 cups of cooked, shredded chicken
- 1 cup of shredded cheddar cheese
- 1/4 cup of mayonnaise
- 1/4 cup of barbecue sauce
- 1/4 cup of finely chopped onion
- 12 slider buns
- 2 tablespoons of melted butter
- 1 teaspoon of garlic powder
- 1 teaspoon of dried parsley
- Salt and pepper to taste
Cooking Instructions:
- Preheat your oven to 375 degrees Fahrenheit.
- In a large bowl, mix together the shredded chicken, shredded cheese, mayonnaise, barbecue sauce, and finely chopped onion. Stir until all ingredients are well combined. Season with salt and pepper to taste.
- Cut your slider buns in half and place the bottom halves in a baking dish.
- Spread the chicken and cheese mixture evenly over the bottom halves of the slider buns. Place the top halves of the buns on top.
- In a small bowl, mix together the melted butter, garlic powder, and dried parsley. Brush this mixture over the top of the slider buns.
- Cover the baking dish with aluminum foil and bake for 15 minutes.
- After 15 minutes, remove the foil and bake for an additional 5 minutes, or until the tops of the buns are golden brown and the cheese is melted.
When making these chicken and cheese sliders, don’t be afraid to get creative with your ingredients. Different types of cheese, such as mozzarella or pepper jack, can add an interesting twist to the flavor.
Also, consider adding a bit of heat with some sliced jalapenos or a spicy barbecue sauce. These sliders are sure to be a hit, no matter the occasion.
Chicken Lettuce Wraps
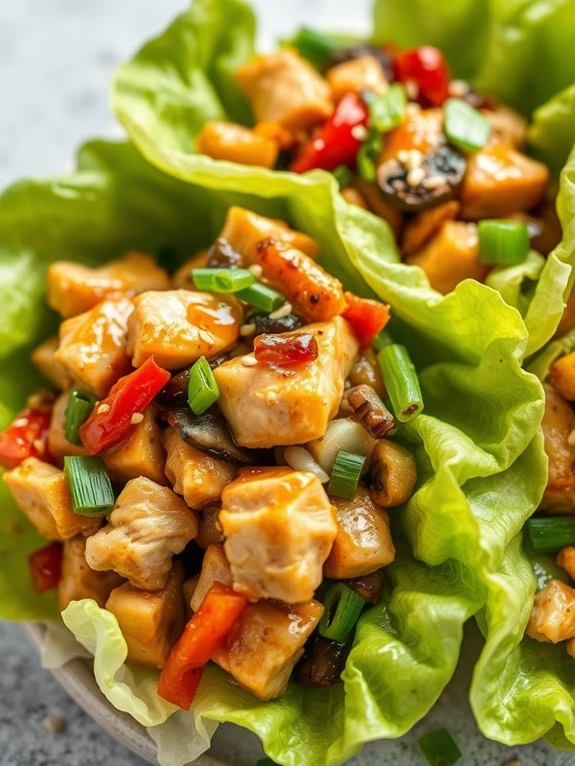
Chicken Lettuce Wraps are a perfect appetizer for any gathering. They’re light, delicious, and packed with flavor, making them a crowd favorite. This dish features tender chicken sautéed with a variety of vegetables and seasonings, all wrapped up in crisp lettuce leaves. It’s a handy, bite-sized treat that’s easy to serve and eat, making it ideal for parties or large gatherings.
The beauty of these Chicken Lettuce Wraps is in their simplicity and versatility. You can prepare the chicken filling in advance, and guests can assemble their own wraps, adding as much or as little filling as they like. This dish is also quite adjustable – you can easily increase the quantities to cater to a larger crowd or modify the ingredients to suit different dietary preferences.
Ingredients:
- 2 boneless, skinless chicken breasts, cut into small pieces
- 1 large onion, finely chopped
- 2 cloves of garlic, minced
- 1 red bell pepper, diced
- 1 green bell pepper, diced
- 1 cup of diced mushrooms
- 1 tablespoon of olive oil
- 2 tablespoons of soy sauce
- 1 tablespoon of hoisin sauce
- Salt and pepper to taste
- 1 head of iceberg lettuce, leaves carefully separated
- 2 green onions, thinly sliced, for garnish
- Sesame seeds, for garnish
Instructions:
- Heat the olive oil in a large pan over medium heat. Add the onions and garlic and sauté until they’re soft and fragrant.
- Add the diced chicken to the pan. Cook until the chicken is no longer pink in the middle, stirring occasionally.
- Next, add the bell peppers and mushrooms to the pan. Stir well and continue to cook until the vegetables are tender.
- Stir in the soy sauce, hoisin sauce, salt, and pepper. Mix well to guarantee all ingredients are coated with the sauces. Cook for a few more minutes to allow the flavors to meld together.
- Remove the pan from the heat and let the filling cool slightly.
- To assemble the wraps, spoon some of the chicken mixture onto a lettuce leaf. Sprinkle with green onions and sesame seeds.
- Roll up the lettuce leaf around the filling, tucking in the sides as you go. Repeat with the remaining lettuce leaves and chicken filling.
When making these Chicken Lettuce Wraps, remember to wash the lettuce leaves thoroughly and pat them dry. Wet leaves can make the wraps soggy and difficult to handle.
Also, be careful not to overfill the lettuce wraps; a good balance of lettuce to filling will make them easier to eat. These wraps are best served immediately, but the chicken filling can be made in advance and reheated just before serving. Enjoy this delightful appetizer that’s sure to be a hit with your crowd.
BBQ Chicken Nachos
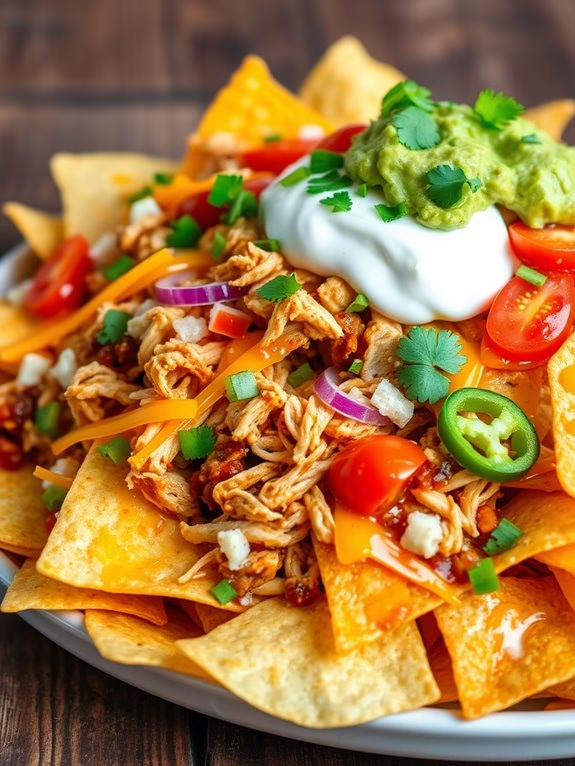
BBQ Chicken Nachos are the perfect appetizer for any party or gathering. They’re easy to make, deliciously cheesy, and packed with flavor. This dish includes crispy tortilla chips, tender BBQ chicken, melted cheese, and an array of toppings that can be customized to your liking. It’s a crowd-pleaser that will have your guests coming back for more.
These nachos are a great make-ahead appetizer, as well. You can prep the chicken and toppings ahead of time and assemble and bake them just before your guests arrive. This guarantees that the nachos are fresh, warm, and crispy when served. This recipe serves 4-6 people, but can easily be adjusted to accommodate a larger crowd.
Ingredients:
- 2 boneless skinless chicken breasts
- 1 cup of BBQ sauce
- 1 bag of tortilla chips
- 2 cups of shredded cheddar cheese
- 1 cup of shredded Monterey Jack cheese
- 1 red onion, diced
- 1 jalapeno, sliced
- 1 cup of cherry tomatoes, halved
- 1/2 cup of fresh cilantro, chopped
- 1 cup of sour cream
- 1/2 cup of guacamole
Cooking Instructions:
- Start by preheating your oven to 375 degrees F.
- In a skillet over medium heat, cook the chicken breasts until they’re no longer pink in the middle, about 6-8 minutes per side.
- Once the chicken is cooked, shred it using two forks and mix it with the BBQ sauce until well combined. Set aside.
- Spread half of the tortilla chips in a large ovenproof dish. Top with half of the shredded chicken, half of the cheeses, half of the diced red onion, and half of the jalapeno slices.
- Repeat this process with the remaining tortilla chips, chicken, cheeses, onion, and jalapeno.
- Place the dish in the preheated oven and bake for about 15 minutes, or until the cheese is melted and bubbly.
- Remove from the oven and top with the cherry tomatoes, fresh cilantro, sour cream, and guacamole.
Extra Tips:
When making BBQ Chicken Nachos, it’s crucial to layer the ingredients to make sure every chip gets covered with toppings.
Although this recipe includes specific toppings, feel free to customize them based on your preferences. You can add black beans, corn, olives, or even pineapple for a sweet and savory twist.
Additionally, if you want to make the recipe even easier or quicker, you could use pre-cooked shredded chicken or rotisserie chicken from the store. Just mix it with BBQ sauce and proceed with the recipe.
Chicken Pot Pie Bites
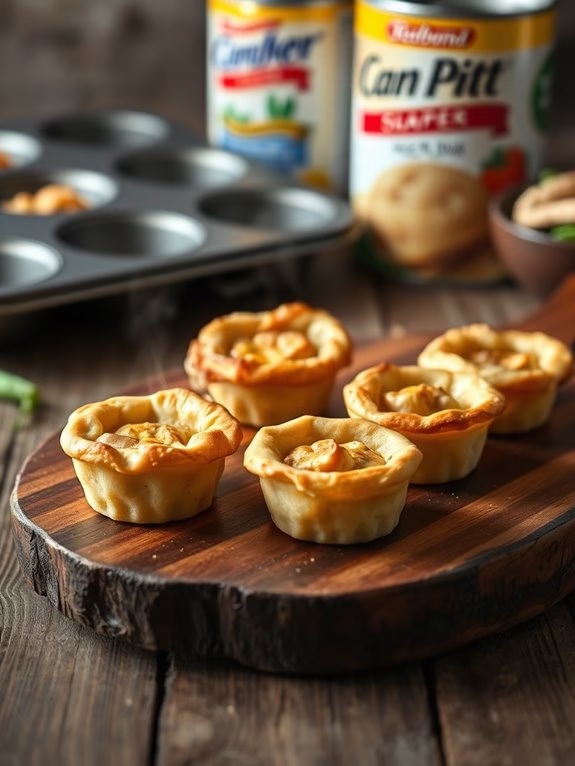
Chicken Pot Pie Bites are the ultimate appetizer for a crowd. The miniaturized version of the classic comfort food is packed full of flavor and is sure to be a hit at any gathering.
These bites are a great way to serve chicken in a fun and unique way, they’re easy to eat and carry around, making them perfect for any kind of party or event. Not only that, but they’re also incredibly easy to make.
Whether you’re an experienced cook or a beginner in the kitchen, this recipe is simple and straightforward. And the best part? You can prepare them ahead of time and pop them in the oven just before your guests arrive. This recipe is designed to serve 4-6 people.
Ingredients:
- 1 lb chicken breast, cooked and diced
- 1 cup frozen mixed vegetables
- 1 can condensed cream of chicken soup
- 1 package refrigerated pie crusts
- 1 egg
- Salt and pepper to taste
Instructions:
- Preheat your oven to 375°F (190°C) and grease a mini muffin tin.
- Roll out the pie crusts on a floured surface. Using a round cookie cutter or glass, cut out circles from the dough. Press these circles into the bottoms and up the sides of the muffin tin cups.
- In a large bowl, combine the cooked chicken, frozen vegetables, and cream of chicken soup. Season with salt and pepper to taste.
- Spoon the chicken mixture into each pie crust, filling them to the top.
- Beat the egg in a small bowl and brush the tops of the pot pie bites with the egg wash. This will give them a nice golden color as they bake.
- Bake for 15-20 minutes, or until the crusts are golden and the filling is bubbling. Allow them to cool for a few minutes before serving.
Extra Tips:
One of the best things about this recipe is its versatility. You can easily swap out the chicken for turkey or even a vegetarian protein, and the vegetables can be changed to suit your taste or what you have on hand.
Additionally, these pot pie bites freeze well, so you can make them ahead of time and simply reheat them when you’re ready to serve. Enjoy this tasty twist on a classic dish at your next gathering!
Chicken Parmesan Meatballs
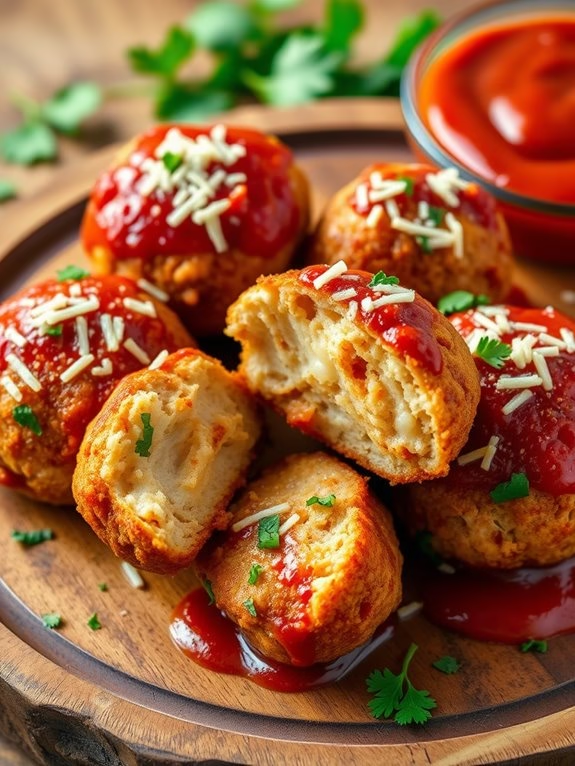
Chicken Parmesan Meatballs are the perfect appetizer for any gathering. Their bite-sized nature makes them easy to serve and eat, while their flavorful combination of tender chicken, tangy marinara, and gooey melted cheese guarantees they’ll be a hit with your crowd.
Not only are these meatballs delicious, but they’re also incredibly easy to make. You don’t need to be a professional chef to assemble these tasty morsels – just a few simple steps and your appetizers will be ready to serve!
These meatballs are cooked in the oven, making them a healthier alternative to traditional fried meatballs. The breadcrumbs and Parmesan cheese create a crispy exterior, while the inside remains juicy and full of flavor. The marinara sauce adds a burst of tangy sweetness that perfectly complements the savory meatballs.
Ingredients:
- 1 lb ground chicken
- 1/2 cup breadcrumbs
- 1/2 cup grated Parmesan cheese
- 1/4 cup chopped fresh parsley
- 2 cloves garlic, minced
- 1 large egg
- 1/2 teaspoon salt
- 1/4 teaspoon black pepper
- 1 cup marinara sauce
- 1 cup shredded mozzarella cheese
Cooking Instructions:
- Preheat your oven to 400 degrees F (200 degrees C) and line a baking sheet with parchment paper.
- In a large bowl, combine the ground chicken, breadcrumbs, Parmesan cheese, parsley, garlic, egg, salt, and pepper. Mix well until all the ingredients are evenly distributed.
- Form the mixture into small meatballs, about 1 inch in diameter, and place them on the prepared baking sheet.
- Bake the meatballs in the preheated oven for about 20 minutes, or until they’re cooked through and golden brown.
- Remove the meatballs from the oven and carefully spoon some marinara sauce on top of each one. Sprinkle the shredded mozzarella cheese over the sauce.
- Return the meatballs to the oven and bake for an additional 5 minutes, or until the cheese is melted and bubbly.
- Allow the meatballs to cool slightly before serving.
When preparing these Chicken Parmesan Meatballs, remember to handle the raw meat as little as possible when mixing and forming the meatballs. Overworking the meat can result in tough, dense meatballs.
Also, make sure to evenly distribute the marinara sauce and mozzarella cheese over each meatball. Finally, these meatballs are best served warm, but they can also be made in advance and reheated in the oven before serving. Enjoy this delicious appetizer at your next gathering!
Crispy Chicken Tenders
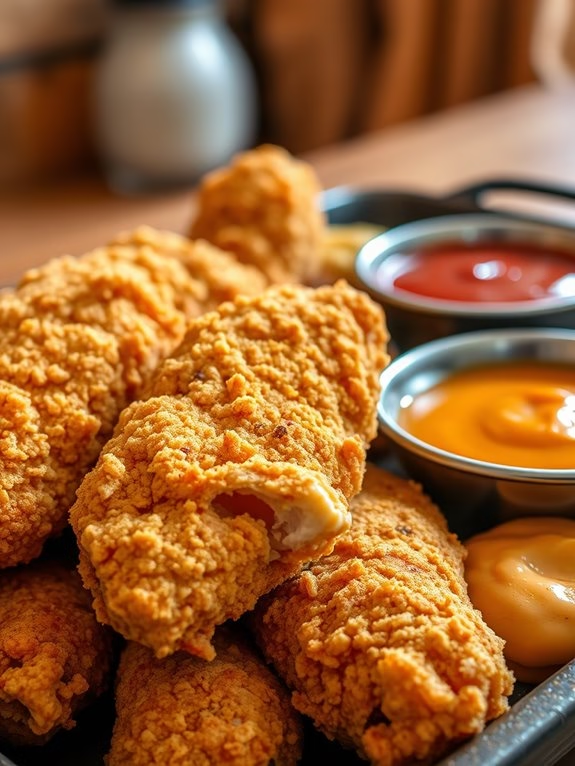
Crispy chicken tenders are a classic crowd-pleaser appetizer. They’re versatile, easy to make, and can be customized with a variety of dips and sauces to fit any palate.
Whether you’re hosting a large gathering or a small family get-together, these chicken tenders will surely be a hit. With a perfectly seasoned crispy exterior and juicy tender interior, this recipe is promised to leave your guests asking for more.
This recipe is perfect for 4-6 people, making it an ideal appetizer for small to medium gatherings. However, it can easily be doubled or tripled to cater to a larger crowd. You can serve these crispy chicken tenders with a side of your favorite dipping sauce, like honey mustard, barbecue sauce, or a spicy buffalo dip for an added kick.
Ingredients:
- 1.5 lbs boneless skinless chicken breasts
- Salt and pepper to taste
- 1 cup all-purpose flour
- 1 cup breadcrumbs
- 1 teaspoon paprika
- 2 eggs
- 1/4 cup milk
- Vegetable oil for frying
Cooking Instructions:
- Begin by cutting the chicken breasts into strips of approximately 1 inch in width. Season them with salt and pepper to taste.
- In a large bowl, combine the all-purpose flour, breadcrumbs, and paprika. This will be your coating mixture.
- In a separate bowl, whisk together the eggs and milk. This will act as your binding agent for the coating.
- Dip each chicken strip into the egg mixture, making sure it’s fully coated, then roll it in the flour mixture. Repeat this process for all the chicken strips.
- Heat the vegetable oil in a deep frying pan over medium heat. Confirm the oil is hot enough by dropping a small piece of bread into it; if it sizzles immediately, the oil is ready.
- Fry the chicken strips in batches, making sure not to overcrowd the pan. Cook them for about 2-3 minutes on each side until they’re golden brown and crispy.
- Place the cooked chicken strips on a paper towel-lined plate to drain any excess oil.
- Serve hot with your favorite dipping sauces.
Extra tips: It’s important to maintain the oil at the right temperature when frying the chicken tenders. If the oil is too hot, the exterior will burn before the interior is fully cooked, and if it’s too cold, the chicken tenders will absorb too much oil and become greasy.
Also, using a wire rack instead of a paper towel to drain the excess oil will keep the chicken tenders crispy for longer. Enjoy your cooking!
Chicken Taquitos With Salsa
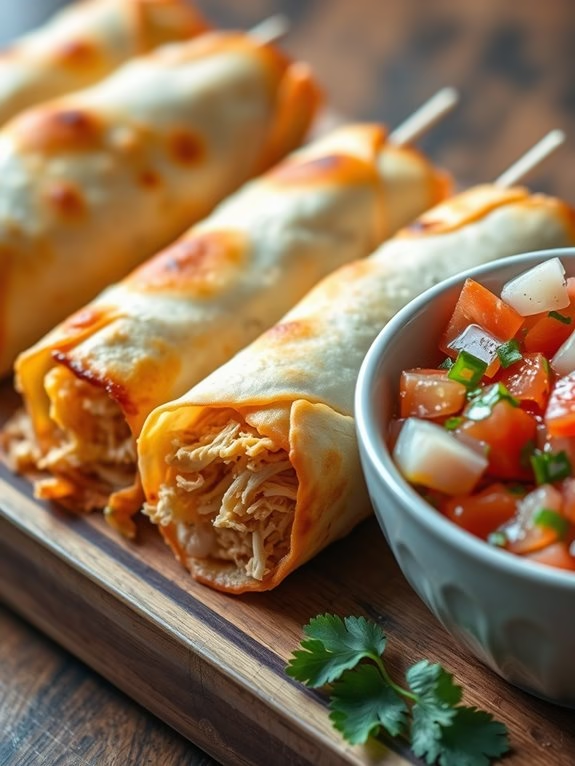
Chicken taquitos are a popular Mexican dish that’s often enjoyed as an appetizer or main course. They’re rolled tortillas filled with chicken and other ingredients, then fried until crisp. Served with salsa, these taquitos make a flavorful addition to any party menu. This Chicken Taquitos with Salsa recipe isn’t only delicious but also easy to prepare, ensuring you have more time to enjoy the party instead of being stuck in the kitchen.
To make these taquitos, you’ll need to first prepare the chicken filling. This involves seasoning the chicken with spices and then cooking it until tender. The chicken is then shredded and combined with cheese before being rolled in tortillas. The tortillas are then fried until they’re crispy and golden. The salsa is a simple combination of tomatoes, onions, and cilantro, providing a fresh and tangy contrast to the rich and savory taquitos.
Ingredients:
- 2 boneless, skinless chicken breasts
- 2 cups of shredded Monterey Jack cheese
- 12 small corn tortillas
- 2 cups of vegetable oil, for frying
- 4 tomatoes, diced
- 1 onion, diced
- 1 bunch of fresh cilantro, chopped
- Juice of 1 lime
- Salt and pepper to taste
Instructions:
- Season the chicken breasts with salt and pepper. Cook them in a pan over medium heat until they’re fully cooked and no longer pink in the middle. This should take about 20 minutes.
- Once the chicken is cooked, let it cool before shredding it with a fork.
- In a large bowl, combine the shredded chicken and cheese. Mix until well combined.
- Warm the tortillas in a microwave for about 30 seconds to make them pliable.
- Place a spoonful of the chicken and cheese mixture in the center of each tortilla. Roll up the tortilla tightly and secure it with a toothpick.
- Heat the vegetable oil in a large pan over medium heat. Fry the taquitos until they’re golden brown and crispy. This should take about 2-3 minutes per side.
- While the taquitos are frying, prepare the salsa by combining the diced tomatoes, onion, chopped cilantro, and lime juice in a bowl. Season with salt and pepper.
- Serve the taquitos with the salsa on the side for dipping.
When making these chicken taquitos, it’s important to roll the tortillas tightly to prevent the filling from spilling out during the frying process. Also, be sure to use a high smoking point oil like vegetable or canola oil for frying to get a crispy and golden result.
Finally, the salsa can be made ahead of time and stored in the refrigerator to save on prep time on the day of your event. Enjoy this delicious and crowd-pleasing appetizer at your next party.
Chicken and Waffle Sliders
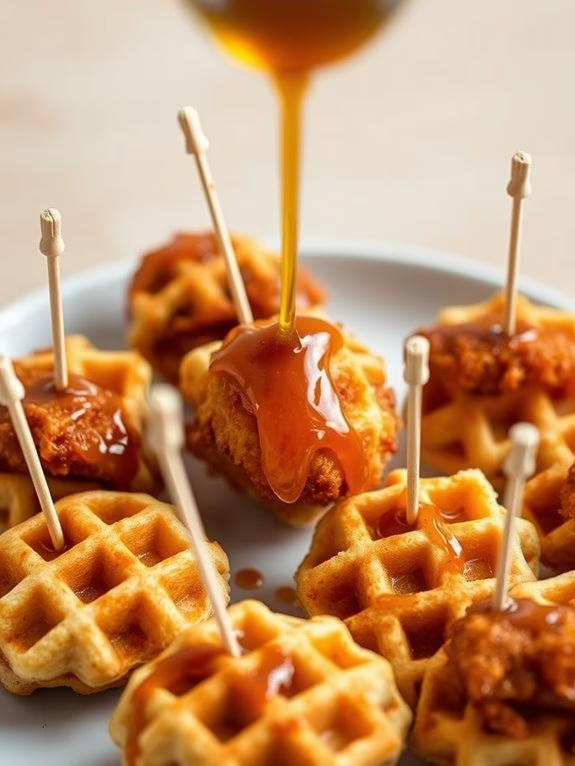
Chicken and Waffle Sliders are a deliciously unique appetizer that will have your crowd coming back for seconds and thirds. This Southern favorite combines sweet, savory and spicy flavors all in one bite-sized treat. The tender, juicy chicken is sandwiched between two soft, fluffy mini waffles and drizzled with a spicy maple syrup for a dish that’s bound to impress.
Preparing these sliders is a fun and straightforward process that involves frying the chicken, cooking the waffles, and assembling the sliders. The recipe is pretty flexible, allowing you to adjust the heat level and even the waffle flavor to suit your crowd’s tastes. Let’s break it down.
Ingredients:
- 1 lb boneless, skinless chicken breasts, cut into slider-sized pieces
- 1 cup buttermilk
- 1 cup all-purpose flour
- 1 tsp each of salt, black pepper, paprika, and garlic powder
- Vegetable oil for frying
- 2 cups waffle batter (prepared from your favorite mix)
- 1/2 cup maple syrup
- 1/2 tsp cayenne pepper
- Toothpicks for serving
Instructions:
- Start by marinating the chicken. Place the chicken pieces in a bowl and pour the buttermilk over them. Let them soak for at least 30 minutes in the refrigerator. This will tenderize the chicken and give it a rich flavor.
- While the chicken is marinating, prepare the waffle batter according to the package instructions. Set aside.
- In another bowl, combine the flour, salt, black pepper, paprika, and garlic powder. This will be your breading mixture.
- Once the chicken has marinated, remove each piece and dredge it in the flour mixture. Confirm each piece is thoroughly coated.
- Heat the vegetable oil in a deep fryer or large skillet over medium heat. Fry the chicken pieces until they’re golden brown and cooked through, about 3-5 minutes per side. Place the fried chicken on a paper towel-lined plate to drain excess oil.
- While the chicken is frying, cook your waffles. Pour the batter into a preheated mini waffle maker and cook according to the manufacturer’s instructions. You should end up with waffles that are about the same size as your chicken pieces.
- To prepare the spicy maple syrup, simply mix the maple syrup and cayenne pepper in a small bowl.
- Now it’s time to assemble your sliders. Place a piece of chicken between two mini waffles. Secure with a toothpick and drizzle with the spicy maple syrup.
When preparing Chicken and Waffle Sliders, remember to keep the chicken and waffles relatively the same size for easy eating. Also, don’t skip the marinating step as it guarantees the chicken is tender and flavorful.
If you’re not a fan of heat, feel free to leave out the cayenne pepper or adjust it to your liking. With these tips in mind, you’re ready to serve up a batch of these crowd-pleasing sliders!
Teriyaki Chicken Bites
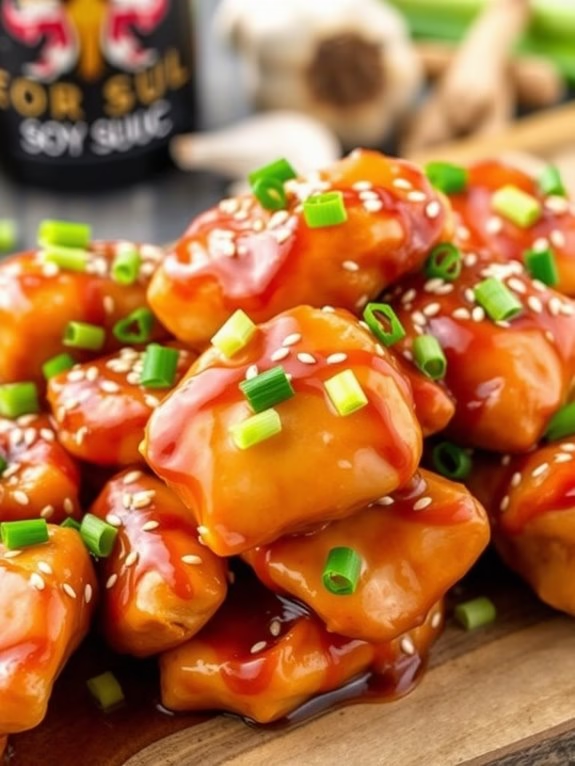
Teriyaki Chicken Bites are a fantastic crowd-pleasing appetizer, perfect for any social gathering. With their tempting flavors of sweet and savory, these bite-sized chicken pieces marinated in a tangy, homemade teriyaki sauce are sure to disappear off the plate in no time. The ease of preparation combined with their popularity makes this dish a go-to appetizer for any occasion.
These chicken bites can be prepared ahead of time, and then quickly cooked up when your guests arrive. The teriyaki sauce, made from scratch, adds an extra layer of flavor that sets these bites apart from your usual chicken appetizers. Let’s get started with this recipe, designed to serve between 4-6 people.
Ingredients:
- 2 boneless, skinless chicken breasts
- 1 cup soy sauce
- 1/2 cup brown sugar
- 1/2 cup water
- 2 tablespoons honey
- 2 cloves garlic, minced
- 1 tablespoon minced fresh ginger
- 1 tablespoon cornstarch
- 2 tablespoons water
- 2 tablespoons vegetable oil
- 2 green onions, thinly sliced
- 1 tablespoon sesame seeds
Cooking Instructions:
- Begin by cutting the chicken breasts into bite-sized pieces. Make sure they’re roughly the same size to guarantee even cooking.
- In a medium saucepan, combine the soy sauce, brown sugar, water, honey, garlic, and ginger. Bring the mixture to a simmer over medium heat.
- In a small bowl, mix together the cornstarch and 2 tablespoons water to make a slurry. Slowly add this to the simmering sauce, stirring continuously until the sauce thickens. This should take about 2-3 minutes.
- Place the chicken pieces in a dish and pour half of the teriyaki sauce over them. Reserve the rest for later. Let the chicken marinate for at least 30 minutes, or up to 24 hours in the refrigerator for more intense flavor.
- Heat the vegetable oil in a large skillet over medium-high heat. Add the chicken pieces and cook until golden brown and cooked through, about 5-7 minutes.
- Once cooked, drizzle the remaining teriyaki sauce over the chicken, tossing to coat. Sprinkle the sliced green onions and sesame seeds on top for garnish before serving.
To make the best Teriyaki Chicken Bites, marinate the chicken for as long as possible – overnight is ideal. This allows the flavors to fully penetrate the meat. If you’re short on time, marinating for just 30 minutes will still yield tasty results.
Confirm your pan is hot before adding the chicken to achieve a nice sear. Finally, double the recipe for larger crowds; these appetizers will go quickly!
Chicken and Bacon Roll-Ups
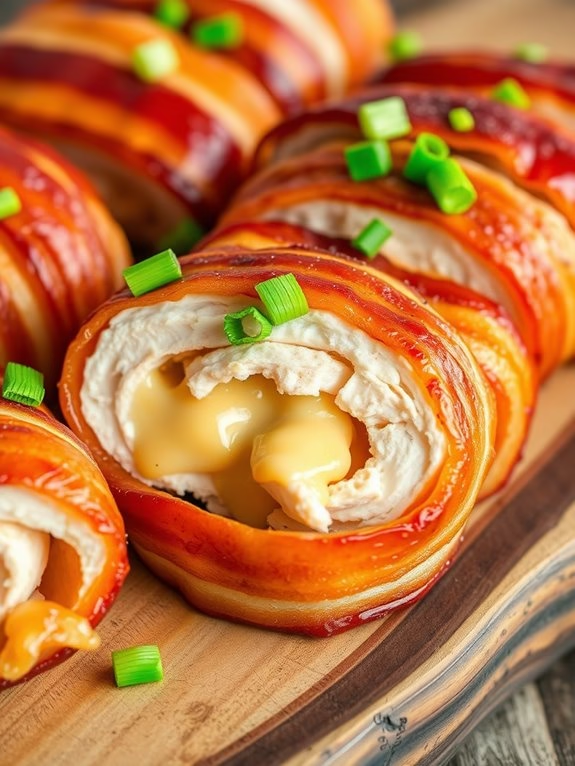
When you’re hosting a gathering, you want to serve food that not only tastes great but also impresses your guests. One such dish is the Chicken and Bacon Roll-Ups, a crowd-pleasing appetizer that’s packed with flavors and textures. This delicious and easy-to-make dish is guaranteed to get your guests excited for the main course. Its combination of juicy chicken, crispy bacon, and a creamy filling makes it an irresistible choice for any event.
The Chicken and Bacon Roll-Ups aren’t only delicious, but they’re also a sight to behold. Each roll-up is a delightful package of flavor, and when lined up on a serving plate, they create an appetizing display. They’re perfect for parties, potlucks, and other special occasions.
Here’s how to prepare Chicken and Bacon Roll-Ups for a crowd of 4-6 people.
Ingredients:
- 2 chicken breasts, cut into thin strips
- 12 slices of bacon
- 1 cup of cream cheese
- 1/2 cup of shredded cheddar cheese
- 1/2 cup of green onions, chopped
- Salt and pepper to taste
- Toothpicks for securing the roll-ups
Instructions:
- Start by preheating your oven to 375°F (190°C) and lining a baking sheet with aluminum foil for easy clean-up.
- Season the chicken strips with salt and pepper. Set them aside.
- In a bowl, combine the cream cheese, shredded cheddar, and chopped green onions. Mix until well incorporated.
- Lay a slice of bacon flat on a clean surface. Place a chicken strip on top of the bacon slice. Spoon a generous amount of the cream cheese mixture onto the chicken strip.
- Roll the bacon and chicken around the cream cheese mixture, ensuring that the filling is secure. Use a toothpick to hold the roll-up together. Repeat this process with the remaining ingredients.
- Place the roll-ups on the prepared baking sheet and bake in the preheated oven for 25-30 minutes, or until the chicken is cooked through and the bacon is crispy.
- Allow the roll-ups to cool for a few minutes before serving.
Extra Tips:
Chicken and Bacon Roll-Ups can be prepared ahead of time and stored in the refrigerator until you’re ready to bake them. This makes them an excellent choice for parties or gatherings where you have a lot to prepare.
Be sure to remove the toothpicks before serving. You can also experiment with different fillings, such as adding jalapenos for a spicy kick or using different cheeses for a variety of flavors. Enjoy these delightful appetizers!
Chicken Caesar Salad Cups
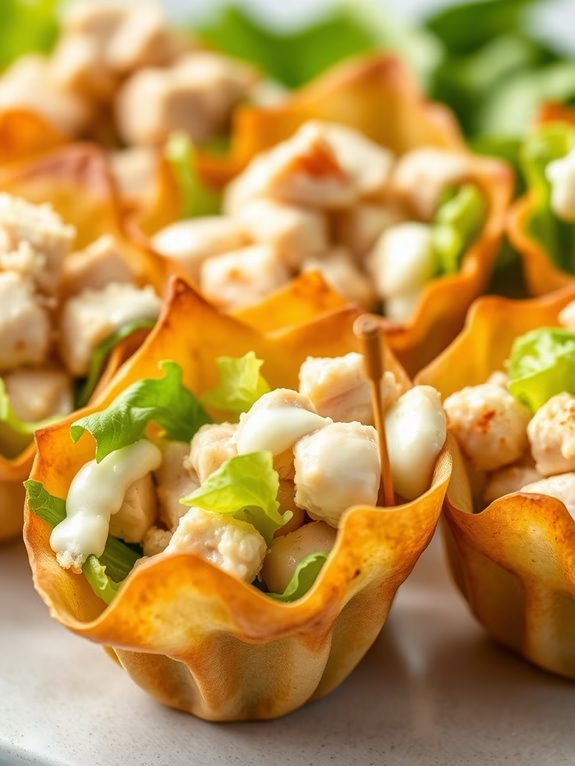
Chicken Caesar Salad Cups are a unique and crowd-pleasing appetizer that combine the beloved flavors of a classic Caesar salad with the convenience of an easy-to-eat finger food. They’re perfect for parties, picnics, or any gathering where you want to serve an appetizer that’s both delicious and a little bit different.
The crunchy lettuce, juicy chicken, creamy dressing, and sharp Parmesan cheese are all packed into a crispy wonton cup for a bite-sized burst of flavor.
Making these appetizers is also straightforward. The chicken can be grilled, baked, or even purchased pre-cooked for convenience, and the wonton cups are easy to shape and bake. The Caesar dressing can be homemade or store-bought, depending on your preference and time constraints.
Once all the components are prepared, assembling the cups is a breeze, and they can be made a few hours ahead of time if needed.
Ingredients:
- 24 wonton wrappers
- 2 boneless, skinless chicken breasts
- 1 head of Romaine lettuce, washed and chopped
- 1 cup of Caesar dressing
- 1 cup of grated Parmesan cheese
- Olive oil for brushing
- Salt and pepper to taste
Cooking Instructions:
- Preheat your oven to 375°F (190°C). Brush each wonton wrapper lightly with olive oil, then press into the cups of a muffin tin to form a cup shape. Bake for 10-12 minutes until golden brown and crispy. Allow to cool.
- While the wonton cups are baking, season the chicken breasts with salt and pepper and cook using your preferred method. Once cooked, allow the chicken to cool slightly before chopping it into bite-sized pieces.
- In a large bowl, combine the chopped lettuce, chicken pieces, Caesar dressing, and half of the Parmesan cheese. Toss until everything is well coated in the dressing.
- Spoon the salad mixture into the cooled wonton cups, dividing it evenly between them. Sprinkle the remaining Parmesan cheese on top of each cup.
- Serve immediately, or refrigerate until ready to serve. If refrigerating, add the Parmesan topping just before serving to maintain its crisp texture.
Cooking Tips:
When making Chicken Caesar Salad Cups, remember that the wonton cups will soften over time, especially if filled with the salad and refrigerated. Consequently, if you’re not serving them immediately, it’s best to keep the salad and cups separate until just before serving.
Also, consider adding a squeeze of fresh lemon juice to the salad mixture for a bit of added brightness. Finally, while these appetizers are best served cold, the chicken can be served warm if preferred.
