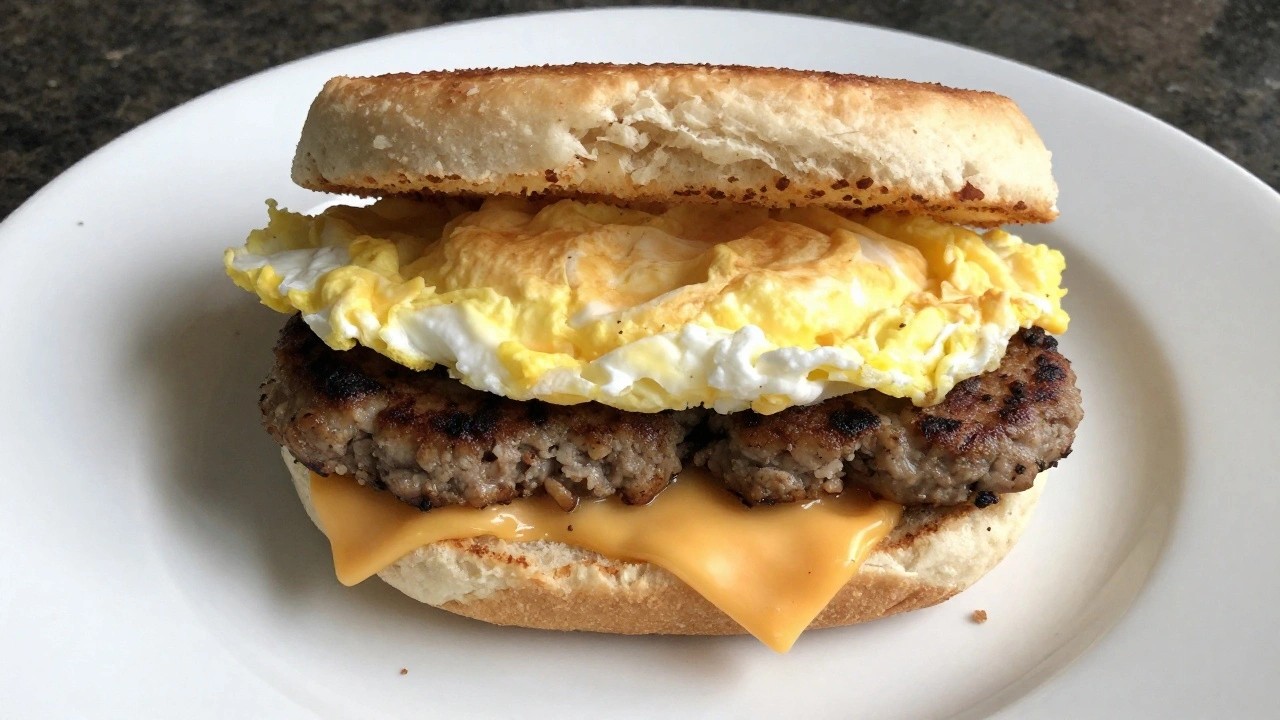
Busy mornings often leave little time for a good breakfast.
Prepping sandwiches ahead and freezing them can save a lot of time later.
These ideas focus on flavors that reheat well without losing taste.
You will find options that work for different preferences and diets.
Each recipe includes tips for storing and reheating.
Helpful Tips Before You Start
These tips will help your breakfast sandwiches freeze well and reheat with good texture.
Cool Sandwiches Fully
Let cooked sandwiches reach room temperature before wrapping. Warm fillings create steam that turns bread soggy in the freezer.
Wrap Each Sandwich Twice
First wrap in parchment paper, then seal in a freezer bag or wrap with foil. Double wrapping prevents freezer burn and keeps sandwiches from sticking.
Skip Wet Ingredients
Hold off on tomatoes, avocado, or extra sauces until reheating. These items release moisture and ruin the texture after freezing.
Reheat Straight from Frozen
Microwave the unwrapped sandwich for 60 to 90 seconds, then finish in a skillet or toaster oven for 2 minutes to crisp the bread.
Make a Batch on One Day
Cook all the proteins and assemble everything in one session. This keeps the process efficient and ensures consistent results across the batch.
Bacon, Egg, and Cheddar Everything Bagels
These bacon, egg, and cheddar everything bagels deliver a savory start to the day with bold seasoning from the bagels and a balance of crispy and soft textures. They fit freezer prep well because the components hold their structure after cooking and reheating. The result is a filling sandwich that feels like a treat but works for everyday mornings.
Each bite gives you smoky bacon, fluffy eggs, and sharp cheddar inside a chewy everything bagel. The seasoning blend on the bagel adds garlic and onion notes that stand up to the other fillings.
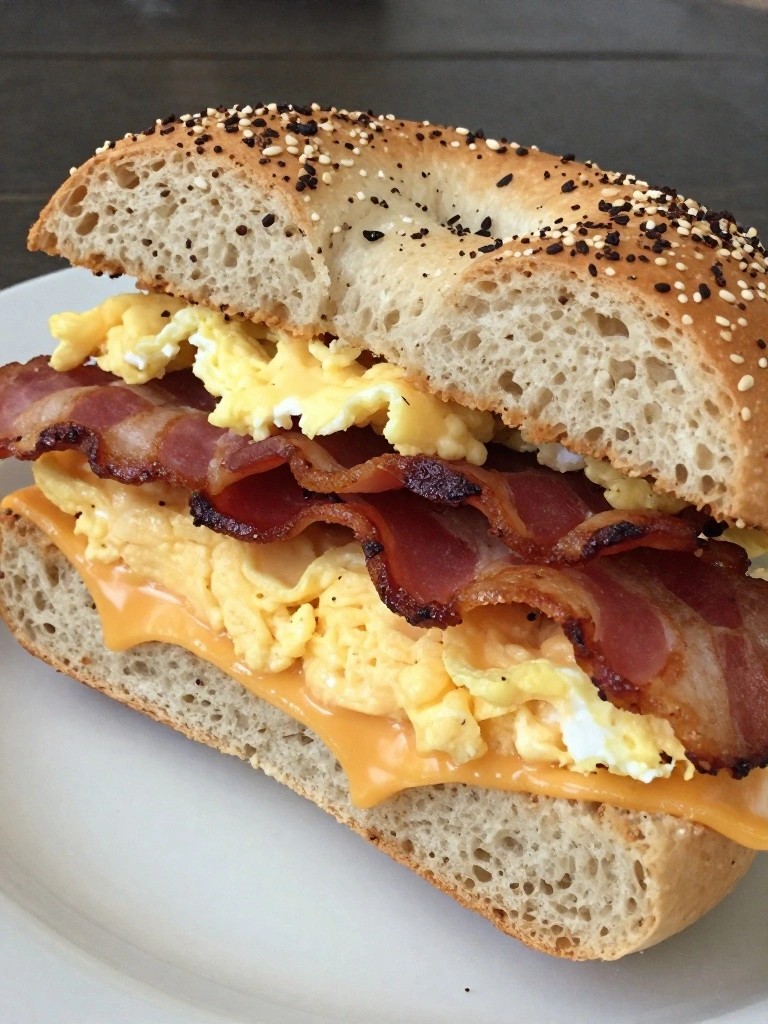
Serves 4 people.
Ingredients
- 4 everything bagels
- 8 slices bacon
- 4 large eggs
- 4 slices cheddar cheese
- 2 tablespoons butter
- Salt
- Pepper
Instructions
- Cook the bacon in a large skillet over medium heat until crispy. Drain on paper towels and set aside.
- Wipe out most of the bacon fat from the skillet, then add the butter and let it melt.
- Crack the eggs into a bowl, season with salt and pepper, and whisk until combined. Pour the eggs into the skillet and scramble until just set.
- Split the everything bagels and place one slice of cheddar on the bottom half of each bagel.
- Divide the scrambled eggs evenly among the four bagels, then top each with two slices of bacon.
- Close the sandwiches with the top halves of the bagels.
- Wrap each sandwich tightly in plastic wrap, then in foil, and place in a freezer bag for storage.
Extra Tips
Cool the cooked bacon and eggs fully before assembling so the bagels do not steam and soften. To reheat from frozen, remove the foil and microwave on medium power for two minutes, then finish in a toaster oven for one minute to restore crisp edges on the bagel. Course: Breakfast Cuisine: American Equipment: Large Skillet, Mixing Bowl, Baking Sheet
Sausage, Apple, and Gouda Biscuit Sandwiches
These sandwiches combine savory sausage with sweet apple slices and creamy gouda inside a flaky biscuit. They make a solid choice for weekend prep so you can grab a hearty breakfast from the freezer on busy mornings. The mix of flavors gives a nice balance of salty, sweet, and rich notes without feeling heavy.
The texture stays satisfying after reheating, with the biscuit holding up well and the cheese melting smoothly over the fillings. This version keeps things straightforward while delivering a breakfast that feels a little special.
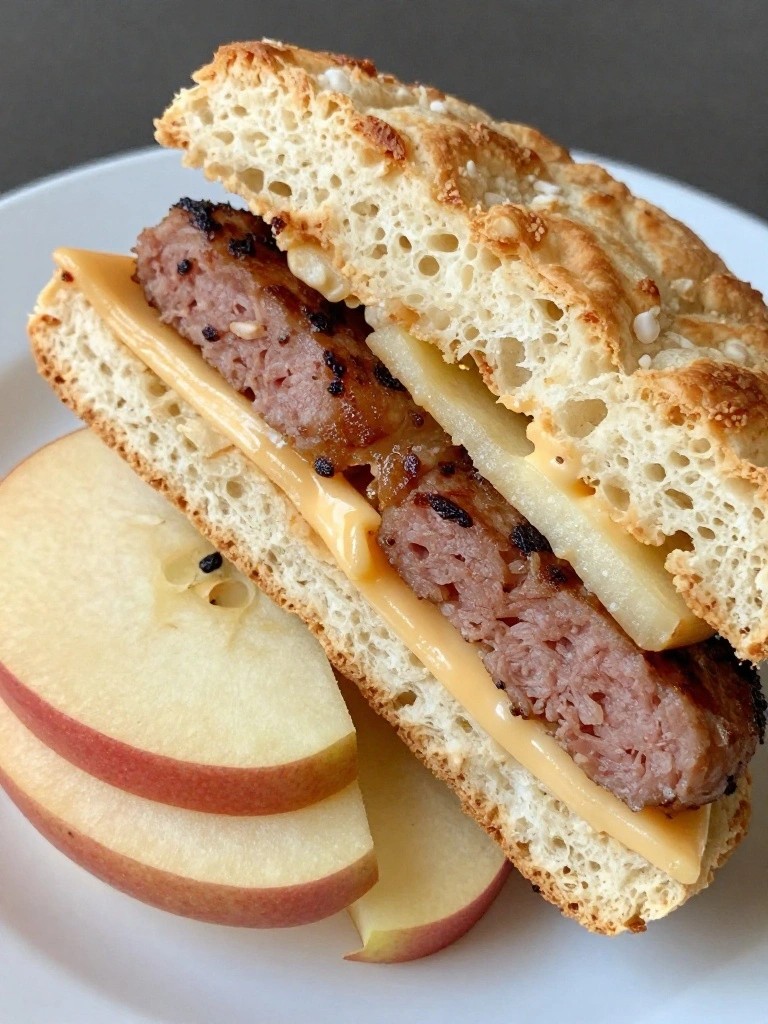
Serves 4 people.
Ingredients
- 4 breakfast sausage patties
- 1 large apple, thinly sliced
- 4 slices gouda cheese
- 4 biscuits, split
- 1 tablespoon butter
Instructions
- Heat the butter in a skillet over medium heat. Add the sausage patties and cook until browned on both sides and cooked through, about 4 minutes per side. Remove the patties and set them aside.
- Add the apple slices to the same skillet. Cook them for 3 to 4 minutes until they soften slightly but still hold their shape.
- Place one sausage patty on the bottom half of each biscuit. Layer several apple slices over the sausage, then top with a slice of gouda.
- Close each sandwich with the top half of the biscuit. Let the sandwiches cool completely before wrapping them individually in foil or plastic wrap for freezing.
Extra Tips
Wrap the cooled sandwiches tightly and store them in a freezer bag for up to two months. Reheat straight from frozen by unwrapping and warming in a 350°F oven for 20 minutes or in the microwave for 2 to 3 minutes on medium power. Skip extra seasonings on the apples so their natural sweetness stands out against the gouda. Course: Breakfast Cuisine: American Equipment: Skillet, Knife, Baking sheet
Ham, Swiss, and Caramelized Onion Croissants
These croissants combine sweet caramelized onions with salty ham and creamy Swiss cheese inside a buttery, flaky shell. They make a satisfying breakfast that feels a little special without much daily effort. The recipe is built for freezer prep so you can pull one out on busy mornings and have a warm sandwich ready in minutes.
The onions cook down slowly to bring out their natural sweetness, which balances the rich cheese and ham. Once assembled, the sandwiches freeze cleanly and reheat without turning soggy if you follow a few simple steps.

Serves 4 people.
Ingredients
- 4 large croissants, sliced in half
- 8 ounces sliced deli ham
- 4 slices Swiss cheese
- 2 large yellow onions, thinly sliced
- 2 tablespoons butter
- 1 tablespoon olive oil
- 1/2 teaspoon salt
- 1 teaspoon brown sugar
Instructions
- Heat the butter and olive oil in a large skillet over medium heat. Add the sliced onions, salt, and brown sugar. Cook, stirring often, for 20 to 25 minutes until the onions turn deep golden and soft.
- Remove the skillet from the heat and let the onions cool for a few minutes.
- Lay the bottom halves of the croissants on a clean surface. Divide the ham evenly among the four croissants.
- Place one slice of Swiss cheese on top of the ham on each croissant. Spoon the cooled caramelized onions over the cheese.
- Add the top halves of the croissants to close each sandwich. Wrap each one tightly in plastic wrap, then place them in a freezer bag or container.
- Freeze the sandwiches for up to two months. To reheat, unwrap and bake at 350 degrees F for 20 to 25 minutes straight from frozen, or microwave for 2 to 3 minutes then finish in a toaster oven for crispness.
Extra Tips
Wrap each croissant individually before freezing so you can grab just one at a time. Reheat in the oven rather than the microwave alone to keep the croissant from getting soft. If the onions seem too sweet for your taste, reduce the brown sugar next time you make a batch. Course: Breakfast Cuisine: American Equipment: Large Skillet, Baking Sheet, Knife
Chorizo, Potato, and Pepper Jack Breakfast Burritos
These chorizo, potato, and pepper jack breakfast burritos pack bold flavor into a freezer-friendly package. The spicy sausage and tender potatoes create a hearty filling that holds up well after freezing, while the pepper jack melts into a creamy layer inside the tortilla. They make a solid choice for weekend prep so you have ready-to-heat options on busy mornings.
The burritos deliver a mix of savory heat from the chorizo, soft potato chunks, and a slight kick from the cheese. They reheat evenly without becoming soggy when wrapped properly for the freezer.
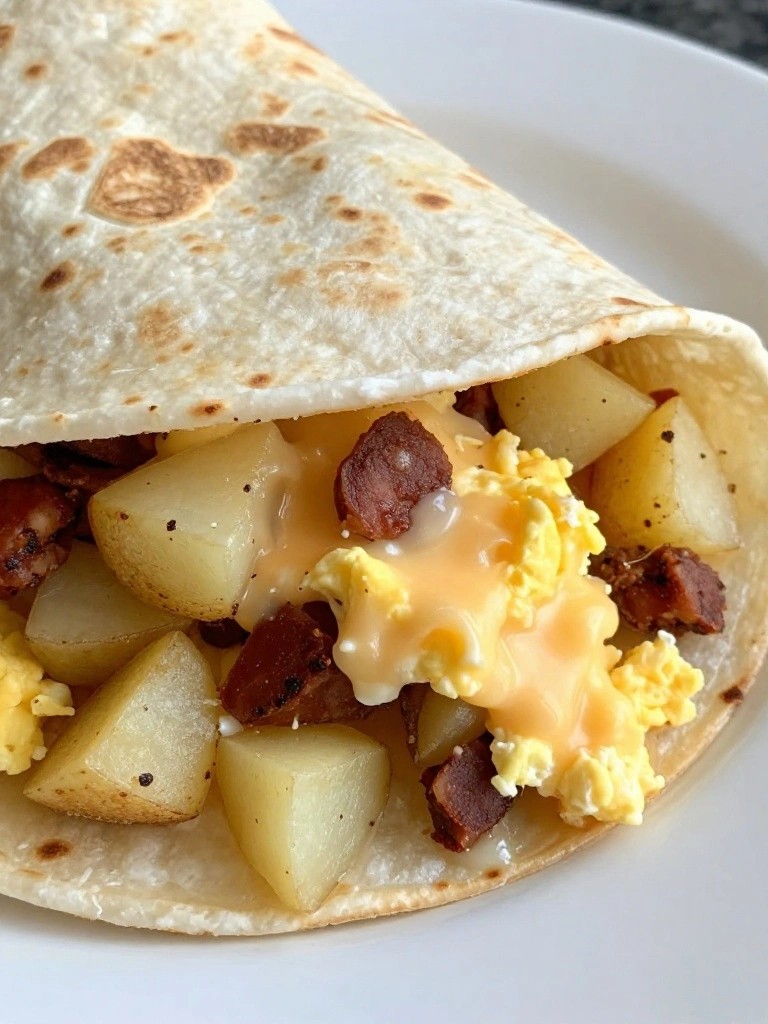
Serves 4 people.
Ingredients
- 4 large flour tortillas
- 8 ounces Mexican chorizo, casings removed
- 2 medium russet potatoes, diced into ½-inch cubes
- 4 large eggs
- 1 cup shredded pepper jack cheese
- 1 tablespoon vegetable oil
- Salt and black pepper to taste
Instructions
- Heat the vegetable oil in a large skillet over medium heat. Add the diced potatoes, season with salt and pepper, and cook for 8 to 10 minutes until they begin to soften and brown at the edges.
- Add the chorizo to the skillet. Break it apart with a spoon and cook for 5 minutes until it is browned and cooked through, stirring occasionally to combine with the potatoes.
- Whisk the eggs in a mixing bowl. Pour them into the skillet and stir gently until the eggs are just set, about 2 minutes.
- Remove the skillet from the heat. Spoon the filling evenly onto the center of each tortilla and top with ¼ cup pepper jack cheese per burrito.
- Roll each tortilla tightly into a burrito, folding in the sides first. Let them cool to room temperature, then wrap individually in foil or plastic wrap for freezing.
Extra Tips
Cool the burritos fully before wrapping to keep ice from forming inside. To reheat from frozen, remove the wrap and microwave on medium power for 2 to 3 minutes or bake at 350°F for 15 minutes. Dice the potatoes small so they finish cooking at the same time as the chorizo without extra steps. Course: Breakfast Cuisine: Mexican Equipment: Large Skillet, Mixing Bowl
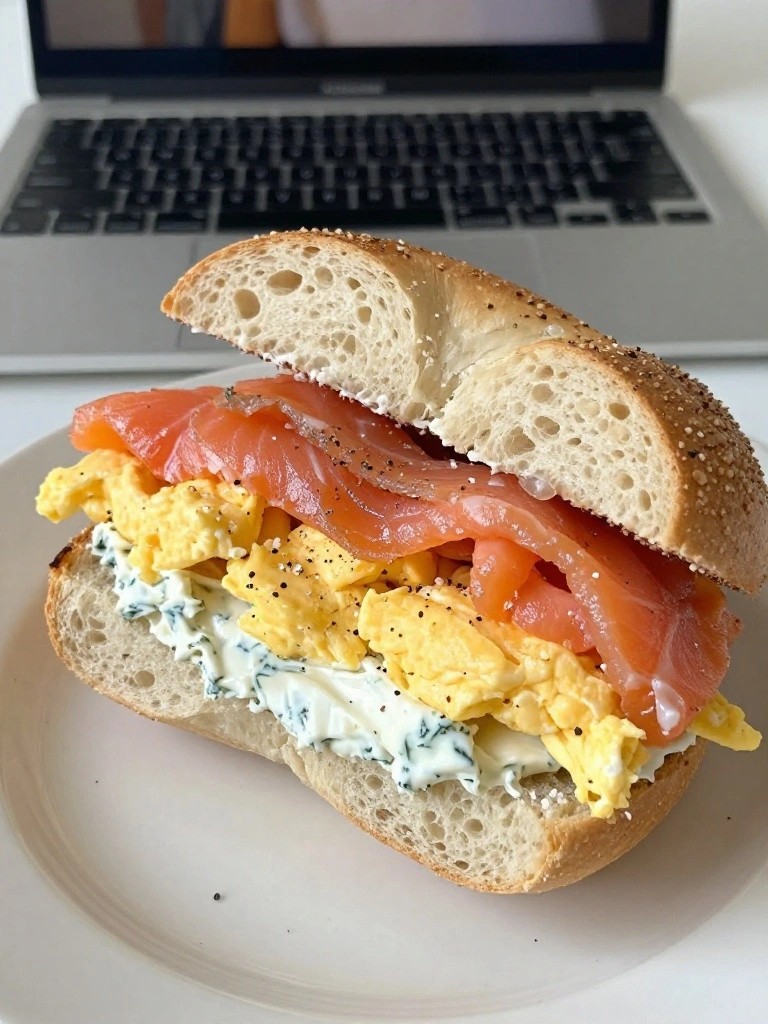
Smoked Salmon, Dill Cream Cheese, and Egg Bagels
These bagels bring together creamy dill spread, tender eggs, and rich smoked salmon in a sandwich that feels fresh yet hearty. They work well for busy mornings when you want something more than basic toast, and the flavors hold up nicely after freezing. The texture stays balanced with soft eggs against the chewy bagel and silky salmon.
Serves 4 people.
Ingredients
- 4 bagels, sliced in half
- 8 ounces smoked salmon
- 4 ounces cream cheese, softened
- 2 tablespoons fresh dill, chopped
- 4 large eggs
- 1 tablespoon butter
- 1/4 teaspoon salt
- 1/4 teaspoon black pepper
Instructions
- In a small bowl, stir the cream cheese and chopped dill together until evenly mixed.
- Heat the butter in a skillet over medium heat. Crack the eggs into the pan, add the salt and pepper, and scramble gently until just set. Remove from heat.
- Spread the dill cream cheese mixture on the bottom half of each bagel. Layer the scrambled eggs evenly over the cream cheese, then top with slices of smoked salmon.
- Place the top half of each bagel on the sandwich. Wrap each assembled bagel tightly in plastic wrap, then in foil for freezer storage.
Extra Tips
To reheat from frozen, unwrap the bagel and warm it in a 350 degree oven for 15 minutes so the bagel stays crisp instead of steaming. If you prefer a milder dill flavor, reduce the herb to one tablespoon when mixing the cream cheese. These sandwiches keep well in the freezer for up to one month. Course: Breakfast Cuisine: American Equipment: Skillet, Mixing Bowl, Knife
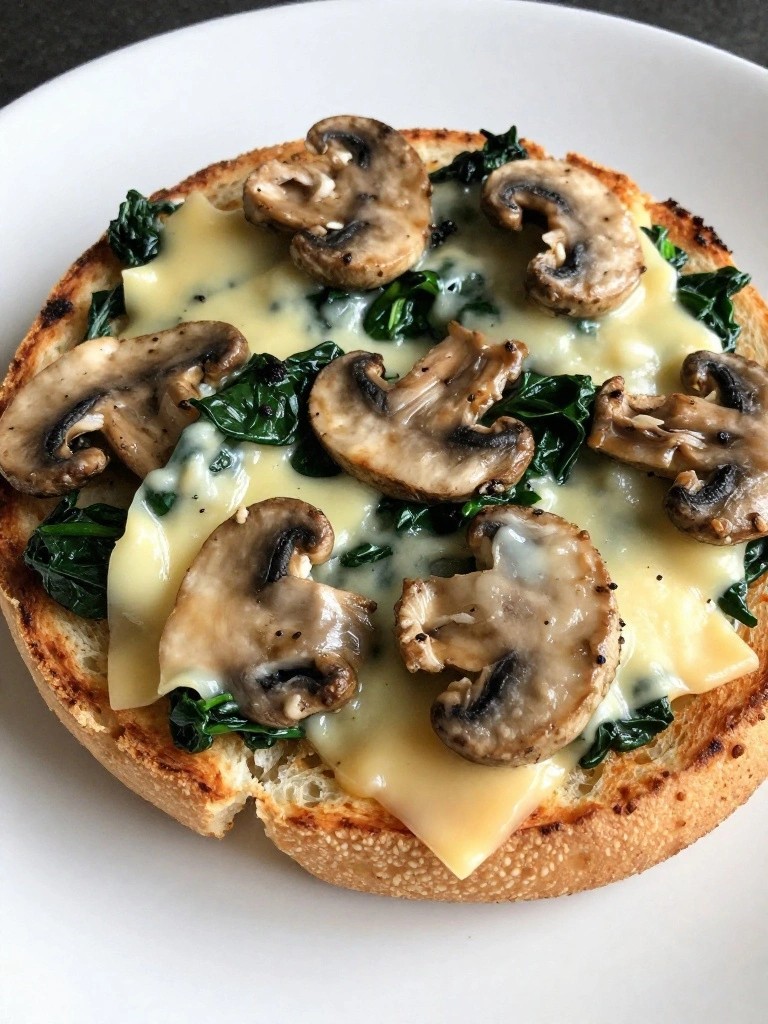
Mushroom, Spinach, and Gruyère English Muffins
These Mushroom, Spinach, and Gruyère English Muffins combine sautéed mushrooms and wilted spinach with nutty melted cheese on a sturdy English muffin base. The recipe works well for batch cooking on weekends so you can stock the freezer with ready-to-heat breakfast sandwiches. The finished sandwiches have a savory, earthy flavor and a mix of soft filling with toasted muffin edges.
They suit busy mornings when you want something warm and filling without extra effort. The ingredients hold up nicely after freezing and reheating, keeping the texture balanced rather than soggy.
Serves 4 people.
Ingredients
- 4 English muffins, split
- 2 tablespoons olive oil
- 8 ounces cremini mushrooms, sliced
- 4 cups fresh spinach
- 1/2 teaspoon salt
- 1/4 teaspoon black pepper
- 6 ounces Gruyère cheese, sliced
Instructions
- Heat the olive oil in a large skillet over medium heat. Add the sliced mushrooms and cook for 6 to 8 minutes until they release their liquid and start to brown.
- Add the fresh spinach to the skillet along with the salt and black pepper. Stir for 2 to 3 minutes until the spinach wilts and most of the moisture evaporates.
- Remove the skillet from the heat. Place the split English muffins on a baking sheet and divide the mushroom-spinach mixture evenly among the bottom halves.
- Top each filled muffin half with Gruyère cheese slices. Place the top halves of the muffins on a separate area of the baking sheet.
- Bake at 350°F for 8 to 10 minutes until the cheese melts and the muffins are lightly toasted. Assemble the sandwiches and let them cool completely before wrapping for the freezer.
Extra Tips
Wrap each cooled sandwich tightly in foil or parchment before freezing so the mushrooms do not dry out. Reheat straight from frozen in a 350°F oven for 20 minutes to restore crisp edges on the muffin. Skip extra salt if your Gruyère is already sharp. Course: Breakfast Cuisine: American Equipment: Large skillet, Baking sheet
Caprese Egg, Tomato, and Basil Ciabatta Sandwiches
These sandwiches combine creamy mozzarella, ripe tomatoes, and fresh basil with scrambled eggs on sturdy ciabatta. They work well for freezer prep because the flavors hold up nicely after reheating and give you a bright start to the day without much effort.
The result is a balanced mix of soft eggs, melted cheese, and crisp bread that feels satisfying yet light. You can make a batch on the weekend, freeze them, and pull one out when mornings get busy.

Serves 4 people.
Ingredients
- 4 ciabatta rolls, sliced in half
- 8 large eggs
- 8 ounces fresh mozzarella, sliced
- 2 large tomatoes, sliced
- 1/4 cup fresh basil leaves
- 1 tablespoon olive oil
- Salt and black pepper to taste
Instructions
- Heat the olive oil in a large skillet over medium heat. Crack the eggs into a bowl, whisk them with a pinch of salt and pepper, and pour them into the skillet.
- Scramble the eggs gently until they are just set but still soft, then remove the skillet from the heat.
- Place the bottom halves of the ciabatta rolls on a clean surface. Divide the scrambled eggs evenly among the four rolls.
- Layer the fresh mozzarella slices over the eggs on each sandwich. Add the tomato slices on top of the cheese.
- Tuck several basil leaves into each sandwich and season lightly with additional salt and pepper if desired. Place the top halves of the rolls on each sandwich.
- Wrap each assembled sandwich tightly in plastic wrap, then in foil. Place them in a freezer bag and freeze for up to one month.
Extra Tips
For best texture after freezing, reheat the wrapped sandwiches in a 350°F oven for 20 minutes, then unwrap and toast them briefly to crisp the ciabatta. If you prefer firmer tomatoes, add the slices after reheating instead of before freezing. Course: Breakfast Cuisine: Italian Equipment: Large Skillet, Knife, Baking Sheet
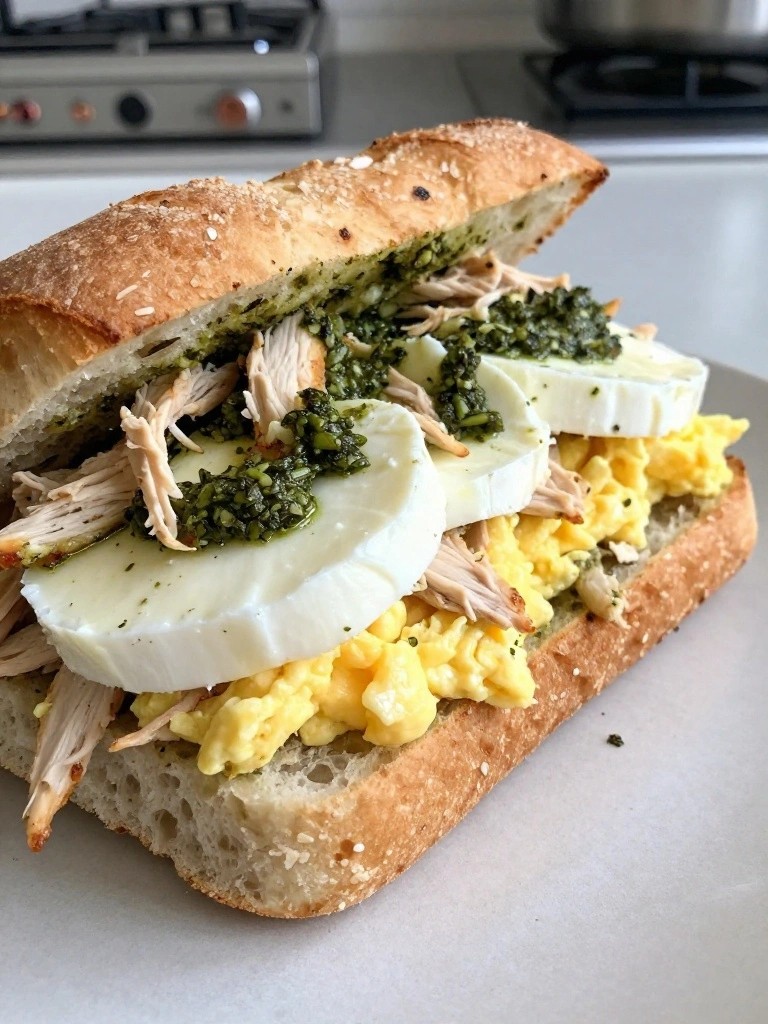
Pesto Chicken, Mozzarella, and Egg Focaccia Sandwiches
These sandwiches combine tender chicken coated in pesto with creamy mozzarella and soft scrambled eggs on sturdy focaccia. They work well for busy weeks when you want a savory breakfast ready in minutes after reheating. The bread stays firm in the freezer while the flavors stay balanced.
The pesto adds freshness that pairs nicely with the rich eggs and cheese. You can prep a batch on the weekend and pull them out as needed for quick meals.
Serves 4 people.
Ingredients
- 4 focaccia squares or rolls, split horizontally
- 2 cups shredded cooked chicken
- 1/2 cup basil pesto
- 8 ounces mozzarella, sliced
- 8 large eggs
- 1 tablespoon olive oil
- Salt and pepper to taste
Instructions
- Heat the olive oil in a large skillet over medium heat. Crack the eggs into the skillet, season with salt and pepper, and scramble until just set. Remove from heat and set aside.
- Place the shredded chicken in a mixing bowl. Add the pesto and stir until the chicken is evenly coated.
- Lay the bottom halves of the focaccia on a clean surface. Divide the pesto chicken among the four bottoms. Top each with scrambled eggs and slices of mozzarella.
- Place the top halves of the focaccia on each sandwich. Wrap each sandwich tightly in plastic wrap followed by foil.
- Place the wrapped sandwiches in a freezer bag and store in the freezer for up to two months.
Extra Tips
To reheat, remove the foil and plastic wrap, then wrap the sandwich in a damp paper towel and microwave for two to three minutes until heated through. Focaccia holds its texture better than softer breads during freezing, so avoid swapping it for another type. Course: Breakfast Cuisine: Italian Equipment: Large Skillet, Mixing Bowl, Baking Sheet
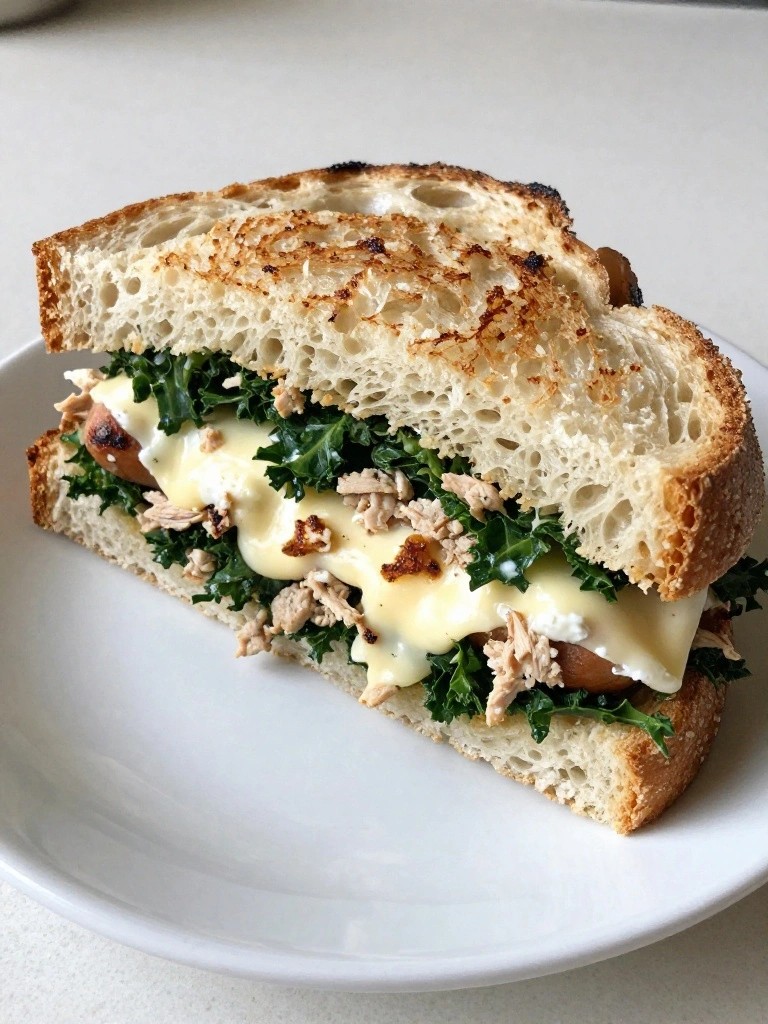
Turkey Sausage, Kale, and Fontina Sourdough Sandwiches
These sandwiches bring together savory turkey sausage and tender kale with creamy fontina cheese on sturdy sourdough. They hold up well in the freezer and reheat to a satisfying breakfast that feels fresh even after weeks in storage. The mix of earthy greens and rich cheese gives each bite a balanced, hearty texture.
This recipe works well for busy weeks when you want something more than basic egg sandwiches. It freezes cleanly because the ingredients stay moist without making the bread soggy.
Serves 4 people.
Ingredients
- 8 slices sourdough bread
- 12 oz turkey sausage, casings removed
- 3 cups chopped kale
- 6 oz fontina cheese, thinly sliced
- 1 tablespoon olive oil
- 1/2 teaspoon garlic powder
- Salt and black pepper to taste
Instructions
- Heat the olive oil in a large skillet over medium heat. Add the turkey sausage and cook, breaking it into small pieces, until browned and cooked through, about 6 to 8 minutes.
- Stir in the chopped kale, garlic powder, salt, and pepper. Cook for 3 to 4 minutes until the kale wilts and softens. Remove the skillet from heat and let the mixture cool slightly.
- Lay out 4 slices of sourdough bread. Divide half the fontina cheese among the slices. Spoon the sausage and kale mixture evenly on top of the cheese.
- Add the remaining fontina cheese over the filling, then top with the remaining bread slices to form 4 sandwiches.
- Wrap each sandwich tightly in plastic wrap followed by aluminum foil. Place them in a freezer bag and store in the freezer for up to 2 months.
Extra Tips
To reheat from frozen, unwrap the sandwich and place it on a baking sheet in a 350°F oven for 25 minutes, flipping once halfway through. This keeps the sourdough crisp while melting the cheese evenly. If the kale seems dry after thawing, a light brush of olive oil before reheating restores moisture without changing the flavor. Course: Breakfast Cuisine: American Equipment: Large skillet, Baking sheet
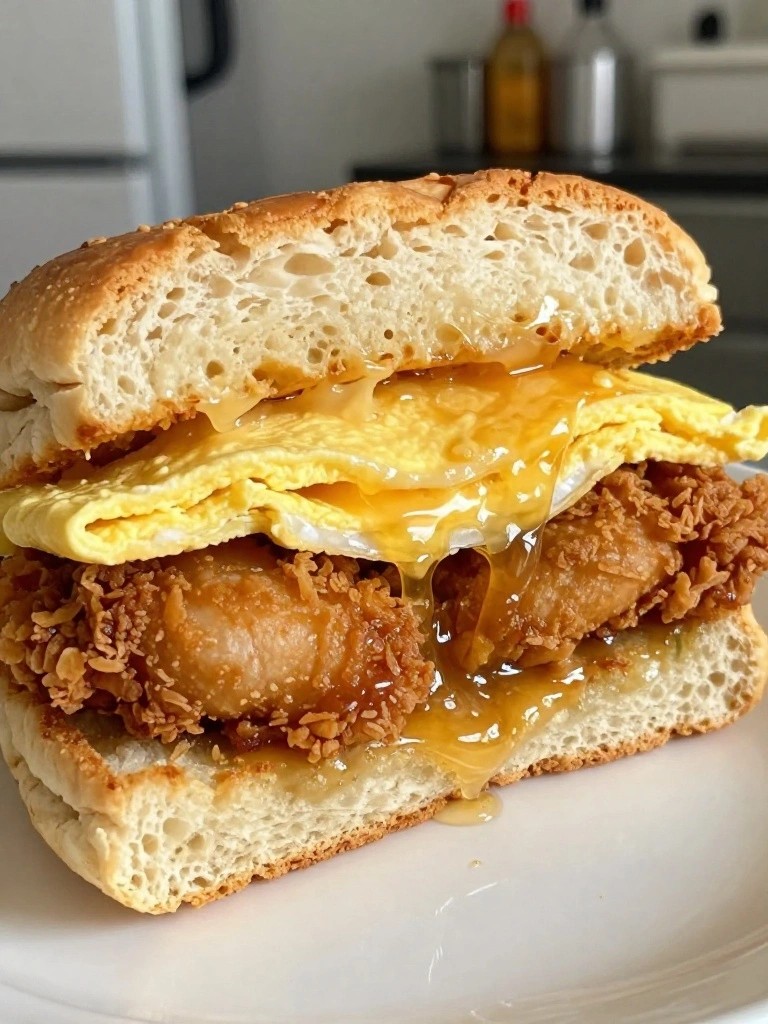
Fried Chicken, Honey Butter, and Egg Biscuits
These sandwiches bring together crispy chicken, soft eggs, and sweet honey butter tucked inside a biscuit. They make a hearty breakfast that holds up well when made in batches for the freezer. The contrast of crunchy coating and rich, slightly sweet flavors keeps each bite interesting.
They work especially well for mornings when you want something more filling than toast or cereal. Once assembled and cooled, the sandwiches freeze neatly and reheat without much fuss.
Serves 4 people.
Ingredients
- 4 chicken tenders
- 1/2 cup all-purpose flour
- 1 teaspoon garlic powder
- 1/2 teaspoon salt
- 1/4 teaspoon black pepper
- 2 tablespoons vegetable oil
- 4 large eggs
- 3 tablespoons butter, softened
- 2 tablespoons honey
- 4 biscuits, split
Instructions
- Mix the softened butter and honey in a small bowl until smooth. Set the honey butter aside.
- Combine the flour, garlic powder, salt, and black pepper on a plate. Dredge each chicken tender in the seasoned flour, pressing lightly so the coating sticks.
- Heat the vegetable oil in a large skillet over medium heat. Add the coated chicken tenders and cook for 4 to 5 minutes per side until golden and cooked through. Remove to a plate.
- In the same skillet, fry the eggs to your preferred doneness, about 3 minutes for over-easy or 4 minutes for over-medium.
- Spread a generous layer of honey butter on the cut sides of each biscuit. Place one piece of chicken and one fried egg on the bottom half of each biscuit, then add the top half to finish the sandwich.
Extra Tips
Cool the assembled sandwiches completely before wrapping each one tightly in plastic wrap and placing them in a freezer bag. To reheat, unwrap and warm in a 350°F oven for 20 minutes or until the chicken is hot and the biscuit is crisp again. If the honey butter firms up in the fridge, let it sit at room temperature for a few minutes before spreading. Course: Breakfast Cuisine: American Equipment: Large Skillet, Mixing Bowl
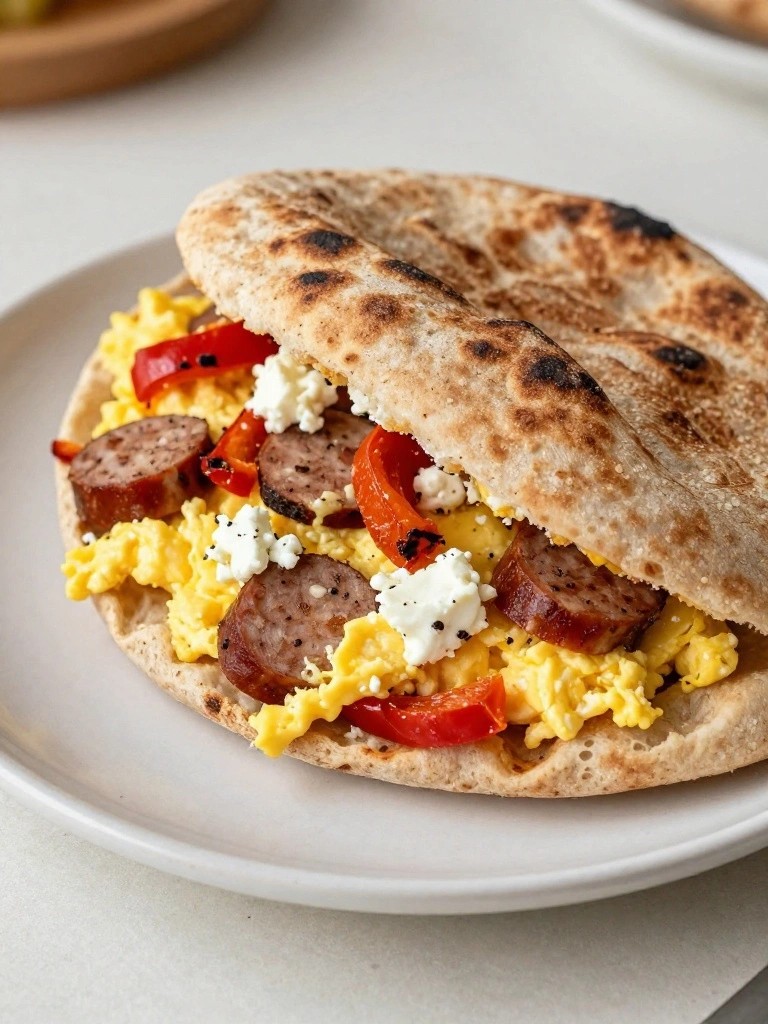
Veggie Sausage, Roasted Red Pepper, and Feta Pitas
These pitas combine savory veggie sausage with sweet roasted red peppers and tangy feta for a satisfying breakfast that holds up well in the freezer. They work well for busy mornings when you want something hearty and portable without extra prep each day. The mix of textures stays balanced after reheating, with soft eggs and crisp pepper pieces inside the sturdy pita.
This recipe serves 4 people. – 4 whole wheat pitas – 4 veggie sausages – 1 cup sliced roasted red peppers – 4 ounces feta cheese, crumbled – 6 large eggs – 1 tablespoon olive oil – 1/4 teaspoon salt – 1/4 teaspoon black pepper
### Instructions 1. Heat the olive oil in a large skillet over medium heat. Add the veggie sausages and cook for 8 to 10 minutes, turning occasionally, until browned on all sides. Remove them from the skillet and slice into rounds. 2. In the same skillet, add the sliced roasted red peppers and cook for 2 minutes to warm them through. Push the peppers to one side. 3. Crack the eggs into a bowl, add the salt and black pepper, and whisk until combined. Pour the eggs into the skillet and scramble gently for 3 to 4 minutes until just set. 4. Stir in the sliced veggie sausages and crumbled feta. Cook for 1 minute more to combine and warm the feta slightly. 5. Slice each pita in half and divide the filling evenly among the four pitas. Let the filled pitas cool completely before wrapping each one in foil or parchment for freezing.
### Extra Tips Wrap the cooled pitas tightly before freezing so the filling stays moist. Reheat straight from frozen in a 350 degree oven for 15 minutes or in a microwave for 2 to 3 minutes after unwrapping. If the pitas seem dry after reheating, add a light brush of olive oil inside before serving.
Course: Breakfast Cuisine: Mediterranean Equipment: Large Skillet, Mixing Bowl
Serves 4 people.
Instructions
- Heat the olive oil in a large skillet over medium heat. Add the veggie sausages and cook for 8 to 10 minutes, turning occasionally, until browned on all sides. Remove them from the skillet and slice into rounds.
- In the same skillet, add the sliced roasted red peppers and cook for 2 minutes to warm them through. Push the peppers to one side.
- Crack the eggs into a bowl, add the salt and black pepper, and whisk until combined. Pour the eggs into the skillet and scramble gently for 3 to 4 minutes until just set.
- Stir in the sliced veggie sausages and crumbled feta. Cook for 1 minute more to combine and warm the feta slightly.
- Slice each pita in half and divide the filling evenly among the four pitas. Let the filled pitas cool completely before wrapping each one in foil or parchment for freezing.
Extra Tips
Wrap the cooled pitas tightly before freezing so the filling stays moist. Reheat straight from frozen in a 350 degree oven for 15 minutes or in a microwave for 2 to 3 minutes after unwrapping. If the pitas seem dry after reheating, add a light brush of olive oil inside before serving. Course: Breakfast Cuisine: Mediterranean Equipment: Large Skillet, Mixing Bowl
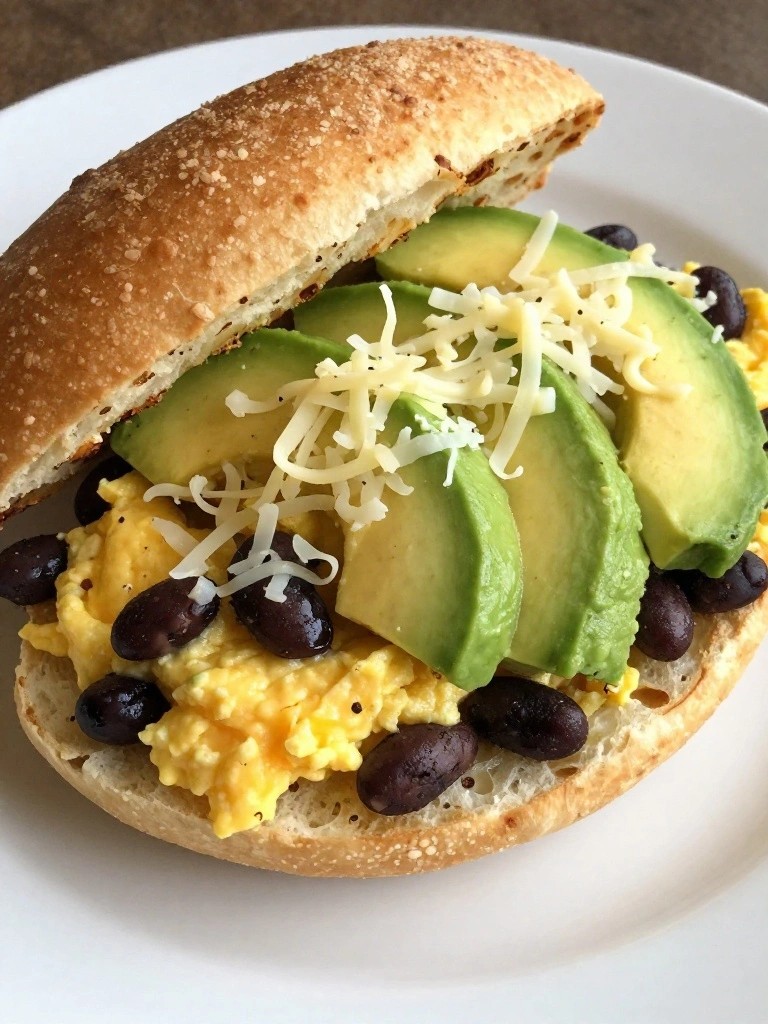
Black Bean, Avocado, and Scrambled Egg Tortas
These tortas bring together creamy avocado, seasoned black beans, and soft scrambled eggs on crusty rolls. They make a filling breakfast that freezes well and reheats without much effort on busy mornings.
The mix offers a savory, slightly earthy flavor with rich avocado that balances the fluffy eggs and hearty beans. Each sandwich stays satisfying after freezing and reheats to a warm, melty texture.
Serves 4 people.
Ingredients
- 4 bolillo rolls
- 1 tablespoon olive oil
- 8 large eggs
- ½ teaspoon salt
- ¼ teaspoon black pepper
- 1 (15-ounce) can black beans, drained and rinsed
- 1 teaspoon ground cumin
- 2 avocados
- Juice of 1 lime
- ½ cup shredded Monterey Jack cheese
Instructions
- Heat the olive oil in a large skillet over medium heat. Crack the eggs into a bowl, add the salt and black pepper, and whisk until combined. Pour the eggs into the skillet and cook, stirring gently, until they form soft curds. Remove from heat and set aside.
- Place the black beans in the same skillet with the cumin. Stir over medium heat for 3 to 4 minutes until the beans are warmed through. Lightly mash some of the beans with the back of a spoon for better texture.
- Slice the avocados in half, remove the pits, and scoop the flesh into a bowl. Add the lime juice and mash until mostly smooth with a few small chunks remaining.
- Slice each bolillo roll horizontally. Spread a layer of mashed avocado on the bottom half of each roll. Divide the scrambled eggs evenly among the four rolls, then spoon the seasoned black beans over the eggs. Top each with a portion of shredded Monterey Jack cheese and close the rolls.
- Wrap each assembled torta tightly in plastic wrap, then in aluminum foil. Place in a freezer bag and freeze for up to one month.
Extra Tips
To keep the avocado from browning during storage, make sure the lime juice is fully mixed in before spreading. When reheating from frozen, remove the plastic wrap, keep the foil on, and warm in a 350°F oven for 20 minutes, then unwrap for the last 5 minutes to crisp the roll. Monterey Jack melts smoothly without becoming oily after freezing. Course: Breakfast Cuisine: Mexican Equipment: Large Skillet, Mixing Bowl, Knife
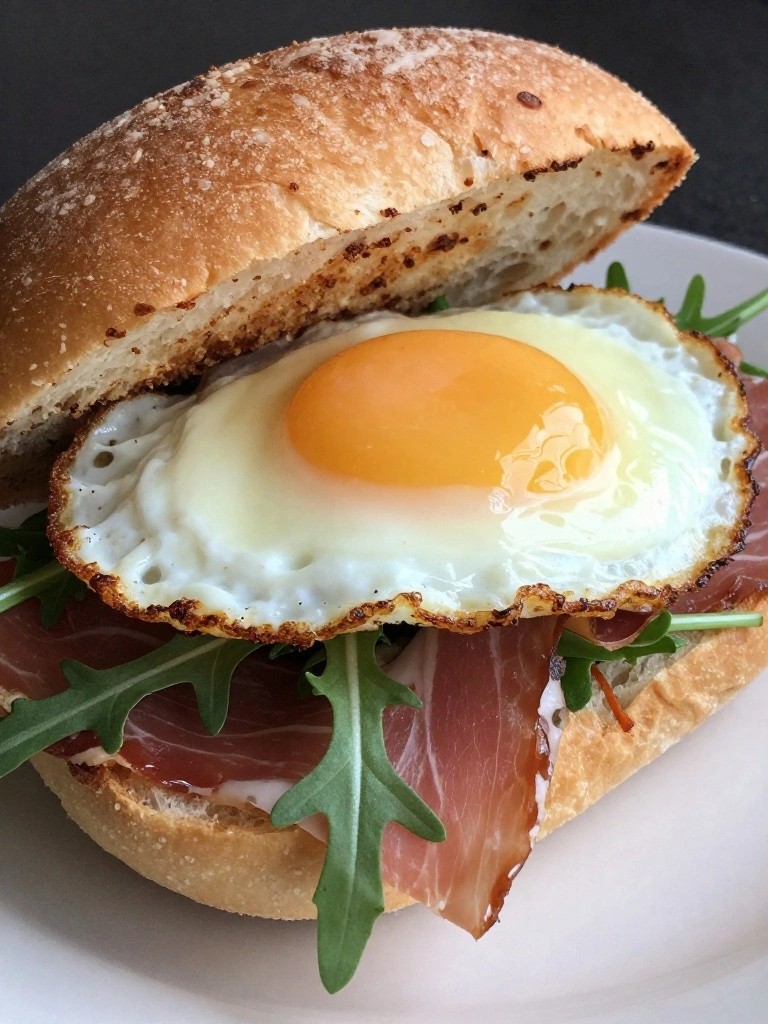
Prosciutto, Arugula, and Fried Egg Brioche Sandwiches
These sandwiches combine salty prosciutto with peppery arugula and a rich fried egg on toasted brioche. They work well for freezer prep because you can make a batch on the weekend and pull one out on busy mornings.
The mix of textures holds up after reheating, with the soft bun giving way to the crisp edges of the egg and the fresh greens.
Serves 4 people.
Ingredients
- 4 brioche rolls, split
- 8 slices prosciutto
- 4 large eggs
- 2 cups fresh arugula
- 1 tablespoon butter
- Salt and black pepper
Instructions
- Spread butter on the cut sides of the brioche rolls and toast them in a skillet over medium heat until lightly golden.
- In the same skillet, fry the eggs one or two at a time, seasoning each with a pinch of salt and black pepper. Cook until the whites are set but the yolks remain slightly soft.
- Place two slices of prosciutto on the bottom half of each toasted roll.
- Top the prosciutto with a fried egg, then add a handful of arugula.
- Close the sandwiches with the top halves of the rolls. Wrap each one tightly in plastic wrap followed by foil, then place in a freezer bag for storage.
Extra Tips
Reheat the frozen sandwiches in a 350°F oven for 15 minutes to restore the brioche texture. Add the arugula after reheating if you prefer it fully crisp, or include it before freezing for a softer bite once thawed. Course: Breakfast Cuisine: Italian Equipment: Large Skillet, Baking Sheet