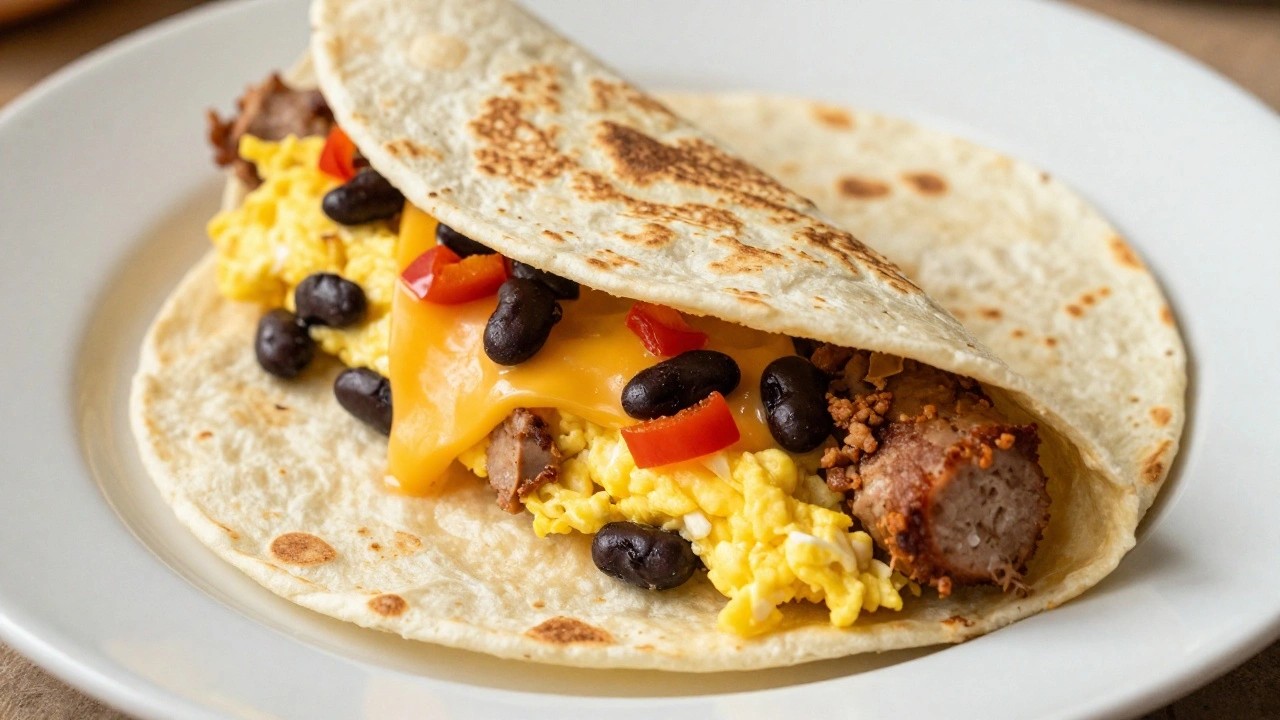
Mornings can get busy when you have work and family to handle. Making breakfast ahead and freezing portions helps you stay on track without extra effort each day. These recipes focus on simple ingredients that hold up well in the freezer. You can prep them on a weekend and pull out what you need during the week. Each idea includes clear steps for cooking, storing, and reheating.
Helpful Tips Before You Start
These tips will help your breakfasts freeze cleanly and reheat well later.
Cool Items Fully
Place cooked breakfasts on a wire rack until they reach room temperature. Warm food creates steam that turns into ice crystals in the freezer.
Wrap Tightly
Use plastic wrap followed by a freezer bag or airtight container. Press out extra air to limit freezer burn on items like burritos and muffins.
Label With Dates
Write the name and date on every package. Most of these breakfasts keep best for two to three months.
Portion Before Freezing
Divide casseroles or batches into single servings right away. This lets you thaw only what you need each morning.
Plan Reheating
Test one portion after freezing to check the best method. Some items reheat well in a toaster oven while others work best in the microwave.
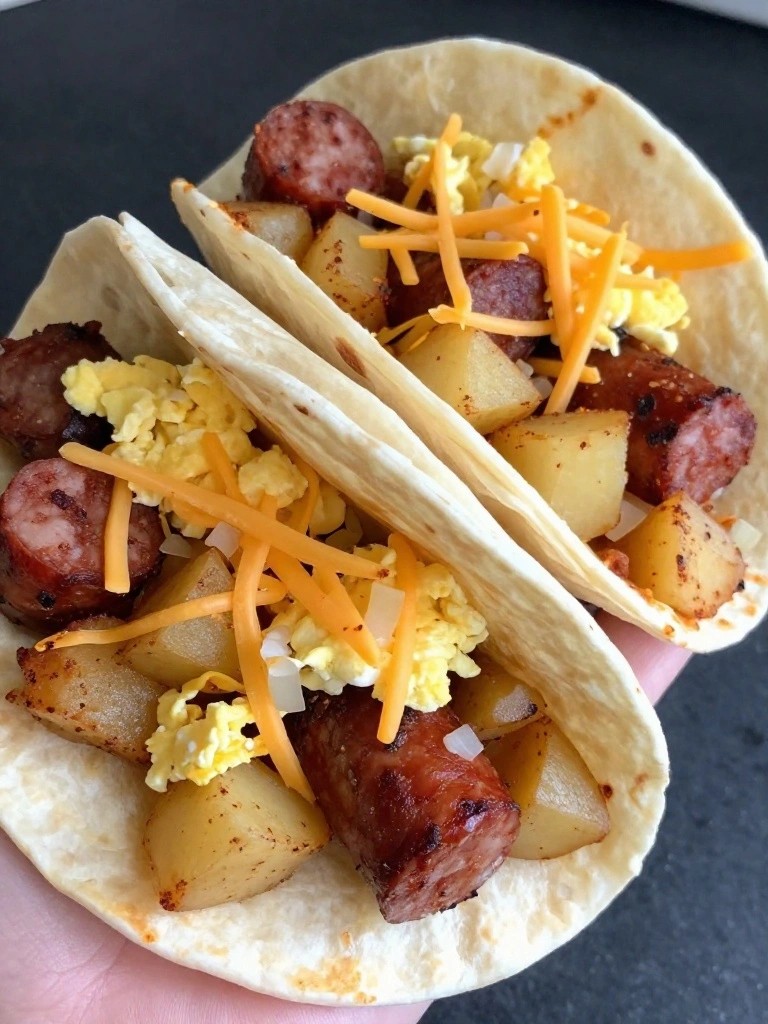
Chorizo and Potato Breakfast Burritos
These burritos combine spicy chorizo with tender potatoes and scrambled eggs for a filling breakfast that freezes well. They are a solid choice for busy weekdays when you want something hearty you can heat up quickly. The texture stays satisfying after reheating, with the potatoes providing a soft bite and the chorizo adding bold flavor inside a warm tortilla.
This recipe works especially well when you prep a batch on the weekend. You can store the wrapped burritos in the freezer and pull them out as needed for a complete meal.
Serves 4 people.
Ingredients
- 8 ounces chorizo sausage, casings removed
- 2 medium potatoes, peeled and diced into small cubes
- 1 small onion, diced
- 1 tablespoon olive oil
- 4 large eggs
- 4 large flour tortillas
- 1 cup shredded cheddar cheese
- Salt and black pepper to taste
Instructions
- Heat the olive oil in a large skillet over medium heat. Add the diced potatoes and cook for 8 to 10 minutes, stirring occasionally, until they start to soften and turn golden.
- Add the diced onion and chorizo to the skillet. Break up the chorizo with a spoon and cook for 6 to 8 minutes until the sausage is browned and the potatoes are fully tender. Season with salt and black pepper.
- In a separate bowl, whisk the eggs. Push the chorizo mixture to one side of the skillet and pour in the eggs. Scramble the eggs gently until they are just set, then mix everything together.
- Warm the flour tortillas briefly in a microwave or dry skillet. Divide the filling evenly among the tortillas and sprinkle each with shredded cheddar cheese.
- Fold the sides of each tortilla inward, then roll tightly to form burritos. Wrap each one in plastic wrap or aluminum foil for storage.
Extra Tips
To freeze, place the wrapped burritos in a single layer on a baking sheet until solid, then transfer them to a freezer bag. Reheat straight from frozen by unwrapping and microwaving for 2 to 3 minutes or baking at 350 degrees for 20 minutes. If the filling seems dry after reheating, add a light sprinkle of cheese before serving. Course: Breakfast Cuisine: Mexican Equipment: Large Skillet, Mixing Bowl, Aluminum Foil
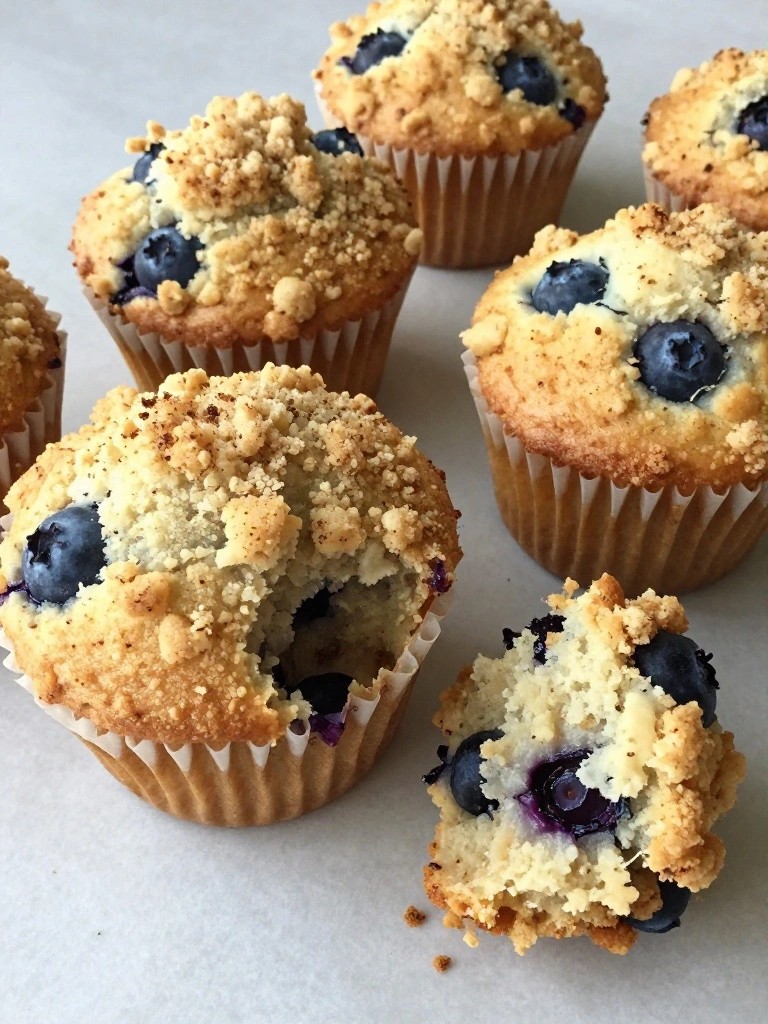
Blueberry Streusel Breakfast Muffins
These muffins pair sweet blueberries with a simple crumb topping that turns golden in the oven. They bake in one batch, cool quickly, and slide straight into the freezer for weekday mornings when you need breakfast ready fast. Each bite gives you soft cake-like texture inside and a light crunch on top.
The recipe uses basic pantry items and stays straightforward from mixing bowl to muffin tin. Once frozen, the muffins hold their texture after a quick reheat, making them a reliable option for grab-and-go breakfasts.
Serves 4 people.
Ingredients
- 1 1/2 cups all-purpose flour
- 1/2 cup granulated sugar
- 2 teaspoons baking powder
- 1/4 teaspoon salt
- 1/2 cup milk
- 1 large egg
- 1/4 cup vegetable oil
- 1 cup fresh blueberries
- 1/4 cup all-purpose flour (for streusel)
- 2 tablespoons granulated sugar (for streusel)
- 2 tablespoons cold butter (for streusel)
- 1/2 teaspoon ground cinnamon
Instructions
- Heat the oven to 375 degrees and line a muffin tin with paper liners.
- In a large bowl, stir together 1 1/2 cups flour, 1/2 cup sugar, baking powder, and salt.
- In a separate bowl, whisk the milk, egg, and oil until smooth.
- Pour the wet mixture into the dry ingredients and stir just until combined.
- Gently fold in the blueberries.
- In a small bowl, mix 1/4 cup flour, 2 tablespoons sugar, and cinnamon. Cut in the cold butter with a fork until the mixture forms coarse crumbs.
- Spoon the batter into the prepared muffin cups, filling each about three-quarters full.
- Sprinkle the streusel mixture evenly over the tops.
- Bake for 18 to 20 minutes, until a toothpick inserted in the center comes out clean.
- Cool the muffins in the tin for 5 minutes, then transfer to a wire rack to cool completely before freezing.
Extra Tips
Cool the muffins fully before packing them into a freezer bag with parchment between layers to prevent sticking. To reheat, place a frozen muffin in the microwave for 30 seconds or warm it in a 300-degree oven for 10 minutes. If you want a little less sweetness, reduce the streusel sugar by half without changing the rest of the recipe.
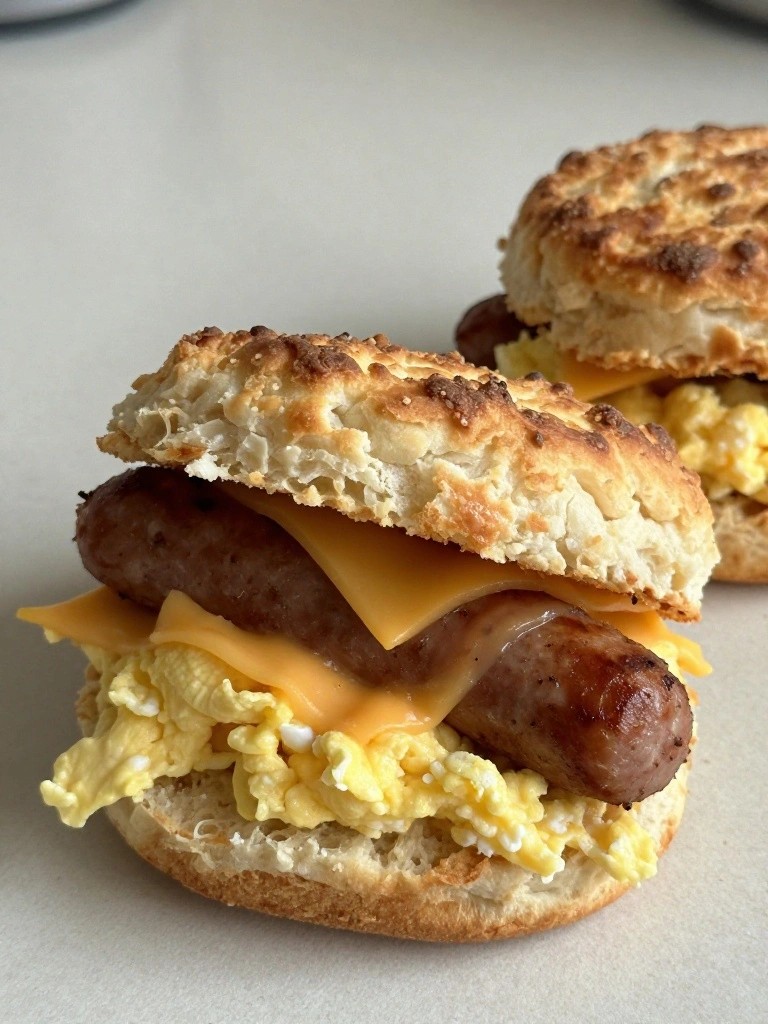
Course: Breakfast Cuisine: American Equipment: Mixing bowls, Muffin tin, Whisk, OvenSausage Egg and Cheese Biscuit Sandwiches
These sausage egg and cheese biscuit sandwiches make a reliable option for busy mornings. Prepare a batch on the weekend, wrap them individually, and pull one from the freezer whenever you need a hot breakfast in minutes.
The savory sausage pairs with fluffy eggs and melted cheese inside flaky biscuits. Each sandwich holds up well after freezing and reheating without losing texture.
Serves 4 people.
Ingredients
- 4 breakfast sausage patties
- 4 large eggs
- 1 tablespoon butter
- 4 slices cheddar cheese
- 4 baked biscuits, cooled
- Salt and pepper
Instructions
- Cook the sausage patties in a large skillet over medium heat until browned and cooked through. Set them aside on a plate.
- Melt the butter in the same skillet. Crack the eggs into the pan, season with salt and pepper, and cook until the whites are set and the yolks reach your preferred doneness.
- Split each cooled biscuit in half. Place one sausage patty on the bottom half of each biscuit.
- Top each sausage patty with a cooked egg and one slice of cheddar cheese.
- Place the top half of each biscuit over the cheese to form a sandwich.
- Wrap each sandwich tightly in plastic wrap, then in foil, and place in a freezer bag for storage.
Extra Tips
Cool the biscuits fully before assembly so they do not steam and turn soggy once frozen. Reheat straight from the freezer by unwrapping and warming in a 350 degree oven for 20 minutes or in a microwave for 2 minutes after removing the foil. Use sharp cheddar if you want a stronger cheese flavor. Course: Breakfast Cuisine: American Equipment: Large Skillet, Baking Sheet
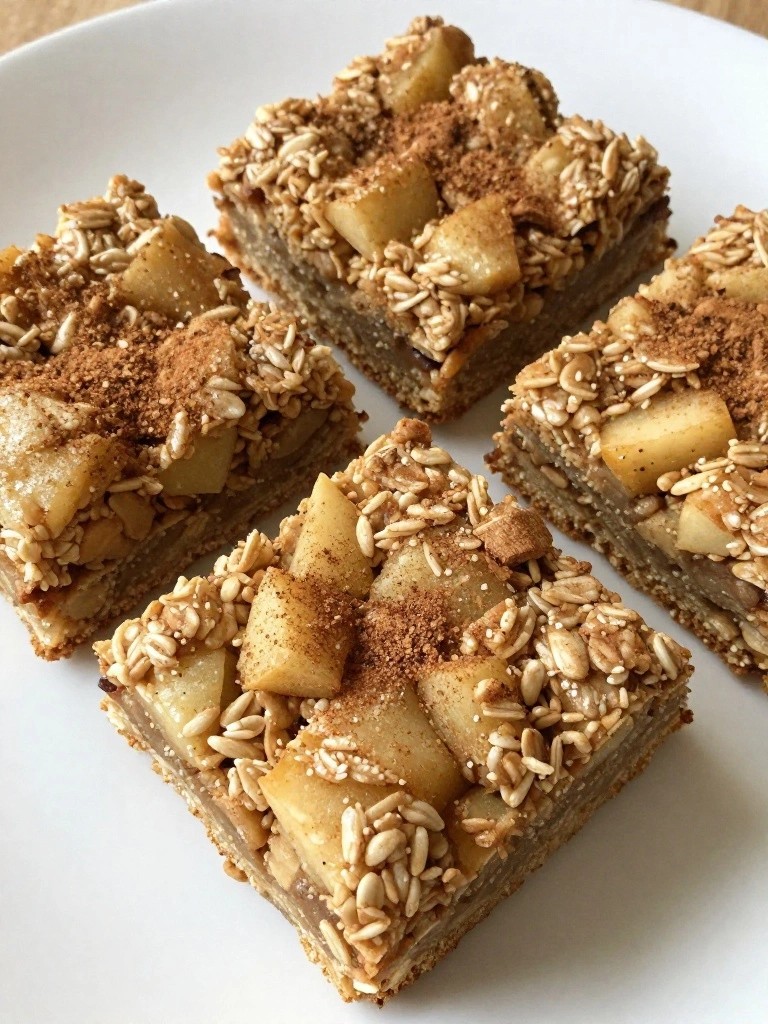
Apple Cinnamon Baked Oatmeal Squares
These squares turn simple pantry staples into a hearty breakfast that freezes well and reheats in minutes. They work best for busy weekdays when you want something warm and filling without daily prep. The oats bake into a chewy base while the apples soften and release natural sweetness alongside the cinnamon.
This recipe serves 4 people. – 2 cups rolled oats – 2 medium apples, diced – 1 1/2 cups milk – 2 large eggs – 1/4 cup maple syrup – 1 teaspoon baking powder – 1 teaspoon ground cinnamon – 1 teaspoon vanilla extract – 1/4 teaspoon salt
### Instructions 1. Preheat the oven to 350 degrees and lightly grease an 8×8 inch baking pan. 2. In a large bowl, whisk together the milk, eggs, maple syrup, vanilla extract, and salt. 3. Add the rolled oats, baking powder, and cinnamon to the wet mixture and stir until evenly combined. 4. Fold the diced apples into the oat mixture. 5. Pour the batter into the prepared pan and spread it into an even layer. 6. Bake for 30 to 35 minutes until the top is set and lightly golden. 7. Cool the pan completely on a wire rack before cutting into squares.
### Extra Tips Cool the squares fully before wrapping each one in parchment and placing them in a freezer bag. To reheat, microwave a frozen square for 60 to 90 seconds or warm it in a 300 degree oven for 10 minutes. If you want a bit more moisture after freezing, drizzle a teaspoon of milk over the square before reheating.
Course: Breakfast Cuisine: American Equipment: Mixing Bowl, 8×8 Inch Baking Pan, Wire Rack
Serves 4 people.
Instructions
- Preheat the oven to 350 degrees and lightly grease an 8×8 inch baking pan.
- In a large bowl, whisk together the milk, eggs, maple syrup, vanilla extract, and salt.
- Add the rolled oats, baking powder, and cinnamon to the wet mixture and stir until evenly combined.
- Fold the diced apples into the oat mixture.
- Pour the batter into the prepared pan and spread it into an even layer.
- Bake for 30 to 35 minutes until the top is set and lightly golden.
- Cool the pan completely on a wire rack before cutting into squares.
Extra Tips
Cool the squares fully before wrapping each one in parchment and placing them in a freezer bag. To reheat, microwave a frozen square for 60 to 90 seconds or warm it in a 300 degree oven for 10 minutes. If you want a bit more moisture after freezing, drizzle a teaspoon of milk over the square before reheating. Course: Breakfast Cuisine: American Equipment: Mixing Bowl, 8×8 Inch Baking Pan, Wire Rack
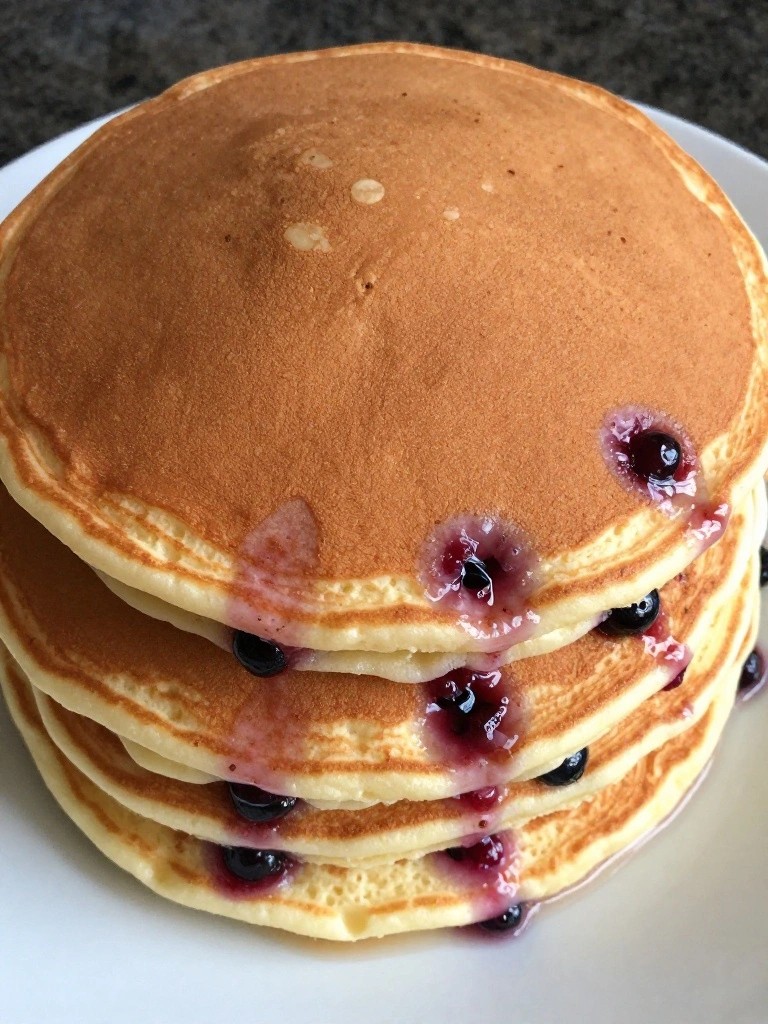
Fluffy Buttermilk Pancakes with Berry Swirl
These pancakes deliver a light texture from buttermilk and a gentle berry flavor swirled right into the batter. They are designed to be cooked in advance, frozen, and reheated quickly for weekday breakfasts.
The finished pancakes stay tender after freezing and taste fresh when warmed. The berry swirl gives each one a hint of natural sweetness without extra toppings needed at serving time.
Serves 4 people.
Ingredients
- 2 cups all-purpose flour
- 2 tablespoons granulated sugar
- 2 teaspoons baking powder
- 1/2 teaspoon baking soda
- 1/2 teaspoon salt
- 2 cups buttermilk
- 2 large eggs
- 1/4 cup unsalted butter, melted and cooled
- 1 cup mixed berries
- 2 tablespoons granulated sugar
- 1 tablespoon water
- Maple syrup, for serving
Instructions
- Combine the mixed berries, 2 tablespoons sugar, and water in a small saucepan. Cook over medium heat for 5 minutes, stirring until the berries soften and release juice. Remove from heat and set aside to cool slightly.
- In a large bowl, whisk together the flour, 2 tablespoons sugar, baking powder, baking soda, and salt.
- In a separate bowl, whisk the buttermilk, eggs, and melted butter until smooth.
- Pour the wet mixture into the dry ingredients and stir gently until just combined. Do not overmix. Fold the berry mixture into the batter in a few broad strokes to create visible swirls.
- Heat a griddle or skillet over medium heat and lightly grease the surface. Scoop 1/4 cup portions of batter onto the griddle. Cook until bubbles form on top and the edges look set, then flip and cook the second side until golden.
- Transfer cooked pancakes to a wire rack to cool completely. Once cool, stack them with parchment paper between each pancake, place in a freezer bag, and freeze.
Extra Tips
Cool the pancakes fully before freezing so they do not steam and lose their fluffy texture. Reheat frozen pancakes in a toaster or toaster oven for the best crisp edges. If you want a stronger berry flavor, use only blueberries in the swirl mixture. Course: Breakfast Cuisine: American Equipment: Mixing bowls, Whisk, Small saucepan, Griddle or skillet, Spatula, Wire rack
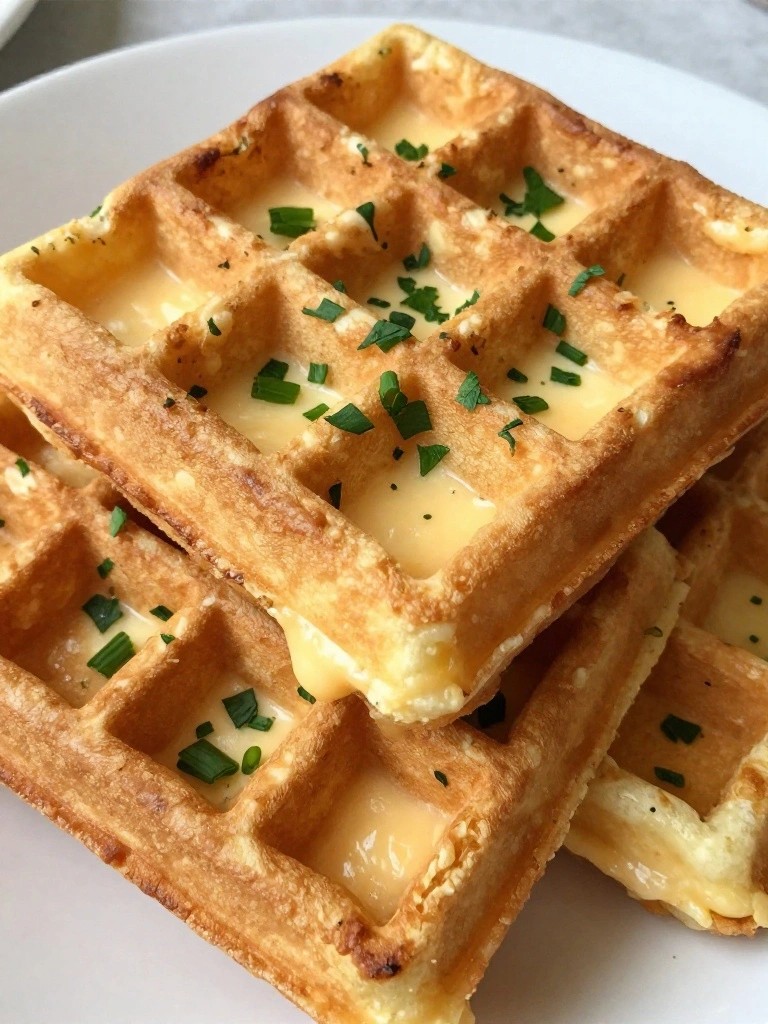
Savory Cheddar Herb Waffles
These waffles combine sharp cheddar with fresh herbs for a savory breakfast option. They freeze well, so you can cook a batch ahead and pull them out on busy mornings. Reheat straight from the freezer for a quick start to the day.
The waffles turn out crisp on the edges with a soft center. The cheese melts into the batter while the herbs give a bright, savory note that pairs well with eggs or plain yogurt.
Serves 4 people.
Ingredients
- 2 cups all-purpose flour
- 2 teaspoons baking powder
- 1/2 teaspoon salt
- 1/4 teaspoon black pepper
- 2 large eggs
- 1 1/2 cups milk
- 1/4 cup unsalted butter, melted
- 1 1/2 cups shredded cheddar cheese
- 2 tablespoons chopped fresh chives
- 1 tablespoon chopped fresh parsley
Instructions
- Preheat your waffle maker to medium-high heat.
- In a large bowl, whisk together the flour, baking powder, salt, and black pepper.
- In a separate bowl, beat the eggs, then stir in the milk and melted butter.
- Pour the wet mixture into the dry ingredients and stir until just combined. Fold in the cheddar cheese, chives, and parsley.
- Lightly grease the waffle maker if needed. Scoop batter into the center and cook until the waffles are golden and crisp, about 4 to 5 minutes per batch.
- Transfer cooked waffles to a wire rack to cool completely before freezing.
Extra Tips
Cool the waffles fully before stacking them with parchment paper between each one for easy freezer storage. Reheat frozen waffles in a toaster or oven to restore crispness. If you want a milder herb flavor, reduce the chives by half. Course: Breakfast Cuisine: American Equipment: Waffle maker, Large mixing bowl, Whisk
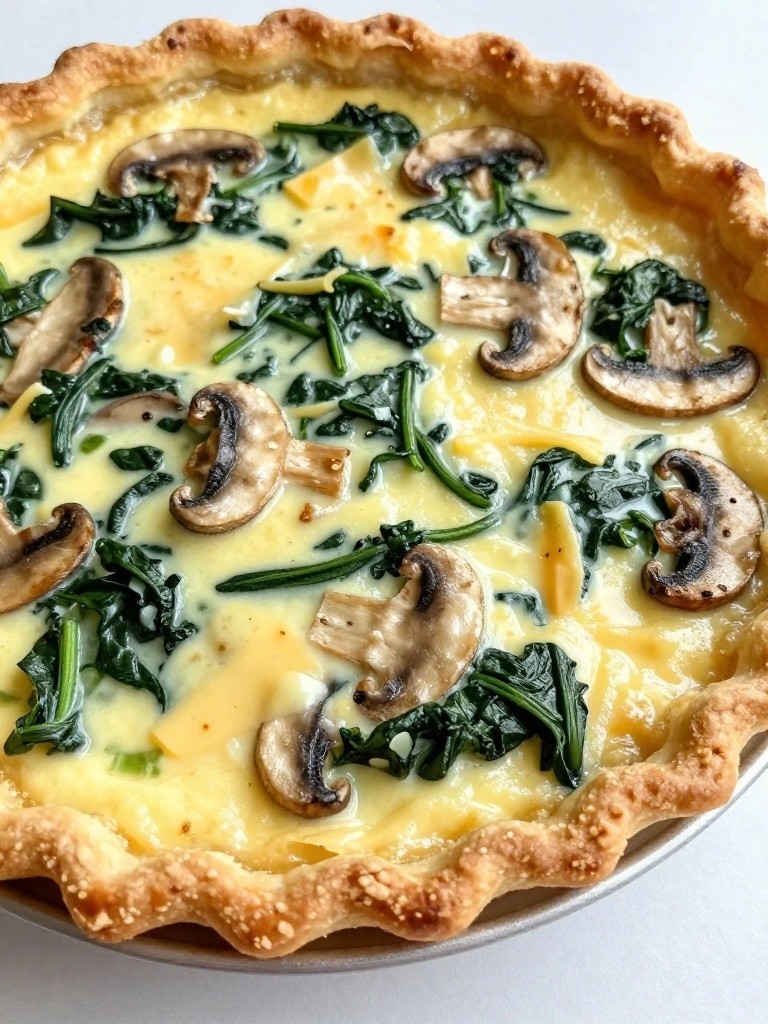
Mushroom Spinach and Swiss Quiche Slices
This quiche makes a reliable breakfast option when you want something ready in the freezer. Bake it once, slice it into portions, and pull out what you need on busy mornings. The crust stays crisp after reheating while the filling stays creamy with bits of earthy mushroom and wilted spinach throughout.
The Swiss cheese adds a mild, nutty flavor that pairs well with the vegetables without overpowering them. Each slice reheats evenly and holds its shape, which makes it easy to pack for work or serve with a simple side.
Serves 4 people.
Ingredients
- 1 unbaked pie crust
- 1 tablespoon butter
- 8 ounces mushrooms, sliced
- 2 cups fresh spinach
- 4 large eggs
- 1 cup milk
- 1 cup shredded Swiss cheese
- 1/2 teaspoon salt
- 1/4 teaspoon black pepper
Instructions
- Preheat the oven to 375 degrees and fit the pie crust into a 9-inch pie dish. Set it aside.
- Melt the butter in a skillet over medium heat. Add the mushrooms and cook until they release their liquid and turn golden, about 6 minutes.
- Stir in the spinach and cook just until it wilts, about 2 minutes. Remove the skillet from the heat and let the mixture cool slightly.
- In a mixing bowl, whisk the eggs with the milk, salt, and pepper until smooth. Stir in the shredded Swiss cheese and the cooled mushroom-spinach mixture.
- Pour the filling into the prepared crust. Bake for 35 to 40 minutes until the center is set and the top is lightly golden.
- Cool the quiche completely on a wire rack. Slice into four portions, wrap each slice tightly, and freeze for later use.
Extra Tips
Cool the quiche fully before freezing so the slices stay intact. Reheat frozen slices in a 350-degree oven for 15 minutes to restore the crust texture. If you want a lighter filling, swap the milk for half-and-half, but avoid adding extra cheese or the slices may become too rich after reheating. Course: Breakfast Cuisine: American Equipment: Skillet, Mixing Bowl, Pie Dish, Oven
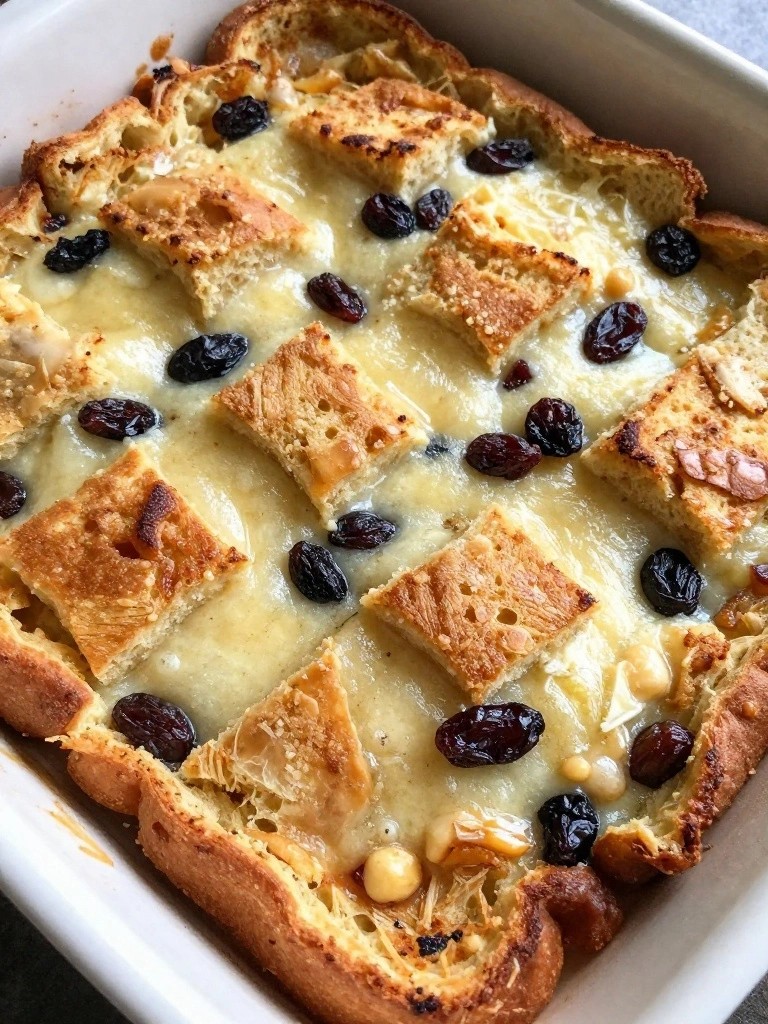
Cinnamon Raisin French Toast Casserole
This casserole turns simple bread and pantry staples into a warm breakfast that you can pull from the freezer on busy mornings. It works well when you need something ready ahead of time without extra steps on the day you serve it. The finished dish has a soft, custardy center with crisp edges and sweet raisins scattered throughout.
Serves 4 people.
Ingredients
- 8 slices day-old bread, cut into 1-inch cubes
- 4 large eggs
- 1 1/2 cups milk
- 1/4 cup granulated sugar
- 1 teaspoon ground cinnamon
- 1 teaspoon vanilla extract
- 1/2 cup raisins
- 1 tablespoon butter, softened
Instructions
- Grease a 9×9-inch baking dish with the softened butter. Set the dish aside.
- Place the bread cubes and raisins in a large bowl and toss to combine.
- In a separate bowl, whisk together the eggs, milk, sugar, cinnamon, and vanilla extract until smooth.
- Pour the egg mixture over the bread and raisins. Stir gently until all the bread pieces are coated.
- Transfer the mixture to the prepared baking dish and press down lightly to create an even layer.
- Cover the dish tightly with plastic wrap and foil. Freeze for up to one month.
- To bake, thaw overnight in the refrigerator. Remove the coverings and bake at 350°F for 35 to 40 minutes until the top is golden and the center is set.
Extra Tips
Freeze the casserole in a disposable aluminum pan if you want to avoid tying up your baking dish. If the top browns too quickly during baking, loosely cover it with foil for the last 10 minutes. Leftovers reheat well in a toaster oven at 325°F for 10 minutes. Course: Breakfast Cuisine: American Equipment: Baking Dish, Mixing Bowl, Whisk
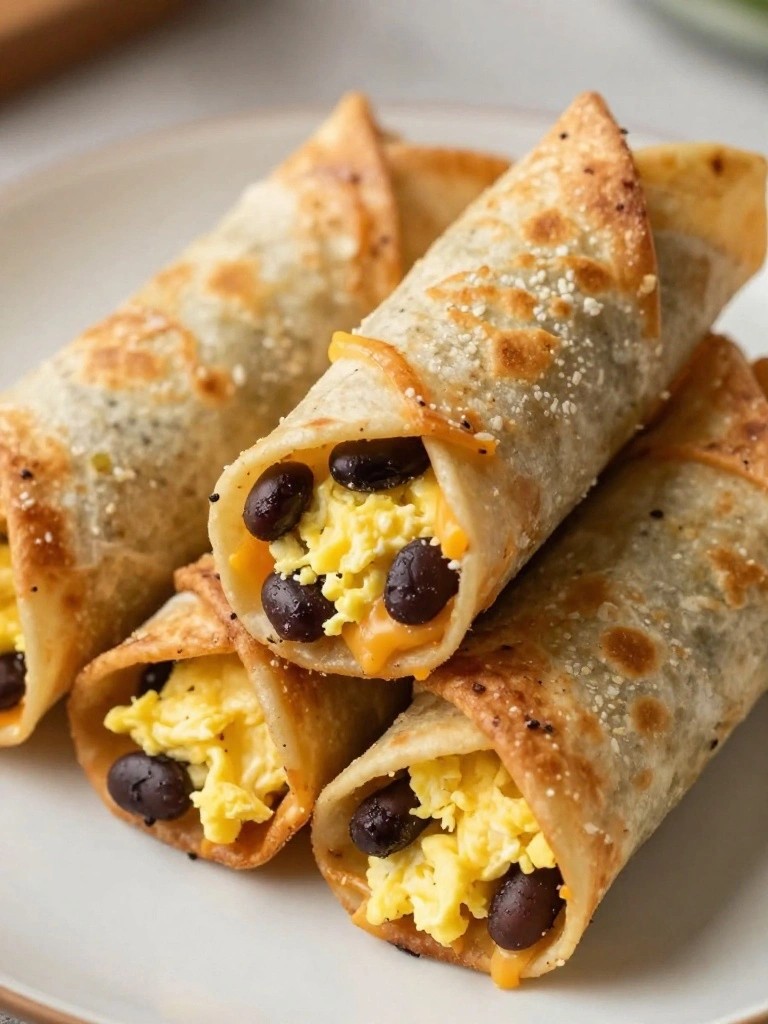
Black Bean Egg and Cheese Breakfast Taquitos
These taquitos pack black beans, eggs, and cheese into a compact roll that freezes well and reheats quickly on busy mornings. They give you a savory, filling breakfast that travels straight from freezer to oven without much effort.
The finished taquitos come out with a lightly crisp tortilla shell and a warm, seasoned center. They work nicely for meal prep because the ingredients hold up through freezing and reheating.
Serves 4 people.
Ingredients
- 8 small flour tortillas
- 6 large eggs
- 1 (15 oz) can black beans, rinsed and drained
- 1 cup shredded cheddar cheese
- 1 teaspoon ground cumin
- 1/2 teaspoon salt
- 1/4 teaspoon black pepper
- 1 tablespoon olive oil
- Salsa, for serving
Instructions
- Crack the eggs into a mixing bowl and whisk them with the cumin, salt, and black pepper until combined.
- Heat the olive oil in a large skillet over medium heat. Pour in the egg mixture and cook, stirring often, until the eggs are just set but still soft.
- Stir the black beans into the skillet and cook for one minute more to warm them through. Remove the pan from the heat.
- Lay a tortilla flat and spoon about 1/4 cup of the egg and bean mixture down the center. Sprinkle 2 tablespoons of cheddar cheese over the filling.
- Roll the tortilla tightly around the filling and place it seam side down on a baking sheet. Repeat with the remaining tortillas.
- Brush the tops of the rolled taquitos lightly with a little extra olive oil if desired. Freeze the baking sheet until the taquitos are solid, then transfer them to a freezer bag for storage.
- To serve, place frozen taquitos on a baking sheet and bake at 400°F for 15 to 20 minutes until heated through and lightly browned. Serve with salsa on the side.
Extra Tips
Freeze the taquitos in a single layer first so they do not stick together in the bag. Reheat them in the oven rather than the microwave to keep the tortilla crisp. If you want a milder flavor, reduce the cumin to 1/2 teaspoon before scrambling the eggs. Course: Breakfast Cuisine: Mexican Equipment: Large skillet, Baking sheet, Mixing bowl
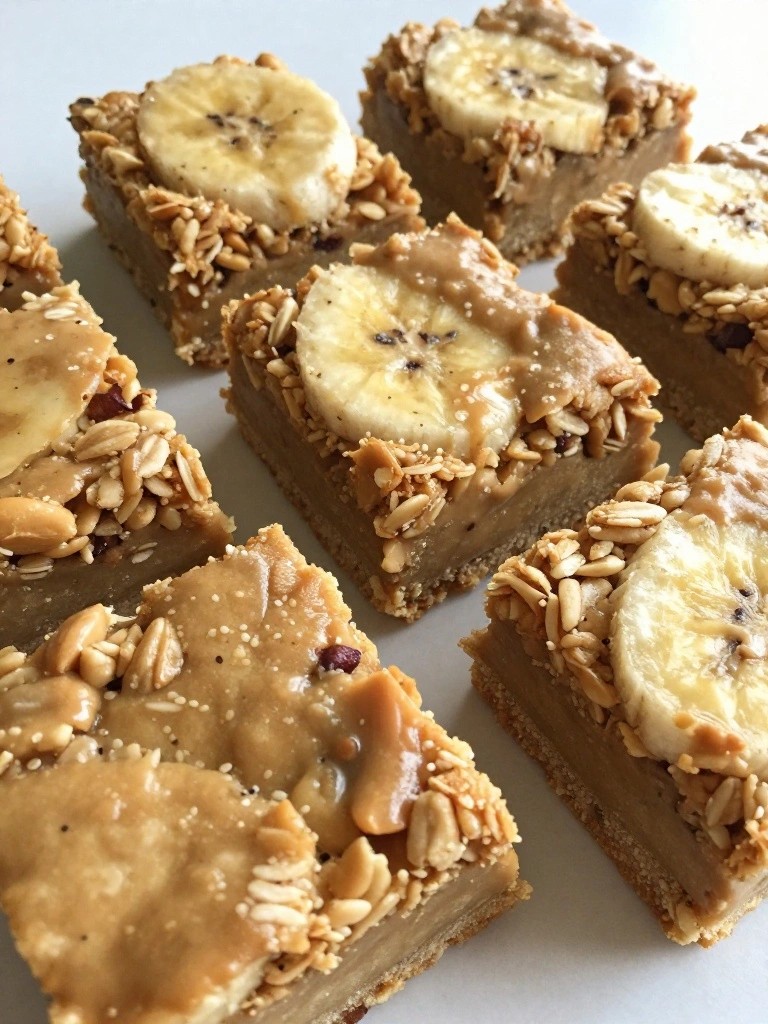
Peanut Butter Banana Oat Breakfast Bars
These bars pack peanut butter and banana into a chewy oat base that travels well from freezer to breakfast table. They work best when you bake a batch on the weekend and pull out individual portions as needed throughout the week.
The flavor stays mild and nutty with natural sweetness from the banana. Each bar holds its shape after thawing so you can eat it by hand or warm it briefly.
Serves 4 people.
Ingredients
- 2 ripe bananas
- 1/2 cup creamy peanut butter
- 2 tablespoons honey
- 2 cups rolled oats
- 1 teaspoon baking powder
- 1/4 teaspoon salt
Instructions
- Heat the oven to 350 degrees and line an 8-inch square baking pan with parchment paper.
- Mash the bananas in a mixing bowl until mostly smooth.
- Stir the peanut butter and honey into the mashed banana until evenly combined.
- Add the rolled oats, baking powder, and salt to the bowl. Mix until the oats are fully coated and the mixture holds together.
- Press the mixture firmly into the prepared pan in an even layer.
- Bake for 20 to 22 minutes until the edges turn lightly golden.
- Remove the pan from the oven and let the bars cool completely before cutting into four squares.
Extra Tips
Wrap each cooled bar in parchment and store them in a freezer bag for up to two months. Thaw overnight in the fridge or warm a single bar in the microwave for 20 seconds straight from frozen. If the mixture feels too dry while mixing, add one extra tablespoon of peanut butter before pressing it into the pan. Course: Breakfast Cuisine: American Equipment: Mixing Bowl, Baking Pan