
Starting your day with a sweet breakfast pastry can feel like a little indulgence.
Whether it’s a flaky croissant or a Danish with glistening fruit, these treats offer a delightful change from the usual morning routine.
Perfect for those mornings when you crave something special.
These pastries add a touch of elegance to your breakfast table.
Let’s explore some irresistible recipes that bring a bakery feel right to your home.
Flaky Croissants: A Parisian Delight

Flaky Croissants: A Parisian Delight is an iconic breakfast pastry that embodies the elegance and sophistication of French baking. Their golden, buttery layers melt in your mouth, delivering a taste that transports you straight to a quaint Parisian café.
Crafting the perfect croissant at home requires patience and precision, but the reward is well worth the effort. With a few key ingredients and some dedicated time, you can create these delightful pastries in your own kitchen, filling your home with the irresistible aroma of freshly baked croissants.
When making croissants, the key is in the lamination process, which involves folding layers of butter into the dough to create those signature flaky layers. This process can be challenging for first-time bakers, but by following the steps carefully, you’ll achieve beautifully layered results.
This recipe yields 12 croissants, perfect for serving 4-6 people, making it ideal for a special breakfast gathering or brunch with family and friends. Let’s explore the ingredients and steps needed to create these luxurious pastries.
Ingredients (Serves 4-6)
- 4 cups all-purpose flour
- 1/2 cup granulated sugar
- 1 tablespoon active dry yeast
- 1 tablespoon salt
- 1 1/4 cups whole milk, warmed
- 1 1/4 cups unsalted butter, cold
- 1 large egg, beaten (for egg wash)
Instructions
- Prepare the Dough: In a large mixing bowl, combine the flour, sugar, yeast, and salt. Gradually add the warmed milk while stirring to form a soft dough. Knead the dough on a lightly floured surface for about 5 minutes until smooth. Cover it with a clean cloth and let it rest for 30 minutes.
- Roll and Fold: Roll out the dough into a rectangle about 1/2-inch thick. Spread the cold butter over two-thirds of the dough. Fold the unbuttered third over the buttered middle third, then fold the remaining third on top, like a letter. Roll the dough back into a rectangle and repeat the folding process two more times. Chill the dough in the refrigerator for at least 1 hour.
- Shape the Croissants: After chilling, roll the dough into a large rectangle, about 1/4-inch thick. Cut the dough into triangles with a base of about 5 inches. Roll each triangle from the base to the tip to form a crescent shape. Place the shaped croissants on a baking sheet lined with parchment paper.
- Proof the Croissants: Cover the croissants with a clean cloth and let them rise in a warm place for 1-2 hours, or until they’ve doubled in size.
- Bake: Preheat your oven to 400°F (200°C). Brush the croissants with the beaten egg to give them a golden glaze. Bake in the preheated oven for 15-20 minutes, or until they’re puffed and golden brown.
- Cool and Serve: Allow the croissants to cool on a wire rack for a few minutes before serving. Enjoy them warm, ideally with a bit of butter or jam.
Extra Tips
When making croissants, it’s essential to keep the butter cold to maintain distinct layers. If at any point the dough becomes too warm or the butter starts to melt, place it back in the refrigerator to chill before continuing.
Additionally, for an even flakier texture, try to handle the dough as little as possible to avoid developing too much gluten. Finally, if you prefer sweeter croissants, consider adding a bit more sugar to the dough or sprinkling a touch of sugar on top before baking.
Perfecting Buttery Danish Pastries
Danish pastries, with their delicate layers and buttery aroma, are the epitome of indulgent breakfast treats. Originating from Denmark, these pastries are known for their flaky dough and sweet fillings, making them a staple in chic patisseries worldwide. Whether you’re serving them for a sophisticated brunch or simply treating yourself, mastering these pastries will elevate your baking repertoire.
The key to perfecting Danish pastries lies in the lamination process, where layers of butter are folded into the dough, creating the signature flaky texture.
Creating Danish pastries at home requires patience and precision, but the results are well worth the effort. By preparing a dough enriched with eggs and butter, and incorporating your favorite fillings such as cream cheese, fruit preserves, or almond paste, you can customize these pastries to your taste.
This recipe will guide you through the process of achieving perfectly baked Danish pastries for 4-6 people, with a focus on guaranteeing that each bite is a delightful balance of crispy, buttery layers and sweet, gooey fillings.
Ingredients for 4-6 servings:
- 2 1/2 cups all-purpose flour
- 1/4 cup granulated sugar
- 1 teaspoon salt
- 1 packet (2 1/4 teaspoons) active dry yeast
- 1/2 cup warm milk
- 2 large eggs
- 1 cup unsalted butter, chilled and divided
- 1 teaspoon vanilla extract
- 1/2 cup cream cheese, softened
- 1/4 cup fruit preserves (such as apricot or raspberry)
- 1 egg (for egg wash)
- Powdered sugar for dusting
Cooking Instructions:
- Prepare the Dough: In a large bowl, mix the flour, sugar, and salt. In a small bowl, dissolve the yeast in warm milk and let it sit for about 5 minutes until frothy. Combine the yeast mixture with the flour mixture, adding the eggs and vanilla extract. Mix until a soft dough forms.
- Knead the Dough: Transfer the dough to a floured surface and knead for about 5-7 minutes until smooth and elastic. Form the dough into a ball, place it in a greased bowl, cover with plastic wrap, and let it rise in a warm place for about 1 hour or until doubled in size.
- Laminate the Dough: Roll out the dough into a rectangle about 1/4 inch thick. Slice 3/4 cup of the chilled butter into thin strips and place them evenly over the top two-thirds of the dough. Fold the dough into thirds, like a letter, then turn it 90 degrees. Roll out again and repeat the folding process two more times, chilling the dough in the refrigerator for 30 minutes between folds.
- Shape the Pastries: Once the dough is adequately chilled and laminated, roll it out into a 16×12 inch rectangle. Cut the dough into 12 squares. In the center of each square, add a teaspoon of softened cream cheese and a teaspoon of fruit preserves.
- Form the Pastries: Gather the corners of each square to the center and press them together to form a pouch. Place the pastries on a baking sheet lined with parchment paper, cover with a towel, and let them rise for another 30 minutes.
- Bake the Pastries: Preheat the oven to 375°F (190°C). Brush each pastry with an egg wash made from a beaten egg, then bake for 15-20 minutes until golden brown and puffed.
- Finishing Touches: Allow the pastries to cool slightly on a wire rack before dusting them with powdered sugar for an elegant finish.
Extra Tips:
To guarantee your Danish pastries turn out perfectly, it’s essential to keep the dough and butter cold throughout the lamination process. This helps create distinct layers that are light and flaky. If the butter begins to melt while handling the dough, return it to the refrigerator to firm up.
Additionally, experimenting with different fillings can add variety to your pastries, from sweet to savory options. Finally, remember that patience is key; each step is essential for achieving that restaurant-quality pastry that’s sure to impress your guests.
Chocolate-Filled Croissants You’ll Love

Chocolate-Filled Croissants You’ll Love are the perfect way to indulge in a sweet breakfast treat. Imagine starting your morning with a warm, buttery croissant filled with rich, melted chocolate. This elegant pastry isn’t only a delight to the senses but also surprisingly easy to make at home. With a few simple ingredients and some time, you can create a bakery-quality pastry that will impress your family and friends.
The key to making these delectable croissants is in the pastry dough and the quality of the chocolate you choose. The dough should be flaky and light, allowing the chocolate to melt perfectly inside. By following the steps below, you’ll be able to enjoy fresh, homemade chocolate-filled croissants that are perfect for breakfast, brunch, or a special treat any time of the day.
Ingredients (for 4-6 servings):
- 2 cups all-purpose flour
- 1/4 cup granulated sugar
- 1/2 teaspoon salt
- 1 cup unsalted butter, cold and cut into small pieces
- 1/2 cup cold whole milk
- 1 packet active dry yeast (about 2 1/4 teaspoons)
- 1/4 cup warm water (110°F/45°C)
- 1 bar (100g) high-quality dark chocolate, broken into pieces
- 1 egg, beaten (for egg wash)
- Additional flour for dusting
Cooking Instructions:
- Prepare the Yeast: In a small bowl, dissolve the active dry yeast in warm water and let it sit for about 5 minutes until it becomes frothy.
- Mix Dry Ingredients: In a large mixing bowl, combine the all-purpose flour, granulated sugar, and salt.
- Create the Dough: Add the cold butter pieces into the flour mixture. Using a pastry cutter or your fingertips, blend until the mixture resembles coarse crumbs.
- Combine Ingredients: Stir the yeast mixture and cold milk into the flour mixture until a dough forms. Be careful not to overmix.
- Chill the Dough: Wrap the dough in plastic wrap and refrigerate for at least 1 hour to allow it to firm up.
- Roll out the Dough: On a lightly floured surface, roll out the chilled dough into a large rectangle, about 1/4 inch thick.
- Fold and Roll: Fold the dough into thirds (like a letter), turn it 90 degrees, roll it out again, and fold into thirds once more. Repeat this process twice more to create layers.
- Shape the Croissants: Roll the dough out one final time into a rectangle. Cut the dough into triangles. Place a piece of chocolate at the base of each triangle and roll up towards the tip, tucking the ends slightly.
- Proof the Croissants: Place the rolled croissants on a baking sheet lined with parchment paper. Cover with a clean kitchen towel and let them rise in a warm place for about 1 hour or until they’ve doubled in size.
- Preheat and Egg Wash: Preheat your oven to 375°F (190°C). Brush the risen croissants with the beaten egg for a glossy finish.
- Bake: Bake the croissants in the preheated oven for 15-20 minutes or until golden brown. Keep an eye on them to prevent burning.
- Serve Warm: Allow the croissants to cool slightly on a wire rack before serving them warm.
Extra Tips:
To guarantee the best texture, keep all your ingredients cold, especially the butter, which helps create the flaky layers. When folding and rolling the dough, work quickly to prevent the butter from melting. If you find the dough getting too warm or sticky, refrigerate it for a few minutes before continuing.
The quality of the chocolate is essential; choose a high-quality dark chocolate for the most satisfying flavor. Enjoy these croissants fresh out of the oven for the best experience!
Almond Croissants for Breakfast Bliss

Almond Croissants for Breakfast Bliss are the perfect blend of buttery, flaky pastry and sweet almond filling, making them an irresistible morning treat. Originating from traditional French patisseries, these delightful pastries are a luxurious way to start the day, offering a touch of elegance and indulgence that pairs beautifully with a hot cup of coffee or tea.
Whether you’re planning a special brunch or simply want to elevate your everyday breakfast, almond croissants are bound to impress with their rich flavor and satisfying texture.
Crafting the perfect almond croissant involves a few key steps, but the results are well worth the effort. You’ll begin with pre-made croissants, which are transformed into something extraordinary with a creamy almond filling and a sprinkle of toasted almond slices. The key to achieving the perfect balance of flavors and textures lies in the filling—a luscious mixture of almond paste, butter, and sugar that bakes to a golden perfection.
Follow this recipe to create a serving size of 4-6 people and share the blissful experience of almond croissants with friends and family.
Ingredients:
- 8 large croissants
- 1 cup almond paste
- 1/2 cup unsalted butter, softened
- 1/2 cup granulated sugar
- 2 eggs
- 1 teaspoon almond extract
- 1/4 cup sliced almonds
- Powdered sugar, for dusting
- 1/4 cup simple syrup (made from equal parts water and sugar)
Instructions:
- Preheat the Oven: Start by preheating your oven to 350°F (175°C) to guarantee it’s ready for baking once the croissants are assembled.
- Prepare the Almond Filling: In a medium mixing bowl, combine the almond paste, softened butter, granulated sugar, one egg, and almond extract. Mix thoroughly until the filling is smooth and creamy, making sure that all ingredients are well incorporated.
- Prepare the Simple Syrup: In a small saucepan, combine equal parts of water and sugar. Heat the mixture over medium heat, stirring occasionally, until the sugar is fully dissolved. Allow it to cool slightly.
- Assemble the Croissants: Slice each croissant horizontally, being careful not to cut all the way through. Brush the inside of each croissant with the simple syrup to moisten them.
- Fill the Croissants: Spoon a generous amount of the almond filling into each croissant, spreading it evenly. Close the croissants gently, ensuring the filling stays inside.
- Brush with Egg Wash: In a small bowl, beat the remaining egg and lightly brush the tops of the croissants with the egg wash to give them a glossy finish.
- Add Almonds: Sprinkle a few sliced almonds over each croissant, pressing them lightly so they adhere to the egg wash.
- Bake: Place the croissants on a baking sheet lined with parchment paper and bake in the preheated oven for 15-20 minutes, or until they’re golden brown and the filling is set.
- Cool and Serve: Once baked, remove the croissants from the oven and allow them to cool for a few minutes. Dust with powdered sugar before serving.
Extra Tips:
To confirm your Almond Croissants for Breakfast Bliss are exceptionally delicious, use high-quality almond paste for the best flavor. If you’re short on time, you can prepare the almond filling a day in advance and refrigerate it until you’re ready to assemble the croissants.
When brushing with simple syrup, be generous to keep the croissants moist and flavorful. Finally, keep an eye on the baking time, as ovens can vary, and you want a perfect golden finish without over-browning. Enjoy these croissants fresh, as they’re best served warm, straight from the oven.
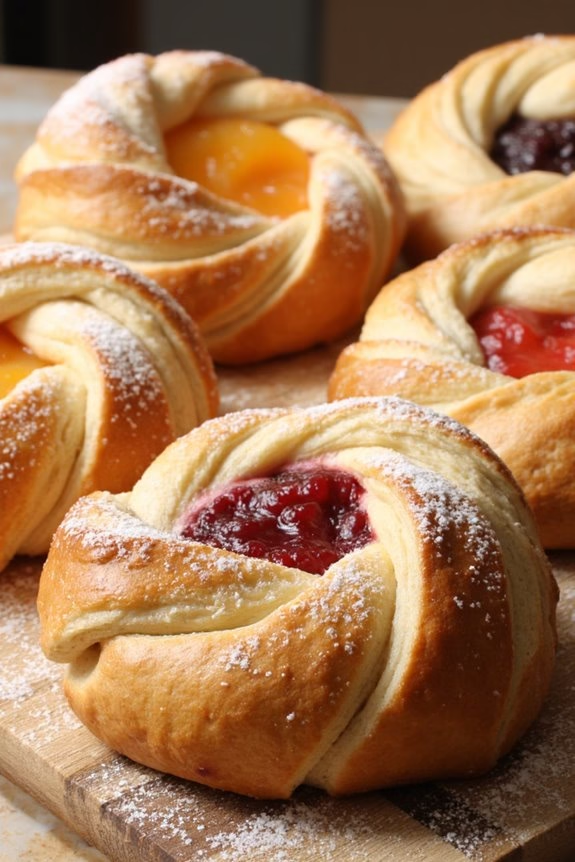
Fruit-Topped Danish With Berries and Apples

Indulge your taste buds with these chic sweet breakfast pastries, perfectly balancing the rich, buttery flavors of Danish pastry with the fresh and juicy taste of seasonal fruits. These Fruit-Topped Danish pastries, adorned with vibrant berries and crisp apples, offer an elegant and delicious start to your day. This recipe is designed to make 4-6 servings, perfect for a weekend family breakfast or a brunch gathering with friends.
The combination of tart berries and sweet apples enhances the delicate layers of the flaky pastry, making each bite a harmonious blend of textures and flavors. Easy to make yet sophisticated in presentation, these pastries are sure to impress both in taste and appearance. Follow the instructions below to create these delightful morning treats.
Ingredients (Serves 4-6):
- 1 package (16 oz) of frozen puff pastry sheets, thawed
- 1 cup mixed fresh berries (such as blueberries, raspberries, and strawberries)
- 2 medium apples, peeled, cored, and thinly sliced
- 1/4 cup granulated sugar
- 1 teaspoon ground cinnamon
- 1 tablespoon lemon juice
- 1 egg, beaten
- 2 tablespoons apricot preserves
- 1 tablespoon water
- Powdered sugar for dusting (optional)
Cooking Instructions:
- Preheat and Prepare: Preheat your oven to 400°F (200°C). Line a baking sheet with parchment paper to prevent the pastries from sticking.
- Prepare the Pastry: On a lightly floured surface, roll out the thawed puff pastry sheets to smooth out any creases. Cut each sheet into 6 equal squares. You should have a total of 12 squares.
- Prepare the Filling: In a medium-sized bowl, combine the sliced apples with sugar, cinnamon, and lemon juice. Toss until the apples are well coated. In another small bowl, mix the berries gently to combine.
- Assemble the Danish: Place a spoonful of the apple mixture in the center of half of the pastry squares. Top with a few berries. For the remaining squares, place a spoonful of mixed berries in the center. Fold in the corners of the pastry squares towards the center, pressing gently to secure the filling.
- Brush and Bake: Brush the tops of the pastries with the beaten egg for a golden finish. Transfer the pastries to the prepared baking sheet. Bake in the preheated oven for 18-22 minutes or until the pastries are puffed and golden brown.
- Prepare the Glaze: While the pastries are baking, heat the apricot preserves and water in a small saucepan over low heat until smooth. Remove from heat and set aside.
- Finish and Serve: Once the pastries are baked, remove them from the oven and allow them to cool slightly. Brush the tops with the apricot glaze for a glossy finish. Dust with powdered sugar if desired. Serve warm or at room temperature.
Extra Tips:
Ensure that the puff pastry is properly thawed but still cold to the touch for easy handling. This will help maintain its structure and flakiness during baking.
Adjust the sugar in the filling according to the sweetness of your fruits. Additionally, for a more varied flavor profile, consider adding a pinch of nutmeg or cardamom to the apple mixture.
If you prefer a more robust glaze, you can substitute apricot preserves with a glaze made from any of your favorite jams.
Glazed Cinnamon Rolls: A Sweet Classic

Glazed Cinnamon Rolls are a timeless breakfast delight that brings warmth and sweetness to your morning table. These soft, gooey rolls swirled with cinnamon sugar and topped with a smooth, creamy glaze, are perfect for a weekend brunch or a special treat to start your day. With their enticing aroma and irresistible flavor, they’re a favorite for both kids and adults.
Preparing these delicious pastries from scratch is a rewarding experience that fills your kitchen with the comforting scent of cinnamon and freshly baked bread.
The process of making Glazed Cinnamon Rolls involves two main stages: preparing the dough and creating the filling, followed by the assembly and baking. While it may seem like a labor of love, the result is well worth the effort.
You’ll begin by making a soft, enriched dough that rises to perfection. Once the dough is ready, you’ll spread a mixture of cinnamon and sugar over it, roll it up, and cut it into individual rolls. After baking, a generous drizzle of glaze completes these classic pastries, making them a true indulgence.
Ingredients (serves 4-6):
- 2 ¾ cups all-purpose flour
- ¼ cup granulated sugar
- 1 packet (2 ¼ teaspoons) active dry yeast
- ½ teaspoon salt
- ½ cup milk
- ¼ cup water
- 3 tablespoons unsalted butter
- 1 large egg
For the Filling:
- ⅓ cup brown sugar, packed
- 2 tablespoons ground cinnamon
- 3 tablespoons unsalted butter, softened
For the Glaze:
- 1 cup powdered sugar
- 1 teaspoon vanilla extract
- 2-3 tablespoons milk
Cooking Instructions:
- Prepare the Dough: In a large mixing bowl, combine 1 cup of flour, sugar, yeast, and salt. In a small saucepan, heat the milk, water, and butter over low heat until the butter is melted and the mixture is warm (not hot). Gradually add the milk mixture to the flour mixture, stirring to combine. Add the egg and mix well. Gradually add the remaining flour until a soft dough forms.
- Knead the Dough: Turn the dough onto a floured surface and knead for about 6-8 minutes until smooth and elastic. Place the dough in a lightly greased bowl, cover with a damp cloth, and allow it to rise in a warm place for about 1 hour, or until doubled in size.
- Prepare the Filling: In a small bowl, mix the brown sugar and cinnamon. Roll out the dough into a rectangle (about 14×8 inches) on a floured surface. Spread the softened butter over the dough and sprinkle evenly with the cinnamon sugar mixture.
- Roll and Cut the Dough: Starting from the long side, roll the dough tightly into a log. Cut into 12 equal-sized rolls and place them in a greased baking dish.
- Second Rise and Bake: Cover the dish with a cloth and let the rolls rise for another 30 minutes. Preheat your oven to 375°F (190°C). Bake the rolls for 20-25 minutes until golden brown.
- Make the Glaze: While the rolls are baking, whisk together powdered sugar, vanilla, and milk in a small bowl until smooth. Adjust the consistency as needed.
- Glaze the Rolls: Once the rolls are out of the oven, let them cool slightly before drizzling the glaze generously over the top. Serve warm.
Extra Tips:
For best results, make sure your milk is warm to the touch but not hot, as overly hot liquids can kill the yeast. If you prefer a richer glaze, substitute some of the milk with cream or half-and-half.
You can also customize your cinnamon rolls by adding raisins or chopped nuts to the filling. If you want to prepare these rolls ahead of time, you can refrigerate them before the second rise and bake them fresh the next morning.
Enjoy your homemade Glazed Cinnamon Rolls with a cup of coffee or tea for a perfect breakfast experience.
Cream Cheese-Stuffed Pastries

Start your day with a touch of elegance by crafting these delectable cream cheese-stuffed pastries. Their light, flaky texture paired with a smooth, creamy filling creates a delightful morning indulgence.
These pastries not only serve as a perfect breakfast treat but also as a charming addition to any brunch spread. The combination of the buttery pastry and tangy cream cheese will leave your taste buds craving more.
This recipe is designed for a serving size of 4-6 people, making it ideal for family breakfasts or small gatherings. The process is straightforward, allowing even novice bakers to enjoy the rewarding experience of making pastries from scratch.
Gather your ingredients and prepare to impress your loved ones with this chic morning delight.
Ingredients:
- 1 package (8 oz) cream cheese, softened
- 1/4 cup granulated sugar
- 1 teaspoon vanilla extract
- 1 package (17.3 oz) frozen puff pastry sheets, thawed
- 1 egg
- 1 tablespoon water
- Powdered sugar for dusting
Instructions:
- Preheat the Oven: Preheat your oven to 400°F (200°C). This guarantees that the pastries bake evenly and achieve a perfectly golden-brown finish.
- Prepare the Cream Cheese Filling: In a medium bowl, combine the softened cream cheese, granulated sugar, and vanilla extract. Use a hand mixer or a whisk to blend the mixture until it’s smooth and creamy.
- Roll Out the Puff Pastry: On a lightly floured surface, unfold and roll out the thawed puff pastry sheets to remove any creases. Cut each sheet into 6 equal squares, giving you a total of 12 pastry squares.
- Fill the Pastries: Place a heaping tablespoon of the cream cheese filling in the center of each pastry square. Be careful not to overfill, as this may cause the filling to leak out during baking.
- Seal the Pastries: Fold each square in half to form a triangle, then press the edges together with a fork to seal. Confirm the edges are well-sealed to prevent the filling from escaping.
- Prepare the Egg Wash: In a small bowl, whisk together the egg and water. Brush the tops of the pastries with the egg wash to promote browning during baking.
- Bake the Pastries: Arrange the pastries on a baking sheet lined with parchment paper. Bake in the preheated oven for 15-18 minutes, or until they’re puffed and golden brown.
- Cool and Serve: Remove the pastries from the oven and allow them to cool for a few minutes before dusting them with powdered sugar. Serve warm or at room temperature.
Extra Tips:
When working with puff pastry, it’s important to keep it cool to maintain its flakiness. If the dough becomes too warm while you’re working with it, pop it back in the refrigerator for a few minutes. This will help prevent it from becoming sticky and difficult to handle.
Also, feel free to experiment with additional flavors by adding a bit of lemon zest to the cream cheese filling or a sprinkle of cinnamon on top before baking. Enjoy these Cream Cheese-Stuffed Pastries as a versatile treat, perfect for any occasion!
Authentic Pain Au Chocolat Made Easy
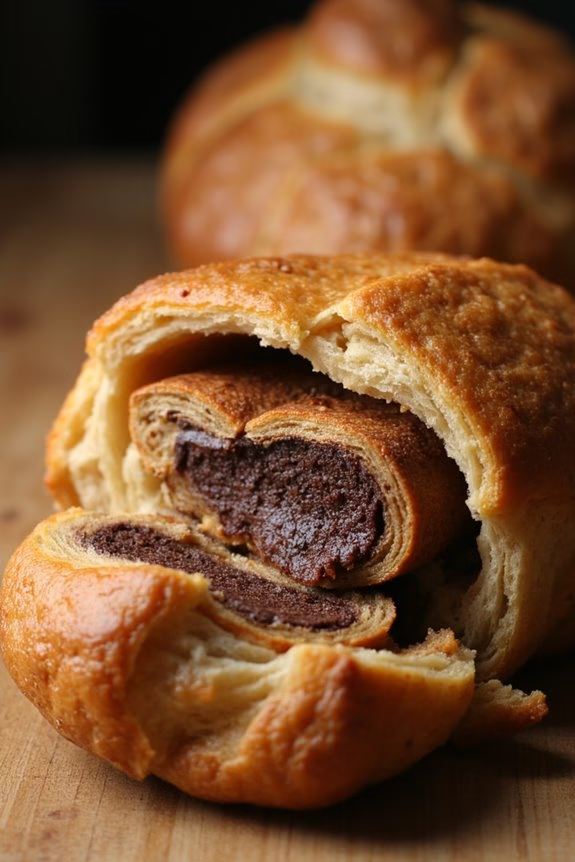
There’s nothing quite like the delight of biting into a freshly baked pain au chocolat, with its crisp, flaky layers giving way to a rich, chocolatey center. This classic French pastry, often enjoyed at breakfast, can seem quite intimidating to replicate at home. However, with some patience and attention to detail, you can recreate this authentic treat in your own kitchen.
By using high-quality ingredients and following a few straightforward steps, you can bring the taste of a Parisian bakery to your breakfast table.
To achieve the perfect pain au chocolat, it’s crucial to create a well-laminated dough. This involves repeatedly rolling and folding the dough to create the buttery layers that are the hallmark of this pastry. While this process does take some time, it’s not as complicated as it may sound. The result is a beautifully golden pastry that’s crisp on the outside and tender on the inside, with just the right amount of chocolate to satisfy your sweet tooth.
Let’s plunge into the recipe!
Ingredients for 4-6 servings:
- 500g all-purpose flour
- 60g sugar
- 10g salt
- 10g instant yeast
- 300ml cold water
- 300g unsalted butter (chilled)
- 150g dark chocolate (in small bars or sticks)
- 1 egg (for egg wash)
Cooking Instructions:
1. Prepare the dough: In a large mixing bowl, combine the flour, sugar, salt, and yeast. Gradually add the cold water, mixing until a rough dough forms. Knead the dough on a lightly floured surface for about 5 minutes, until smooth. Wrap in plastic wrap and refrigerate for at least 1 hour.
2. Prepare the butter block: While the dough chills, place the chilled butter between two sheets of parchment paper. Use a rolling pin to shape it into a 20x20cm square. Refrigerate the butter block to keep it cold.
3. Laminate the dough: Roll out the chilled dough on a floured surface to a 40x20cm rectangle. Place the butter block in the center, folding the edges of the dough over the butter to encase it fully. Roll the dough out again to a 60x20cm rectangle, then fold it into thirds, like a letter. Wrap in plastic and chill for 30 minutes.
Repeat this rolling and folding process two more times, chilling between each step.
4. Shape the pastries: Roll the dough out to a 40x30cm rectangle. Cut into 10x10cm squares. Place a chocolate bar on one edge of each square and roll the dough over the chocolate, sealing the seam underneath. Place on a baking sheet lined with parchment paper.
5. Proof the pastries: Cover the rolled pastries with a damp cloth and let them rise at room temperature until doubled in size, approximately 1-2 hours.
6. Bake: Preheat the oven to 200°C (390°F). Brush the pastries with the beaten egg for a glossy finish. Bake for 15-20 minutes, or until golden brown and puffed. Cool on a wire rack before serving.
Extra Tips:
For the best results, confirm that your ingredients are cold, particularly the butter, which should remain firm during the lamination process. If your kitchen is warm, consider chilling your rolling pin and work surface, as this will help maintain the dough’s integrity.
Additionally, if you’re short on time, you can prepare the dough a day ahead and refrigerate it overnight, resuming with the lamination process the next day. Enjoy your freshly baked pain au chocolat warm for the ultimate breakfast indulgence!
Savory-Sweet Ham and Cheese Croissants

Savory-Sweet Ham and Cheese Croissants are the perfect indulgence for breakfast or brunch, combining the rich flavors of ham and cheese with the buttery, flaky goodness of croissants. This recipe is designed to elevate your morning with a delightful balance of savory and sweet notes. The combination of ingredients guarantees a satisfying meal that’s both filling and flavorful, making it an instant favorite for family gatherings or weekend treats.
These croissants aren’t just a feast for the taste buds but also a visually appealing addition to any breakfast table. The golden-brown crust encases a melty, cheesy interior, complemented by the subtle sweetness of a honey glaze. Whether you’re serving them for a special occasion or simply treating yourself on a lazy morning, these croissants promise to deliver both comfort and elegance.
Ingredients for 4-6 servings:
- 6 large croissants
- 12 slices of deli ham
- 12 slices of Swiss cheese
- 2 tablespoons Dijon mustard
- 2 tablespoons honey
- 1 egg (for egg wash)
- 1 tablespoon milk
- 1 tablespoon sesame seeds (optional)
Instructions:
- Preheat the Oven: Start by preheating your oven to 375°F (190°C). This guarantees that the croissants bake evenly and develop a crisp, golden crust.
- Prepare the Croissants: Slice each croissant in half horizontally without cutting all the way through, creating a hinge. This allows the fillings to be added more easily while keeping the croissant intact.
- Assemble the Fillings: Spread a thin layer of Dijon mustard on the inside of each croissant. Place two slices of ham and two slices of Swiss cheese inside each croissant, guaranteeing even coverage for a balanced flavor in every bite.
- Prepare the Honey Glaze: In a small bowl, mix together the honey and a tablespoon of warm water until well combined. This honey glaze adds a delightful sweetness that complements the savory filling.
- Brush with Egg Wash: Beat one egg with a tablespoon of milk to create an egg wash. Using a pastry brush, lightly coat the tops of the croissants with the egg wash. This will give them a beautiful sheen and help the sesame seeds stick, if using.
- Sprinkle Sesame Seeds (Optional): If desired, sprinkle sesame seeds over the top of each croissant for added texture and flavor.
- Bake the Croissants: Place the croissants on a baking sheet lined with parchment paper. Bake in the preheated oven for 15-20 minutes or until the croissants are golden brown and the cheese is melted and bubbly.
- Apply Honey Glaze: Remove the croissants from the oven and immediately brush them with the prepared honey glaze while they’re still warm.
- Serve and Enjoy: Allow the croissants to cool slightly before serving. They’re best enjoyed warm for the full experience of their savory-sweet goodness.
Extra Tips:
To guarantee the best results, always use fresh croissants for this recipe, as they’ll yield a better texture and flavor. If you like a bit more sweetness, you can drizzle a little extra honey over the top before serving. For a more intense flavor, try using a smoked ham and aged Swiss cheese. When preparing for a larger crowd, consider doubling the recipe and staggering the baking times to guarantee each batch is perfectly fresh and warm when served.
Ultimate Lemon Drizzle Pastries

Indulging in a delightful breakfast pastry is a treat that can elevate any morning, and the Ultimate Lemon Drizzle Pastries do just that. These pastries combine the tangy zing of fresh lemons with a sweet, buttery dough, creating a perfect balance that will tantalize your taste buds. The sweet lemon drizzle perfectly complements the flaky pastry, making this an irresistible choice for breakfast or brunch gatherings.
Crafted to serve 4-6 people, these pastries are perfect for sharing with family or friends. The recipe is straightforward, allowing even novice bakers to achieve a professional-quality pastry. With just a few steps, you can transform simple ingredients into a sophisticated breakfast delight that will leave everyone craving more.
Ingredients (Serves 4-6):
- 1 sheet of puff pastry
- 4 tablespoons unsalted butter, melted
- 1/3 cup granulated sugar
- Zest of 2 lemons
- Juice of 1 lemon
- 1/2 cup powdered sugar
- 1 egg, beaten (for egg wash)
Instructions:
- Preheat the Oven: Preheat your oven to 400°F (200°C). Line a baking sheet with parchment paper to prevent sticking and guarantee easy cleanup.
- Prepare the Puff Pastry: Roll out the puff pastry on a lightly floured surface to remove any creases. Cut the sheet into 8 equal rectangles, perfect for serving 4-6 people.
- Make the Lemon Sugar: In a small bowl, combine the granulated sugar and the lemon zest. Use your fingers to rub the zest into the sugar until it becomes fragrant. This will infuse the sugar with a strong lemon flavor.
- Fill the Pastries: Brush each rectangle with the melted butter. Sprinkle a generous amount of the lemon sugar mixture over the buttered surface, guaranteeing an even coating.
- Fold the Pastries: Fold each rectangle in half lengthwise, encasing the lemon sugar. Press the edges gently to seal them. Use a fork to crimp the edges for a decorative touch.
- Apply the Egg Wash: Place the pastries on the prepared baking sheet. Brush the tops with the beaten egg to give them a golden, glossy finish when baked.
- Bake the Pastries: Bake in the preheated oven for 15-18 minutes, or until the pastries are golden brown and puffed up. Remove from the oven and let them cool on a wire rack.
- Prepare the Lemon Drizzle: While the pastries cool, whisk together the lemon juice and powdered sugar in a small bowl until smooth. This will create a tangy, sweet drizzle.
- Drizzle and Serve: Once the pastries have cooled slightly, drizzle the lemon glaze over the top. Serve warm and enjoy the burst of lemon flavor with each bite.
Extra Tips:
For the best results, use puff pastry that’s well-chilled but pliable, as this will make it easier to handle and shape. If you prefer a stronger lemon flavor, you can add a little extra lemon zest or juice to the glaze.
Additionally, these pastries are best enjoyed fresh but can be stored in an airtight container at room temperature for up to two days. Reheat them in the oven at a low temperature for a few minutes to regain their crispiness before serving.
Breakfast Scones With Berries

Start your day with a touch of elegance by indulging in these delightful breakfast scones with berries. Perfect for a weekend brunch or a special morning treat, these scones combine the buttery, flaky texture of a classic scone with the sweet and tangy flavors of fresh berries. The berries not only add a burst of color but also infuse the scones with natural sweetness and juiciness, making every bite a luxurious experience.
These breakfast scones are ideal for serving to a small gathering of 4-6 people, allowing everyone to enjoy a warm, freshly baked treat. With simple ingredients and straightforward steps, you’ll find that these scones are both rewarding and easy to make. Whether you prefer strawberries, blueberries, or raspberries, you can customize the scones to suit your taste and what’s in season.
Ingredients (serving size: 4-6 people):
- 2 cups all-purpose flour
- 1/3 cup granulated sugar
- 1 tablespoon baking powder
- 1/2 teaspoon salt
- 1/2 cup unsalted butter, chilled and cubed
- 1/2 cup heavy cream
- 1 large egg
- 1 teaspoon vanilla extract
- 1 cup fresh mixed berries (such as strawberries, blueberries, and raspberries)
- 1 tablespoon milk (for brushing)
- 1 tablespoon coarse sugar (for sprinkling)
Cooking Instructions:
- Preheat the Oven: Begin by preheating your oven to 400°F (200°C). Line a baking sheet with parchment paper for easy cleanup and to prevent the scones from sticking.
- Mix Dry Ingredients: In a large mixing bowl, whisk together the all-purpose flour, granulated sugar, baking powder, and salt until well combined.
- Cut in the Butter: Add the chilled, cubed butter to the dry ingredients. Use a pastry cutter or your fingertips to cut the butter into the flour mixture until it resembles coarse crumbs. This step guarantees a flaky texture.
- Prepare Wet Ingredients: In a separate bowl, whisk together the heavy cream, egg, and vanilla extract until smooth. Gradually add this mixture to the dry ingredients, stirring gently until just combined.
- Fold in the Berries: Carefully fold in the fresh mixed berries, being cautious not to overmix as the berries can break and color the dough excessively.
- Shape the Dough: Turn the dough onto a lightly floured surface. Gently knead it a few times until it comes together. Pat the dough into a circle about 1-inch thick.
- Cut the Scones: Use a sharp knife or a pastry cutter to divide the dough into 8 equal wedges. Transfer the wedges to the prepared baking sheet, spacing them slightly apart.
- Finish and Bake: Brush the tops of the scones with milk and sprinkle with coarse sugar for a sweet, crunchy finish. Bake in the preheated oven for 18-22 minutes or until the scones are golden brown and a toothpick inserted into the center comes out clean.
- Cool and Serve: Allow the scones to cool on the baking sheet for a few minutes before transferring them to a wire rack to cool completely. Serve warm or at room temperature.
Extra Tips:
For the best results, confirm your butter is very cold before incorporating it into the dry ingredients; this helps create the flaky layers characteristic of a good scone.
If your kitchen is warm, consider chilling your mixing bowl and utensils to keep the butter from melting. You can also experiment with different types of berries or even add a handful of chocolate chips for a sweeter variation.
Finally, these scones are best enjoyed fresh, but they can be stored in an airtight container for up to two days or frozen for longer storage. Simply reheat in a low oven before serving.
Nutella-Packed Pastries for a Sweet Start
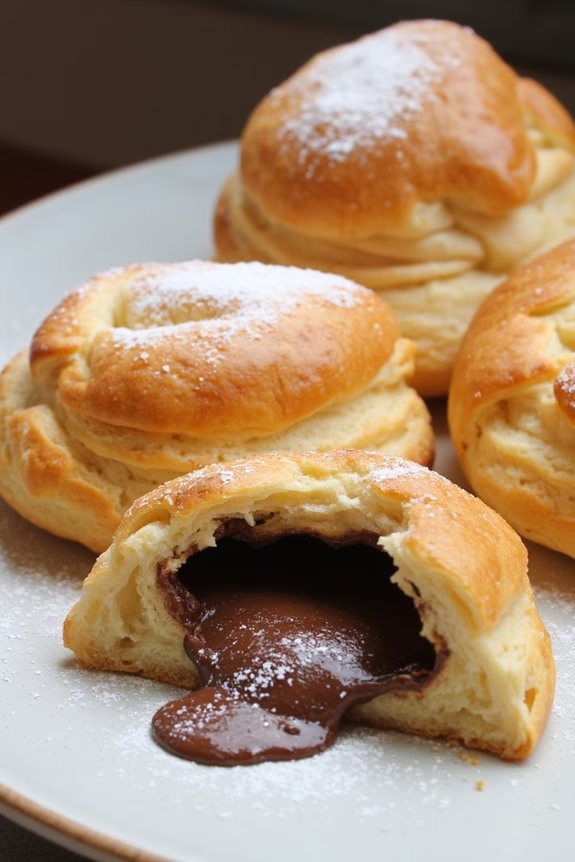
There’s nothing quite like starting your day with a sweet and satisfying treat, and Nutella-packed pastries offer the perfect blend of flaky, buttery goodness with rich chocolate hazelnut flavor.
These delightful pastries aren’t only incredibly easy to make, but they also look and taste like they’ve come straight from a high-end bakery. Whether you’re hosting a brunch or simply treating yourself, these pastries are a surefire way to elevate your morning routine.
The key to these pastries lies in their simplicity and the quality of the ingredients. Using pre-made puff pastry sheets cuts down on preparation time, making this recipe accessible even on a busy morning. The combination of warm, gooey Nutella encased in a crisp, golden pastry shell is a match made in heaven that will leave everyone reaching for more.
Perfect for serving 4-6 people, this recipe guarantees there’s plenty to go around.
Ingredients (Serves 4-6)
- 2 sheets of puff pastry, thawed
- 1 cup of Nutella
- 1 egg, beaten
- 1 tablespoon milk
- 1/4 cup powdered sugar (optional, for dusting)
Cooking Instructions
- Preheat the Oven: Begin by preheating your oven to 375°F (190°C). Line a baking sheet with parchment paper to guarantee the pastries don’t stick during baking.
- Prepare the Pastry: On a lightly floured surface, roll out the thawed puff pastry sheets to smooth any creases. Cut each sheet into rectangles, approximately 4×6 inches in size. You should have around 8-12 rectangles depending on the size of your sheets.
- Fill with Nutella: Place a generous tablespoon of Nutella in the center of each rectangle, spreading it slightly while leaving a border around the edges to guarantee the filling doesn’t spill out during baking.
- Seal the Edges: Brush the edges of the pastry with the beaten egg mixed with milk. Fold the pastry over the Nutella to form a square or rectangle, pressing the edges down with a fork to seal them securely.
- Add an Egg Wash: Brush the top of each pastry with the egg wash. This will give the pastries a beautiful, golden finish once baked.
- Bake: Place the prepared pastries on the lined baking sheet, leaving space between each one. Bake in the preheated oven for 15-20 minutes, or until they’re puffed up and golden brown.
- Cool and Dust: Allow the pastries to cool slightly on a wire rack. If desired, dust with powdered sugar before serving for an extra touch of sweetness.
Extra Tips
To guarantee the best results, make sure your puff pastry is thawed but still cold when you start working with it. This helps maintain its structure and results in a better rise during baking.
If you want to add a bit of flair, consider sprinkling chopped hazelnuts over the Nutella before sealing the pastries for added crunch and flavor.
Additionally, these pastries are best enjoyed fresh out of the oven but can be reheated in a low oven for a few minutes if needed. Enjoy your deliciously chic morning treat with a cup of coffee or tea for the perfect start to your day!
Apple Turnovers With a Flaky Crust

Indulge in the delightful taste of homemade Apple Turnovers with a Flaky Crust, a perfect treat to elevate your breakfast experience. These pastries combine the tartness of fresh apples with a hint of cinnamon, all encased in a perfectly flaky crust.
Whether you’re hosting a brunch or simply want to add a touch of elegance to your morning, these turnovers are bound to impress. Not only are they delicious, but they’re also surprisingly easy to make, allowing you to enjoy a chic breakfast without spending hours in the kitchen.
The secret to these scrumptious pastries lies in the balance of flavors and textures. The buttery, flaky crust complements the sweet and slightly spiced apple filling, creating a harmony that’s both comforting and satisfying.
With just a few simple ingredients and steps, you’ll have a batch of turnovers ready to enjoy, whether hot from the oven or cooled to room temperature. Savor them with a steaming cup of coffee or tea for a perfect start to your day.
Ingredients (for 4-6 people):
- 2 cups all-purpose flour
- 1 teaspoon salt
- 1 tablespoon granulated sugar
- 1 cup unsalted butter, chilled and diced
- 1/4 to 1/2 cup ice water
- 3 medium apples, peeled, cored, and diced
- 1/4 cup brown sugar
- 1 teaspoon ground cinnamon
- 1 tablespoon lemon juice
- 1 tablespoon cornstarch
- 1 egg
- 1 tablespoon milk
Cooking Instructions:
1. Prepare the Dough: In a large mixing bowl, combine the flour, salt, and granulated sugar. Add the chilled butter and use a pastry cutter or your fingers to mix until the mixture resembles coarse crumbs. Gradually add ice water, a tablespoon at a time, mixing gently until the dough clumps together.
Form the dough into a ball, wrap in plastic wrap, and refrigerate for at least 1 hour.
2. Make the Apple Filling: In a medium saucepan, combine the diced apples, brown sugar, cinnamon, lemon juice, and cornstarch. Cook over medium heat, stirring occasionally, until the apples are soft and the mixture has thickened, about 8-10 minutes.
Remove from heat and let it cool.
3. Roll Out the Dough: Preheat your oven to 400°F (200°C). On a floured surface, roll out the dough to about 1/8 inch thick. Cut the dough into squares, approximately 5×5 inches.
4. Assemble the Turnovers: Place a spoonful of the apple filling in the center of each square. Fold the dough over the filling to form a triangle and press the edges with a fork to seal.
Place the turnovers on a baking sheet lined with parchment paper.
5. Egg Wash and Bake: In a small bowl, beat the egg with milk to make an egg wash. Brush the tops of the turnovers with the egg wash. Cut small slits on the top of each turnover to allow steam to escape.
Bake for 20-25 minutes, or until the pastries are golden brown.
6. Cool and Serve: Allow the turnovers to cool on a wire rack for a few minutes before serving. Enjoy them warm or at room temperature.
Extra Tips:
For the best results, verify that your butter is cold when making the dough, as this helps create the flaky layers in the pastry. If your dough becomes too warm while handling, return it to the refrigerator for 10-15 minutes to firm up.
You can also customize the filling by adding a handful of raisins or chopped nuts for extra texture and flavor. Finally, if you prefer a sweeter pastry, drizzle the turnovers with a simple icing made from powdered sugar and milk before serving.
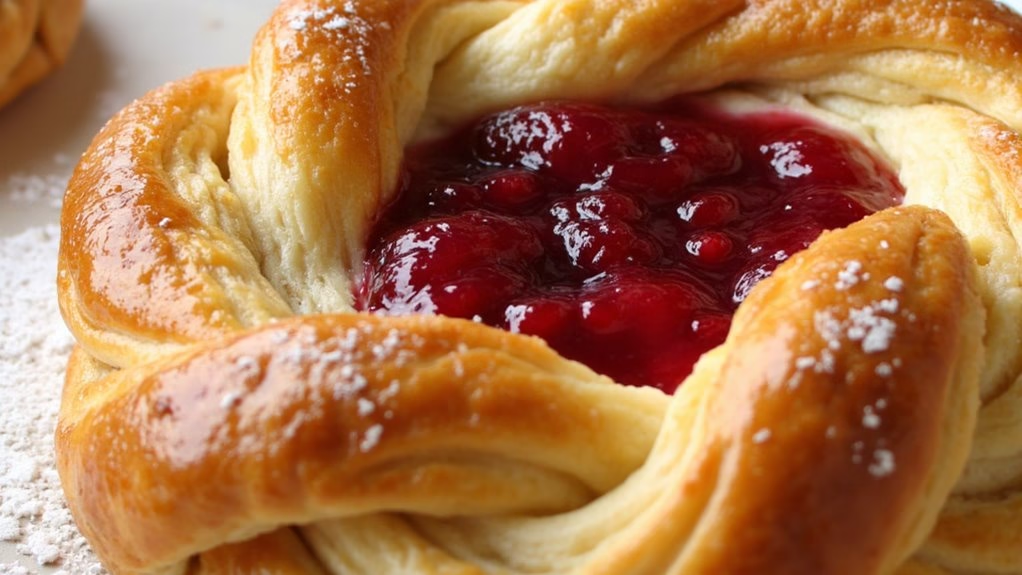
Raspberry Jam-Filled Danish Pastries

Raspberry Jam-Filled Danish Pastries are a delightful addition to any breakfast spread, offering a perfect balance of buttery pastry and sweet, tangy raspberry jam. These pastries aren’t only delicious but also visually appealing, making them a great choice for brunches or special occasions. The flaky layers of the pastry combined with the rich raspberry filling make each bite a treat.
To make these pastries, you’ll start with a simple yet rich dough that will be rolled out and filled with a generous amount of raspberry jam. The key to achieving the perfect Danish pastry lies in the lamination process, which involves folding and rolling the dough to create multiple layers. Once baked, these pastries will have a golden, crispy exterior and a soft, flavorful interior. This recipe yields enough to serve 4-6 people, making it ideal for a family breakfast or a small gathering.
Ingredients (Serves 4-6)
- 2 cups all-purpose flour
- 1/4 cup granulated sugar
- 1/2 teaspoon salt
- 1 packet (2 1/4 teaspoons) active dry yeast
- 1/2 cup whole milk, warmed
- 8 tablespoons unsalted butter, cold and cubed
- 1 large egg
- 1 teaspoon vanilla extract
- 1 cup raspberry jam
- 1 egg, beaten (for egg wash)
- Powdered sugar (optional, for dusting)
Cooking Instructions
- Prepare the Dough: In a large bowl, mix the flour, sugar, and salt. In a separate bowl, dissolve the yeast in the warmed milk and let it sit for about 5 minutes until frothy. Add the yeast mixture, egg, and vanilla extract to the dry ingredients and mix until a dough forms.
- Incorporate Butter: On a floured surface, roll out the dough into a rectangle. Evenly distribute the cold, cubed butter over two-thirds of the dough. Fold the dough into thirds like a letter, enclosing the butter. Roll out again and fold into thirds. Wrap in plastic wrap and refrigerate for at least 1 hour.
- Laminate the Dough: Repeat the rolling and folding process two more times, chilling the dough for 30 minutes between each fold. This will create the flaky layers.
- Shape the Pastries: Roll out the dough to about 1/4-inch thickness. Cut into 4-inch squares, and place a tablespoon of raspberry jam in the center of each square. Fold the corners over the jam, overlapping slightly in the center.
- Proof the Pastries: Place the shaped pastries on a parchment-lined baking sheet. Cover with a clean kitchen towel and let them rise in a warm place until doubled in size, about 30-45 minutes.
- Bake: Preheat the oven to 375°F (190°C). Brush the pastries with the beaten egg for a glossy finish. Bake for 18-20 minutes or until golden brown.
- Serve: Allow the pastries to cool slightly on a wire rack. Dust with powdered sugar before serving, if desired.
Extra Tips
To guarantee your Raspberry Jam-Filled Danish Pastries are perfectly flaky, it’s essential to keep the dough and butter cold throughout the process. If at any point the dough becomes too warm or sticky, return it to the refrigerator to chill.
When adding the jam, be careful not to overfill, as it can leak out during baking. For a different twist, you can substitute the raspberry jam with other flavors such as apricot or blueberry. Enjoy these pastries fresh out of the oven for the best taste and texture.