
Mornings used to be a whirlwind until I discovered the magic of freezer meal prep breakfasts. These 13 unique recipes have turned my start of the day from hectic to harmonious. Think savory breakfast burritos and sweet berry oatmeal cups, ready to enjoy in minutes. They are absolute game-changers for simplifying your morning routine. Curious to try them out?
Savory Breakfast Burritos

Savory Breakfast Burritos are a delicious and convenient way to start your day, especially when you’re short on time. These make-ahead breakfast burritos are packed with flavor and nutrition, combining fluffy scrambled eggs, crispy bacon, sautéed vegetables, and melty cheese, all wrapped in a soft tortilla.
They’re perfect for meal prepping as they can be frozen and reheated, providing a quick and satisfying breakfast on busy mornings. Whether you’re feeding a family or preparing meals for the week, these burritos will keep everyone satisfied and energized.
Preparing Savory Breakfast Burritos involves simple ingredients that come together quickly, making them an ideal choice for those who love a hearty breakfast without the hassle. The recipe is versatile, allowing you to customize the fillings to match your taste preferences or dietary needs.
With this recipe designed to serve 4-6 people, you’ll have plenty to enjoy or share with loved ones. The preparation is straightforward, and the results are deliciously rewarding, offering a flavorful breakfast option that’s ready whenever you are.
Ingredients (Serving Size: 4-6 people):
- 8 large eggs
- 1/4 cup milk
- Salt and pepper to taste
- 1 tablespoon butter
- 6 slices of bacon
- 1 red bell pepper, diced
- 1 small onion, diced
- 1 cup shredded cheddar cheese
- 6 large flour tortillas
- Salsa, for serving (optional)
Cooking Instructions:
- Prepare the Eggs: In a large bowl, whisk together the eggs, milk, salt, and pepper until well combined. Set aside.
- Cook the Bacon: In a large skillet over medium heat, cook the bacon until crispy. Remove the bacon from the skillet and place it on a plate lined with paper towels to drain excess fat. Once cooled, crumble the bacon into small pieces.
- Sauté the Vegetables: In the same skillet, remove excess bacon grease, leaving about 1 tablespoon. Add the diced onion and bell pepper to the skillet and sauté over medium heat until the vegetables are softened and the onion is translucent, about 5 minutes.
- Scramble the Eggs: Reduce the heat to low and add the butter to the skillet. Once melted, pour in the egg mixture. Stir gently and continuously until the eggs are just set and slightly runny. Remove from heat.
- Assemble the Burritos: Lay out the tortillas on a clean surface. Evenly distribute the scrambled eggs, sautéed vegetables, bacon, and shredded cheese between each tortilla. If desired, add a spoonful of salsa inside each burrito for extra flavor.
- Wrap the Burritos: Fold the sides of each tortilla over the filling, then roll them up tightly from bottom to top to form burritos.
- Freeze or Serve: If eating immediately, serve with additional salsa on the side. To freeze for later, wrap each burrito individually in aluminum foil or plastic wrap, then place them in a freezer-safe bag or container.
Extra Tips:
When reheating frozen burritos, it’s best to remove them from the freezer and allow them to thaw in the refrigerator overnight. To reheat, unwrap the burrito and place it in the microwave with a damp paper towel over it to prevent it from drying out. Heat on high for 1-2 minutes or until thoroughly warmed.
Alternatively, burritos can be reheated in an oven at 350°F (175°C) for about 15-20 minutes. Feel free to add or substitute ingredients based on your dietary preferences, such as using turkey bacon, adding spinach, or using a different type of cheese.
Sweet Berry Oatmeal Cups
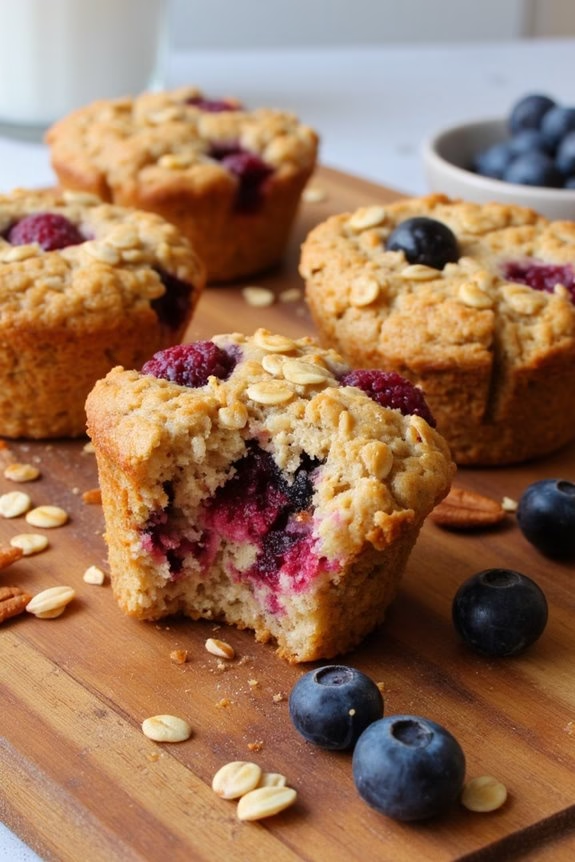
Sweet Berry Oatmeal Cups are the perfect make-ahead breakfast option for busy mornings. Packed with nutritious oats and bursting with the fresh flavors of mixed berries, these oatmeal cups are both delicious and satisfying. Not only do they taste great, but they also come together quickly and can easily be stored in the freezer for future breakfasts. Just pop them in the microwave or oven to reheat, and you’ll have a warm, filling breakfast ready in no time.
Ideal for serving 4-6 people, this recipe provides a batch of oatmeal cups that can be enjoyed throughout the week. They’re versatile, allowing for customization based on your favorite fruits or dietary preferences. Whether you enjoy them as-is or topped with a dollop of yogurt or a drizzle of honey, Sweet Berry Oatmeal Cups are sure to become a staple in your breakfast routine.
Ingredients (Serving Size: 4-6 people):
- 2 cups rolled oats
- 1 teaspoon baking powder
- 1 teaspoon cinnamon
- 1/2 teaspoon salt
- 1 cup milk (dairy or plant-based)
- 2 large eggs
- 1/4 cup honey or maple syrup
- 1 teaspoon vanilla extract
- 1 cup mixed berries (fresh or frozen)
- 1/4 cup chopped nuts (optional)
Instructions:
- Preheat the Oven: Start by preheating your oven to 350°F (175°C) and line a muffin tin with paper liners or lightly grease each cup with cooking spray to prevent sticking.
- Mix Dry Ingredients: In a large mixing bowl, combine the rolled oats, baking powder, cinnamon, and salt. Stir until well combined. This guarantees an even distribution of the leavening agent and spices throughout the oatmeal cups.
- Combine Wet Ingredients: In a separate bowl, whisk together the milk, eggs, honey or maple syrup, and vanilla extract. Make sure the mixture is smooth and well-blended to guarantee even sweetness and flavor in each cup.
- Incorporate Wet and Dry Mixtures: Pour the wet ingredients into the bowl of dry ingredients and gently stir until everything is evenly moistened. The mixture should be slightly runny.
- Fold in Berries: Gently fold the mixed berries into the oatmeal mixture. If using frozen berries, there’s no need to thaw them – they can be added directly to the mix. If desired, fold in the chopped nuts for added texture and flavor.
- Fill Muffin Tins: Evenly distribute the oatmeal mixture into the prepared muffin tin, filling each cup about 3/4 full. This allows room for the mixture to expand as it bakes.
- Bake: Place the muffin tin in the preheated oven and bake for 25-30 minutes, or until the tops are golden brown and a toothpick inserted into the center comes out clean.
- Cool and Store: Once baked, remove the oatmeal cups from the oven and allow them to cool in the tin for about 5 minutes before transferring them to a wire rack to cool completely. Store in an airtight container in the fridge for up to a week or freeze for up to three months.
Extra Tips: For added flavor and nutrition, consider topping your Sweet Berry Oatmeal Cups with a sprinkle of chia seeds or a spoonful of almond butter before serving. If you’re looking to make these oatmeal cups even more heart-healthy, you can substitute the eggs with flax eggs (1 tablespoon of flaxseed meal mixed with 2.5 tablespoons of water, left to sit for a few minutes).
Additionally, feel free to experiment with different types of berries or nuts based on what’s in season or your personal preference. When reheating from frozen, simply thaw them in the fridge overnight or microwave directly from frozen for a quick and easy breakfast.
Protein-Packed Egg Muffins

Protein-Packed Egg Muffins are a delightful and nutritious way to kickstart your mornings, especially when you’re pressed for time. These savory muffins are packed with protein and vegetables, making them an excellent breakfast choice for those who wish to maintain a balanced diet. The best part about these muffins is that they can be prepared in advance and stored in the freezer, guaranteeing you have a quick and healthy meal option ready to go on those busy mornings.
Whether you’re rushing out the door or simply want to enjoy a hearty breakfast with minimal prep, these egg muffins are your go-to solution. Each muffin is bursting with flavor from a mixture of eggs, cheese, and your choice of vegetables and proteins. The recipe is versatile, allowing you to customize it with your favorite ingredients or whatever you have on hand. This makes it a fantastic way to use up leftover veggies or meats.
Additionally, these muffins are perfect for meal prep; simply pop them in the microwave or oven to reheat, and you have a warm, satisfying breakfast in minutes. With a serving size of 4-6 people, this recipe is perfect for families or for those who like to meal prep for the week ahead.
Ingredients (serving size: 4-6 people):
- 10 large eggs
- 1 cup shredded cheddar cheese
- 1 cup chopped spinach
- 1/2 cup diced bell peppers
- 1/2 cup diced cooked ham or cooked sausage
- 1/4 cup chopped green onions
- Salt to taste
- Pepper to taste
- Non-stick cooking spray
Cooking Instructions:
- Preheat the Oven: Start by preheating your oven to 375°F (190°C). This will guarantee that your muffins cook evenly and achieve a nice, fluffy texture.
- Prepare the Muffin Tin: Generously spray a 12-cup muffin tin with non-stick cooking spray. This prevents the egg muffins from sticking to the tin and makes them easier to remove once baked.
- Mix the Ingredients: In a large mixing bowl, crack the eggs and whisk them until the yolks and whites are fully combined. Add the shredded cheese, chopped spinach, diced bell peppers, cooked ham or sausage, and chopped green onions. Season with salt and pepper. Mix everything together until well incorporated.
- Fill the Muffin Tin: Pour the egg mixture into each muffin cup, filling them about three-quarters full. This allows room for the muffins to rise as they bake.
- Bake the Muffins: Place the muffin tin in the preheated oven and bake for 20-25 minutes, or until the egg muffins are set and slightly golden on top. To check if they’re done, insert a toothpick into the center of a muffin; if it comes out clean, they’re ready.
- Cool and Store: Once baked, remove the muffin tin from the oven and let the muffins cool for about 5 minutes. Carefully remove the muffins from the tin and let them cool completely on a wire rack. Once cooled, they can be stored in an airtight container in the refrigerator for up to 5 days or in the freezer for up to 3 months.
Extra Tips:
When preparing Protein-Packed Egg Muffins, feel free to experiment with different flavor combinations by swapping in your favorite vegetables, cheeses, or meats. For added convenience, consider using pre-cooked meats or pre-chopped veggies.
If freezing the muffins, wrap each one individually in plastic wrap and then place them in a freezer bag to maintain freshness. To reheat, simply microwave for about 30-60 seconds or warm them in the oven at 350°F (175°C) for about 10 minutes. Enjoy these versatile muffins as a hearty breakfast, a quick snack, or even a protein-rich post-workout meal.
Veggie-Packed Quiche Cups

Veggie-Packed Quiche Cups are a delicious and nutritious way to start your day. These mini quiches are perfect for busy mornings as they can be made in advance and stored in the freezer. They’re packed with a variety of colorful vegetables, making them not only visually appealing but also a great source of vitamins and minerals.
The combination of eggs, cheese, and veggies creates a rich and satisfying flavor that will keep you energized throughout the day.
These quiche cups are easy to customize to your taste preferences or dietary needs, as you can mix and match your favorite vegetables and cheeses. They’re also a fantastic way to use up any leftover vegetables in your fridge.
Whether you’re preparing breakfast for a family or meal prepping for the week, these quiche cups are a versatile and convenient option that everyone will love.
Ingredients (Serves 4-6):
- 6 large eggs
- 1/2 cup milk
- 1/2 cup shredded cheddar cheese
- 1/4 cup diced bell peppers (any color)
- 1/4 cup chopped spinach
- 1/4 cup diced mushrooms
- 1/4 cup chopped onions
- 1/4 teaspoon salt
- 1/4 teaspoon black pepper
- Cooking spray or muffin liners
Cooking Instructions:
- Preheat the Oven: Preheat your oven to 375°F (190°C) to guarantee it’s ready for baking the quiche cups.
- Prepare the Muffin Tin: Lightly spray a muffin tin with cooking spray or line with muffin liners to prevent the quiche cups from sticking.
- Whisk Eggs and Milk: In a medium-sized bowl, whisk together the eggs and milk until well combined. This mixture will serve as the base for your quiche cups.
- Add the Cheese and Vegetables: Stir in the shredded cheddar cheese, diced bell peppers, chopped spinach, diced mushrooms, and chopped onions. Mix well to guarantee the vegetables and cheese are evenly distributed.
- Season the Mixture: Add salt and black pepper to the egg mixture. Stir again to guarantee the seasoning is evenly incorporated.
- Fill the Muffin Tin: Pour the egg and vegetable mixture evenly into the prepared muffin tin, filling each cup about 3/4 full to allow room for the quiche to rise.
- Bake the Quiche Cups: Place the muffin tin in the preheated oven and bake for 20-25 minutes, or until the quiche cups are set and lightly golden on top.
- Cool and Serve: Allow the quiche cups to cool slightly before running a knife around the edges to release them from the tin. Serve warm, or let them cool completely before storing for later use.
Extra Tips:
When making Veggie-Packed Quiche Cups, feel free to experiment with different vegetables and cheeses based on what you have on hand or what flavors you enjoy.
You can also add cooked bacon or sausage for a heartier option. To freeze, let the quiche cups cool completely, then wrap them individually in plastic wrap and place them in a freezer-safe bag.
Reheat in the microwave for about 30-60 seconds, or until heated through, for a quick and easy breakfast.
Banana Nut Pancake Bites

Banana Nut Pancake Bites are a delightful twist on the classic breakfast pancake, offering a bite-sized treat that’s perfect for busy mornings. These mini pancake bites are packed with the natural sweetness of bananas and the satisfying crunch of nuts, making them a nutritious and delicious way to start your day.
Perfect for meal prep, they can be made in advance, frozen, and reheated for a quick breakfast that’s both healthy and convenient. Ideal for serving 4-6 people, this recipe is designed to make your mornings smoother and more enjoyable. By preparing these Banana Nut Pancake Bites in advance, you not only save time but also guarantee you have a wholesome breakfast option ready to go.
Whether you enjoy them on their own or pair them with syrup or fresh fruit, these pancake bites will quickly become a family favorite.
Ingredients:
- 2 large ripe bananas
- 2 cups all-purpose flour
- 2 tablespoons sugar
- 2 teaspoons baking powder
- 1/2 teaspoon baking soda
- 1/4 teaspoon salt
- 1 cup milk
- 2 large eggs
- 1 teaspoon vanilla extract
- 1/4 cup vegetable oil
- 1/2 cup chopped walnuts
- Cooking spray or extra oil for greasing
Cooking Instructions:
- Preheat the Oven: Begin by preheating your oven to 350°F (175°C). Lightly grease a mini muffin tin with cooking spray or a little vegetable oil to prevent the pancake bites from sticking.
- Mash the Bananas: In a large mixing bowl, mash the ripe bananas with a fork until smooth. The bananas should be free of large lumps to guarantee even mixing with other ingredients.
- Mix Dry Ingredients: In a separate bowl, combine the all-purpose flour, sugar, baking powder, baking soda, and salt. Stir these dry ingredients together until well mixed.
- Combine Wet Ingredients: Add the milk, eggs, vanilla extract, and vegetable oil to the mashed bananas. Whisk the mixture until all the wet ingredients are well-blended.
- Mix Wet and Dry Ingredients: Gradually add the dry ingredient mixture to the wet ingredients, stirring gently until just combined. Avoid overmixing to guarantee the pancake bites remain light and fluffy.
- Add Nuts: Gently fold in the chopped walnuts, distributing them evenly throughout the batter for a consistent nutty flavor in every bite.
- Fill the Muffin Tin: Spoon the batter into the prepared mini muffin tin, filling each cup about 3/4 full. This allows room for the pancake bites to rise as they bake.
- Bake: Place the muffin tin in the preheated oven and bake for 12-15 minutes, or until the pancake bites are golden brown and a toothpick inserted into the center comes out clean.
- Cool and Serve: Allow the pancake bites to cool in the pan for a few minutes before transferring them to a wire rack. Serve immediately, or let them cool completely before freezing for future breakfasts.
Extra Tips:
To guarantee the best texture and flavor, make sure your bananas are ripe, as they’ll be sweeter and easier to mash. You can customize the nuts in the recipe by substituting pecans or almonds for walnuts, or even mix in some chocolate chips for an extra treat.
If you plan to freeze the pancake bites, arrange them in a single layer on a baking sheet and freeze until solid before transferring them to a freezer-safe container. This will prevent them from sticking together. When ready to eat, simply reheat in the microwave or oven until warmed through.
Cheesy Sausage Breakfast Casserole

Cheesy Sausage Breakfast Casserole is the perfect make-ahead breakfast meal that combines savory sausage, fluffy eggs, and plenty of cheese to create a satisfying and delicious dish. This casserole isn’t only ideal for busy mornings but also makes a great brunch option for gatherings or lazy weekend mornings.
Preparing this dish ahead of time allows the flavors to meld together, making it even more delicious when reheated.
This breakfast casserole is a versatile dish that can easily be customized to suit your family’s preferences. You can add vegetables like bell peppers, onions, or spinach to boost the nutrition and flavor. The combination of sausage and cheese creates a rich, comforting meal that’s sure to be a hit with everyone in the family.
Plus, the ease of preparation means you can spend less time in the kitchen and more time enjoying your morning.
Ingredients (Serves 4-6):
- 1 pound breakfast sausage
- 6 large eggs
- 2 cups shredded cheddar cheese
- 2 cups milk
- 6 slices of bread, cubed
- 1 teaspoon salt
- 1/2 teaspoon black pepper
- 1/2 teaspoon garlic powder
- 1/2 teaspoon onion powder
Cooking Instructions:
- Preheat the Oven: Preheat your oven to 350°F (175°C) to guarantee it’s at the right temperature by the time you’re ready to bake the casserole.
- Cook the Sausage: In a skillet over medium heat, cook the breakfast sausage until browned and fully cooked, breaking it into small crumbles. Drain excess fat and set aside.
- Prepare the Bread: Cut the slices of bread into cubes and spread them evenly in the bottom of a greased 9×13 inch baking dish. This will form the base of your casserole.
- Mix the Egg Mixture: In a large mixing bowl, whisk together the eggs, milk, salt, black pepper, garlic powder, and onion powder until well combined.
- Assemble the Casserole: Spread the cooked sausage over the bread cubes in the baking dish. Pour the egg mixture over the top, guaranteeing all the bread cubes are soaked. Sprinkle the shredded cheddar cheese evenly over the casserole.
- Bake the Casserole: Cover the dish with aluminum foil and bake in the preheated oven for 30 minutes. Remove the foil and bake for an additional 10-15 minutes until the cheese is bubbly and golden brown.
- Cool and Serve: Allow the casserole to cool for a few minutes before serving. This helps the casserole set and makes it easier to slice and serve.
Extra Tips:
For added flavor, consider adding a variety of herbs such as chives or parsley to the egg mixture. If you prefer a spicier dish, you can use hot sausage or add a pinch of red pepper flakes.
This casserole can be stored in the refrigerator for up to three days or frozen for up to two months. To freeze, guarantee the casserole is fully cooled, then wrap in plastic wrap and aluminum foil. When ready to serve, reheat in the oven at 350°F until warmed through.
Spinach and Feta Breakfast Wraps

Start your day on a healthy note with these delicious Spinach and Feta Breakfast Wraps, a perfect make-ahead meal for busy mornings. Combining nutrient-rich spinach with the creamy tanginess of feta cheese, these wraps aren’t just nutritious but also bursting with flavor.
They’re designed to be freezer-friendly, making them an ideal option for meal prep enthusiasts who want a quick, satisfying breakfast without compromising on taste or nutrition.
These wraps are easy to assemble and can be customized to suit your taste preferences. Feel free to add in your favorite veggies or switch up the cheese to keep things interesting. The wraps can be frozen individually and reheated in a matter of minutes, providing a warm, hearty meal that will keep you energized throughout the morning.
Prepare a batch over the weekend, and you’ll have a week’s worth of breakfasts ready to go!
Ingredients for 4-6 Servings:
- 8 large eggs
- 1 cup fresh spinach, chopped
- 1/2 cup feta cheese, crumbled
- 1/4 cup milk
- 6 whole wheat tortillas
- Salt and pepper to taste
- 1 tablespoon olive oil
- 1 small onion, finely chopped
- 1 red bell pepper, diced
Cooking Instructions:
- Prepare the Egg Mixture: In a large mixing bowl, whisk together the eggs, milk, salt, and pepper until well combined. This mixture will serve as the base of your filling, so make certain it’s thoroughly mixed.
- Cook the Vegetables: Heat the olive oil in a large skillet over medium heat. Add the chopped onion and diced red bell pepper, sautéing until the onion is translucent and the pepper is tender, about 5 minutes.
- Add Spinach: Stir in the chopped spinach, cooking for another 2 minutes until it wilts. This guarantees that the spinach is tender and well integrated with the other vegetables.
- Scramble the Eggs: Pour the egg mixture over the cooked vegetables in the skillet. Cook the eggs, stirring frequently, until they’re fully scrambled and set, about 5-7 minutes.
- Incorporate Feta Cheese: Remove the skillet from heat and gently fold in the crumbled feta cheese. The residual heat will soften the cheese without melting it completely, adding a creamy texture to the filling.
- Assemble the Wraps: Lay out the whole wheat tortillas on a clean surface. Divide the scrambled egg mixture evenly among the tortillas, placing it in the center of each tortilla.
- Wrap It Up: Fold in the sides of the tortilla over the filling, then roll it up from the bottom to the top. Confirm that the wraps are tightly sealed to prevent the filling from spilling out.
- Freeze the Wraps: Individually wrap each breakfast wrap in aluminum foil or plastic wrap. Place them in a single layer in a freezer-safe bag or container, and store in the freezer for up to 3 months.
- Reheat and Serve: When ready to eat, remove a wrap from the freezer and unwrap it. Reheat in the microwave for 1-2 minutes or until heated through, or bake in a preheated oven at 350°F (175°C) for 10-15 minutes.
Extra Tips:
For an added crunch, consider including chopped nuts or seeds in your wraps. If you’re looking to reduce calories, use egg whites or a combination of whole eggs and egg whites.
To prevent the tortillas from becoming soggy, allow the egg mixture to cool slightly before assembling. For extra flavor, try adding herbs like dill or parsley to the egg mixture.
Apple Cinnamon French Toast Sticks

Apple Cinnamon French Toast Sticks are a delightful and convenient breakfast option that can be prepped ahead of time and stored in the freezer for those busy mornings. These French toast sticks combine the comforting flavors of sweet apples and warm cinnamon, making them a family favorite.
Perfect for a quick breakfast or a satisfying snack, they’re easy to make and can be cooked directly from the freezer, saving you precious time without sacrificing flavor.
Cooking up a batch of these Apple Cinnamon French Toast Sticks isn’t only simple but also allows for a great opportunity to involve the little ones in the kitchen. With minimal ingredients and straightforward steps, this recipe is both fun and practical.
Whether you prefer to enjoy them with a drizzle of maple syrup or a dusting of powdered sugar, these French toast sticks are sure to become a staple in your breakfast menu.
Ingredients (Serves 4-6)
- 1 loaf of thick-sliced bread (such as brioche or Texas toast)
- 3 large eggs
- 1 cup milk
- 1 teaspoon vanilla extract
- 1 tablespoon ground cinnamon
- 2 tablespoons sugar
- 1/2 cup finely chopped apples (any variety)
- Butter or non-stick cooking spray (for cooking)
- Maple syrup or powdered sugar (optional, for serving)
Cooking Instructions
- Prepare the Bread: Start by cutting the loaf of bread into thick sticks, about 1-inch wide. This will yield approximately 12-16 sticks depending on the loaf size.
- Make the Batter: In a large mixing bowl, whisk together the eggs, milk, vanilla extract, ground cinnamon, and sugar until well combined. Make sure the cinnamon and sugar are evenly distributed throughout the mixture.
- Add Apples: Stir the finely chopped apples into the batter, ensuring they’re evenly mixed in. The apples will add a lovely texture and flavor to the French toast sticks.
- Soak the Bread: Dip each bread stick into the batter, allowing it to soak for a few seconds on each side to absorb the mixture. Be careful not to over-soak, as this can make the bread too soggy.
- Cook the Sticks: Heat a large skillet or griddle over medium heat and add a dollop of butter or spray with non-stick cooking spray. Cook the soaked bread sticks in batches, turning occasionally, until they’re golden brown on all sides, about 3-4 minutes per side.
- Cool and Freeze: Allow the cooked French toast sticks to cool completely. Once cooled, place them in a single layer on a baking sheet and freeze for about 1-2 hours. After freezing, transfer them to an airtight container or freezer bag for long-term storage.
- Reheat: When ready to serve, you can reheat the French toast sticks directly from the freezer. Preheat your oven to 375°F (190°C) and bake for 8-10 minutes, or until heated through. Alternatively, you can reheat them in a toaster oven or air fryer.
Extra Tips
For the best texture, use a bread that’s slightly stale or leave fresh bread slices out for a few hours to dry out before making the French toast sticks. This helps the bread hold its shape and absorb the batter without becoming too soggy.
If you want to add a bit of crunch, you can coat the sticks with crushed cornflakes before cooking for an extra crispy texture. Also, feel free to experiment with different types of apples or add a pinch of nutmeg for additional warmth and flavor in the batter.
Hearty Breakfast Sandwiches
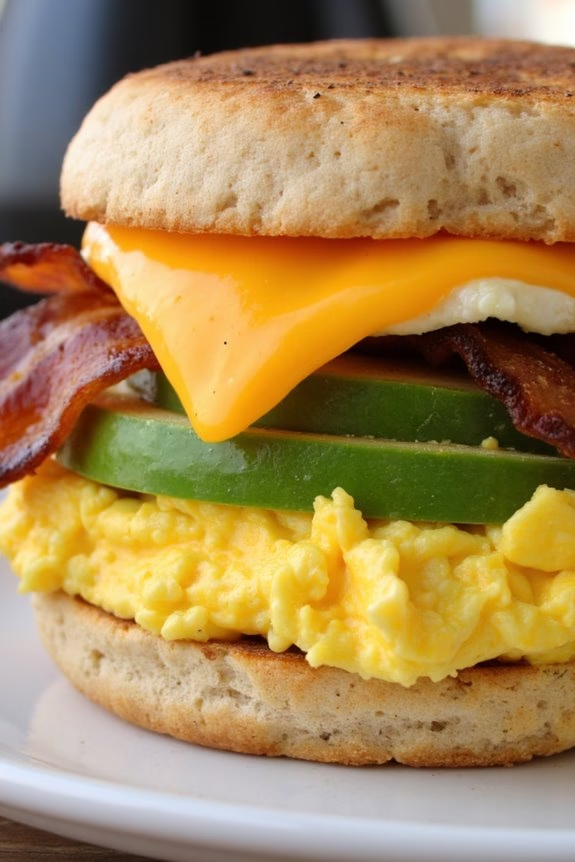
Start your morning off right with these delicious and hearty breakfast sandwiches, perfect for prepping ahead and enjoying throughout the week.
These sandwiches are loaded with fluffy scrambled eggs, crispy bacon, creamy avocado, and gooey melted cheese, all nestled between a toasted English muffin. Ideal for those busy mornings, these freezer-friendly sandwiches can be made in bulk, stored, and quickly reheated for a satisfying meal that will keep you full and energized.
Whether you’re rushing out the door or savoring a leisurely morning at home, these breakfast sandwiches are a versatile and filling option. By preparing them in advance, you can avoid the morning scramble and have a nutritious meal ready in minutes.
Plus, customizing them to your taste is easy – swap out ingredients or add your favorite veggies to make it your own.
Ingredients (Serves 4-6):
- 6 English muffins, split and toasted
- 6 large eggs
- 1/4 cup milk
- Salt and pepper to taste
- 6 slices of bacon
- 6 slices of cheddar cheese
- 1 ripe avocado, sliced
- 1 tablespoon butter or oil for cooking
- Optional: Hot sauce or ketchup for serving
Cooking Instructions:
- Prepare the Bacon: Preheat your oven to 400°F (200°C). Place the bacon slices on a baking sheet lined with parchment paper. Bake for 15-20 minutes or until crispy. Remove from the oven and drain on paper towels.
- Scramble the Eggs: In a medium bowl, whisk together the eggs, milk, salt, and pepper until well combined. Heat a non-stick skillet over medium heat and add the butter or oil. Pour in the egg mixture and cook, stirring gently, until the eggs are fully cooked and fluffy. Remove from heat.
- Assemble the Sandwiches: On the bottom half of each toasted English muffin, layer scrambled eggs, a slice of cheese, a piece of crispy bacon, and avocado slices. Top with the other half of the muffin.
- Wrap and Freeze: Wrap each assembled sandwich tightly in aluminum foil or plastic wrap. Place the wrapped sandwiches in a freezer-safe bag or container and store in the freezer for up to one month.
- Reheat and Serve: To reheat, remove the sandwich from the freezer and unwrap. If using a microwave, place the sandwich on a microwave-safe plate and heat on high for 1-2 minutes, or until heated through. Alternatively, reheat in an oven preheated to 350°F (175°C) for 10-15 minutes. Serve immediately, with hot sauce or ketchup if desired.
Extra Tips:
When preparing these sandwiches, consider using a variety of cheeses or adding extra fillings like sautéed spinach, sliced tomatoes, or roasted red peppers for added flavor and nutrition.
If you prefer a meatless option, substitute the bacon with a plant-based alternative or omit it altogether. To guarantee even reheating, cut the sandwiches in half before microwaving, and always wrap the sandwiches tightly before freezing to prevent freezer burn.
Blueberry Almond Smoothie Packs
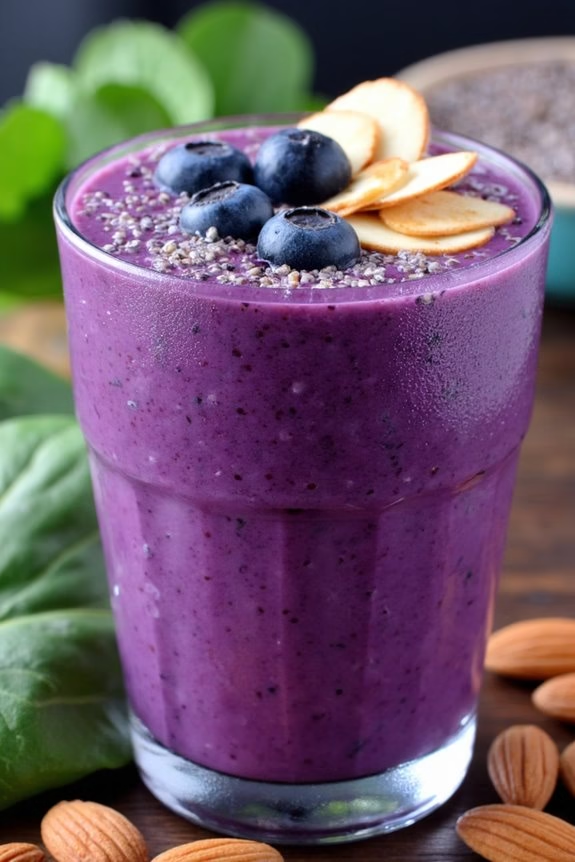
Blueberry Almond Smoothie Packs are a perfect solution for those busy mornings when you need a nutritious breakfast on the go. By preparing these smoothie packs in advance, you can guarantee a healthy start to your day without the hassle of gathering ingredients each morning.
These smoothie packs are loaded with the natural sweetness of blueberries, the creamy richness of almonds, and the nutritional benefits of spinach, making them a delicious and wholesome choice. The combination of fruits, nuts, and greens makes this smoothie not only invigorating but also packed with antioxidants, fiber, and protein.
Whether you’re rushing to work, heading to the gym, or simply looking to simplify your morning routine, these freezer-friendly smoothie packs will have you covered. Once prepared, just blend, pour, and enjoy a nutritious breakfast that will keep you energized throughout the day.
Ingredients (Serves 4-6):
- 3 cups fresh or frozen blueberries
- 2 cups fresh baby spinach leaves
- 1 cup plain Greek yogurt
- 1 cup almond milk
- 1/2 cup almond butter
- 2 tablespoons chia seeds
- 2 tablespoons honey (optional)
- 1 teaspoon vanilla extract
- 1/2 teaspoon almond extract
- 1 cup ice cubes
Cooking Instructions:
- Prepare the Ingredients: Start by washing and drying the fresh blueberries and spinach leaves. If you’re using frozen blueberries, guarantee they’re properly thawed before use.
- Assemble the Smoothie Packs: Divide the blueberries, spinach, Greek yogurt, almond milk, almond butter, chia seeds, honey, vanilla extract, and almond extract equally into 4-6 airtight freezer bags or containers. This will make it easy to grab a pack and blend when needed.
- Freeze the Packs: Seal each bag or container tightly, guaranteeing there’s minimal air trapped inside. Place them in the freezer, where they can be stored for up to 3 months.
- Blend the Smoothie: When ready to enjoy, take a smoothie pack from the freezer. Add the contents to a blender along with 1 cup of ice cubes. Blend on high until smooth and creamy. If the consistency is too thick, you can add a splash of almond milk to reach your desired texture.
- Serve and Enjoy: Pour the smoothie into a glass and serve immediately for the freshest taste. You can also take it with you in a portable smoothie container for a nutritious breakfast on the go.
Extra Tips:
To guarantee the best flavor and texture, consider freezing the blueberries and spinach separately in the pack. This will allow them to maintain their individual textures and prevent clumping.
If you’re looking to reduce sugar intake, you can skip the honey or substitute it with a natural sweetener like stevia. For a protein boost, consider adding a scoop of your favorite protein powder to each smoothie pack before freezing.
Overnight Chia Seed Pudding

Overnight Chia Seed Pudding is a delightful and nutritious breakfast option that’s perfect for those hectic mornings when you need a quick and healthy meal. The beauty of this recipe lies in its simplicity and versatility; it requires minimal preparation time and can be left to set overnight.
Chia seeds are packed with fiber and omega-3 fatty acids, making them an excellent choice for a health-conscious breakfast. When combined with your choice of milk and sweetener, they swell up to create a pudding-like consistency that can be customized with various toppings to suit your taste.
This recipe is perfect for meal prepping, as it can be made in larger quantities and stored in the fridge for up to five days. Whether you enjoy it plain or topped with fresh fruits, nuts, or a drizzle of honey, Overnight Chia Seed Pudding is sure to become a staple in your breakfast routine. Preparing it in advance means you can enjoy a nutritious meal without any morning rush, guaranteeing a stress-free start to your day.
Ingredients (Serving Size: 4-6 people):
- 1 cup chia seeds
- 4 cups almond milk (or any milk of choice)
- 1/4 cup maple syrup or honey
- 1 teaspoon vanilla extract
- A pinch of salt
- Optional toppings: fresh berries, sliced bananas, nuts, coconut flakes, or granola
Instructions:
- Combine Ingredients: In a large mixing bowl, combine the chia seeds, almond milk, maple syrup (or honey), vanilla extract, and a pinch of salt. Stir well to assure the chia seeds are evenly distributed throughout the liquid.
- Initial Mixing: Let the mixture sit for about 5 minutes and then stir again. This helps to prevent the seeds from clumping together as they start to absorb the liquid.
- Refrigerate: Cover the bowl with plastic wrap or a lid and place it in the refrigerator. Allow the pudding to set for at least 4 hours, but ideally overnight, to achieve the perfect pudding consistency.
- Serve: Once the pudding has set, give it a good stir before serving. Spoon the chia seed pudding into individual bowls or jars and top with your choice of fresh berries, sliced bananas, nuts, coconut flakes, or granola.
- Store: If not consuming immediately, store the prepared pudding in airtight containers in the refrigerator. This pudding can be stored for up to 5 days, making it ideal for meal prep.
Extra Tips:
For a creamier texture, try using half milk and half yogurt instead of using all milk. You can also experiment with different types of milk, such as coconut or oat milk, to find your preferred taste and texture.
Adjust the sweetness to your liking by varying the amount of maple syrup or honey. If you prefer a smoother pudding, blend the mixture after it has set, or opt for ground chia seeds instead of whole ones.
Don’t hesitate to get creative with your toppings, as they can add both flavor and nutrition to your breakfast.
Zucchini and Cheese Frittata

Zucchini and Cheese Frittata is a versatile and satisfying breakfast dish that’s perfect for meal prep. It combines the fresh, mild flavor of zucchini with the rich, creamy taste of cheese to create a dish that’s both nutritious and delicious. This frittata can be made in advance, stored in the freezer, and reheated for a quick and easy breakfast option on busy mornings. It’s a great way to start your day with a balanced meal that’s packed with protein and vegetables.
This recipe is designed to serve 4-6 people, making it ideal for family breakfasts or meal prepping for the week. The combination of eggs, zucchini, and cheese creates a fluffy and flavorful frittata that’s sure to please everyone at the table. Enjoy it as is, or pair it with a side salad or toast for a complete meal. With its simple ingredients and straightforward preparation, this zucchini and cheese frittata is a must-try for anyone looking to add variety to their breakfast routine.
Ingredients (Serves 4-6):
- 8 large eggs
- 1 cup shredded cheese (cheddar, mozzarella, or your choice)
- 1 medium zucchini, thinly sliced
- 1/4 cup milk
- 1 tablespoon olive oil
- 1/2 teaspoon salt
- 1/4 teaspoon black pepper
- 1/4 cup chopped fresh herbs (such as parsley or basil)
- 1/4 cup chopped onion
- 2 cloves garlic, minced
Cooking Instructions:
- Preheat the Oven: Start by preheating your oven to 350°F (175°C). This guarantees your frittata will cook evenly once placed in the oven.
- Prepare the Zucchini: In a large skillet, heat olive oil over medium heat. Add the sliced zucchini and chopped onion, sautéing for about 5 minutes until they’re soft. Add the minced garlic and sauté for another minute until fragrant.
- Mix the Eggs: In a large bowl, whisk together the eggs, milk, salt, and pepper until well combined. Stir in the shredded cheese and fresh herbs.
- Combine Ingredients: Add the sautéed zucchini, onion, and garlic mixture to the egg mixture, stirring until all ingredients are evenly distributed.
- Cook the Frittata: Pour the entire mixture back into the skillet (confirm it’s oven-proof) or transfer it to a greased baking dish. Place it in the preheated oven and bake for 20-25 minutes, or until the frittata is set and slightly golden on top.
- Cool and Serve: Allow the frittata to cool for a few minutes before slicing and serving. Enjoy it warm, or let it cool completely before wrapping it for freezer storage.
Extra Tips:
When making this frittata, feel free to customize it with other vegetables you have on hand, such as bell peppers or mushrooms. You can also experiment with different types of cheese for varied flavors.
To freeze, let the frittata cool completely, then cut it into individual portions. Wrap each portion tightly in plastic wrap or place them in freezer-safe bags. To reheat, simply microwave or bake the frozen frittata slices until warmed through. This dish is an excellent meal prep option that can be enjoyed in various ways throughout the week.
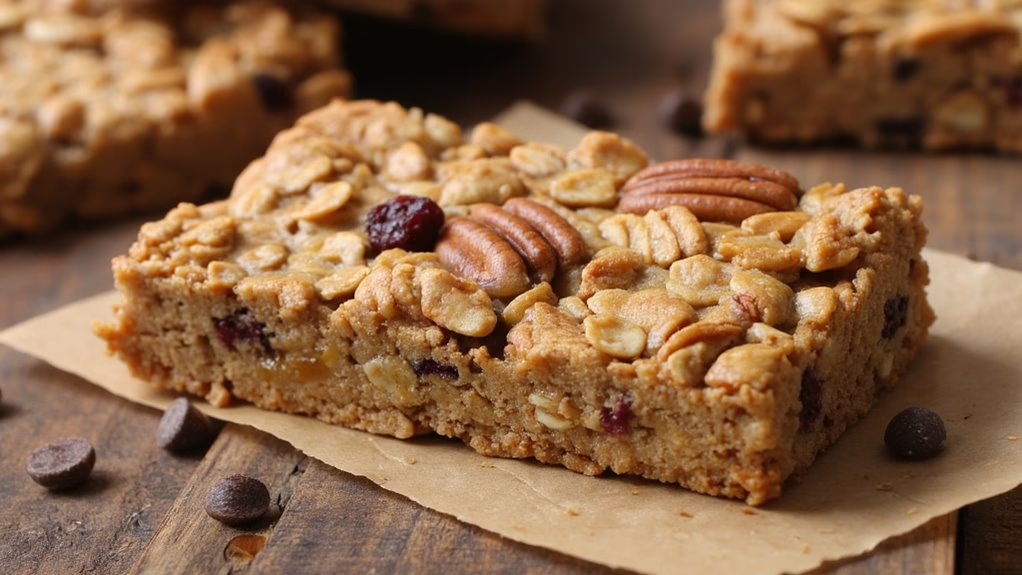
Maple Pecan Granola Bars
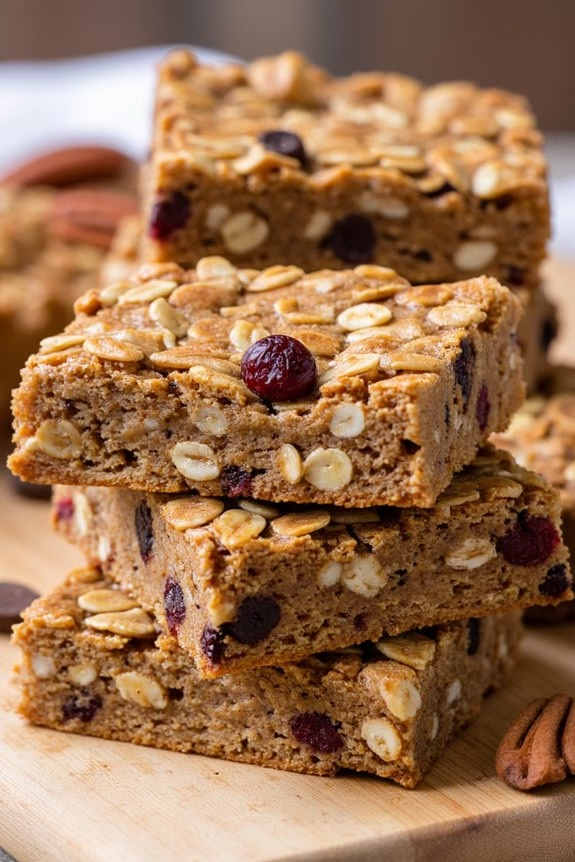
Maple Pecan Granola Bars are a delicious and nutritious breakfast option that you can prepare in advance and store in your freezer for those busy mornings. These bars combine the sweet and robust flavors of maple syrup with the crunchy texture of pecans, making them an irresistible morning treat. Not only are they great for breakfast, but they also make a perfect snack to keep your energy levels up throughout the day.
Preparing these granola bars ahead of time guarantees you always have a quick, healthy option on hand. Making Maple Pecan Granola Bars at home allows you to control the ingredients, guaranteeing they’re fresh and tailored to your taste. This recipe is designed for a serving size of 4-6 people, making it ideal for families or meal prepping for the week.
With simple, wholesome ingredients and easy-to-follow instructions, you’ll be able to whip up a batch of these bars in no time. They’re perfect for freezing, so you can enjoy a homemade breakfast whenever you need it.
Ingredients (Serves 4-6):
- 2 cups rolled oats
- 1 cup pecans, roughly chopped
- 1/2 cup maple syrup
- 1/4 cup honey
- 1/4 cup unsalted butter
- 1/2 teaspoon vanilla extract
- 1/2 teaspoon ground cinnamon
- 1/4 teaspoon salt
- 1/2 cup dried cranberries (optional)
- 1/4 cup mini chocolate chips (optional)
Cooking Instructions:
- Preheat the Oven: Start by preheating your oven to 350°F (175°C). This guarantees that the oven is hot and ready to bake the granola bars evenly.
- Toast the Oats and Pecans: Spread the rolled oats and chopped pecans on a large baking sheet. Place them in the preheated oven and toast for about 10 minutes, stirring halfway through, until they’re lightly golden. This enhances their flavor and crunch.
- Prepare the Wet Ingredients: In a saucepan over medium heat, combine the maple syrup, honey, and unsalted butter. Stir continuously until the butter is fully melted and the mixture is smooth. Remove the saucepan from heat and stir in the vanilla extract, ground cinnamon, and salt.
- Mix Everything Together: In a large mixing bowl, combine the toasted oats and pecans with the wet ingredients. Stir until the mixture is well-coated. If desired, fold in the dried cranberries and mini chocolate chips for added flavor and texture.
- Shape the Granola Bars: Line an 8×8 inch baking dish with parchment paper, leaving some overhang on the sides for easy removal. Press the granola mixture firmly and evenly into the dish with a spatula or your hands. Guarantee it’s compact to help the bars hold their shape after baking.
- Bake: Place the baking dish in the oven and bake for 20-25 minutes, or until the edges are golden brown. This will help the bars set and become chewy.
- Cool Completely: Remove the baking dish from the oven and allow it to cool completely on a wire rack. Once cool, lift the granola slab out of the dish using the parchment paper overhang and cut it into bars of your preferred size.
- Freeze for Later: If you’re meal prepping, wrap each bar individually in plastic wrap or parchment paper and store them in an airtight container or a ziplock bag in the freezer.
Extra Tips:
When making Maple Pecan Granola Bars, be sure to press the mixture firmly into the baking dish as this helps the bars hold together better. If you prefer softer bars, you can reduce the baking time slightly.
Additionally, feel free to experiment with different add-ins like sunflower seeds, coconut flakes, or other dried fruits to tailor the bars to your taste. When freezing, label the container with the date so you can keep track of their freshness; they should last up to three months in the freezer.
Enjoy your homemade breakfast bars straight from the freezer or let them thaw for a few minutes to your desired texture.