
Do you ever feel the morning rush and wish you had a delicious breakfast ready in no time? Freezer-friendly breakfasts are a game-changer. Think breakfast burritos, egg muffin cups, and mini frittatas that you can simply reheat. It’s like having a ready-to-go breakfast buffet. Let’s explore some quick and tasty recipes to make your mornings easier.
Breakfast Burritos

Breakfast burritos are a versatile and convenient meal option that can be enjoyed any time of the day. Perfect for busy mornings, these delicious and hearty burritos can be made ahead of time and frozen for later use. With a combination of eggs, cheese, meat, and veggies, breakfast burritos aren’t only nutritious but also a great way to start your day with a burst of energy.
This recipe for freezer-friendly breakfast burritos serves 4-6 people, making it ideal for meal prep or feeding a family. By preparing and freezing these burritos, you can guarantee a quick and satisfying breakfast that requires minimal effort on busy mornings. Simply heat them up straight from the freezer and enjoy a delicious, homemade breakfast within minutes.
Ingredients:
- 6 large eggs
- 1/4 cup milk
- 1/2 teaspoon salt
- 1/4 teaspoon black pepper
- 1 tablespoon olive oil
- 1 cup cooked breakfast sausage (crumbled)
- 1 cup shredded cheddar cheese
- 1 cup diced bell peppers (any color)
- 1 cup diced onions
- 6 large flour tortillas
Instructions:
- Prepare the Egg Mixture: In a medium-sized bowl, whisk together the eggs, milk, salt, and black pepper until well combined and slightly frothy.
- Cook the Vegetables: Heat the olive oil in a large skillet over medium heat. Add the diced bell peppers and onions. Sauté for about 5 minutes, or until the vegetables are softened and slightly caramelized.
- Cook the Eggs: Pour the egg mixture into the skillet with the vegetables. Cook, stirring gently, until the eggs are scrambled and cooked through, about 5-7 minutes.
- Assemble the Burritos: Lay each tortilla flat. Evenly divide the cooked sausage, scrambled eggs, and cheese among the tortillas. Spread the filling in the center of each tortilla.
- Wrap the Burritos: Fold in the sides of each tortilla, then roll it up from the bottom to form a burrito. Make sure the filling is securely tucked inside.
- Wrap for Freezing: Tightly wrap each burrito in aluminum foil or plastic wrap. Place the wrapped burritos in a large resealable plastic bag. Label the bag with the date and contents.
- Freeze the Burritos: Store the burritos in the freezer for up to 3 months. When ready to eat, remove the foil or plastic wrap and microwave on high for 2-3 minutes, or until heated through. Alternatively, reheat in an oven at 350°F (175°C) for about 20 minutes.
Extra Tips:
When making freezer-friendly breakfast burritos, remember to let the filling cool slightly before wrapping to prevent the tortillas from becoming soggy.
You can customize your burritos by adding your favorite ingredients, such as black beans, spinach, or salsa, for added flavor and nutrition.
For a lighter version, consider using whole wheat tortillas and turkey sausage.
To guarantee even reheating, allow the burritos to thaw in the refrigerator overnight before microwaving or heating in the oven.
Egg Muffin Cups

Egg Muffin Cups are a perfect quick breakfast option that can be easily made ahead and stored in the freezer for those hectic mornings. These savory delights aren’t only customizable with your choice of ingredients but are also packed with protein, making them a nutritious start to your day.
Whether you’re rushing off to work or need a fast breakfast for the family, egg muffin cups are a convenient, delicious solution.
Preparing Egg Muffin Cups involves combining fresh ingredients such as eggs, vegetables, cheese, and protein of your choice, all baked in a muffin tin. They’re simple to make, easy to store, and can be reheated in minutes for a warm, satisfying breakfast. This recipe serves 4-6 people, making it ideal for family breakfasts or meal prepping for the week.
Ingredients for Egg Muffin Cups (serving size: 4-6 people):
- 10 large eggs
- 1 cup diced bell peppers (any color)
- 1 cup diced cooked ham or cooked bacon
- 1 cup shredded cheddar cheese
- 1/2 cup chopped spinach
- 1/4 cup milk
- Salt and pepper to taste
- Non-stick cooking spray
Cooking Instructions:
1. Preheat the Oven: Start by preheating your oven to 350°F (175°C) to guarantee it’s hot and ready for baking when the muffin tray is prepared.
2. Prepare the Muffin Tin: Use non-stick cooking spray to lightly coat a 12-cup muffin tin. This prevents the egg muffins from sticking to the pan and makes for easy removal.
3. Mix the Ingredients: In a large mixing bowl, crack the eggs and whisk them together with the milk until well combined. Add salt and pepper to taste.
Stir in the diced bell peppers, diced ham or bacon, shredded cheese, and chopped spinach. Confirm all ingredients are evenly distributed throughout the egg mixture.
4. Fill the Muffin Cups: Carefully pour the egg mixture into each muffin cup, filling them about three-quarters full. This allows space for the egg mixture to expand as it cooks.
5. Bake the Muffins: Place the muffin tin in the preheated oven and bake for about 20-25 minutes, or until the egg muffins are fully set and lightly golden on top.
To check for doneness, insert a toothpick into the center of a muffin; it should come out clean.
6. Cool and Store: Once baked, remove the muffin tin from the oven and let the egg muffins cool in the pan for a few minutes before transferring them to a wire rack to cool completely.
Once cooled, you can store them in an airtight container or freezer bag and freeze them for up to 2 months.
Extra Tips:
When making Egg Muffin Cups, feel free to get creative with the ingredients based on your preferences or what you have on hand. You can substitute or add other vegetables like mushrooms, onions, or tomatoes, and switch up the cheese or protein for variety.
To reheat, simply pop a frozen egg muffin in the microwave for about 1-2 minutes or until heated through. For an added touch, serve these muffins with a side of salsa or hot sauce for extra flavor. Enjoy a quick, warm breakfast without the morning rush!
Overnight Oats
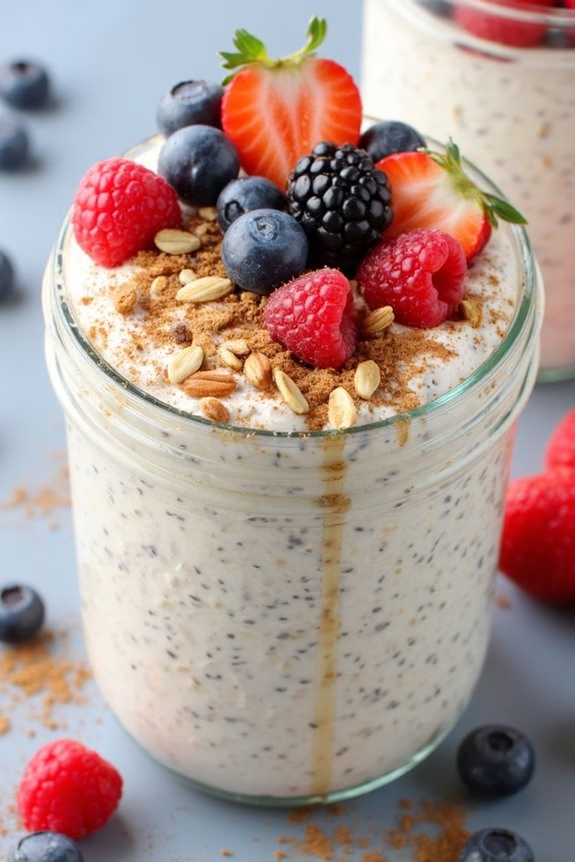
Overnight oats are a convenient and nutritious breakfast option that can be prepared in advance, making them perfect for those busy mornings when you’re on the go. This recipe for freezer-friendly overnight oats allows you to batch prepare your breakfast, ensuring that you have a healthy meal ready whenever you need it. By preparing these oats ahead of time and storing them in the freezer, you can enjoy a quick, hearty breakfast that only requires a few minutes of preparation the night before you plan to eat it.
This recipe serves 4-6 people and can be customized with your favorite fruits, nuts, and seeds, making it versatile and adaptable to suit your personal taste preferences. The base recipe is simple, consisting of oats soaked in milk or a plant-based alternative, which allows them to soften and absorb flavors overnight. The addition of yogurt and chia seeds not only enhances the creamy texture of the oats but also boosts the nutritional profile, providing you with a balanced meal rich in fiber, protein, and healthy fats.
Ingredients for 4-6 servings:
- 3 cups rolled oats
- 3 cups milk (dairy or plant-based)
- 1 cup Greek yogurt
- 6 tablespoons chia seeds
- 2 tablespoons honey or maple syrup
- 1 teaspoon vanilla extract
- 1 tablespoon cinnamon
- Assorted toppings: fresh berries, sliced bananas, nuts, seeds, or dried fruit (optional)
Cooking Instructions:
- Prepare the Base Mixture: In a large mixing bowl, combine the rolled oats, milk, Greek yogurt, chia seeds, honey or maple syrup, vanilla extract, and cinnamon. Stir everything together thoroughly until well combined.
- Distribute into Containers: Divide the oat mixture evenly into individual freezer-safe containers or jars, leaving some space at the top for expansion. This will make it easy to grab a single serving whenever you need it.
- Add Toppings: If you plan to add any toppings before freezing, such as nuts or seeds, now is the time to do so. However, it’s best to add fresh fruit or more delicate toppings just before serving to keep them fresh.
- Seal and Freeze: Secure the lids on your containers tightly to avoid freezer burn. Place the containers in the freezer and store them for up to 3 months.
- Thaw and Serve: The night before you plan to enjoy your oats, remove a container from the freezer and transfer it to the refrigerator to thaw overnight. In the morning, give the oats a good stir, add any fresh toppings you desire, and enjoy your delicious and nutritious breakfast.
Extra Tips:
For best results, use rolled oats as they hold up better than quick oats when frozen and thawed. If you prefer a creamier texture, increase the amount of Greek yogurt or add a splash more milk when serving. Experiment with different flavor combinations by adding cocoa powder, almond extract, or even a dollop of nut butter before freezing.
Finally, remember to label your containers with the date to keep track of freshness in the freezer.
Pancake Stacks
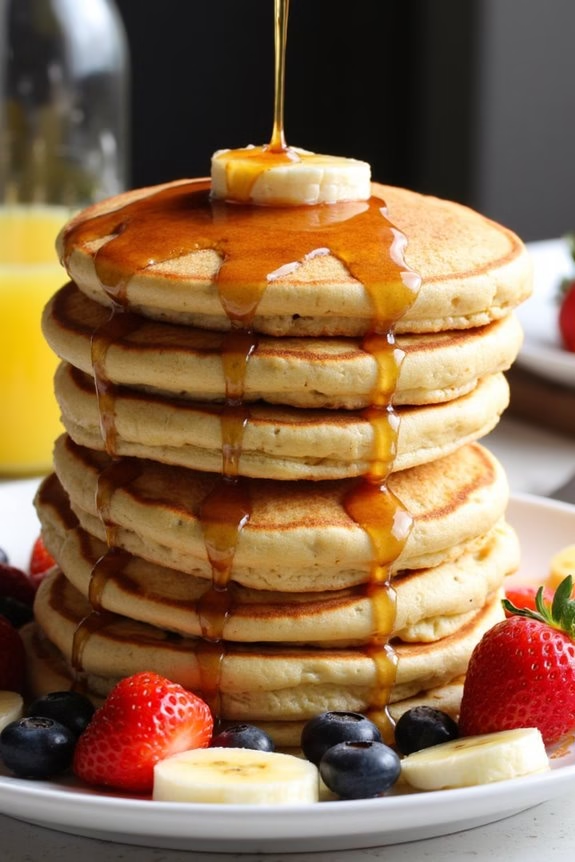
Pancake Stacks are a delightful, time-saving breakfast option that can be prepared in advance and stored in the freezer for those hectic mornings when time is short. These versatile stacks aren’t only quick to make but also offer a comforting, fluffy texture that pairs beautifully with a variety of toppings, from fresh fruits to a drizzle of maple syrup.
Whether you’re preparing breakfast for a busy family or simply planning ahead for yourself, Pancake Stacks are a delicious solution. Freezing pancakes is a convenient way to guarantee you always have a nutritious breakfast option on hand. By following this simple recipe, you’ll be able to whip up a batch of pancakes that can be frozen and reheated with ease, without losing their fluffy texture and delightful taste.
This recipe yields enough pancakes to serve 4-6 people, making it perfect for a family breakfast or meal prep session.
Ingredients for Pancake Stacks (Serves 4-6):
- 2 cups all-purpose flour
- 2 tablespoons granulated sugar
- 2 teaspoons baking powder
- 1/2 teaspoon baking soda
- 1/2 teaspoon salt
- 2 large eggs
- 2 cups buttermilk
- 1/4 cup melted butter
- 1 teaspoon vanilla extract
- Butter or oil for cooking
Cooking Instructions:
- Prepare the Dry Ingredients: In a large mixing bowl, whisk together the all-purpose flour, granulated sugar, baking powder, baking soda, and salt until well combined. This guarantees that all dry ingredients are evenly distributed.
- Mix the Wet Ingredients: In a separate bowl, whisk the eggs until they’re lightly beaten. Then, add the buttermilk, melted butter, and vanilla extract, and stir until the mixture is smooth.
- Combine Wet and Dry Ingredients: Pour the wet ingredients into the bowl containing the dry ingredients. Gently stir with a spatula until just combined. It’s okay if the batter is a bit lumpy; overmixing can result in tough pancakes.
- Preheat the Pan: Heat a non-stick skillet or griddle over medium heat and lightly grease it with butter or oil. Guarantee the pan is hot before you start cooking the pancakes.
- Cook the Pancakes: Pour about 1/4 cup of batter onto the skillet for each pancake. Cook until bubbles form on the surface and the edges look set, about 2-3 minutes. Flip the pancakes and cook for an additional 1-2 minutes until golden brown.
- Cool and Freeze: Allow the pancakes to cool on a wire rack. Once cooled, stack them with a piece of parchment paper between each pancake to prevent sticking and place them in a freezer-safe bag or container. Seal tightly and freeze.
- Reheat: When ready to eat, remove the desired number of pancakes from the freezer. Reheat in the microwave for about 30 seconds to 1 minute, or in a toaster oven until heated through.
Extra Tips:
To maintain the fluffiness and moisture of your Pancake Stacks, avoid overmixing the batter and guarantee your skillet is adequately preheated before cooking. Using buttermilk instead of regular milk adds a tangy flavor and enhances the pancakes’ texture.
If you don’t have buttermilk on hand, you can make a substitute by adding 1 tablespoon of lemon juice or vinegar to 2 cups of milk and letting it sit for a few minutes. Additionally, consider customizing your pancakes by adding ingredients like blueberries, chocolate chips, or nuts into the batter before cooking for added flavor and texture.
Smoothie Packs
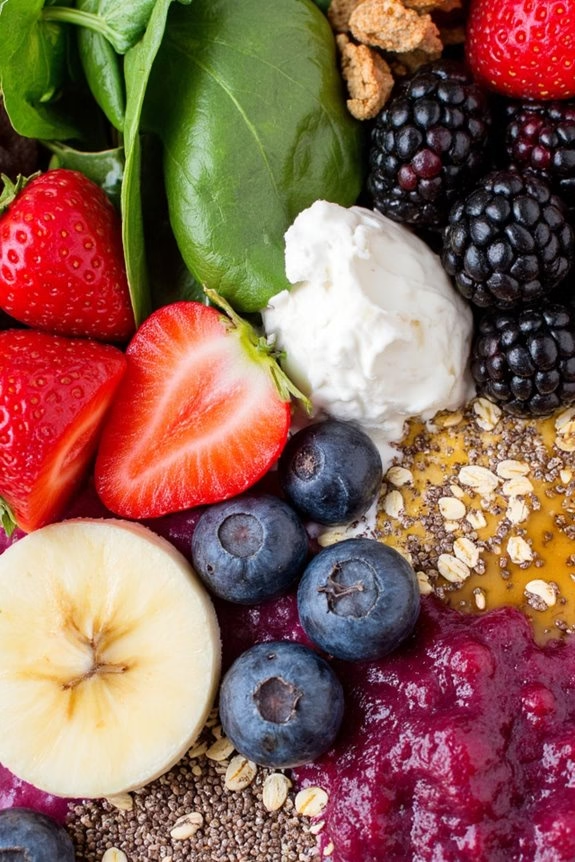
Smoothie packs are a fantastic solution for those busy mornings when you need a nutritious breakfast but don’t have much time to prepare it. By preparing these packs in advance and storing them in the freezer, you can guarantee a quick and healthy meal ready to blend in minutes.
Customize your smoothie packs with a variety of fruits, vegetables, and add-ins to suit your taste and nutritional needs. This recipe will guide you through creating smoothie packs that serve 4-6 people, allowing everyone in the family to start their day with a revitalizing boost of energy.
Making smoothie packs involves gathering your favorite fruits, vegetables, and other ingredients, then portioning them into individual bags or containers for easy access. A well-balanced smoothie pack typically includes a combination of frozen fruits, a handful of greens, a protein or fiber booster, and a liquid of choice.
By freezing these ingredients together, you preserve their freshness and flavor, making it easy to blend them into a delicious smoothie whenever you need a quick breakfast solution.
Ingredients for 4-6 servings:
- 2 cups frozen mixed berries
- 2 bananas, sliced
- 2 cups spinach or kale
- 1 cup Greek yogurt or silken tofu
- 1/2 cup oats or chia seeds
- 2 tablespoons honey or maple syrup
- 4 cups almond milk or preferred liquid
- 1 teaspoon vanilla extract
- Optional: 2 tablespoons nut butter or protein powder
Instructions:
1. Prepare and Portion Ingredients:
Start by washing and drying your spinach or kale thoroughly. Slice the bananas and gather all your other ingredients. This preparation step guarantees that all ingredients are ready to be portioned into the smoothie packs.
2. Assemble the Smoothie Packs:
Lay out 4-6 freezer-safe bags or containers. In each bag, add approximately 1/2 cup of frozen mixed berries, 1/3 of a sliced banana, and a small handful of spinach or kale. Follow with a spoonful of Greek yogurt or silken tofu, and a sprinkle of oats or chia seeds.
3. Add Flavor and Sweetness:
Drizzle about 1 teaspoon of honey or maple syrup into each bag for natural sweetness. Add a few drops of vanilla extract to enhance the flavor profile of your smoothie.
4. Seal and Freeze:
After assembling all ingredients in the bags, seal them tightly, guaranteeing as much air as possible is removed to prevent freezer burn. Lay the bags flat in the freezer for easy storage and quick thawing.
5. Blend Your Smoothie:
When ready to enjoy, take a smoothie pack from the freezer. Empty the contents into a blender and add approximately 1 cup of almond milk or your preferred liquid. Blend until smooth and creamy. If desired, add nut butter or protein powder for an extra protein boost.
Extra Tips:
For ideal blending, allow the smoothie pack to sit at room temperature for a few minutes before blending, which helps soften the frozen contents slightly. This can prevent strain on your blender and guarantee a smoother final texture.
Feel free to experiment with different fruits and greens based on what’s in season or on sale. Adding a pinch of cinnamon or a splash of citrus juice can also enhance the flavor of your smoothie. If you prefer a thicker smoothie, reduce the amount of liquid, or add more yogurt or oats. Enjoy getting creative with your smoothie packs, making breakfast both nutritious and convenient!
French Toast Sticks

French Toast Sticks are a delightful and convenient breakfast option that you can prepare in advance and freeze for those busy mornings. These crispy, golden-brown sticks are infused with the delicious flavors of cinnamon and vanilla, making them a favorite among both kids and adults. By preparing a batch ahead of time, you can enjoy a homemade breakfast any day of the week without the hassle of cooking from scratch each morning.
The beauty of French Toast Sticks lies in their simplicity and versatility. They can be served with maple syrup, fresh fruit, or a dusting of powdered sugar. Preparing them at home allows you to customize the recipe to your liking, whether that means adjusting the spices or choosing your preferred type of bread. Follow this recipe to create a scrumptious batch of French Toast Sticks that can be stored in the freezer and enjoyed at your convenience.
Ingredients (Serves 4-6):
- 1 loaf of thick-sliced bread (such as brioche or Texas toast)
- 4 large eggs
- 1 cup of milk
- 1 tablespoon of vanilla extract
- 1 tablespoon of ground cinnamon
- 2 tablespoons of granulated sugar
- A pinch of salt
- Butter or oil for frying
Cooking Instructions:
- Prepare the Bread: Start by cutting the loaf of bread into thick slices, if not already sliced. Each slice should then be cut into thirds, creating stick-like pieces.
- Mix the Custard: In a large mixing bowl, whisk together the eggs, milk, vanilla extract, cinnamon, sugar, and salt until well combined. This mixture forms the custard base that will coat the bread sticks.
- Dip the Bread Sticks: Take each bread stick and dip it into the custard mixture, making sure that it’s fully coated. Allow any excess custard to drip off to prevent sogginess.
- Cook the Sticks: Heat a large skillet or griddle over medium heat and add butter or oil to coat the surface. Once the skillet is hot, place the coated bread sticks onto the skillet, leaving space between each piece. Cook for about 2-3 minutes on each side, or until they’re golden brown and crispy.
- Cool and Freeze: Transfer the cooked French Toast Sticks to a wire rack to cool completely. Once cooled, arrange them in a single layer on a baking sheet and place them in the freezer. Once frozen, transfer the sticks to a resealable freezer bag for long-term storage.
Extra Tips:
To reheat the French Toast Sticks, preheat your oven to 375°F (190°C) and bake them on a baking sheet for about 8-10 minutes, or until heated through and crispy. This method guarantees they regain their original crispiness.
Alternatively, you can use a toaster oven or an air fryer for a quick reheat. For added flavor, try experimenting with different spices such as nutmeg or cardamom, or consider using flavored syrups. Remember, the type of bread you choose can affect the texture, so opt for a sturdy bread that will hold up well during cooking.
Breakfast Quesadillas

Breakfast Quesadillas are a delightful way to start your day with a burst of flavor and a satisfying meal that keeps you energized. These quesadillas are packed with a delicious combination of eggs, cheese, vegetables, and your choice of protein, all wrapped in a crispy tortilla. Perfectly suited for busy mornings, they can be prepared in advance and stored in the freezer, ready to be reheated for a quick and nourishing breakfast.
The versatility of this recipe allows you to customize the fillings according to your preferences, making sure everyone in your family starts their day with a smile. Whether you’re a fan of spicy chorizo, prefer the mildness of ham, or opt for a vegetarian version with mushrooms and spinach, these Breakfast Quesadillas cater to all tastes.
The key to their success lies in the balance of flavors and textures, combining the creaminess of the cheese with the richness of the eggs and the crispiness of the tortilla. This recipe yields 4-6 servings, making it ideal for family breakfasts or meal prep for the week. Let’s explore the ingredients and method to create these freezer-friendly breakfast delights.
Ingredients (for 4-6 servings):
- 6 large flour tortillas
- 8 eggs
- 1 cup shredded cheddar cheese
- 1 cup cooked and crumbled chorizo or diced ham (optional)
- 1 bell pepper, diced
- 1 small onion, diced
- 1 cup fresh spinach, chopped
- Salt and pepper to taste
- 2 tablespoons olive oil or butter
- Salsa or hot sauce for serving (optional)
Cooking Instructions:
- Prepare the Filling: In a large skillet, heat 1 tablespoon of olive oil or butter over medium heat. Add the diced onion and bell pepper, sautéing until they’re soft, about 5 minutes. If using chorizo or ham, add it to the skillet and cook until heated through. Add the chopped spinach and cook for another 2 minutes until wilted. Remove from heat and set aside.
- Cook the Eggs: In a bowl, whisk the eggs with a pinch of salt and pepper. In a separate skillet, heat the remaining tablespoon of oil or butter over medium heat. Pour the eggs into the skillet and gently scramble until they’re just set but still soft. Remove from heat and mix with the cooked vegetables and protein in the skillet.
- Assemble the Quesadillas: Lay out the tortillas on a flat surface. Evenly distribute the egg mixture over one half of each tortilla. Sprinkle a generous amount of shredded cheddar cheese over the filling. Fold the tortillas in half to enclose the filling.
- Cook the Quesadillas: Wipe the skillet clean and return it to medium heat. Cook each quesadilla for about 3-4 minutes per side, or until the tortillas are golden brown and the cheese has melted. Adjust the heat as necessary to prevent burning.
- Freeze or Serve: Allow the quesadillas to cool completely if you plan to freeze them. Wrap each quesadilla individually in plastic wrap and place them in a freezer-safe bag. To serve, heat them in the microwave or toaster oven until warmed through. Serve with salsa or hot sauce if desired.
Extra Tips:
To enhance the flavor of your Breakfast Quesadillas, consider adding some fresh herbs like cilantro or chives before folding the tortillas. For a spicier kick, incorporate jalapeños or a dash of hot sauce into the egg mixture.
When freezing, make sure the quesadillas are completely cool to prevent sogginess. For reheating, a toaster oven works well to maintain crispiness, or a microwave for convenience. Customize the fillings to suit your taste, and enjoy a delicious breakfast even on the busiest of mornings!
Banana Bread Slices
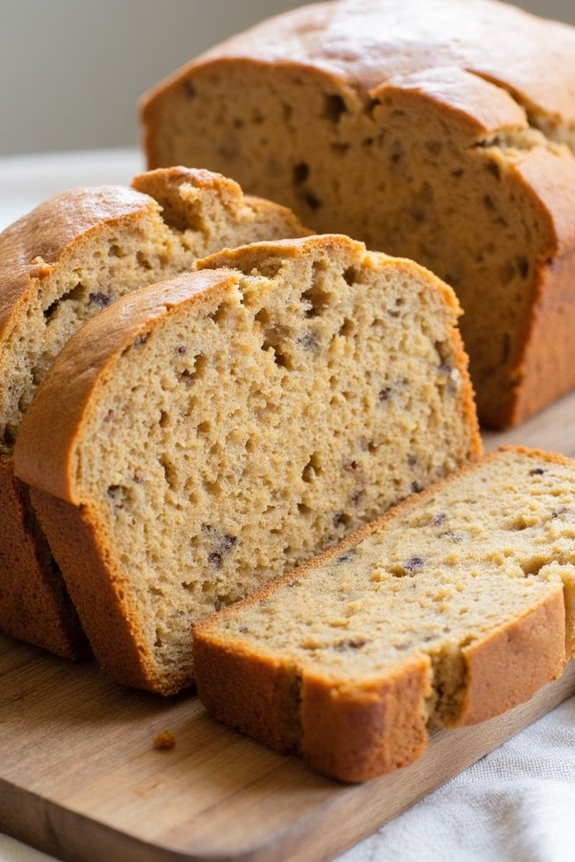
Banana bread slices are a delightful and convenient option for a quick breakfast that can be easily frozen and reheated. This bread is moist, full of banana flavor, and perfect for those busy mornings when you need something nutritious yet effortless.
By preparing banana bread slices in advance and storing them in the freezer, you’ll have a ready-to-eat breakfast option that can be paired with your favorite spreads or enjoyed on its own.
Making banana bread slices involves creating a simple batter with ripe bananas, flour, and a few additional pantry staples. Once baked and cooled, the bread can be sliced and individually wrapped for freezing. This recipe yields a loaf that serves 4-6 people, making it ideal for a family breakfast or for anyone looking to meal prep their morning meals for the week.
Ingredients for 4-6 Servings:
- 3 ripe bananas, mashed
- 1/3 cup melted butter
- 1 teaspoon baking soda
- Pinch of salt
- 3/4 cup sugar
- 1 large egg, beaten
- 1 teaspoon vanilla extract
- 1 1/2 cups all-purpose flour
Cooking Instructions:
- Preheat and Prepare: Preheat your oven to 350°F (175°C). Grease a 9×5 inch loaf pan or line it with parchment paper for easy removal.
- Mash Bananas: In a large mixing bowl, mash the ripe bananas with a fork until smooth. It’s okay if small lumps remain; they’ll add to the texture of the bread.
- Mix Wet Ingredients: Stir the melted butter into the mashed bananas using a spoon or spatula. Mix well until combined.
- Add Dry Ingredients: Add the baking soda and a pinch of salt to the banana mixture. Stir in the sugar, beaten egg, and vanilla extract. Mix until thoroughly combined.
- Incorporate Flour: Gradually add the all-purpose flour to the wet ingredients. Stir gently until the flour is just incorporated. Avoid over-mixing to prevent a dense loaf.
- Pour and Bake: Pour the batter into the prepared loaf pan. Smooth the top with a spatula. Bake in the preheated oven for about 60 minutes, or until a toothpick inserted into the center comes out clean.
- Cool and Slice: Once baked, remove the loaf from the oven and let it cool in the pan for about 10 minutes. Transfer it to a wire rack to cool completely. Once cooled, slice the bread into 1-inch thick slices.
- Freeze Slices: Wrap each slice individually in plastic wrap or aluminum foil. Place the wrapped slices in a resealable freezer bag or airtight container. Store in the freezer for up to 3 months.
Extra Tips:
For the best results, make sure your bananas are overripe, as they provide the necessary sweetness and moisture to the bread.
If you prefer a nuttier texture, consider adding a half cup of chopped walnuts or pecans to the batter before baking.
To reheat, microwave frozen slices for about 30-45 seconds or toast them lightly for a crispy edge.
Finally, feel free to experiment by adding chocolate chips or dried fruit for added variety and flavor.
Breakfast Sandwiches
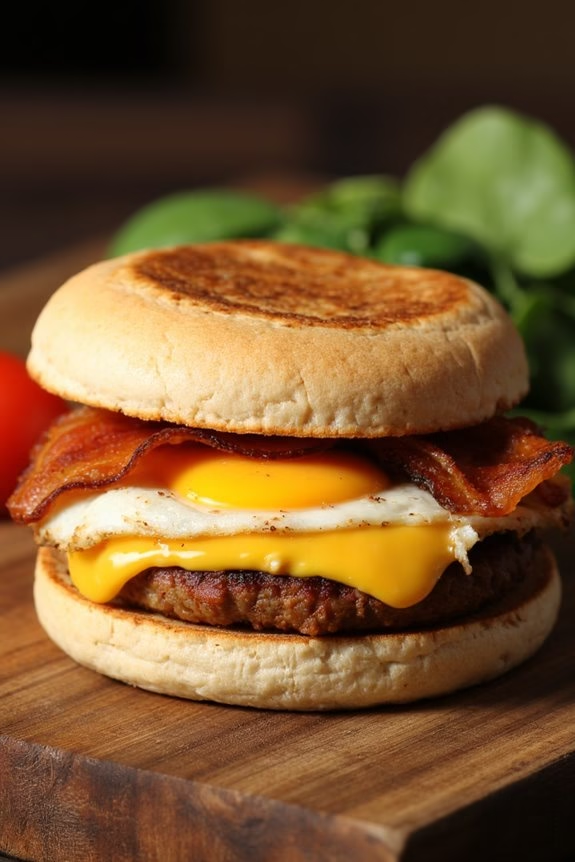
Breakfast sandwiches are the perfect hearty and satisfying meal to jumpstart your day. They’re convenient, easy to make, and can be customized to suit any palate. Imagine waking up to a delicious sandwich, filled with eggs, cheese, and your favorite breakfast meat, all tucked into a perfectly toasted English muffin.
The best part? You can prepare these breakfast sandwiches ahead of time and freeze them, ensuring you always have a quick, nutritious breakfast option on busy mornings.
This recipe will guide you through creating a batch of four to six freezer-friendly breakfast sandwiches. With just a little preparation, you’ll have a stash of ready-to-eat breakfasts that require only a quick reheat. Whether you prefer sausage, bacon, or ham, this recipe is versatile enough to accommodate your preferences.
Get ready to make your mornings smoother and more delicious with these freezer-friendly delights!
Ingredients for 4-6 Servings:
- 4-6 English muffins
- 4-6 large eggs
- 4-6 slices of cheese (cheddar or American)
- 4-6 slices of cooked bacon, sausage patties, or ham
- Salt and pepper to taste
- Cooking spray or butter
- Aluminum foil or parchment paper for wrapping
Cooking Instructions:
- Prepare the Eggs:
- Preheat your oven to 350°F (175°C). Grease a muffin tin or a baking dish with cooking spray or butter.
- Crack the eggs into the muffin tin or baking dish, one egg per slot or portion, and season with salt and pepper.
- Bake for 12-15 minutes, or until the eggs are set and cooked through. Remove from the oven and let them cool.
- Prepare the English Muffins:
- While the eggs are baking, slice the English muffins in half and lightly toast them in a toaster or oven. This helps prevent sogginess once they’re assembled and frozen.
- Assemble the Sandwiches:
- Place one slice of cheese on the bottom half of each English muffin. Add one portion of your chosen breakfast meat (bacon, sausage, or ham) on top of the cheese.
- Place a cooked egg on top of the meat, and finish with the top half of the English muffin.
- Wrap and Freeze:
- Wrap each sandwich tightly in aluminum foil or parchment paper. This will protect them from freezer burn and keep them fresh.
- Place the wrapped sandwiches in a single layer on a baking sheet and freeze for at least 2 hours. Once frozen, you can transfer them to a freezer-safe bag or container for long-term storage.
Extra Tips:
When you’re ready to enjoy your breakfast sandwich, simply remove the foil or parchment and reheat in the microwave for about 1-2 minutes, or until heated through. You can also reheat them in the oven at 350°F (175°C) for about 10-15 minutes if you prefer a crispier texture.
Feel free to add vegetables like spinach or tomatoes before freezing for an extra nutritional boost. Remember to label the sandwiches with the preparation date to keep track of their freshness in the freezer.
Granola Bars
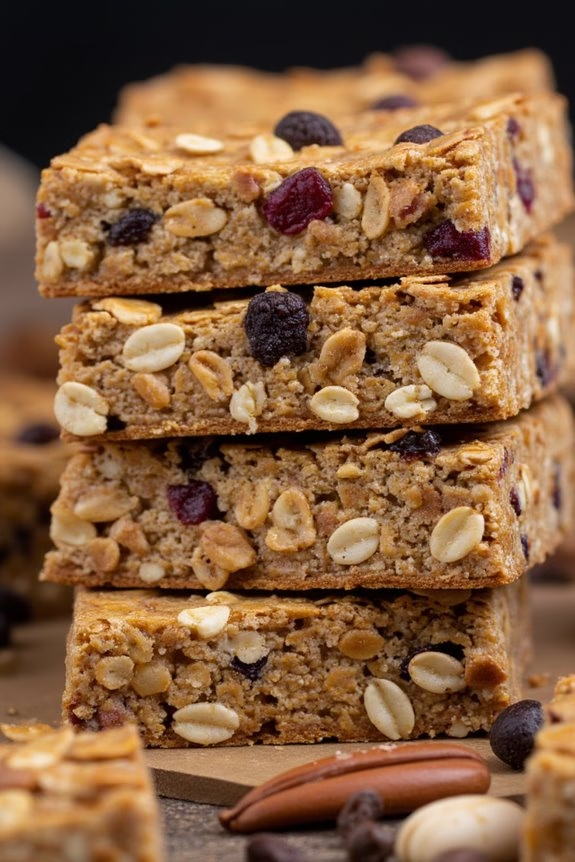
Granola bars are a fantastic quick breakfast option that you can make ahead of time and freeze for those busy mornings. These bars are packed with nutritious ingredients that will keep you energized throughout the day. The combination of oats, nuts, seeds, and dried fruits offers a healthy dose of fiber, protein, and essential vitamins.
Not only are these homemade granola bars delicious, but they also give you the flexibility to tailor the ingredients to suit your liking or dietary needs. Making your own granola bars at home means you can avoid the preservatives and high sugar content often found in store-bought versions.
This recipe yields a batch of granola bars that serves 4-6 people, making it perfect for a small family or for meal prepping for the week. You can store these bars in the freezer for up to a month, making them a convenient grab-and-go breakfast or snack option.
Ingredients for 4-6 Servings:
- 2 cups rolled oats
- 1 cup mixed nuts (e.g., almonds, walnuts, pecans), roughly chopped
- 1/2 cup honey or maple syrup
- 1/4 cup unsalted butter or coconut oil
- 1/4 cup brown sugar
- 1 teaspoon vanilla extract
- 1/2 teaspoon salt
- 1 teaspoon cinnamon
- 1/2 cup dried fruits (e.g., raisins, cranberries, apricots), chopped
- 1/4 cup seeds (e.g., pumpkin, sunflower, chia seeds)
Cooking Instructions:
- Preheat the Oven: Begin by preheating your oven to 350°F (175°C). Line an 8×8 inch baking pan with parchment paper, allowing some paper to hang over the edges for easy removal later.
- Toast the Oats and Nuts: Spread the rolled oats and mixed nuts on a baking sheet. Toast them in the preheated oven for about 10 minutes, stirring halfway through, until they’re golden brown and fragrant. This step enhances the flavor of your granola bars.
- Prepare the Binding Mixture: In a small saucepan over medium heat, combine the honey or maple syrup, unsalted butter or coconut oil, and brown sugar. Stir continuously until the mixture is smooth and the sugar has dissolved completely. Remove from heat and stir in the vanilla extract, salt, and cinnamon.
- Combine Ingredients: In a large mixing bowl, combine the toasted oats and nuts, chopped dried fruits, and seeds. Pour the warm honey mixture over the dry ingredients. Stir well to confirm everything is evenly coated.
- Pack into the Pan: Transfer the mixture into the prepared baking pan. Use a spatula to press the mixture firmly and evenly into the pan. The tighter you pack it, the better your bars will hold together.
- Bake the Bars: Place the pan in the oven and bake for 15-20 minutes until the edges are slightly golden. Be careful not to overbake, as this can make the bars too hard.
- Cool and Cut: Allow the granola bars to cool completely in the pan. Once cooled, lift them out using the parchment paper overhang. Cut into bars of your desired size.
Extra Tips:
For a softer texture, you can add a few tablespoons of nut butter (such as almond or peanut butter) to the binding mixture. Feel free to get creative with your add-ins; you can include chocolate chips, shredded coconut, or even spices like nutmeg for a different flavor profile.
If you prefer a vegan version, confirm you use coconut oil and maple syrup. When freezing, wrap each bar individually in plastic wrap or parchment paper and place them in a freezer-safe container or zip-lock bag to prevent them from sticking together. To enjoy, simply thaw them at room temperature or warm slightly in the microwave.
Mini Frittatas

Start your morning right with a batch of Mini Frittatas, a versatile and delicious breakfast option that can be prepared ahead of time and frozen for those busy mornings.
These bite-sized delights are packed with protein, vegetables, and cheese, making them a wholesome choice for the entire family. Not only are Mini Frittatas easy to make, but they also allow for endless customization based on your favorite ingredients or whatever you have on hand.
The beauty of Mini Frittatas lies in their adaptability and convenience. Prepare them over the weekend, freeze them, and enjoy a quick reheat during the workweek.
Whether you prefer a classic combination of spinach and feta or want to experiment with mushrooms and cheddar, the possibilities are endless. With this recipe, you can enjoy a delicious breakfast that doesn’t require any morning prep, guaranteeing that you start your day with a nutritious meal.
Ingredients (Serves 4-6 people):
- 8 large eggs
- 1/4 cup milk
- 1 cup spinach, chopped
- 1/2 cup bell peppers, diced (any color)
- 1/2 cup cherry tomatoes, halved
- 1/4 cup onion, finely chopped
- 1/2 cup shredded cheese (such as cheddar or mozzarella)
- Salt and pepper, to taste
- Cooking spray or paper muffin liners
Cooking Instructions:
- Preheat and Prepare: Preheat your oven to 375°F (190°C). Lightly grease a muffin tin with cooking spray or line with paper muffin liners to prevent sticking.
- Whisk the Eggs: In a large mixing bowl, crack the eggs and whisk them together with the milk until well combined. Season with salt and pepper to your liking.
- Add the Vegetables: Stir in the chopped spinach, diced bell peppers, cherry tomatoes, and onion into the egg mixture. Confirm the vegetables are evenly distributed throughout the mixture.
- Fill the Muffin Tin: Pour the egg and vegetable mixture into the prepared muffin tin, filling each cup about 2/3 full to leave room for rising.
- Top with Cheese: Sprinkle shredded cheese on top of each filled muffin cup. This adds a delicious golden crust to each frittata.
- Bake: Place the muffin tin in the preheated oven and bake for 18-20 minutes or until the frittatas are set and lightly golden on top. A toothpick inserted into the center should come out clean.
- Cool and Freeze: Allow the frittatas to cool in the tin for a few minutes before transferring them to a wire rack to cool completely. Once cooled, place them in a single layer on a baking sheet and freeze. After they’re frozen, store them in an airtight container or freezer bag.
Extra Tips:
To reheat the Mini Frittatas, simply pop them in the microwave for 1-2 minutes, or until warmed through. You can also reheat them in the oven at 350°F (175°C) for about 10 minutes if you prefer a crispier texture.
Feel free to experiment with different vegetables or proteins like cooked bacon or sausage for added flavor. Remember, the key to perfect frittatas isn’t overfilling the muffin cups and confirming ingredients are well mixed for even cooking.
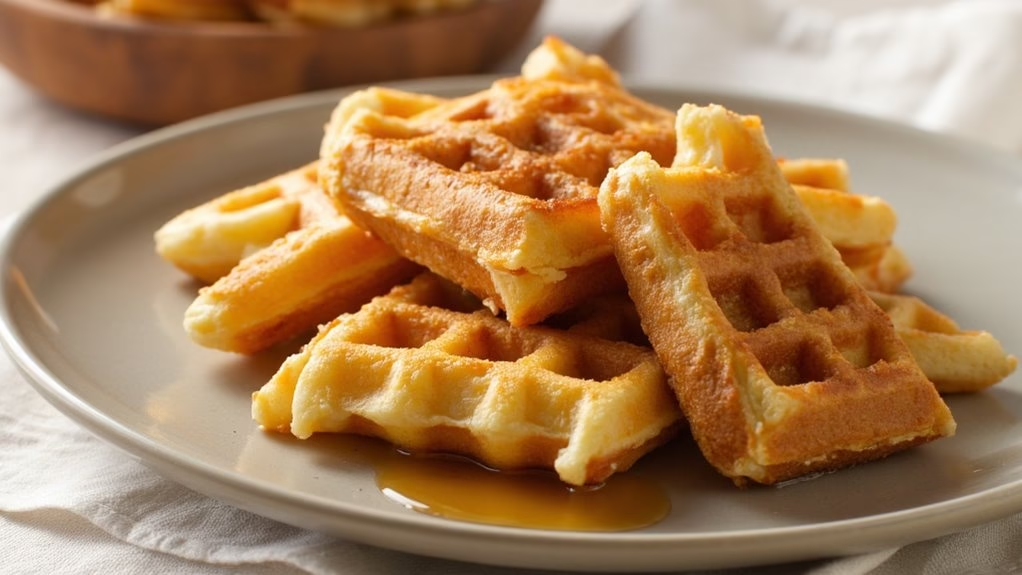
Waffle Bites
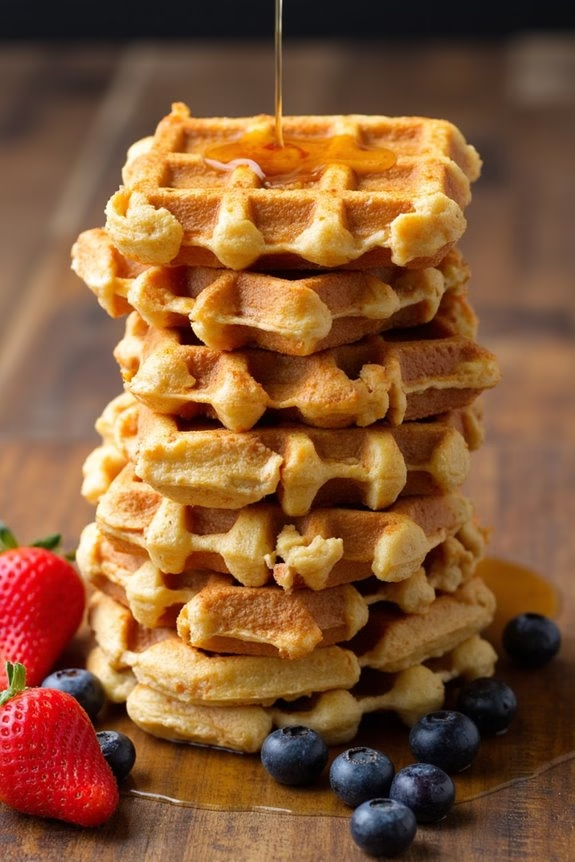
When mornings get hectic, having a stash of ready-to-go breakfast options can be a lifesaver. Waffle Bites are the perfect solution, combining the delightful crispiness of waffles with the convenience of bite-sized pieces. These little morsels aren’t only delicious but also perfect for freezing and reheating, making them a quick and satisfying breakfast option for busy days.
Whether you enjoy them plain, drizzled with syrup, or paired with your favorite toppings, Waffle Bites are sure to please the whole family.
Preparing Waffle Bites is a breeze, and they can be made in batches to guarantee you have plenty on hand. Utilizing a standard waffle batter, you can get creative with add-ins like chocolate chips, berries, or nuts to suit your taste preferences.
Once cooked, these bites can be frozen and reheated in minutes, offering a warm and hearty start to any day. Here’s a recipe to make Waffle Bites for 4-6 people, making sure everyone gets their fill.
Ingredients:
- 2 cups all-purpose flour
- 2 tablespoons sugar
- 1 tablespoon baking powder
- 1/2 teaspoon salt
- 2 large eggs
- 1 3/4 cups milk
- 1/2 cup vegetable oil
- 1 teaspoon vanilla extract
- Optional: 1/2 cup chocolate chips or berries
Cooking Instructions:
- Prepare the Batter: In a large mixing bowl, whisk together the flour, sugar, baking powder, and salt until well combined. In a separate bowl, beat the eggs and then add the milk, oil, and vanilla extract. Stir the wet ingredients into the dry ingredients, mixing just until combined. If desired, fold in chocolate chips or berries.
- Preheat the Waffle Maker: Turn on your waffle maker and allow it to preheat according to the manufacturer’s instructions. Lightly grease the waffle plates with non-stick spray or a small amount of oil to prevent sticking.
- Cook the Waffles: Once the waffle maker is ready, pour a small amount of batter onto each section of the waffle iron (about 2 tablespoons per section, depending on the size of your waffle maker). Close the lid and cook until the waffles are golden brown and crisp.
- Cut into Bites: Carefully remove the waffles from the waffle maker and place them on a cutting board. Using a sharp knife or kitchen scissors, cut the waffles into bite-sized pieces.
- Freeze the Bites: Allow the waffle bites to cool completely. Arrange them in a single layer on a baking sheet and freeze for about 1 hour. Once frozen, transfer the waffle bites to a resealable plastic bag or airtight container and store in the freezer.
- Reheat and Serve: To enjoy your waffle bites, remove the desired amount from the freezer and reheat in a toaster oven or conventional oven at 350°F (175°C) for about 5-7 minutes, or until heated through. Serve with syrup, honey, or your favorite toppings.
Extra Tips:
For the best results, make sure your waffle maker is properly preheated to avoid uneven cooking. If you’re adding ingredients like chocolate chips or berries, be sure to distribute them evenly in the batter to prevent clumping.
When freezing, make sure the waffle bites are fully cooled to prevent ice crystals from forming. Label your storage bags with the date to keep track of freshness, and try to use them within three months for the best taste and texture.