
Looking for gluten-free breakfast ideas that won’t break the calorie bank? I’ve been on the same journey and found some truly satisfying options. Think creamy chia seed pudding with fresh berries or hearty overnight oats with bananas and walnuts. Or maybe a smoothie bowl loaded with spinach and fruits is more your style. Let’s explore these delicious possibilities together.
Chia Seed Pudding With Fresh Berries
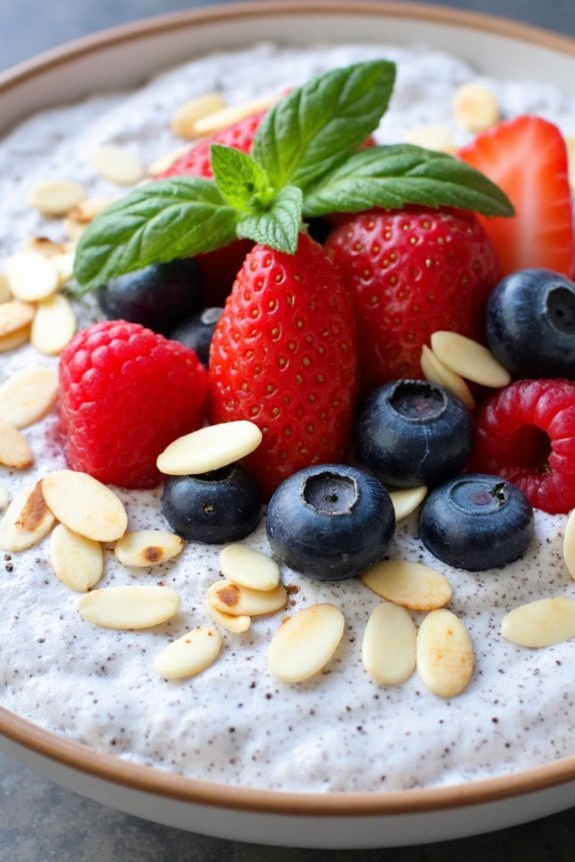
Chia seed pudding is a fantastic gluten-free and low-calorie breakfast option that’s both nutritious and delicious. This dish is incredibly easy to prepare and can be made ahead of time for a quick morning meal.
Chia seeds are a powerhouse of nutrition, offering a rich source of omega-3 fatty acids, fiber, and protein. When combined with the natural sweetness of fresh berries, this pudding becomes a delightful and invigorating start to your day.
The beauty of chia seed pudding lies in its versatility. You can customize it with your favorite milk, whether it’s almond, coconut, or any other plant-based milk, and top it with a variety of fruits and nuts to suit your taste preferences.
This recipe serves 4-6 people, making it perfect for a family breakfast or to have ready for several mornings. With its creamy texture and vibrant berry topping, this chia seed pudding will quickly become a staple in your breakfast rotation.
Ingredients (Serves 4-6):
- 1 cup chia seeds
- 4 cups almond milk (or any preferred milk)
- 1/4 cup maple syrup or honey
- 1 teaspoon vanilla extract
- 2 cups mixed fresh berries (such as strawberries, blueberries, raspberries)
- 1/4 cup sliced almonds or other nuts (optional)
- Fresh mint leaves for garnish (optional)
Cooking Instructions:
- Prepare the Chia Pudding Base: In a large mixing bowl, combine the chia seeds, almond milk, maple syrup (or honey), and vanilla extract. Stir well to guarantee the chia seeds are evenly dispersed and not clumping together.
- Refrigerate the Pudding: Cover the bowl with plastic wrap or transfer the mixture into an airtight container. Place it in the refrigerator for at least 4 hours or overnight. This allows the chia seeds to absorb the liquid and create a pudding-like consistency.
- Stir the Pudding: After the pudding has set, give it a good stir to break up any clumps and guarantee a smooth texture.
- Prepare the Berries: Wash and dry the fresh berries. If using larger berries like strawberries, chop them into bite-sized pieces.
- Assemble the Pudding: Divide the chia pudding among individual serving bowls or jars. Top each serving with a generous amount of fresh berries.
- Add Optional Toppings: Sprinkle sliced almonds or your choice of nuts on top of the berries for added crunch. Garnish with fresh mint leaves for an extra touch of vibrancy, if desired.
Extra Tips:
To enhance the flavor of your chia seed pudding, consider adding a pinch of cinnamon or nutmeg to the base mixture.
If you prefer a thicker pudding, reduce the amount of almond milk slightly or add a few more chia seeds. For those who like a sweeter pudding, adjust the sweetness by adding more maple syrup or honey to taste.
Avocado and Egg Breakfast Bowl
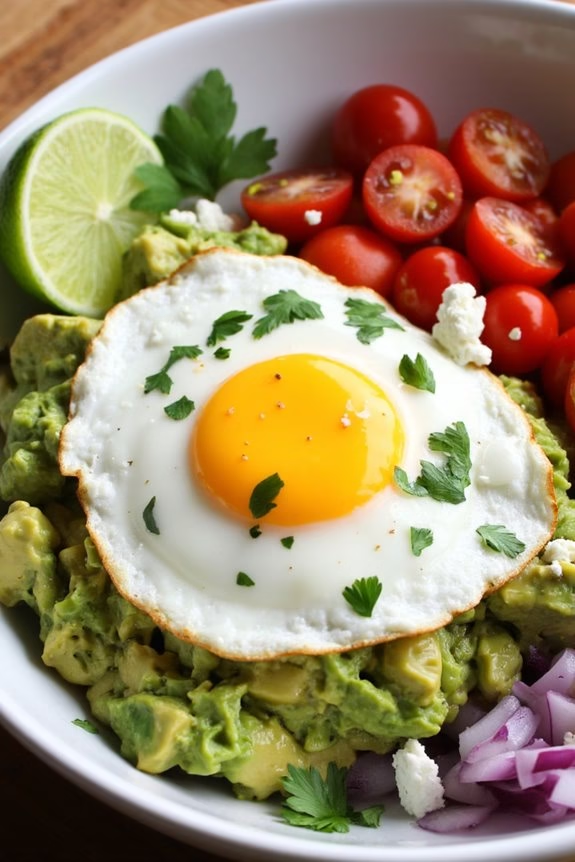
The Avocado and Egg Breakfast Bowl is a delightful gluten-free and low-calorie breakfast option that satisfies your taste buds and nutritional needs. This dish combines creamy avocado, perfectly cooked eggs, and a selection of fresh vegetables to create a vibrant and wholesome meal.
Not only is it quick and simple to prepare, but it’s also packed with healthy fats, proteins, and essential vitamins, making it an ideal way to start your day. Perfect for a family breakfast or a weekend brunch, this recipe serves 4-6 people.
Each bowl is customizable, allowing each person to add their favorite toppings and seasonings. Whether you prefer a bit of spice or a hint of citrus, the Avocado and Egg Breakfast Bowl can be tailored to match your personal preferences.
Let’s explore the ingredients and instructions to create this delicious breakfast dish.
Ingredients (for 4-6 servings):
- 3 ripe avocados
- 6 large eggs
- 1 cup cherry tomatoes, halved
- 1 small red onion, finely chopped
- 1 red bell pepper, diced
- 2 tablespoons fresh cilantro, chopped
- 2 tablespoons lime juice
- Salt and pepper to taste
- Optional toppings: hot sauce, lime wedges, or feta cheese
Cooking Instructions:
- Prepare the Avocados: Cut each avocado in half, remove the pit, and scoop out the flesh into a large mixing bowl. Use a fork to gently mash the avocado, leaving it slightly chunky. Add lime juice, salt, and pepper to taste, and mix well to combine.
- Cook the Eggs: In a non-stick skillet, heat a small amount of oil over medium heat. Crack the eggs into the skillet and cook them to your desired consistency. For sunny-side-up eggs, cook until the whites are set but the yolk is still runny. For scrambled eggs, whisk the eggs in a bowl before adding them to the pan and stirring gently until cooked through.
- Prepare the Vegetables: In a separate pan, add a little oil and sauté the red onion and red bell pepper until they’re soft and aromatic. Add the cherry tomatoes and cook for another minute or two until they begin to soften.
- Assemble the Bowls: Divide the mashed avocado equally among the serving bowls. Top each bowl with an egg, followed by the sautéed vegetables. Garnish with fresh cilantro and any optional toppings you prefer, such as hot sauce or crumbled feta cheese.
- Serve and Enjoy: Serve the breakfast bowls immediately while the eggs are still warm. Provide lime wedges on the side for an extra citrus kick.
Extra Tips:
For the best flavor, use ripe avocados that yield slightly to gentle pressure. If you prefer poached eggs instead of fried or scrambled, poach them in simmering water with a splash of vinegar to help set the whites.
To save time in the morning, prepare the vegetables the night before and store them in the refrigerator. This recipe is versatile, so feel free to add other ingredients like black beans or spinach for additional flavor and nutrients.
Enjoy your Avocado and Egg Breakfast Bowl with a cup of your favorite coffee or tea for a perfect start to your day.
Smoothie Bowl With Almond Milk and Spinach
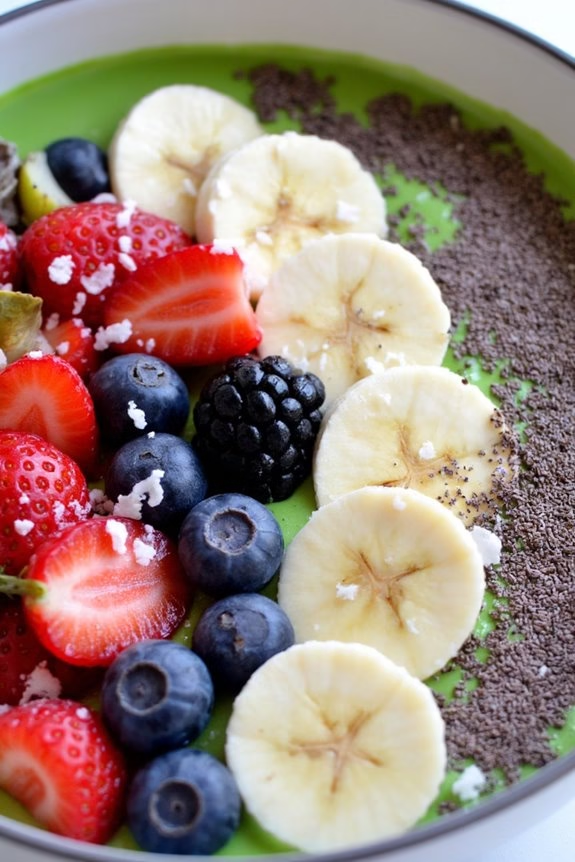
Start your day with a revitalizing and nutritious Smoothie Bowl With Almond Milk and Spinach. This gluten-free, low-calorie breakfast option is perfect for those who are looking to maintain a healthy lifestyle without sacrificing flavor. Packed with vitamins and antioxidants, this smoothie bowl not only fuels your body but also keeps you full and satisfied until your next meal.
The combination of almond milk and spinach creates a creamy base, while the toppings add a delightful crunch and additional nutrients. What makes this smoothie bowl special is its versatility. You can customize it with your favorite fruits, nuts, and seeds, making it an ideal breakfast for everyone in the family.
Whether you’re rushing out the door or enjoying a leisurely morning at home, this dish is quick to prepare and can be tailored to suit personal preferences. Plus, it’s an excellent way to sneak some greens into your diet without compromising on taste.
Ingredients (Serves 4-6):
- 4 cups unsweetened almond milk
- 4 cups fresh spinach leaves
- 2 frozen bananas
- 2 cups frozen mixed berries (such as strawberries, blueberries, and raspberries)
- 2 tablespoons chia seeds
- 1 teaspoon vanilla extract
- Toppings: sliced almonds, fresh berries, sliced banana, shredded coconut, chia seeds
Instructions:
- Prepare the Ingredients: Gather all the ingredients and verify your frozen fruits are ready to use. This will help speed up the blending process.
- Blend the Base: In a blender, combine almond milk, spinach leaves, frozen bananas, frozen mixed berries, chia seeds, and vanilla extract. Blend on high speed until the mixture becomes smooth and creamy. You may need to stop and scrape down the sides to verify everything is well incorporated.
- Adjust Consistency: Check the consistency of the smoothie. If it’s too thick for your liking, add a little more almond milk and blend again until you reach the desired texture.
- Serve the Smoothie: Pour the smoothie mixture into bowls, dividing evenly among 4-6 servings.
- Add Toppings: Decorate each bowl with your choice of toppings such as sliced almonds, fresh berries, sliced banana, shredded coconut, and additional chia seeds. Feel free to get creative with other healthy toppings you enjoy.
- Enjoy: Serve immediately for the best taste and texture.
Extra Tips:
For an extra boost of protein, consider adding a scoop of your favorite protein powder during the blending process. If you prefer a sweeter smoothie bowl, a drizzle of honey or agave syrup can be added.
For a nut-free version, substitute almond milk with another plant-based milk such as oat or rice milk. To save time in the morning, prep the toppings the night before and store them in airtight containers.
Finally, always verify that your blender is powerful enough to handle frozen ingredients for a smooth and consistent blend.
Quinoa Breakfast Porridge With Cinnamon
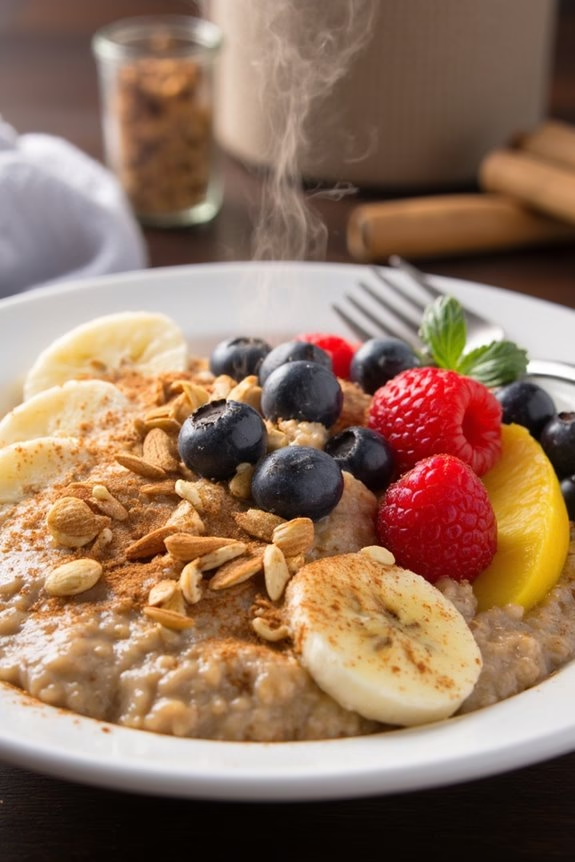
Quinoa Breakfast Porridge with Cinnamon is a warm and satisfying way to start your day on a healthy note. This gluten-free breakfast option isn’t only low in calories but also packed with essential nutrients. Quinoa is a complete protein, making it a perfect choice for those looking to maintain or lose weight while keeping energy levels high.
The addition of cinnamon not only enhances the flavor but also brings a host of health benefits, including its ability to stabilize blood sugar levels and boost metabolism.
This breakfast porridge is incredibly easy to make and can be prepared in advance for a quick and nutritious meal in the morning. The creamy texture of quinoa, combined with the natural sweetness of cinnamon and a hint of vanilla, makes this dish a delightful treat. Perfect for serving 4-6 people, this recipe guarantees that everyone at the table can enjoy a delectable and health-conscious meal.
Ingredients (Serves 4-6)
- 1 cup quinoa, rinsed
- 2 cups water
- 2 cups almond milk (or any milk of choice)
- 1 teaspoon ground cinnamon
- 1 teaspoon vanilla extract
- 1 tablespoon honey or maple syrup (optional)
- A pinch of salt
- Fresh fruits and nuts for topping (e.g., berries, bananas, almonds)
Cooking Instructions
- Prepare Quinoa: Rinse the quinoa thoroughly under cold water using a fine-mesh sieve to remove any bitterness. This step is vital to guarantee the porridge has a clean taste.
- Cook Quinoa: In a medium-sized saucepan, combine the rinsed quinoa and water. Bring to a boil over medium-high heat. Once boiling, reduce the heat to low, cover, and let it simmer for about 15 minutes, or until the water is absorbed and the quinoa is tender.
- Mix with Milk: Once the quinoa is cooked, add the almond milk, ground cinnamon, vanilla extract, and a pinch of salt. Stir to combine the ingredients thoroughly.
- Simmer: Continue to cook the mixture over low heat, stirring occasionally, until it reaches your desired consistency. This should take approximately 10 minutes. If the porridge becomes too thick, you can add more milk to reach the preferred consistency.
- Sweeten: Remove the saucepan from the heat and stir in the honey or maple syrup if you desire a sweeter porridge.
- Serve: Divide the porridge into bowls and top with fresh fruits and nuts of your choice for added texture and flavor.
Extra Tips
For an even richer flavor, try toasting the quinoa in the saucepan for a couple of minutes before adding the water. This will give the porridge a nutty aroma.
Feel free to experiment with different milk options like coconut or soy milk for a unique twist. Additionally, consider making a larger batch and storing portions in the refrigerator for up to three days, which makes weekday breakfasts effortless.
Simply reheat in a saucepan or microwave, adding a splash of milk to adjust the consistency.
Sweet Potato Toast With Almond Butter

Sweet Potato Toast with Almond Butter is a delicious and nutritious gluten-free breakfast option that’s both low in calories and satisfying. The natural sweetness of the sweet potato pairs perfectly with the creamy, nutty flavor of almond butter, creating a hearty and wholesome start to your day.
This dish isn’t only simple to prepare but also offers a delightful twist on traditional toast, making it a great option for those who are gluten-sensitive or looking to reduce their carbohydrate intake.
This recipe is ideal for serving 4-6 people, making it perfect for a family breakfast or a small gathering. Sweet potato toast is versatile and can be topped with various ingredients like fresh fruits, seeds, or a sprinkle of cinnamon to add extra flavor and nutrients.
With just a few ingredients and easy preparation steps, you can enjoy a delicious breakfast that’s both healthy and indulgent.
Ingredients for 4-6 servings:
- 2 large sweet potatoes
- 1 cup almond butter
- 1 teaspoon cinnamon (optional)
- 1/4 cup sliced almonds
- 2 tablespoons honey or maple syrup (optional)
- Fresh fruit slices (such as banana, strawberries, or blueberries) for topping
Cooking Instructions:
1. Prepare the Sweet Potatoes: Begin by washing and scrubbing the sweet potatoes thoroughly. Pat them dry with a towel. Slice the sweet potatoes lengthwise into 1/4-inch thick slices. These slices will act as your “toast.”
2. Cook the Sweet Potato Slices: Preheat your oven to 400°F (200°C). Arrange the sweet potato slices in a single layer on a baking sheet lined with parchment paper. Bake the slices for 20-25 minutes, flipping them halfway through, until they’re tender and slightly crispy on the edges.
Alternatively, you can toast the slices in a toaster or toaster oven, repeating the toasting cycle until they’re cooked through.
3. Prepare the Almond Butter Topping: While the sweet potatoes are baking, prepare the almond butter topping. If desired, you can mix the almond butter with a teaspoon of cinnamon for added flavor. Stir well to combine.
4. Assemble the Toast: Once the sweet potato slices are done, remove them from the oven and let them cool slightly. Spread a generous layer of almond butter over each slice. Drizzle honey or maple syrup on top if desired.
5. Add Toppings: Sprinkle sliced almonds over the almond butter for a bit of crunch. Add fresh fruit slices on top as a final touch to enhance both the flavor and presentation.
6. Serve: Arrange the Sweet Potato Toast with Almond Butter on a serving plate and serve immediately while warm.
Extra Tips:
For best results, choose sweet potatoes that are long and even in shape to guarantee uniform slices. Adjust the baking time based on the thickness of your slices, as thinner slices will cook more quickly.
Feel free to experiment with toppings to suit your taste, such as chia seeds, shredded coconut, or a pinch of sea salt. If you prefer a savory twist, consider adding avocado slices and a sprinkle of chili flakes instead of fruit.
Enjoy your sweet potato toast immediately after preparing for the best texture and flavor.
Greek Yogurt Parfait With Gluten-Free Granola
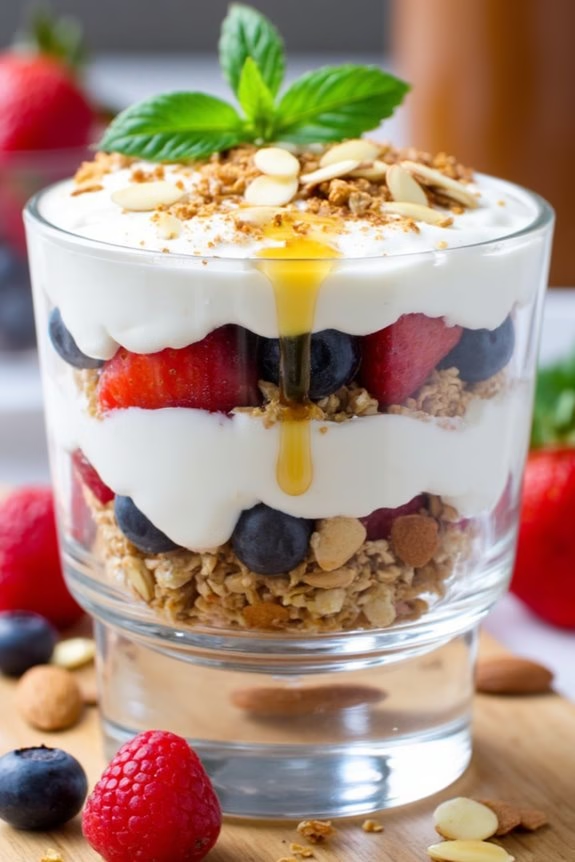
Start your day on a deliciously healthy note with a Greek Yogurt Parfait with Gluten-Free Granola. This breakfast dish isn’t only gluten-free but also low in calories, making it perfect for those who are health-conscious or have dietary restrictions. The creamy texture of Greek yogurt paired with the crunchy granola and the sweetness of fresh fruits makes for a balanced and satisfying breakfast.
It’s easy to prepare, requires no cooking, and can be customized with your choice of toppings, making it versatile for the whole family. This parfait is a great option for busy mornings, as it can be prepared ahead of time and stored in the refrigerator. The combination of protein-rich Greek yogurt and fiber-packed granola helps keep you full and energized until lunchtime.
This recipe serves 4-6 people, making it ideal for a family breakfast or a small brunch gathering. With this simple yet flavorful parfait, you’ll have a nutritious breakfast that everyone will love.
Ingredients (Serves 4-6):
- 4 cups Greek yogurt (plain or vanilla-flavored)
- 2 cups gluten-free granola
- 2 cups mixed berries (such as strawberries, blueberries, and raspberries)
- 1/4 cup honey or maple syrup
- 1 teaspoon vanilla extract (optional)
- 1/4 cup sliced almonds or other nuts (optional)
- Fresh mint leaves for garnish (optional)
Instructions:
- Prepare the Ingredients: Begin by washing the mixed berries thoroughly under cold water and patting them dry with a paper towel. If using strawberries, hull and slice them into smaller pieces.
- Mix the Yogurt: In a medium bowl, mix the Greek yogurt with vanilla extract (if using) and 2 tablespoons of honey or maple syrup. Stir well until the ingredients are fully combined. This adds a touch of sweetness and enhances the flavor of the yogurt.
- Layer the Parfait: In a tall glass or a bowl, start by adding a layer of Greek yogurt at the bottom. Follow this with a layer of gluten-free granola, then a layer of mixed berries. Repeat the layers until the container is full, finishing with a yogurt layer on top.
- Garnish: Drizzle the remaining honey or maple syrup over the top layer of yogurt. Sprinkle sliced almonds or nuts if desired for extra crunch. Add a few fresh mint leaves for a revitalizing touch.
- Serve: Serve immediately for the best texture, or cover and refrigerate for up to 24 hours to enjoy later.
Extra Tips:
For a more indulgent parfait, consider adding a layer of chia seed pudding or a spoonful of nut butter between the yogurt and granola layers. You can also customize the fruit selection based on seasonal availability or personal preference.
If you’re preparing the parfaits ahead of time, add the granola just before serving to retain its crunchiness. Finally, for an added nutritional boost, sprinkle some chia seeds or flaxseeds on top along with the nuts.
Veggie Omelette With Fresh Herbs

Start your day with a delicious and nutritious gluten-free breakfast by making a Veggie Omelette With Fresh Herbs. This dish isn’t only low in calories but also packed with flavor and essential nutrients. It’s the perfect way to fuel your morning and keep you satisfied until your next meal.
With fresh vegetables and aromatic herbs, this omelette is light, invigorating, and incredibly tasty. The combination of colorful bell peppers, spinach, tomatoes, and onions, along with a blend of fresh herbs like parsley, chives, and basil, creates a delightful medley of flavors that will awaken your taste buds.
This recipe is ideal for serving 4-6 people, making it perfect for a family breakfast or brunch gathering. Let’s explore the ingredients and steps to prepare this wholesome dish.
Ingredients (for 4-6 servings):
- 8 large eggs
- 1/4 cup milk (or dairy-free alternative)
- 1 red bell pepper, diced
- 1 green bell pepper, diced
- 1 small onion, finely chopped
- 1 cup fresh spinach, chopped
- 1 large tomato, diced
- 1/4 cup fresh parsley, chopped
- 2 tablespoons fresh chives, chopped
- 2 tablespoons fresh basil, chopped
- Salt and pepper to taste
- 2 tablespoons olive oil
- Optional: 1/4 cup feta cheese or dairy-free cheese, crumbled
Cooking Instructions:
- Prepare the Vegetables and Herbs: Begin by washing and chopping all your vegetables and herbs. Dice the bell peppers, chop the onion, tomatoes, spinach, and finely chop the parsley, chives, and basil. Set aside.
- Whisk the Eggs: In a large mixing bowl, crack the eggs and add the milk. Whisk together until well combined. Season with salt and pepper to taste.
- Cook the Vegetables: Heat 1 tablespoon of olive oil in a large non-stick skillet over medium heat. Add the onions and bell peppers and sauté for about 3-4 minutes until they begin to soften. Add the tomatoes and spinach, and cook for an additional 2 minutes, stirring frequently.
- Add the Eggs: Pour the whisked eggs over the sautéed vegetables in the skillet. Use a spatula to gently stir the mixture, ensuring the vegetables are evenly distributed.
- Cook the Omelette: Allow the omelette to cook undisturbed for about 3-4 minutes until the edges begin to set. Sprinkle the fresh herbs evenly over the top. If using cheese, sprinkle it over the omelette at this point.
- Finish Cooking: Cover the skillet with a lid and reduce the heat to low. Cook for an additional 2-3 minutes until the eggs are fully set and the cheese, if used, is melted.
- Serve: Carefully slide the omelette onto a serving platter and cut it into wedges. Serve hot and enjoy!
Extra Tips:
For a fluffier omelette, consider separating the egg whites from the yolks and beating them separately before folding them together. If you’re looking to add some extra protein, you can include diced cooked chicken or turkey.
Fresh herbs add a burst of flavor, but if you don’t have them on hand, dried herbs can be used as a substitute. Just be sure to use them sparingly, as dried herbs are more concentrated in flavor.
Finally, always use a non-stick skillet or a well-seasoned cast iron pan to prevent the omelette from sticking.
Coconut Flour Pancakes With Maple Syrup
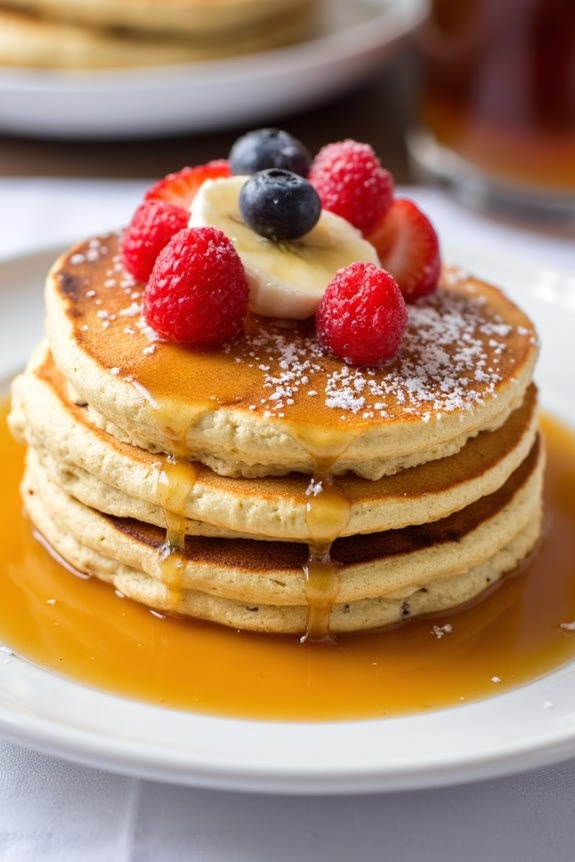
Coconut Flour Pancakes With Maple Syrup are a delicious and healthy way to start your day, especially for those who are gluten intolerant or looking to enjoy a low-calorie breakfast. Made with the nutrient-rich coconut flour, these pancakes aren’t only gluten-free but also high in fiber and low in carbohydrates.
Combined with the natural sweetness of maple syrup, this breakfast option provides a comforting and satisfying meal that won’t weigh you down. Coconut flour can be a bit tricky to work with due to its high absorbency, but with the right balance of wet ingredients, you’ll have fluffy and flavorful pancakes ready in no time.
This recipe serves 4-6 people, making it perfect for a family breakfast or a small brunch gathering. Enjoy these pancakes with a drizzle of pure maple syrup or your favorite toppings such as fresh berries or sliced bananas for an extra burst of flavor.
Ingredients:
- 1 cup coconut flour
- 6 large eggs
- 1 ½ cups almond milk (or any preferred milk)
- 2 tablespoons coconut oil, melted
- 2 tablespoons honey or maple syrup
- 1 teaspoon vanilla extract
- ½ teaspoon baking powder
- ¼ teaspoon salt
- Maple syrup, for serving
Instructions:
- Prepare the Batter: In a large mixing bowl, whisk together the eggs, almond milk, melted coconut oil, honey (or maple syrup), and vanilla extract until well combined. This mixture serves as the wet ingredients base for the pancakes.
- Combine Dry Ingredients: In another bowl, sift together the coconut flour, baking powder, and salt. Sifting helps to aerate the flour and guarantees that there are no lumps in the batter.
- Mix Wet and Dry Ingredients: Gradually add the dry ingredients to the wet ingredients, stirring continuously to avoid lumps. Let the batter sit for a few minutes to allow the coconut flour to fully absorb the liquid and thicken. The batter should be slightly thicker than traditional pancake batter.
- Preheat the Pan: Heat a non-stick skillet or griddle over medium-low heat. Lightly grease it with a bit of coconut oil to prevent sticking.
- Cook the Pancakes: Pour about ¼ cup of batter onto the skillet for each pancake. Use the back of a spoon to gently spread the batter into a round shape. Cook for 3-4 minutes on one side, or until bubbles form on the surface and the edges start to set.
- Flip and Finish Cooking: Carefully flip the pancakes using a spatula and cook for an additional 2-3 minutes on the other side until golden brown. Adjust the heat as necessary to prevent burning.
- Serve Warm: Transfer the cooked pancakes to a plate and keep them warm under a clean kitchen towel. Repeat the process with the remaining batter.
Extra Tips:
Coconut Flour Pancakes can be delicate, so handle them gently when flipping to prevent breaking. If the batter is too thick, add a little more almond milk to reach the desired consistency.
Additionally, these pancakes are quite filling due to the high fiber content, so smaller servings might be sufficient for some guests. For added flavor, consider mixing a pinch of cinnamon or nutmeg into the batter.
Finally, always use pure maple syrup for serving to complement the natural flavors of the pancakes without adding unnecessary sugars.
Overnight Oats With Banana and Walnuts
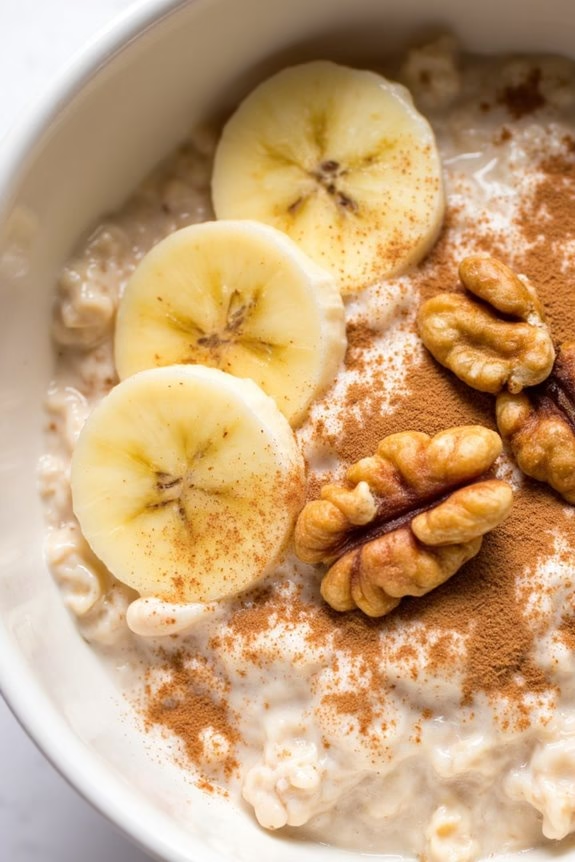
Start your day with a nutritious and delicious breakfast that’s both gluten-free and low in calories: Overnight Oats with Banana and Walnuts. This dish is perfect for those busy mornings when you need something quick yet satisfying. The combination of creamy oats, sweet bananas, and crunchy walnuts offers a delightful blend of flavors and textures. Plus, the natural sweetness of bananas means you can skip added sugars, making this a healthy choice for breakfast.
The beauty of overnight oats lies in their simplicity and convenience. By preparing them the night before, you allow the oats to soak up the milk, becoming soft and flavorful with minimal effort required in the morning. This recipe serves 4-6 people, making it ideal for families or meal prep for the week. Just follow the easy steps below, and you’ll have a wholesome breakfast ready to go when you wake up.
Ingredients (Serves 4-6)
- 3 cups gluten-free rolled oats
- 3 cups almond milk (or your preferred milk)
- 3 ripe bananas, sliced
- 1 cup walnuts, chopped
- 1 teaspoon vanilla extract
- 1 teaspoon ground cinnamon
- Pinch of salt
Cooking Instructions
- Prepare the Base: In a large mixing bowl, combine the gluten-free rolled oats and almond milk. Stir until the oats are fully submerged in the milk.
- Add Flavors: Add the vanilla extract, ground cinnamon, and a pinch of salt to the oat mixture. Stir well to guarantee the spices and vanilla are evenly distributed.
- Incorporate Bananas and Walnuts: Gently fold in the sliced bananas and chopped walnuts, being careful not to mash the bananas too much. This will help maintain some texture in the final dish.
- Refrigerate: Transfer the mixture into individual serving containers or a large airtight container. Cover and refrigerate overnight, or for at least 6 hours, to allow the oats to soften and absorb the flavors.
- Serve: In the morning, give the oats a good stir and serve chilled. You can top with additional banana slices or a sprinkle of walnuts for extra texture and flavor.
Extra Tips
For those looking to add a little more sweetness or variety, consider topping your overnight oats with a drizzle of honey or maple syrup, a sprinkle of chia seeds, or a handful of fresh berries.
If you prefer your oats warm, simply heat them in the microwave for a minute or two before serving. When choosing your milk, feel free to experiment with different types, such as coconut or soy milk, to find the flavor that suits you best.
Egg Muffins With Bell Peppers and Onion

Egg Muffins With Bell Peppers and Onion are a delicious and nutritious way to start your day, especially if you’re looking for a gluten-free and low-calorie breakfast option. These savory muffins boast the vibrant flavors of bell peppers and onions, combined with the protein-packed goodness of eggs.
They’re perfect for meal prepping and can be easily stored in the refrigerator or freezer for a quick breakfast on busy mornings. Additionally, this dish is versatile, allowing you to add your favorite vegetables or spices to suit your taste preferences.
These egg muffins aren’t only healthy but also incredibly easy to make. The preparation involves minimal ingredients, and the baking requires just a short time, making it a convenient choice for families or individuals on-the-go.
With a serving size of 4-6 people, this recipe yields approximately 12 muffins, making it excellent for sharing or saving some for later. Whether you’re hosting a brunch or simply want to enjoy a hearty breakfast, these egg muffins are sure to become a favorite in your kitchen.
Ingredients (for 4-6 servings):
- 10 large eggs
- 1 cup diced bell peppers (red, yellow, or green)
- 1/2 cup diced onion
- 1/2 cup shredded cheese (optional)
- 1/4 cup milk or milk substitute
- Salt and pepper to taste
- Cooking spray or muffin liners
Cooking Instructions:
- Preheat the Oven: Begin by preheating your oven to 375°F (190°C). This guarantees that your egg muffins will cook evenly and develop a nice, golden exterior.
- Prepare the Muffin Tin: Spray a 12-cup muffin tin with cooking spray or line it with muffin liners. This step is essential to prevent sticking and allows for easy removal of the muffins once they’re baked.
- Mix the Ingredients: In a large mixing bowl, crack the eggs and whisk them together with the milk, salt, and pepper until well combined. Add the diced bell peppers and onions, stirring them into the egg mixture. If you’re using cheese, fold it in gently at this stage.
- Fill the Muffin Cups: Pour the egg mixture evenly into the prepared muffin cups, filling each about 3/4 full. This allows room for the muffins to rise as they bake.
- Bake the Muffins: Place the muffin tin in the preheated oven and bake for 20-25 minutes, or until the eggs are set and the tops are slightly golden. To confirm they’re fully cooked, insert a toothpick into the center of a muffin; it should come out clean.
- Cool and Serve: Once baked, remove the muffins from the oven and let them cool in the tin for a few minutes before transferring them to a wire rack. Serve warm, or let them cool completely before storing them in an airtight container for later use.
Extra Tips: For added flavor, consider incorporating other vegetables like spinach or mushrooms into the egg mixture. You can also use various cheeses to introduce different taste profiles.
If you prefer a spicier kick, add a dash of hot sauce or a sprinkle of chili flakes to the egg mixture. Remember that these muffins can be easily customized based on dietary preferences—use dairy-free cheese or milk substitutes if needed.
Finally, when reheating, a quick zap in the microwave or a few minutes in a toaster oven will bring them back to life without compromising their texture.
Rice Cake With Smoked Salmon and Cream Cheese
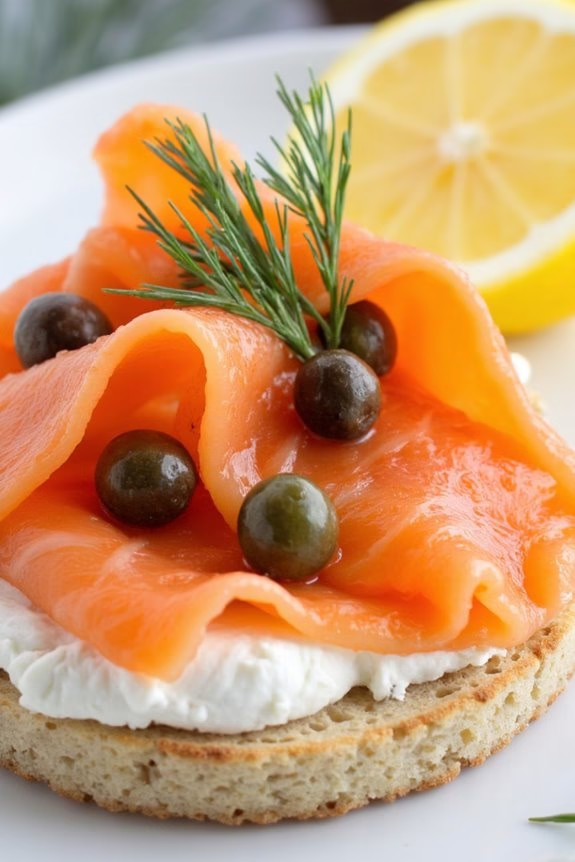
For a delightful and healthy breakfast option, Rice Cake With Smoked Salmon and Cream Cheese is a perfect choice. This gluten-free dish combines the nutty flavor of rice cakes with the rich, savory taste of smoked salmon and the creaminess of cream cheese. It’s an elegant yet simple meal that’s sure to impress your family or guests while keeping your calorie intake in check.
Whether you’re hosting a brunch or simply want to enjoy a nutritious breakfast, this dish is both satisfying and easy to prepare. The combination of flavors and textures in this breakfast dish is truly exceptional. The crispness of the rice cakes complements the smooth cream cheese, while the smoked salmon adds a touch of sophistication and a burst of flavor.
Topping it with fresh dill and capers will enhance the overall taste, making each bite an enjoyable experience. You can prepare this breakfast in just a few minutes, making it an ideal choice for busy mornings.
Ingredients for 4-6 Servings:
- 6 rice cakes
- 8 ounces of smoked salmon
- 8 ounces of cream cheese
- 2 tablespoons of capers
- 1 lemon, sliced into wedges
- Fresh dill for garnish
- Salt and pepper to taste
Cooking Instructions:
- Prepare the Ingredients: Start by gathering all the ingredients. Make sure that the cream cheese is softened to room temperature for easy spreading. Slice the smoked salmon into thin strips for easier assembly.
- Spread the Cream Cheese: Lay out the rice cakes on a clean surface or serving platter. Using a butter knife, generously spread a layer of cream cheese over each rice cake, guaranteeing full coverage.
- Add the Smoked Salmon: Carefully layer the sliced smoked salmon over the cream cheese on each rice cake. Try to distribute the salmon evenly across all rice cakes for a consistent flavor in each bite.
- Garnish: Sprinkle a few capers on top of the salmon for a tangy bite. Add a sprig of fresh dill on each rice cake to enhance the flavor and add a touch of color.
- Season and Serve: Lightly season each rice cake with a pinch of salt and pepper to taste. Serve with a lemon wedge on the side, allowing each person to squeeze fresh lemon juice over their serving for added zest.
Extra Tips:
When preparing Rice Cake With Smoked Salmon and Cream Cheese, opt for high-quality smoked salmon, as its flavor is essential to the dish. If possible, use wild-caught salmon for better taste and nutritional benefits.
Consider using low-fat cream cheese if you’re watching your calorie intake. The rice cakes should be fresh and crunchy for the best texture. You can also experiment by adding thinly sliced red onions or cucumber for extra crunch and freshness.
This dish is best enjoyed immediately after preparation to maintain the crispness of the rice cakes.
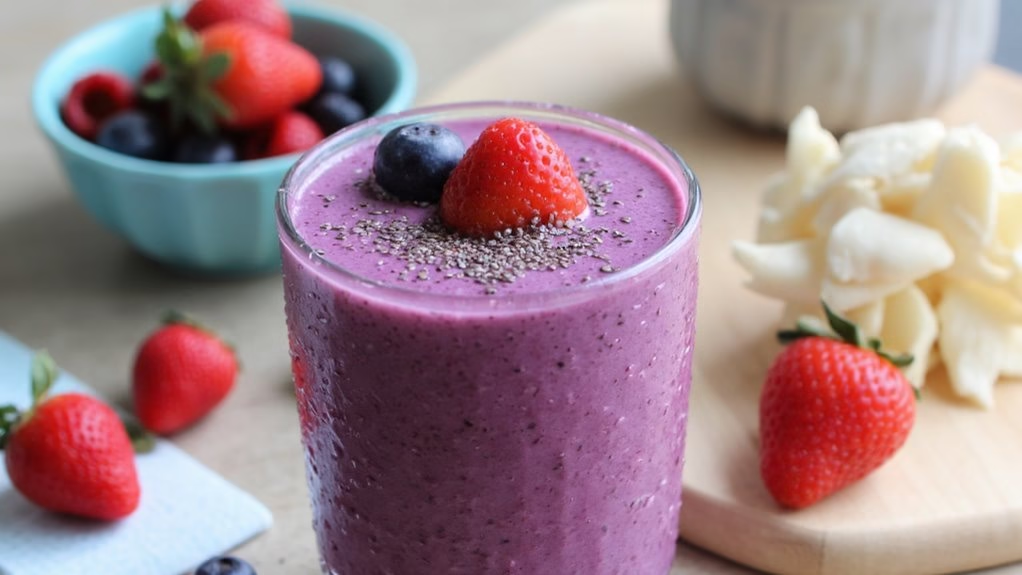
Berry and Almond Butter Smoothie
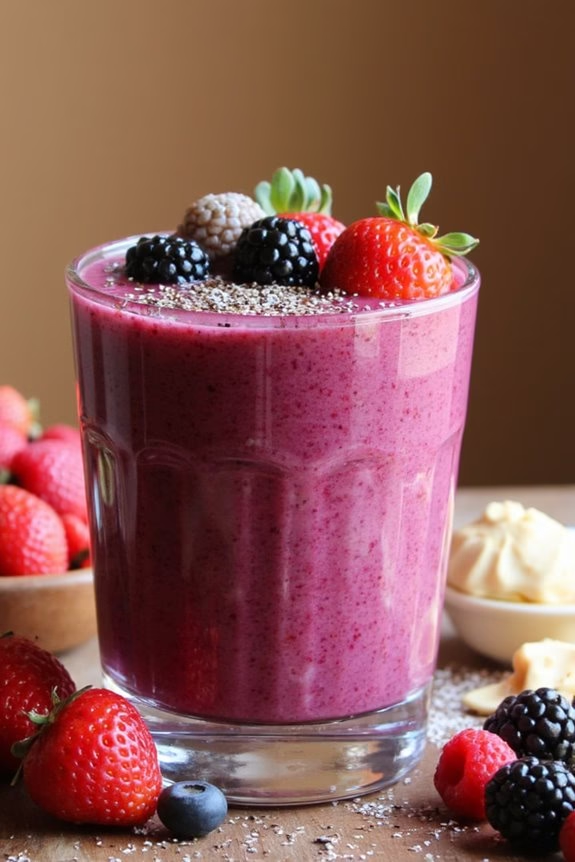
Start your day with a revitalizing and nutritious Berry and Almond Butter Smoothie. This smoothie isn’t only gluten-free but also low in calories, making it an excellent choice for a healthy breakfast. Packed with antioxidants from the berries and healthy fats from the almond butter, this smoothie will keep you energized and full throughout the morning.
The natural sweetness of the berries combined with the creamy texture of almond butter provides a delicious flavor that feels indulgent yet remains wholesome. Perfect for busy mornings, this smoothie can be prepared in minutes, allowing you to enjoy a nutritious breakfast even on the go.
Whether you’re catering to a gluten-free diet or simply looking to incorporate more healthy options into your morning routine, this Berry and Almond Butter Smoothie is a versatile choice that can be easily modified to suit your taste preferences.
Ingredients (Serving Size: 4-6 People):
- 2 cups mixed berries (fresh or frozen)
- 1 cup almond milk (unsweetened)
- 1/2 cup Greek yogurt (plain, gluten-free)
- 1/4 cup almond butter
- 2 tablespoons honey or maple syrup (optional)
- 1 tablespoon chia seeds
- 1 teaspoon vanilla extract
- Ice cubes (optional, for thicker consistency)
Cooking Instructions:
- Prepare the Ingredients: Begin by measuring out all of your ingredients. If you’re using fresh berries, make sure they’re washed and any stems are removed. If using frozen berries, there’s no need to thaw them as they’ll add a nice chill to your smoothie.
- Add to Blender: Place the berries, almond milk, Greek yogurt, and almond butter into a high-speed blender. These are the base ingredients that will provide the core flavors of your smoothie.
- Sweeten and Flavor: Add the honey or maple syrup if you prefer a sweeter smoothie. Then, include the chia seeds and vanilla extract, which will enhance the smoothie’s texture and flavor profile.
- Blend: Secure the lid on the blender and start blending on a low setting. Gradually increase to high speed for about 1-2 minutes, or until the mixture is smooth and creamy. If you desire a thicker consistency, add a few ice cubes and blend until they’re fully incorporated.
- Taste and Adjust: Taste the smoothie and adjust the sweetness if needed by adding more honey or maple syrup. Blend again briefly to mix any additional ingredients.
- Serve: Pour the smoothie into glasses and serve immediately for the best taste and texture. Enjoy it as is, or garnish with a few fresh berries or a sprinkle of chia seeds for an extra touch.
Extra Tips:
For a protein boost, consider adding a scoop of your favorite gluten-free protein powder to the smoothie before blending. If you prefer a dairy-free version, substitute the Greek yogurt with a plant-based alternative like coconut yogurt.
To save time in the morning, you can prepare the ingredients the night before, storing them in the fridge, so they’re ready to blend immediately. Additionally, this smoothie can be poured into popsicle molds and frozen for a delicious gluten-free treat on warm days.