
I’ve got a sweet tooth, especially in the morning, and I love starting my day with something indulgent yet quick. Fluffy pancakes drizzled with maple syrup or Nutella-stuffed French toast are just the beginning. These easy, mouthwatering ideas make breakfast feel like a celebration. There’s something special for everyone, whether you’re in the mood for a berry smoothie bowl or sweet potato waffles. Curious to see what else is on the menu?
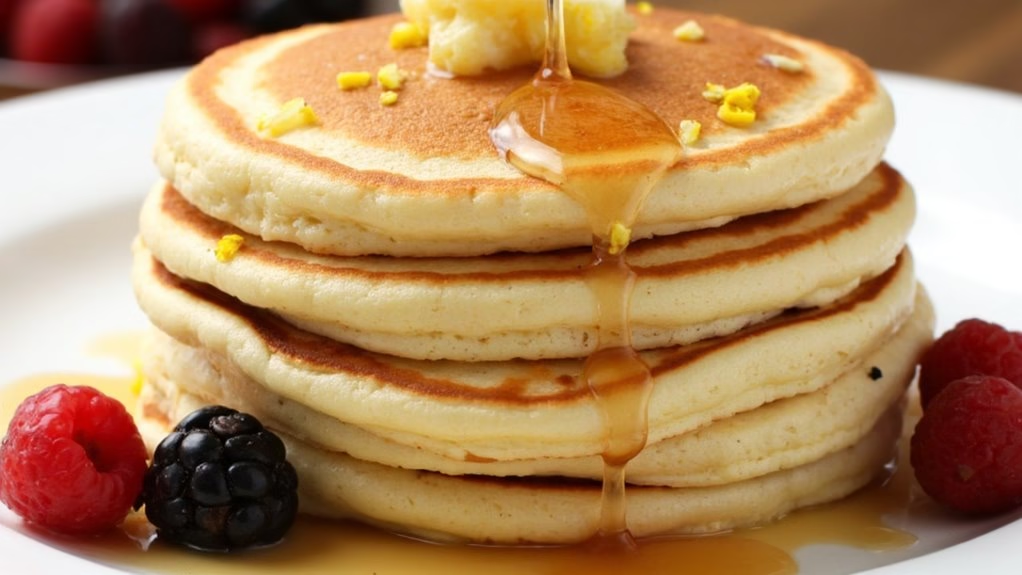
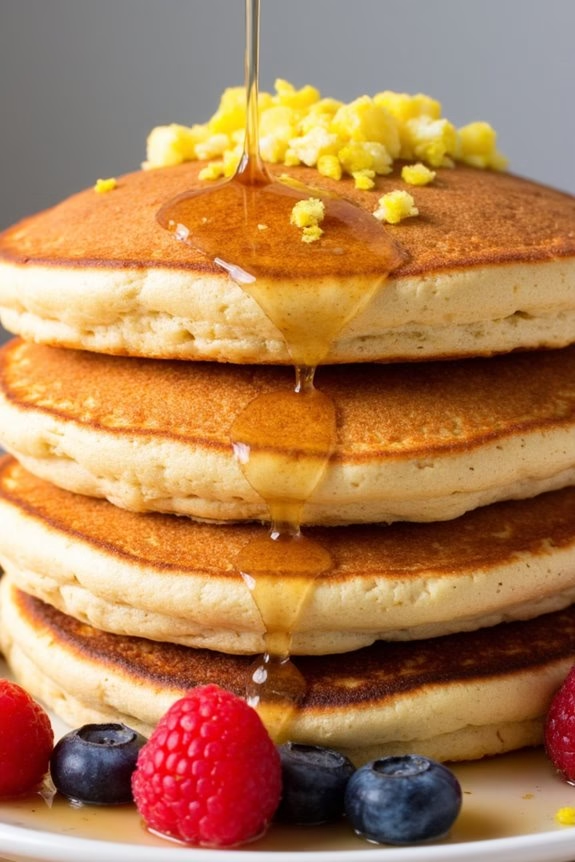
Fluffy Pancakes With Maple Syrup
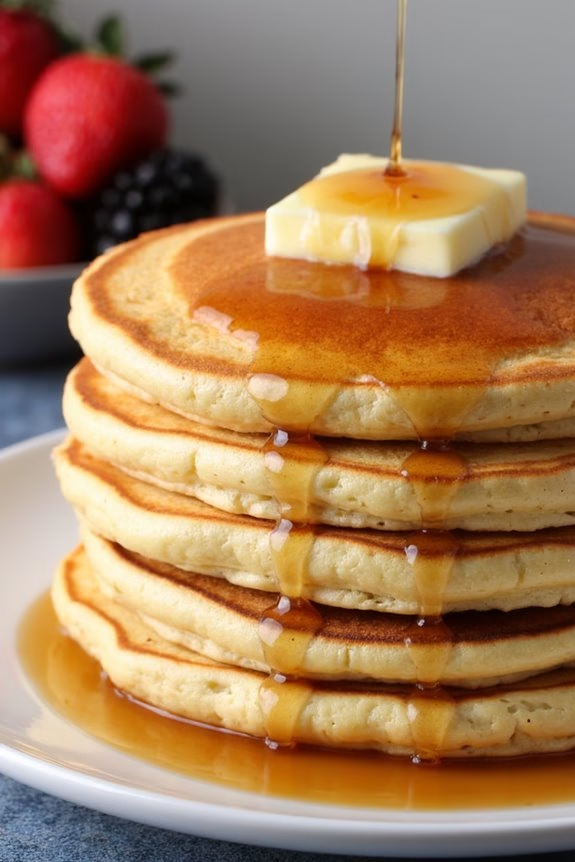
Fluffy Pancakes With Maple Syrup are a classic breakfast delight, perfect for a sweet start to your day. These pancakes are light, airy, and have a melt-in-your-mouth texture, making them an irresistible treat for both kids and adults alike. The key to achieving their fluffiness lies in the right blend of ingredients and a careful cooking process. Topped with rich maple syrup, these pancakes create a perfect balance of sweetness and warmth, making every bite a celebration of flavors.
To prepare these delightful pancakes, it’s important to use fresh ingredients and follow the steps closely to guarantee the best results. This recipe will guide you on how to create a stack of pancakes that are golden brown on the outside and soft on the inside. Ideal for a family breakfast or brunch, this recipe serves 4-6 people, ensuring everyone gets to enjoy this sweet breakfast treat.
Ingredients (serving size: 4-6 people):
- 2 cups all-purpose flour
- 2 tablespoons granulated sugar
- 2 teaspoons baking powder
- 1/2 teaspoon baking soda
- 1/2 teaspoon salt
- 2 large eggs
- 1 3/4 cups buttermilk
- 1/4 cup unsalted butter, melted
- 1 teaspoon vanilla extract
- Maple syrup, for serving
Cooking Instructions:
- Prepare the Dry Ingredients: In a large mixing bowl, whisk together the flour, sugar, baking powder, baking soda, and salt. This guarantees even distribution of the leavening agents and prevents clumping.
- Mix the Wet Ingredients: In a separate bowl, beat the eggs lightly. Add the buttermilk, melted butter, and vanilla extract, whisking until well combined. The buttermilk and butter contribute to the pancakes’ moist texture.
- Combine the Mixtures: Make a well in the center of the dry ingredients and pour in the wet mixture. Stir gently with a spatula or wooden spoon until just combined. Be careful not to over-mix, as this can lead to dense pancakes. The batter should be slightly lumpy.
- Preheat the Griddle or Pan: Heat a non-stick griddle or large skillet over medium heat. Lightly grease with a small amount of butter or oil. The surface should be hot enough that a drop of water sizzles upon contact.
- Cook the Pancakes: Using a ladle or measuring cup, pour about 1/4 cup of batter onto the griddle for each pancake. Cook until bubbles form on the surface and the edges appear set, about 2-3 minutes. Carefully flip the pancakes and cook for another 1-2 minutes, or until golden brown on both sides.
- Serve: Transfer the cooked pancakes to a warm plate. Repeat the process with the remaining batter. Serve the pancakes warm with generous drizzles of maple syrup.
Extra Tips:
For the fluffiest pancakes, guarantee that your baking powder and baking soda are fresh, as these are essential for the pancakes to rise properly. If you don’t have buttermilk, you can make a substitute by adding 1 tablespoon of vinegar or lemon juice to 1 3/4 cups of milk and letting it sit for 5 minutes.
Also, avoid pressing down on the pancakes with a spatula while they’re cooking, as this can flatten them and reduce fluffiness. Enjoy your pancakes with additional toppings like fresh fruits, nuts, or a dollop of whipped cream for an extra special treat.
Quick Cinnamon Roll Bites
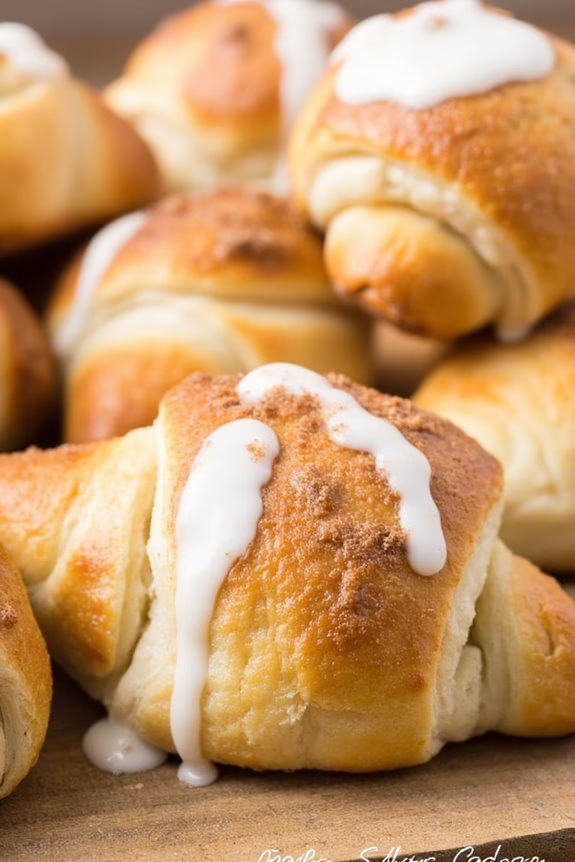
Quick Cinnamon Roll Bites are the perfect solution for a sweet breakfast that’s both delicious and effortless to prepare. These bite-sized treats capture all the flavors of traditional cinnamon rolls in a fraction of the time, making them an ideal option for busy mornings. The aroma of cinnamon and sugar baking in the oven will fill your kitchen, creating a warm and inviting atmosphere that’s hard to resist.
These delightful bites are perfect for sharing with family and friends, guaranteeing everyone starts their day with a smile.
The beauty of Quick Cinnamon Roll Bites lies in their simplicity and speed. With minimal ingredients and a straightforward method, you can whip up these tasty bites in no time. The key is using store-bought dough, which cuts down on preparation time without compromising on flavor.
Whether you’re a seasoned baker or a kitchen novice, you’ll find this recipe easy to follow and highly rewarding. Plus, they’re a hit with both kids and adults alike, making them a versatile breakfast option for gatherings or a special weekend treat.
Ingredients (Serves 4-6):
- 1 can (8 oz) refrigerated crescent roll dough
- 1/4 cup unsalted butter, melted
- 1/4 cup granulated sugar
- 1 tbsp ground cinnamon
- 1/4 cup powdered sugar
- 1 tbsp milk
- 1/2 tsp vanilla extract
Instructions:
- Preheat the Oven: Begin by preheating your oven to 375°F (190°C). This guarantees that the cinnamon roll bites bake evenly and achieve a golden brown color.
- Prepare the Dough: Unroll the crescent roll dough onto a clean work surface. Press the seams together to create a single sheet of dough. This will form the base for your cinnamon roll bites.
- Mix Cinnamon Sugar: In a small bowl, combine the granulated sugar and ground cinnamon. Mix well until fully blended.
- Brush and Sprinkle: Using a pastry brush, evenly coat the entire surface of the dough with the melted butter. Sprinkle the cinnamon sugar mixture over the buttered dough, ensuring even coverage.
- Roll and Slice: Starting from the long edge, tightly roll the dough into a log. Using a sharp knife, slice the log into approximately 16 equal pieces.
- Arrange and Bake: Place the sliced pieces, cut side up, into a greased baking dish. Bake in the preheated oven for 10-12 minutes or until they’re golden brown.
- Prepare the Glaze: While the bites are baking, whisk together the powdered sugar, milk, and vanilla extract in a small bowl until smooth. This will be your glaze.
- Glaze the Bites: Once the cinnamon roll bites are out of the oven, allow them to cool for a few minutes before drizzling the glaze over the top with a spoon.
Extra Tips:
For an even more indulgent experience, consider adding a handful of chopped nuts or raisins to the cinnamon sugar mixture before rolling the dough. If you prefer a thicker glaze, adjust the consistency by adding more powdered sugar.
To avoid sticking, use parchment paper to line your baking dish. Ultimately, these bites are best enjoyed warm, but you can reheat any leftovers in the microwave for a few seconds to regain their soft, fresh-baked texture.
Overnight Chia Seed Pudding
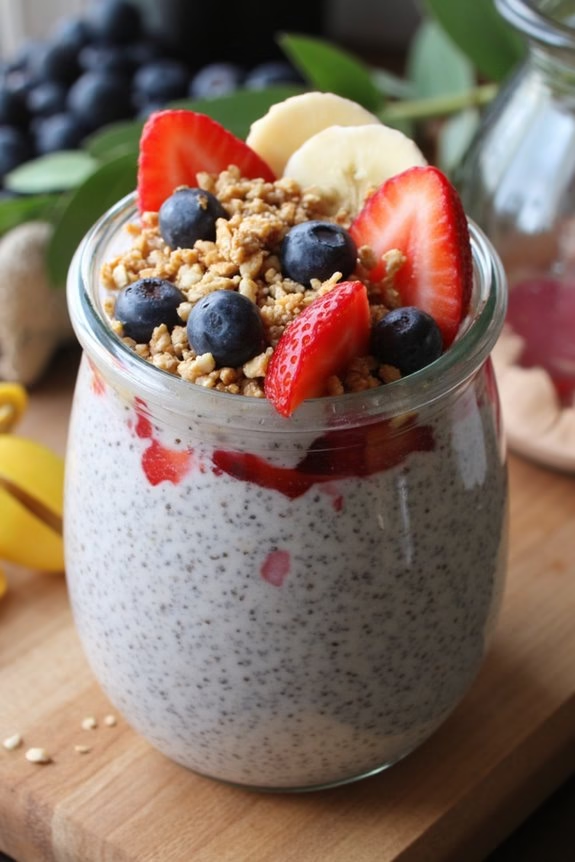
Overnight Chia Seed Pudding is a delightful and simple make-ahead breakfast option that’s both nutritious and satisfying. Packed with omega-3 fatty acids, fiber, and protein, chia seeds expand in liquid to create a creamy and pudding-like texture.
This dish can be customized with various flavors and toppings, making it a versatile choice for those who want to start their day with a sweet yet healthy meal. By preparing the pudding the night before, you can save time in the morning and enjoy a stress-free breakfast.
This recipe serves 4-6 people, making it perfect for family breakfasts or meal prepping for the week. With a base of chia seeds and milk, you can add your favorite sweeteners, spices, or fruit to suit your taste preferences. Here’s how to make Overnight Chia Seed Pudding.
Ingredients:
- 1 cup chia seeds
- 4 cups milk (dairy or non-dairy)
- 1/4 cup honey or maple syrup
- 1 teaspoon vanilla extract
- 1/2 teaspoon ground cinnamon (optional)
- Fresh fruit and nuts for topping (optional)
Instructions:
- Mix the Base: In a large mixing bowl, combine the chia seeds and milk. Stir well to guarantee that the seeds are evenly distributed and not clumping together.
- Add Sweeteners and Flavors: Stir in the honey or maple syrup, vanilla extract, and ground cinnamon if using. Mix thoroughly to incorporate all the ingredients.
- Refrigerate: Cover the bowl with a lid or plastic wrap and place it in the refrigerator. Allow the mixture to sit overnight, or for at least 4 hours, until the chia seeds have absorbed the liquid and the pudding has thickened to your desired consistency.
- Stir Before Serving: Before serving, give the pudding a good stir to break up any clumps that may have formed.
- Serve and Enjoy: Portion the pudding into individual serving bowls or jars. Top with fresh fruit, nuts, or any other desired toppings before serving.
Extra Tips:
For a creamier texture, consider using coconut milk or almond milk. If you prefer a thicker pudding, you can reduce the amount of milk slightly or increase the chia seeds.
Feel free to experiment with different flavorings such as cocoa powder for a chocolate twist, or add a handful of shredded coconut. The pudding can be stored in the refrigerator for up to 5 days, making it a convenient option for busy mornings.
Berry Smoothie Bowl
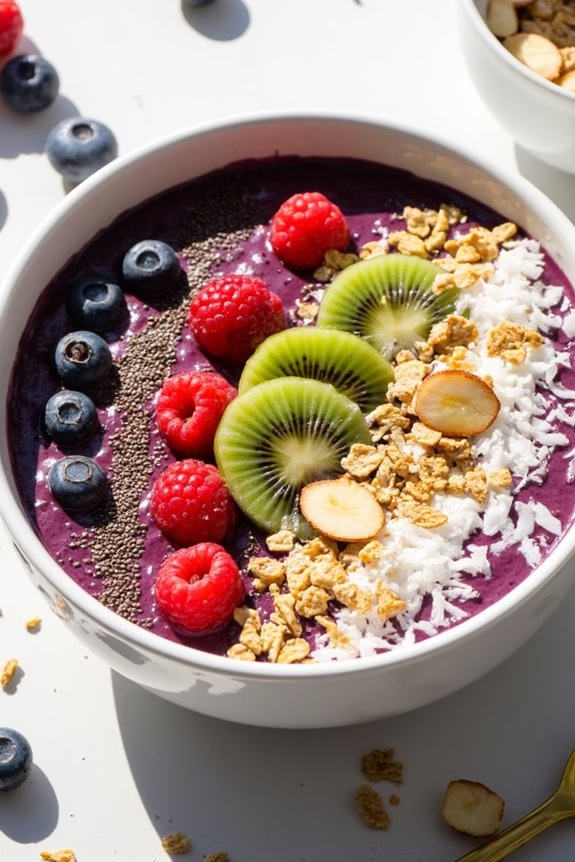
Start your day with a revitalizing and nutritious Berry Smoothie Bowl, a delightful way to enjoy breakfast, especially in warmer months. This dish isn’t only visually appealing but also packed with antioxidants, vitamins, and minerals. The vibrant blend of mixed berries, creamy yogurt, and a hint of honey makes it a perfect sweet breakfast option for both adults and kids.
You can customize your smoothie bowl with your favorite toppings, adding a personal touch that caters to your taste and nutritional preferences. Ideal for a serving size of 4-6 people, this Berry Smoothie Bowl recipe is simple to prepare and requires minimal ingredients. The base is made creamy with Greek yogurt and bananas, while a medley of berries provides the sweet and tangy flavor profile.
Top this nutritious bowl with granola, nuts, seeds, or more fresh fruit for added texture and flavor. Whether you’re looking for a quick breakfast or a healthy snack, this smoothie bowl is sure to satisfy both your hunger and your taste buds.
Ingredients:
- 2 cups frozen mixed berries
- 2 ripe bananas
- 1 cup Greek yogurt
- 1/2 cup almond milk (or preferred milk)
- 2 tablespoons honey
- 1 teaspoon vanilla extract
Optional Toppings:
- Fresh berries
- Granola
- Chia seeds
- Sliced almonds
- Coconut flakes
- Sliced kiwi or banana
Instructions:
- Prepare the Ingredients: Gather all the ingredients. If you’re using fresh berries instead of frozen ones, consider freezing them for a couple of hours to achieve a thicker consistency in your smoothie bowl.
- Blend the Base: In a high-speed blender, combine the frozen mixed berries, bananas, Greek yogurt, almond milk, honey, and vanilla extract. Blend on high until the mixture is smooth and creamy, scraping down the sides if necessary.
- Adjust Consistency: If the smoothie mixture is too thick, add a little more almond milk and blend again. The consistency should be thick enough to eat with a spoon but not so thick that it won’t blend.
- Pour and Serve: Divide the smoothie mixture into bowls. Use a spatula to evenly distribute and smooth the top.
- Add Toppings: Decorate each bowl with your choice of toppings such as fresh berries, granola, chia seeds, sliced almonds, coconut flakes, or additional banana or kiwi slices.
- Serve Immediately: Enjoy your smoothie bowl immediately to savor the fresh flavors and textures.
Extra Tips:
To enhance the flavor and nutritional value of your Berry Smoothie Bowl, try experimenting with different types of berries or add a scoop of protein powder for an extra energy boost.
If you prefer a sweeter taste, adjust the honey amount to your liking or use maple syrup as an alternative. For a more tropical flavor, consider adding a handful of frozen mango or pineapple chunks.
Finally, make sure to use ripe bananas, as they’ll provide natural sweetness and help achieve a creamy texture in your smoothie bowl.
Recommended Products

Packets of our most popular blend of certified organic Açaí and Guaraná for Rio-Style Açaí bowls & smoothies.

100% REAL FREEZE-DRIED FRUIT – NOTHING ARTIFICIAL - Made from real freeze-dried fruit and berries: banana, strawberry, raspberry, blueberry, blackcurrant, chokeberry, dates & chia seeds. No preservatives, no artificial flavors, no fillers - just naturally sweet fruit powder.

Nutella-Stuffed French Toast
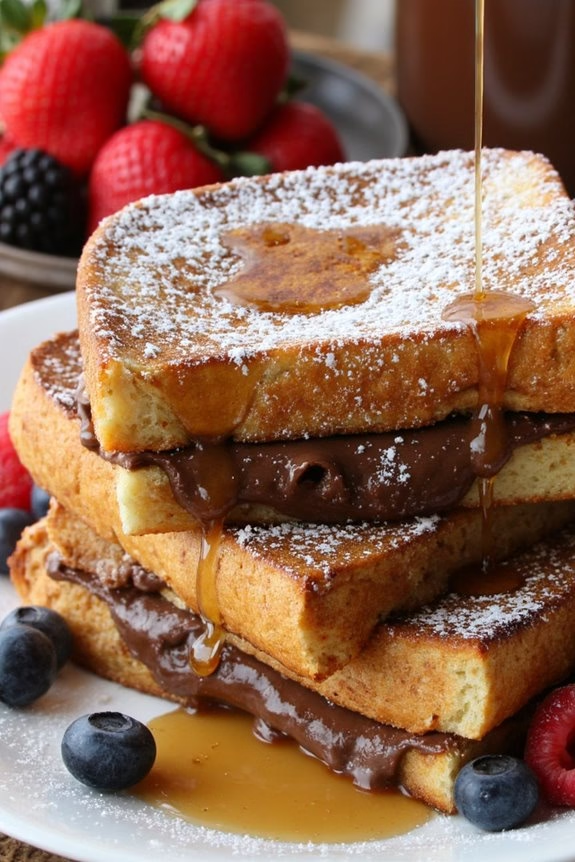
Indulge in the ultimate sweet breakfast delight with Nutella-Stuffed French Toast. This decadent dish combines the rich, creamy goodness of Nutella with the classic flavors of French toast to create a breakfast treat that’s both satisfying and delicious.
Perfect for a weekend brunch or a special occasion, this dish is bound to impress your family and friends with its irresistible taste and presentation.
The combination of soft bread filled with warm, gooey Nutella, and lightly crisped from frying, is a match made in culinary heaven. With just the right amount of sweetness and a hint of vanilla, Nutella-Stuffed French Toast is an easy yet luxurious breakfast option.
Prepare to make a serving size fit for 4-6 people with the following ingredients and instructions.
Ingredients:
- 12 slices of thick white bread
- 1 cup Nutella
- 4 large eggs
- 1 cup whole milk
- 1 teaspoon vanilla extract
- 1 teaspoon ground cinnamon
- 2 tablespoons granulated sugar
- Pinch of salt
- 2 tablespoons unsalted butter
- Powdered sugar, for dusting (optional)
- Fresh berries, for serving (optional)
- Maple syrup, for serving (optional)
Instructions:
1. Prepare the Bread: Start by laying out the slices of bread and spreading a generous amount of Nutella on half of them. Use about 2 tablespoons per slice, guaranteeing you leave a small border around the edges.
Top with the remaining slices of bread to form sandwiches.
2. Prepare the Batter: In a shallow bowl, whisk together the eggs, milk, vanilla extract, cinnamon, sugar, and a pinch of salt until well combined. Make sure the mixture is smooth and all the ingredients are fully incorporated.
3. Dip the Sandwiches: Preheat a non-stick skillet or frying pan over medium heat and add 1 tablespoon of butter. Dip each Nutella sandwich into the egg mixture, ensuring both sides are coated.
Allow any excess to drip off before placing the sandwich in the skillet.
4. Cook the French Toast: Place the dipped sandwiches in the skillet, cooking for about 3-4 minutes on each side, or until they’re golden brown and crispy.
You may need to add more butter to the pan as needed. Work in batches if necessary to avoid overcrowding the pan.
5. Serve: Once cooked, transfer the Nutella-Stuffed French Toast to a serving platter. Dust with powdered sugar and serve with fresh berries and maple syrup if desired.
Extra Tips:
To guarantee the Nutella-Stuffed French Toast holds together and cooks evenly, use slightly stale bread as it absorbs the egg mixture better without becoming too soggy.
You can also experiment with different types of bread such as brioche or challah for added flavor. If you prefer a richer flavor, consider using half-and-half instead of whole milk in the batter.
Finally, be sure to monitor the heat of your skillet to prevent the toast from burning before the center is warmed through. Enjoy your breakfast masterpiece!
Banana Oatmeal Muffins
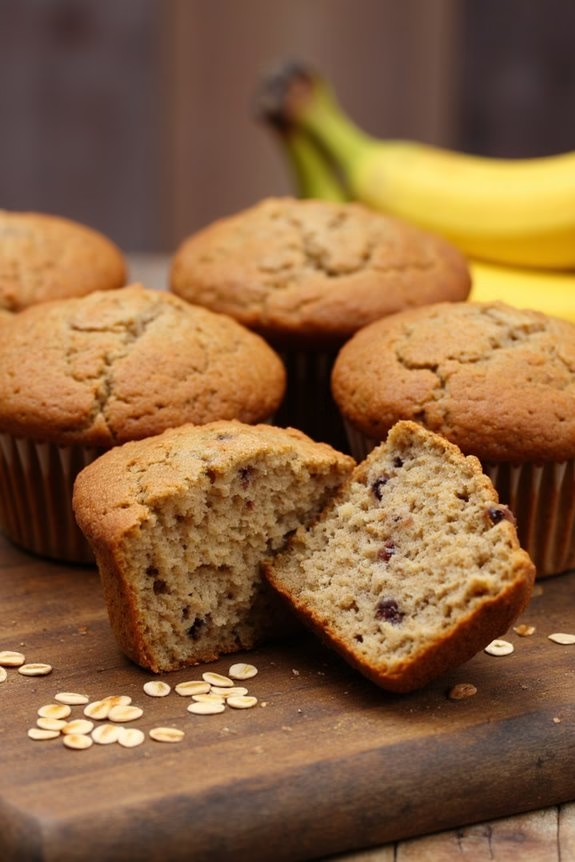
Banana Oatmeal Muffins are a delightful and healthy option for a sweet breakfast treat that can be enjoyed by the whole family. These muffins aren’t only moist and flavorful but also packed with nutritious ingredients like ripe bananas and hearty oats. Perfect for a quick grab-and-go breakfast or a leisurely weekend brunch, these muffins are certain to become a favorite in your household. The natural sweetness of bananas means you can use less sugar, making this a guilt-free indulgence.
Preparing Banana Oatmeal Muffins is simple and requires minimal effort, making it a great choice even for novice bakers. The combination of bananas and oats creates a satisfying texture, while ingredients like cinnamon and vanilla add warmth and depth to the flavor profile. This recipe yields about 12 muffins, perfect for serving 4-6 people, allowing everyone to enjoy a couple of these deliciously moist treats.
Ingredients (for 4-6 people):
- 2 cups rolled oats
- 1 cup whole wheat flour
- 1 teaspoon baking powder
- 1/2 teaspoon baking soda
- 1/2 teaspoon salt
- 1 teaspoon ground cinnamon
- 3 ripe bananas, mashed
- 1/2 cup brown sugar
- 1/4 cup melted coconut oil (or vegetable oil)
- 2 large eggs
- 1 teaspoon vanilla extract
- 1/2 cup milk (dairy or plant-based)
Cooking Instructions:
- Preheat and Prepare: Preheat your oven to 350°F (175°C) and line a 12-cup muffin tin with paper liners or lightly grease it.
- Mix Dry Ingredients: In a large bowl, combine the rolled oats, whole wheat flour, baking powder, baking soda, salt, and cinnamon. Mix well to guarantee all dry ingredients are evenly distributed.
- Combine Wet Ingredients: In a separate medium-sized bowl, mash the ripe bananas using a fork until smooth. Add the brown sugar, melted coconut oil, eggs, and vanilla extract to the mashed bananas. Whisk until the mixture is well combined.
- Incorporate Milk: Gradually add the milk to the wet mixture, mixing until fully incorporated. This will help achieve a smoother batter consistency.
- Combine Wet and Dry Mixtures: Pour the wet ingredients into the bowl with the dry ingredients. Stir gently until just combined. Be careful not to overmix, as this can make the muffins dense.
- Fill Muffin Cups: Using a spoon or ice cream scoop, distribute the batter evenly among the 12 muffin cups, filling each about 3/4 full.
- Bake: Place the muffin tin in the preheated oven and bake for 20-25 minutes, or until a toothpick inserted into the center of a muffin comes out clean.
- Cool and Serve: Allow the muffins to cool in the tin for about 5 minutes before transferring them to a wire rack to cool completely. Serve warm or at room temperature.
Extra Tips: For an added boost of flavor and texture, consider mixing in a handful of chopped nuts, chocolate chips, or dried fruit into the batter before baking. If you prefer sweeter muffins, you can increase the amount of brown sugar or add a drizzle of honey to the mixture.
These muffins can be stored in an airtight container at room temperature for up to three days, or they can be frozen for up to three months—simply reheat them in the oven or microwave before serving.
Yogurt Parfait With Granola
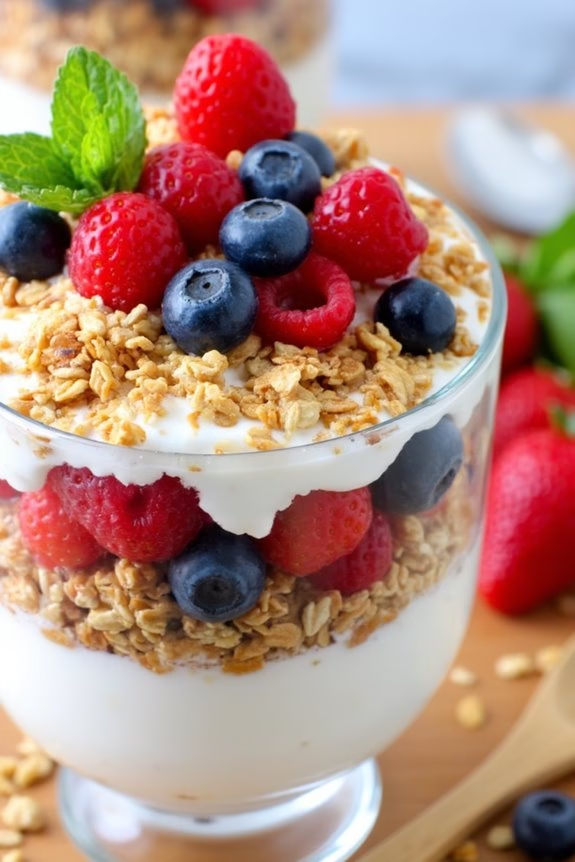
If you’re looking for a sweet yet healthy breakfast option, a Yogurt Parfait with Granola is an ideal choice. This dish combines creamy yogurt with layers of crunchy granola and fresh fruit, creating a delightful contrast in texture and flavor. It’s not only visually appealing but also packed with nutrients, making it a perfect start to your day.
Whether you’re serving this for a family breakfast or a brunch with friends, the Yogurt Parfait with Granola is sure to impress.
Preparing a Yogurt Parfait is incredibly simple and requires no cooking, which makes it a quick go-to recipe for busy mornings. You can customize the parfait with your favorite type of yogurt, whether it’s plain, Greek, or flavored, and choose from a variety of fruits and granola to suit your taste.
This recipe serves 4-6 people, allowing you to enjoy this delicious breakfast with your loved ones.
Ingredients for 4-6 servings:
- 4 cups of yogurt (plain or flavored)
- 2-3 cups of granola
- 2 cups of mixed berries (such as strawberries, blueberries, raspberries)
- 1/4 cup of honey or maple syrup (optional)
- Fresh mint leaves for garnish (optional)
Instructions:
- Prepare the Ingredients: Start by gathering all the ingredients. Wash the berries thoroughly and pat them dry with a clean towel. If the strawberries are large, slice them into bite-sized pieces.
- Layer the Yogurt: In a large glass or parfait dish, spoon a layer of yogurt at the bottom. Aim for about 1/2 cup per glass if serving individually or evenly distribute in a large serving dish.
- Add the Granola: Sprinkle a layer of granola over the yogurt. Be generous, as this adds a crunch to the parfait. Use about 1/4 cup per individual serving or adjust according to preference.
- Top with Berries: Add a layer of mixed berries on top of the granola. This not only adds color but also a burst of freshness and sweetness.
- Repeat the Layers: Continue layering the yogurt, granola, and berries until you’ve used up all the ingredients or reached the top of your serving dish. Finish with a final layer of berries for a beautiful presentation.
- Drizzle with Honey: If desired, drizzle honey or maple syrup over the top layer for additional sweetness. This step is optional, especially if using flavored yogurt.
- Garnish and Serve: Garnish with fresh mint leaves for a touch of elegance. Serve immediately to maintain the granola’s crunchiness.
Extra Tips:
To make the parfait even more nutritious, consider adding a handful of nuts or seeds, such as almonds or chia seeds, to the layers.
If you’re preparing this dish ahead of time, keep the granola separate and add it just before serving to prevent it from becoming soggy.
For a dairy-free version, substitute the yogurt with a plant-based alternative like coconut or almond yogurt.
Enjoy experimenting with different fruit combinations and granola flavors to find your perfect parfait mix!
Chocolate Chip Banana Bread
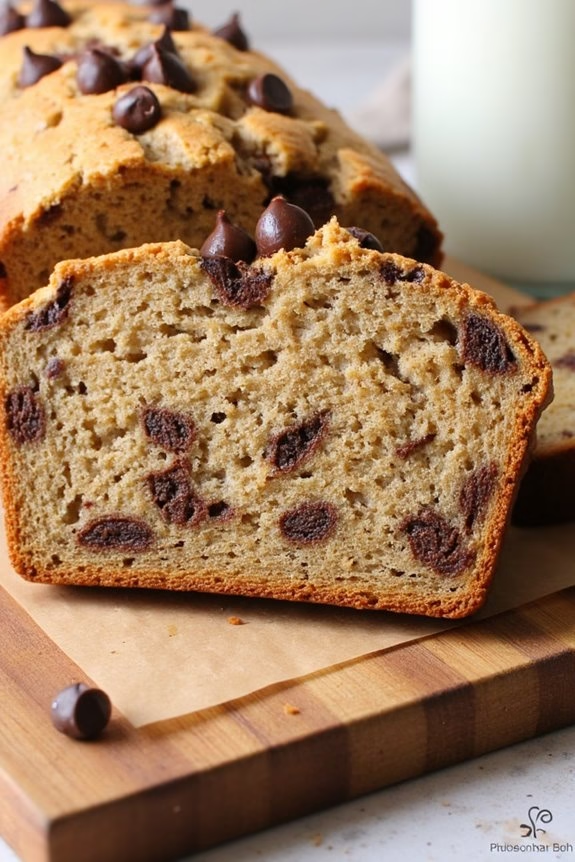
Chocolate Chip Banana Bread is a delightful and indulgent breakfast treat that combines the comforting flavors of ripe bananas with the rich taste of chocolate chips. Perfect for family gatherings or a weekend brunch, this moist and flavorful bread is certain to become a favorite.
Whether enjoyed warm from the oven or toasted with a pat of butter, Chocolate Chip Banana Bread is a versatile dish that can be served as a hearty breakfast or a sweet snack throughout the day.
This recipe makes a loaf that serves 4-6 people, allowing everyone to enjoy a generous slice. The combination of sweet bananas and semi-sweet chocolate chips creates a balanced flavor that’s both satisfying and irresistible. With just a few simple ingredients and straightforward instructions, you can easily whip up this delightful bread in no time.
Ingredients:
- 3 ripe bananas, mashed
- 1/3 cup melted butter
- 3/4 cup sugar
- 1 egg, beaten
- 1 teaspoon vanilla extract
- 1 teaspoon baking soda
- Pinch of salt
- 1 1/2 cups all-purpose flour
- 1 cup semi-sweet chocolate chips
Instructions:
- Preheat and Prepare: Preheat your oven to 350°F (175°C). Grease a 9×5 inch loaf pan or line it with parchment paper to prevent sticking.
- Mix the Wet Ingredients: In a large mixing bowl, combine the mashed bananas with the melted butter. Stir in the sugar, beaten egg, and vanilla extract until well combined.
- Combine Dry Ingredients: In a separate bowl, mix together the baking soda and salt. Add the flour and mix until the dry ingredients are well-blended.
- Create the Batter: Gradually add the dry ingredients to the banana mixture, stirring gently until just incorporated. Be careful not to overmix, as this can make the bread tough.
- Add Chocolate Chips: Fold in the chocolate chips, making sure they’re evenly distributed throughout the batter.
- Transfer to Pan: Pour the batter into the prepared loaf pan, smoothing the top with a spatula.
- Bake: Place the loaf pan in the preheated oven and bake for 60 minutes, or until a toothpick inserted into the center comes out clean.
- Cool and Serve: Allow the bread to cool in the pan for about 10 minutes before transferring it to a wire rack to cool completely. Slice and serve.
Extra Tips:
When making Chocolate Chip Banana Bread, verify that your bananas are ripe, as they’ll provide the best flavor and sweetness.
If you prefer a less sweet loaf, you can reduce the amount of sugar slightly or use dark chocolate chips instead of semi-sweet. For added texture, consider incorporating nuts like walnuts or pecans into the batter.
Additionally, storing the bread in an airtight container will keep it fresh for several days, and it can also be wrapped and frozen for longer storage.
Fruit and Cream Cheese Danish

Fruit and Cream Cheese Danish is a delightful sweet breakfast treat that’s certain to start your day off on the right note. With its flaky pastry, creamy filling, and fresh fruit topping, this Danish is perfect for a weekend brunch or a special breakfast occasion. The combination of the tangy cream cheese with the natural sweetness of the fruit creates a balanced flavor profile that everyone will love.
Making Fruit and Cream Cheese Danish at home is surprisingly simple and allows you to customize the flavors to suit your taste. Whether you prefer berries, peaches, or even apples, you can mix and match your favorite fruits for a personalized touch. This recipe is designed to serve 4-6 people, making it ideal for a family breakfast or a small gathering.
Ingredients for 4-6 servings:
- 1 package (14 oz) of puff pastry sheets, thawed
- 8 oz cream cheese, softened
- 1/4 cup granulated sugar
- 1 teaspoon vanilla extract
- 1 egg
- 1 tablespoon water
- 1 cup mixed fresh fruits (such as berries, peaches, or apples), sliced
- 2 tablespoons apricot preserves
- 1 tablespoon lemon juice
- Powdered sugar for dusting (optional)
Cooking Instructions:
- Preheat and Prep: Preheat your oven to 400°F (200°C). Line a baking sheet with parchment paper to prevent sticking and make cleanup easier.
- Prepare the Cream Cheese Filling: In a medium bowl, beat the softened cream cheese with the granulated sugar and vanilla extract until smooth and creamy. Set aside.
- Roll and Cut the Pastry: On a lightly floured surface, unfold the puff pastry sheets and roll them out to smooth the creases. Cut each sheet into 4 equal squares, giving you a total of 8 squares.
- Assemble the Danish: Place a spoonful of the cream cheese mixture in the center of each pastry square. Top with a few pieces of your chosen fruit. Fold two opposite corners of the pastry over the filling, pressing gently to seal.
- Egg Wash: In a small bowl, whisk together the egg and tablespoon of water. Brush this egg wash over the pastry edges to give them a golden brown finish as they bake.
- Bake: Transfer the pastries to the prepared baking sheet. Bake for 15-18 minutes or until the pastries are puffed and golden brown.
- Prepare the Glaze: While the pastries are baking, heat the apricot preserves and lemon juice in a small saucepan over low heat until melted and smooth.
- Glaze and Serve: Once the pastries are out of the oven, brush them with the apricot glaze for added shine and sweetness. Let them cool slightly before serving. Dust with powdered sugar if desired.
Extra Tips:
For best results, verify that your puff pastry is properly thawed before using, as this will make it easier to work with and result in a flakier texture.
When selecting fruit, opt for ripe but firm options to avoid excess moisture that can make the pastry soggy.
Store any leftovers in an airtight container at room temperature for up to two days, and reheat them in the oven to regain their crispiness before serving.
Apple Cinnamon Breakfast Quinoa
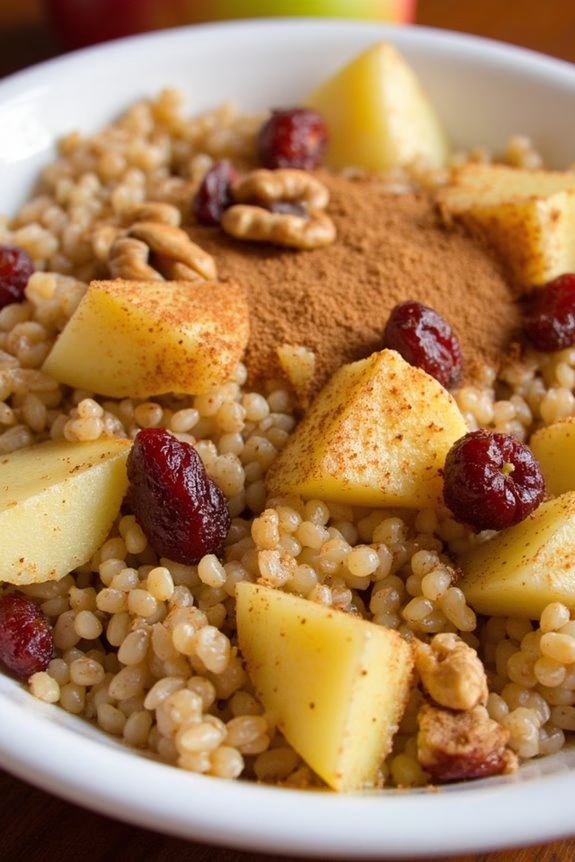
Quinoa is a fantastic alternative to traditional grains because it’s high in protein and naturally gluten-free. This recipe pairs quinoa with apples, a touch of maple syrup, and a sprinkle of cinnamon to create a balanced breakfast that will keep you satisfied for hours.
It’s easy to prepare, making it an excellent choice for busy mornings or a leisurely weekend brunch.
Ingredients (serving size: 4-6 people):
- 1 cup quinoa
- 2 cups water
- 1 1/2 cups almond milk
- 2 medium apples, peeled and diced
- 1/4 cup maple syrup
- 1 teaspoon ground cinnamon
- 1/4 teaspoon nutmeg
- 1/4 teaspoon salt
- 1 teaspoon vanilla extract
- 1/4 cup chopped walnuts (optional)
- 1/4 cup dried cranberries (optional)
Cooking Instructions:
- Rinse the Quinoa: Begin by rinsing the quinoa under cold water using a fine mesh strainer. This step removes the natural coating, called saponin, which can make it taste bitter.
- Cook the Quinoa: In a medium saucepan, combine the rinsed quinoa and 2 cups of water. Bring to a boil over medium-high heat, then reduce the heat to low, cover, and let it simmer for about 15 minutes, or until the quinoa is fluffy and the water has been absorbed.
- Prepare the Apple Mixture: While the quinoa is cooking, in a separate saucepan, combine the almond milk, diced apples, maple syrup, cinnamon, nutmeg, and salt. Stir well and bring to a gentle simmer over medium heat. Cook for about 5 minutes, until the apples start to soften.
- Combine Quinoa and Apple Mixture: Once the quinoa is cooked and the apple mixture is ready, add the cooked quinoa to the apple mixture. Stir in the vanilla extract and continue to cook for an additional 5 minutes, allowing the flavors to meld together.
- Add Toppings: If desired, stir in the chopped walnuts and dried cranberries. These add a nice crunch and a burst of sweetness to the dish.
- Serve: Spoon the Apple Cinnamon Breakfast Quinoa into bowls and serve warm. You can drizzle a bit more maple syrup on top if you prefer a sweeter taste.
Extra Tips:
To guarantee the quinoa is perfectly fluffy, make sure to let it rest covered for a few minutes after cooking before fluffing it with a fork.
For a creamier texture, use full-fat coconut milk instead of almond milk. If you prefer a bit more spice, consider adding a pinch of ground ginger.
This dish can also be made ahead of time and stored in the refrigerator for up to three days, making it an excellent option for meal prepping. Simply reheat before serving for a quick and easy breakfast.
Sweet Potato Waffles
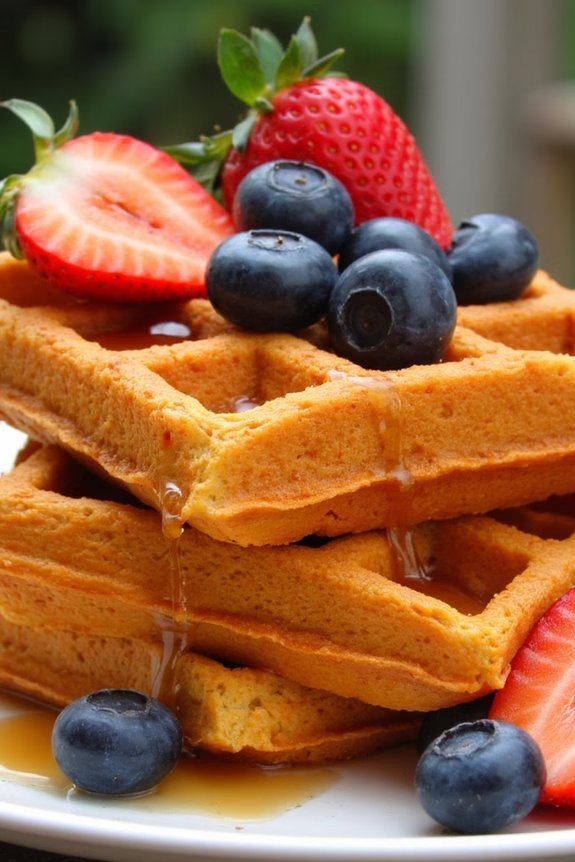
Sweet potato waffles are a delightful twist on the traditional breakfast favorite, offering a sweet and nutritious start to your day. The natural sweetness of sweet potatoes complements the fluffy texture of waffles, creating a comforting dish that’s both satisfying and healthy.
These waffles are perfect for a leisurely weekend breakfast or brunch, and they pair beautifully with a variety of toppings such as maple syrup, whipped cream, or fresh fruit.
This recipe is designed to serve 4-6 people, making it ideal for family gatherings or sharing with friends. It’s a simple yet impressive dish that combines wholesome ingredients with an easy preparation process. Whether you’re a novice in the kitchen or a seasoned cook, you’ll find these sweet potato waffles to be a rewarding culinary adventure.
Ingredients:
- 2 medium sweet potatoes
- 2 cups all-purpose flour
- 2 tablespoons brown sugar
- 1 tablespoon baking powder
- 1 teaspoon cinnamon
- 1/2 teaspoon nutmeg
- 1/2 teaspoon salt
- 1 and 3/4 cups milk
- 2 large eggs
- 4 tablespoons unsalted butter, melted
- 1 teaspoon vanilla extract
Instructions:
- Prepare the Sweet Potatoes: Begin by peeling the sweet potatoes and cutting them into chunks. Boil them in a pot of water until they’re tender, about 15-20 minutes. Once cooked, drain the water and mash the sweet potatoes until smooth. Set aside to cool slightly.
- Mix the Dry Ingredients: In a large mixing bowl, combine the all-purpose flour, brown sugar, baking powder, cinnamon, nutmeg, and salt. Stir the dry ingredients together until they’re well mixed.
- Combine the Wet Ingredients: In a separate bowl, whisk together the milk, eggs, melted butter, and vanilla extract. Make sure the butter has cooled a bit so that it doesn’t cook the eggs.
- Incorporate the Sweet Potatoes: Add the mashed sweet potatoes to the wet ingredients, stirring until well integrated. You want a smooth, even mixture with no large lumps of sweet potato.
- Create the Batter: Gradually add the wet mixture to the dry ingredients, stirring gently until just combined. Be careful not to overmix the batter, as this can result in tough waffles.
- Preheat the Waffle Iron: Turn on your waffle iron and allow it to heat up. Lightly grease it with cooking spray or a bit of butter to prevent sticking.
- Cook the Waffles: Pour the batter onto the preheated waffle iron, using an amount appropriate for your specific waffle maker. Cook according to the manufacturer’s instructions, typically about 5-7 minutes, or until the waffles are golden brown and cooked through.
- Serve and Enjoy: Once cooked, serve the waffles hot, topped with your choice of maple syrup, whipped cream, or fresh fruit. Enjoy them while they’re fresh for the best texture and flavor.
Extra Tips:
When preparing sweet potato waffles, the key to success lies in achieving the right consistency of the batter. Make sure the sweet potatoes are mashed thoroughly to avoid lumps, and be careful not to overmix the batter once the wet and dry ingredients are combined. This will guarantee your waffles are light and fluffy.
If you prefer a slightly sweeter waffle, consider adding a tablespoon of maple syrup to the batter. To keep waffles warm while you cook the entire batch, place cooked waffles on a baking sheet in a warm oven (around 200°F) until you’re ready to serve.
Lemon Ricotta Pancakes
Start your morning on a delightful note with Lemon Ricotta Pancakes, a sweet breakfast idea that combines the fluffiness of traditional pancakes with the creamy richness of ricotta cheese and the tangy brightness of lemon.
These pancakes are perfect for a weekend brunch or any day when you want to treat yourself and your loved ones to something special. The ricotta adds a subtle creaminess to the batter, while the lemon zest infuses a rejuvenating citrus aroma, making these pancakes light and flavorful.
Perfect for serving 4-6 people, this recipe is simple yet sophisticated, making it an ideal choice for both novice cooks and seasoned chefs. The pancakes can be served with a variety of toppings such as fresh berries, a dusting of powdered sugar, or a drizzle of maple syrup, allowing you to customize each serving to your taste.
Follow this recipe, and you’ll be on your way to creating a breakfast that’s as beautiful as it’s delicious.
Ingredients:
- 1 ½ cups all-purpose flour
- 1 tablespoon baking powder
- ¼ teaspoon salt
- 3 tablespoons granulated sugar
- 1 cup ricotta cheese
- 1 cup milk
- 3 large eggs
- Zest of 2 lemons
- ¼ cup freshly squeezed lemon juice
- 1 teaspoon vanilla extract
- Butter or oil for cooking
Instructions:
- Prepare the Dry Ingredients: In a large mixing bowl, whisk together the all-purpose flour, baking powder, salt, and granulated sugar. This will confirm that the dry ingredients are well combined and free of lumps.
- Mix the Wet Ingredients: In another bowl, combine the ricotta cheese, milk, and eggs. Whisk until smooth. Then, add the lemon zest, lemon juice, and vanilla extract to the mixture, stirring until everything is well incorporated.
- Combine Wet and Dry Mixtures: Gradually add the wet ingredients to the dry ingredients, gently folding them together with a spatula. Be careful not to overmix; it’s okay if there are a few small lumps remaining in the batter.
- Preheat the Cooking Surface: Heat a large non-stick skillet or griddle over medium heat. Add a small amount of butter or oil to coat the surface evenly.
- Cook the Pancakes: Pour about ¼ cup of batter onto the skillet for each pancake. Cook until bubbles form on the surface and the edges look set, approximately 2-3 minutes. Carefully flip the pancakes and cook for another 2-3 minutes or until golden brown.
- Serve: Transfer the pancakes to a plate and keep warm. Repeat with the remaining batter, adding butter or oil to the skillet as needed. Serve the pancakes warm with your choice of toppings.
Extra Tips:
For best results, confirm that all ingredients are at room temperature before starting, which helps the batter to mix more evenly and results in fluffier pancakes.
If you prefer a sweeter pancake, you can increase the sugar to 4 tablespoons. Adjust the heat as necessary to prevent the pancakes from burning; medium heat is ideal for achieving a golden brown color.
Finally, consider using a lemon-infused syrup or honey for an additional layer of lemony flavor.