

Mornings can be a whirlwind, but that doesn’t mean you have to miss out on a cozy breakfast. Picture starting your day with creamy overnight oats sprinkled with fresh fruits or savoring a beautifully layered yogurt parfait. Avocado toast offers a versatile and quick option, while nut butter banana wraps are perfect for those on-the-go moments. Curious about making your mornings more delicious and comforting? Let’s explore some delightful breakfast ideas that will make your mornings feel just a bit more special.
Overnight Oats With Fresh Fruit
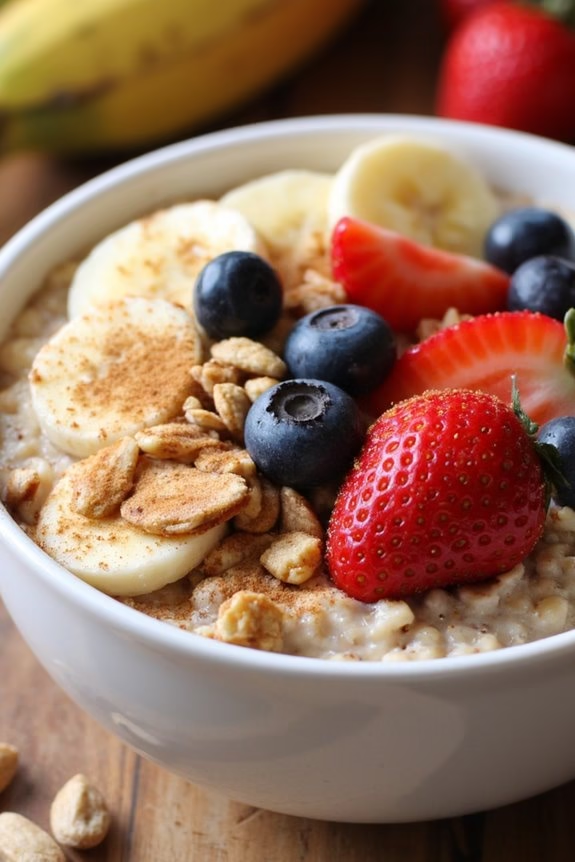
Overnight oats are a delightful and easy breakfast option that can be prepared in advance, offering you a nourishing start to your day without the morning rush. This recipe combines the creaminess of soaked oats with the freshness of seasonal fruits, providing a balanced meal that’s both filling and delicious.
The beauty of overnight oats lies in their versatility; you can adjust the ingredients to suit your taste preferences and dietary needs. By preparing this dish the night before, you’ll have a ready-to-eat breakfast waiting for you in the morning—perfect for busy families or anyone looking to streamline their morning routine.
In this recipe, we’ll guide you through making a hearty batch of overnight oats suitable for 4-6 people. We’ll use a base of rolled oats, which are ideal for absorbing liquid and achieving a creamy texture. We’ll add chia seeds for an extra boost of fiber and omega-3 fatty acids, along with a touch of honey and vanilla to enhance the flavor.
The fresh fruit topping can vary based on what’s in season or your personal favorites, such as berries, bananas, or apples. This dish isn’t only nutritious but also visually appealing, making it a wonderful choice for any cozy breakfast gathering.
Ingredients (Serves 4-6):
- 3 cups rolled oats
- 3 cups milk (dairy or plant-based)
- 1 cup Greek yogurt
- 3 tablespoons chia seeds
- 3 tablespoons honey
- 1 teaspoon vanilla extract
- 2 cups assorted fresh fruit (e.g., berries, bananas, apples)
- 1/2 cup chopped nuts (optional)
- 1/2 teaspoon ground cinnamon (optional)
Cooking Instructions:
- Combine Oats and Liquid: In a large mixing bowl, combine the rolled oats, milk, Greek yogurt, and chia seeds. Stir well to guarantee the chia seeds are evenly distributed, which will help them swell and thicken the mixture as it sits overnight.
- Add Sweetener and Flavoring: Add the honey and vanilla extract to the oat mixture. Stir thoroughly to guarantee the sweetener and vanilla are evenly incorporated, giving the oats a subtly sweet and aromatic flavor.
- Refrigerate Overnight: Cover the bowl with plastic wrap or transfer the mixture into an airtight container. Place it in the refrigerator and let it sit overnight, or for at least 6-8 hours. This allows the oats to soak up the liquid, resulting in a creamy, pudding-like consistency.
- Prepare Fresh Fruit: Just before serving, wash and prepare your chosen fresh fruits. Slice or dice them as needed and set them aside. This will add a burst of freshness and color to your oats.
- Assemble and Serve: Spoon the overnight oats into individual bowls or jars. Top each serving with a generous portion of fresh fruit. If desired, sprinkle with chopped nuts and a dash of ground cinnamon for added texture and flavor.
Extra Tips:
When preparing overnight oats, feel free to experiment with different combinations of milk, yogurt, and sweeteners to find your preferred taste and texture. Almond milk and coconut yogurt, for instance, can provide a dairy-free alternative.
You can also adjust the sweetness level by adding more or less honey. To save time, consider preparing individual servings in mason jars or containers, making them easy to grab and go on busy mornings. Additionally, the overnight oats can be stored in the refrigerator for up to three days, allowing you to enjoy a quick and healthy breakfast throughout the week.
Quick Avocado Toast
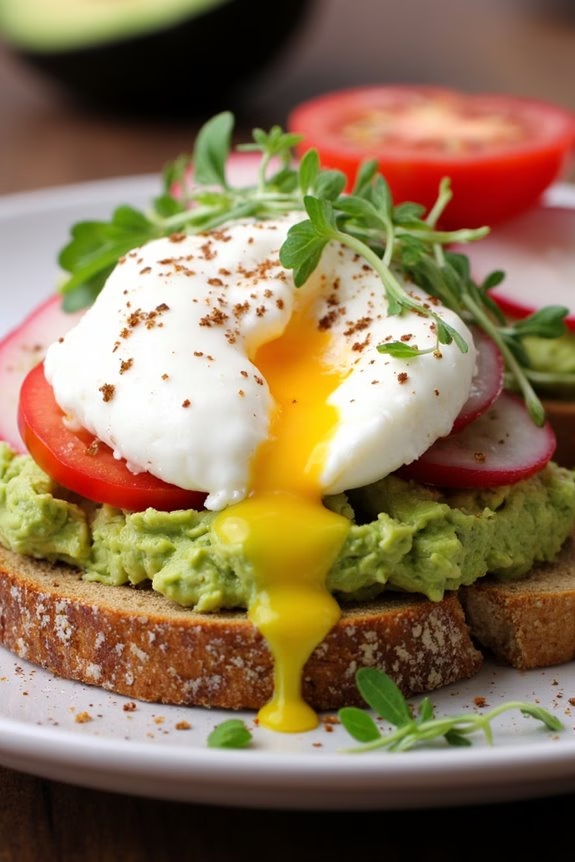
Start your day with a nourishing and delightful dish that combines simplicity and flavor: Quick Avocado Toast. This cozy breakfast idea is perfect for those mornings when you want something satisfying but don’t have a lot of time to spend in the kitchen. Made with creamy avocados, crunchy bread, and a touch of seasoning, this recipe guarantees a delicious meal that will keep you fueled throughout the morning.
Whether you’re making breakfast for yourself or a small group, Quick Avocado Toast is sure to be a hit.
This avocado toast recipe isn’t only quick to prepare but also offers room for creativity. You can keep it classic with just a sprinkle of salt and pepper, or jazz it up with additional toppings like cherry tomatoes, radishes, or a poached egg. The combination of textures and flavors makes it a versatile dish that caters to both simple and sophisticated palates.
Let’s plunge into how you can create this delightful breakfast for 4-6 people.
Ingredients (Serving Size: 4-6 people):
- 4 ripe avocados
- 8-12 slices of whole-grain bread
- 2 tablespoons fresh lemon juice
- Salt, to taste
- Black pepper, to taste
- Optional toppings: cherry tomatoes, radishes, poached eggs, red pepper flakes, microgreens
Cooking Instructions:
- Prepare the Avocados: Begin by slicing the avocados in half, removing the pits, and scooping the flesh into a mixing bowl. Use a fork to mash the avocados until they reach your desired level of smoothness.
- Season the Avocado Mixture: Add the fresh lemon juice to the mashed avocados to enhance the flavor and prevent browning. Season with salt and black pepper to taste, then mix thoroughly to guarantee even distribution.
- Toast the Bread: While preparing the avocado mixture, toast the slices of whole-grain bread to your preferred level of crispness. This can be done using a toaster or by placing the bread slices on a baking sheet and broiling them in the oven for a few minutes.
- Assemble the Toasts: Once the bread is toasted, spread a generous amount of the seasoned avocado mixture onto each slice. Guarantee an even layer for a perfect bite every time.
- Add Optional Toppings: If you’re using additional toppings, now is the time to add them. Slice cherry tomatoes or radishes thinly and place them on top of the avocado. For a protein boost, consider adding a poached egg. Sprinkle red pepper flakes or microgreens for extra flavor and presentation.
Extra Tips:
To keep your avocados from browning too quickly, make sure to use fresh lemon juice and mix it well into the avocado. If you want to prepare this dish ahead of time, keep the avocado mixture covered tightly with plastic wrap, pressing it directly onto the surface to minimize air exposure.
Additionally, experimenting with different types of bread, such as sourdough or rye, can add a unique twist to your avocado toast, bringing out different flavor profiles. Enjoy your Quick Avocado Toast with a warm cup of coffee or herbal tea for a cozy breakfast experience.
Microwave Scrambled Eggs

Microwave scrambled eggs are a quick and convenient way to enjoy a hearty breakfast without the hassle of using a stove. Perfect for those busy mornings, this recipe provides a fluffy, delicious meal that can be ready in under 10 minutes.
Whether you’re feeding a family or just looking for an easy breakfast option, microwave scrambled eggs are a versatile dish that can be customized with your favorite ingredients, such as cheese, herbs, or veggies.
By using the microwave, you can save time and still achieve the creamy texture of traditionally cooked scrambled eggs. This method also reduces the need for excess oil or butter, making it a healthier choice for your morning routine. The following recipe is designed to serve 4-6 people, guaranteeing there’s enough to satisfy everyone at the table.
Ingredients for 4-6 servings:
- 12 large eggs
- 1/2 cup milk
- Salt, to taste
- Pepper, to taste
- 1/2 cup shredded cheese (optional)
- 1/4 cup chopped chives or green onions (optional)
- 1/2 cup diced bell peppers or other vegetables (optional)
- 2 tablespoons butter
Cooking Instructions:
- Prepare Ingredients: Crack 12 large eggs into a large microwave-safe bowl. Make sure the bowl is big enough to allow for expansion during cooking. Add 1/2 cup of milk, and season with salt and pepper to taste. Whisk the mixture until the eggs are well beaten and the milk is fully incorporated.
- Microwave Initial Cooking: Place the bowl in the microwave and cook on high for 1 minute. Remove the bowl, and use a fork or whisk to stir and break up the partially cooked eggs. This guarantees even cooking and prevents the eggs from sticking to the sides.
- Continue Cooking in Intervals: Return the bowl to the microwave and cook in 30-second intervals, stirring after each interval. Continue this process until the eggs are just set but still slightly runny, as they’ll continue to cook after being removed from the microwave.
- Add Optional Ingredients: If desired, stir in the shredded cheese, chopped chives or green onions, and diced bell peppers or other vegetables. These should be added just before the eggs are fully cooked to maintain their texture and flavor.
- Final Cooking and Butter Addition: Cook for an additional 30 seconds to 1 minute, depending on the desired consistency of your eggs. Add 2 tablespoons of butter to the hot eggs, allowing it to melt and coat the eggs, adding richness and flavor.
- Serve Immediately: Once cooked to your preference, serve the scrambled eggs immediately while hot. They pair well with toast, bacon, or fresh fruit.
Extra Tips:
For the best results, confirm you use a high-quality microwave-safe bowl to prevent any accidents. If you prefer creamier scrambled eggs, consider substituting the milk with half-and-half or cream.
Adjust the seasoning and add-ins according to your taste preferences. If you find that your eggs are cooking unevenly, reduce the power level of your microwave and increase the cooking time slightly, stirring frequently to guarantee even cooking.
Nut Butter Banana Wrap
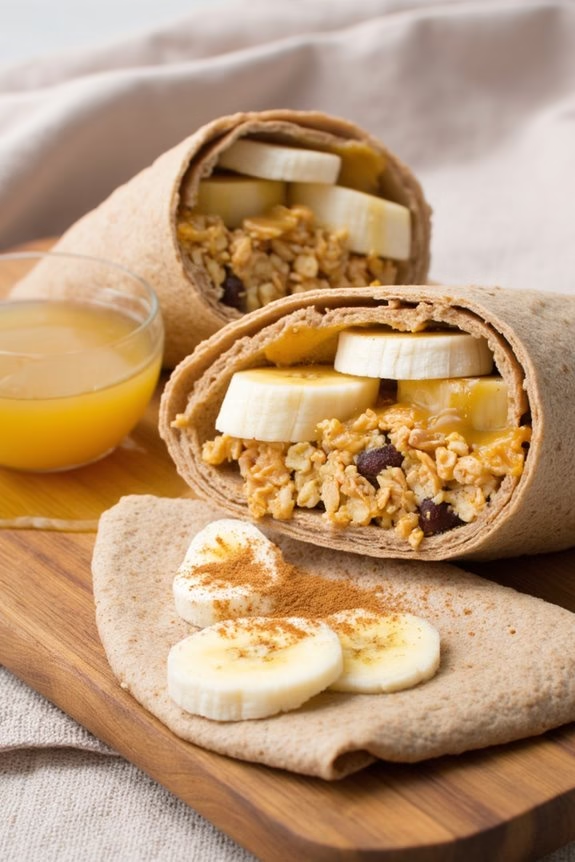
Start your morning with a delicious and cozy breakfast idea: the Nut Butter Banana Wrap. This delightful dish combines the creamy texture of your favorite nut butter with the natural sweetness of ripe bananas, all wrapped up in a soft tortilla.
It’s not only quick and easy to prepare but also offers a nutritious start to your day, providing energy and essential nutrients to fuel your morning activities. Whether you’re preparing breakfast for your family or friends, or simply treating yourself to something special, this wrap will surely satisfy your morning cravings.
The Nut Butter Banana Wrap is perfect for those busy mornings when time is of the essence but you still want something wholesome and satisfying. The combination of flavors and textures makes it a hit with both kids and adults alike.
Plus, it’s customizable to suit different tastes and dietary preferences. You can choose from a variety of nut butters and add your favorite toppings to create a breakfast wrap that’s uniquely yours. Let’s explore the recipe and make this delightful breakfast treat for 4-6 people.
Ingredients (Serves 4-6):
- 6 whole wheat tortillas
- 1 cup of creamy almond butter (or any preferred nut butter)
- 6 ripe bananas
- 1/4 cup honey
- 1/2 cup granola
- 1/4 cup shredded coconut
- 1 teaspoon ground cinnamon
Cooking Instructions:
- Prepare the Ingredients: Start by laying out the tortillas on a clean, flat surface. Peel the bananas and set them aside. Gather all other ingredients so they’re ready for assembly.
- Spread the Nut Butter: Take a tablespoon of almond butter and spread it evenly over each tortilla, confirming to cover as much surface area as possible for even flavor distribution.
- Add the Banana: Place one peeled banana near the edge of each tortilla. If the bananas are large, you can slice them lengthwise to fit better and distribute the flavor more evenly through the wrap.
- Drizzle with Honey: Drizzle about a teaspoon of honey over the banana on each tortilla. This adds a touch of sweetness and helps the other ingredients stick together.
- Sprinkle with Granola and Coconut: Evenly sprinkle a handful of granola and shredded coconut over the banana and nut butter layer. This will add a delightful crunch and flavor to your wrap.
- Add a Dash of Cinnamon: Lightly dust each wrap with a pinch of ground cinnamon for an extra layer of warmth and spice that complements the other flavors beautifully.
- Roll the Wraps: Carefully roll each tortilla tightly around the banana and other ingredients. Confirm the seam side is down to prevent unrolling.
- Slice and Serve: Slice each wrap in half diagonally for easy handling and an appealing presentation. Serve immediately and enjoy your cozy breakfast!
Extra Tips:
For an extra indulgent version, consider warming the wraps in a skillet over medium heat for about 1-2 minutes on each side until they’re lightly toasted. This will give them a slightly crispy texture and enhance the flavors.
If you’re preparing the wraps in advance, wrap them in parchment paper or foil to keep them fresh. Feel free to experiment with different nut butters, such as peanut or cashew butter, to find your favorite combination.
Additionally, you can add other toppings like sliced strawberries or a sprinkle of chia seeds for added nutrition and flavor.
Instant Pot Breakfast Quinoa
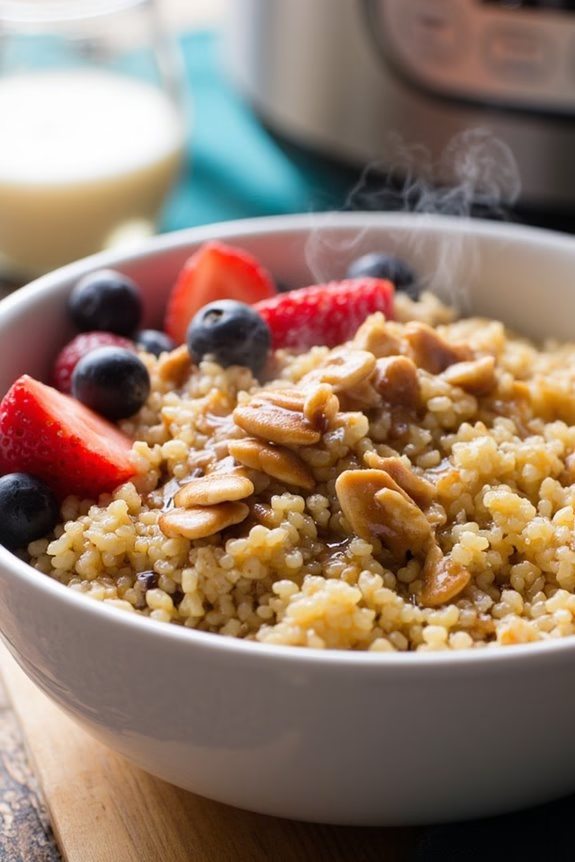
Breakfast is the most important meal of the day, and what better way to start your morning than with a nutritious and delicious bowl of Instant Pot Breakfast Quinoa. This dish is perfect for those busy mornings when you need something quick yet filling to fuel your day. Quinoa is a superfood packed with protein, fiber, and essential amino acids, making it an excellent choice for a healthy breakfast.
When cooked in an Instant Pot, the quinoa becomes fluffy and tender, absorbing the flavors of spices and sweeteners you choose to add.
This Instant Pot Breakfast Quinoa is versatile and can be customized to suit your taste preferences. Whether you like your breakfast to be sweet or savory, quinoa can accommodate both. For a sweet version, you might add fruits, nuts, and a hint of maple syrup or honey. For a savory twist, consider toppings like avocado, poached eggs, or a sprinkle of cheese.
The possibilities are endless, and the Instant Pot makes it all so simple by notably reducing the cooking time. For a serving size of 4-6 people, here’s what you’ll need:
Ingredients:
- 1 cup quinoa, rinsed
- 2 cups water or milk of choice
- 1/4 teaspoon salt
- 1 teaspoon vanilla extract (optional for sweet version)
- 1 tablespoon maple syrup or honey (optional for sweet version)
- Toppings of choice (e.g., fresh berries, nuts, seeds, dried fruits, cinnamon, nut butter)
Cooking Instructions:
- Prepare the Quinoa: Start by rinsing the quinoa under cold water using a fine-mesh strainer. This step is essential to remove the natural coating, called saponin, which can make quinoa taste bitter.
- Set Up the Instant Pot: Pour the rinsed quinoa, water or milk, and salt into the Instant Pot. If making a sweet version, add vanilla extract and maple syrup or honey at this stage.
- Cooking Process: Secure the lid on the Instant Pot and set the valve to the sealing position. Select the ‘Pressure Cook’ or ‘Manual’ setting, and adjust the time to 1 minute on high pressure.
- Natural Release: After the cooking time is complete, let the pressure release naturally for about 10 minutes. This helps the quinoa to finish cooking and become fluffy.
- Fluff and Serve: Carefully open the lid and fluff the quinoa with a fork. Serve warm and add your desired toppings. Enjoy your nutritious Instant Pot Breakfast Quinoa.
Extra Tips:
When cooking quinoa in the Instant Pot, verify the ratio of quinoa to liquid is 1:2 for the perfect fluffy texture. If you prefer a creamier consistency, use milk instead of water.
For added flavor, consider adding a cinnamon stick or cardamom pods to the pot before cooking. Leftovers can be refrigerated and reheated with a splash of milk or water.
Customizing your toppings allows you to create endless variations, making this a versatile breakfast option that can be adapted to your dietary needs and preferences. Experiment with different flavor combinations to keep breakfast exciting and satisfying.
Yogurt Parfait With Granola
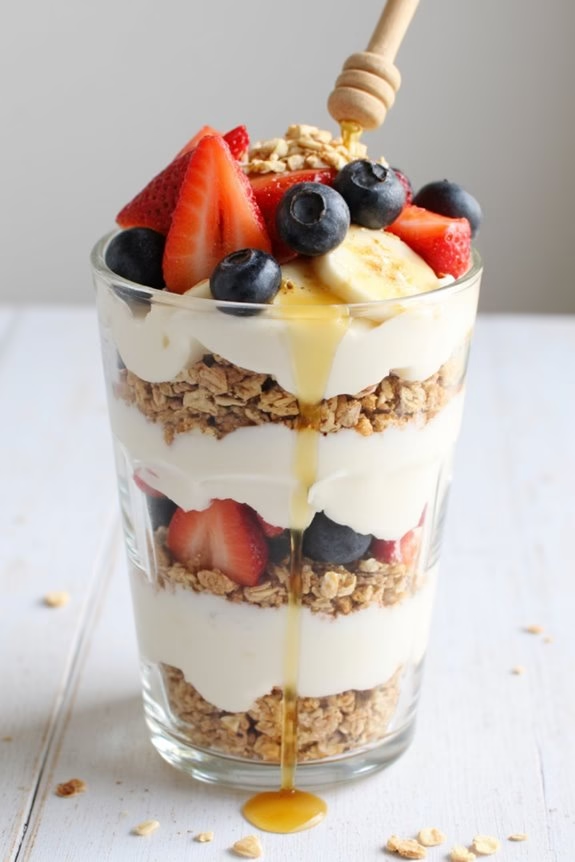
Start your day with a delightful and nutritious yogurt parfait with granola, a perfect cozy breakfast idea that’s both satisfying and easy to prepare. This dish combines creamy yogurt, crunchy granola, and fresh fruits to create a rejuvenating morning treat. Yogurt parfaits aren’t only visually appealing but also packed with essential nutrients, making them a great start to your day.
This versatile recipe can be customized to fit your taste preferences, allowing you to mix and match ingredients as you please. Whether you prefer a tangy Greek yogurt or a smoother plain yogurt, or enjoy a medley of berries or tropical fruits, the choice is yours. The crunchy granola adds texture and a hint of sweetness, perfectly complementing the creamy yogurt and juicy fruits. This recipe serves 4-6 people, making it ideal for family breakfasts or brunch gatherings.
Ingredients for 4-6 servings:
- 4 cups of yogurt (plain or Greek)
- 3 cups of granola
- 2 cups of mixed fresh fruits (such as berries, sliced bananas, or chopped apples)
- 1/4 cup of honey or maple syrup
- 1/4 cup of chopped nuts (optional)
- 1 teaspoon of vanilla extract (optional)
Cooking Instructions:
- Prepare the Ingredients: Start by gathering all your ingredients. Wash and dry the fruits, then slice or chop them as needed. If you’re using whole nuts, chop them into small pieces.
- Flavor the Yogurt: In a large mixing bowl, combine the yogurt with honey or maple syrup and vanilla extract if using. Stir well until the mixture is smooth and the sweeteners are fully incorporated.
- Layer the Parfait: Take six glasses or small bowls. Begin by adding a layer of yogurt at the bottom of each glass. Follow this with a layer of granola, then a layer of fruits. Repeat the layers until the glasses are nearly full, ensuring the top layer is a combination of fruits and granola for an appealing presentation.
- Chill if Desired: You can serve the parfaits immediately, or if you prefer a chilled dessert, cover them with plastic wrap and refrigerate for about 15-30 minutes.
- Garnish and Serve: Just before serving, sprinkle some chopped nuts over the top layer of the parfaits for added crunch. Drizzle a little extra honey or syrup if desired.
Extra Tips:
For a more indulgent treat, consider adding a dollop of whipped cream or a sprinkle of cinnamon on top.
If you’re serving these parfaits for a brunch, you can set up a parfait bar with various toppings such as shredded coconut, chocolate chips, or a selection of fruits, allowing guests to customize their own parfaits.
To keep the granola crunchy, assemble the parfaits just before serving or store the granola separately if preparing in advance.
Smoothie Bowl With Berries
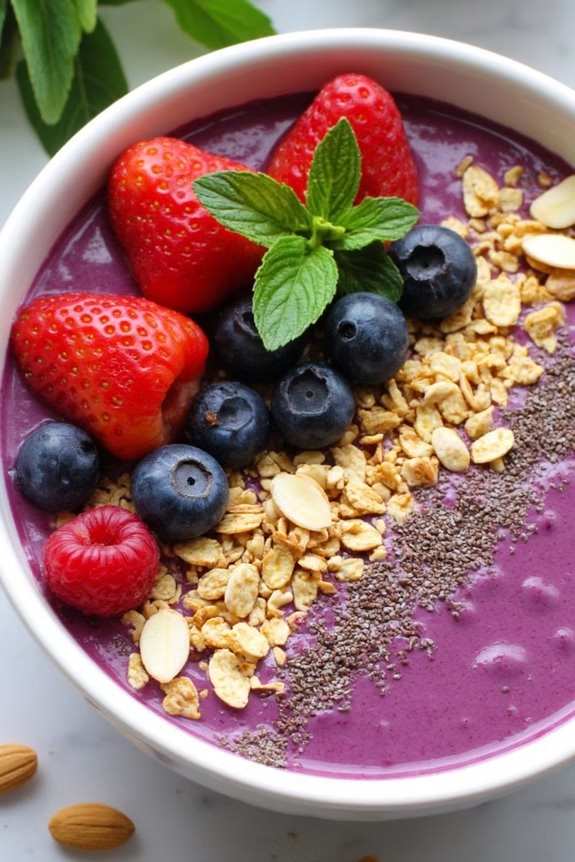
Start your morning off with a burst of flavor and nutrients by indulging in a delicious Smoothie Bowl With Berries. This breakfast option isn’t only aesthetically pleasing but also packed with antioxidants and vitamins from the vibrant assortment of berries.
The creamy consistency of the smoothie combined with the crunch of toppings creates a delightful texture that will keep you satisfied and energized throughout the day. Perfect for a cozy breakfast at home, this recipe is versatile and can be customized to suit your taste preferences or dietary needs.
Ideal for serving 4-6 people, this smoothie bowl is an excellent choice for family breakfasts or a brunch gathering with friends. The recipe is simple and can be prepared in minutes, making it a great option even on busy mornings.
With a base of frozen berries, yogurt, and bananas, this smoothie bowl is both invigorating and nourishing. You can top it with your favorite add-ons like granola, seeds, or nuts to add more flavor and texture. Read on to discover the ingredients you’ll need and the easy steps to create this wholesome breakfast dish.
Ingredients for 4-6 servings:
- 2 cups frozen mixed berries (blueberries, strawberries, raspberries, etc.)
- 2 ripe bananas
- 1 cup Greek yogurt (or any yogurt of your choice)
- 1/2 cup almond milk (or any milk of your choice)
- 2 tablespoons honey or maple syrup
- 1 teaspoon vanilla extract
- 1/2 cup granola
- 1/4 cup sliced almonds
- 1/4 cup chia seeds
- 1/2 cup fresh mixed berries for garnish (optional)
- A handful of mint leaves for garnish (optional)
Instructions:
- Prepare the Ingredients: Begin by gathering all your ingredients and making certain you have everything ready. Peel the bananas and set them aside. If your berries aren’t already frozen, place them in the freezer for about 30 minutes beforehand.
- Blend the Smoothie Base: In a high-speed blender, combine the frozen mixed berries, bananas, Greek yogurt, almond milk, honey, and vanilla extract. Blend on high until smooth and creamy, scraping down the sides of the blender as needed to make sure all ingredients are well incorporated.
- Adjust Consistency: If the smoothie is too thick for your liking, add a little more almond milk to reach the desired consistency. Blend again until smooth.
- Assemble the Bowls: Divide the smoothie mixture evenly among 4-6 bowls. Use the back of a spoon to create a smooth surface.
- Add Toppings: Sprinkle granola, sliced almonds, and chia seeds over each bowl. Arrange fresh mixed berries and mint leaves on top for garnish, if using.
- Serve Immediately: Serve the smoothie bowls immediately while they’re cold and fresh. Enjoy the vibrant colors and flavors as you start your day.
Extra Tips:
To make your smoothie bowl extra creamy, use a combination of frozen and fresh bananas. If you prefer a sweeter smoothie, adjust the sweetness by adding more honey or maple syrup.
For a protein boost, consider adding a scoop of protein powder to the smoothie base. Feel free to experiment with different toppings, such as coconut flakes or dark chocolate shavings, to suit your taste.
Finally, serve the smoothie bowl right after preparation to keep the toppings crunchy and the smoothie at its best consistency.
Breakfast Burrito With Veggies

Start your day with a burst of flavors and nutrients with this delicious Breakfast Burrito With Veggies. This dish is perfect for those cozy mornings when you crave something warm and satisfying. Packed with fresh vegetables, fluffy scrambled eggs, and melted cheese, these burritos offer a wholesome and hearty breakfast option.
They’re not only easy to make but also customizable to suit any dietary preferences or what’s available in your fridge. Whether you’re serving a family brunch or meal prepping for the week, these burritos are sure to please everyone at the table.
Ideal for serving 4-6 people, these burritos make a generous meal that can be enjoyed by adults and children alike. The combination of sautéed vegetables, eggs, and cheese wrapped in a soft tortilla provides a balance of textures and flavors.
The key to a great breakfast burrito is using fresh ingredients and seasoning them to perfection. With this recipe, you’ll learn how to achieve just the right balance of spices and ingredients to create a breakfast masterpiece that will be the highlight of your morning.
Ingredients (Serves 4-6):
- 6 large eggs
- 1 cup milk
- 1 tablespoon olive oil
- 1 red bell pepper, diced
- 1 green bell pepper, diced
- 1 small onion, chopped
- 1 cup mushrooms, sliced
- 2 cups baby spinach
- 1 teaspoon salt
- 1/2 teaspoon black pepper
- 1 teaspoon garlic powder
- 1 cup shredded cheddar cheese
- 6 large flour tortillas
- Salsa (optional)
- Sour cream (optional)
- Hot sauce (optional)
Cooking Instructions:
- Prepare the Eggs: In a large bowl, whisk together the eggs and milk until well combined. Set aside.
- Sauté Vegetables: Heat the olive oil in a large skillet over medium heat. Add the diced red and green bell peppers, onion, and mushrooms. Cook for about 5-7 minutes, stirring occasionally, until the vegetables are tender.
- Add Spinach and Season: Add the baby spinach to the skillet with the sautéed vegetables. Cook for an additional 2 minutes until the spinach is wilted. Season the vegetables with salt, black pepper, and garlic powder, and stir well to combine.
- Cook the Eggs: Pour the egg mixture into the skillet with the vegetables. Cook, gently stirring with a spatula, until the eggs are fully scrambled and cooked through, about 5 minutes.
- Assemble Burritos: Warm the flour tortillas in a dry skillet or microwave. Place a generous portion of the egg and vegetable mixture onto each tortilla. Sprinkle with shredded cheddar cheese.
- Fold and Serve: Fold the sides of the tortilla over the filling and then roll it up tightly. Serve immediately with salsa, sour cream, or hot sauce on the side, if desired.
Extra Tips:
To add more protein to your burrito, consider including cooked sausage or bacon in the egg mixture. For a vegetarian option, you can substitute the cheese with a plant-based alternative.
To save time in the morning, you can prepare the vegetable mixture in advance and store it in the fridge, then simply reheat and assemble the burritos as needed. Finally, using fresh, high-quality tortillas will elevate the taste and texture of your burritos, making them even more enjoyable.
Peanut Butter and Honey Toast
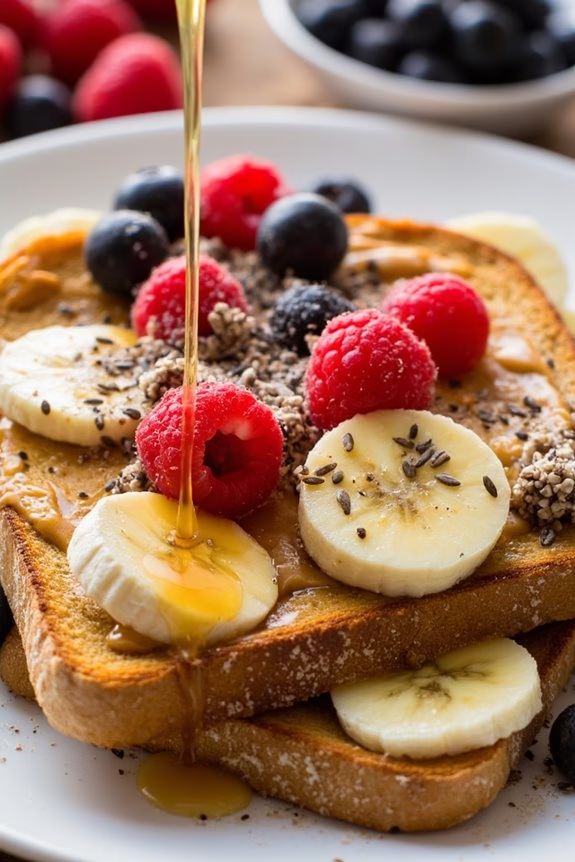
Peanut Butter and Honey Toast is a delightful and simple breakfast option that combines the creamy richness of peanut butter with the natural sweetness of honey. This cozy breakfast is perfect for mornings when you want something quick yet satisfying, offering a balance of protein, healthy fats, and carbohydrates. The toast provides a crunchy base that complements the smooth spread and sticky drizzle, creating a harmonious blend of flavors and textures.
This dish can be customized to suit different tastes and dietary needs. You can choose your favorite type of bread—whole grain, sourdough, or even gluten-free options work well. For a more indulgent version, you might use thick slices of brioche or challah. The combination of peanut butter and honey isn’t only delicious but also nutritious, making it a great choice for both adults and kids.
Whether you’re eating it at home or on the go, Peanut Butter and Honey Toast is a breakfast that will keep you energized and satisfied throughout the morning.
Ingredients for 4-6 servings:
- 8-12 slices of bread (your choice of type)
- 1 cup of smooth or chunky peanut butter
- 1/2 cup of honey
- Optional: Sliced bananas, berries, or seeds for topping
Cooking Instructions:
- Prepare the Bread: Begin by toasting your slices of bread to your desired level of crispiness. You can use a toaster, toaster oven, or a regular oven set to broil. Toasting should take about 2-4 minutes depending on the method and your preference.
- Spread Peanut Butter: Once the bread is nicely toasted, remove it and let it cool slightly for about 1 minute. This prevents the peanut butter from melting too quickly. Spread a generous amount of peanut butter on each slice, ensuring an even layer.
- Add Honey: Drizzle honey over the peanut butter-topped toast. You can use a spoon or a squeeze bottle for better control. Adjust the amount to your taste preference.
- Optional Toppings: If desired, add sliced bananas, berries, or a sprinkle of seeds like chia or flaxseed for extra flavor and nutrition. These toppings add a fresh and vibrant touch to the toast.
- Serve: Arrange the prepared toasts on a serving platter and serve immediately. This dish is best enjoyed fresh while the toast is still warm and crunchy.
Extra Tips:
For a more gourmet twist, consider using specialty peanut butter, such as those infused with flavors like cinnamon or chocolate. If you prefer a less sweet option, you can use almond butter or another nut butter as an alternative.
Additionally, when choosing honey, try a variety with distinct flavors like wildflower or clover to enhance the overall taste. If you’re serving this to children, cutting the toast into fun shapes can make it more appealing.
Mini Frittatas in Muffin Tins

Start your morning with a delightful and cozy breakfast by making Mini Frittatas in Muffin Tins. These bite-sized frittatas are perfect for a quick and nutritious meal that can easily be customized to suit your taste preferences. Packed with a variety of vegetables, cheese, and protein, they aren’t only delicious but also a great way to use up any leftover ingredients you may have in your fridge.
Plus, they’re incredibly convenient, as they can be made ahead of time and stored in the refrigerator or freezer for a quick breakfast on busy mornings.
These Mini Frittatas are also perfect for brunch gatherings or family breakfasts, allowing everyone to enjoy their favorite flavors in a single, tidy package. With this simple recipe, you can make enough to serve 4-6 people, guaranteeing that everyone gets to savor these delectable treats.
Whether you prefer them with a touch of spice or a hint of herbiness, these frittatas are sure to impress and satisfy.
Ingredients (for 4-6 servings):
- 8 large eggs
- 1/4 cup milk
- Salt and pepper to taste
- 1 cup spinach, chopped
- 1/2 cup cherry tomatoes, halved
- 1/2 cup red bell pepper, diced
- 1/4 cup onion, finely chopped
- 1/2 cup shredded cheese (cheddar, mozzarella, or your choice)
- 1/4 cup cooked bacon or ham, chopped (optional)
- Cooking spray or butter for greasing
Cooking Instructions:
- Preheat the Oven: Start by preheating your oven to 375°F (190°C). This guarantees that your frittatas cook evenly and achieve the perfect texture.
- Prepare the Muffin Tin: Lightly grease a standard 12-cup muffin tin with cooking spray or butter. This will prevent the frittatas from sticking and make removal easy.
- Mix the Egg Base: In a large bowl, whisk together the eggs, milk, salt, and pepper until well combined. This egg mixture will be the base of your frittatas.
- Add the Fillings: Divide the spinach, cherry tomatoes, red bell pepper, onion, and optional bacon or ham evenly among the muffin cups.
- Pour the Egg Mixture: Carefully pour the egg mixture over the vegetables and meat in each muffin cup, filling them about three-quarters full.
- Add Cheese: Sprinkle shredded cheese on top of each frittata. This adds a lovely cheesy crust as they bake.
- Bake: Place the muffin tin in the preheated oven and bake for 18-20 minutes, or until the frittatas are puffed up and slightly golden on top. A toothpick inserted into the center should come out clean.
- Cool and Serve: Allow the frittatas to cool in the muffin tin for a few minutes before gently removing them with a butter knife. Serve warm, and enjoy!
Extra Tips:
For a fluffier texture, beat the eggs more vigorously to incorporate more air. Feel free to experiment with different fillings, such as mushrooms, zucchini, or different cheese varieties.
If you’re making these in advance, store them in an airtight container in the refrigerator for up to 4 days or freeze them for up to a month. Reheat in the oven or microwave before serving.
Adjust the seasoning to your liking, and consider adding herbs like basil or parsley for extra flavor.