

Planning healthy meals can be a breeze with a bit of inspiration. Today, I’ve gathered 13 simple menu ideas that are perfect for any day. Start your morning with a vibrant breakfast smoothie or creamy overnight oats. For lunch, enjoy a colorful quinoa salad bowl or a veggie-packed frittata. There’s so much more to explore, so let’s get started!
Quick and Easy Breakfast Smoothies

Start your morning with a burst of fruity flavor and nutrients with this Berry Banana Breakfast Smoothie, a perfect quick and easy breakfast option. This smoothie isn’t only delicious but also packed with essential vitamins, minerals, and antioxidants. It’s a great way to fuel your body for the day ahead, and the best part is that it takes only a few minutes to prepare.
Whether you’re rushing out the door or enjoying a leisurely morning, this smoothie makes for a satisfying and nutritious start to your day. This recipe combines the natural sweetness of ripe bananas with the tartness of mixed berries, creating a delightful balance of flavors.
The addition of Greek yogurt provides a creamy texture while adding protein to keep you full throughout the morning. A splash of almond milk ties everything together, making it a revitalizing drink that’s both rich and light. This recipe is perfect for serving a family or a small group, yielding enough to satisfy 4-6 people.
Ingredients (Serving Size: 4-6 people):
- 2 ripe bananas
- 2 cups frozen mixed berries
- 1 cup Greek yogurt
- 1-2 tablespoons honey (optional, to taste)
- 2 cups unsweetened almond milk
- 1 teaspoon vanilla extract
- 1 tablespoon chia seeds
- 1 tablespoon flaxseed meal (optional)
- Ice cubes (optional, for a thicker consistency)
Instructions:
- Prepare the Ingredients: Peel the bananas and cut them into chunks. This makes it easier for blending and guarantees a smoother texture.
- Blend the Base: In a blender, combine the banana chunks, frozen mixed berries, Greek yogurt, and almond milk. The combination of these ingredients forms the base of your smoothie.
- Add Sweeteners and Flavor: Add the honey, if using, and vanilla extract to the blender. These add a hint of sweetness and enhance the overall flavor of the smoothie.
- Boost with Seeds: Add the chia seeds and flaxseed meal. These ingredients are nutrient powerhouses, adding fiber, omega-3 fatty acids, and protein to your smoothie.
- Blend Until Smooth: Start the blender on a low speed and gradually increase to high, blending until the mixture is smooth and creamy. If the smoothie is too thick, add a little more almond milk until you reach your desired consistency.
- Adjust Consistency: If you prefer a thicker smoothie, add a few ice cubes and blend again. This will chill the smoothie further and give it a frosty texture.
- Serve and Enjoy: Pour the smoothie into glasses and serve immediately. Enjoy the invigorating and nourishing goodness with family or friends.
Extra Tips:
For a creamier smoothie, use frozen bananas instead of fresh ones. This not only enhances the texture but also makes the smoothie colder without needing additional ice.
You can prepare the fruits ahead of time by peeling and slicing bananas and storing them in the freezer. If you’re looking to increase protein intake, consider adding a scoop of your favorite protein powder.
Remember that the sweetness of the smoothie can be adjusted based on personal preference and the ripeness of the bananas, so feel free to modify the amount of honey used.
Overnight Oats With Fresh Toppings
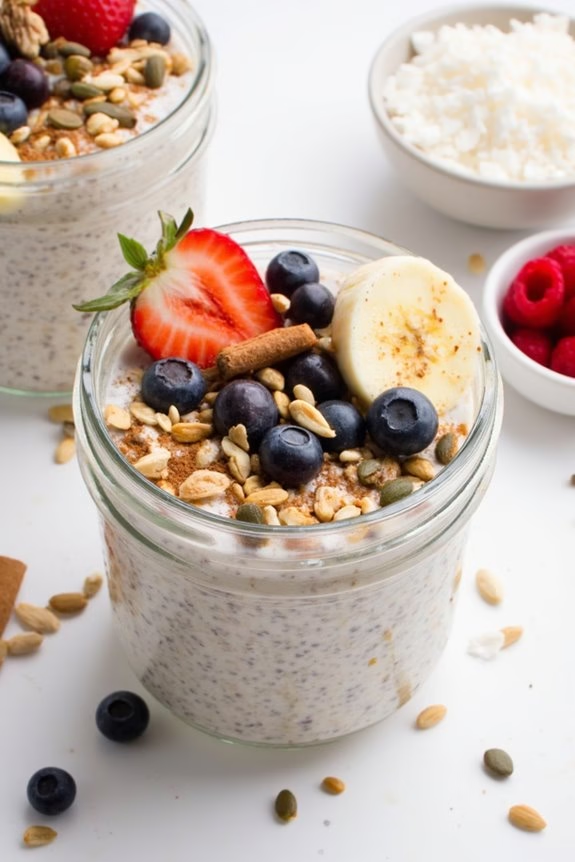
Overnight oats are a convenient and nutritious breakfast option that effortlessly fits into any busy morning routine. This dish allows you to prepare your breakfast the night before, guaranteeing that you start your day with a wholesome meal.
The beauty of overnight oats lies in their versatility; you can customize them with a variety of fresh toppings to suit your taste preferences. Whether you enjoy a sweet or savory start to your day, overnight oats can be tailored to satisfy your cravings.
In addition to being delicious, overnight oats are packed with health benefits. Oats are a great source of fiber, promoting digestive health and keeping you full longer. By adding fresh fruits, nuts, and seeds, you not only enhance the flavor but also boost the nutritional value with vitamins, minerals, and healthy fats.
This recipe serves 4-6 people, making it perfect for family breakfasts or meal prepping for the week.
Ingredients:
- 3 cups rolled oats
- 3 cups milk (dairy or non-dairy)
- 1 cup Greek yogurt
- 2 tablespoons chia seeds
- 2 tablespoons honey or maple syrup
- 1 teaspoon vanilla extract
- 1 cup fresh berries (such as strawberries, blueberries, or raspberries)
- 1 large banana, sliced
- 1/2 cup chopped nuts (such as almonds or walnuts)
- 1/4 cup unsweetened shredded coconut
- 1/4 cup pumpkin seeds
- 1 teaspoon cinnamon
Cooking Instructions:
- Combine base ingredients: In a large mixing bowl, combine the rolled oats, milk, Greek yogurt, chia seeds, honey or maple syrup, and vanilla extract. Stir well to guarantee all the ingredients are evenly distributed.
- Portion into containers: Once the mixture is well combined, divide it evenly into individual serving containers or jars. Leave some space at the top of each container for the toppings.
- Chill overnight: Seal the containers with lids and place them in the refrigerator overnight, or for at least 6 hours. This allows the oats to absorb the liquid and soften, creating a creamy texture.
- Prepare toppings: Before serving, prepare your fresh toppings. Wash and slice the berries and banana. Chop the nuts if they aren’t already chopped.
- Assemble and serve: When ready to eat, remove the containers from the refrigerator. Top each serving with a generous amount of fresh berries, banana slices, chopped nuts, shredded coconut, pumpkin seeds, and a sprinkle of cinnamon.
- Enjoy: Serve the overnight oats cold, straight from the fridge, or let them sit at room temperature for a few minutes if you prefer a slightly warmer dish.
Extra Tips:
For added variety, consider experimenting with different flavor combinations. Try adding a dollop of nut butter for creaminess or a handful of granola for extra crunch.
If you prefer your oats a bit sweeter, adjust the amount of honey or maple syrup to taste. Remember that the toppings can be mixed and matched based on what’s in season or available in your pantry.
If you find the oats too thick in the morning, simply stir in a splash of milk before adding the toppings to reach your desired consistency.
Veggie-Packed Frittatas

Veggie-Packed Frittatas are a delicious and nutritious meal option that’s perfect for breakfast, brunch, or even a light dinner. This dish isn’t only filled with vibrant vegetables but also rich in protein, thanks to the eggs. The beauty of making a frittata is its versatility; you can use whatever vegetables you have on hand, making it a great way to clean out your fridge while still delivering a healthy and satisfying meal.
Plus, it’s naturally gluten-free and can be easily adapted for vegetarians or those on a dairy-free diet.
In this recipe, we’re crafting a veggie-packed frittata that serves 4-6 people, bursting with flavors from a mix of seasonal vegetables like bell peppers, spinach, and cherry tomatoes. This combination not only adds a range of colors to your plate but also a diverse array of nutrients.
The frittata is cooked to perfection in a skillet and then finished in the oven, resulting in a fluffy, golden masterpiece. Whether you’re serving it hot or at room temperature, this dish is sure to delight both family and friends.
Ingredients (serves 4-6):
- 8 large eggs
- 1/2 cup milk (or dairy-free alternative)
- 1 cup baby spinach leaves
- 1 cup cherry tomatoes, halved
- 1 red bell pepper, diced
- 1/2 cup red onion, finely chopped
- 1/2 cup feta cheese, crumbled (optional)
- 2 tablespoons olive oil
- 1 teaspoon salt
- 1/2 teaspoon black pepper
- 1 teaspoon dried oregano
- 1/4 teaspoon red pepper flakes (optional)
Cooking Instructions:
- Prepare the Oven and Skillet: Preheat your oven to 375°F (190°C). Heat the olive oil in a large ovenproof skillet over medium heat.
- Cook the Vegetables: Add the red onion and red bell pepper to the skillet. Sauté for about 5 minutes until the vegetables are soft. Add the cherry tomatoes and spinach, and cook for another 2 minutes until the spinach is wilted.
- Whisk the Eggs: In a large bowl, whisk together the eggs, milk, salt, black pepper, oregano, and red pepper flakes. Make sure the mixture is well combined.
- Combine and Cook: Pour the egg mixture over the sautéed vegetables in the skillet. Gently stir to guarantee the vegetables are evenly distributed. Allow the frittata to cook on the stove for about 5 minutes, or until the edges begin to set.
- Add Cheese: If using, sprinkle the feta cheese evenly over the top of the frittata.
- Bake in the Oven: Transfer the skillet to the preheated oven. Bake for 15-20 minutes, or until the frittata is puffed and the center is set. You can test this by inserting a knife into the center; it should come out clean.
- Serve: Remove from the oven and let it cool for a few minutes before slicing. Serve warm or at room temperature, as desired.
Extra Tips:
When making a veggie-packed frittata, feel free to be creative with your vegetable choices. You can add mushrooms, zucchini, or asparagus for different textures and flavors.
If you don’t have an ovenproof skillet, you can transfer the cooked vegetable and egg mixture to a greased baking dish before placing it in the oven.
Also, for a more elevated flavor profile, consider adding fresh herbs like basil or parsley just before serving. Remember that frittatas are highly adaptable, so adjust the seasonings and ingredients to suit your taste preferences.
Whole Grain Avocado Toast
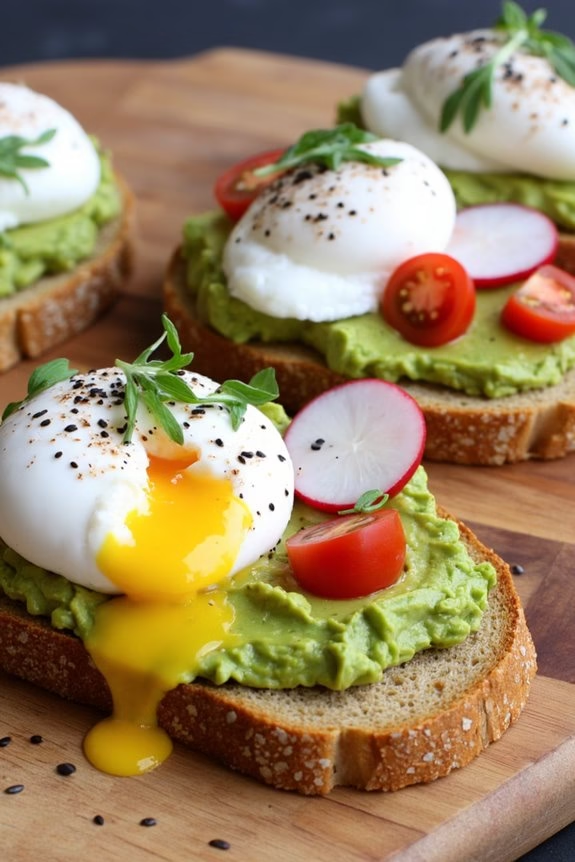
Whole Grain Avocado Toast is a delicious and nutritious option that can be enjoyed for breakfast, lunch, or even as a light dinner. Known for its simplicity and health benefits, this dish combines the heartiness of whole-grain bread with the creamy richness of mashed avocado.
The toast is often topped with a variety of ingredients such as tomatoes, radishes, eggs, or seeds, making it a versatile meal that can be customized to suit any taste or dietary preference. Not only is it packed with vitamins, minerals, and healthy fats, but it also provides a satisfying and energizing start to your day.
This recipe for Whole Grain Avocado Toast serves 4-6 people, making it perfect for family meals or small gatherings. Each serving is a delightful combination of textures and flavors, with the potential for additional toppings to enhance the nutritional profile and taste.
Whether you’re a novice in the kitchen or an experienced cook, this recipe is straightforward and quick to prepare, allowing you to enjoy a wholesome meal in minutes.
Ingredients:
- 8-12 slices of whole-grain bread
- 4 ripe avocados
- 1 lemon
- Salt and pepper to taste
- Optional toppings: cherry tomatoes, radish slices, poached eggs, sesame seeds, or microgreens
Cooking Instructions:
- Prepare the Avocados: Cut the avocados in half, remove the pits, and scoop the flesh into a bowl. Use a fork to mash the avocado to your desired consistency. Add a squeeze of lemon juice, and season with salt and pepper to taste. Mix well until the ingredients are combined.
- Toast the Bread: Place the slices of whole-grain bread in a toaster or under a broiler on high heat until they’re golden brown and crispy. This should take about 2-4 minutes, depending on your equipment.
- Assemble the Toast: Spread a generous amount of the mashed avocado mixture onto each slice of toasted bread. Make certain to cover the toast evenly for a balanced flavor in each bite.
- Add Optional Toppings: Customize your avocado toast by adding your choice of toppings. Arrange sliced cherry tomatoes, radish slices, or poached eggs on top of the avocado mixture. Sprinkle with sesame seeds or microgreens for added texture and flavor.
- Serve and Enjoy: Once assembled, serve the avocado toast immediately while the bread is still warm. Enjoy it as a standalone dish or pair it with a side salad for a more substantial meal.
Extra Tips:
When making Whole Grain Avocado Toast, selecting ripe avocados is essential for the best flavor and texture. If your avocados are still firm, you can speed up the ripening process by placing them in a paper bag with a banana or apple.
Additionally, to prevent the avocado mixture from browning, make sure you incorporate lemon juice thoroughly, which acts as a natural preservative. For an extra flavor boost, consider adding a sprinkle of red pepper flakes or a dash of your favorite hot sauce.
Hearty Quinoa Salad Bowls

Hearty Quinoa Salad Bowls are a delicious and nutritious option for those looking to enjoy a lighter yet satisfying meal. These bowls are packed with wholesome ingredients, vibrant colors, and a variety of textures that make each bite a delightful experience. The combination of quinoa, fresh vegetables, and a tangy dressing provides a balanced meal that’s both filling and flavorful.
Perfect for lunch, dinner, or even a potluck gathering, these quinoa salad bowls are guaranteed to please everyone at the table.
With a foundation of fluffy quinoa and an array of vegetables like cherry tomatoes, cucumber, and bell peppers, these salad bowls offer a revitalizing crunch with every bite. The addition of creamy avocado and protein-rich chickpeas makes this dish not only nutritious but also incredibly satisfying.
A zesty lemon-tahini dressing ties all the flavors together, creating a harmonious blend that’s both healthy and delicious. This recipe serves 4-6 people, making it a great choice for family meals or meal prep for the week.
Ingredients:
- 1 1/2 cups quinoa
- 3 cups water
- 1 can (15 oz) chickpeas, drained and rinsed
- 1 pint cherry tomatoes, halved
- 1 cucumber, diced
- 1 red bell pepper, diced
- 1 avocado, diced
- 1/4 cup red onion, thinly sliced
- 1/4 cup fresh parsley, chopped
- 1/4 cup fresh mint, chopped
- 1/4 cup olive oil
- 1/4 cup tahini
- 2 lemons, juiced
- Salt and pepper to taste
Cooking Instructions:
- Cook the Quinoa: Begin by rinsing the quinoa under cold water to remove any bitterness. In a medium-sized pot, combine the quinoa with 3 cups of water. Bring to a boil over medium-high heat, then reduce the heat to low, cover, and simmer for about 15 minutes, or until the quinoa is tender and the water is fully absorbed. Fluff with a fork and set aside to cool.
- Prepare the Dressing: In a small bowl, whisk together the olive oil, tahini, and lemon juice until smooth and creamy. Season with salt and pepper to taste. Adjust the consistency with a little water if needed.
- Combine the Ingredients: In a large mixing bowl, combine the cooked quinoa, chickpeas, cherry tomatoes, cucumber, red bell pepper, avocado, red onion, parsley, and mint. Toss gently to combine all ingredients.
- Dress the Salad: Pour the prepared lemon-tahini dressing over the quinoa mixture. Toss until everything is well coated with the dressing. Taste and adjust seasoning with more salt, pepper, or lemon juice, if desired.
- Serve: Divide the salad into individual bowls and serve immediately. Alternatively, refrigerate for about 30 minutes for a chilled salad experience.
Extra Tips: To add more protein, consider topping the salad with grilled chicken, shrimp, or even tofu for a vegetarian option. If you prefer a bit of heat, sprinkle in some red pepper flakes or a dash of hot sauce.
For added texture, consider mixing in some toasted nuts or seeds such as almonds or sunflower seeds. This salad is also highly adaptable—feel free to substitute or add your favorite seasonal vegetables.
When storing leftovers, keep the dressing separate to guarantee the vegetables stay crisp and fresh.
Grilled Chicken and Veggie Wraps
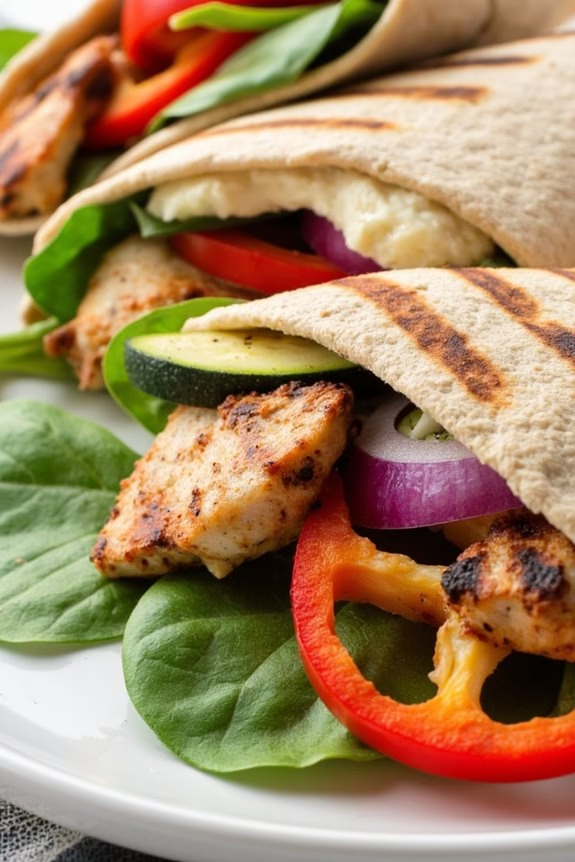
Grilled Chicken and Veggie Wraps are a delightful and healthy meal option that combines the lean protein of chicken with the rich flavors of various vegetables. This dish is perfect for those who want a nutritious and satisfying meal without the heaviness of traditional wraps or sandwiches. The grilled chicken provides a smoky taste that pairs beautifully with the fresh, crisp veggies, all wrapped up in a soft tortilla for a convenient and delicious meal.
Whether you’re preparing lunch for the family or hosting a casual dinner with friends, these wraps are bound to be a hit.
The versatility of Grilled Chicken and Veggie Wraps allows you to customize the ingredients to suit your taste preferences or dietary needs. You can choose from a variety of vegetables such as bell peppers, zucchini, or spinach, and add your favorite dressing or sauce to enhance the flavor.
The simplicity of this recipe guarantees that even those with minimal cooking experience can create a delicious dish that everyone will enjoy. Perfect for serving 4-6 people, these wraps are a fantastic addition to any meal plan.
Ingredients:
- 4 boneless, skinless chicken breasts
- 2 tablespoons olive oil
- 1 teaspoon paprika
- 1 teaspoon garlic powder
- Salt and pepper to taste
- 2 red bell peppers, sliced
- 1 zucchini, sliced
- 1 red onion, sliced
- 6 large whole wheat tortillas
- 1 cup hummus or your favorite spread
- 2 cups fresh spinach leaves
Cooking Instructions:
- Prepare the Chicken: Begin by seasoning the chicken breasts with olive oil, paprika, garlic powder, salt, and pepper. Ascertain that each piece is evenly coated with the seasoning mix.
- Grill the Chicken: Preheat your grill to medium-high heat. Grill the chicken breasts for about 6-7 minutes on each side, or until they’re fully cooked and have a nice char. Once done, remove them from the grill and let them rest for a few minutes before slicing them into thin strips.
- Grill the Vegetables: While the chicken is resting, use the same grill to cook the sliced red bell peppers, zucchini, and red onion. Grill them for about 4-5 minutes, or until they’re tender and have grill marks.
- Assemble the Wraps: Lay each tortilla flat and spread a generous layer of hummus or your favorite spread over it. Place a handful of fresh spinach leaves on top, followed by the grilled chicken slices and grilled vegetables.
- Wrap and Serve: Carefully wrap the tortilla around the filling, tucking in the ends as you roll. Cut each wrap in half and serve immediately.
Extra Tips:
For an added burst of flavor, consider marinating the chicken in the spice mix for a few hours before grilling. This allows the spices to penetrate the meat more deeply.
If you’re short on time, you can use a grill pan on the stove instead of an outdoor grill. To keep the wraps from getting soggy, ascertain that the grilled vegetables are patted dry with a paper towel before assembling.
You can also experiment with different sauces such as tzatziki or a light vinaigrette to suit your taste preferences.
Zucchini Noodles With Pesto
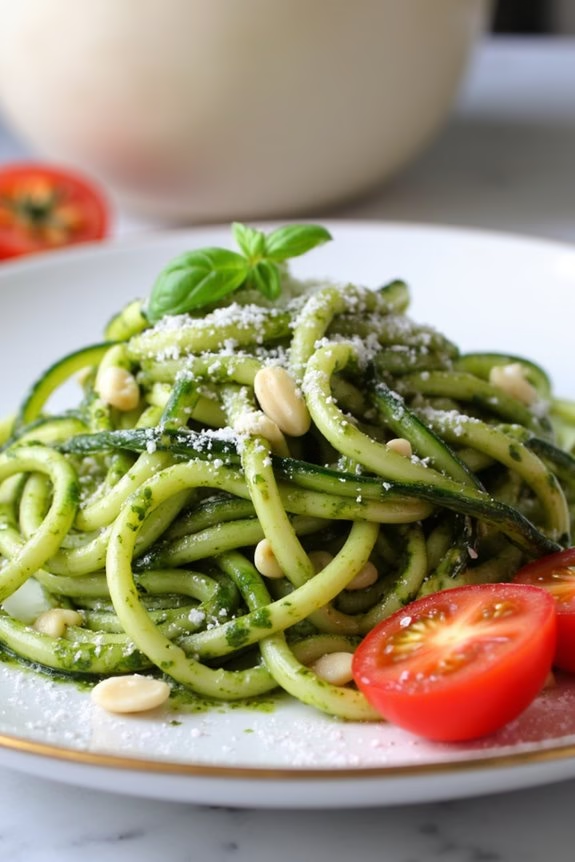
Zucchini noodles, affectionately known as “zoodles,” offer a delightful and healthy alternative to traditional pasta. They’re low in carbohydrates, high in fiber, and packed with essential nutrients like vitamin C and potassium. When paired with a vibrant and aromatic pesto sauce, zucchini noodles transform into a revitalizing and satisfying dish that’s perfect for those seeking a lighter meal option.
The fresh basil, garlic, and parmesan cheese in the pesto bring a burst of flavor, making this dish not only nutritious but also incredibly delicious. This Zucchini Noodles with Pesto recipe is perfect for a simple weeknight dinner or as a side dish for a larger meal. It’s quick to prepare and requires minimal cooking, which preserves the nutrients in the zucchini.
The pesto sauce can be made in advance, allowing you to whip up this dish in a matter of minutes. Suitable for a serving size of 4-6 people, this recipe is sure to be a hit at your next meal.
Ingredients:
- 4 medium zucchinis
- 2 cups fresh basil leaves
- 1/2 cup grated Parmesan cheese
- 1/3 cup pine nuts
- 2 garlic cloves
- 1/2 cup extra-virgin olive oil
- Salt and pepper to taste
- 1 tablespoon lemon juice
- Optional: cherry tomatoes and grated Parmesan for garnish
Instructions:
- Prepare the Zucchini Noodles: Use a spiralizer to create noodles from the zucchini. If you don’t have a spiralizer, you can use a julienne peeler or a vegetable peeler to make thin strips resembling noodles. Set aside.
- Make the Pesto: In a food processor, combine the basil leaves, Parmesan cheese, pine nuts, garlic cloves, and lemon juice. Pulse until the ingredients are finely chopped.
- Add Olive Oil: With the food processor running, slowly pour in the olive oil until the mixture is smooth and creamy. Season with salt and pepper to taste.
- Toss the Noodles: In a large bowl, combine the zucchini noodles with the pesto sauce. Use tongs to gently toss and coat the noodles evenly with the sauce.
- Serve: Transfer the coated noodles to serving plates. If desired, top with cherry tomatoes and additional grated Parmesan cheese for garnish.
- Enjoy: Serve immediately and enjoy your healthy, flavorful Zucchini Noodles with Pesto.
Extra Tips:
When making zucchini noodles, it’s important not to overcook them. Zucchini releases water as it cooks, so to avoid soggy noodles, keep them raw or lightly sauté them for just 1-2 minutes if you prefer them warm.
The pesto can be stored in an airtight container in the refrigerator for up to a week, making it a convenient sauce to have on hand. If pine nuts are unavailable or too costly, walnuts or almonds can be used as a substitute for a similar nutty flavor.
Baked Salmon With Asparagus

Baked Salmon With Asparagus is a delightful and nutritious meal that combines succulent salmon fillets with fresh, tender asparagus. This dish is perfect for a healthy dinner option that’s both quick and easy to prepare. The rich flavors of the salmon are complemented by the earthy tones of asparagus, creating a harmonious balance that’s certain to please any palate.
Not only is this dish delicious, but it’s also packed with essential nutrients such as omega-3 fatty acids from the salmon and vitamins A, C, and K from the asparagus.
This recipe is designed for a serving size of 4-6 people, making it an excellent choice for family dinners or small gatherings. By using simple, fresh ingredients and a straightforward cooking method, you can create a restaurant-quality meal in the comfort of your own home. Whether you’re a seasoned cook or a beginner in the kitchen, this recipe is sure to become a favorite in your repertoire of healthy menu ideas.
Ingredients:
- 4 to 6 salmon fillets (about 6 ounces each)
- 1 pound of fresh asparagus, trimmed
- 2 tablespoons olive oil
- 2 tablespoons lemon juice
- 3 cloves garlic, minced
- Salt and pepper to taste
- 1 lemon, sliced
- Fresh dill or parsley for garnish (optional)
Cooking Instructions:
- Preheat the oven: Start by preheating your oven to 400°F (200°C). This guarantees that your salmon and asparagus will cook evenly and develop a nice, roasted flavor.
- Prepare the baking sheet: Line a large baking sheet with parchment paper or lightly grease it with oil. This will prevent the fish and vegetables from sticking and make for easy cleanup.
- Season the salmon: Place the salmon fillets on one side of the baking sheet. Drizzle them with olive oil and lemon juice, then sprinkle with minced garlic, salt, and pepper. Rub the seasoning gently into the fish.
- Arrange the asparagus: On the other side of the baking sheet, lay out the asparagus spears. Drizzle them with olive oil, and season with salt and pepper. Toss them lightly to guarantee they’re evenly coated.
- Add lemon slices: Place lemon slices over the salmon fillets. This will add a fresh, citrusy flavor to the dish as it bakes.
- Bake the dish: Transfer the baking sheet to the preheated oven and bake for about 12-15 minutes, or until the salmon is cooked through and flakes easily with a fork, and the asparagus is tender.
- Garnish and serve: Once out of the oven, garnish the dish with fresh dill or parsley, if desired. Serve immediately, pairing the salmon with the roasted asparagus on each plate.
Extra Tips:
When selecting salmon, opt for wild-caught varieties for the best flavor and nutritional benefits. Confirm the asparagus is fresh by checking that the stalks are firm and the tips are tightly closed.
Adjust cooking times based on the thickness of the salmon fillets; thicker pieces may require a few extra minutes in the oven. For added flavor, consider marinating the salmon in the olive oil, lemon juice, and garlic mixture for 30 minutes before baking.
This dish pairs well with a side of quinoa or a light, mixed green salad for a complete meal.
Stir-Fried Tofu and Broccoli

Stir-Fried Tofu and Broccoli is a delightful and nutrient-rich dish that combines the goodness of plant-based protein and vibrant veggies. This dish isn’t only quick to prepare but also offers a satisfying blend of flavors and textures. The crispy tofu paired with tender broccoli creates a perfect harmony, making it an excellent choice for a healthy meal.
Whether you’re a seasoned cook or a beginner looking to try something new, this recipe is sure to become a staple in your kitchen. This dish is great for a weeknight dinner or a weekend gathering, and it’s versatile enough to adapt to your taste preferences.
The tofu is marinated to enhance its flavor, while the broccoli remains slightly crisp, adding a pleasant crunch. The combination is tossed in a savory sauce, creating a meal that’s both delicious and packed with nutrients. Serve it over steamed rice or noodles for a complete and satisfying experience.
Ingredients for 4-6 servings:
- 1 block (14 oz) firm tofu, drained and pressed
- 4 cups broccoli florets
- 3 tablespoons vegetable oil, divided
- 1 tablespoon soy sauce
- 1 tablespoon oyster sauce
- 1 tablespoon hoisin sauce
- 2 teaspoons cornstarch
- 1/4 cup water
- 2 cloves garlic, minced
- 1-inch piece ginger, grated
- 2 tablespoons sesame seeds (optional)
- Salt and pepper to taste
Cooking Instructions:
- Prepare the Tofu: Cut the tofu into bite-sized cubes. Press the tofu to remove excess moisture by wrapping it in a clean kitchen towel and placing a heavy object on top for about 15 minutes.
- Marinate the Tofu: In a small bowl, mix 1 tablespoon of soy sauce and 1 teaspoon of cornstarch. Toss the tofu cubes in this mixture until well-coated. Allow the tofu to marinate while you prepare the other ingredients.
- Prep the Broccoli: Wash and cut the broccoli into florets. Blanch the broccoli in boiling water for 2 minutes, then immediately transfer it to a bowl of ice water to stop the cooking process. Drain and set aside.
- Make the Sauce: In a separate bowl, combine the oyster sauce, hoisin sauce, remaining soy sauce, remaining cornstarch, and water. Stir until smooth and set aside.
- Cook the Tofu: Heat 2 tablespoons of vegetable oil in a large skillet or wok over medium-high heat. Add the tofu cubes and cook until they’re golden brown on all sides, about 5-7 minutes. Remove the tofu from the skillet and set aside.
- Stir-Fry the Broccoli: In the same skillet, add the remaining tablespoon of vegetable oil. Add the minced garlic and grated ginger, stirring for about 30 seconds until fragrant. Add the blanched broccoli and stir-fry for 2-3 minutes.
- Combine Ingredients: Return the fried tofu to the skillet. Pour the prepared sauce over the tofu and broccoli, stirring gently to combine. Allow the sauce to simmer for a couple of minutes until it thickens and coats the ingredients evenly.
- Serve: Transfer the stir-fried tofu and broccoli to a serving dish. Sprinkle with sesame seeds if desired. Serve hot over steamed rice or noodles.
Extra Tips:
When cooking this dish, be sure to press the tofu well to guarantee it absorbs the marinade and achieves a nice crispy texture when fried.
Adjust the seasoning according to your taste preference; you can add a dash of chili flakes for a spicy kick. If you prefer a gluten-free version, use tamari instead of soy sauce.
Finally, feel free to add other vegetables like bell peppers or snap peas to enhance the dish’s flavor and nutritional value.
Lentil and Vegetable Soup

Lentil and Vegetable Soup is a nourishing and hearty dish perfect for those seeking a healthy and filling meal. Packed with protein-rich lentils and an array of colorful vegetables, this soup isn’t only delicious but also incredibly satisfying. It’s an ideal choice for a comforting lunch or a light dinner, especially during the colder months. The combination of spices and fresh ingredients brings out a depth of flavor that will please your taste buds while providing essential nutrients.
This Lentil and Vegetable Soup is versatile and can be easily adapted to suit your preferences or dietary needs. You can include your favorite vegetables or substitute any ingredient to make it your own. Best of all, this recipe is simple to prepare and requires minimal effort, making it a great option for busy weeknights. This recipe serves 4-6 people, perfect for family meals or for having leftovers to enjoy throughout the week.
Ingredients:
- 1 cup of dry lentils, rinsed and drained
- 1 tablespoon olive oil
- 1 large onion, diced
- 3 cloves of garlic, minced
- 2 carrots, peeled and sliced
- 2 celery stalks, sliced
- 1 zucchini, diced
- 1 red bell pepper, diced
- 1 teaspoon ground cumin
- 1 teaspoon ground coriander
- 1 teaspoon smoked paprika
- 6 cups vegetable broth
- 1 can (14.5 oz) diced tomatoes
- Salt and pepper to taste
- 1 bay leaf
- 1 cup spinach leaves
- 1 tablespoon lemon juice
- Fresh parsley, chopped (for garnish)
Cooking Instructions:
- Prepare the Ingredients: Begin by thoroughly rinsing the lentils under cold water and set them aside to drain. Chop and prepare all the vegetables as mentioned in the ingredient list to guarantee a smooth cooking process.
- Sauté the Aromatics: In a large pot, heat the olive oil over medium heat. Add the diced onion and sauté for about 5 minutes until it becomes translucent. Stir in the minced garlic and continue to sauté for another minute until fragrant.
- Cook the Vegetables: Add the sliced carrots, celery, zucchini, and red bell pepper to the pot. Stir occasionally and cook the vegetables for about 5-7 minutes until they begin to soften.
- Season and Add Lentils: Sprinkle in the cumin, coriander, and smoked paprika. Stir to coat the vegetables with the spices, then add the rinsed lentils to the pot.
- Simmer the Soup: Pour in the vegetable broth and canned diced tomatoes, then add the bay leaf. Season with salt and pepper to taste. Bring the mixture to a boil, then reduce the heat to low and let it simmer uncovered for about 25-30 minutes, or until the lentils are tender.
- Finish with Greens and Lemon: Once the lentils are cooked, stir in the spinach leaves and allow them to wilt for a couple of minutes. Add the lemon juice to the soup and adjust the seasoning if necessary.
- Serve: Remove the bay leaf before serving. Ladle the soup into bowls, garnish with fresh parsley, and enjoy!
Extra Tips:
When making Lentil and Vegetable Soup, feel free to experiment with different vegetables according to what’s in season or available in your pantry. If you prefer a thicker consistency, you can use a blender to puree a portion of the soup, then mix it back into the pot.
Additionally, this soup freezes well, so you can prepare a large batch and store individual servings in the freezer for a quick and healthy meal anytime. Adjust the spices to your taste, and don’t hesitate to add a pinch of chili flakes if you prefer a bit of heat.
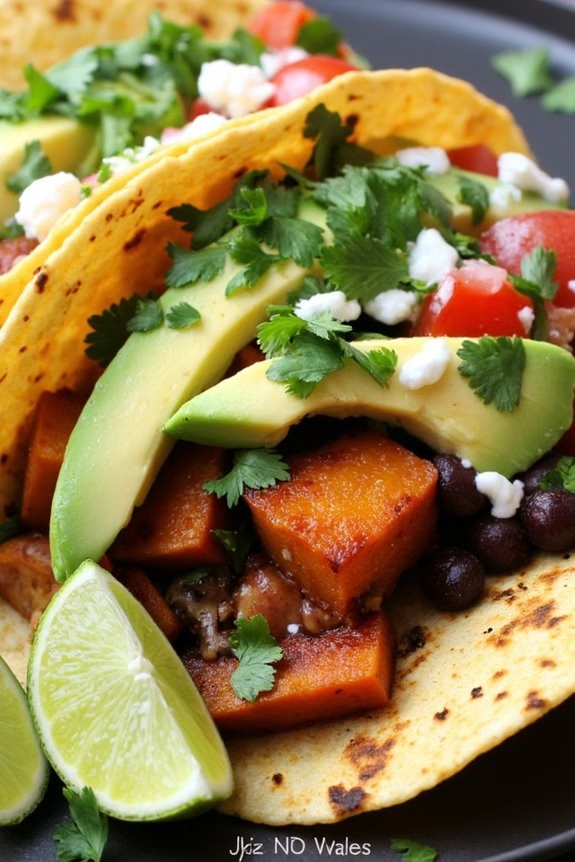
Sweet Potato and Black Bean Tacos
Sweet Potato and Black Bean Tacos are a delightful and nutritious option for those looking to enjoy a healthy meal that’s both satisfying and full of flavor. These tacos are perfect for a quick weeknight dinner or a fun weekend gathering with friends and family. Packed with the goodness of sweet potatoes and protein-rich black beans, this dish isn’t only delicious but also a great source of fiber and essential nutrients.
The combination of roasted sweet potatoes and black beans creates a hearty filling, while the addition of spices adds a depth of flavor that will surely please your taste buds. Served in warm corn tortillas and topped with fresh garnishes like avocado, cilantro, and lime, these tacos offer a burst of freshness in every bite. Get ready to enjoy a vibrant and healthy meal that everyone will love!
Ingredients (Serving Size: 4-6 people):
- 2 large sweet potatoes
- 1 tablespoon olive oil
- 1 teaspoon ground cumin
- 1 teaspoon smoked paprika
- Salt and pepper to taste
- 1 (15-ounce) can black beans, drained and rinsed
- 1 teaspoon chili powder
- 12 small corn tortillas
- 1 ripe avocado, sliced
- 1/4 cup fresh cilantro, chopped
- 1 lime, cut into wedges
- Optional toppings: salsa, diced red onion, crumbled queso fresco
Cooking Instructions:
- Preheat the oven: Start by preheating your oven to 425°F (220°C). This will guarantee your sweet potatoes roast evenly and become perfectly tender.
- Prepare the sweet potatoes: Peel the sweet potatoes and cut them into small cubes, roughly 1/2-inch in size. Place them in a large mixing bowl.
- Season the sweet potatoes: Drizzle the sweet potato cubes with olive oil, then sprinkle with ground cumin, smoked paprika, salt, and pepper. Toss until the cubes are evenly coated with the seasoning.
- Roast the sweet potatoes: Spread the seasoned sweet potato cubes in a single layer on a baking sheet. Roast in the preheated oven for 25-30 minutes, or until they’re tender and slightly caramelized, stirring halfway through to guarantee even cooking.
- Prepare the black bean filling: While the sweet potatoes are roasting, heat a small pan over medium heat. Add the drained black beans and sprinkle with chili powder. Stir and cook for about 5 minutes, until the beans are heated through and fragrant.
- Warm the tortillas: Wrap the corn tortillas in aluminum foil and place them in the oven for the last 5 minutes of the sweet potatoes’ roasting time, or heat them individually on a skillet over medium heat, flipping once, until warm and pliable.
- Assemble the tacos: Once the sweet potatoes are done, remove them from the oven. To assemble the tacos, spoon some roasted sweet potatoes and black beans onto each warm tortilla. Top with slices of avocado, a sprinkle of fresh cilantro, and any optional toppings you desire.
- Serve: Squeeze lime wedges over the assembled tacos for an extra burst of freshness before serving.
Extra Tips:
For the best flavor, make sure the sweet potatoes are cut into uniform pieces to guarantee even roasting. You can experiment with a variety of toppings to suit your taste, such as adding a drizzle of chipotle sauce or a dollop of Greek yogurt for a creamy touch.
If you prefer a spicier kick, consider adding sliced jalapeños to your tacos. These Sweet Potato and Black Bean Tacos are versatile and can be customized easily to match your preferences, making them a fantastic addition to your healthy menu repertoire.
Homemade Hummus and Veggie Platters
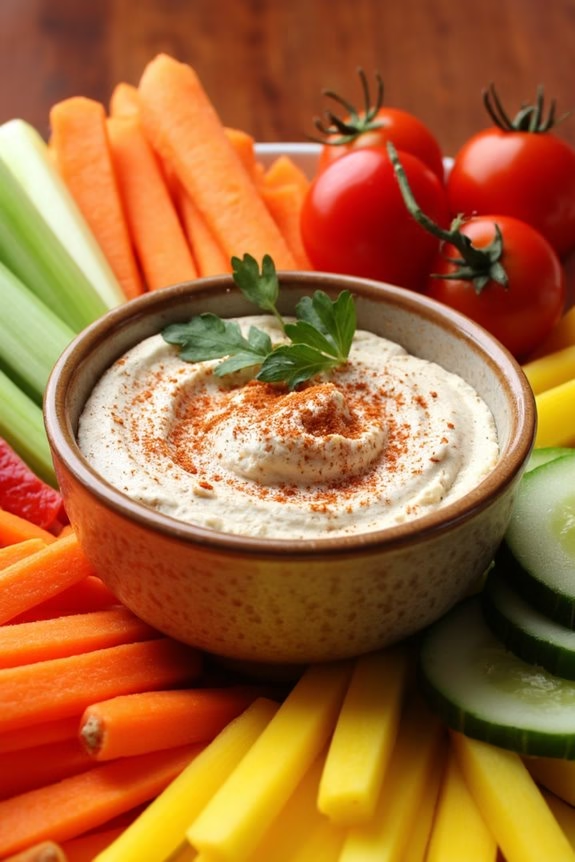
Homemade hummus is a delightful and nutritious dish that’s perfect for any occasion, whether you’re planning a light lunch or a party appetizer. It’s creamy, flavorful, and can easily be made in your kitchen with a few simple ingredients.
Pair it with a colorful array of fresh vegetables, and you have a beautiful platter that’s both satisfying and healthy. This dish isn’t only wholesome and delicious but also versatile, allowing you to customize it with your favorite flavors and veggies.
Creating a homemade hummus and veggie platter is a great way to incorporate more vegetables into your diet while enjoying the rich, nutty taste of chickpeas. The hummus serves as a perfect dip, offering a protein-packed option that’s both vegan and gluten-free.
The veggie platter can include a variety of textures and colors, providing a feast for both the eyes and the palate. This recipe serves 4-6 people, making it ideal for gatherings or family meals.
Ingredients:
- 2 cups cooked chickpeas (or one 15-ounce can, drained and rinsed)
- 1/4 cup tahini
- 2 tablespoons extra virgin olive oil
- 2 tablespoons fresh lemon juice
- 2 cloves garlic, minced
- 1 teaspoon ground cumin
- Salt to taste
- 2 to 4 tablespoons water (as needed for consistency)
- Assorted fresh vegetables (such as carrots, celery, bell peppers, cherry tomatoes, cucumbers)
- Optional: Paprika and fresh parsley for garnish
Cooking Instructions:
- Prepare the Chickpeas: If using canned chickpeas, drain and rinse them thoroughly under cold water to remove excess sodium.
- Blend the Ingredients: In a food processor, combine the chickpeas, tahini, olive oil, lemon juice, minced garlic, cumin, and a pinch of salt. Blend until the mixture is smooth and creamy. If the hummus is too thick, add water, one tablespoon at a time, until you reach the desired consistency.
- Taste and Adjust: Taste the hummus, and adjust the seasoning as needed. You may want to add more salt, lemon juice, or garlic depending on your preference.
- Chill the Hummus: Transfer the hummus to a serving bowl and refrigerate for at least 30 minutes to allow the flavors to meld together.
- Prepare the Veggies: While the hummus is chilling, wash and cut the vegetables into bite-sized pieces. Arrange them attractively on a platter.
- Serve: Before serving, garnish the hummus with a sprinkle of paprika and a few fresh parsley leaves. Place the hummus bowl in the center of the veggie platter and serve.
Extra Tips:
For the best flavor, use freshly squeezed lemon juice and high-quality tahini. If you have time, peeling the chickpeas can result in an even smoother hummus, though it’s not necessary.
Feel free to experiment with additional flavors such as roasted red peppers, sun-dried tomatoes, or olives for a unique twist. Also, remember that hummus can be made a day in advance and stored in an airtight container in the refrigerator, which allows the flavors to develop even more.
Fruit and Nut Energy Bites

Fruit and nut energy bites are a delicious and nutritious snack that’s perfect for on-the-go energy boosts. These bites are packed with natural sweetness from dried fruits and a satisfying crunch from various nuts. They aren’t only easy to make but also customizable to suit your taste preferences.
Whether you need a quick snack before a workout or a healthy treat for your afternoon slump, these energy bites will keep you fueled and satisfied. These energy bites are ideal for families, gatherings, or simply to have on hand for a quick snack throughout the week.
The combination of fruits and nuts provides a balanced mix of carbohydrates, healthy fats, and protein, making them a wholesome choice. Creating these bites takes minimal effort and requires no baking, making them a convenient option for anyone looking to maintain a healthy diet with minimal prep time.
Ingredients for 4-6 servings:
- 1 cup pitted dates
- 1/2 cup dried apricots
- 1/2 cup almonds
- 1/2 cup walnuts
- 1/4 cup shredded coconut
- 1 tablespoon chia seeds
- 1 tablespoon honey
- 1 teaspoon vanilla extract
- Pinch of salt
Cooking Instructions:
- Prepare the Ingredients: Begin by gathering all the ingredients. Make sure the dates and apricots are pitted and roughly chopped to make blending easier.
- Blend the Fruits and Nuts: In a food processor, combine the dates, apricots, almonds, and walnuts. Pulse until the mixture is finely chopped and starts to stick together. You may need to scrape down the sides of the processor a few times to guarantee even blending.
- Add Flavorings and Mix: Add the shredded coconut, chia seeds, honey, vanilla extract, and a pinch of salt to the food processor. Blend again until all the ingredients are well incorporated and the mixture forms a sticky dough.
- Shape the Energy Bites: Using your hands, scoop out tablespoon-sized portions of the mixture and roll them into balls. If the mixture is too sticky, lightly dampen your hands with water to make shaping easier.
- Chill and Set: Place the rolled energy bites on a baking sheet lined with parchment paper. Refrigerate for at least 30 minutes to allow them to firm up.
- Store and Enjoy: Once chilled, transfer the energy bites to an airtight container. They can be stored in the refrigerator for up to two weeks or frozen for up to three months.
Extra Tips:
When making fruit and nut energy bites, feel free to experiment with different combinations of dried fruits and nuts to find your favorite flavor. If you prefer a sweeter taste, additional honey or maple syrup can be added.
For those who enjoy a bit of spice, a pinch of cinnamon or nutmeg can be included for an extra kick. Additionally, if you find the mixture too dry, a tablespoon of water or unsweetened applesauce can help bind it together.
Enjoy these bites as a nutritious snack or a quick energy boost anytime you need it!