

When I think of comfort food, I picture warmth and coziness wrapped around me. These 13 vegetarian recipes offer that comforting feeling we all crave, perfect for gatherings or a quiet night in. Picture creamy pumpkin Alfredo on your fork and the inviting aroma of lentil stew simmering away. Each recipe is a delightful mix of flavors and textures, making them a must-try. Curious to explore these comforting dishes?
Creamy Pumpkin Alfredo Pasta
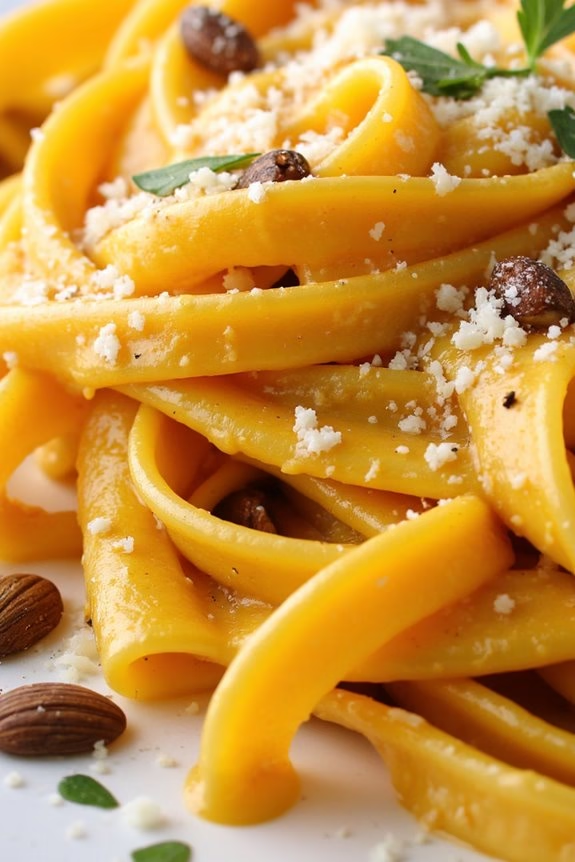
Creamy Pumpkin Alfredo Pasta is a comforting and delicious twist on the classic Alfredo pasta, perfect for those seeking a vegetarian option with a seasonal flair. The dish combines the rich, velvety texture of pumpkin puree with the creamy goodness of Alfredo sauce, creating a perfect harmony of flavors that’s both indulgent and satisfying.
This recipe is ideal for a cozy dinner at home, especially during the fall when pumpkins are in abundance. The sweetness of the pumpkin pairs beautifully with the savory notes of garlic and Parmesan cheese, offering a delightful balance that will have everyone asking for seconds.
The warmth and richness of the sauce make it an inviting dish for family gatherings or a quiet night in. The best part? It’s simple to prepare, making it accessible for cooks of all skill levels.
Ingredients (Serves 4-6):
- 12 oz fettuccine pasta
- 2 tablespoons unsalted butter
- 3 cloves garlic, minced
- 1 cup pumpkin puree
- 1 cup heavy cream
- 1 1/2 cups grated Parmesan cheese
- 1/4 teaspoon ground nutmeg
- Salt and black pepper to taste
- Fresh parsley, chopped (for garnish)
Cooking Instructions:
- Prepare the Pasta: Cook the fettuccine according to the package instructions in a large pot of salted boiling water until al dente. Reserve 1 cup of pasta water, then drain the pasta and set aside.
- Make the Sauce: In a large skillet, melt the butter over medium heat. Add the minced garlic and sauté for about 1 minute until fragrant, being careful not to burn it.
- Add the Pumpkin: Stir in the pumpkin puree and cook for 2-3 minutes, allowing the flavors to meld. This step is essential for a well-integrated sauce.
- Incorporate Cream and Cheese: Gradually add the heavy cream to the mixture, stirring constantly. Once combined, add the grated Parmesan cheese, stirring until the cheese is fully melted and the sauce is smooth.
- Season the Sauce: Season the sauce with nutmeg, salt, and black pepper. Taste and adjust seasoning as needed.
- Combine Pasta and Sauce: Add the cooked fettuccine to the skillet, tossing until the pasta is well-coated with the sauce. If the sauce is too thick, gradually add the reserved pasta water until the desired consistency is reached.
- Serve: Divide the pasta among serving plates. Garnish with freshly chopped parsley and additional Parmesan cheese if desired. Serve immediately.
Extra Tips: For a vegan version of Creamy Pumpkin Alfredo Pasta, substitute the heavy cream with coconut milk or a plant-based cream alternative, and use nutritional yeast instead of Parmesan cheese.
For added texture, consider topping the dish with toasted pumpkin seeds. If you prefer a bit of heat, a pinch of red pepper flakes can add a nice kick to the creamy sauce.
Hearty Lentil and Vegetable Stew
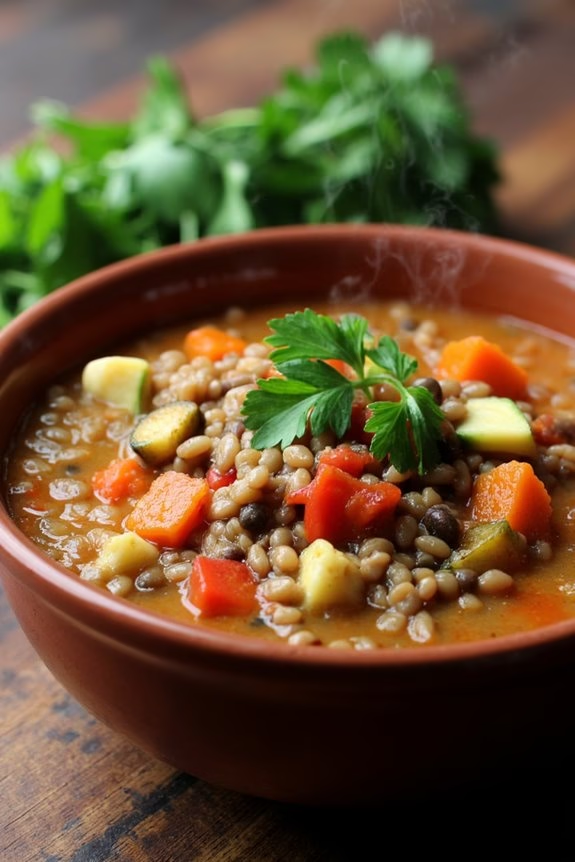
Warm your soul with a bowl of Hearty Lentil and Vegetable Stew, a vegetarian comfort food classic that’s both nutritious and satisfying. This stew combines the earthy flavors of lentils with a medley of fresh vegetables, creating a nourishing and filling dish perfect for chilly days.
Lentils provide a good source of protein and fiber, making this stew a complete meal that will keep you full and energized. The vegetables add a variety of textures and flavors, while herbs and spices enhance the overall taste, creating a rich and delicious stew that’s sure to become a family favorite.
Ideal for serving 4-6 people, this recipe is perfect for a cozy family dinner or a gathering with friends. The stew is also versatile, allowing you to adjust the ingredients based on what you have on hand or to suit your personal taste preferences.
Whether you’re a seasoned vegetarian or just looking to incorporate more plant-based meals into your diet, this Hearty Lentil and Vegetable Stew is a must-try recipe that delivers on both taste and nutrition.
Ingredients:
- 1 cup green or brown lentils
- 2 tablespoons olive oil
- 1 large onion, diced
- 2 cloves garlic, minced
- 2 carrots, peeled and sliced
- 2 celery stalks, sliced
- 1 large potato, peeled and diced
- 1 zucchini, sliced
- 1 red bell pepper, diced
- 1 can (14 oz) diced tomatoes
- 4 cups vegetable broth
- 1 teaspoon dried thyme
- 1 teaspoon dried oregano
- 1 bay leaf
- Salt and pepper to taste
- 2 tablespoons fresh parsley, chopped (for garnish)
Cooking Instructions:
- Prepare the Lentils: Start by rinsing the lentils under cold water in a fine-mesh sieve. This removes any dust or debris. Set aside.
- Sauté Aromatics: In a large pot, heat the olive oil over medium heat. Add the diced onion and minced garlic, sautéing until the onion becomes translucent and fragrant, approximately 4-5 minutes.
- Add Vegetables: Stir in the sliced carrots, celery, potato, zucchini, and red bell pepper. Cook for another 5-7 minutes, stirring occasionally, until the vegetables start to soften.
- Incorporate Lentils and Tomatoes: Add the rinsed lentils and the can of diced tomatoes (including the juice) to the pot. Stir well to combine with the vegetables.
- Pour in Broth and Season: Pour in the vegetable broth, ensuring that it covers all the ingredients. Add the dried thyme, oregano, bay leaf, salt, and pepper. Stir to mix all the flavors together.
- Simmer the Stew: Bring the mixture to a boil, then reduce the heat to low. Cover the pot and let the stew simmer for about 30-40 minutes, or until the lentils are cooked through and tender.
- Final Adjustments: Check the seasoning and adjust salt and pepper to your taste. Remove the bay leaf before serving.
- Serve: Ladle the stew into bowls and garnish with fresh parsley. Enjoy the stew warm with crusty bread or over rice.
Extra Tips:
For a deeper flavor, consider adding a splash of balsamic vinegar or lemon juice just before serving to brighten up the dish. If you prefer a thicker stew, mash some of the potatoes with a fork against the side of the pot before serving.
This stew can also be made in advance and stored in the refrigerator for up to 3 days, allowing the flavors to meld even further. Feel free to experiment with different vegetables or add greens like spinach or kale towards the end of cooking for added nutrition.
Mushroom and Spinach Risotto
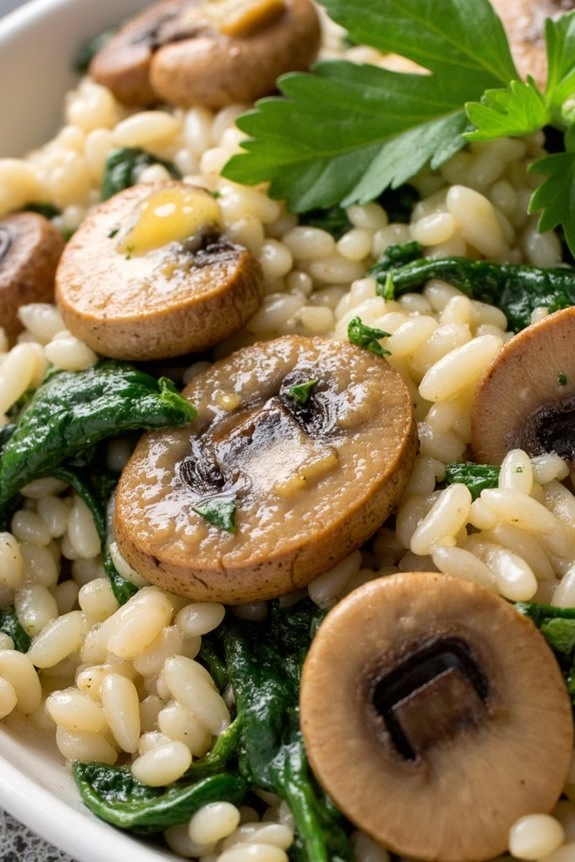
Mushroom and Spinach Risotto is a rich and creamy vegetarian comfort food that’s perfect for a cozy dinner. The earthy flavor of mushrooms combined with the freshness of spinach, enveloped in creamy Arborio rice, creates a dish that’s both nutritious and satisfying.
This risotto isn’t only delicious but also quite versatile; it can stand alone as a main dish or function as a delightful side to accompany other vegetarian offerings. This recipe is designed to serve 4-6 people and is perfect for family dinners or small gatherings.
The key to a perfect risotto lies in the gradual addition of broth and constant stirring, which coaxes the starches out of the rice and leads to that desired creamy texture. With a few simple ingredients and a little bit of patience, you can create a restaurant-quality dish right at home.
Ingredients:
- 1 1/2 cups Arborio rice
- 8 cups vegetable broth
- 2 tablespoons olive oil
- 1 medium onion, finely chopped
- 3 cloves garlic, minced
- 1 pound mushrooms, sliced
- 5 ounces fresh spinach
- 1/2 cup dry white wine
- 1/2 cup grated Parmesan cheese
- Salt and pepper to taste
- 2 tablespoons butter
- Fresh parsley, chopped (for garnish)
Instructions:
- Prepare the broth: In a medium saucepan, bring the vegetable broth to a gentle simmer. Keep it warm over low heat throughout the cooking process.
- Cook the aromatics: In a large skillet or pot, heat the olive oil over medium heat. Add the chopped onion and sauté until translucent, about 3-4 minutes. Add the garlic and cook for an additional minute, stirring frequently to avoid burning.
- Add the mushrooms: Stir in the sliced mushrooms and cook until they release their moisture and begin to brown, about 5-7 minutes.
- Toast the rice: Add the Arborio rice to the skillet and stir to coat the grains with the oil and mushroom mixture. Cook for about 2 minutes, until the edges of the rice become translucent.
- Deglaze with wine: Pour in the white wine and stir continuously until the liquid is mostly absorbed by the rice.
- Cook the risotto: Begin adding the simmering vegetable broth one ladle at a time, stirring constantly. Allow each addition of broth to be absorbed before adding the next. This process should take about 18-20 minutes.
- Add spinach and season: When the rice is just about cooked, stir in the fresh spinach until wilted. Season the risotto with salt and pepper to taste.
- Finish with cheese and butter: Remove the skillet from the heat and stir in the Parmesan cheese and butter. The risotto should be creamy and slightly loose in texture.
- Serve: Garnish with chopped fresh parsley and serve immediately while hot.
Extra Tips:
For the best results, use fresh, high-quality mushrooms such as cremini or shiitake, which offer a robust flavor that complements the spinach well.
Keep in mind that constant stirring is key to achieving the creamy consistency of risotto, so don’t rush the process. If you prefer a sharper cheese flavor, substitute some of the Parmesan with Pecorino Romano.
Finally, verify your broth is hot when adding it to the rice to maintain the cooking temperature and promote even cooking.
Sweet Potato and Black Bean Chili
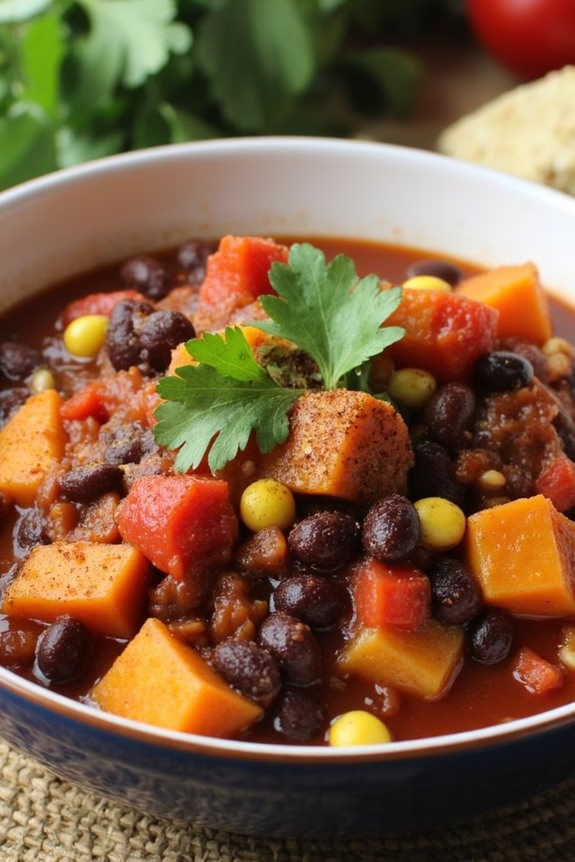
Sweet Potato and Black Bean Chili is a hearty, flavorful dish that’s perfect for those seeking a comforting vegetarian meal. This chili combines the natural sweetness of sweet potatoes with the earthy flavor of black beans, creating a satisfying and nutritious meal. As the chili simmers, the flavors meld together, resulting in a rich and delicious stew that warms you from the inside out.
Perfect for a cozy dinner, this dish can be enjoyed on its own, or with a side of crusty bread or rice. This recipe serves 4-6 people, making it a great option for family dinners or meal prep. With a variety of spices and vegetables, Sweet Potato and Black Bean Chili isn’t only tasty but also packed with nutrients.
The use of canned black beans and tomatoes makes this recipe easy to prepare, while the addition of bell peppers and corn adds color and texture. Whether you’re a long-time vegetarian or just looking to try something new, this chili is sure to become a favorite.
Ingredients:
- 2 tablespoons olive oil
- 1 medium onion, diced
- 2 cloves garlic, minced
- 2 medium sweet potatoes, peeled and diced
- 1 red bell pepper, diced
- 1 yellow bell pepper, diced
- 2 teaspoons ground cumin
- 1 tablespoon chili powder
- 1 teaspoon smoked paprika
- 1/2 teaspoon cayenne pepper (optional)
- 1 can (14 oz) diced tomatoes
- 2 cans (15 oz each) black beans, drained and rinsed
- 1 cup vegetable broth
- 1 cup corn kernels (fresh, frozen, or canned)
- Salt and pepper to taste
- Juice of 1 lime
- Fresh cilantro, for garnish
Instructions:
- Prepare the vegetables: Begin by heating the olive oil in a large pot over medium heat. Add the diced onion and sauté for about 5 minutes, until the onion becomes translucent. Stir in the minced garlic and cook for an additional minute until fragrant.
- Add the sweet potatoes and peppers: Incorporate the diced sweet potatoes, red bell pepper, and yellow bell pepper into the pot. Stir well to combine with the onion and garlic, and cook for another 5 minutes, allowing the vegetables to soften slightly.
- Season the vegetables: Sprinkle the cumin, chili powder, smoked paprika, and cayenne pepper (if using) over the vegetables. Stir continuously for 1-2 minutes to toast the spices, which will enhance their flavors.
- Simmer the chili: Pour in the diced tomatoes, black beans, and vegetable broth. Stir to combine all the ingredients thoroughly. Bring the mixture to a gentle simmer, then reduce the heat to low. Cover the pot and let the chili cook for about 30-40 minutes, or until the sweet potatoes are tender.
- Add the corn: In the last 10 minutes of cooking, stir in the corn kernels. Season the chili with salt and pepper to taste.
- Finalize the dish: Once the sweet potatoes are fully cooked and the chili has thickened to your liking, remove from heat. Stir in the lime juice to add a fresh, zesty flavor.
- Serve: Ladle the chili into bowls and garnish with fresh cilantro before serving.
Extra Tips:
For an even richer flavor, consider making this chili a day ahead and allowing it to sit overnight in the refrigerator; the flavors will deepen and meld together beautifully.
You can also customize the spice level to suit your taste by adjusting the amount of chili powder and cayenne pepper. If you prefer a thicker chili, mash some of the sweet potatoes and beans against the side of the pot before serving.
For a creamier texture, try adding a dollop of sour cream or a sprinkle of shredded cheese on top when serving.
Classic Veggie Shepherd’s Pie

Classic Veggie Shepherd’s Pie is a delightful twist on the traditional meat-based dish, offering a comforting and hearty meal that’s perfect for vegetarians. This version of shepherd’s pie is packed with a variety of vegetables that provide a rich depth of flavor and texture, ensuring that every bite is as satisfying as the final one.
The dish is topped with creamy mashed potatoes, creating a warm and inviting meal that’s perfect for a family dinner or a cozy night in. The beauty of this Classic Veggie Shepherd’s Pie is its versatility; you can easily adjust the vegetables based on what’s in season or what you have on hand.
The base consists of a savory mix of vegetables simmered in a flavorful sauce, which is then topped with fluffy mashed potatoes and baked until golden brown. This recipe serves 4-6 people, making it ideal for gatherings or for preparing in advance and enjoying leftovers throughout the week.
Ingredients (Serves 4-6):
- 2 tablespoons olive oil
- 1 large onion, diced
- 3 cloves garlic, minced
- 2 carrots, diced
- 1 cup mushrooms, sliced
- 1 cup peas (fresh or frozen)
- 1 cup corn (fresh or frozen)
- 1 cup vegetable broth
- 2 tablespoons tomato paste
- 1 tablespoon soy sauce
- 1 teaspoon dried thyme
- 1 teaspoon dried rosemary
- Salt and pepper to taste
- 4 cups potatoes, peeled and cubed
- 1/2 cup milk (or plant-based milk)
- 1/4 cup butter (or plant-based butter)
- 1/4 cup grated cheese (optional)
- Fresh parsley for garnish (optional)
Cooking Instructions:
- Prepare the Potatoes: Begin by boiling the cubed potatoes in a large pot of salted water until they’re tender, about 15-20 minutes. Once cooked, drain the water and mash the potatoes with milk and butter until smooth and creamy. Set aside.
- Cook the Vegetables: While the potatoes are cooking, heat olive oil in a large skillet over medium heat. Add the diced onion and garlic, sautéing until the onion becomes translucent.
- Add Remaining Vegetables: Stir in the carrots and mushrooms, cooking for about 5 minutes until they begin to soften. Add the peas and corn, stirring to combine.
- Create the Sauce: Mix in the tomato paste, soy sauce, dried thyme, and rosemary. Pour in the vegetable broth and bring to a simmer. Allow the sauce to thicken slightly, about 5-7 minutes. Season with salt and pepper to taste.
- Assemble the Pie: Preheat your oven to 400°F (200°C). Transfer the vegetable mixture to a baking dish, spreading it evenly. Spoon the mashed potatoes over the top, smoothing with a spatula. If desired, sprinkle grated cheese over the potatoes for an extra layer of flavor.
- Bake the Pie: Place the baking dish in the preheated oven and bake for 20-25 minutes, or until the top is golden brown and slightly crispy.
- Garnish and Serve: Remove from the oven and let it cool slightly before serving. Garnish with fresh parsley if desired.
Extra Tips:
For additional flavor, try incorporating different herbs or adding a splash of red wine to the vegetable mixture for a richer sauce. If you prefer a spicier dish, consider adding a pinch of chili flakes.
To make the mashed potatoes even creamier, you can use a hand mixer instead of a masher. Finally, if you’re planning to make this dish ahead of time, prepare it up to the point of baking, cover, and refrigerate. When ready to serve, bake as directed, adding a few extra minutes if necessary to heat through.
Eggplant Parmesan Casserole

Eggplant Parmesan Casserole is a hearty and delicious vegetarian dish that brings comfort and satisfaction with every bite. This classic Italian-inspired recipe features layers of tender eggplant slices, savory marinara sauce, and creamy melted cheese, all baked to perfection. It’s a meal that warms the soul and makes for a perfect family dinner or potluck dish.
With its rich flavors and satisfying textures, Eggplant Parmesan Casserole is a go-to recipe for anyone looking for a meatless meal that doesn’t skimp on taste.
Preparing this casserole involves a few simple steps, but the end result is a dish that will impress even the most discerning palates. The eggplant is sliced and lightly breaded, adding a delightful crunch to the tender vegetable. Combined with a robust marinara sauce and a generous helping of cheese, this casserole is both comforting and indulgent.
Whether you’re a seasoned vegetarian or simply looking to incorporate more plant-based meals into your diet, this recipe is sure to become a favorite in your household.
Ingredients (Serves 4-6):
- 2 large eggplants
- 1 teaspoon salt
- 2 cups marinara sauce
- 2 cups shredded mozzarella cheese
- 1 cup grated Parmesan cheese
- 1 cup all-purpose flour
- 3 large eggs
- 2 cups breadcrumbs
- 1 teaspoon dried oregano
- 1 teaspoon garlic powder
- 1 teaspoon dried basil
- 1/2 teaspoon black pepper
- 1/4 cup olive oil
- Fresh basil leaves for garnish (optional)
Cooking Instructions:
- Prepare the Eggplant: Slice the eggplants into 1/4-inch thick rounds. Lay the slices on a baking sheet and sprinkle both sides with salt. Let them sit for 20-30 minutes to draw out excess moisture. Rinse the slices under cold water and pat them dry with paper towels.
- Set Up Breading Station: In three separate shallow bowls, place the flour in one, beaten eggs in another, and in the third bowl, combine breadcrumbs with oregano, garlic powder, dried basil, and black pepper.
- Bread the Eggplant Slices: Dredge each eggplant slice in flour, shaking off the excess. Next, dip it into the beaten eggs, then coat it thoroughly in the breadcrumb mixture. Repeat with all slices.
- Fry the Eggplant Slices: Heat olive oil in a large skillet over medium heat. Fry the breaded eggplant slices in batches until golden brown on both sides, about 3-4 minutes per side. Drain on paper towels to remove excess oil.
- Assemble the Casserole: Preheat the oven to 375°F (190°C). In a 9×13-inch baking dish, spread a thin layer of marinara sauce on the bottom. Arrange a layer of fried eggplant slices over the sauce, followed by a layer of mozzarella cheese and a sprinkle of Parmesan cheese. Repeat the layers until all ingredients are used, finishing with a layer of cheese on top.
- Bake the Casserole: Cover the dish with aluminum foil and bake in the preheated oven for 25 minutes. Remove the foil and bake for an additional 15-20 minutes, or until the cheese is bubbly and golden brown.
- Cool and Serve: Allow the casserole to cool for about 10 minutes before serving. Garnish with fresh basil leaves if desired.
Extra Tips: When selecting eggplants, choose ones that are firm to the touch and have smooth, shiny skin to guarantee the best texture and flavor.
Be sure to salt the eggplants before cooking to remove any bitterness and excess moisture, which helps the breading adhere better. For a lighter version, you can bake the breaded eggplant slices instead of frying them. Simply place them on a baking sheet lined with parchment paper and bake at 400°F (200°C) for about 15 minutes on each side until they’re crisp.
This dish also freezes well, so consider making a double batch to enjoy later!
Cheesy Broccoli and Quinoa Bake

Immerse yourself in a warm and comforting dish with our Cheesy Broccoli and Quinoa Bake. This vegetarian delight combines the nutty flavors of quinoa with the wholesome goodness of broccoli, all enveloped in a rich, cheesy sauce. Perfect for a family dinner or a potluck, this dish isn’t only delicious but also packed with nutrients.
The combination of textures and flavors makes every bite a satisfying experience, ensuring even the pickiest of eaters will ask for seconds.
The Cheesy Broccoli and Quinoa Bake is easy to prepare and can be made in under an hour, making it an excellent option for weeknight dinners. The creamy cheese sauce perfectly complements the tender broccoli and fluffy quinoa, creating a hearty dish that will keep you full and satisfied.
Whether you’re a seasoned vegetarian or just looking to add more meat-free meals to your diet, this recipe is sure to be a hit with everyone at the table.
Ingredients (Serves 4-6):
- 1 cup quinoa
- 2 cups water or vegetable broth
- 4 cups broccoli florets
- 2 tablespoons olive oil
- 1 small onion, finely chopped
- 2 cloves garlic, minced
- 3 tablespoons all-purpose flour
- 2 cups milk
- 2 cups shredded cheddar cheese
- 1/2 teaspoon salt
- 1/4 teaspoon black pepper
- 1/4 teaspoon paprika
- 1/4 cup grated Parmesan cheese
Cooking Instructions:
- Preheat and Prepare Quinoa: Preheat your oven to 375°F (190°C). Rinse the quinoa under cold water and drain. In a medium pot, bring the 2 cups of water or vegetable broth to a boil. Add the quinoa, reduce the heat to low, cover, and simmer for about 15 minutes or until the quinoa is cooked and the liquid has been absorbed. Fluff the quinoa with a fork and set aside.
- Cook the Broccoli: While the quinoa is cooking, steam or blanch the broccoli florets until they’re tender but still bright green, about 3-4 minutes. Drain and set aside.
- Make the Cheese Sauce: In a large saucepan, heat the olive oil over medium heat. Add the chopped onion and garlic, sautéing until the onion is translucent. Stir in the flour and cook for about 1 minute. Gradually whisk in the milk, ensuring there are no lumps. Continue to cook, stirring constantly, until the sauce thickens.
- Add Cheese and Seasoning: Remove the saucepan from heat and stir in the shredded cheddar cheese until it melts smoothly into the sauce. Season with salt, black pepper, and paprika.
- Assemble the Bake: In a large mixing bowl, combine the cooked quinoa, broccoli, and cheese sauce. Mix until the ingredients are evenly coated. Transfer the mixture to a lightly greased 9×13 inch baking dish.
- Bake the Dish: Sprinkle the grated Parmesan cheese over the top of the quinoa mixture. Bake in the preheated oven for 20-25 minutes, or until the top is golden and bubbly.
- Serve: Allow the dish to cool for a few minutes before serving. Enjoy this cheesy, comforting bake while it’s warm.
Extra Tips:
For a richer flavor, try using a mix of cheeses such as Gruyère or mozzarella alongside cheddar. You can also add a pinch of nutmeg to the cheese sauce for a subtle depth of flavor.
If you prefer a bit of crunch, sprinkle some breadcrumbs over the top of the bake before adding the Parmesan cheese. Additionally, this recipe is versatile, so feel free to add other veggies like mushrooms or bell peppers for extra nutrition and flavor.
Spicy Vegetable Curry With Coconut Milk

Spicy Vegetable Curry With Coconut Milk is a delightful vegetarian dish that blends the rich, creamy texture of coconut milk with an array of colorful vegetables and aromatic spices. This dish is perfect for those who enjoy a bit of heat in their meals, as it features a blend of spices that provide a warm, spicy kick.
It’s a great comfort food option for anyone looking to indulge in a healthy, satisfying meal that doesn’t compromise on flavor. This curry isn’t only nutritious but also incredibly versatile, allowing you to use whatever vegetables you have on hand. The coconut milk adds a luscious creaminess that balances the heat from the spices, making every bite a delightful experience.
It’s an excellent choice for dinner parties or family meals, as it can be easily prepared in large quantities. Serve it over steamed rice or with warm naan bread for a complete meal that will leave everyone satisfied.
Ingredients (serves 4-6):
- 2 tablespoons vegetable oil
- 1 large onion, diced
- 3 cloves garlic, minced
- 1 tablespoon fresh ginger, grated
- 1 teaspoon cumin seeds
- 1 teaspoon turmeric powder
- 1 teaspoon coriander powder
- 1 teaspoon garam masala
- 1/2 teaspoon red chili powder (adjust to taste)
- 2 medium carrots, sliced
- 1 red bell pepper, chopped
- 1 zucchini, sliced
- 1 cup cauliflower florets
- 1 can (14 oz) coconut milk
- 1 cup vegetable broth
- Salt, to taste
- Fresh cilantro, for garnish
Cooking Instructions:
- Prepare the Aromatics: Heat the vegetable oil in a large pot over medium heat. Add the diced onion and sauté until it becomes translucent, about 5 minutes. Stir in the minced garlic and grated ginger, cooking for another minute until fragrant.
- Toast the Spices: Add the cumin seeds, turmeric powder, coriander powder, garam masala, and red chili powder to the pot. Stir the spices continuously for about 1-2 minutes, allowing them to release their aromas and deepen in color, which enhances the flavor of the curry.
- Cook the Vegetables: Add the sliced carrots, chopped red bell pepper, sliced zucchini, and cauliflower florets to the pot. Stir well to coat the vegetables with the spices. Cook for about 5-7 minutes, stirring occasionally, until the vegetables begin to soften.
- Simmer the Curry: Pour in the coconut milk and vegetable broth. Stir to combine all the ingredients, ensuring the vegetables are submerged in the liquid. Bring the mixture to a gentle simmer. Cover the pot and let it cook for 15-20 minutes, or until the vegetables are tender and the flavors have melded together.
- Season and Serve: Once the vegetables are cooked, taste the curry and add salt as needed. Remove the pot from the heat and garnish with fresh cilantro. Serve hot with steamed rice or naan bread.
Extra Tips:
For a thicker curry, let the dish simmer uncovered for a few more minutes after the vegetables are tender. This will allow some of the liquid to evaporate and the sauce to thicken.
If you prefer a milder curry, reduce the amount of red chili powder or omit it altogether. Experiment with different vegetables based on what’s in season or available, such as sweet potatoes, green beans, or peas.
Finally, always taste and adjust the seasoning at the end to suit your personal preference.
Roasted Butternut Squash Soup
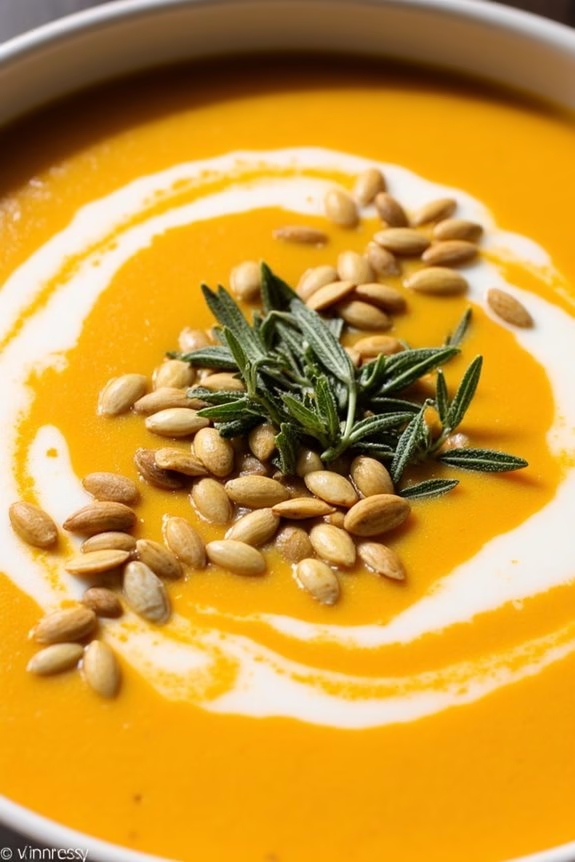
Roasted Butternut Squash Soup is a quintessential vegetarian comfort food that warms the soul and delights the palate. Its creamy texture and rich flavors make it a perfect dish for chilly days or when you need a little pick-me-up. This soup isn’t only delicious but also packed with nutrients, making it a hearty yet healthy meal option. The roasting process enhances the natural sweetness of the butternut squash, creating a depth of flavor that’s both satisfying and nourishing.
This recipe is easy to follow and can be made in under an hour, making it ideal for a quick weeknight dinner or a leisurely weekend lunch. The combination of butternut squash, aromatic herbs, and a hint of spice creates a soup that’s both comforting and invigorating. Whether you’re a seasoned chef or a beginner in the kitchen, this Roasted Butternut Squash Soup recipe is certain to become a staple in your kitchen repertoire.
Ingredients (Serves 4-6):
- 1 large butternut squash (about 2-3 pounds), peeled and cubed
- 2 tablespoons olive oil
- Salt and pepper, to taste
- 1 large onion, chopped
- 2 cloves garlic, minced
- 1 teaspoon ground cinnamon
- 1/2 teaspoon ground nutmeg
- 4 cups vegetable broth
- 1 cup coconut milk
- Optional garnish: fresh thyme, pumpkin seeds, or a drizzle of olive oil
Instructions:
- Preheat the Oven: Start by preheating your oven to 400°F (200°C).
- Prepare the Squash: Place the cubed butternut squash on a baking sheet. Drizzle with 1 tablespoon of olive oil and season with salt and pepper. Toss to coat evenly.
- Roast the Squash: Roast the squash in the preheated oven for about 25-30 minutes, or until it’s tender and lightly caramelized. Stir halfway through to guarantee even roasting.
- Sauté Aromatics: In a large pot, heat the remaining tablespoon of olive oil over medium heat. Add the chopped onion and garlic, sautéing until the onion becomes translucent and fragrant, about 5 minutes.
- Add Spices: Stir in the ground cinnamon and nutmeg, cooking for an additional minute to release the spices’ aroma.
- Combine Ingredients: Add the roasted butternut squash to the pot, followed by the vegetable broth. Stir to combine and bring the mixture to a gentle simmer.
- Simmer the Soup: Allow the soup to simmer for about 10-15 minutes to let the flavors meld together.
- Blend the Soup: Using an immersion blender, blend the soup until smooth and creamy. Alternatively, you can transfer the soup in batches to a countertop blender.
- Incorporate Coconut Milk: Stir in the coconut milk and adjust seasoning with additional salt and pepper if needed. Heat through without bringing it to a boil.
- Serve and Garnish: Ladle the soup into bowls and garnish with fresh thyme, pumpkin seeds, or a drizzle of olive oil if desired.
Extra Tips:
When preparing Roasted Butternut Squash Soup, choosing a ripe squash is key to enhancing the soup’s natural sweetness. Look for squash with a solid color and a matte finish, avoiding any with soft spots or shiny skin.
To save time, pre-cut butternut squash available at most grocery stores can be a convenient option. If you prefer a thicker consistency, reduce the amount of broth slightly or simmer the soup longer to allow it to reduce.
For an added layer of flavor, try roasting the butternut squash with a hint of maple syrup or a sprinkle of cayenne pepper for a sweet and spicy kick.
Spinach and Ricotta Stuffed Shells

Spinach and Ricotta Stuffed Shells are a delightful vegetarian dish that combines the creamy texture of ricotta cheese with the earthy flavors of spinach, all enveloped within tender pasta shells. This comforting recipe is perfect for family dinners or gatherings with friends, offering a satisfying and flavorful experience that will please both vegetarians and non-vegetarians alike.
The rich, cheesy filling is perfectly balanced by a tangy tomato sauce, making each bite a harmonious blend of taste and texture. This dish isn’t only delicious but also visually appealing, making it a great centerpiece for your dining table. The preparation is straightforward, involving a simple filling, a flavorful sauce, and a short baking time to achieve a bubbly, golden finish.
Whether you’re looking to impress your guests or simply enjoy a cozy meal at home, Spinach and Ricotta Stuffed Shells are certain to become a favorite in your culinary repertoire.
Ingredients (Serves 4-6):
- 20 jumbo pasta shells
- 2 cups ricotta cheese
- 1 cup mozzarella cheese, shredded
- 1/2 cup Parmesan cheese, grated
- 1 large egg
- 2 cups fresh spinach, chopped
- 2 cloves garlic, minced
- 1/4 teaspoon nutmeg
- 1/4 teaspoon salt
- 1/4 teaspoon black pepper
- 3 cups marinara sauce
- 1 tablespoon olive oil
- 1 tablespoon fresh basil, chopped
Cooking Instructions:
- Preheat and Prepare: Preheat your oven to 375°F (190°C). Cook the jumbo pasta shells according to package instructions until al dente. Drain, rinse with cold water to stop cooking, and set aside.
- Make the Filling: In a large mixing bowl, combine the ricotta cheese, 1/2 cup mozzarella cheese, 1/4 cup Parmesan cheese, egg, chopped spinach, minced garlic, nutmeg, salt, and black pepper. Mix until well combined.
- Stuff the Shells: Carefully fill each cooked pasta shell with about 2 tablespoons of the ricotta-spinach mixture. Ascertain each shell is generously filled but not overstuffed to prevent tearing.
- Prepare the Baking Dish: In a 9×13 inch baking dish, spread 1 cup of marinara sauce evenly across the bottom. Arrange the stuffed shells in the dish, open side up, in a single layer.
- Add Sauce and Cheese: Pour the remaining marinara sauce over the shells, ensuring each shell is covered. Sprinkle the remaining mozzarella and Parmesan cheese evenly over the top.
- Bake: Cover the dish with aluminum foil and bake in the preheated oven for 25 minutes. Remove the foil and bake for an additional 10-15 minutes, or until the cheese is bubbly and golden brown.
- Garnish and Serve: Remove from the oven and let cool for a few minutes. Sprinkle with fresh basil before serving.
Extra Tips:
For an extra boost of flavor, consider adding a pinch of red chili flakes to the ricotta mixture if you enjoy a bit of heat. Make sure the spinach is well-drained to prevent excess moisture in the filling, which could make the shells soggy.
If you prefer, you can use frozen spinach—just thaw and squeeze out any excess water before adding it to the ricotta mixture. This dish pairs beautifully with a crisp green salad and some crusty garlic bread, rounding out a perfect comfort meal.
Rustic Tomato Basil Soup

Rustic Tomato Basil Soup is a delightful and comforting dish that brings warmth and flavor to any meal. Ideal for a cool autumn evening or a rainy day, this soup combines the vibrant taste of ripe tomatoes with the aromatic essence of fresh basil. The velvety texture of the soup is achieved by blending the ingredients to perfection, resulting in a smooth yet hearty consistency. This vegetarian treat isn’t only simple to prepare but also rich in nutrients, making it a healthy option for anyone looking to enjoy a classic comfort food.
With its deep colors and robust flavors, Rustic Tomato Basil Soup is a versatile dish that can be served as an appetizer or a main course. Pair it with a crusty loaf of bread or a grilled cheese sandwich for a complete and satisfying meal. This recipe is designed to serve 4-6 people, ensuring there’s plenty to go around. The fresh ingredients and easy preparation make it a go-to recipe for both novice and experienced cooks alike.
Ingredients for 4-6 servings:
- 2 tablespoons olive oil
- 1 medium onion, chopped
- 3 cloves garlic, minced
- 2 cans (28 ounces each) of whole peeled tomatoes
- 2 cups vegetable broth
- 1 tablespoon sugar
- 1 teaspoon salt
- 1/2 teaspoon black pepper
- 1 cup fresh basil leaves, roughly chopped
- 1/4 cup heavy cream or coconut cream (optional)
- Fresh basil leaves for garnish
Instructions:
- Prepare the Ingredients: Begin by chopping the onion and mincing the garlic. Roughly chop the fresh basil leaves and set them aside. Open the cans of tomatoes and have the vegetable broth ready.
- Sauté the Aromatics: In a large pot, heat the olive oil over medium heat. Add the chopped onion and sauté for about 5 minutes or until the onion becomes translucent. Stir in the minced garlic and cook for an additional minute, taking care not to let it brown.
- Add Tomatoes and Broth: Pour in the whole peeled tomatoes along with their juices and break them down with a spoon. Add the vegetable broth, sugar, salt, and black pepper. Stir to combine all the ingredients.
- Simmer the Soup: Bring the mixture to a gentle boil, then reduce the heat to low. Simmer uncovered for 25-30 minutes, allowing the flavors to meld and the soup to thicken slightly.
- Blend the Soup: Remove the pot from the heat and let it cool slightly. Using an immersion blender, puree the soup until smooth. If you prefer a chunkier texture, you can blend just half of the soup. Alternatively, you can carefully transfer the soup in batches to a countertop blender.
- Add Fresh Basil and Cream: Return the pot to low heat and stir in the chopped basil leaves. If desired, add the heavy cream or coconut cream for a richer texture. Allow the soup to warm through but don’t let it boil.
- Serve and Garnish: Ladle the soup into bowls and garnish with additional fresh basil leaves. Serve hot with your choice of bread or a sandwich.
Extra Tips:
For a deeper flavor, consider roasting the tomatoes before adding them to the soup. Simply place them on a baking sheet, drizzle with olive oil, and roast at 400°F (200°C) for 20-25 minutes. This step adds a caramelized sweetness to the tomatoes.
If you prefer a spicier kick, add a pinch of red pepper flakes during the sautéing step. Remember to adjust the seasoning to your taste, as the flavor can vary depending on the tomatoes used.
Whether creamy or chunky, this Rustic Tomato Basil Soup is sure to be a comforting favorite in your recipe collection.
Cauliflower and Chickpea Tikka Masala

Cauliflower and Chickpea Tikka Masala is the perfect vegetarian comfort food dish that combines the rich and aromatic flavors of traditional Indian cuisine with the wholesome ingredients of cauliflower and chickpeas. This dish isn’t only delicious but also satisfying, providing a hearty and healthy meal that can be enjoyed by everyone, regardless of dietary preferences.
The creamy, spiced tomato sauce envelops tender cauliflower florets and protein-packed chickpeas, making it an excellent choice for a cozy family dinner or a warming meal on a chilly evening.
The beauty of Cauliflower and Chickpea Tikka Masala lies in its versatility and depth of flavor. The spices used in this dish, such as cumin, coriander, and garam masala, create a robust taste that’s both warming and invigorating. The coconut milk adds a creamy texture that balances the heat, while the fresh cilantro brightens up the dish with its zesty notes.
Whether you’re a seasoned vegetarian or simply looking to incorporate more plant-based meals into your diet, this recipe is a must-try.
Ingredients (Serves 4-6):
- 1 large head of cauliflower, cut into florets
- 2 tablespoons vegetable oil
- 1 large onion, finely chopped
- 3 cloves garlic, minced
- 1 tablespoon fresh ginger, grated
- 2 teaspoons ground cumin
- 2 teaspoons ground coriander
- 1 teaspoon turmeric
- 1 teaspoon paprika
- 1 teaspoon garam masala
- 1 can (14 oz) crushed tomatoes
- 1 can (14 oz) coconut milk
- 1 can (15 oz) chickpeas, drained and rinsed
- Salt and pepper to taste
- 1 tablespoon lemon juice
- Fresh cilantro for garnish
Cooking Instructions:
- Prepare the Cauliflower: Preheat your oven to 400°F (200°C). Spread the cauliflower florets on a baking sheet and drizzle with 1 tablespoon of vegetable oil. Season with salt and pepper, then roast in the oven for 20-25 minutes until golden and tender.
- Sauté the Aromatics: In a large pot or Dutch oven, heat the remaining 1 tablespoon of vegetable oil over medium heat. Add the chopped onion and sauté for about 5 minutes until translucent. Stir in the garlic and ginger, cooking for an additional 1-2 minutes until fragrant.
- Add Spices: Mix in the ground cumin, coriander, turmeric, paprika, and garam masala to the pot. Stir for about 1 minute to toast the spices and release their flavors.
- Incorporate Tomatoes and Coconut Milk: Pour in the crushed tomatoes and coconut milk, stirring to combine. Bring the mixture to a gentle simmer over medium heat.
- Simmer with Chickpeas: Add the roasted cauliflower and chickpeas to the pot. Stir well and reduce the heat to low. Allow the tikka masala to simmer for about 15-20 minutes, letting the flavors meld and the sauce thicken.
- Finish with Lemon and Cilantro: Stir in the lemon juice and adjust seasoning with salt and pepper as needed. Garnish with fresh cilantro before serving.
Extra Tips:
For an extra layer of flavor, consider marinating the cauliflower in a mixture of yogurt, turmeric, and a pinch of salt before roasting. This can enhance the taste and give the cauliflower a slight tang.
If you prefer a thicker sauce, you can simmer the tikka masala for a longer period with the lid off, allowing excess liquid to evaporate. Additionally, this dish pairs beautifully with basmati rice or warm naan bread, which can help soak up the delicious sauce.
Finally, feel free to experiment with the level of heat by adjusting the amount of paprika or adding a pinch of cayenne pepper for a spicier kick.
Warm French Onion Soup With Gruyère

Warm French Onion Soup With Gruyère is a classic comfort food that combines the rich and savory flavors of caramelized onions with the creamy, nutty taste of Gruyère cheese. This vegetarian version of the beloved French onion soup is a perfect dish for cold days, providing warmth and satisfaction with every spoonful. It’s a hearty meal that can be enjoyed as a main course or served as a starter to a grander dinner.
This recipe is designed to serve 4-6 people and is made with simple, wholesome ingredients that come together to create a delightful symphony of flavors. The onions are slowly caramelized to develop their natural sweetness, which is then balanced by the savory notes of vegetable broth and the subtle tang of white wine. Topped with a slice of crusty bread and melted Gruyère cheese, this soup is sure to be a hit at your table.
Ingredients:
- 4 large yellow onions, thinly sliced
- 2 tablespoons unsalted butter
- 1 tablespoon olive oil
- 4 cups vegetable broth
- 1 cup dry white wine
- 1 bay leaf
- Salt and freshly ground black pepper, to taste
- 1 teaspoon sugar (optional, to enhance sweetness)
- 6 slices of crusty French baguette
- 1 ½ cups grated Gruyère cheese
Instructions:
- Caramelize the Onions: In a large pot, heat the butter and olive oil over medium heat. Add the sliced onions and stir to coat them in the butter and oil. Cook the onions slowly, stirring frequently, for about 30-40 minutes until they’re deeply caramelized and golden brown. If desired, add the sugar to enhance their sweetness.
- Deglaze the Pot: Pour in the white wine to deglaze the pot, scraping up any bits stuck to the bottom. Let the wine simmer until it reduces by half, which will take about 5 minutes.
- Add Broth and Seasonings: Stir in the vegetable broth and add the bay leaf. Bring the mixture to a simmer and let it cook for another 15-20 minutes to allow the flavors to meld. Season with salt and pepper to taste, then remove the bay leaf.
- Prepare the Bread: While the soup is simmering, preheat your oven to 350°F (175°C). Arrange the baguette slices on a baking sheet and toast them in the oven until they’re lightly golden, about 5 minutes. Remove from the oven and set aside.
- Assemble and Broil: Preheat your broiler on high. Ladle the soup into oven-safe bowls, placing a slice of toasted baguette on top of each bowl. Generously sprinkle the grated Gruyère cheese over the bread. Place the bowls under the broiler until the cheese is melted, bubbly, and beginning to brown, about 3-5 minutes.
- Serve: Carefully remove the bowls from the oven (they will be hot!) and serve the soup immediately. Enjoy the rich, comforting flavors with a side of extra bread if desired.
Extra Tips:
When caramelizing the onions, patience is key. Don’t rush this process as the slow cooking develops the rich flavor essential to a good French onion soup. If you notice the onions sticking to the pot, you can add a splash of water to help loosen them.
For an extra depth of flavor, try adding a splash of balsamic vinegar after caramelizing the onions. Also, for a different twist, you can experiment with different types of cheese, such as Emmental or Comté, which also melt beautifully.