

The holiday season is all about gathering with loved ones and sharing delicious meals, right?
But for those of us who want to keep things gluten-free, it can sometimes feel like a challenge to find recipes that everyone will love.
This year, let’s make sure our Christmas potluck is filled with festive dishes that are as inclusive as they are tasty.
From savory spinach and cheese stuffed mushrooms to zesty lemon and garlic baked chicken wings, these recipes are sure to please every guest.
Get ready to make this holiday meal memorable and, most importantly, delicious for everyone!
Savory Spinach and Cheese Stuffed Mushrooms

Savory Spinach and Cheese Stuffed Mushrooms are the perfect addition to your gluten-free Christmas potluck. These bite-sized delights aren’t only delicious but also easy to make and certain to impress your family and friends. With a creamy cheese filling, infused with fresh spinach and herbs, these stuffed mushrooms offer a flavorful experience that everyone will enjoy, regardless of dietary restrictions. They make for an excellent appetizer or side dish, adding a touch of elegance to your holiday spread.
Stuffed mushrooms are a versatile dish that can be customized to your liking. For this gluten-free version, we’ll use cream cheese, parmesan, and mozzarella to create a rich and tangy filling. Fresh spinach gives the filling a vibrant color and freshness, while a hint of garlic and herbs brings the flavors together. Whether you’re hosting a party or attending one, these Savory Spinach and Cheese Stuffed Mushrooms are certain to be a hit.
Ingredients (Serves 4-6):
- 24 large white or cremini mushrooms
- 2 tablespoons olive oil
- 1 cup fresh spinach, finely chopped
- 4 ounces cream cheese, softened
- 1/2 cup grated parmesan cheese
- 1/2 cup shredded mozzarella cheese
- 2 cloves garlic, minced
- 1 tablespoon fresh parsley, chopped
- 1/2 teaspoon dried thyme
- Salt and pepper to taste
Cooking Instructions:
- Prepare the Mushrooms: Preheat your oven to 375°F (190°C). Clean the mushrooms gently with a damp paper towel and remove the stems. Set the mushroom caps aside and finely chop the stems.
- Cook the Spinach: In a large skillet, heat the olive oil over medium heat. Add the chopped mushroom stems and garlic, sautéing for about 2-3 minutes until the stems are soft. Stir in the chopped spinach and cook until wilted, about 2 minutes. Remove from heat and let cool slightly.
- Make the Filling: In a mixing bowl, combine the cooked spinach mixture with cream cheese, parmesan cheese, mozzarella cheese, parsley, thyme, salt, and pepper. Mix well until all ingredients are evenly incorporated.
- Stuff the Mushrooms: Using a teaspoon, fill each mushroom cap with the cheese and spinach mixture, pressing it down gently to guarantee it stays in place.
- Bake the Mushrooms: Place the stuffed mushrooms on a baking sheet lined with parchment paper. Bake in the preheated oven for 20-25 minutes, or until the mushrooms are tender and the cheese filling is golden brown on top.
- Serve: Remove from the oven and allow them to cool slightly before serving. Garnish with additional parsley if desired.
Extra Tips:
To enhance the flavor of these stuffed mushrooms, consider adding a pinch of red pepper flakes to the filling for a bit of heat. If you’re preparing these ahead of time, stuff the mushrooms and refrigerate them until you’re ready to bake. This dish can be easily doubled or tripled for larger gatherings.
Additionally, feel free to experiment with different cheese combinations or add some gluten-free breadcrumbs on top for extra crunch. Enjoy the process, and your guests will surely appreciate your culinary efforts!
Cranberry and Walnut Quinoa Salad
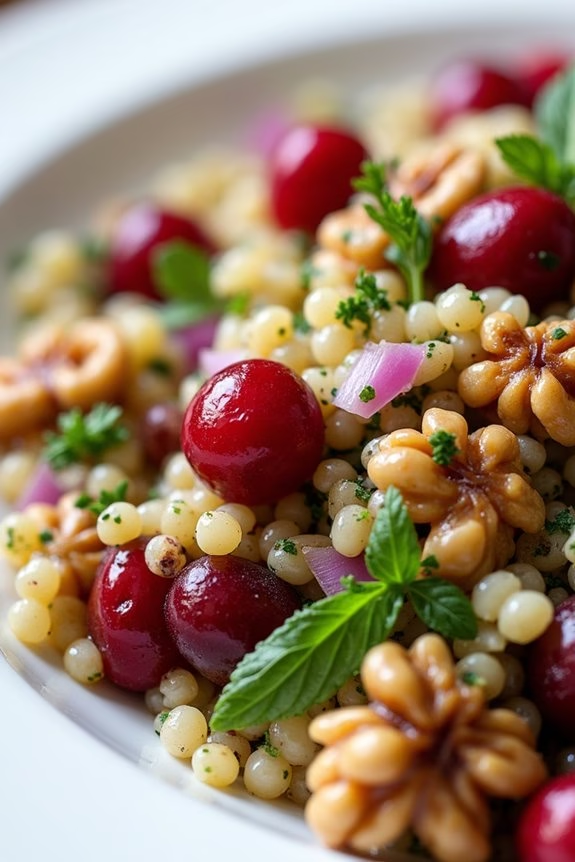
If you’re looking for a festive dish that fits perfectly into a gluten-free Christmas potluck, this Cranberry and Walnut Quinoa Salad is an excellent choice.
It’s a vibrant salad that brings a burst of flavors and textures to the table, combining the nutty taste of quinoa with the sweet-tartness of cranberries and the crunch of walnuts. This salad isn’t only delicious but also packed with nutrients, making it a healthy addition to your holiday feast.
Perfect for serving a group of 4-6 people, this salad is easy to prepare and can be made ahead of time, giving you one less thing to worry about on the big day.
The combination of fresh herbs, citrus, and a simple dressing ties the ingredients together, creating a harmonious blend that will have your guests coming back for seconds. Whether you’re hosting or just bringing a dish to share, this Cranberry and Walnut Quinoa Salad is sure to be a hit.
Ingredients (serving size: 4-6 people):
- 1 cup quinoa
- 2 cups water
- 1/2 cup dried cranberries
- 1/2 cup walnuts, chopped
- 1/4 cup fresh parsley, chopped
- 1/4 cup fresh mint, chopped
- 1/4 cup red onion, finely chopped
- 1/4 cup olive oil
- 2 tablespoons fresh lemon juice
- 1 tablespoon apple cider vinegar
- Salt and pepper to taste
Cooking Instructions:
- Cook the Quinoa: Rinse the quinoa under cold water to remove any bitterness. In a medium saucepan, combine the quinoa and water. Bring to a boil over medium-high heat, then reduce to a simmer, cover, and cook for about 15 minutes until the water is absorbed and the quinoa is fluffy. Remove from heat and let it cool.
- Prepare the Dressing: In a small bowl, whisk together the olive oil, fresh lemon juice, apple cider vinegar, salt, and pepper. Adjust seasoning to taste. Set aside.
- Combine Ingredients: In a large mixing bowl, combine the cooked quinoa, dried cranberries, chopped walnuts, parsley, mint, and red onion. Mix well to guarantee all ingredients are evenly distributed.
- Dress the Salad: Pour the dressing over the quinoa mixture. Toss gently until the salad is well coated with the dressing.
- Chill and Serve: For best results, chill the salad in the refrigerator for at least 30 minutes before serving to allow the flavors to meld. Serve cold or at room temperature.
Extra Tips:
For an extra layer of flavor, consider toasting the walnuts lightly in a dry skillet over medium heat before adding them to the salad. This will enhance their nutty aroma and add additional crunch.
If you prefer a sweeter salad, you can soak the dried cranberries in warm water or orange juice for 10 minutes before adding them to the mix, which will plump them up and add a juicy burst to each bite.
Finally, feel free to customize the herbs based on your preference; cilantro or basil can also be excellent choices to complement the fresh flavors of this dish.
Herb-Infused Roasted Vegetable Medley

A delightful addition to any gluten-free Christmas potluck is the Herb-Infused Roasted Vegetable Medley. Bursting with color and flavor, this dish combines a variety of seasonal vegetables with a medley of fresh herbs, creating a side dish that’s as visually appealing as it’s delicious.
The roasting process brings out the natural sweetness of the vegetables while the herbs infuse them with an aromatic depth, making it a perfect accompaniment to any holiday spread. Ideal for serving 4-6 people, this dish can be easily scaled up for larger gatherings.
Selecting a vibrant mixture of vegetables not only adds to the dish’s aesthetic appeal but also guarantees a range of textures and flavors. This recipe is straightforward, allowing even novice cooks to create a dish that will surely impress guests with its simplicity and taste.
Ingredients:
- 2 medium carrots, peeled and sliced
- 1 red bell pepper, chopped
- 1 yellow bell pepper, chopped
- 1 zucchini, sliced
- 1 red onion, cut into wedges
- 1 cup cherry tomatoes
- 2 tablespoons olive oil
- 1 teaspoon salt
- 1/2 teaspoon black pepper
- 1 tablespoon fresh rosemary, chopped
- 1 tablespoon fresh thyme, leaves only
- 1 tablespoon fresh parsley, chopped
- 3 cloves garlic, minced
Instructions:
- Preheat the oven: Begin by preheating your oven to 425°F (220°C). This guarantees that your vegetables will roast evenly and develop a nice caramelized surface.
- Prepare the vegetables: Wash and prepare all the vegetables as indicated in the ingredients list. Confirm that they’re cut into similar sizes to promote even cooking.
- Combine ingredients: In a large mixing bowl, combine the carrots, bell peppers, zucchini, red onion, and cherry tomatoes. Drizzle the olive oil over the vegetables and sprinkle with salt, black pepper, rosemary, thyme, parsley, and minced garlic. Toss everything together until the vegetables are well-coated with oil and seasonings.
- Arrange on baking sheet: Spread the seasoned vegetables in a single layer on a large baking sheet. Avoid overcrowding the pan, which can lead to steaming rather than roasting.
- Roast the vegetables: Place the baking sheet in the preheated oven and roast for 25-30 minutes. Check halfway through and give them a stir to guarantee even cooking. The vegetables should be tender and slightly charred on the edges when done.
- Serve: Once roasted to perfection, transfer the vegetable medley to a serving platter. Garnish with additional fresh parsley for a burst of color and freshness.
Extra Tips:
For an added layer of flavor, consider including other seasonal vegetables like Brussels sprouts or butternut squash. You can also sprinkle some grated Parmesan cheese over the vegetables five minutes before they’re done roasting for a delightful cheesy crust.
If fresh herbs aren’t available, dried herbs can be used, but remember to reduce the quantity by half as dried herbs are more potent. Finally, roasting times may vary slightly depending on your oven and the size of the vegetable pieces, so keep an eye on them to prevent burning.
Zesty Lemon and Garlic Baked Chicken Wings
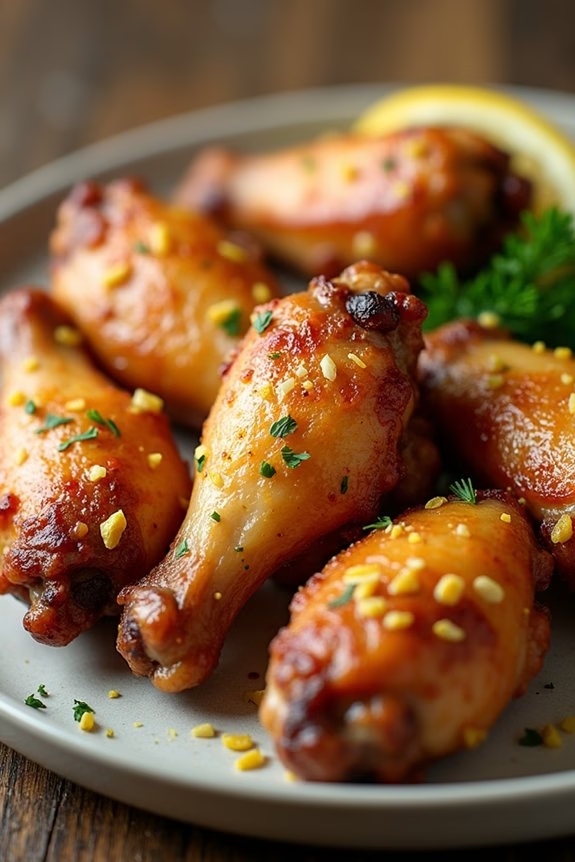
Zesty Lemon and Garlic Baked Chicken Wings are the perfect addition to your gluten-free Christmas potluck menu. These wings are marinated in a revitalizing blend of lemon juice, garlic, and a hint of spice, then baked to crispy perfection. Not only are they packed with flavor, but they’re also simple to prepare, making them an ideal dish to bring to any festive gathering.
The combination of zesty citrus and aromatic garlic guarantees these wings will be a hit with your guests, offering a delightful contrast to the typically heavier holiday fare. This recipe is designed to serve 4-6 people, making it a great choice for sharing. The wings are best served hot and can be easily paired with a variety of dips or side dishes to complement their bold flavors.
Whether you’re hosting or attending a potluck, these Zesty Lemon and Garlic Baked Chicken Wings are sure to impress and satisfy. Prepare to receive compliments on this gluten-free delight that showcases both taste and convenience.
Ingredients:
- 2 pounds of chicken wings
- 1/4 cup freshly squeezed lemon juice
- 2 tablespoons olive oil
- 4 cloves garlic, minced
- 1 tablespoon lemon zest
- 1 teaspoon salt
- 1/2 teaspoon black pepper
- 1/2 teaspoon paprika
- 1/4 teaspoon cayenne pepper
- Fresh parsley, chopped (for garnish)
Cooking Instructions:
- Prepare the Marinade: In a large mixing bowl, combine the lemon juice, olive oil, minced garlic, lemon zest, salt, black pepper, paprika, and cayenne pepper. Whisk everything together until well combined.
- Marinate the Wings: Add the chicken wings to the bowl, making certain each wing is well coated with the marinade. Cover the bowl with plastic wrap or transfer the wings and marinade to a resealable plastic bag. Refrigerate for at least 2 hours, or overnight for a more intense flavor.
- Preheat the Oven: When ready to cook, preheat your oven to 400°F (200°C). Line a baking sheet with aluminum foil and place a wire rack on top. This will allow the wings to cook evenly and become crispy.
- Arrange the Wings: Remove the wings from the marinade and arrange them in a single layer on the prepared wire rack. Discard any leftover marinade.
- Bake the Wings: Place the baking sheet in the preheated oven and bake for 40-45 minutes, turning the wings halfway through cooking. The wings should be golden brown and cooked through, with an internal temperature of 165°F (74°C).
- Garnish and Serve: Once cooked, remove the wings from the oven and let them rest for a few minutes. Transfer them to a serving platter and garnish with freshly chopped parsley before serving.
Extra Tips:
For the best results, make sure to pat the chicken wings dry with paper towels before marinating. This helps the marinade adhere better and results in a crisper skin. If you prefer less spice, feel free to adjust the cayenne pepper to your taste.
Additionally, these wings can be served with a side of your favorite gluten-free dipping sauce, such as ranch or blue cheese, to enhance their flavor profile. Remember, turning the wings halfway through baking ensures an even cook and maximizes their crispy texture. Enjoy your delicious gluten-free Zesty Lemon and Garlic Baked Chicken Wings!
Creamy Pumpkin and Sage Risotto
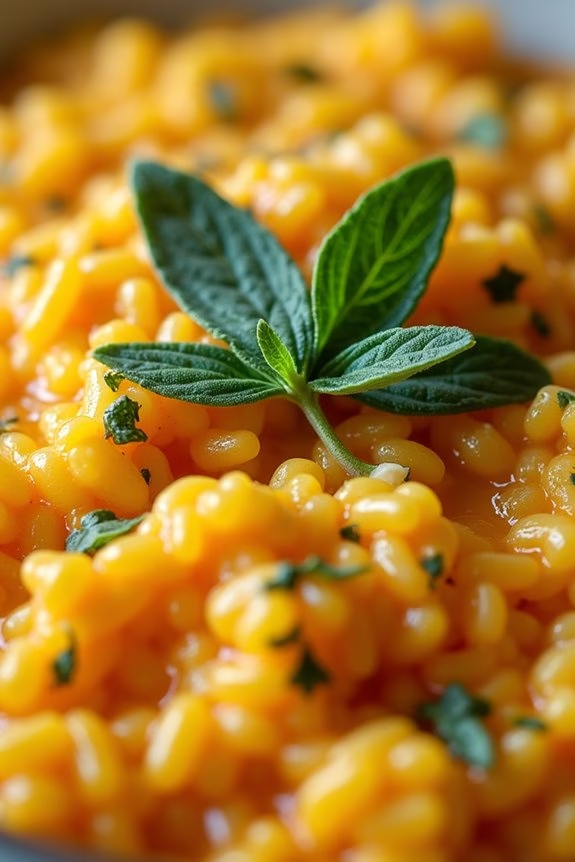
Bring a touch of warmth and comfort to your gluten-free Christmas potluck with this creamy pumpkin and sage risotto. This delightful dish combines the earthy, slightly sweet flavors of pumpkin with the aromatic notes of fresh sage, creating a luscious and hearty meal that’s bound to impress. The risotto’s creamy texture is achieved through the gradual addition of broth, allowing the rice to absorb the flavors and become deliciously tender.
Perfect for serving a group of 4-6 people, this risotto isn’t only gluten-free but also vegetarian, making it a versatile dish for various dietary preferences. With a few simple ingredients and a bit of patience, you can create a festive dish that will leave your guests craving for more. Whether as a main course or a side dish, this pumpkin and sage risotto will be a memorable addition to your holiday spread.
Ingredients:
- 2 tablespoons olive oil
- 1 small onion, finely chopped
- 2 cloves garlic, minced
- 1 cup Arborio rice
- 1 cup pumpkin puree
- 4 cups vegetable broth
- 1/2 cup white wine
- 1/2 cup grated Parmesan cheese
- 2 tablespoons butter
- 10 fresh sage leaves, chopped
- Salt and pepper to taste
- Optional: extra sage leaves for garnish
Instructions:
- Prepare the Ingredients: Begin by gathering all your ingredients and preparing them for cooking. Finely chop the onion and sage leaves, and mince the garlic. Confirm your pumpkin puree and vegetable broth are ready for use.
- Sauté the Aromatics: In a large saucepan or skillet, heat the olive oil over medium heat. Add the chopped onion and minced garlic, sautéing until the onion becomes translucent and the garlic is fragrant, about 3-4 minutes.
- Toast the Rice: Add the Arborio rice to the pan, stirring continuously for about 2 minutes until the rice is well-coated with oil and starts to toast slightly. This step enhances the nutty flavor of the rice.
- Deglaze with Wine: Pour in the white wine and stir constantly until the wine is mostly absorbed by the rice, adding a layer of complexity to the risotto.
- Add the Pumpkin and Broth Gradually: Stir in the pumpkin puree, followed by 1 cup of the vegetable broth. Cook over medium-low heat, stirring frequently until the liquid is absorbed. Continue adding the broth, 1 cup at a time, allowing the rice to absorb the liquid before adding more. This process should take about 18-20 minutes for the rice to become creamy and tender.
- Incorporate Sage and Cheese: Once the rice is cooked to your desired consistency, stir in the chopped sage, butter, and grated Parmesan cheese. Mix well until the butter and cheese have melted and the risotto is creamy.
- Season and Serve: Taste the risotto and season with salt and pepper as needed. Serve hot, garnished with extra sage leaves if desired.
Extra Tips:
For a perfectly creamy risotto, patience is key. Stirring often and adding the broth gradually guarantees that the rice releases its starches, creating a naturally creamy texture.
If you prefer a richer flavor, consider using chicken broth instead of vegetable broth. Additionally, for a vegan version, substitute the Parmesan with nutritional yeast and the butter with a plant-based alternative.
Remember that risotto is best served immediately, as it tends to thicken as it cools. If it becomes too thick, simply stir in a bit more warm broth to reach the desired consistency.
Sweet and Tangy Balsamic Glazed Brussels Sprouts
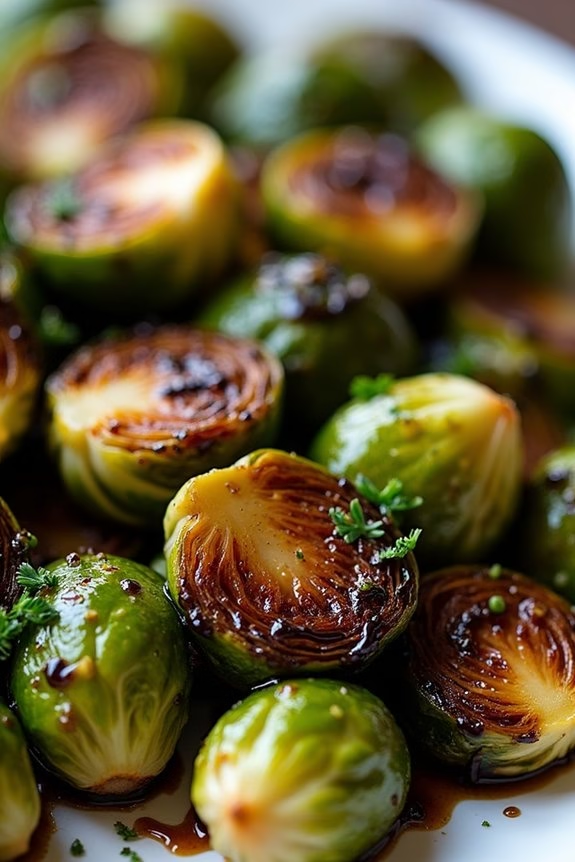
Sweet and Tangy Balsamic Glazed Brussels Sprouts are a delightful addition to any gluten-free Christmas potluck. These flavorful sprouts are roasted to perfection and then tossed in a sweet and tangy balsamic glaze that enhances their natural nuttiness. The dish isn’t only packed with flavor but is also a healthy option, making it a crowd-pleaser for those looking to enjoy the holiday season without undermining their dietary needs.
The combination of balsamic vinegar, honey, and Dijon mustard creates a luscious glaze that coats each Brussels sprout, giving them a glossy finish and a burst of flavor in every bite. Whether you’re a Brussels sprouts enthusiast or a skeptic, this recipe is bound to convert anyone into a fan. With its vibrant presentation and delicious taste, Sweet and Tangy Balsamic Glazed Brussels Sprouts will surely become a staple at your holiday gatherings.
Ingredients (Serves 4-6)
- 1 ½ pounds Brussels sprouts, trimmed and halved
- 2 tablespoons olive oil
- Salt and pepper to taste
- 1/3 cup balsamic vinegar
- 1 tablespoon honey
- 1 teaspoon Dijon mustard
- 2 cloves garlic, minced
- 2 tablespoons chopped fresh parsley (optional, for garnish)
Cooking Instructions
- Preheat the Oven: Begin by preheating your oven to 400°F (200°C). This temperature is ideal for roasting Brussels sprouts to achieve that perfect crispy exterior.
- Prepare the Brussels Sprouts: Rinse the Brussels sprouts under cold water, trim the ends, and remove any yellow or damaged leaves. Cut each sprout in half to guarantee even cooking.
- Season and Roast: Place the halved Brussels sprouts on a baking sheet. Drizzle them with olive oil, and sprinkle with salt and pepper. Toss them gently to guarantee they’re well-coated. Spread them out in a single layer for even roasting.
- Roast the Sprouts: Place the baking sheet in the preheated oven and roast for 20-25 minutes, or until the Brussels sprouts are tender and have a golden-brown color, shaking the pan halfway through to guarantee even cooking.
- Make the Glaze: While the Brussels sprouts are roasting, prepare the balsamic glaze. In a small saucepan over medium heat, combine the balsamic vinegar, honey, Dijon mustard, and minced garlic. Stir the mixture and let it simmer for about 5-7 minutes until it thickens slightly.
- Combine and Serve: Once the Brussels sprouts are done roasting, remove them from the oven and transfer them to a large bowl. Pour the balsamic glaze over the sprouts and toss them to coat evenly. Transfer the glazed Brussels sprouts to a serving dish and garnish with chopped fresh parsley if desired.
Extra Tips
For an extra depth of flavor, consider adding a sprinkle of red pepper flakes to the balsamic glaze for a bit of heat. If you prefer a sweeter glaze, you can increase the amount of honey to suit your taste.
Additionally, make sure not to overcrowd the baking sheet when roasting the Brussels sprouts, as this can cause them to steam instead of crisp up. Enjoy this dish warm, as the flavors are most pronounced when freshly made.
Decadent Chocolate Almond Flour Brownies

Decadent Chocolate Almond Flour Brownies are a delicious and indulgent treat perfect for any gluten-free Christmas potluck. These rich brownies are made with almond flour, which not only makes them gluten-free but also adds a delightful nutty flavor that complements the intense chocolate taste.
They’re moist, fudgy, and have a slightly crisp top, making them irresistible to both gluten-free and non-gluten-free guests alike. Whether you’re hosting a holiday gathering or looking to contribute a dessert that everyone can enjoy, these brownies are bound to be a hit.
The secret to their depth of flavor lies in using high-quality cocoa powder and dark chocolate, which together create a decadent chocolate experience. Additionally, using almond flour guarantees that the brownies remain soft and tender while adding a touch of nuttiness that elevates the entire dessert.
With just a few simple ingredients and an easy preparation process, these brownies are a breeze to make. Serve them warm with a scoop of vanilla ice cream or a dollop of whipped cream for an extra special touch.
Ingredients (serving size: 4-6 people):
- 1 cup almond flour
- 1/2 cup unsweetened cocoa powder
- 1/2 teaspoon baking powder
- 1/4 teaspoon salt
- 1/2 cup unsalted butter
- 1 cup granulated sugar
- 2 large eggs
- 1 teaspoon vanilla extract
- 1/2 cup dark chocolate chips
Cooking Instructions:
- Preheat the Oven: Begin by preheating your oven to 350°F (175°C). This will guarantee that the brownies bake evenly.
- Prepare the Baking Pan: Line an 8×8-inch baking pan with parchment paper, leaving some overhang on the sides to make it easy to lift the brownies out after baking.
- Mix Dry Ingredients: In a medium-sized bowl, whisk together the almond flour, cocoa powder, baking powder, and salt until well combined. This helps to evenly distribute the dry ingredients throughout the batter.
- Melt Butter and Chocolate: In a separate microwave-safe bowl, melt the butter. Stir in the granulated sugar until well combined. Let it cool slightly before adding the eggs and vanilla extract to prevent the eggs from cooking.
- Combine Wet and Dry Ingredients: Gradually add the dry ingredient mixture into the wet mixture, stirring until just combined. Be careful not to overmix, as this can result in tough brownies.
- Fold in Chocolate Chips: Gently fold in the dark chocolate chips, ensuring they’re evenly distributed throughout the batter.
- Pour into Pan and Bake: Pour the batter into the prepared baking pan, spreading it evenly with a spatula. Bake in the preheated oven for 25-30 minutes, or until a toothpick inserted in the center comes out with a few moist crumbs attached.
- Cool and Serve: Allow the brownies to cool in the pan for at least 10 minutes before using the parchment paper overhang to lift them out. Cut into squares and serve warm or at room temperature.
Extra Tips:
For an extra rich flavor, consider adding a teaspoon of espresso powder to the dry ingredients; it enhances the chocolate flavor without making the brownies taste like coffee.
If you’d like to add a nutty crunch, include a handful of chopped walnuts or pecans in the batter. Store any leftover brownies in an airtight container at room temperature for up to three days, or in the refrigerator for up to a week.
Classic Vanilla Bean Panna Cotta With Berry Compote
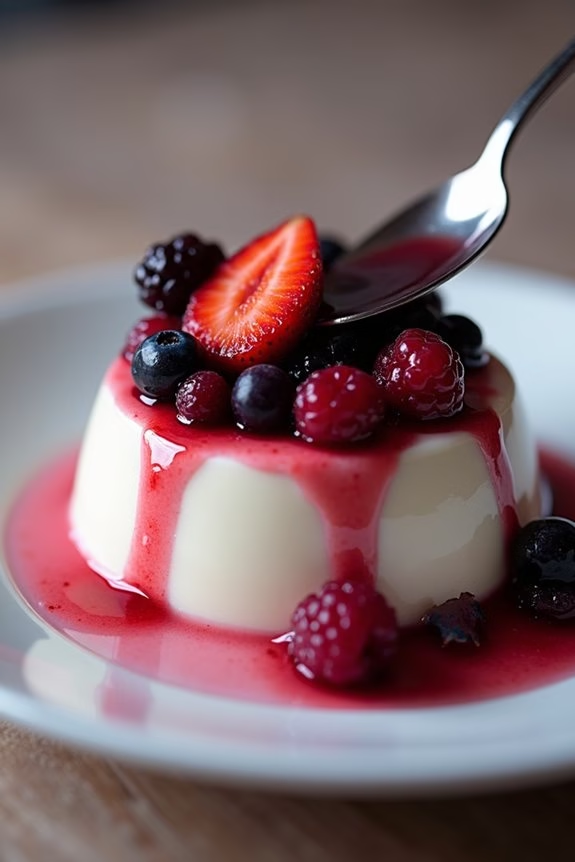
Classic Vanilla Bean Panna Cotta With Berry Compote is a delightful and elegant dessert perfect for a gluten-free Christmas potluck. This Italian classic is known for its creamy texture and rich vanilla flavor, making it a crowd-pleaser. The panna cotta is beautifully complemented by a vibrant berry compote, adding a touch of tartness and color to the dish.
Whether you’re hosting or attending a festive gathering, this dessert will surely impress your guests with its simplicity and sophistication. The beauty of this dish lies in its ease of preparation and the use of gluten-free ingredients, allowing everyone at the table to enjoy it without worry.
The panna cotta is made with fresh cream, sugar, and exquisitely fragrant vanilla beans, while the berry compote features a mix of your favorite berries, lightly sweetened and cooked to perfection. This recipe serves 4-6 people, making it an ideal choice for a small potluck or family gathering.
Ingredients:
- 2 cups heavy cream
- 1 cup whole milk
- 1/2 cup granulated sugar
- 1 vanilla bean, split and scraped (or 2 teaspoons pure vanilla extract)
- 2 1/2 teaspoons unflavored gelatin
- 3 tablespoons cold water
- 1 cup mixed berries (such as strawberries, blueberries, raspberries)
- 2 tablespoons granulated sugar (for compote)
- 1 tablespoon lemon juice
Cooking Instructions:
- Prepare the Gelatin: In a small bowl, sprinkle the gelatin over the cold water and let it sit for about 5 minutes to bloom. This will allow the gelatin to dissolve evenly when heated.
- Heat the Cream Mixture: In a saucepan over medium heat, combine the heavy cream, whole milk, and 1/2 cup of granulated sugar. Stir occasionally until the sugar is dissolved. Add the split vanilla bean and its seeds (or vanilla extract) into the mixture.
- Dissolve the Gelatin: Once the cream mixture is warm (but not boiling), remove from heat and add the bloomed gelatin. Stir gently until the gelatin is completely dissolved.
- Strain and Pour: Strain the mixture through a fine-mesh sieve into a large measuring cup or bowl to remove the vanilla bean pod and any undissolved gelatin. Pour the mixture evenly into 4-6 lightly greased ramekins or dessert cups.
- Chill the Panna Cotta: Cover the ramekins with plastic wrap and refrigerate for at least 4 hours or until set. The panna cotta should have a slight wobble when shaken.
- Make the Berry Compote: In a small saucepan, combine the mixed berries, 2 tablespoons of sugar, and lemon juice. Cook over medium heat, stirring occasionally, until the berries break down and the mixture thickens slightly, about 5-7 minutes. Remove from heat and let cool.
- Serve: Once the panna cotta is set, run a sharp knife around the edge of each ramekin and gently invert onto a serving plate. Spoon the berry compote over the top and serve immediately.
Extra Tips:
For the best flavor, use fresh, high-quality vanilla beans and ripe berries. If fresh berries aren’t available, frozen berries can be used for the compote; just make sure to adjust the cooking time as they may release more liquid.
When making the panna cotta, avoid boiling the cream mixture, as this can cause the gelatin to lose its setting properties. For a twist, consider adding a splash of your favorite liqueur to the panna cotta mixture or the berry compote for an extra depth of flavor.
Spiced Apple and Pear Crisp
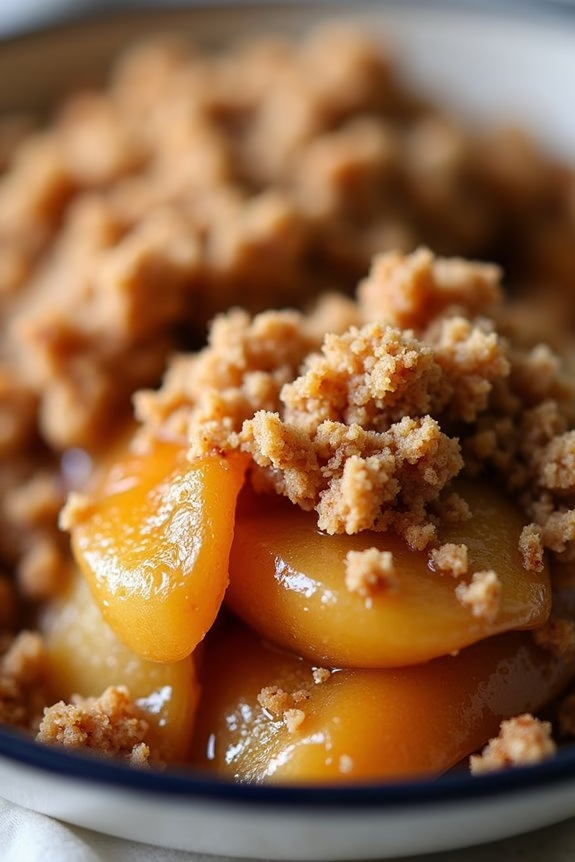
This recipe is designed to serve 4-6 people, making it ideal for small gatherings or as part of a larger spread. The spiced apple and pear mixture is sweetened with brown sugar and enhanced with cinnamon and nutmeg, giving it a cozy and festive aroma.
The topping, made with gluten-free oats and almond flour, adds a satisfying crunch that complements the tender fruit beneath. Whether served warm with a scoop of vanilla ice cream or at room temperature, this Spiced Apple and Pear Crisp is a must-try for any holiday celebration.
Ingredients:
- 3 medium apples, peeled, cored, and sliced
- 3 medium pears, peeled, cored, and sliced
- 1 tablespoon lemon juice
- 1/3 cup brown sugar
- 1 teaspoon ground cinnamon
- 1/4 teaspoon ground nutmeg
- 1 tablespoon cornstarch
- 1 cup gluten-free rolled oats
- 1/2 cup almond flour
- 1/3 cup brown sugar
- 1/4 teaspoon salt
- 1/2 cup unsalted butter, melted
Cooking Instructions:
- Preheat the Oven: Start by preheating your oven to 350°F (175°C). This will guarantee the crisp bakes evenly.
- Prepare the Fruit Filling: In a large mixing bowl, combine the sliced apples and pears with lemon juice, 1/3 cup brown sugar, cinnamon, nutmeg, and cornstarch. Toss everything together until the fruit is well-coated with the mixture.
- Assemble the Filling in a Baking Dish: Transfer the fruit mixture into a 9×13-inch baking dish, spreading it out evenly to create a uniform layer.
- Make the Oat Topping: In another bowl, mix together the gluten-free oats, almond flour, 1/3 cup brown sugar, and salt. Pour the melted butter over the oat mixture and stir until the ingredients are thoroughly combined and clumps form.
- Add the Topping: Evenly distribute the oat topping over the fruit filling in the baking dish. Make sure the fruit is completely covered to guarantee a crunchy topping.
- Bake the Crisp: Place the baking dish in the preheated oven and bake for 35-40 minutes, or until the topping is golden brown and the fruit is bubbly and tender.
- Cool Slightly Before Serving: Allow the crisp to cool for about 10 minutes before serving. This will help the juices set slightly and make serving easier.
Extra Tips:
For the best results, use a combination of firm apples and pears to maintain some texture after baking. Granny Smith apples and Bosc pears are excellent choices.
If you prefer a sweeter dessert, you can adjust the amount of sugar to taste. To make this dish dairy-free, substitute the butter with coconut oil or a vegan butter alternative.
Additionally, serving the crisp with a scoop of vanilla ice cream or a dollop of whipped cream can elevate the dessert to a truly indulgent experience.
Rich and Creamy Coquito (Puerto Rican Eggnog)

Coquito is a beloved Puerto Rican holiday drink, perfect for a gluten-free Christmas potluck. This rich and creamy beverage is often compared to eggnog but with a tropical twist. It’s made with a blend of coconut milk, rum, and warm spices, giving it a unique and addictive flavor.
The drink is traditionally served chilled and can be garnished with cinnamon sticks or a sprinkle of nutmeg for an extra festive touch. This gluten-free version of Coquito isn’t only delicious but also easy to prepare, making it an ideal choice for serving a crowd.
The recipe below serves 4-6 people and can be prepared in advance, allowing you to enjoy the holiday festivities without spending too much time in the kitchen. Whether you’re hosting a holiday party or attending a Christmas potluck, Coquito is sure to be a hit with its creamy texture and flavorful spices.
Ingredients:
- 1 can (13.5 oz) of coconut milk
- 1 can (14 oz) of sweetened condensed milk
- 1 can (12 oz) of evaporated milk
- 1 cup of white rum
- 1 teaspoon of vanilla extract
- 1 teaspoon of ground cinnamon
- 1/2 teaspoon of ground nutmeg
- 1/4 teaspoon of ground cloves
- Cinnamon sticks for garnish (optional)
Instructions:
- Combine Ingredients: In a blender, combine the coconut milk, sweetened condensed milk, and evaporated milk. Blend until the mixture is smooth and well combined.
- Add Rum and Flavorings: Pour in the white rum, vanilla extract, ground cinnamon, ground nutmeg, and ground cloves. Blend the mixture again until all the ingredients are thoroughly mixed.
- Chill the Coquito: Transfer the Coquito to a glass pitcher or a large jar with a lid. Place it in the refrigerator and allow it to chill for at least 2 hours. This chilling time allows the flavors to meld together beautifully.
- Serve: Before serving, give the Coquito a good stir to verify the spices are evenly distributed. Pour the chilled Coquito into small glasses and garnish each with a cinnamon stick, if desired.
- Store: If there are leftovers, store the Coquito in the refrigerator for up to one week. Shake well before serving again.
Extra Tips:
When making Coquito, feel free to adjust the amount of rum based on your preference. If you prefer a non-alcoholic version, simply omit the rum for a delicious creamy drink that can be enjoyed by everyone.
You can also experiment with coconut cream for an even richer texture. For a fun presentation, consider serving the Coquito in festive glasses rimmed with cinnamon sugar. Remember to shake or stir the Coquito well before serving, as the spices tend to settle at the bottom.