
The holiday season is just around the corner, and I’m already dreaming about the perfect vegetarian dishes for this year’s Christmas potluck. Last year’s Balsamic Roasted Brussels Sprouts with Cranberries were such a crowd-pleaser that I’m planning to bring those flavors to the table again. The beautiful colors and bold tastes are sure to make a lasting impression. Curious about what else to bring? I’ve got a list of mouthwatering recipes to share that are perfect for any festive gathering.
Balsamic Roasted Brussels Sprouts With Cranberries
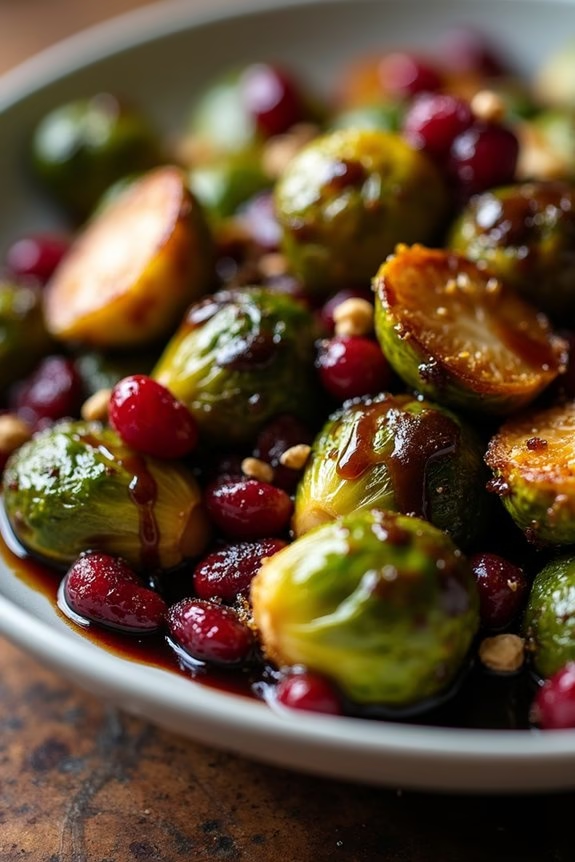
Balsamic Roasted Brussels Sprouts with Cranberries is a delightful vegetarian dish that brings together the earthy flavors of Brussels sprouts and the sweet-tartness of cranberries. This recipe is perfect for a Christmas potluck, offering a vibrant pop of color and a burst of flavor to any festive table.
The balsamic glaze adds a rich, tangy depth that perfectly complements the roasted Brussels sprouts, while the cranberries offer a rejuvenating, fruity contrast. This dish isn’t only delicious but also incredibly easy to prepare, making it an ideal choice for those looking to contribute a healthy and flavorful option to their holiday gatherings.
Whether you’re catering to vegetarians or simply looking to add a nutritious side to your meal, Balsamic Roasted Brussels Sprouts with Cranberries is sure to be a hit. The following recipe serves 4-6 people, making it perfect for a small gathering or as a side dish at a larger feast.
Ingredients:
- 1 1/2 pounds Brussels sprouts, trimmed and halved
- 2 tablespoons olive oil
- Salt and pepper, to taste
- 1/2 cup balsamic vinegar
- 2 tablespoons brown sugar
- 1 cup fresh or dried cranberries
- 1/4 cup chopped walnuts (optional)
Instructions:
- Preheat the Oven: Begin by preheating your oven to 400°F (200°C). This guarantees the Brussels sprouts will roast evenly and achieve a crispy exterior.
- Prepare the Brussels Sprouts: In a large mixing bowl, toss the halved Brussels sprouts with olive oil, salt, and pepper, making sure they’re well-coated. This step is vital for even roasting and flavor.
- Roast the Sprouts: Spread the Brussels sprouts in a single layer on a baking sheet. Place them in the preheated oven and roast for about 25-30 minutes, or until they’re tender and golden brown, stirring halfway through for even cooking.
- Make the Balsamic Reduction: While the Brussels sprouts are roasting, combine the balsamic vinegar and brown sugar in a small saucepan over medium heat. Bring to a simmer and cook until the mixture has reduced by half and is syrupy, about 8-10 minutes.
- Combine Ingredients: Once the Brussels sprouts are roasted, remove them from the oven and transfer them to a serving dish. Drizzle the balsamic reduction over the roasted sprouts, making sure they’re well-coated.
- Add Cranberries and Walnuts: Finally, sprinkle the cranberries and chopped walnuts over the top. Toss gently to combine, allowing the flavors to meld together before serving.
Extra Tips:
When making Balsamic Roasted Brussels Sprouts with Cranberries, it’s important to keep an eye on the balsamic reduction to prevent it from burning. If it thickens too much, you can thin it out with a little water.
For an extra crunch, toast the walnuts before adding them to the dish. You can also substitute dried cranberries with fresh ones for a more tart flavor, or add a touch of honey to balance the tartness if desired. This dish can be served warm or at room temperature, making it a versatile addition to any holiday spread.
Creamy Butternut Squash Risotto
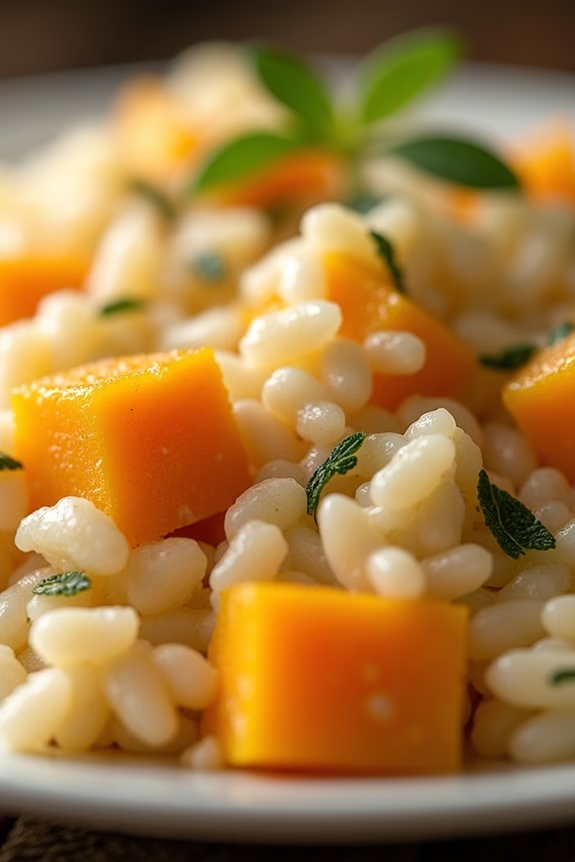
Creamy Butternut Squash Risotto is the perfect vegetarian dish to serve at your Christmas potluck. This rich and velvety risotto brings together the natural sweetness of butternut squash with the comforting creaminess of Arborio rice, all heightened by the aromatic presence of fresh herbs and spices.
The dish not only boasts a beautiful golden hue but also offers a delightful balance of flavors that will please any palate at the festive gathering. Ideal for serving 4-6 people, this risotto is a wonderful centerpiece for your vegetarian spread.
The process of making risotto, while requiring some attention, is straightforward and rewarding. The transformation of simple ingredients into a luxurious dish is a demonstration of the magic of slow cooking and patience. With the right technique, this Creamy Butternut Squash Risotto will soon become a favorite holiday tradition.
Ingredients:
- 2 cups Arborio rice
- 1 medium butternut squash, peeled and diced
- 1 small onion, finely chopped
- 3 cloves garlic, minced
- 6 cups vegetable broth
- 1 cup dry white wine
- 1 cup grated Parmesan cheese (or vegetarian alternative)
- 2 tablespoons unsalted butter
- 2 tablespoons olive oil
- 1 teaspoon salt
- 1/2 teaspoon black pepper
- 1/4 teaspoon nutmeg
- 1/4 cup fresh sage leaves, chopped
- 1/4 cup fresh parsley, chopped
Instructions:
- Preparation of Butternut Squash: In a large pot, heat the olive oil over medium heat. Add the diced butternut squash and cook for about 8-10 minutes until the squash is tender and slightly caramelized. Remove the squash from the pot and set aside.
- Sautéing Aromatics: In the same pot, add the butter and allow it to melt. Add the chopped onion and garlic, cooking until the onion is translucent and the garlic is fragrant, about 3-4 minutes.
- Toasting the Rice: Add the Arborio rice to the pot with the onions and garlic. Stir frequently for about 2-3 minutes until the rice grains are well-coated and slightly translucent around the edges.
- Deglazing with Wine: Pour in the white wine, stirring continuously until the wine is mostly absorbed by the rice, which should take about 2 minutes.
- Cooking the Risotto: Gradually add the vegetable broth, one cup at a time, stirring continuously and allowing each addition to be absorbed before adding the next. This process should take about 18-20 minutes in total.
- Incorporating the Squash and Cheese: Once the rice is al dente and creamy, fold in the cooked butternut squash, grated Parmesan cheese, salt, pepper, and nutmeg. Stir until the cheese is melted and the ingredients are well combined.
- Final Touches: Remove the pot from the heat and stir in the fresh sage and parsley. Adjust seasoning to taste and let the risotto sit for a few minutes before serving.
Extra Tips:
When making risotto, constant stirring is essential to achieve the creamy texture that characterizes the dish. Be patient during the cooking process, as adding the broth too quickly can result in unevenly cooked rice.
If you prefer a vegan version, substitute the butter and Parmesan cheese with vegan alternatives. Additionally, pairing this risotto with a crisp white wine can enhance the flavor profile, making it a delightful addition to your Christmas potluck.
Spinach and Feta Stuffed Mushrooms
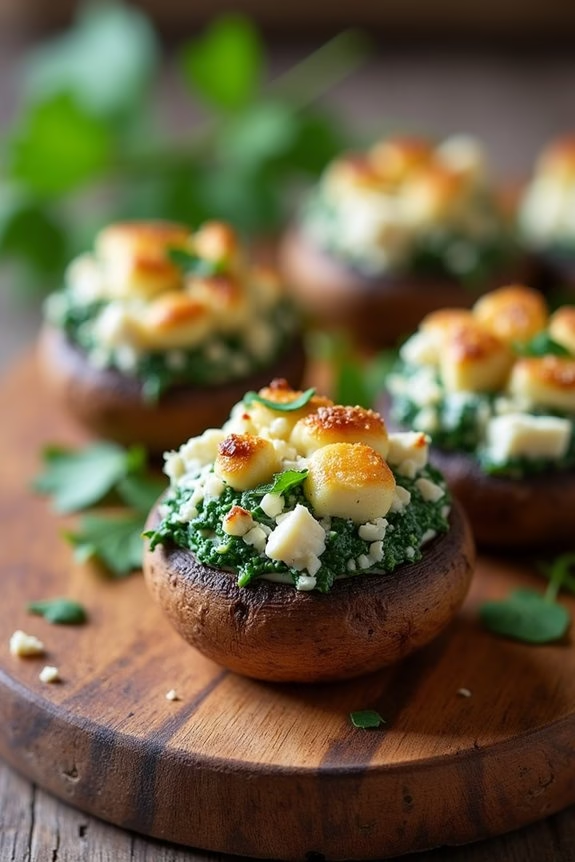
The perfect appetizer for a vegetarian Christmas potluck, Spinach and Feta Stuffed Mushrooms bring a delightful fusion of flavors and textures to your festive table.
These bite-sized morsels feature a succulent filling of creamy feta, earthy spinach, and aromatic herbs. When baked to golden perfection, the mushrooms become tender and juicy, while the filling achieves a wonderful balance of tangy and savory notes.
This dish not only caters to vegetarians but is a crowd-pleaser for everyone, showcasing the richness of simple ingredients transformed into something extraordinary.
Ideal for serving 4-6 people, this dish is as easy to prepare as it’s to devour. With minimal preparation time and straightforward steps, you’ll have these enticing stuffed mushrooms ready in no time.
The combination of fresh spinach and crumbly feta cheese, enhanced with garlic and herbs, creates a filling that’s both hearty and flavorful. Whether you’re an experienced cook or a beginner, this recipe is designed to guide you through each step, guaranteeing your mushrooms are the star of your Christmas potluck.
Ingredients:
- 20-24 medium-sized cremini or button mushrooms
- 2 tablespoons olive oil
- 1 small onion, finely chopped
- 2 cloves garlic, minced
- 150g fresh spinach, roughly chopped
- 100g feta cheese, crumbled
- 1/4 cup breadcrumbs
- 2 tablespoons fresh parsley, chopped
- 1 teaspoon dried oregano
- Salt and pepper to taste
Cooking Instructions:
- Preheat the Oven: Start by preheating your oven to 375°F (190°C). This guarantees that the oven is at the right temperature when you’re ready to bake the stuffed mushrooms.
- Prepare the Mushrooms: Gently clean the mushrooms with a damp cloth to remove any dirt. Carefully remove the stems and set them aside. The caps will be used for stuffing.
- Cook the Filling: Heat the olive oil in a skillet over medium heat. Add the chopped onion and sauté until translucent, about 3-4 minutes. Add the minced garlic and cook for an additional minute. Stir in the chopped spinach and cook until wilted, about 2 minutes.
- Mix the Filling: In a large bowl, combine the sautéed onion and spinach mixture with the crumbled feta cheese, breadcrumbs, chopped parsley, and dried oregano. Season with salt and pepper to taste. Mix until well combined.
- Stuff the Mushrooms: Spoon the filling mixture into each mushroom cap, pressing gently to make sure they’re well-filled.
- Bake the Mushrooms: Arrange the stuffed mushrooms on a baking sheet lined with parchment paper. Bake in the preheated oven for 15-20 minutes, or until the mushrooms are tender and the tops are slightly golden.
- Serve: Remove from the oven and let them cool for a few minutes before serving. These stuffed mushrooms are best enjoyed warm.
Extra Tips:
When preparing the mushrooms, make sure not to soak them in water as they’ll absorb moisture and become soggy. Instead, use a damp cloth to clean them.
If you prefer a little crunch, consider adding a sprinkle of toasted pine nuts to the filling. Additionally, these mushrooms can be assembled a day in advance and stored in the refrigerator, making them an excellent option for stress-free entertaining.
Simply bake them fresh before serving.
Savory Sweet Potato and Black Bean Enchiladas

Delight your family and friends this holiday season with a delicious twist on a classic favorite. These Savory Sweet Potato and Black Bean Enchiladas are a vibrant and nutritious addition to your vegetarian Christmas potluck.
Combining the natural sweetness of roasted sweet potatoes with the hearty texture of black beans, these enchiladas are packed with flavor. The smoky, spicy enchilada sauce ties everything together, making each bite a warm and comforting experience.
Perfect for a serving size of 4-6 people, this dish isn’t only satisfying but also incredibly easy to prepare. Whether you’re a seasoned cook or a beginner in the kitchen, these enchiladas will impress your guests without requiring hours of cooking.
Plus, they’re customizable, allowing you to adjust the level of spice and add your favorite toppings for a truly personalized dish. Let’s get started on crafting these scrumptious enchiladas!
Ingredients (Serving Size: 4-6 people)
- 2 large sweet potatoes, peeled and diced
- 1 tablespoon olive oil
- 1 teaspoon ground cumin
- 1/2 teaspoon smoked paprika
- Salt and pepper, to taste
- 1 (15-ounce) can black beans, drained and rinsed
- 1 cup corn kernels (fresh, frozen, or canned)
- 8 flour or corn tortillas
- 2 cups enchilada sauce
- 1 cup shredded cheese (cheddar, Monterey Jack, or a blend)
- 1/4 cup chopped fresh cilantro
- 1 avocado, sliced
- Lime wedges, for serving
Cooking Instructions
- Preheat and Prepare the Sweet Potatoes: Preheat your oven to 400°F (200°C). Spread the diced sweet potatoes on a baking sheet, drizzle with olive oil, and sprinkle with cumin, smoked paprika, salt, and pepper. Toss to coat evenly. Roast in the oven for 25-30 minutes, or until the sweet potatoes are tender and slightly caramelized.
- Prepare the Filling: In a large mixing bowl, combine the roasted sweet potatoes, black beans, and corn kernels. Stir gently to mix the ingredients thoroughly.
- Assemble the Enchiladas: Lightly coat the bottom of a 9×13-inch baking dish with a thin layer of enchilada sauce. Warm the tortillas slightly to make them pliable. Take a tortilla, add a generous scoop of the sweet potato and black bean filling, then roll it up tightly. Place it seam side down in the baking dish. Repeat with the remaining tortillas and filling.
- Add Sauce and Cheese: Pour the remaining enchilada sauce evenly over the rolled enchiladas. Sprinkle the shredded cheese on top, covering the enchiladas completely.
- Bake the Enchiladas: Place the baking dish in the oven and bake for 20-25 minutes, or until the cheese is melted and bubbly.
- Garnish and Serve: Once baked, remove the dish from the oven and let it cool slightly. Garnish with chopped cilantro and avocado slices. Serve with lime wedges on the side for an extra zing of flavor.
Extra Tips
To guarantee your enchiladas are extra flavorful, consider roasting your sweet potatoes until they’re slightly caramelized, which enhances their natural sweetness.
If you prefer a spicier dish, add a pinch of cayenne pepper to the sweet potato mixture or choose a spicier enchilada sauce. For a gluten-free option, use corn tortillas instead of flour.
Finally, these enchiladas can be prepared a day in advance and stored in the fridge, making them an excellent choice for a stress-free potluck gathering.
Festive Cranberry and Pistachio Cheese Ball
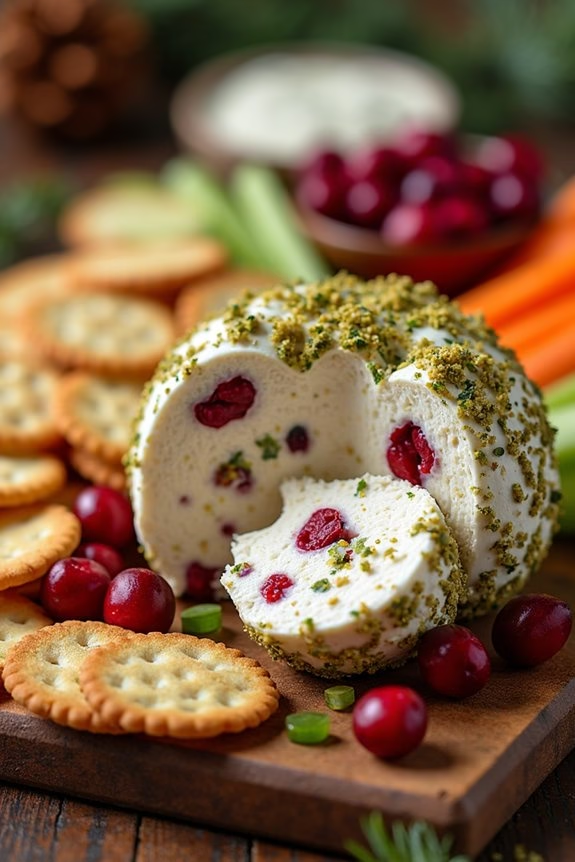
Festive Cranberry and Pistachio Cheese Ball is a delightful addition to your Christmas potluck spread. This cheese ball isn’t only visually appealing with its vibrant colors, but it also offers a perfect balance of flavors with the tanginess of cranberries, the nutty crunch of pistachios, and the creamy richness of cheese.
Whether you’re hosting or attending a festive gathering, this cheese ball is bound to impress and satisfy all your guests, including vegetarians. This recipe is designed to serve 4-6 people, making it an ideal appetizer for your holiday celebrations.
The cheese ball can be prepared in advance, allowing you to focus on other dishes or simply enjoy the festivities. Pair it with a variety of crackers and sliced vegetables for a stunning and delicious centerpiece on your table.
Ingredients:
- 8 oz cream cheese, softened
- 1 cup sharp cheddar cheese, shredded
- 1/2 cup dried cranberries, chopped
- 1/2 cup pistachios, shelled and chopped
- 2 tablespoons green onions, finely chopped
- 1 teaspoon garlic powder
- 1 teaspoon Worcestershire sauce
- 1/4 teaspoon salt
- 1/4 teaspoon black pepper
Instructions:
- Prepare the Cheese Mixture: In a large mixing bowl, combine the softened cream cheese and shredded cheddar cheese. Mix thoroughly until the cheeses are well blended and smooth.
- Add Flavorings: Stir in the chopped green onions, garlic powder, Worcestershire sauce, salt, and black pepper. Mix until all ingredients are evenly distributed throughout the cheese mixture.
- Form the Cheese Ball: Lay a piece of plastic wrap on a clean surface. Transfer the cheese mixture onto the plastic wrap and shape it into a ball using your hands. Wrap the cheese ball tightly in the plastic wrap and refrigerate for at least 1 hour, or until firm.
- Prepare the Coating: While the cheese ball is chilling, combine the chopped cranberries and pistachios in a shallow dish or plate.
- Coat the Cheese Ball: Once the cheese ball has firmed up, remove it from the refrigerator and unwrap it from the plastic. Roll the cheese ball in the cranberry and pistachio mixture, pressing gently to guarantee the coating adheres evenly around the cheese ball.
- Serve: Place the coated cheese ball on a serving platter surrounded by your choice of crackers, sliced baguette, or vegetable sticks. Serve immediately or refrigerate until ready to serve.
Extra Tips:
For a more intense flavor, consider preparing the cheese ball a day in advance and allowing the flavors to develop in the refrigerator overnight.
If you find the cheese ball too sticky to handle, lightly oil your hands before shaping it. Additionally, feel free to customize the recipe by adding herbs such as parsley or chives for a fresh touch, or substituting the sharp cheddar with another cheese like blue cheese or goat cheese if you prefer a different flavor profile.
Hearty Lentil and Vegetable Shepherd’s Pie
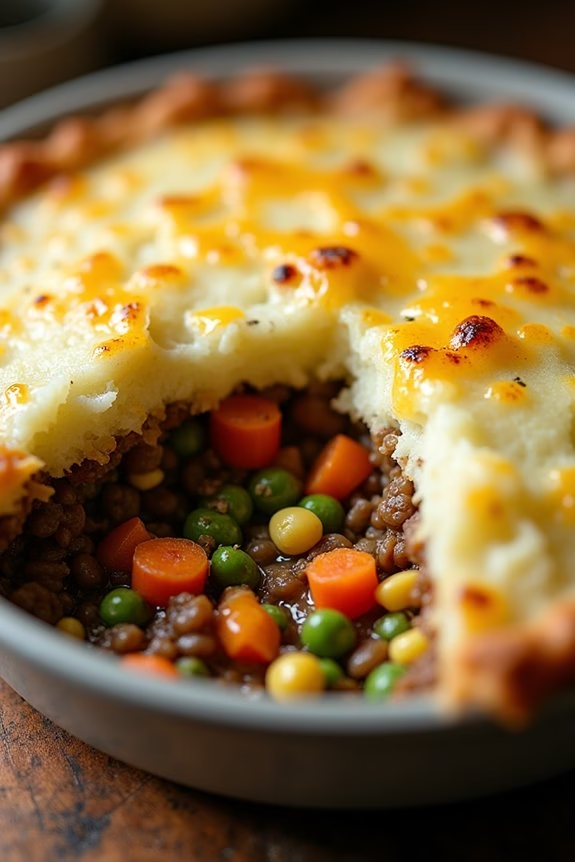
Hearty Lentil and Vegetable Shepherd’s Pie is a delicious and satisfying dish perfect for a festive Christmas potluck. This vegetarian version of the classic Shepherd’s Pie combines a rich and flavorful lentil and vegetable filling with a creamy mashed potato topping. It’s a comforting and hearty meal that everyone will love, whether you’re a vegetarian or not.
The dish is also easy to prepare in advance, making it a convenient option for holiday gatherings. The filling is made with protein-packed lentils, which are simmered with an array of colorful vegetables such as carrots, peas, and corn, all seasoned with savory herbs and spices. This mixture is then topped with fluffy mashed potatoes, which are baked to golden perfection. The result is a wholesome and satisfying dish that’s both nutritious and indulgent.
Perfect for serving 4-6 people, this Shepherd’s Pie is sure to be a hit at your Christmas potluck.
Ingredients (serves 4-6):
- 1 cup dried green or brown lentils
- 3 cups vegetable broth
- 2 tablespoons olive oil
- 1 onion, chopped
- 2 cloves garlic, minced
- 2 carrots, diced
- 1 cup frozen peas
- 1 cup frozen corn
- 1 tablespoon tomato paste
- 1 teaspoon dried thyme
- 1 teaspoon dried rosemary
- Salt and pepper to taste
- 6 medium potatoes, peeled and diced
- 1/2 cup milk (or plant-based milk)
- 3 tablespoons butter (or plant-based alternative)
- 1/2 cup shredded cheese (optional)
Cooking Instructions:
- Prepare the Lentils: Rinse the lentils under cold water. In a medium saucepan, combine the lentils and vegetable broth. Bring to a boil, then reduce the heat and simmer for about 20-25 minutes, or until the lentils are tender. Drain any excess liquid and set aside.
- Cook the Vegetables: In a large skillet, heat the olive oil over medium heat. Add the chopped onion and minced garlic, sautéing until the onion becomes translucent. Add the diced carrots and continue to cook for about 5 minutes.
- Combine Ingredients: Stir in the tomato paste, cooked lentils, peas, corn, thyme, rosemary, salt, and pepper. Cook for another 5 minutes, allowing the flavors to meld together. Remove from heat and transfer the mixture to a baking dish.
- Make the Mashed Potatoes: In a large pot, boil the diced potatoes until they’re fork-tender. Drain and return to the pot. Add the milk and butter, mashing until smooth and creamy. Season with salt and pepper to taste.
- Assemble the Pie: Spread the mashed potatoes evenly over the lentil and vegetable mixture in the baking dish. If desired, sprinkle shredded cheese on top.
- Bake: Preheat your oven to 375°F (190°C). Bake the Shepherd’s Pie for 25-30 minutes, or until the top is golden brown and the filling is bubbling around the edges.
- Serve: Allow the pie to cool for a few minutes before serving. Enjoy warm.
Extra Tips: For a creamier mashed potato topping, consider adding a dollop of sour cream or cream cheese to your potatoes. You can also customize the vegetable filling by adding other vegetables like mushrooms or bell peppers.
This dish can be made a day ahead and reheated in the oven before serving; just cover it with foil to prevent the potatoes from drying out. Remember to taste the lentil mixture before topping with potatoes and adjust seasonings as needed to guarantee the perfect balance of flavors.
Caramelized Onion and Goat Cheese Tart

Caramelized Onion and Goat Cheese Tart is a delightful addition to any vegetarian Christmas potluck, offering a combination of savory and slightly sweet flavors that will impress your guests. The tart features a flaky puff pastry crust, topped with rich and creamy goat cheese and sweet, caramelized onions. The balance of these ingredients creates a sophisticated dish that’s both simple to make and elegant in presentation, making it perfect for special occasions like Christmas.
This recipe is designed to serve 4-6 people, guaranteeing that everyone at your gathering gets a taste of this delicious treat. The tart can be served warm or at room temperature, which makes it a versatile option for potlucks where dishes may need to sit out for a while. The preparation is straightforward, allowing you to focus on enjoying the festivities rather than spending all your time in the kitchen. Here’s how to prepare this crowd-pleasing dish:
Ingredients:
- 1 sheet of puff pastry, thawed
- 2 large onions, thinly sliced
- 2 tablespoons olive oil
- 1 tablespoon balsamic vinegar
- 1 teaspoon sugar
- Salt and pepper to taste
- 150g goat cheese, crumbled
- 1 tablespoon fresh thyme leaves
- 1 egg, beaten (for egg wash)
Cooking Instructions:
- Prepare the Puff Pastry: Preheat your oven to 400°F (200°C). Roll out the puff pastry on a lightly floured surface until it fits a tart pan or baking tray. Transfer the pastry to the pan and gently press it into the edges. Prick the bottom with a fork to prevent it from puffing up too much during baking. Set aside in the refrigerator to keep it cold while you prepare the onions.
- Caramelize the Onions: In a large skillet, heat the olive oil over medium heat. Add the sliced onions and cook, stirring occasionally, until they begin to soften, about 10 minutes. Stir in the balsamic vinegar and sugar, and continue to cook until the onions are caramelized and golden brown, about another 10-15 minutes. Season with salt and pepper to taste. Remove from heat and let cool slightly.
- Assemble the Tart: Spread the caramelized onions evenly over the prepared puff pastry. Sprinkle the crumbled goat cheese on top of the onions, followed by the fresh thyme leaves.
- Bake the Tart: Brush the edges of the puff pastry with beaten egg to give it a golden, glossy finish. Place the tart in the preheated oven and bake for 20-25 minutes, or until the pastry is golden brown and the cheese is melted and slightly browned.
- Serve: Let the tart cool for a few minutes before slicing. Serve warm or at room temperature, garnished with additional thyme leaves if desired.
Extra Tips:
For an even richer flavor, try adding a handful of chopped walnuts or pine nuts to the tart before baking. If you prefer a stronger cheese flavor, consider substituting a portion of the goat cheese with blue cheese.
Assure that the puff pastry is kept cold until just before baking to achieve the best, flakiest texture. You can also prepare the caramelized onions in advance and store them in the refrigerator, making assembly on the day of your event quick and easy.
Maple Glazed Carrots With Thyme
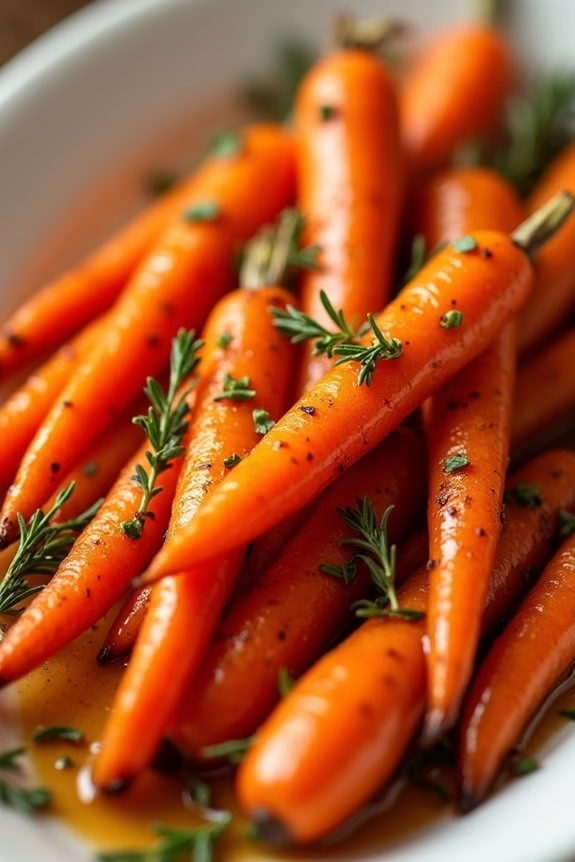
Preparing Maple Glazed Carrots With Thyme is straightforward and requires minimal ingredients, making it an easy addition to your holiday meal planning. The combination of maple syrup and thyme creates a sophisticated yet comforting flavor profile that enhances the natural sweetness of the carrots. This recipe is designed to serve 4-6 people, making it perfect for a small gathering or as part of a larger spread.
The dish can be prepared in advance and reheated, freeing up valuable time on the day of your celebration.
Ingredients (serves 4-6):
- 2 pounds of carrots, peeled and cut into 2-inch pieces
- 3 tablespoons of olive oil
- 1/4 cup of pure maple syrup
- 1 tablespoon of fresh thyme leaves, plus extra for garnish
- Salt and pepper to taste
Cooking Instructions:
- Preheat the Oven: Start by preheating your oven to 400°F (200°C). This temperature is ideal for roasting the carrots, guaranteeing they become tender and slightly caramelized without drying out.
- Prepare the Carrots: Peel and cut the carrots into uniform 2-inch pieces. This helps them cook evenly. Place the carrots in a large mixing bowl.
- Make the Glaze: In a small bowl, whisk together the olive oil, maple syrup, fresh thyme leaves, salt, and pepper. This mixture will serve as both the glaze and seasoning for the carrots.
- Combine and Coat: Pour the glaze over the carrots in the mixing bowl. Toss the carrots thoroughly to guarantee they’re evenly coated with the glaze.
- Roast the Carrots: Spread the glazed carrots in a single layer on a baking sheet lined with parchment paper. Roasting them in a single layer helps them cook evenly. Place the baking sheet in the preheated oven.
- Check and Stir: Roast the carrots for about 25-30 minutes, stirring halfway through the cooking time to promote even browning. The carrots should be tender and slightly caramelized when done.
- Serve: Once cooked, remove the carrots from the oven and transfer them to a serving dish. Garnish with additional fresh thyme leaves for an extra pop of color and flavor before serving.
Extra Tips:
When preparing Maple Glazed Carrots With Thyme, consider using rainbow carrots for a more colorful presentation.
This dish can be made a day in advance; simply cool and store the roasted carrots in an airtight container in the refrigerator, then reheat in the oven at 350°F (175°C) for about 10-15 minutes before serving.
Adjust the amount of maple syrup based on your sweetness preference, and feel free to experiment with adding a splash of balsamic vinegar for a tangy twist.
Wild Rice and Mushroom Stuffed Acorn Squash
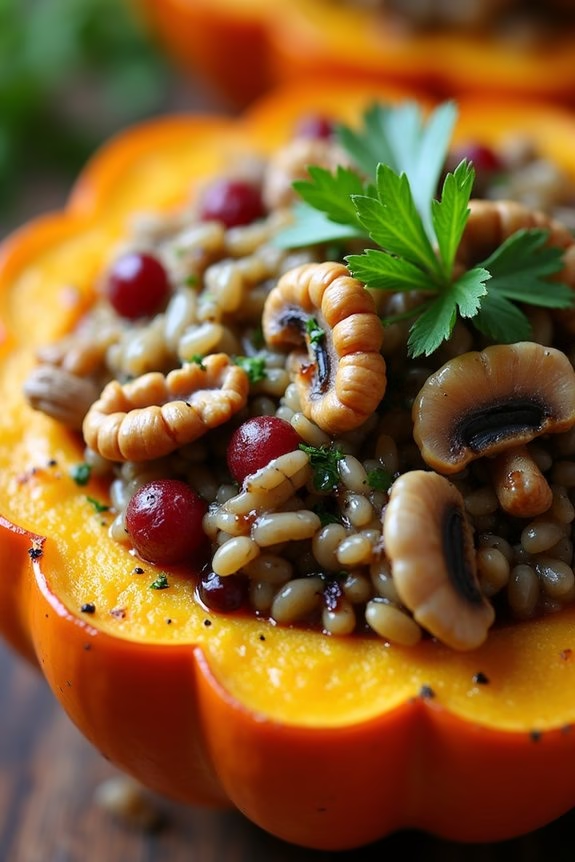
Wild Rice and Mushroom Stuffed Acorn Squash is the perfect centerpiece for a vegetarian Christmas potluck. This dish combines the earthy flavors of mushrooms and wild rice with the natural sweetness of roasted acorn squash. The stuffing, rich in textures and flavors, isn’t only a treat for the palate but also a visual delight, making it a feast for both the eyes and the taste buds. It’s a hearty, satisfying dish that’s certain to please vegetarians and meat-eaters alike.
The preparation of Wild Rice and Mushroom Stuffed Acorn Squash is straightforward, yet it brings about a sophisticated dish that feels like a celebration in itself. The wild rice provides a nutty, chewy texture, while the mushrooms add a savory depth. The squash, when roasted, becomes tender and slightly caramelized, creating a delicious vessel for the filling. This dish is also highly nutritious, full of fiber and vitamins, making it a wholesome addition to any holiday spread.
Ingredients (Serves 4-6):
- 3 medium acorn squash
- 1 cup wild rice
- 2 cups vegetable broth
- 1 tablespoon olive oil
- 1 medium onion, diced
- 2 cloves garlic, minced
- 8 ounces mushrooms, chopped
- 1 teaspoon dried thyme
- 1/2 teaspoon salt
- 1/4 teaspoon black pepper
- 1/2 cup dried cranberries
- 1/2 cup chopped walnuts
- 1/4 cup parsley, chopped
Instructions:
- Preheat the Oven: Start by preheating your oven to 400°F (200°C). This guarantees that the squash will roast evenly.
- Prepare the Squash: Cut each acorn squash in half and scoop out the seeds and stringy bits. Lightly brush the cut sides with olive oil and sprinkle with a pinch of salt and pepper. Place them cut side down on a baking sheet lined with parchment paper.
- Roast the Squash: Put the baking sheet in the preheated oven and roast the squash for about 30-35 minutes, or until the flesh is tender when pierced with a fork.
- Cook the Wild Rice: While the squash is roasting, rinse the wild rice under cold water. In a medium saucepan, bring the vegetable broth to a boil, add the rice, and reduce the heat to a simmer. Cover and cook for about 45 minutes, or until the rice is tender and the liquid is absorbed.
- Sauté the Aromatics: In a large skillet, heat olive oil over medium heat. Add the diced onion and sauté for about 5 minutes until soft. Stir in the garlic and cook for an additional minute until fragrant.
- Cook the Mushrooms: Add the chopped mushrooms to the skillet, along with the thyme, salt, and pepper. Cook for 8-10 minutes until the mushrooms are browned and any liquid they release has evaporated.
- Combine the Filling: In a large bowl, mix the cooked wild rice, sautéed mushroom mixture, dried cranberries, chopped walnuts, and parsley. Stir well to combine all the ingredients.
- Stuff the Squash: Once the squash is done roasting, remove them from the oven and carefully turn them over. Spoon the wild rice and mushroom mixture into each squash half, pressing down lightly to pack the filling.
- Final Bake: Place the stuffed squash back in the oven and bake for an additional 10-15 minutes until heated through.
Extra Tips:
When selecting acorn squash, look for those that are firm and heavy for their size with a dull, not shiny, rind. This indicates they’re ripe and will roast beautifully. You can prepare the stuffing a day ahead to save time on the day of your event. If you have leftovers, they reheat well in the oven. For added flavor, consider topping the stuffed squash with a sprinkle of grated Parmesan cheese or a drizzle of balsamic glaze before serving.
Pomegranate and Avocado Winter Salad
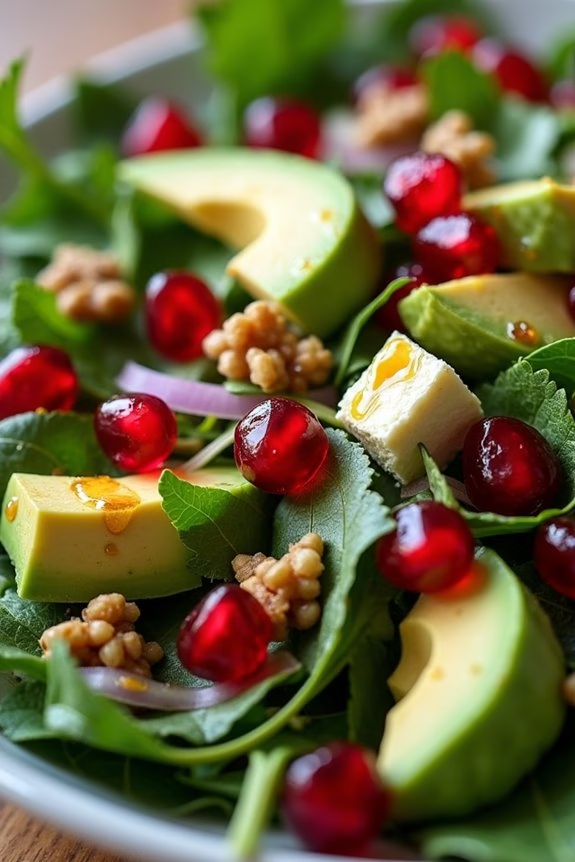
This Pomegranate and Avocado Winter Salad is a vibrant, invigorating addition to any holiday potluck. The contrasting flavors and textures of this dish make it a standout at any gathering. Juicy pomegranate arils provide bursts of sweetness, while creamy avocado offers a rich, buttery texture that perfectly balances the crispness of mixed greens.
To top it off, a tangy citrus dressing ties all the flavors together, making each bite a delightful experience. This salad isn’t only delicious but also nutritious, packed with vitamins and antioxidants, making it a guilt-free indulgence during the festive season.
It’s quick to prepare and can be made right before serving to guarantee the freshest ingredients. Whether you’re hosting a vegetarian Christmas potluck or attending one, this salad is a crowd-pleaser that will leave your guests asking for the recipe.
Ingredients (Serves 4-6):
- 1 large pomegranate or 1 cup pomegranate arils
- 2 ripe avocados
- 6 cups mixed salad greens (e.g., spinach, arugula, and kale)
- 1/2 cup walnuts, toasted
- 1/4 cup crumbled feta cheese (optional)
- 1 small red onion, thinly sliced
- 1/4 cup fresh cilantro leaves
- 1/4 cup fresh orange juice
- 2 tablespoons olive oil
- 1 tablespoon apple cider vinegar
- 1 teaspoon honey or maple syrup
- Salt and pepper to taste
Instructions:
- Prepare the Pomegranate Arils: If you’re using a whole pomegranate, cut it in half and gently remove the arils by tapping the back of each half with a wooden spoon over a bowl. Be sure to remove any white pith that may have fallen in.
- Toast the Walnuts: In a small skillet over medium heat, toast the walnuts for about 3-5 minutes, stirring frequently, until they’re golden brown and fragrant. Set aside to cool.
- Make the Dressing: In a small bowl, whisk together the orange juice, olive oil, apple cider vinegar, honey, salt, and pepper until well combined. Adjust the seasoning according to your taste.
- Prepare the Avocados: Cut the avocados in half, remove the pit, and slice the flesh into cubes. Gently scoop out the cubes with a spoon and set aside.
- Assemble the Salad: In a large salad bowl, combine the mixed greens, pomegranate arils, avocado cubes, toasted walnuts, red onion slices, and cilantro leaves. If using, add the crumbled feta cheese.
- Dress the Salad: Drizzle the prepared dressing over the salad and gently toss until all the ingredients are evenly coated. Be careful not to mash the avocados while tossing.
- Serve: Transfer the salad to a serving platter or individual plates and serve immediately for the freshest taste and texture.
Extra Tips:
For the best flavor, make sure to use ripe but firm avocados to avoid them turning mushy in the salad. If you prepare the ingredients in advance, keep the avocado from browning by squeezing a little lemon or lime juice over it.
The dressing can be made a day ahead and stored in the fridge, but mix the salad just before serving. Feel free to customize the salad by adding more of your favorite fruits or nuts, such as pear slices or almonds, for additional flavor and texture.
Classic Vegetarian Stuffing With Sage
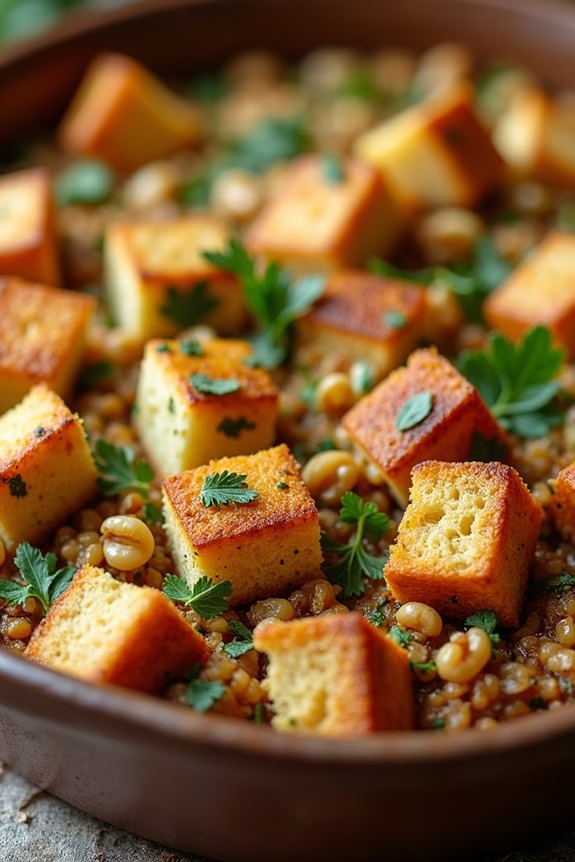
Classic Vegetarian Stuffing With Sage is a delightful addition to any holiday spread, offering a savory and aromatic complement to your festive table. This dish combines the comforting flavors of traditional stuffing with a vegetarian twist, making it suitable for everyone to enjoy at your Christmas potluck.
Sage, a key herb in this recipe, imparts a warm, earthy taste that pairs beautifully with the other ingredients, creating a dish that’s flavorful and satisfying. The beauty of this stuffing lies in its simplicity and versatility. You can easily prepare it ahead of time, allowing you to focus on other dishes during your holiday preparations.
It’s an ideal recipe for those who want to bring a hearty, vegetarian option to the gathering. This stuffing is sure to be a crowd-pleaser, rich with the essence of the season and perfect for sharing with family and friends.
Ingredients (Serves 4-6):
- 10 cups cubed bread (preferably day-old, any type)
- 1/2 cup unsalted butter
- 1 large onion, chopped
- 3 stalks celery, chopped
- 2 cloves garlic, minced
- 1/2 cup chopped fresh parsley
- 2 tablespoons fresh sage, chopped
- 1 tablespoon fresh rosemary, chopped
- 1 tablespoon fresh thyme, chopped
- 1/2 teaspoon salt
- 1/2 teaspoon black pepper
- 2 1/2 cups vegetable broth
- 1/2 cup chopped walnuts (optional)
Instructions:
- Prepare the Bread: Preheat your oven to 350°F (175°C). Spread the cubed bread evenly on a baking sheet and toast in the oven for about 10-12 minutes until it’s dry and slightly golden. Remove from the oven and set aside to cool.
- Cook the Vegetables: In a large skillet, melt the butter over medium heat. Add the chopped onion and celery, and sauté for about 5 minutes until they’re soft and translucent. Stir in the minced garlic and cook for another minute until fragrant.
- Add Herbs and Seasonings: Mix in the chopped parsley, sage, rosemary, thyme, salt, and black pepper. Cook for an additional 2 minutes to allow the herbs to release their flavors.
- Combine Ingredients: In a large mixing bowl, combine the toasted bread cubes with the cooked vegetable and herb mixture. Toss everything together to make sure the bread is evenly coated with the butter and herbs.
- Moisten the Mixture: Gradually pour the vegetable broth over the bread mixture, gently tossing as you go to guarantee even distribution. The bread should be moist but not soggy. If using, mix in the chopped walnuts for added crunch.
- Bake the Stuffing: Transfer the stuffing mixture into a greased baking dish. Cover with foil and bake in the preheated oven for 30 minutes. Remove the foil and bake for an additional 15 minutes until the top is golden and crispy.
- Serve: Once done, remove from the oven and let it cool slightly before serving. Enjoy your Classic Vegetarian Stuffing With Sage as a flavorful side dish at your Christmas potluck.
Extra Tips:
For best results, use bread that’s at least a day old, as fresh bread may become too mushy. If you don’t have access to fresh herbs, dried herbs can be used, but remember to reduce the quantities by about one-third as dried herbs are more potent.
Feel free to customize the recipe by adding your favorite ingredients, such as cranberries for a touch of sweetness or mushrooms for an earthy flavor. Adjust the seasoning to suit your taste, and don’t hesitate to experiment with different types of bread for varying textures and flavors.
Chocolate Peppermint Bark Brownies

As the holiday season approaches, indulging in festive treats is a must. Chocolate Peppermint Bark Brownies are a perfect addition to any vegetarian Christmas potluck, combining the rich flavors of chocolate with the invigorating zing of peppermint.
These brownies aren’t only decadent and delicious but also visually appealing, making them a standout dessert at any gathering. The combination of chewy brownie base with a layer of creamy chocolate and a sprinkle of crushed peppermint candies creates a delightful contrast in both texture and taste.
These Chocolate Peppermint Bark Brownies are easy to make and are sure to impress your friends and family. Whether you’re a seasoned baker or a novice in the kitchen, this recipe offers a straightforward approach to creating a memorable dessert.
The recipe yields enough to serve about 4-6 people, making it suitable for small gatherings or as part of a larger dessert spread. Gather your ingredients and get ready to create a holiday treat that’s sure to bring cheer to your festive celebrations.
Ingredients:
- 1/2 cup unsalted butter
- 1 cup granulated sugar
- 2 large eggs
- 1 teaspoon vanilla extract
- 1/3 cup unsweetened cocoa powder
- 1/2 cup all-purpose flour
- 1/4 teaspoon salt
- 1/4 teaspoon baking powder
- 1 cup semi-sweet chocolate chips
- 1/2 cup white chocolate chips
- 1/4 teaspoon peppermint extract
- 1/2 cup crushed peppermint candies
Instructions:
- Preheat and Prep: Preheat your oven to 350°F (175°C). Line an 8×8 inch baking pan with parchment paper, leaving some overhang on the sides to easily lift the brownies out after baking.
- Make the Brownie Batter: In a medium saucepan, melt the butter over low heat. Once melted, remove from heat and stir in the sugar, eggs, and vanilla extract until smooth.
- Combine Dry Ingredients: In a separate bowl, whisk together the cocoa powder, flour, salt, and baking powder. Gradually add this dry mixture to the wet ingredients, stirring until just combined.
- Bake the Brownies: Pour the batter into the prepared baking pan, spreading it evenly. Bake in the preheated oven for 20-25 minutes, or until a toothpick inserted into the center comes out with just a few moist crumbs. Allow the brownies to cool in the pan.
- Prepare the Chocolate Layer: In a microwave-safe bowl, melt the semi-sweet chocolate chips in 30-second intervals, stirring in between until smooth. Stir in the peppermint extract. Spread this melted chocolate evenly over the cooled brownies.
- Add the White Chocolate and Peppermint Topping: Melt the white chocolate chips in a similar manner, then drizzle over the semi-sweet chocolate layer. Sprinkle the crushed peppermint candies over the top while the chocolate is still warm.
- Set and Serve: Allow the chocolate to set at room temperature or speed up the process by refrigerating for about 15 minutes. Once set, use the parchment overhang to lift the brownies from the pan and cut into squares.
Extra Tips: For a more intense peppermint flavor, you can increase the peppermint extract slightly, but be cautious as it can quickly overpower the chocolate.
If you prefer a softer mint flavor, consider using mint-flavored chocolate chips. When crushing the peppermint candies, placing them in a sealed plastic bag and using a rolling pin or mallet ensures a clean and efficient process. Enjoy these brownies with a warm cup of cocoa for the ultimate holiday treat!
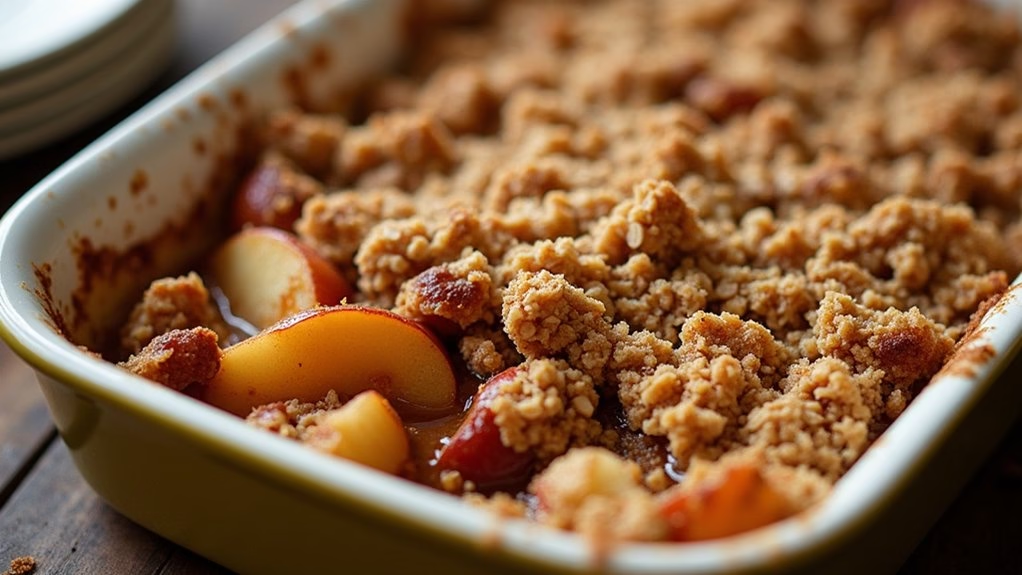
Spiced Apple and Pear Crisp
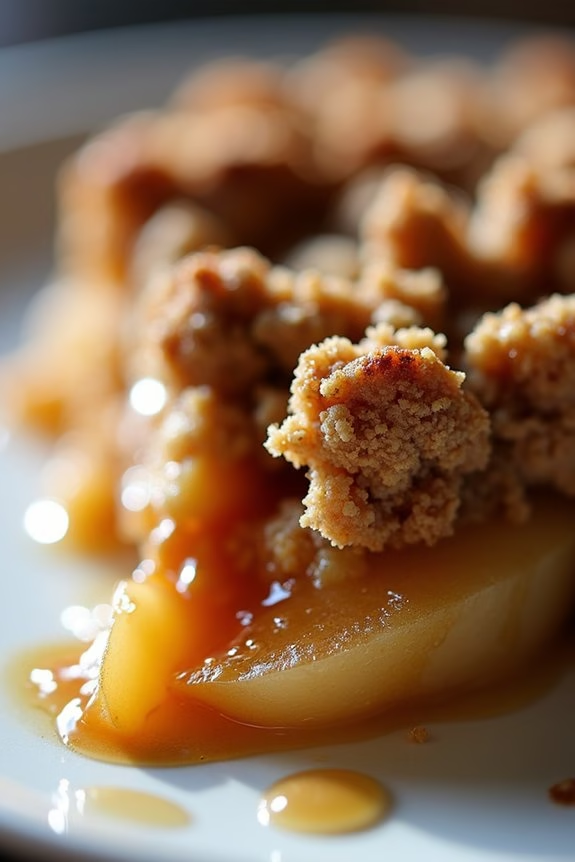
Spiced Apple and Pear Crisp is a delightful and warming dessert perfect for a festive vegetarian Christmas potluck. This dish combines the sweet and tart flavors of apples and pears with a comforting, spiced oat topping that provides a crunchy contrast to the soft and juicy fruit. The subtle warmth of spices like cinnamon, nutmeg, and ginger enhances the natural sweetness of the fruit, making this crisp a crowd-pleaser at any holiday gathering.
This dessert isn’t only delicious but also incredibly simple to make, requiring minimal preparation time. The crisp can be assembled ahead of time and baked just before serving, allowing you to enjoy the festivities without worrying about dessert. Serve it warm with a scoop of vanilla ice cream or a dollop of whipped cream for an extra indulgent treat. The following recipe serves 4-6 people, making it an ideal choice for a small gathering.
Ingredients:
- 3 medium apples, peeled, cored, and sliced
- 3 medium pears, peeled, cored, and sliced
- 1 tablespoon lemon juice
- 1/4 cup granulated sugar
- 1/2 teaspoon ground cinnamon
- 1/4 teaspoon ground nutmeg
- 1/4 teaspoon ground ginger
- 1 cup rolled oats
- 1/2 cup all-purpose flour
- 1/2 cup brown sugar
- 1/2 teaspoon salt
- 1/2 cup unsalted butter, melted
Instructions:
- Preheat the Oven: Start by preheating your oven to 350°F (175°C). This guarantees that the crisp will bake evenly and the topping will become golden brown.
- Prepare the Fruit Filling: In a large bowl, combine the sliced apples and pears. Drizzle with lemon juice to prevent browning. Add the granulated sugar, ground cinnamon, nutmeg, and ginger. Toss everything together until the fruit is evenly coated with the spices. Transfer the fruit mixture into a 9×13-inch baking dish, spreading it out evenly.
- Make the Topping: In another bowl, mix together the rolled oats, all-purpose flour, brown sugar, and salt. Pour in the melted butter and stir until the mixture becomes crumbly and well combined.
- Assemble the Crisp: Evenly sprinkle the oat mixture over the fruit in the baking dish, covering the fruit completely. This crumbly topping will turn into a deliciously crispy layer as it bakes.
- Bake the Crisp: Place the baking dish in the preheated oven and bake for 40-45 minutes, or until the topping is golden brown and the fruit is bubbling around the edges.
- Cool and Serve: Once baked, remove the crisp from the oven and let it cool for about 10 minutes before serving. This resting time allows the juices to thicken slightly and the flavors to meld.
Extra Tips:
For the best flavor, choose a mix of sweet and tart apple varieties, such as Granny Smith and Honeycrisp. If you prefer a less sweet dessert, reduce the amount of sugar in the fruit filling.
Feel free to customize the spices according to your taste—adding a pinch of cloves or cardamom can introduce an interesting twist. This crisp can also be made gluten-free by substituting the all-purpose flour with almond flour or a gluten-free baking mix.
Finally, if you have leftovers, store the crisp covered in the refrigerator for up to three days. To reheat, simply warm it in a preheated oven at 350°F (175°C) for about 10 minutes.