

The holiday season is all about coming together and sharing the joy of good food.
I’ve gathered 14 heartwarming Christmas dinner potluck recipes that promise to bring a cozy, homemade feel to your festive table.
From the sweet allure of honey-glazed ham to the savory goodness of herb-roasted turkey breast, there’s a comforting dish for everyone.
Let’s explore these delightful recipes and make your Christmas gathering truly special.
Classic Honey-Glazed Ham
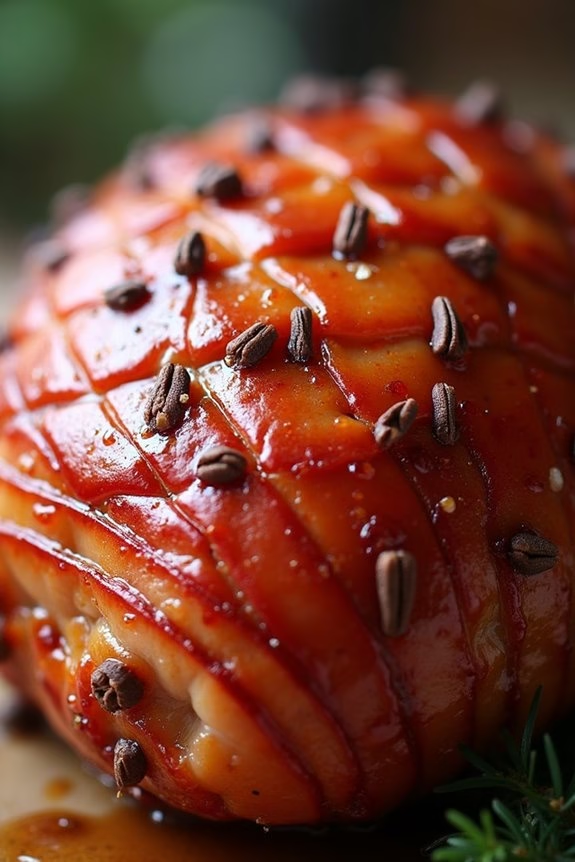
The Classic Honey-Glazed Ham is a timeless centerpiece for any Christmas dinner potluck. Its succulent, tender meat and the sweet, sticky glaze make it an irresistible dish that draws everyone to the table. The combination of honey, brown sugar, and spices creates a caramelized crust that perfectly complements the savory flavors of the ham.
This dish not only looks impressive but is also straightforward to prepare, making it an ideal choice for both novice and experienced cooks.
This recipe is designed to serve 4-6 people, making it suitable for small gatherings or as a part of a larger holiday spread. The key to achieving the perfect honey-glazed ham is selecting a high-quality, fully cooked ham and allowing ample time for the flavors to meld together in the oven.
The slow baking process guarantees that the ham stays moist and juicy while absorbing the sweet glaze, resulting in a dish that’s as delightful to eat as it’s to serve.
Ingredients (serves 4-6):
- 1 fully cooked, bone-in half ham (approximately 5-7 pounds)
- 1 cup honey
- 1/2 cup brown sugar
- 2 tablespoons Dijon mustard
- 1/4 teaspoon ground cloves
- 1/4 teaspoon ground cinnamon
- 1/4 teaspoon ground ginger
- 1/2 cup water
- Whole cloves (optional, for decoration)
Cooking Instructions:
- Preheat the Oven: Begin by preheating your oven to 325°F (165°C). This low temperature allows the ham to heat through without drying out.
- Prepare the Ham: Place the ham on a rack in a shallow roasting pan. If desired, score the surface of the ham in a diamond pattern, about 1/4-inch deep, and press whole cloves into the intersections of the cuts for added flavor and a festive appearance.
- Make the Glaze: In a small saucepan over medium heat, combine the honey, brown sugar, Dijon mustard, ground cloves, ground cinnamon, and ground ginger. Stir until the sugar is dissolved and the mixture is smooth. Remove from heat.
- Apply Glaze: Pour the water into the bottom of the roasting pan to prevent the drippings from burning. Brush the ham generously with the prepared glaze, making sure that it covers the entire surface.
- Bake the Ham: Place the ham in the preheated oven. Bake for approximately 1 1/2 to 2 hours, or until the internal temperature reaches 140°F (60°C), basting every 20-30 minutes with additional glaze to maintain a moist, flavorful crust.
- Rest and Serve: Once cooked, remove the ham from the oven and let it rest for 10-15 minutes before carving. This resting period allows the juices to redistribute, resulting in a more tender and flavorful ham.
Extra Tips:
For an even more intense flavor, consider marinating the ham in the glaze overnight in the refrigerator before baking. If you prefer a thicker glaze, simmer the glaze on the stove until it reduces to your desired consistency before applying it to the ham.
Remember to cover any leftover ham with foil or store it in an airtight container to keep it moist and flavorful for sandwiches or salads the following days.
Herb-Roasted Turkey Breast
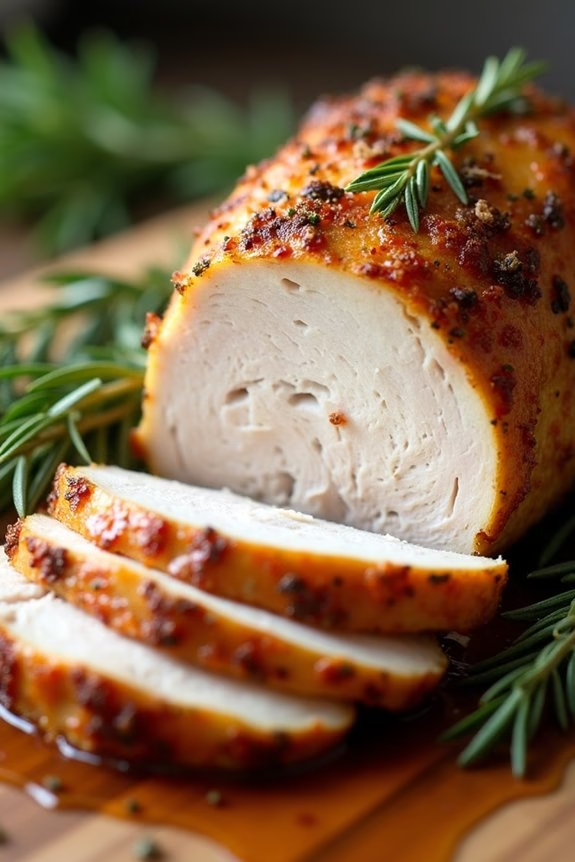
Herb-Roasted Turkey Breast is a perfect dish to bring to a Christmas potluck. It’s flavorful, juicy, and a healthier alternative to a whole turkey, making it ideal for serving a smaller group of people. The combination of fresh herbs and butter creates a rich and aromatic crust that enhances the natural flavors of the turkey. This recipe is designed to serve 4-6 people, making it a great choice for an intimate holiday gathering.
Roasting a turkey breast instead of a whole bird allows you to save time and effort, while still offering a festive centerpiece. The key to a successful herb-roasted turkey breast lies in the fresh herbs and proper seasoning, which infuse the meat with a delightful aroma and taste. Whether you’re an experienced cook or a novice in the kitchen, this recipe is straightforward and sure to impress your family and friends at any holiday potluck.
Ingredients (Serves 4-6):
- 1 turkey breast (about 3-4 pounds)
- 4 tablespoons unsalted butter, softened
- 2 tablespoons olive oil
- 1 tablespoon fresh rosemary, chopped
- 1 tablespoon fresh thyme, chopped
- 1 tablespoon fresh sage, chopped
- 4 cloves garlic, minced
- 1 lemon, zested and juiced
- Salt and pepper to taste
Cooking Instructions:
- Preheat the Oven: Start by preheating your oven to 375°F (190°C). This guarantees that your turkey breast cooks evenly and thoroughly.
- Prepare the Herb Butter: In a small bowl, mix together the softened butter, olive oil, chopped rosemary, thyme, sage, minced garlic, lemon zest, and lemon juice. Season with salt and pepper to taste.
- Season the Turkey: Pat the turkey breast dry with paper towels. Loosen the skin carefully with your fingers, being cautious not to tear it. Spread about half of the herb butter mixture under the skin, and then spread the remaining butter over the skin.
- Roast the Turkey: Place the turkey breast in a roasting pan, skin side up. Roast in the preheated oven for about 1.5 to 2 hours, or until the internal temperature reaches 165°F (74°C). Baste the turkey with the pan juices every 30 minutes to keep it moist.
- Rest the Turkey: Once done, remove the turkey from the oven and let it rest for at least 15 minutes before carving. This allows the juices to redistribute, guaranteeing a juicy and tender turkey breast.
Extra Tips: To enhance the flavor even further, consider marinating the turkey breast in the herb butter mixture for a few hours or overnight before roasting. If you prefer a more crispy skin, broil the turkey for a few minutes at the end of the cooking process, keeping a close eye to prevent burning.
Finally, remember to use a meat thermometer to confirm the turkey is cooked perfectly, as oven temperatures can vary. Enjoy your herb-roasted turkey breast with your favorite holiday sides for a complete festive meal.
Garlic and Herb Mashed Potatoes
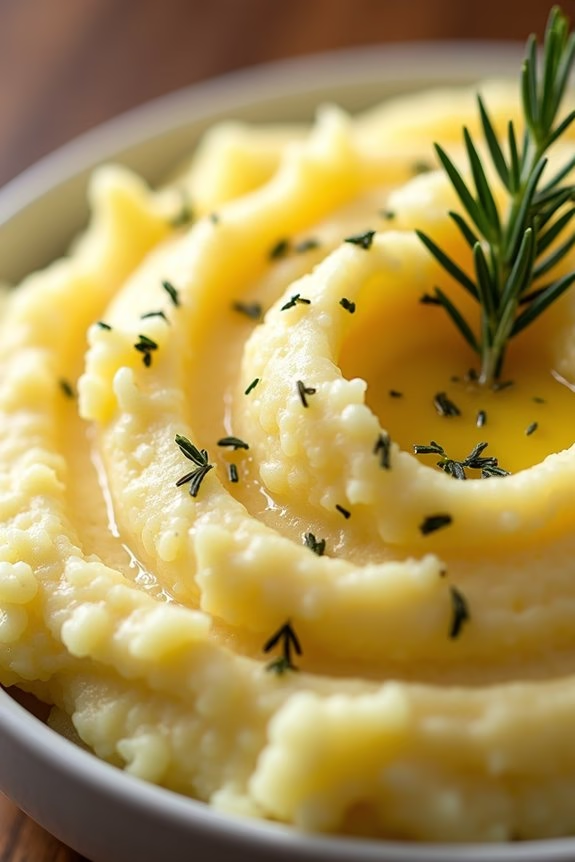
Garlic and Herb Mashed Potatoes are a delightful side dish that adds a touch of elegance to any Christmas dinner. This recipe combines the comforting creaminess of traditional mashed potatoes with the aromatic flavors of garlic and fresh herbs, creating a dish that’s both familiar and sophisticated. The use of herbs like rosemary and thyme, along with roasted garlic, elevates the flavor profile, making these potatoes a memorable accompaniment to your holiday feast.
Whether you’re hosting a large gathering or a cozy family dinner, this dish is certain to impress your guests and leave them asking for more.
The key to perfect Garlic and Herb Mashed Potatoes lies in selecting the right type of potatoes and infusing them with just the right amount of garlic and herbs. Yukon Gold potatoes are an excellent choice for this recipe due to their buttery texture and rich flavor. Roasting the garlic before adding it to the potatoes guarantees a mellow, sweet taste that blends seamlessly with the herbs.
By following this recipe, you’ll create a dish that’s not only delicious but also a beautiful addition to your Christmas dinner table, with its vibrant colors and enticing aroma.
Ingredients (Serves 4-6):
- 2 pounds Yukon Gold potatoes, peeled and quartered
- 4 cloves garlic, unpeeled
- 1/4 cup unsalted butter
- 1/2 cup heavy cream
- 1/4 cup sour cream
- 1 tablespoon fresh rosemary, finely chopped
- 1 tablespoon fresh thyme, finely chopped
- Salt and pepper to taste
Instructions:
- Prepare the Garlic:
- Preheat the oven to 400°F (200°C). Place the unpeeled garlic cloves on a piece of aluminum foil, drizzle with a small amount of olive oil, and wrap tightly. Roast in the oven for about 20 minutes, or until the garlic is soft and fragrant. Remove from the oven and allow to cool slightly before peeling.
- Cook the Potatoes:
- Meanwhile, place the peeled and quartered potatoes in a large pot of cold, salted water. Bring to a boil over medium-high heat, then reduce the heat and simmer for 15-20 minutes, or until the potatoes are tender and easily pierced with a fork. Drain the potatoes well and return them to the pot.
- Mash the Potatoes:
- Add the peeled roasted garlic, butter, heavy cream, and sour cream to the pot with the drained potatoes. Use a potato masher or an electric mixer to mash the potatoes until smooth and creamy.
- Add Herbs and Season:
- Stir in the chopped rosemary and thyme, mixing well to evenly distribute the herbs. Season the mashed potatoes generously with salt and pepper to taste. Continue to mix until the herbs are fully incorporated.
- Serve:
- Transfer the mashed potatoes to a serving dish and garnish with additional sprigs of rosemary or thyme if desired. Serve hot alongside your favorite Christmas main dishes.
Extra Tips:
For an even creamier texture, you can pass the mashed potatoes through a potato ricer before adding the garlic and dairy ingredients. If you prefer a lighter version, substitute the heavy cream with half-and-half or milk.
Be careful not to overmix the potatoes as this can make them gummy. If you want a stronger garlic flavor, add more roasted garlic cloves. Roasted garlic can also be prepared ahead of time and stored in the refrigerator until you’re ready to use it.
Sweet Potato Casserole With Marshmallow Topping
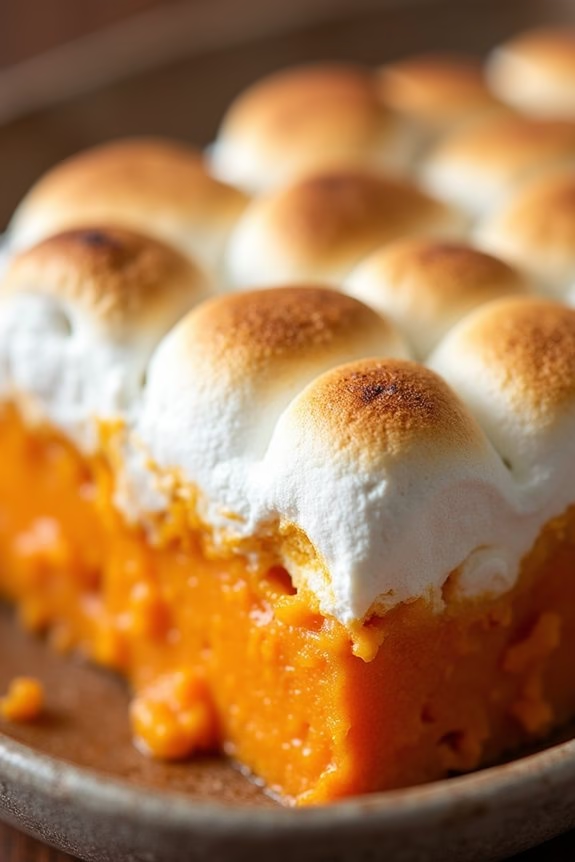
Sweet Potato Casserole With Marshmallow Topping is a classic holiday dish that brings warmth and sweetness to your Christmas dinner potluck. This delightful dish combines the earthy flavors of sweet potatoes with the creamy richness of butter and sugar, topped with a golden layer of marshmallows for an irresistible treat.
Ideal for a serving size of 4-6 people, this casserole is both easy to prepare and perfect for sharing with family and friends during the festive season.
The sweet potato base is made velvety smooth with the addition of butter, milk, and brown sugar, delivering a harmonious blend of flavors. Topped with fluffy marshmallows, it transforms into a beautiful golden crust once baked, providing a contrast of textures with every bite.
Whether you’re hosting the potluck or bringing a dish to share, this Sweet Potato Casserole With Marshmallow Topping is sure to be a crowd-pleaser.
Ingredients (Serves 4-6)
- 4 large sweet potatoes
- 1/2 cup unsalted butter, melted
- 1/3 cup brown sugar
- 1/2 cup milk
- 2 large eggs
- 1 teaspoon vanilla extract
- 1/2 teaspoon ground cinnamon
- 1/4 teaspoon salt
- 2 cups mini marshmallows
Instructions
- Preheat the oven: Start by preheating your oven to 350°F (175°C). This guarantees that the oven is hot enough to bake the casserole evenly.
- Prepare the sweet potatoes: Peel and dice the sweet potatoes into large chunks. Place them in a large pot, cover with water, and bring to a boil. Cook until the sweet potatoes are tender, about 20-25 minutes.
- Mash the sweet potatoes: Drain the cooked sweet potatoes and transfer them to a large mixing bowl. Using a potato masher or electric mixer, mash them until smooth.
- Mix the ingredients: Add the melted butter, brown sugar, milk, eggs, vanilla extract, cinnamon, and salt to the mashed sweet potatoes. Mix until all ingredients are well combined and the mixture is smooth.
- Assemble the casserole: Pour the sweet potato mixture into a greased baking dish, spreading it evenly. This guarantees the casserole bakes uniformly.
- Add the marshmallow topping: Evenly sprinkle the mini marshmallows over the top of the sweet potato mixture.
- Bake the casserole: Place the baking dish in the preheated oven and bake for 25-30 minutes, or until the marshmallows are golden brown and the casserole is heated through.
- Cool and serve: Remove the casserole from the oven and let it cool for a few minutes before serving. This allows the dish to set slightly, making it easier to serve.
Extra Tips
For an extra layer of flavor, consider adding a sprinkle of nutmeg or a dash of maple syrup to the sweet potato mixture.
If you prefer a bit of crunch, you can add a pecan crumble before adding the marshmallows.
To save time on the day of the potluck, you can prepare the sweet potato mixture a day in advance and store it in the refrigerator. Simply add the marshmallows and bake when ready to serve.
Balsamic Roasted Brussels Sprouts
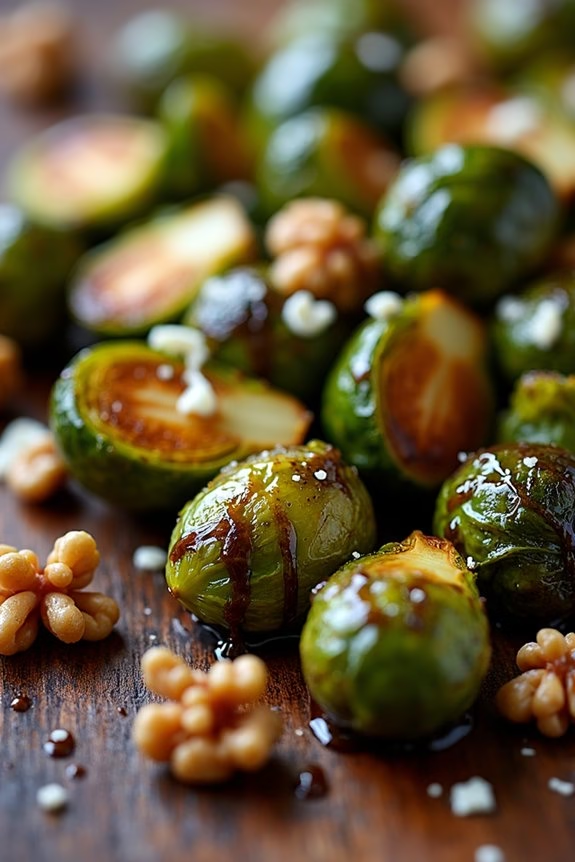
Balsamic Roasted Brussels Sprouts are a delightful and festive addition to any Christmas dinner potluck, offering a perfect balance of savory and tangy flavors. This dish isn’t only easy to prepare but also brings out the natural sweetness of Brussels sprouts, making it a crowd-pleaser even for those who aren’t typically fans of this green vegetable.
The balsamic glaze, combined with the crispy roasted texture, provides a rich depth of flavor that complements any holiday spread. Whether you’re hosting a large gathering or attending a smaller family dinner, these Balsamic Roasted Brussels Sprouts are sure to impress your guests.
They pair wonderfully with traditional holiday mains like turkey or ham, and their vibrant green color adds a festive touch to your table. Plus, this recipe can be prepared ahead of time and quickly reheated, making it a stress-free option for your holiday menu.
Ingredients (serves 4-6):
- 1.5 pounds Brussels sprouts, trimmed and halved
- 3 tablespoons olive oil
- Salt and pepper to taste
- 1/4 cup balsamic vinegar
- 1 tablespoon honey
- 2 cloves garlic, minced
- 1/4 cup chopped walnuts (optional)
- 1/4 cup grated Parmesan cheese (optional)
Cooking Instructions:
- Preheat Oven: Start by preheating your oven to 400°F (200°C). This guarantees the Brussels sprouts will roast evenly and achieve a crispy texture.
- Prepare Brussels Sprouts: Trim the ends of the Brussels sprouts and remove any yellow or damaged leaves. Cut each sprout in half to allow for even roasting.
- Seasoning: In a large mixing bowl, combine the halved Brussels sprouts with olive oil, salt, and pepper. Toss them well to make sure they’re evenly coated with the seasoning.
- Roasting: Spread the seasoned Brussels sprouts in a single layer on a baking sheet. Place them in the preheated oven and roast for 20-25 minutes, or until they’re golden brown and crispy on the edges.
- Prepare Balsamic Glaze: While the sprouts are roasting, prepare the balsamic glaze. In a small saucepan over medium heat, combine balsamic vinegar, honey, and minced garlic. Stir occasionally and let the mixture simmer until it reduces and thickens slightly, about 5 minutes.
- Combine and Serve: Once the Brussels sprouts are done roasting, remove them from the oven and drizzle the balsamic glaze over the top. Toss to combine, making sure each sprout is coated with glaze. If desired, sprinkle with chopped walnuts and Parmesan cheese for added flavor and texture.
- Final Touch: Serve the Balsamic Roasted Brussels Sprouts warm as a side dish for your Christmas dinner.
Extra Tips:
For the best results, confirm the Brussels sprouts are evenly coated with oil before roasting, as this will help them to crisp up nicely. If you prefer a sweeter glaze, adjust the honey to your taste.
Additionally, you can prepare the balsamic glaze in advance and store it in the refrigerator until needed—simply reheat before drizzling over the sprouts. For added flavor, consider adding a dash of red pepper flakes for a spicy kick. Enjoy this versatile and delicious side that pairs perfectly with your holiday favorites!
Cheesy Green Bean Casserole
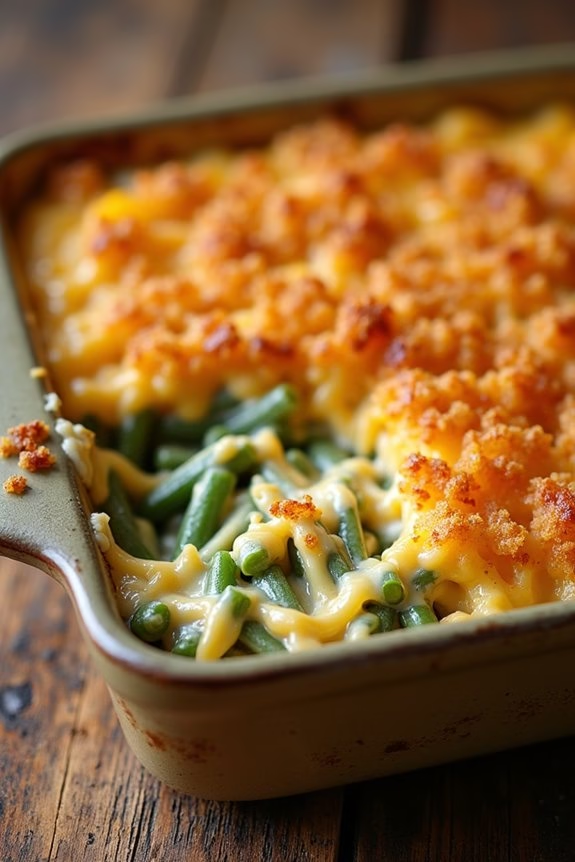
Cheesy Green Bean Casserole is a delightful twist on the classic green bean casserole that will surely become a favorite at your Christmas dinner potluck. This dish combines fresh green beans with a rich, creamy cheese sauce, topped with crispy fried onions for that perfect crunch.
It’s a comforting side dish that pairs well with any main course and adds a pop of color to your holiday table. This recipe serves 4-6 people, making it ideal for a small gathering or as part of a larger potluck spread.
The cheesy sauce is made from a blend of cheeses that melt perfectly over the tender green beans, while the fried onions add a savory, crunchy texture. It’s an easy recipe to make ahead of time, allowing you to enjoy the festivities with your loved ones rather than being stuck in the kitchen.
Ingredients:
- 1 pound fresh green beans, trimmed and cut into 1-inch pieces
- 2 tablespoons unsalted butter
- 2 tablespoons all-purpose flour
- 1 cup milk
- 1 cup shredded cheddar cheese
- 1/2 cup grated Parmesan cheese
- Salt and pepper to taste
- 1 cup crispy fried onions
Cooking Instructions:
- Preheat and Prepare: Preheat your oven to 350°F (175°C). While the oven is heating, bring a large pot of salted water to a boil. Add the green beans and cook them for about 5 minutes until they’re bright green and tender-crisp. Drain and set aside.
- Make the Cheese Sauce: In a medium saucepan, melt the butter over medium heat. Once melted, whisk in the flour and cook for about 1 minute, stirring constantly to create a roux. Gradually whisk in the milk, continuing to stir for about 3-4 minutes until the mixture thickens.
- Add the Cheese: Remove the saucepan from the heat and stir in the cheddar and Parmesan cheeses until they’re fully melted and the sauce is smooth. Season the sauce with salt and pepper to taste.
- Combine and Bake: In a large mixing bowl, combine the cooked green beans with the cheese sauce, guaranteeing all the beans are well-coated. Transfer the mixture to a 9×13 inch baking dish. Sprinkle the crispy fried onions evenly over the top.
- Bake the Casserole: Place the baking dish in the preheated oven and bake for 20-25 minutes, or until the casserole is bubbly and the onion topping is golden brown.
Extra Tips: For an added layer of flavor, consider mixing in a teaspoon of garlic powder or a pinch of cayenne pepper into the cheese sauce.
If you prefer a thicker sauce, reduce the amount of milk slightly or add an extra tablespoon of flour when making the roux. To save time, you can prepare the casserole up to the baking step a day in advance and store it in the refrigerator. Just add the fried onions and bake it before serving to guarantee they stay crispy.
Cranberry and Pecan Stuffing
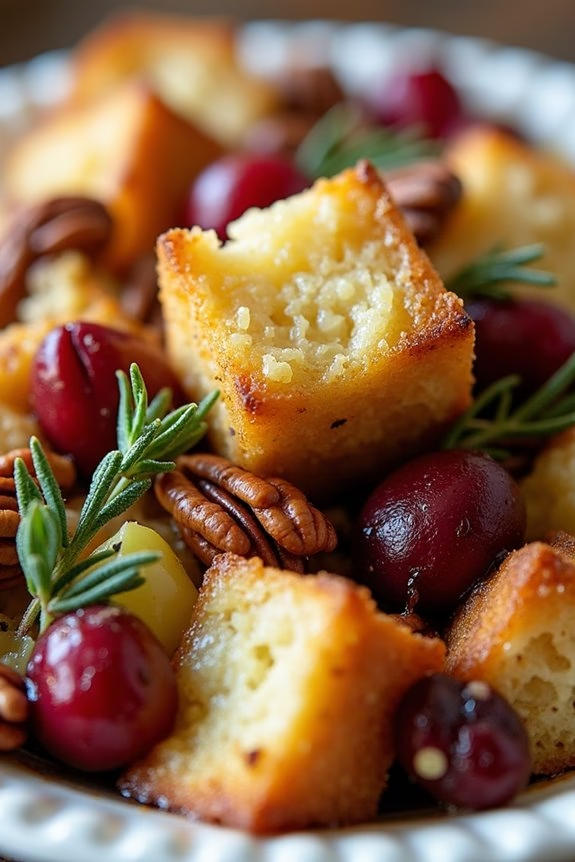
Cranberry and Pecan Stuffing is a delightful twist on the traditional holiday side dish, offering a balance of sweetness and nuttiness that complements the rich flavors of a Christmas dinner. This dish combines crusty bread cubes with tart cranberries, crunchy pecans, aromatic herbs, and a medley of vegetables, creating a stuffing that’s both delicious and visually appealing.
Whether served alongside turkey or a festive roast, this stuffing is bound to be a hit at your Christmas potluck. Perfect for a serving size of 4-6 people, this recipe allows each guest to enjoy a generous portion of this festive favorite. The combination of sweet cranberries and earthy pecans creates a unique flavor profile, while the herbs and vegetables add depth and aroma.
This stuffing can be prepared in advance, which makes it an ideal choice for a busy holiday season.
Ingredients:
- 8 cups of cubed crusty bread (preferably a day old)
- 1 cup of dried cranberries
- 1 cup of chopped pecans
- 1 cup of diced onion
- 1 cup of diced celery
- 2 cloves of garlic, minced
- 1 tablespoon of fresh sage, chopped
- 1 tablespoon of fresh thyme, chopped
- 2 cups of chicken or vegetable broth
- 1/4 cup of unsalted butter
- Salt and pepper to taste
Cooking Instructions:
- Preheat Your Oven: Begin by preheating your oven to 350°F (175°C). This will guarantee that your stuffing cooks evenly and achieves a nice golden crust.
- Prepare the Bread Cubes: Spread the bread cubes on a baking sheet and toast them in the oven for about 10 minutes, or until they become slightly crispy. This helps the bread absorb the flavors without becoming too soggy.
- Cook the Vegetables: In a large skillet, melt the butter over medium heat. Add the diced onion, celery, and garlic. Sauté for about 5-7 minutes, or until the vegetables are softened and fragrant.
- Combine Ingredients: In a large mixing bowl, combine the toasted bread cubes, sautéed vegetables, dried cranberries, chopped pecans, sage, thyme, salt, and pepper. Toss everything together until well mixed.
- Add the Broth: Gradually pour the chicken or vegetable broth over the bread mixture, stirring gently to confirm that all the bread cubes are moistened. Be careful not to over-saturate the bread.
- Transfer to Baking Dish: Lightly grease a baking dish and transfer the stuffing mixture into it, spreading it out evenly.
- Bake the Stuffing: Cover the dish with foil and bake in the preheated oven for 20 minutes. Then, remove the foil and bake for an additional 15-20 minutes, or until the top is golden brown and crispy.
- Serve and Enjoy: Once baked, remove the stuffing from the oven and let it cool slightly before serving.
Extra Tips:
For an even richer flavor, consider adding a splash of white wine when sautéing the vegetables. If you prefer a more moist stuffing, increase the amount of broth slightly. To save time, you can prepare the stuffing mixture a day in advance and store it in the refrigerator, then bake it just before serving.
If you want to make the dish vegetarian, simply use vegetable broth instead of chicken broth.
Savory Bread Pudding With Sausage

Savory Bread Pudding With Sausage is a delightful twist on the traditional sweet bread pudding, making it a perfect dish for a Christmas dinner potluck. This comforting dish combines the hearty flavors of sausage with a creamy custard, all enveloped in cubes of crusty bread. The result is a rich, savory pudding that’s sure to please guests and add a touch of warmth to the holiday table.
It’s a versatile dish that can be prepared in advance and baked just before serving, making it a convenient option for busy holiday gatherings. This savory bread pudding isn’t only delicious but also easy to customize. You can add your favorite vegetables or switch up the type of cheese to suit your taste.
It’s a great way to use up stale bread, and the combination of flavors and textures makes it a standout dish. Whether you’re hosting a large gathering or attending a potluck, this recipe is designed to serve 4-6 people, guaranteeing everyone gets to enjoy a satisfying portion.
Ingredients (serving size: 4-6 people):
- 1 pound Italian sausage, casings removed
- 4 cups day-old bread, cubed
- 1 onion, diced
- 2 cloves garlic, minced
- 1 cup shredded Gruyère cheese
- 4 large eggs
- 2 cups milk
- 1/2 cup heavy cream
- 1 teaspoon salt
- 1/2 teaspoon black pepper
- 1 teaspoon dried thyme
- 1/2 teaspoon dried rosemary
- 1 tablespoon olive oil
- 2 tablespoons chopped fresh parsley
Cooking Instructions:
- Prepare the Sausage: In a large skillet over medium heat, add the olive oil. Once hot, add the sausage, breaking it up with a spoon. Cook until browned and cooked through, about 8-10 minutes. Remove from the skillet and set aside.
- Sauté the Aromatics: In the same skillet, add the diced onion and minced garlic. Sauté for 4-5 minutes until the onion is translucent and the garlic is fragrant. Remove from heat.
- Assemble the Bread Pudding: In a large mixing bowl, combine the cubed bread, cooked sausage, sautéed onions, garlic, and shredded Gruyère cheese. Mix until well incorporated.
- Prepare the Custard: In a separate bowl, whisk together the eggs, milk, heavy cream, salt, pepper, thyme, and rosemary until well blended.
- Combine with Custard: Pour the custard mixture over the bread mixture. Gently toss to confirm all the bread cubes are evenly soaked. Let the mixture sit for about 20 minutes to allow the bread to absorb the custard.
- Preheat the Oven: While the bread mixture is resting, preheat your oven to 350°F (175°C).
- Bake the Pudding: Transfer the bread mixture into a greased 9×13 inch baking dish. Spread it out evenly, and sprinkle with chopped fresh parsley. Bake in the preheated oven for 45-50 minutes, or until the top is golden brown and the custard is set.
- Serve: Allow the savory bread pudding to cool slightly before serving. Enjoy warm.
Extra Tips: For a more intense flavor, consider using a mix of different types of bread, such as sourdough or whole grain, which can add depth to the dish. If you prefer a spicier kick, try using spicy Italian sausage.
Remember that letting the bread soak in the custard is vital for a moist pudding, so don’t rush this step. Finally, this dish can be prepared a day in advance; simply cover and refrigerate, then bake fresh before serving.
Maple-Glazed Carrots
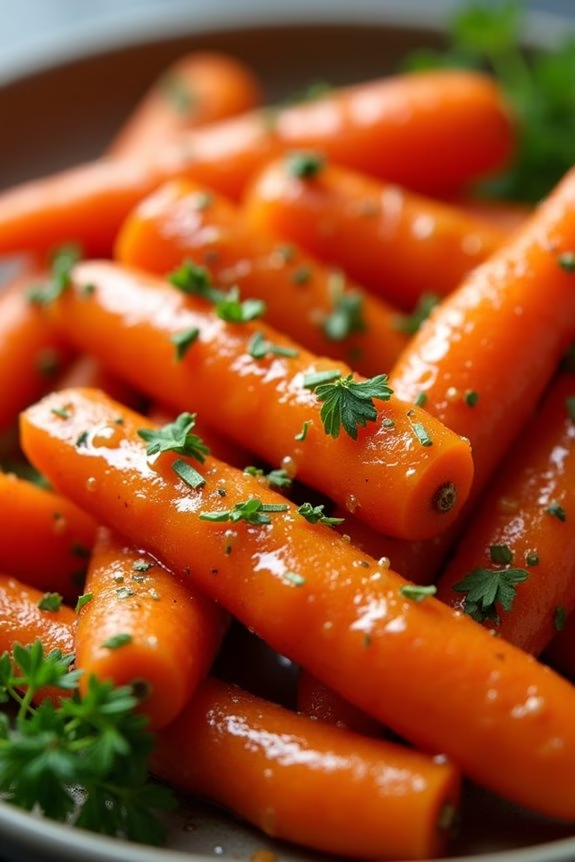
Maple-Glazed Carrots are a delightful side dish that brings a sweet and savory touch to your Christmas dinner potluck. This recipe showcases the natural sweetness of carrots, enhanced by a luscious maple glaze that will have everyone reaching for seconds. The dish is both simple to prepare and elegant enough for a festive holiday meal.
Whether you’re hosting or attending a potluck, these glazed carrots will complement any main course, providing a vibrant splash of color and flavor to your table.
The key to perfect Maple-Glazed Carrots lies in balancing the sweetness of maple syrup with a hint of butter and seasoning. The glaze coats each piece of carrot beautifully, creating a shiny and appetizing finish. When cooked to tender perfection, the carrots retain a slight crunch while absorbing the rich, sweet glaze. This recipe is designed for 4-6 servings, making it ideal for a small family gathering or as part of a larger spread.
Ingredients (Serves 4-6):
- 1 1/2 pounds of carrots, peeled and cut into 1/2-inch thick slices
- 2 tablespoons of unsalted butter
- 1/4 cup pure maple syrup
- 1/2 teaspoon salt
- 1/4 teaspoon freshly ground black pepper
- 1 teaspoon fresh thyme leaves (optional)
- 1 tablespoon fresh parsley, chopped (for garnish)
Instructions:
- Prepare the Carrots: Start by peeling the carrots and slicing them into uniform 1/2-inch thick rounds. This guarantees even cooking and a pleasing presentation.
- Cook the Carrots: In a large skillet or saucepan, add the carrots and enough water to cover them. Bring to a boil over medium-high heat. Once boiling, reduce the heat to medium and let them simmer for about 6-8 minutes, or until they’re just tender but still firm to the bite. Drain the carrots and set them aside.
- Make the Glaze: In the same skillet, melt the butter over medium heat. Once melted, add the maple syrup, salt, and pepper, stirring to combine. Allow the mixture to cook for about 2 minutes until it starts to thicken slightly.
- Glaze the Carrots: Return the cooked carrots to the skillet with the glaze. Toss them gently to confirm each piece is well-coated. Cook for another 3-4 minutes, stirring occasionally, until the carrots are tender and the glaze has thickened to your desired consistency.
- Finish and Serve: Remove the skillet from the heat. If desired, sprinkle fresh thyme leaves over the carrots for an herby accent. Transfer the glazed carrots to a serving dish and garnish with chopped parsley for a pop of color. Serve warm.
Extra Tips:
When selecting carrots, opt for those that are firm and bright in color, as they’ll yield the best flavor and texture.
If you’re preparing this dish in advance, you can partially cook the carrots and prepare the glaze separately. Just before serving, reheat the glaze in a skillet, add the carrots, and finish cooking them through.
For a flavor twist, consider adding a splash of orange juice or a pinch of cinnamon to the glaze. This dish pairs wonderfully with roasted meats, providing a sweet contrast to savory mains.
Creamy Spinach Gratin
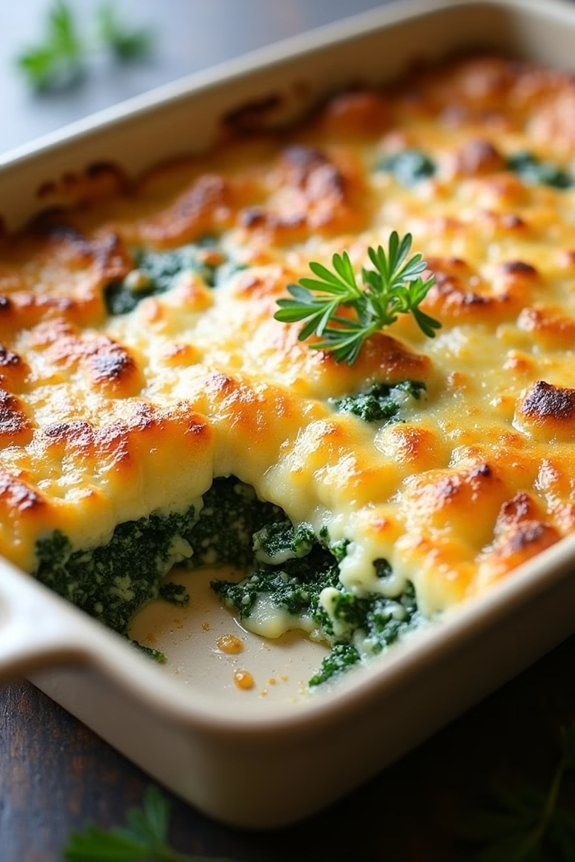
Creamy Spinach Gratin is a delightful side dish that brings a rich and velvety texture to your Christmas dinner potluck. This dish combines tender spinach with a luscious cream sauce, topped with a crispy, golden brown layer of cheese and breadcrumbs. Perfectly complementing any holiday main course, this gratin provides a comforting and savory experience that guests will love and remember.
It’s a wonderful way to incorporate greens into your festive meal without compromising on flavor or elegance. This recipe serves 4-6 people and is relatively simple to prepare, making it an ideal choice for a potluck where you want to impress without spending countless hours in the kitchen. The combination of fresh ingredients and a creamy sauce creates a harmonious balance that will satisfy both the heart and the palate.
Creamy Spinach Gratin isn’t only a treat for the taste buds but also a visually appealing addition to any holiday table spread.
Ingredients:
- 2 pounds fresh spinach, washed and trimmed
- 2 tablespoons unsalted butter
- 2 cloves garlic, minced
- 1 small onion, finely chopped
- 1 cup heavy cream
- 1 cup whole milk
- 1/2 teaspoon ground nutmeg
- Salt and pepper to taste
- 1 cup Gruyère cheese, grated
- 1/2 cup Parmesan cheese, grated
- 1/2 cup breadcrumbs
- 2 tablespoons olive oil
Instructions:
- Preheat and Prepare: Preheat your oven to 375°F (190°C). Grease a medium-sized baking dish with butter or olive oil to prevent sticking.
- Wilt the Spinach: In a large skillet over medium heat, add the spinach and cook until wilted, about 3-4 minutes. You may need to do this in batches. Once wilted, transfer the spinach to a colander and press out excess moisture.
- Sauté Aromatics: In the same skillet, melt the butter over medium heat. Add the minced garlic and chopped onion, cooking until the onion is translucent and fragrant, about 5 minutes.
- Make the Cream Sauce: Pour in the heavy cream and milk, stirring to combine. Add the ground nutmeg, salt, and pepper. Let the mixture simmer for about 5 minutes until slightly thickened.
- Combine Spinach and Sauce: Add the wilted spinach to the cream sauce and stir to coat evenly. Transfer this mixture to the prepared baking dish.
- Top with Cheese and Breadcrumbs: In a bowl, mix the Gruyère and Parmesan cheeses. Sprinkle this cheese mixture over the spinach. In another small bowl, mix breadcrumbs with olive oil and spread evenly over the cheese.
- Bake: Place the baking dish in the preheated oven and bake for 20-25 minutes, or until the top is golden brown and the edges are bubbly.
- Cool and Serve: Remove from the oven and let it cool for a few minutes before serving. This will help the gratin set and make it easier to serve.
Extra Tips:
For an extra layer of flavor, consider adding a pinch of red pepper flakes to the cream sauce for a subtle heat. If you’re preparing this dish ahead of time, you can assemble it up to the baking step and refrigerate it. Just remember to bring it to room temperature before baking.
Additionally, if you prefer a thicker sauce, you can whisk in a tablespoon of flour to the butter before adding the cream and milk to create a roux. For a more indulgent version, try substituting some of the Gruyère with Fontina or Emmental cheese, which melts beautifully.
Traditional Yorkshire Pudding
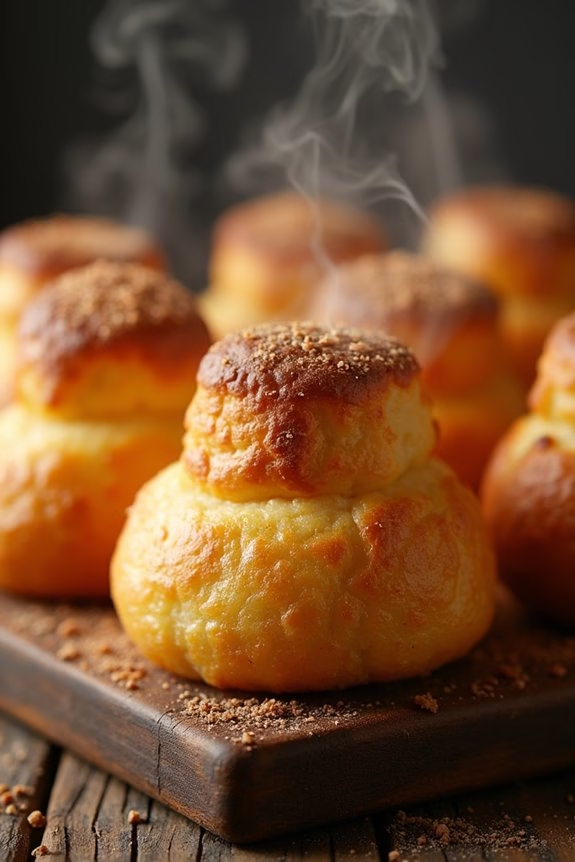
Yorkshire Pudding is a classic British side dish, often enjoyed during festive occasions such as a Christmas dinner. This delightful pudding is known for its light and crispy exterior with a soft, doughy interior, making it the perfect accompaniment to roast meats and gravies.
Originating from Yorkshire in England, this dish has been a staple in British households for centuries and has become a beloved addition to Christmas potlucks around the world.
The key to a successful Yorkshire Pudding lies in its simple ingredients and the method of cooking. The batter is made from a mixture of eggs, flour, and milk, which is then poured into hot beef drippings or oil in a preheated pan. The high oven temperature guarantees that the batter rises beautifully, creating tall and airy puddings.
Whether you’re hosting a family gathering or attending a potluck, this recipe for Traditional Yorkshire Pudding will serve 4-6 people and is bound to impress your guests.
Ingredients (Serves 4-6):
- 2 large eggs
- 1 cup all-purpose flour
- 1 cup whole milk
- 1/2 teaspoon salt
- 1/4 cup beef drippings or vegetable oil
Cooking Instructions:
- Preheat the Oven: Set your oven to 425°F (220°C). Place a 12-cup muffin tin or a dedicated Yorkshire pudding tin in the oven to heat up.
- Make the Batter: In a mixing bowl, whisk together the eggs and milk until well combined. Gradually add the flour and salt, whisking until you have a smooth batter. Let the batter rest for at least 30 minutes to allow the gluten to develop.
- Prepare the Muffin Tin: Once the oven and the tin are hot, carefully remove the tin from the oven. Add about a teaspoon of beef drippings or vegetable oil into each cup of the tin. Return the tin to the oven for about 5 minutes to make sure the oil is sizzling hot.
- Pour the Batter: Quickly and carefully pour the batter into each cup of the hot tin, filling them about halfway. The sizzling oil will help the batter rise and create the desired texture.
- Bake the Puddings: Place the tin back into the oven and bake for 20-25 minutes without opening the oven door. The puddings should be golden brown and puffed up considerably.
- Serve Immediately: Once baked, remove the Yorkshire Puddings from the oven and serve immediately while they’re still warm and crispy. They’re best enjoyed fresh out of the oven.
Extra Tips:
To guarantee your Yorkshire Puddings rise to their full potential, it’s important to have both the tin and the oil extremely hot before adding the batter. This initial heat shock is essential for the batter to puff up.
Additionally, avoid opening the oven door during baking, as this can cause the puddings to deflate. If you’re preparing the dish for a larger crowd, you can easily double the recipe and bake in batches. Enjoy these delightful Yorkshire Puddings with your favorite roast and gravy for a truly traditional Christmas dinner experience.
Homemade Apple Pie

Nothing embodies the spirit of a cozy Christmas dinner quite like a warm, homemade apple pie. With its flaky crust and flavorful filling, this classic dessert is sure to be a hit at your holiday potluck. The combination of tart apples, sweet cinnamon, and a buttery crust creates a deliciously timeless treat that brings comfort and joy to any festive gathering.
Making a homemade apple pie from scratch may seem challenging, but with a bit of patience and the right ingredients, you can create a dessert that will impress your family and friends. The key to a perfect apple pie is choosing the right apples and ensuring the crust is perfectly flaky and golden brown. Follow the steps below to create a delicious apple pie that serves 4-6 people.
Ingredients:
- 2 1/2 cups all-purpose flour
- 1 cup unsalted butter (cold, diced)
- 1/4 cup granulated sugar
- 1/4 teaspoon salt
- 6-8 medium-sized apples (Granny Smith or Honeycrisp)
- 3/4 cup brown sugar
- 1 tablespoon lemon juice
- 1 teaspoon ground cinnamon
- 1/4 teaspoon ground nutmeg
- 1/4 teaspoon ground allspice
- 2 tablespoons cornstarch
- 1 egg (beaten for egg wash)
- 1 tablespoon milk
Instructions:
1. Prepare the Dough: In a large bowl, mix the all-purpose flour, granulated sugar, and salt. Add the cold, diced butter and use a pastry cutter or your fingers to work it into the flour until the mixture resembles coarse crumbs.
Add 1/4 cup of ice-cold water, one tablespoon at a time, mixing until the dough comes together. Divide the dough into two discs, wrap each in plastic wrap, and refrigerate for at least 1 hour.
2. Prepare the Filling: Peel, core, and slice the apples into 1/4-inch thick slices. In a large bowl, combine the apple slices, brown sugar, lemon juice, cinnamon, nutmeg, allspice, and cornstarch. Toss well to coat the apples evenly and set aside.
3. Roll Out the Dough: Preheat your oven to 425°F (220°C). On a lightly floured surface, roll out one disc of dough to fit a 9-inch pie pan. Carefully transfer the dough to the pan, pressing it gently into the bottom and sides. Trim any excess dough hanging over the edge.
4. Assemble the Pie: Pour the apple filling into the prepared pie crust, mounding it slightly in the center. Roll out the second disc of dough and place it over the filling. Trim and crimp the edges to seal. Cut several slits in the top crust to allow steam to escape.
5. Apply Egg Wash: In a small bowl, mix the beaten egg with the milk and brush it over the top crust. This will give your pie a beautiful golden brown finish.
6. Bake the Pie: Place the pie on a baking sheet to catch any drips and bake in the preheated oven for 20 minutes. Lower the temperature to 375°F (190°C) and continue baking for an additional 35-40 minutes, or until the crust is golden brown and the filling is bubbling.
7. Cool and Serve: Once baked, allow the pie to cool on a wire rack for at least 2 hours before serving. This will help the filling set properly.
Extra Tips: When making the pie crust, it’s essential to keep your ingredients cold to achieve the desired flakiness. If the dough becomes too warm while working with it, pop it back in the refrigerator for a few minutes.
Additionally, for a richer flavor, consider adding a touch of vanilla extract or a sprinkle of sea salt to the apple filling. Serve with a scoop of vanilla ice cream or a dollop of whipped cream for an extra indulgent treat.
Gingerbread Trifle
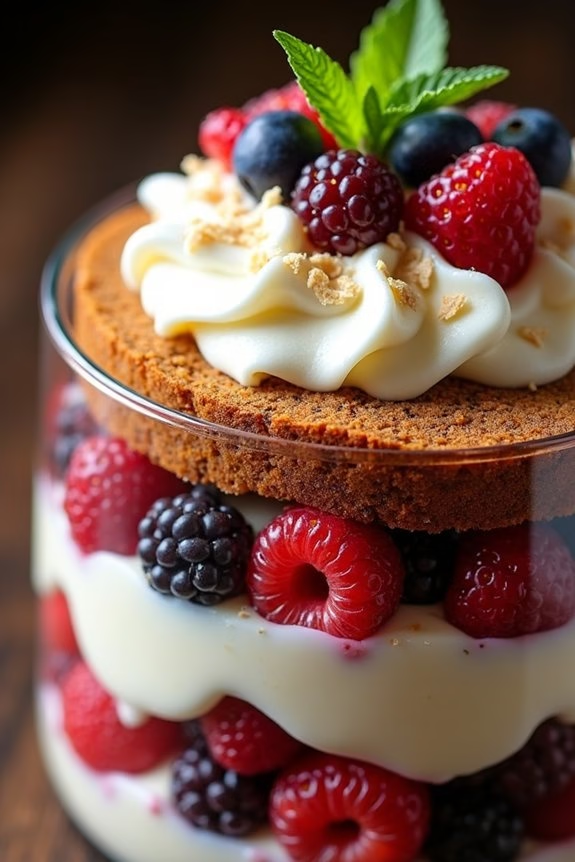
Gingerbread Trifle is a delightful holiday treat that combines the rich, spiced flavors of gingerbread with creamy layers of custard, whipped cream, and a hint of fruit. This dessert not only captivates the palate with its harmonious blend of textures and flavors but also presents beautifully in a trifle dish, making it a perfect centerpiece for your Christmas dinner potluck.
The layers of gingerbread cake, creamy custard, and tart fruit create a balanced dessert that’s both comforting and festive. This trifle is designed to serve 4-6 people, making it an ideal choice for smaller gatherings or as a festive addition to a larger potluck spread. Each spoonful offers a perfect mix of the spicy warmth from the gingerbread, the smoothness of the custard, and the freshness of the fruit, making it a crowd-pleaser that guests of all ages will enjoy.
Prepare this Gingerbread Trifle in advance to allow the flavors to meld together, enhancing the taste even further.
Ingredients for 4-6 servings:
- 1 loaf of gingerbread cake (store-bought or homemade)
- 2 cups vanilla custard
- 1 cup heavy cream
- 2 tablespoons powdered sugar
- 1 teaspoon vanilla extract
- 1 cup mixed berries (e.g., raspberries, blueberries, strawberries)
- 2 tablespoons crystallized ginger, finely chopped
- Fresh mint leaves (for garnish)
Cooking Instructions:
- Prepare the Whipped Cream: In a large mixing bowl, combine the heavy cream, powdered sugar, and vanilla extract. Using an electric mixer, whip the mixture on medium-high speed until soft peaks form. Set aside in the refrigerator to keep it chilled until needed.
- Cut the Gingerbread: Slice the gingerbread cake into thin, even pieces. You can use a serrated knife to make clean cuts. The slices should be about 1/2 inch thick to create a sturdy base for the trifle layers.
- Layer the Trifle: In a clear trifle dish or a large glass bowl, begin layering the dessert. Start with a layer of gingerbread slices at the bottom, making sure to cover the entire base. Add a layer of vanilla custard over the gingerbread, spreading it evenly.
- Add Berries and Ginger: Sprinkle a portion of the mixed berries and some of the crystallized ginger over the custard layer. This will add texture and a burst of flavor to each spoonful.
- Repeat Layers: Continue layering by adding another layer of gingerbread, followed by custard, berries, and crystallized ginger. Repeat until all ingredients are used, finishing with a layer of whipped cream on top.
- Chill the Trifle: Cover the trifle with plastic wrap and refrigerate for at least 2 hours, or overnight if possible. This allows the flavors to meld and the layers to settle.
- Garnish and Serve: Just before serving, garnish the trifle with fresh mint leaves and a few berries for an added touch of color and freshness. Serve chilled and enjoy!
Extra Tips:
For a more intense ginger flavor, consider brushing the gingerbread slices with a ginger syrup before layering. If you prefer a more boozy trifle, you can also add a splash of brandy or rum to the custard.
When selecting your berries, choose a mix that includes both tart and sweet varieties to balance the richness of the gingerbread and custard. Finally, if you’re making this dessert ahead of time, keep the whipped cream separate and add it just before serving to guarantee it stays fluffy and fresh.
Chocolate Peppermint Bark

Chocolate Peppermint Bark is a delightful and festive treat that combines the rich flavor of chocolate with the invigorating zing of peppermint. It’s a perfect addition to any Christmas dinner potluck, offering a sweet end to your holiday meal. This recipe is simple to prepare and requires just a few ingredients, making it an ideal choice for those who want to contribute something special without spending too much time in the kitchen.
This recipe serves 4-6 people and is great for sharing. The combination of dark and white chocolate gives this bark a beautiful marbled effect that’s visually appealing. The crushed peppermint candies add a crunchy texture and a burst of minty flavor, making this dessert both delicious and pretty to look at. Let’s explore how you can make this holiday treat at home.
Ingredients:
- 8 ounces of dark chocolate
- 8 ounces of white chocolate
- 1 teaspoon of peppermint extract
- 1/2 cup of crushed peppermint candies
Cooking Instructions:
- Prepare the Baking Sheet: Line a baking sheet with parchment paper. This will prevent the chocolate from sticking and make it easier to remove the bark once it has set.
- Melt the Dark Chocolate: In a microwave-safe bowl, melt the dark chocolate in 30-second intervals, stirring after each interval until smooth. You can also use a double boiler if preferred. Once melted, stir in 1/2 teaspoon of peppermint extract.
- Spread the Dark Chocolate: Pour the melted dark chocolate onto the prepared baking sheet, spreading it evenly with a spatula to about 1/4 inch thickness. Place the sheet in the refrigerator to set for about 15 minutes.
- Melt the White Chocolate: While the dark chocolate is setting, melt the white chocolate in a similar manner. Stir in the remaining 1/2 teaspoon of peppermint extract once it’s smooth.
- Add the White Chocolate Layer: Remove the baking sheet from the refrigerator and pour the melted white chocolate over the dark chocolate layer. Spread it evenly to cover the dark chocolate.
- Sprinkle the Peppermint Candies: Immediately sprinkle the crushed peppermint candies over the top of the white chocolate layer, pressing down gently to make sure they stick.
- Chill the Bark: Return the baking sheet to the refrigerator and allow the bark to set completely, about 1 hour.
- Break and Serve: Once fully set, remove the bark from the refrigerator. Break it into pieces using your hands or a sharp knife. Serve and enjoy!
Extra Tips:
When melting the chocolate, be careful not to overheat it as this can cause the chocolate to seize and become unusable. If this happens, try adding a small amount of vegetable oil to restore its smoothness.
Also, make sure that the peppermint candies are crushed into fine pieces, as larger chunks may not stick well to the chocolate. If you want to get creative, consider adding a drizzle of dark chocolate over the top for an extra decorative touch.
Remember to store any leftover bark in an airtight container at room temperature to maintain its freshness.