
When the holidays come knocking, the rush to create the perfect spread can feel overwhelming. Having quick and impressive appetizers up your sleeve is a game-changer. Think vibrant Bruschetta with Tomato and Basil or indulgent Stuffed Mushrooms that melt in your mouth. These tasty bites aren’t just delicious; they’re your holiday season saviors. Ready to explore more options to make your gathering unforgettable?
Bruschetta With Tomato and Basil

Bruschetta with Tomato and Basil is a classic Italian appetizer that perfectly blends simplicity with flavor. This delightful dish features crispy slices of toasted bread topped with an invigorating mixture of ripe tomatoes, fragrant basil, and a hint of garlic. It’s an ideal starter for any Christmas gathering, offering a burst of freshness that complements the heartier mains usually served during the season.
The contrasting textures of the crunchy bread and juicy topping make it a hit with guests, appealing to both the eyes and taste buds with its vibrant colors and robust taste.
Preparing Bruschetta with Tomato and Basil isn’t only quick but also allows for flexibility, as you can adjust the ingredients to suit your taste. This recipe serves 4-6 people, making it perfect for intimate holiday dinners or as a part of a larger spread.
Whether you’re a seasoned cook or a beginner looking to impress, this dish is a must-try for your Christmas menu. It requires minimal effort yet delivers maximum satisfaction, leaving your guests craving for more.
Ingredients for 4-6 servings:
- 1 baguette or Italian bread
- 4-5 ripe tomatoes
- 2 cloves of garlic
- A handful of fresh basil leaves
- 3 tablespoons of extra-virgin olive oil
- Salt and pepper to taste
- Balsamic glaze (optional)
Cooking Instructions:
- Prepare the Bread: Preheat your oven to 400°F (200°C). Slice the baguette or Italian bread into 1/2-inch thick slices. Arrange the slices on a baking sheet and lightly brush each piece with olive oil. Toast in the oven for about 5-7 minutes, or until the edges are golden brown and crispy. Remove from the oven and set aside to cool slightly.
- Prepare the Tomato Mixture: While the bread is toasting, dice the tomatoes into small pieces and place them in a bowl. Mince the garlic cloves and add them to the tomatoes. Tear the basil leaves into small pieces and mix them into the bowl with the tomatoes and garlic. Drizzle with 2 tablespoons of olive oil and season with salt and pepper to taste. Stir well to combine all the ingredients.
- Assemble the Bruschetta: Once the bread slices have cooled slightly, take a spoonful of the tomato mixture and place it on each slice. Make sure to distribute the mixture evenly among the bread slices. If desired, drizzle a small amount of balsamic glaze over the top for added flavor.
- Serve Immediately: Arrange the bruschetta on a serving platter and serve immediately, while the bread is still slightly warm and the topping is fresh.
Extra Tips:
For the best results, use high-quality, ripe tomatoes as they’re the star ingredient in this dish. You can prepare the tomato mixture a few hours in advance and store it in the refrigerator.
However, it’s best to assemble the bruschetta just before serving to keep the bread from becoming soggy. If you want to add a touch of sweetness, consider using a balsamic reduction instead of a glaze.
Feel free to experiment by adding other ingredients like mozzarella or a sprinkle of Parmesan cheese for an extra layer of flavor.
Stuffed Mushrooms With Cream Cheese

When it comes to holiday appetizers, Stuffed Mushrooms With Cream Cheese are a definite crowd-pleaser. These savory bites are perfect for Christmas gatherings, offering a delightful combination of flavors in every mouthful. The earthy taste of the mushrooms pairs beautifully with the creaminess of the cheese, creating a harmonious blend that’s both satisfying and irresistible.
Not only are they delicious, but they’re also visually appealing, making them a festive addition to any holiday spread. The best part about this recipe is its simplicity and the capability to prepare it ahead of time, leaving you free to enjoy the festivities with family and friends.
The preparation involves cleaning and preparing the mushrooms, mixing a flavorful filling, and baking them to perfection. Whether you’re hosting a large party or an intimate dinner, these stuffed mushrooms are sure to impress your guests and set the tone for a memorable celebration.
Ingredients for 4-6 Servings:
- 24 large button mushrooms
- 8 oz cream cheese, softened
- 1/4 cup grated Parmesan cheese
- 1/4 cup breadcrumbs
- 2 cloves garlic, minced
- 2 tablespoons fresh parsley, chopped
- 1 tablespoon olive oil
- Salt and pepper to taste
Cooking Instructions:
- Preheat the Oven: Begin by preheating your oven to 375°F (190°C). This will guarantee your mushrooms bake evenly and develop a delicious, golden topping.
- Prepare the Mushrooms: Gently clean the mushrooms with a damp paper towel to remove any dirt. Carefully remove the stems and set them aside. The cavity left by the stem will be perfect for holding the filling.
- Make the Filling: In a medium bowl, combine the cream cheese, Parmesan cheese, breadcrumbs, minced garlic, and chopped parsley. Mix until the ingredients are well blended. Add salt and pepper to taste.
- Stuff the Mushrooms: Using a small spoon or your fingers, fill each mushroom cap with the cream cheese mixture. Be generous with the filling, slightly mounding it over the top of each cap.
- Bake the Mushrooms: Arrange the stuffed mushrooms on a baking sheet lined with parchment paper. Drizzle the olive oil over the top to help them brown. Bake in the preheated oven for 20-25 minutes, or until the tops are golden brown and the mushrooms are tender.
- Serve: Once baked, remove the mushrooms from the oven and let them cool slightly before serving. They can be enjoyed warm or at room temperature, making them perfect for a party spread.
Extra Tips:
For the best flavor, try using fresh, high-quality ingredients. You can also experiment with adding other ingredients to the filling, such as chopped sun-dried tomatoes, crumbled bacon, or a variety of herbs.
If you prefer a spicier kick, add a pinch of red pepper flakes to the mixture. To save time on the day of your event, you can prepare the mushrooms in advance and refrigerate them until you’re ready to bake. Just be sure to bring them to room temperature before placing them in the oven to guarantee even cooking.
Enjoy your holiday gathering with these delightful stuffed mushrooms!
Caprese Skewers With Balsamic Glaze
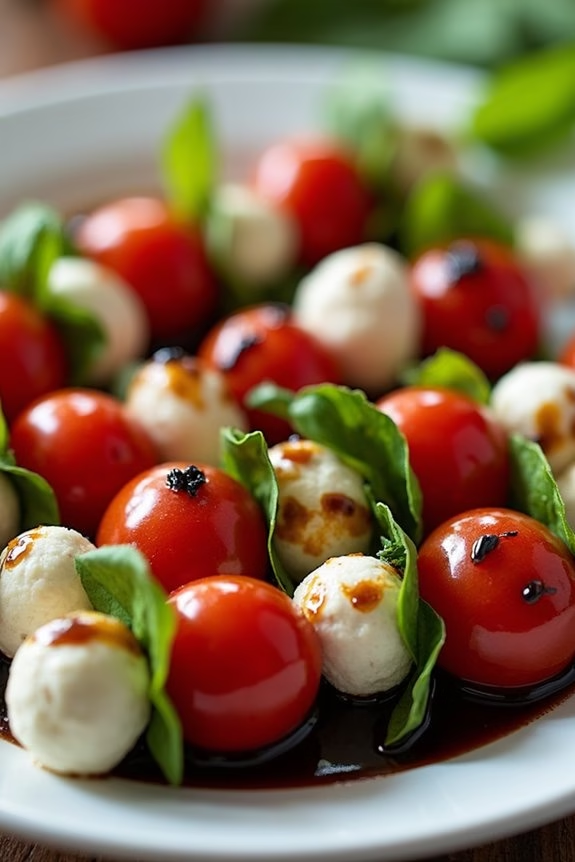
Caprese Skewers With Balsamic Glaze are a delightful and visually appealing appetizer perfect for any Christmas gathering. This simple yet elegant dish combines the fresh flavors of ripe cherry tomatoes, creamy mozzarella, and fragrant basil, all drizzled with a sweet and tangy balsamic glaze. The vibrant colors and fresh ingredients make these skewers not only a treat for the taste buds but also a beautiful addition to your holiday table.
This dish requires minimal preparation and can be assembled quickly, making it an ideal appetizer for hosting. The key to the perfect Caprese Skewers lies in the quality of the ingredients, so be sure to choose the freshest tomatoes, mozzarella, and basil you can find. The balsamic glaze can be made ahead of time, allowing you to focus on assembling the skewers right before your guests arrive.
Ingredients for 4-6 People:
- 20 cherry tomatoes
- 20 small mozzarella balls (bocconcini)
- 20 fresh basil leaves
- 1 cup balsamic vinegar
- 2 tablespoons honey
- 20 wooden skewers (or toothpicks)
- Salt and pepper to taste
Cooking Instructions:
- Prepare the Balsamic Glaze: In a small saucepan, combine the balsamic vinegar and honey. Bring the mixture to a boil over medium-high heat. Once boiling, reduce the heat to low and let it simmer until it reduces by half and thickens into a glaze, about 10-15 minutes. Remove from heat and let it cool.
- Assemble the Skewers: On each wooden skewer, thread one cherry tomato, followed by a basil leaf, and then a mozzarella ball. Repeat this sequence if the skewer is long enough, or continue with new skewers until all ingredients are used up.
- Season the Skewers: Lightly sprinkle the assembled skewers with salt and pepper to taste. This will enhance the natural flavors of the tomatoes and mozzarella.
- Drizzle with Balsamic Glaze: Once the glaze has cooled, drizzle it over the skewers. You can use a spoon or a squeeze bottle for more control over the amount of glaze on each skewer.
- Serve: Arrange the skewers on a serving platter. They’re best enjoyed fresh, so serve them immediately after drizzling with the glaze.
Extra Tips:
When making the balsamic glaze, keep an eye on it as it simmers because it can quickly go from the perfect consistency to burnt. If you prefer a thicker glaze, let it reduce a bit longer, but remember it will thicken more as it cools.
If you’re short on time, you can purchase pre-made balsamic glaze from the store. For a festive touch, consider using multi-colored cherry tomatoes to add more visual appeal.
Finally, if you’re preparing the skewers in advance, wait to drizzle the glaze until just before serving to keep everything fresh and vibrant.
Smoked Salmon and Dill Crackers

Smoked Salmon and Dill Crackers are a delightful and easy-to-make appetizer that can elevate your Christmas party menu. This dish combines the rich and savory flavors of smoked salmon with the fresh and aromatic essence of dill, all served on a crispy cracker base. Perfect for gatherings, these elegant bites aren’t only visually appealing but also incredibly satisfying.
Whether you’re hosting a large festive bash or a small family dinner, these appetizers will surely impress your guests with their gourmet taste and presentation.
The beauty of this recipe lies in its simplicity and the quality of its ingredients. With just a few steps, you can create an appetizer that feels sophisticated yet doesn’t require hours in the kitchen. The creamy layer of cheese mixed with dill adds a luscious texture, while the caper garnish provides a burst of tanginess that complements the smokiness of the salmon.
This recipe is designed for 4-6 people, making it ideal for intimate holiday gatherings or as part of a larger buffet spread.
Ingredients for 4-6 servings:
- 24 plain crackers (such as water crackers or any neutral-flavored crackers)
- 8 ounces of cream cheese, softened
- 1 tablespoon fresh dill, finely chopped
- 1 tablespoon lemon juice
- 12 ounces smoked salmon, thinly sliced
- 2 tablespoons capers, drained
- Freshly ground black pepper, to taste
- Lemon zest, for garnish (optional)
Cooking Instructions:
- Prepare the Dill Cream Cheese: In a medium bowl, combine the softened cream cheese, finely chopped dill, and lemon juice. Mix well until all ingredients are thoroughly blended and the mixture is smooth.
- Assemble the Crackers: Lay out the crackers on a large serving platter. Using a small spatula or spoon, spread a generous layer of the dill cream cheese mixture onto each cracker.
- Add the Smoked Salmon: Cut the smoked salmon into small pieces, approximately the size of each cracker. Place a piece of salmon on top of the cream cheese layer on each cracker.
- Garnish the Crackers: Top each cracker with a few capers. Sprinkle with freshly ground black pepper to taste. If desired, add a pinch of lemon zest for extra flavor and a touch of color.
- Serve Immediately: Arrange the crackers neatly on the platter and serve immediately to guarantee the crackers remain crisp and the flavors are fresh.
Extra Tips:
For the best results, verify that the cream cheese is at room temperature before mixing, as this will make it easier to blend with the dill and lemon juice. If you prefer a stronger dill flavor, consider adding an additional teaspoon of chopped dill to the cream cheese mixture.
When buying smoked salmon, opt for high-quality slices with a smooth, oily sheen, as this will translate into better flavor and texture. Finally, to keep the crackers from becoming soggy, assemble them no more than an hour before serving.
Enjoy your Smoked Salmon and Dill Crackers with a chilled glass of white wine or champagne for a truly festive experience!
Spinach and Artichoke Dip
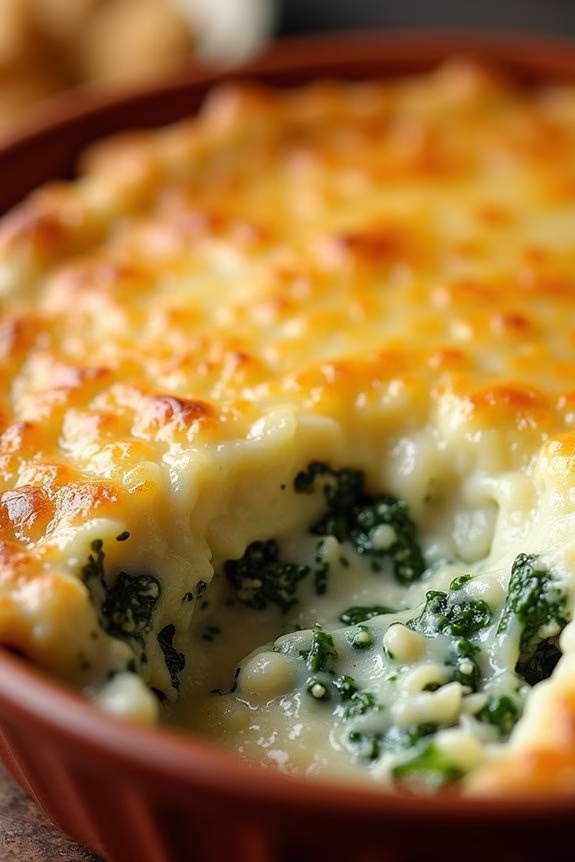
Spinach and Artichoke Dip is a classic appetizer that’s perfect for any Christmas gathering. This creamy and savory dish combines the flavors of tender spinach, tangy artichokes, and rich cheeses to create a warm and inviting dip that’s bound to please any crowd.
It’s a great way to start your holiday festivities, offering a delicious and comforting addition to your Christmas spread. Best served with a side of crispy toasted bread or crackers, this dip isn’t only easy to prepare but also a crowd-pleaser that will have your guests coming back for more.
This recipe is designed to serve 4-6 people, making it ideal for small to medium-sized gatherings. The combination of ingredients used in this dish creates a harmonious blend of flavors that complement each other perfectly.
The creamy texture of the dip, combined with the slight tanginess of the artichokes and the earthy taste of spinach, results in a well-balanced appetizer that’s both flavorful and satisfying. Follow along with the instructions below to create a dish that will undoubtedly become a staple at your holiday parties.
Ingredients:
- 1 (10-ounce) package frozen chopped spinach, thawed and drained
- 1 (14-ounce) can artichoke hearts, drained and chopped
- 1 cup cream cheese, softened
- 1 cup sour cream
- 1 cup mayonnaise
- 1 cup grated Parmesan cheese
- 1 cup shredded mozzarella cheese
- 2 cloves garlic, minced
- 1 teaspoon lemon juice
- Salt and pepper to taste
- Optional: Bread or crackers for serving
Instructions:
- Preheat the Oven: Start by preheating your oven to 375°F (190°C). This guarantees that your dip will cook evenly and develop a nice golden crust.
- Prepare the Spinach and Artichokes: In a medium-sized bowl, combine the thawed and drained spinach with the chopped artichoke hearts. Make sure to remove any excess moisture to prevent the dip from becoming watery.
- Mix the Base: In a large mixing bowl, combine the cream cheese, sour cream, and mayonnaise. Stir until smooth and well combined. This forms the creamy base of your dip.
- Add Cheese and Garlic: Fold in the Parmesan cheese, mozzarella cheese, and minced garlic into the creamy mixture. These ingredients add flavor and richness to the dip.
- Combine All Ingredients: Add the spinach and artichoke mixture into the creamy cheese mixture. Mix thoroughly to guarantee all ingredients are evenly distributed.
- Season and Flavor: Stir in the lemon juice, adding a fresh zing to the dish. Season with salt and pepper to taste, guaranteeing a balanced flavor profile.
- Transfer to Baking Dish: Spoon the mixture into an oven-safe baking dish, smoothing the top for even cooking.
- Bake the Dip: Place the dish in the preheated oven and bake for 25-30 minutes, or until the top is bubbly and golden brown.
- Serve: Once baked, remove from the oven and let cool slightly before serving. Pair with toasted bread or crackers for dipping.
Extra Tips:
For an extra layer of flavor, consider adding some chopped jalapeños or a dash of hot sauce for a spicy kick. You can also prepare the dip a day ahead and store it in the refrigerator, then bake it just before serving to save time on the day of your event.
Remember that freshly grated cheese melts better than pre-shredded, so it’s worth the effort to grate your own. Additionally, if you prefer a smoother texture, you can blend the ingredients together before baking for a creamier dip.
Enjoy your Spinach and Artichoke Dip, a delightful start to your Christmas feast!
Deviled Eggs With a Twist
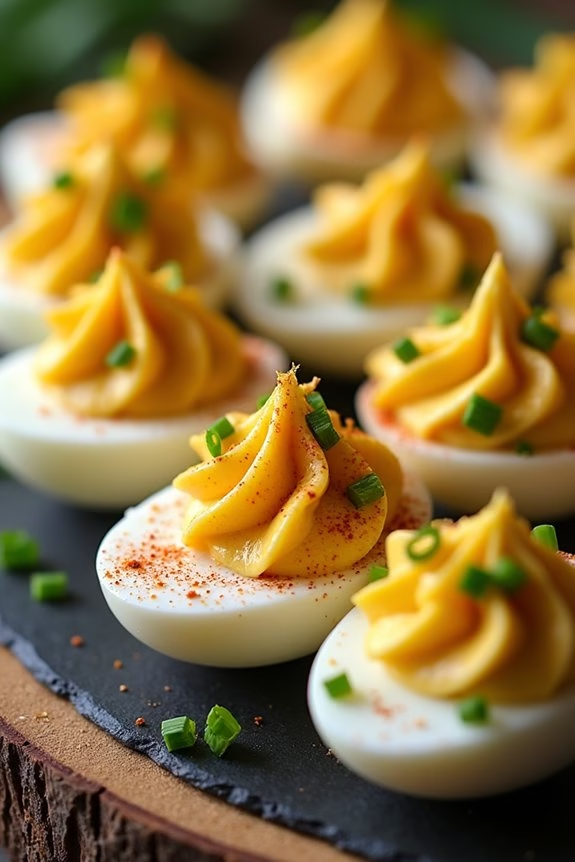
Deviled eggs are a classic appetizer that never fails to please a crowd, especially during the festive holiday season. This version brings a modern twist to the traditional recipe, incorporating unique flavors that elevate the dish to new heights. With a creamy filling that packs a punch of flavor, these deviled eggs are destined to be a hit at your Christmas gathering.
The twist in this recipe comes from adding ingredients like smoked paprika, Dijon mustard, and a touch of sriracha, which give the eggs a smoky, tangy, and slightly spicy flavor profile. The combination of these ingredients creates a delightful balance that will have your guests reaching for more. This recipe yields enough deviled eggs to serve 4-6 people, making it perfect for a small holiday party or family dinner.
Ingredients (Serves 4-6):
- 6 large eggs
- 3 tablespoons mayonnaise
- 1 teaspoon Dijon mustard
- 1 teaspoon apple cider vinegar
- 1/4 teaspoon sriracha sauce
- 1/2 teaspoon smoked paprika (plus extra for garnish)
- Salt and pepper to taste
- Fresh chives for garnish
Cooking Instructions:
- Boil the Eggs: Place the eggs in a single layer in a saucepan and cover them with cold water by about an inch. Bring the water to a rolling boil over medium-high heat. Once boiling, remove the saucepan from the heat, cover it, and let the eggs sit for 10-12 minutes.
- Cool and Peel: After the eggs have rested, gently transfer them to a bowl of ice water to cool for at least 5 minutes. This stops the cooking process and makes peeling easier. Once cooled, carefully peel the eggs.
- Prepare the Filling: Slice each egg in half lengthwise. Remove the yolks and place them in a mixing bowl. Mash the yolks with a fork until smooth.
- Mix the Ingredients: Add mayonnaise, Dijon mustard, apple cider vinegar, sriracha sauce, smoked paprika, salt, and pepper to the mashed yolks. Mix until well combined and creamy.
- Fill the Egg Whites: Spoon or pipe the yolk mixture back into the hollowed egg whites. Ascertain each egg white half is filled generously.
- Garnish and Serve: Lightly sprinkle additional smoked paprika over the filled eggs for a pop of color. Garnish with chopped fresh chives. Serve immediately or refrigerate until ready to serve.
Extra Tips:
When making deviled eggs, it’s important to confirm that the eggs aren’t overcooked to avoid a rubbery texture. Using older eggs can make peeling easier, as fresher eggs are known to be more difficult to peel.
If you prefer a less spicy version, you can adjust the amount of sriracha sauce to suit your taste. Finally, if you don’t have a piping bag, a small plastic bag with the corner snipped off works just as well to fill the egg whites neatly.
Prosciutto-Wrapped Asparagus
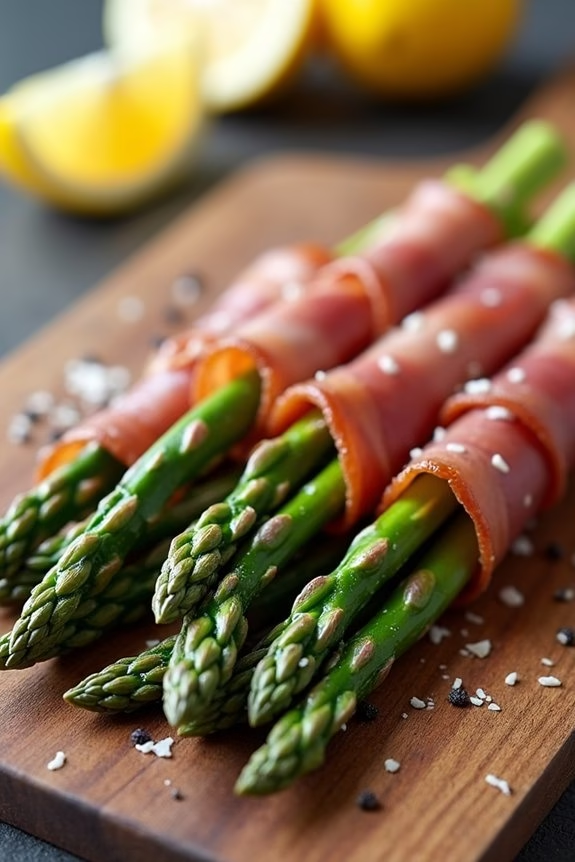
Prosciutto-Wrapped Asparagus is a delightful and elegant appetizer perfect for your Christmas celebrations. This dish combines the earthy flavors of fresh asparagus with the salty, savory taste of prosciutto. The result is a simple yet sophisticated appetizer that will impress your guests and add a touch of gourmet flair to your holiday table.
This recipe isn’t only easy to prepare, but it also requires minimal ingredients, making it a convenient choice for any host or hostess looking to spend more time with their loved ones and less time in the kitchen.
Asparagus, with its vibrant green color, is a wonderful vegetable to serve during the festive season. When wrapped in thin slices of prosciutto, it becomes a visually appealing and mouthwatering bite-sized treat. This recipe for Prosciutto-Wrapped Asparagus is designed to serve 4-6 people, making it an ideal appetizer for small gatherings or larger holiday feasts.
Whether you’re serving it as a starter or alongside a variety of other appetizers, this dish is sure to be a hit at your Christmas celebration.
Ingredients (serves 4-6):
- 1 pound of fresh asparagus spears
- 8 ounces of thinly sliced prosciutto
- 2 tablespoons of olive oil
- Freshly ground black pepper, to taste
- Grated Parmesan cheese (optional)
- Lemon wedges for serving (optional)
Cooking Instructions:
- Prepare the Asparagus: Preheat your oven to 400°F (200°C). Wash the asparagus spears thoroughly and trim the tough ends. Pat them dry with a paper towel to guarantee they roast properly.
- Wrap with Prosciutto: Take a slice of prosciutto and wrap it around each asparagus spear, starting from the bottom and spiraling up towards the tip. Make sure the prosciutto is snug but not too tight, allowing for even cooking.
- Arrange on a Baking Sheet: Line a baking sheet with parchment paper or foil for easy cleanup. Place the wrapped asparagus spears on the sheet, ensuring they’re spaced out to allow for even roasting.
- Season and Drizzle: Lightly drizzle the asparagus with olive oil and sprinkle freshly ground black pepper over them. If desired, you can also sprinkle a bit of grated Parmesan cheese for extra flavor.
- Roast in the Oven: Place the baking sheet in the preheated oven and roast the asparagus for 10-15 minutes, or until the prosciutto becomes crispy and the asparagus is tender. Keep an eye on them to prevent the prosciutto from burning.
- Serve and Enjoy: Once done, remove the asparagus from the oven and let them cool slightly. Serve warm with lemon wedges on the side, allowing guests to squeeze some fresh lemon juice over the asparagus for a zesty finish.
Extra Tips:
For the best results, choose asparagus spears that are of medium thickness; very thin spears may cook too quickly and become overly soft.
If you prefer your prosciutto to be extra crispy, you can broil the asparagus for the last 1-2 minutes of cooking, but be sure to watch them closely to avoid burning.
Additionally, if you’re preparing this dish in advance, you can wrap the asparagus in prosciutto and store them in the refrigerator until you’re ready to roast them. This will save you time on the day of your event, allowing you to focus on other preparations.
Cranberry Brie Bites

Cranberry Brie Bites are a delightful appetizer that perfectly combines the creamy richness of Brie cheese with the tart sweetness of cranberry sauce, all encased in flaky puff pastry. This dish isn’t only visually appealing but also incredibly easy to prepare, making it an ideal choice for holiday gatherings or cozy evenings at home.
The contrasting flavors and textures come together to create a delightful bite-sized treat that’s sure to impress your guests. These Cranberry Brie Bites can be prepared in advance and baked just before serving, allowing you to enjoy your holiday festivities without spending too much time in the kitchen.
The recipe yields enough bites for 4-6 people, making it perfect for a small gathering or as part of a larger appetizer spread. Whether you’re a seasoned cook or a beginner, you’ll find this recipe simple and rewarding, with minimal ingredients and preparation time required.
Ingredients for 4-6 servings:
- 1 sheet of puff pastry, thawed
- 8 oz Brie cheese, cut into small cubes
- 1/2 cup cranberry sauce (homemade or store-bought)
- 1/4 cup chopped walnuts or pecans (optional)
- 1 egg, beaten (for egg wash)
- Fresh rosemary sprigs (optional, for garnish)
Cooking Instructions:
1. Preheat the Oven:
Preheat your oven to 375°F (190°C) and line a baking sheet with parchment paper or a silicone baking mat.
2. Prepare the Puff Pastry:
Roll out the thawed puff pastry sheet on a lightly floured surface. Cut the sheet into approximately 2-inch squares. You should have around 16 squares, which fits well for 4-6 servings.
3. Assemble the Bites:
Place a cube of Brie cheese in the center of each puff pastry square. Add a teaspoon of cranberry sauce on top of the Brie. If using nuts, sprinkle a few chopped walnuts or pecans over the cranberry sauce.
4. Seal the Pastry:
Gather the corners of the puff pastry square and pinch them together to seal the bite. It’s okay if the pastry doesn’t fully enclose the filling, as long as it holds its shape.
5. Apply the Egg Wash:
Use a pastry brush to lightly brush the tops of the pastry bites with the beaten egg. This will give them a beautiful golden color when baked.
6. Bake the Bites:
Arrange the prepared bites on the baking sheet, leaving a little space between each one. Bake in the preheated oven for 15-20 minutes, or until the pastry is puffed and golden brown.
7. Garnish and Serve:
Once baked, remove the bites from the oven and let them cool slightly. Garnish each bite with a small sprig of fresh rosemary if desired, and serve warm.
Extra Tips:
To guarantee your Cranberry Brie Bites turn out perfectly, make sure the puff pastry is well-thawed but still cold when you start working with it; this will help it puff up nicely in the oven.
If you prefer a more pronounced nutty flavor, lightly toast the nuts before adding them to the bites. Additionally, feel free to experiment with different jams or preserves if cranberry isn’t your favorite; apricot or raspberry can be excellent alternatives.
Finally, these bites are best enjoyed warm, so consider baking them just before serving to guarantee they’re at their best.
Mini Meatball Sliders

Mini Meatball Sliders are a festive and delicious appetizer perfect for Christmas gatherings. These bite-sized treats feature juicy, flavorful meatballs nestled in soft slider buns, topped with a tangy marinara sauce and melty cheese. They’re sure to be a crowd-pleaser, offering a satisfying and savory start to your holiday meal.
Whether you’re hosting a big family dinner or an intimate gathering with friends, these sliders are easy to make and serve, ensuring that your guests are well-fed and happy.
The key to great Mini Meatball Sliders is in the quality of the meatballs. Using a blend of ground beef and pork results in a juicy, flavorful combination. The addition of breadcrumbs and Parmesan cheese helps to keep the meatballs tender, while garlic and Italian herbs infuse them with a rich, savory taste.
The finished sliders can be beautifully presented on a platter with festive toothpicks, making them easy to grab and enjoy. Here’s a recipe to make a serving size of 4-6 people:
Ingredients:
- 1 pound ground beef
- 1/2 pound ground pork
- 1/2 cup breadcrumbs
- 1/4 cup grated Parmesan cheese
- 2 cloves garlic, minced
- 1 egg
- 1 tablespoon Italian seasoning
- Salt and pepper to taste
- 1 cup marinara sauce
- 12 slider buns
- 1 cup shredded mozzarella cheese
- 2 tablespoons olive oil
- Fresh basil leaves for garnish (optional)
Instructions:
- Preheat the Oven: Preheat your oven to 375°F (190°C). Line a baking sheet with parchment paper or lightly grease it with cooking spray.
- Prepare the Meatball Mixture: In a large bowl, combine the ground beef, ground pork, breadcrumbs, Parmesan cheese, minced garlic, egg, Italian seasoning, salt, and pepper. Mix well until all ingredients are evenly incorporated.
- Shape the Meatballs: Roll the mixture into small meatballs, about 1 inch in diameter. You should have approximately 24 meatballs.
- Cook the Meatballs: In a large skillet, heat the olive oil over medium-high heat. Add the meatballs in batches, cooking until all sides are browned, about 5-7 minutes. Transfer the browned meatballs to the prepared baking sheet.
- Bake the Meatballs: Place the baking sheet in the preheated oven and bake the meatballs for an additional 10-12 minutes, until they’re cooked through and no longer pink in the center.
- Assemble the Sliders: While the meatballs are baking, warm the marinara sauce in a small saucepan over low heat. Once the meatballs are done, place one meatball on each slider bun, top with a spoonful of marinara sauce, and sprinkle with mozzarella cheese.
- Melt the Cheese: Arrange the assembled sliders on the baking sheet and return them to the oven for 3-5 minutes, or until the cheese is melted and bubbly.
- Serve and Garnish: Remove the sliders from the oven, and if desired, garnish with fresh basil leaves. Serve warm and enjoy!
Extra Tips:
For an even more festive presentation, consider using different types of cheese such as provolone or gouda for a unique twist on the traditional recipe. You can also add a slice of pepperoni or a sprinkle of crushed red pepper for a little extra spice.
If you’re short on time, store-bought meatballs can be used as a substitute; just make sure to choose a high-quality option. Additionally, these sliders can be kept warm in a slow cooker, making them perfect for serving at parties where guests can help themselves.
Garlic Parmesan Cheese Ball

This recipe yields enough for a serving size of 4-6 people, making it ideal for intimate gatherings or as part of a larger spread. The key to a perfect Garlic Parmesan Cheese Ball is using high-quality ingredients and allowing the flavors to meld together for a few hours in the refrigerator before serving. This guarantees a rich, cohesive taste that will have your guests coming back for more.
Ingredients:
- 8 oz cream cheese, softened
- 1 cup grated Parmesan cheese
- 2 cloves garlic, minced
- ½ teaspoon garlic powder
- ¼ cup chopped fresh parsley
- 1 teaspoon Worcestershire sauce
- Salt and pepper to taste
- ½ cup chopped walnuts or pecans (optional)
- Crackers or breadsticks for serving
Cooking Instructions:
- Prepare the Base: In a large mixing bowl, combine the softened cream cheese, grated Parmesan cheese, minced garlic, and garlic powder. Mix well until all ingredients are fully incorporated and smooth.
- Flavor the Mixture: Add the chopped parsley, Worcestershire sauce, and salt and pepper to the cheese mixture. Stir well to evenly distribute the flavors throughout the cheese.
- Shape the Cheese Ball: Using your hands, form the mixture into a ball shape. Confirm that it’s compact and smooth on the outside.
- Coat with Nuts: If using, spread the chopped walnuts or pecans on a plate. Roll the cheese ball in the nuts until it’s evenly coated on all sides.
- Chill the Cheese Ball: Wrap the cheese ball in plastic wrap and refrigerate for at least 2 hours, or overnight. This will allow the flavors to blend and the ball to firm up.
- Serve: Remove the cheese ball from the refrigerator about 15 minutes before serving to allow it to soften slightly. Place it on a serving platter with an assortment of crackers or breadsticks.
Extra Tips:
For the best flavor, use freshly grated Parmesan cheese rather than pre-grated varieties, which can contain additives that affect the texture and taste.
If you prefer a milder garlic flavor, reduce the amount of minced garlic or substitute with roasted garlic. You can also customize the outer coating by using different nuts, or try finely chopped chives or bacon bits for added flavor.
Remember to use a sharp knife when cutting into the cheese ball to guarantee clean slices. Enjoy this festive appetizer with a glass of wine or your favorite holiday cocktail for a complete holiday experience.
Puff Pastry Sausage Rolls

Puff Pastry Sausage Rolls are a delightful and savory appetizer perfect for any Christmas gathering. These golden, flaky pastries encase a flavorful sausage filling, making them a hit with guests of all ages. The combination of the buttery puff pastry and the hearty sausage creates a mouthwatering treat that’s both satisfying and festive.
Whether you’re hosting a large holiday party or a cozy family dinner, these sausage rolls are bound to impress your guests and add a touch of holiday cheer to your table.
Making Puff Pastry Sausage Rolls is surprisingly simple and requires only a few ingredients. The key to success lies in choosing high-quality sausage and perfectly flaky puff pastry. This recipe serves 4-6 people, making it an ideal choice for a small to medium-sized gathering. With a little preparation and attention to detail, you can create a delicious appetizer that will have everyone asking for seconds.
Ingredients (serves 4-6 people):
- 1 sheet of puff pastry (thawed if frozen)
- 1 pound (450g) of ground pork sausage (or sausage meat of choice)
- 1 small onion, finely chopped
- 1 clove of garlic, minced
- 1 teaspoon dried thyme
- 1 teaspoon dried sage
- Salt and pepper to taste
- 1 egg, beaten (for egg wash)
- Sesame seeds or poppy seeds (optional, for topping)
Cooking Instructions:
- Preheat the Oven: Begin by preheating your oven to 400°F (200°C). Line a baking sheet with parchment paper to prevent sticking and facilitate easy cleanup.
- Prepare the Sausage Filling: In a large bowl, combine the ground pork sausage, chopped onion, minced garlic, dried thyme, and dried sage. Season with salt and pepper to your liking. Mix the ingredients thoroughly until well combined.
- Roll Out the Puff Pastry: On a lightly floured surface, roll out the puff pastry sheet into a rectangle approximately 12×10 inches. If your pastry is already pre-rolled, simply unfold it and proceed to the next step.
- Assemble the Sausage Rolls: Spoon the sausage mixture lengthwise down the center of the pastry rectangle. Carefully fold one side of the pastry over the sausage filling, then fold the other side over to enclose the filling completely. Press the edges to seal.
- Cut and Score: Cut the long roll into smaller individual rolls, about 2 inches in length. Use a sharp knife to score the top of each roll lightly, creating small slits for steam to escape.
- Egg Wash and Toppings: Brush the tops of the sausage rolls with the beaten egg for a golden finish. If desired, sprinkle sesame seeds or poppy seeds over the top for added texture and flavor.
- Bake: Place the sausage rolls on the prepared baking sheet, leaving space between each one. Bake in the preheated oven for 20-25 minutes, or until the pastry is golden brown and the sausage is cooked through.
- Cool and Serve: Allow the sausage rolls to cool slightly before serving. They can be enjoyed warm or at room temperature.
Extra Tips:
For the best results, make sure that your puff pastry remains cold until you’re ready to use it, as this will help it puff up nicely during baking. If you have time, chill the assembled rolls in the refrigerator for about 15 minutes before baking to help them maintain their shape.
Additionally, feel free to experiment with different seasonings or add-ins such as chopped herbs or grated cheese to the sausage mixture for a unique twist on this classic recipe. Enjoy your Puff Pastry Sausage Rolls with a side of mustard or a tangy chutney for dipping.
Roasted Red Pepper Hummus

Roasted Red Pepper Hummus is a delightful and flavorful appetizer that’s perfect for Christmas gatherings. This creamy dip combines the earthy taste of chickpeas with the smoky sweetness of roasted red peppers, making it a crowd-pleaser for any festive occasion.
The vibrant color and rich taste add a festive touch to any holiday spread, and it’s a dish that can be prepared in advance, allowing you to spend more time enjoying the festivities with your loved ones.
This recipe serves 4-6 people and is both nutritious and easy to make. The combination of tahini, garlic, and lemon juice enhances the flavor profile, making it irresistible.
Whether you’re serving it with warm pita bread, crunchy vegetables, or crispy crackers, this hummus will surely be a hit. Let’s explore the ingredients and step-by-step instructions to prepare this delicious appetizer.
Ingredients:
- 2 large red bell peppers
- 2 cups canned chickpeas, drained and rinsed
- 1/4 cup tahini
- 2 cloves garlic, minced
- 1/4 cup fresh lemon juice
- 1/4 cup extra-virgin olive oil
- 1 teaspoon ground cumin
- Salt to taste
- 2 tablespoons water (optional, for consistency)
- Paprika for garnish (optional)
- Fresh parsley for garnish (optional)
Cooking Instructions:
- Roasting the Peppers: Preheat your oven to 450°F (230°C). Place the red bell peppers on a baking sheet lined with aluminum foil. Roast in the oven for about 25-30 minutes, turning occasionally, until the skin is charred and blistered.
- Peeling the Peppers: Remove the peppers from the oven and place them in a bowl. Cover the bowl with plastic wrap and let the peppers steam for about 10 minutes. This will make it easier to peel off the charred skin. Once cooled, peel the skin off, remove the seeds and stems, and set the roasted peppers aside.
- Blending the Ingredients: In a food processor, combine the roasted red peppers, chickpeas, tahini, minced garlic, lemon juice, olive oil, and cumin. Blend until smooth and creamy. If the mixture is too thick, add water a tablespoon at a time until you reach your desired consistency.
- Seasoning: Taste the hummus and add salt as needed. Blend again to incorporate the seasoning thoroughly.
- Serving: Transfer the hummus to a serving bowl. Drizzle with a little extra olive oil and sprinkle with paprika and parsley for garnish, if desired. Serve with pita bread, vegetable sticks, or crackers.
Extra Tips:
When roasting the red peppers, make sure to turn them regularly to guarantee they roast evenly on all sides.
If you’re short on time, you can use jarred roasted red peppers as a substitute, though freshly roasted peppers will give a deeper flavor.
Adjust the amount of garlic and lemon juice according to your taste preferences. If your hummus turns out too thick, adding a bit of water or extra olive oil can help achieve the perfect creamy texture.
Enjoy this hummus as a festive appetizer or as part of a holiday mezze platter.
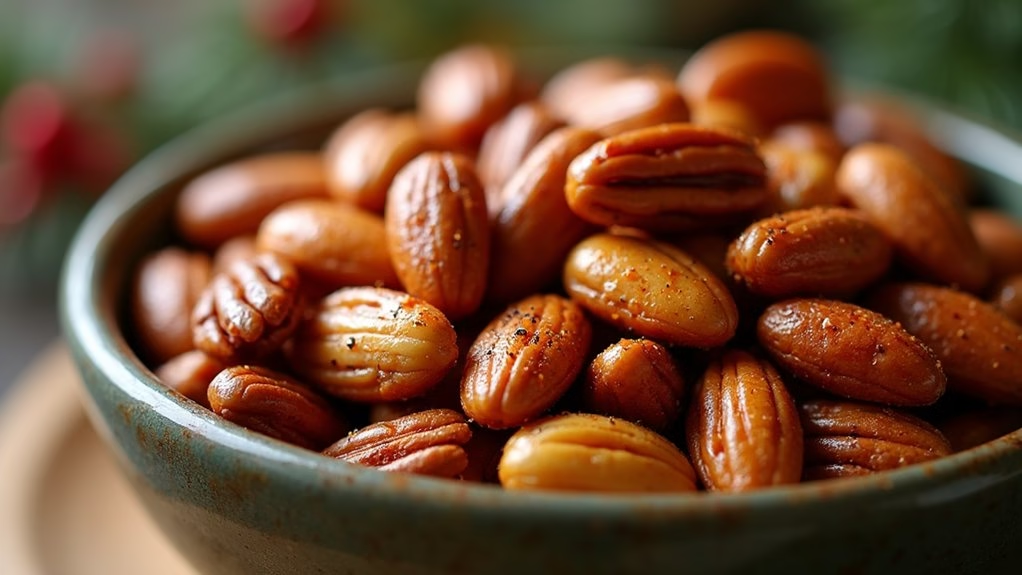
Sweet and Spicy Nuts
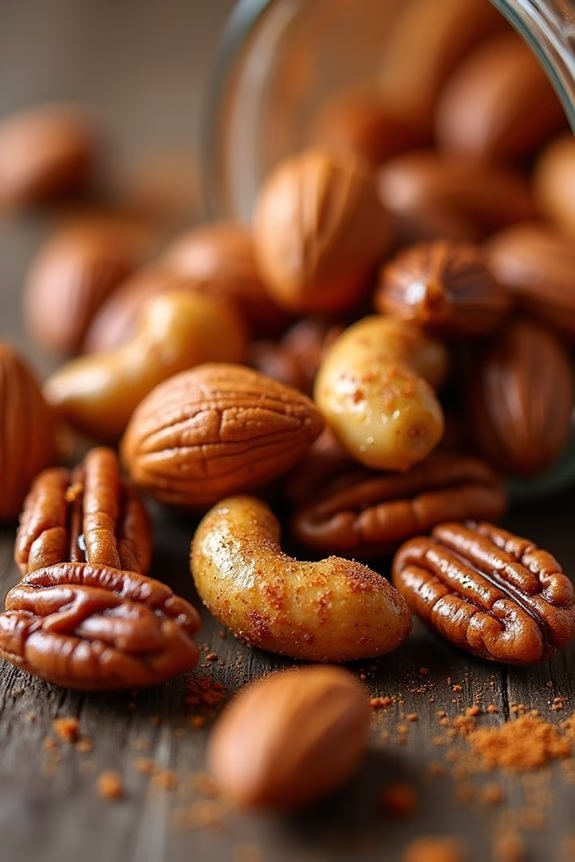
Sweet and Spicy Nuts are the perfect holiday appetizer, combining the delightful crunch of assorted nuts with the harmonious blend of sweet and spicy flavors. This dish is a crowd-pleaser, balancing the sweetness of honey or maple syrup with the kick of cayenne pepper and a hint of smokiness from paprika. Not only are these nuts simple to prepare, but they also fill your home with a warm and inviting aroma, making them an ideal snack for Christmas gatherings.
Versatile and easy to customize, Sweet and Spicy Nuts can be made with a variety of nuts such as almonds, cashews, pecans, or walnuts. The recipe can be adjusted to suit your taste, whether you prefer a milder or more intense flavor.
Besides being a delicious appetizer, these nuts can also serve as a thoughtful homemade gift, beautifully packaged in a festive jar. This recipe serves 4-6 people, making it perfect for intimate holiday get-togethers or as part of a larger spread.
Ingredients for 4-6 servings:
- 2 cups mixed nuts (such as almonds, cashews, pecans, walnuts)
- 2 tablespoons unsalted butter
- 2 tablespoons honey or maple syrup
- 1 teaspoon ground cinnamon
- 1/2 teaspoon cayenne pepper
- 1/2 teaspoon smoked paprika
- 1/2 teaspoon salt
- 1/4 teaspoon black pepper
Cooking Instructions:
- Preheat the Oven: Start by preheating your oven to 350°F (175°C). This temperature will help roast the nuts evenly, enhancing their natural flavors and achieving the desired crunch.
- Melt Butter and Combine Ingredients: In a medium saucepan over low heat, melt the butter. Once melted, add the honey or maple syrup, cinnamon, cayenne pepper, smoked paprika, salt, and black pepper. Stir continuously until the mixture is well combined and slightly bubbling.
- Coat the Nuts: Remove the saucepan from the heat and add the mixed nuts to the butter and spice mixture. Stir thoroughly to guarantee all the nuts are evenly coated with the spice mixture.
- Bake the Nuts: Spread the coated nuts in a single layer on a baking sheet lined with parchment paper. This helps prevent sticking and makes cleanup easier. Bake in the preheated oven for 15-20 minutes, stirring once halfway through to guarantee even roasting.
- Cool and Serve: Once baked, remove the nuts from the oven and let them cool on the baking sheet. As they cool, the coating will harden, creating a delightful, crispy texture. Serve them at room temperature or store them in an airtight container once fully cooled.
Extra Tips:
For a more intense flavor, consider toasting the nuts in a dry skillet for a few minutes before coating them with the butter and spice mixture. This will enhance their natural oils and deepen the flavor profile.
You can also add a variety of spices like cumin or chili powder for a unique twist. If you prefer a less spicy version, adjust the amount of cayenne pepper to your liking, or omit it entirely for a purely sweet treat.
Remember to keep an eye on the nuts while they’re baking, as they can quickly go from perfectly roasted to burnt.