
Planning a holiday gathering can be both exciting and challenging, especially when you want to impress without overspending. Envision your guests admiring a spread of delightful appetizers like cranberry brie bites and savory stuffed mushrooms. There’s nothing quite like the joy of seeing smiles as everyone enjoys each bite. Curious how to create this festive magic on a budget? Let’s explore these budget-friendly Christmas appetizers that will elevate your celebration.
Stuffed Mushrooms With Cream Cheese and Herbs
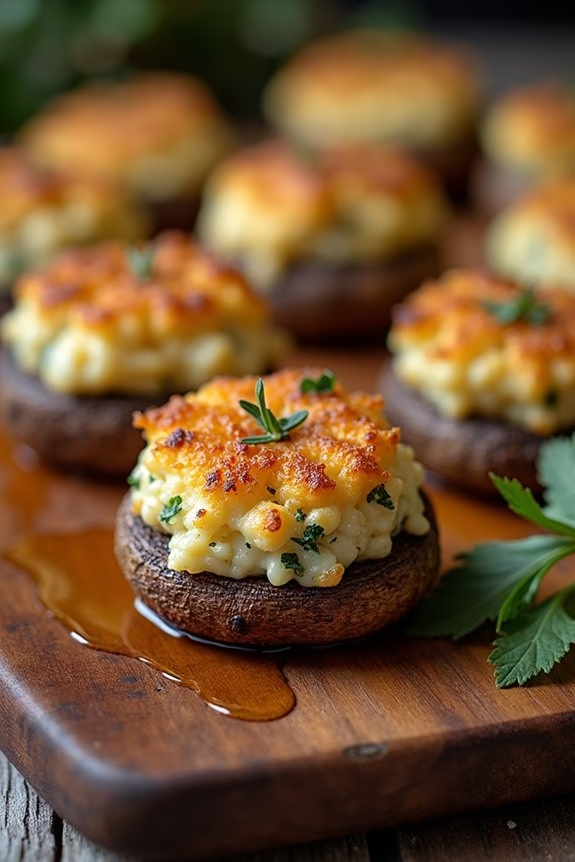
Stuffed Mushrooms With Cream Cheese and Herbs are an ideal appetizer for any festive gathering, offering a delightful blend of flavors and textures. These bite-sized treats aren’t only delicious but also budget-friendly, making them perfect for a Christmas feast. The creamy filling, made with cream cheese and a mix of fresh herbs, is encased in tender mushroom caps, creating a harmonious balance of earthiness and richness.
Whether you’re entertaining a crowd or having a cozy family dinner, these stuffed mushrooms are bound to be a hit. Preparing this dish is both simple and rewarding, making it a great choice for cooks of all skill levels. The process involves selecting fresh mushrooms, creating a delectable filling, and baking them to perfection. The result is a warm and savory appetizer that can be prepared in advance, allowing you to enjoy the festivities without spending too much time in the kitchen.
With a serving size that caters to 4-6 people, this recipe is perfect for a small gathering or as part of a larger spread of holiday appetizers.
Ingredients (for 4-6 servings):
- 24 medium-sized whole mushrooms
- 8 ounces cream cheese, softened
- 1/4 cup grated Parmesan cheese
- 2 cloves garlic, minced
- 2 tablespoons fresh parsley, finely chopped
- 1 tablespoon fresh chives, finely chopped
- 1 tablespoon fresh thyme leaves
- Salt and pepper to taste
- 2 tablespoons olive oil
Cooking Instructions:
- Preheat the Oven: Preheat your oven to 375°F (190°C). This guarantees that it’s ready to bake the mushrooms once they’re assembled.
- Prepare the Mushrooms: Using a damp paper towel, gently clean the mushrooms to remove any dirt. Remove the stems carefully and set the caps aside. Finely chop the stems, as they’ll be added to the filling for extra flavor.
- Make the Filling: In a medium-sized mixing bowl, combine the softened cream cheese, chopped mushroom stems, Parmesan cheese, minced garlic, parsley, chives, and thyme. Mix well until all ingredients are fully incorporated. Add salt and pepper to taste.
- Stuff the Mushroom Caps: Using a small spoon, fill each mushroom cap with the cream cheese filling, making sure it’s packed tightly without overflowing.
- Arrange and Drizzle: Place the stuffed mushroom caps on a baking sheet lined with parchment paper. Drizzle the tops with olive oil to help them cook evenly and enhance their flavor.
- Bake the Mushrooms: Transfer the baking sheet to the preheated oven and bake for 20-25 minutes, or until the mushrooms are tender and the tops are golden brown.
- Serve Warm: Once baked, allow the mushrooms to cool slightly before serving. They’re best enjoyed warm but can also be served at room temperature.
Extra Tips:
When selecting mushrooms, choose ones that are firm and free from blemishes for the best results. For a more robust flavor, consider adding a splash of white wine to the filling mixture. If you have extra filling, it can be stored in the refrigerator for up to two days and used as a spread on crackers or toast.
Additionally, these mushrooms can be prepared a day in advance; simply assemble and refrigerate them, then bake just before serving to save time on the day of your gathering.
Cranberry Brie Bites in Puff Pastry
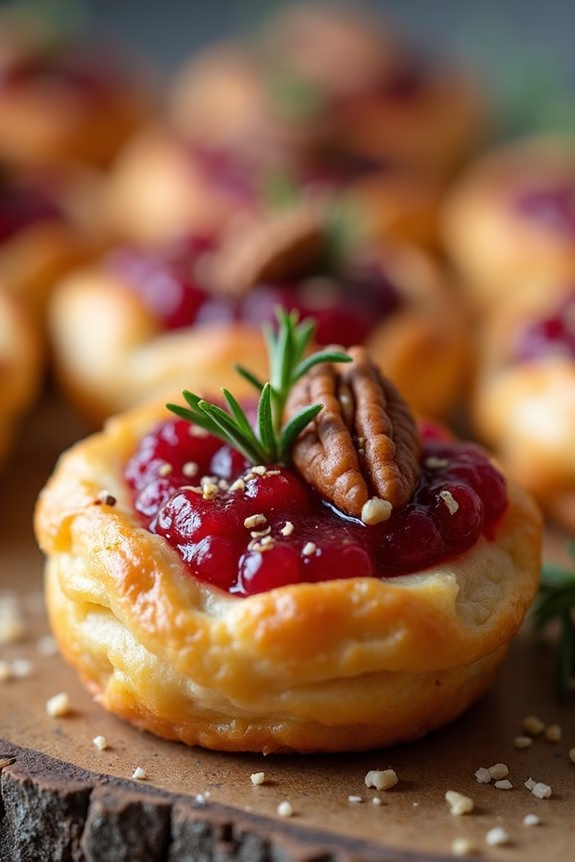
Cranberry Brie Bites in Puff Pastry are a delightful and festive appetizer that combines the creamy richness of Brie cheese with the tartness of cranberries, all encased in a flaky puff pastry. Perfect for holiday gatherings, these bites aren’t only delicious but also visually appealing and easy to prepare.
The combination of flavors and textures makes them an instant hit at any party, and their small size guarantees they’re a convenient finger food for guests to enjoy while mingling.
To create this budget-friendly appetizer, you’ll need to use pre-made puff pastry, which saves time and effort in the kitchen while still delivering a gourmet result. The cranberry sauce can be either homemade or store-bought, depending on your preference and time constraints.
Brie cheese, with its creamy texture and mild flavor, pairs beautifully with the sweet and tangy cranberry sauce. These bites are simple to assemble and bake, making them an ideal choice for those who want to impress without spending hours in the kitchen.
Ingredients (Serves 4-6 people):
- 1 sheet of puff pastry, thawed
- 1/2 cup cranberry sauce
- 4 oz Brie cheese, cut into small pieces
- 1 egg, beaten (for egg wash)
- 1 tablespoon chopped fresh rosemary (optional)
- 1 tablespoon chopped pecans (optional)
Instructions:
- Preheat the Oven: Begin by preheating your oven to 375°F (190°C). This guarantees your oven is at the correct temperature when your bites are ready to bake.
- Prepare the Puff Pastry: Roll out the thawed puff pastry on a lightly floured surface. Cut the pastry into 12 equal squares using a sharp knife or pizza cutter.
- Assemble the Bites: Place a small piece of Brie cheese in the center of each pastry square. Top with about a teaspoon of cranberry sauce. If desired, add a sprinkle of chopped rosemary and pecans for added flavor and texture.
- Seal the Bites: Fold the corners of each pastry square over the filling to form a neat package. Pinch the edges to seal them, guaranteeing the filling doesn’t leak during baking.
- Apply Egg Wash: Arrange the bites on a baking sheet lined with parchment paper. Brush the tops with beaten egg to give them a glossy finish once baked.
- Bake: Place the baking sheet in the preheated oven and bake for 18-20 minutes or until the pastry is golden brown and puffed.
- Cool and Serve: Once baked, remove the bites from the oven and let them cool slightly on a wire rack before serving warm.
Extra Tips:
For the best results, guarantee your puff pastry remains as cold as possible before baking; this helps achieve a flaky texture.
You can prepare these bites a few hours in advance and refrigerate them until you’re ready to bake. Just be sure to apply the egg wash right before placing them in the oven.
If you prefer a sweeter bite, you can add a drizzle of honey on top after baking. Additionally, experiment with different herbs or nuts to customize the taste to your liking.
Deviled Eggs With a Festive Twist
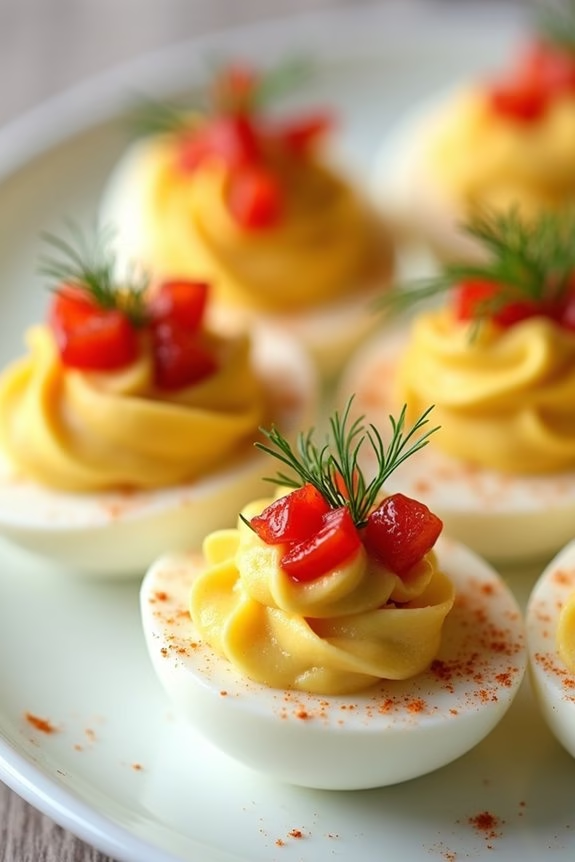
Deviled eggs are always a hit at any gathering, but why not take them up a notch for the holidays? This festive twist on traditional deviled eggs isn’t only budget-friendly but also adds a splash of color and flavor to your Christmas appetizer spread. By incorporating ingredients like roasted red peppers and a sprinkle of dill, these deviled eggs become a delicious and eye-catching addition to your holiday table. Perfect for serving 4-6 people, they’re an ideal choice for intimate gatherings or as part of a larger spread.
This recipe combines the creamy richness of classic deviled eggs with the vibrant flavors of the holidays. The addition of roasted red peppers not only enhances the flavor profile but also adds a pop of color that complements the festive atmosphere. With a preparation time of just about 30 minutes, these deviled eggs are a quick, easy, and affordable option that doesn’t skimp on taste or presentation.
Ingredients (Serving Size: 4-6 people):
- 6 large eggs
- 3 tablespoons mayonnaise
- 1 teaspoon Dijon mustard
- 1 teaspoon apple cider vinegar
- Salt and pepper to taste
- 2 tablespoons roasted red peppers, finely chopped
- 1 tablespoon fresh dill, finely chopped
- Paprika for garnish
- Dill sprigs for garnish (optional)
Cooking Instructions:
- Boil the Eggs: Place the eggs in a saucepan and cover them with cold water by about an inch. Bring the water to a boil over medium-high heat. Once boiling, turn off the heat, cover the saucepan, and let the eggs sit for about 10-12 minutes.
- Cool and Peel: After cooking, transfer the eggs to a bowl of ice water to cool. Once cooled, gently tap the eggs on a hard surface to crack the shells and peel them under running water to remove the shells completely.
- Prepare the Filling: Slice each egg in half lengthwise and carefully remove the yolks, placing them in a small mixing bowl. Mash the yolks with a fork until they’re crumbly and smooth.
- Mix the Filling: To the mashed yolks, add mayonnaise, Dijon mustard, apple cider vinegar, salt, and pepper. Mix until the mixture is smooth and creamy. Stir in the finely chopped roasted red peppers and dill until well combined.
- Fill the Egg Whites: Using a spoon or a piping bag fitted with a star tip, fill each egg white half with the yolk mixture. Be generous with the filling to guarantee each egg has a good amount of the mixture.
- Garnish and Serve: Lightly dust the filled eggs with paprika for a bit of color and flavor. For a festive touch, garnish each deviled egg with a small sprig of fresh dill. Arrange the eggs on a platter and serve chilled.
Extra Tips:
To guarantee perfectly boiled eggs, use eggs that are at least a week old as they’re easier to peel. When chopping the roasted red peppers, make sure they’re drained well to avoid adding excess moisture to the filling. If you prefer a bit of heat, consider adding a pinch of cayenne pepper to the yolk mixture.
These deviled eggs can be prepared a day in advance and stored in an airtight container in the refrigerator, making them a convenient option for busy holiday preparations.
Spinach and Artichoke Dip With Homemade Pita Chips

Spinach and Artichoke Dip With Homemade Pita Chips is a classic appetizer that’s both delicious and easy to prepare, making it perfect for your budget-friendly Christmas gathering. This creamy and flavorful dip combines the earthiness of spinach with the tangy notes of artichokes, all enveloped in a cheesy, savory blend. Complemented by crispy, homemade pita chips, this appetizer will surely delight your guests without breaking the bank.
The great thing about this dip is its versatility; it can be served warm or at room temperature, and it pairs wonderfully with a variety of dippers beyond pita chips. Whether you’re hosting a large party or an intimate family dinner, this recipe is designed to serve 4-6 people, guaranteeing that everyone gets a satisfying taste of this holiday treat. Plus, the ingredients are straightforward and readily available, making your holiday preparation smooth and stress-free.
Ingredients (Serves 4-6):
- 1 (10-ounce) package frozen chopped spinach, thawed and drained
- 1 (14-ounce) can artichoke hearts, drained and chopped
- 1 cup sour cream
- 1 cup mayonnaise
- 1 cup grated Parmesan cheese
- 1 cup shredded mozzarella cheese
- 2 cloves garlic, minced
- 1 teaspoon lemon juice
- Salt and pepper to taste
- 4 pita breads
- 2 tablespoons olive oil
- 1 teaspoon garlic powder
- 1 teaspoon dried oregano
Cooking Instructions:
- Prepare the Dip Base: In a large mixing bowl, combine the thawed and drained spinach with the chopped artichoke hearts. Make sure the spinach is well-drained to avoid a watery dip.
- Mix the Creamy Ingredients: Add sour cream, mayonnaise, Parmesan cheese, mozzarella cheese, and minced garlic to the spinach and artichokes. Mix thoroughly until all ingredients are well incorporated.
- Season the Dip: Stir in the lemon juice, and add salt and pepper to taste. Adjust seasoning according to preference.
- Bake the Dip: Preheat your oven to 375°F (190°C). Transfer the dip mixture into a baking dish and spread it evenly. Bake for 20-25 minutes or until the top is golden brown and bubbly.
- Prepare the Pita Chips: While the dip is baking, cut the pita breads into triangles. Place them on a baking sheet.
- Season the Pita Chips: Drizzle olive oil over the pita triangles. Sprinkle garlic powder and dried oregano, making sure each piece is well-coated.
- Bake the Pita Chips: Place the baking sheet in the oven and bake the pita chips at 375°F (190°C) for 8-10 minutes or until they’re crispy and golden brown. Flip them halfway through to guarantee even baking.
- Serve and Enjoy: Once the dip is baked and the pita chips are ready, serve the dip warm with the homemade pita chips on the side.
Extra Tips:
For a richer flavor, consider adding a pinch of red pepper flakes to the dip for a subtle kick. If you prefer a smoother texture, use a food processor to blend the dip mixture before baking. This dish can be prepared a day in advance and stored in the refrigerator; simply bake it just before your guests arrive. For a gluten-free option, serve the dip with vegetable sticks or gluten-free crackers.
Caprese Skewers With Balsamic Glaze
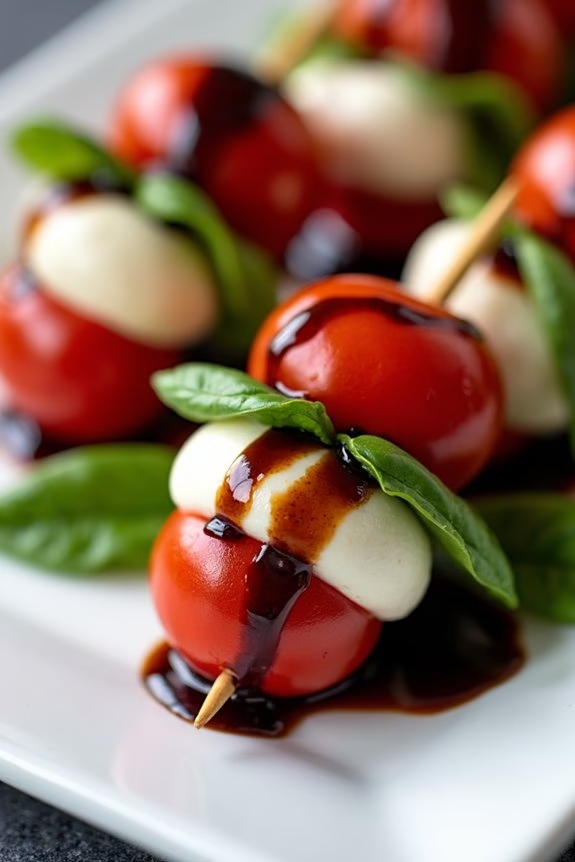
Caprese Skewers With Balsamic Glaze are a delightful and budget-friendly appetizer perfect for any Christmas gathering. These skewers bring together the classic Italian flavors of fresh mozzarella, juicy cherry tomatoes, and aromatic basil. The addition of a sweet and tangy balsamic glaze elevates this simple dish, creating a burst of flavor in every bite.
Served on skewers, they aren’t only easy to make but also convenient for guests to enjoy while mingling. Whether you’re hosting a small family dinner or a festive holiday party, these Caprese Skewers are sure to impress your guests without breaking the bank.
The beauty of this dish lies in its simplicity and the use of fresh, quality ingredients. By opting for seasonal produce and making your own balsamic glaze, you can keep costs low while guaranteeing a delicious appetizer. The skewers are also highly customizable; you can add different elements like olives or prosciutto to suit your taste or dietary preferences.
The recipe below is designed for a serving size of 4-6 people, making it ideal for intimate gatherings or as a part of a larger spread of appetizers.
Ingredients for 4-6 servings:
- 24 cherry tomatoes
- 24 fresh basil leaves
- 12 small mozzarella balls (bocconcini)
- 2 tablespoons extra-virgin olive oil
- Salt and freshly ground black pepper, to taste
- 1 cup balsamic vinegar
- 2 tablespoons honey
- 12 wooden skewers
Cooking Instructions:
- Prepare the Balsamic Glaze:
- In a small saucepan, combine the balsamic vinegar and honey over medium heat.
- Stir occasionally and allow the mixture to come to a gentle simmer.
- Reduce the heat to low and let it simmer until the mixture has reduced by half and thickened to a syrup-like consistency, approximately 10-15 minutes.
- Remove from heat and let it cool; it will thicken slightly more as it cools.
- Prepare the Skewers:
- While the glaze is cooling, start assembling the skewers.
- Thread one cherry tomato onto a skewer, followed by a basil leaf, then a mozzarella ball.
- Repeat the process until each skewer has two sets of tomato, basil, and mozzarella.
- Season the Skewers:
- Place the assembled skewers on a serving platter.
- Drizzle them with extra-virgin olive oil and season with salt and freshly ground black pepper to taste.
- Drizzle with Balsamic Glaze:
- Once the balsamic glaze has cooled, drizzle it generously over the skewers.
- Make sure each skewer is coated with the glaze to enhance the flavors.
Extra Tips:
For the best presentation, consider arranging the skewers in a circular pattern on a round platter, with the balsamic glaze drizzled artfully over the top.
To make the skewers more visually appealing, select a mix of red and yellow cherry tomatoes. If you prefer a vegan version, substitute the mozzarella with marinated tofu cubes.
You can prepare the balsamic glaze up to two days in advance and store it in the refrigerator, saving time on the day of your event. Always taste the balsamic glaze before serving to guarantee the perfect balance of sweet and tangy flavors.
Cheesy Garlic Breadsticks With Marinara Dip
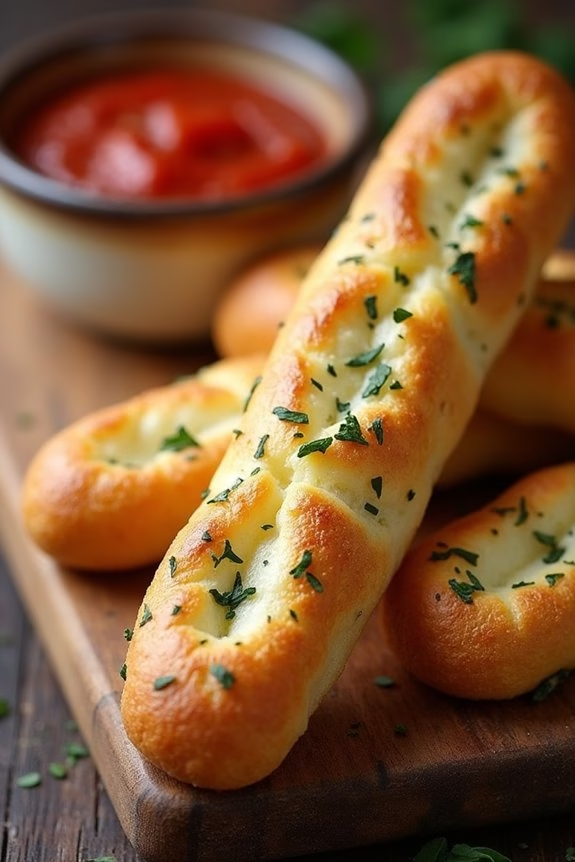
Cheesy Garlic Breadsticks With Marinara Dip are a delightful and budget-friendly appetizer perfect for your Christmas gatherings. These breadsticks are loaded with melted cheese and infused with the rich flavors of garlic and herbs, making them an irresistible treat for guests of all ages.
When paired with a tangy marinara dip, they become the perfect starter to whet your guests’ appetites before the main course. Not only are they easy to make, but they also add a warm, comforting touch to your holiday menu without breaking the bank.
The key to making these breadsticks shine is using fresh, quality ingredients and a simple preparation method that lets their natural flavors stand out. This recipe yields enough for 4-6 people, making it ideal for a small family gathering or a modest holiday party.
You’ll be amazed at how a handful of pantry staples can come together to create something so deliciously satisfying. Whether you’re a seasoned cook or a beginner, these Cheesy Garlic Breadsticks With Marinara Dip are sure to be a hit.
Ingredients (serving size: 4-6 people):
- 1 pound pizza dough
- 2 cups shredded mozzarella cheese
- 1/4 cup grated Parmesan cheese
- 3 tablespoons unsalted butter, melted
- 3 cloves garlic, minced
- 1 teaspoon dried oregano
- 1 teaspoon dried basil
- 1/2 teaspoon salt
- 1/4 teaspoon black pepper
- 1 cup marinara sauce
Cooking Instructions:
- Preheat the Oven: Start by preheating your oven to 425°F (220°C). Line a baking sheet with parchment paper to prevent sticking and make cleanup easier.
- Prepare the Dough: Roll out the pizza dough on a lightly floured surface into a rectangle about 1/4 inch thick. Transfer the rolled dough to the prepared baking sheet.
- Prepare the Garlic Butter: In a small bowl, combine the melted butter, minced garlic, oregano, basil, salt, and pepper. Mix well to guarantee the garlic and herbs are evenly distributed.
- Brush and Top the Dough: Brush the garlic butter mixture generously over the rolled-out dough. Make sure to cover the entire surface to guarantee every bite is flavorful. Sprinkle the mozzarella and Parmesan cheeses evenly over the top.
- Cut and Bake: Using a sharp knife or pizza cutter, slice the dough into strips about 1 inch wide. Bake in the preheated oven for 12-15 minutes, or until the breadsticks are golden brown and the cheese is bubbly and slightly browned.
- Heat the Marinara Sauce: While the breadsticks are baking, heat the marinara sauce in a small saucepan over low heat, stirring occasionally. Alternatively, you can microwave it in a microwave-safe bowl until warm.
- Serve: Once the breadsticks are done, remove them from the oven and allow them to cool slightly. Serve warm with the marinara sauce on the side for dipping.
Extra Tips:
To make the most of your Cheesy Garlic Breadsticks, consider experimenting with different cheese blends to find your favorite combination of flavors.
Adding a sprinkle of red pepper flakes can give a slight kick for those who enjoy a bit of heat. If you’re short on time, you can also use store-bought pizza dough or marinara sauce to speed up the preparation process.
Finally, for an extra touch of freshness, garnish the finished breadsticks with chopped fresh parsley before serving.
Sweet and Spicy Honey-Glazed Meatballs
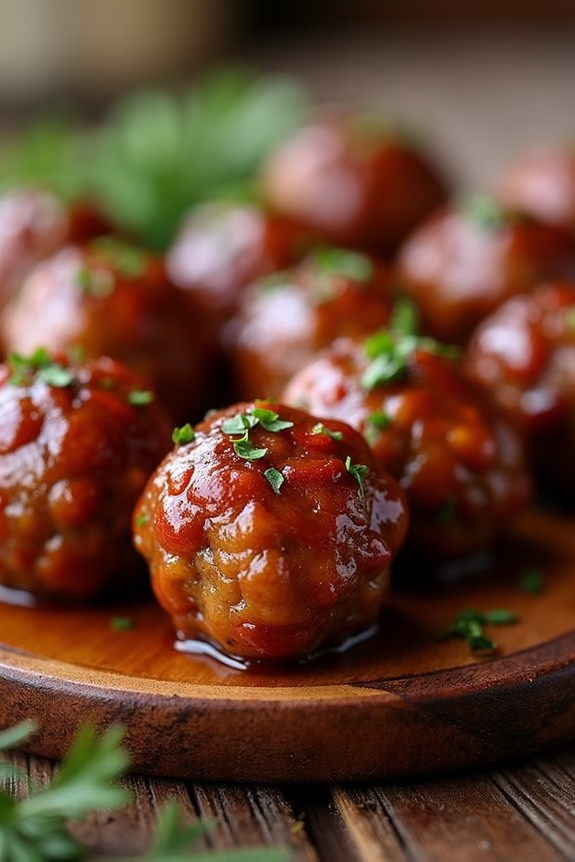
Sweet and Spicy Honey-Glazed Meatballs are a delectable treat that will be the highlight of your Christmas appetizer spread. These mouthwatering meatballs combine the irresistible sweetness of honey with a hint of spice, creating a perfect balance of flavors that will tantalize your taste buds. Ideal for holiday gatherings, this dish isn’t only delicious but also budget-friendly, allowing you to impress your guests without breaking the bank.
Whether you’re hosting a small family get-together or a larger festive party, these meatballs are sure to be a crowd-pleaser.
Preparing Sweet and Spicy Honey-Glazed Meatballs is a breeze, making them an excellent choice for busy hosts. The recipe requires minimal ingredients, most of which you might already have in your pantry. The meatballs can be made with ground beef or pork, or a combination of both, offering flexibility based on your preferences or dietary needs.
The glaze, a simple yet addictive blend of honey, soy sauce, and chili flakes, adds a beautiful sheen and robust flavor to the meatballs. With this dish, you’ll be able to enjoy a stress-free holiday while serving a memorable appetizer.
Ingredients (for 4-6 people):
- 1 pound ground beef or pork
- 1/2 cup breadcrumbs
- 1 egg
- 2 cloves garlic, minced
- 1/4 cup onion, finely chopped
- Salt and pepper to taste
- 1 tablespoon olive oil
- 1/2 cup honey
- 1/4 cup soy sauce
- 1 teaspoon chili flakes (adjust to taste)
- 1 tablespoon cornstarch
- 2 tablespoons water
Cooking Instructions:
- Prepare the Meatball Mixture: In a large bowl, combine the ground meat, breadcrumbs, egg, minced garlic, chopped onion, salt, and pepper. Mix thoroughly until all ingredients are well incorporated.
- Form the Meatballs: Using your hands, shape the mixture into small, evenly-sized meatballs, approximately 1 inch in diameter. This should yield about 20-24 meatballs.
- Cook the Meatballs: Heat olive oil in a large skillet over medium heat. Add the meatballs in batches, being careful not to overcrowd the pan. Cook the meatballs for about 8-10 minutes, turning occasionally, until they’re browned on all sides and cooked through. Remove the meatballs from the skillet and set aside on a plate lined with paper towels to drain excess oil.
- Make the Glaze: In the same skillet, combine honey, soy sauce, and chili flakes. Stir well and bring the mixture to a gentle simmer over low heat.
- Thicken the Glaze: In a small bowl, dissolve cornstarch in water and slowly add to the skillet. Stir continuously until the glaze thickens, about 2-3 minutes.
- Coat the Meatballs: Return the meatballs to the skillet, gently tossing them in the glaze until fully coated. Cook for an additional 2 minutes to allow the flavors to meld.
- Serve: Transfer the meatballs to a serving platter, garnish with extra chili flakes or chopped fresh herbs if desired, and serve warm.
Extra Tips:
For best results, make sure to finely chop the onion and mince the garlic thoroughly to guarantee even distribution throughout the meatballs. If you prefer a milder heat, reduce the amount of chili flakes or omit them altogether.
These meatballs can be made ahead of time and reheated, which makes them a convenient choice for entertaining. You can also experiment with adding different herbs or spices to the meatball mixture for additional flavor. Enjoy these delightful bites as part of your festive celebration!
Roasted Red Pepper Hummus With Veggie Sticks
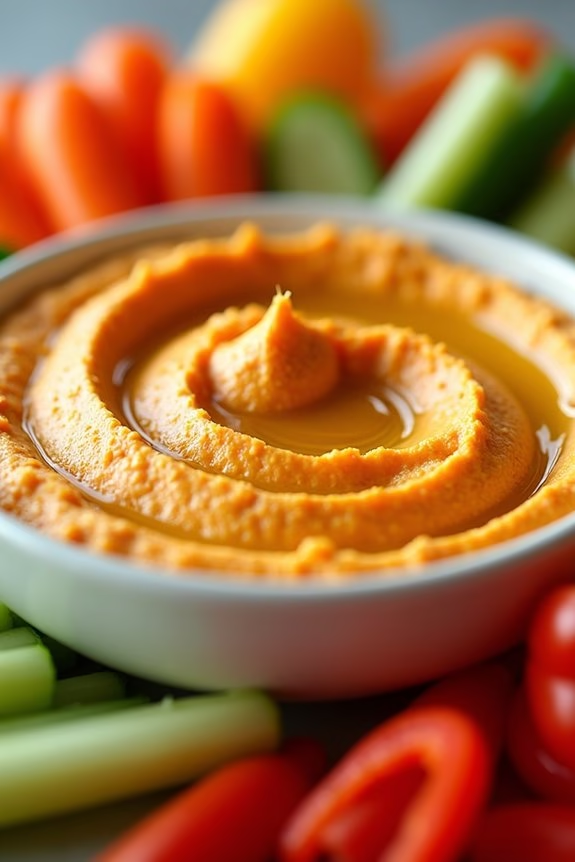
Roasted Red Pepper Hummus With Veggie Sticks is a delightful and budget-friendly appetizer perfect for your Christmas gatherings. This dish combines the creamy, nutty flavors of hummus with the smoky sweetness of roasted red peppers, creating a vibrant and flavorful dip that pairs excellently with an assortment of fresh veggie sticks.
Not only is this dish delicious, but it’s also simple to prepare and can be made ahead of time, allowing you to focus on the festivities. Impress your guests with this colorful and nutritious appetizer that caters to both traditional and plant-based diets.
This recipe serves 4-6 people and is an excellent choice for those aiming to keep their holiday parties light yet satisfying. The homemade hummus is a healthier alternative to store-bought versions, free from preservatives and full of fresh ingredients.
The addition of roasted red peppers not only enhances the taste but also adds a splash of color to your appetizer spread. Paired with crisp veggie sticks, this dish provides a rejuvenating crunch that complements the smooth texture of the hummus. Enjoy this wholesome appetizer as part of your Christmas celebrations, knowing that it’s both delicious and easy on the wallet.
Ingredients (Serves 4-6):
- 1 can (15 oz) chickpeas, drained and rinsed
- 1/3 cup tahini
- 1/4 cup fresh lemon juice
- 2 cloves garlic, minced
- 2 tablespoons olive oil, plus extra for drizzling
- 1/2 teaspoon cumin
- Salt and pepper to taste
- 1 jar (12 oz) roasted red peppers, drained
- Assorted veggie sticks (carrots, celery, cucumber, bell peppers)
Cooking Instructions:
- Prepare the Chickpeas: Drain and rinse the chickpeas thoroughly under cold water. This step helps to reduce the sodium content and guarantees that your hummus is smooth and creamy.
- Blend Ingredients: In a food processor, combine chickpeas, tahini, lemon juice, minced garlic, olive oil, and cumin. Blend until the mixture is smooth and creamy.
- Add Roasted Red Peppers: Add the roasted red peppers to the food processor. Blend again until the peppers are fully incorporated and the hummus is smooth. If the mixture is too thick, you can add a tablespoon of water at a time until you reach the desired consistency.
- Season the Hummus: Taste the hummus and season with salt and pepper to your preference. Blend again briefly to distribute the seasoning evenly.
- Serve: Transfer the hummus to a serving bowl, drizzle with a bit of olive oil, and garnish with a few small pieces of roasted red pepper or a sprinkle of cumin if desired. Arrange the veggie sticks around the bowl for easy dipping.
Extra Tips: To make your hummus extra smooth, consider peeling the chickpeas before blending; while this step is optional, it will result in a creamier texture. You can also customize this recipe by adding spices like smoked paprika or cayenne pepper for an extra kick.
If you have leftovers, store the hummus in an airtight container in the refrigerator for up to five days. This dish can be made a day in advance, which allows the flavors to meld beautifully, making it even more delicious.
Savory Parmesan and Herb Palmiers
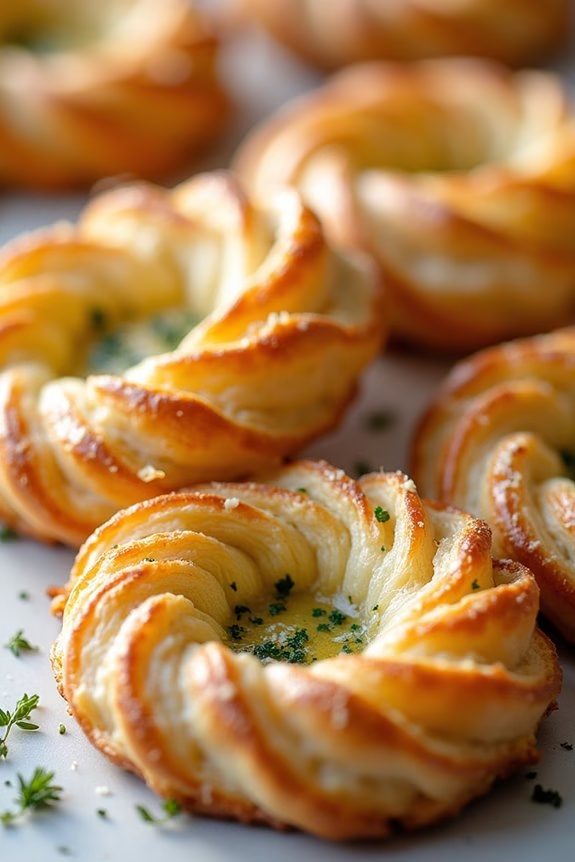
Savory Parmesan and Herb Palmiers are a delightful and budget-friendly appetizer perfect for your Christmas gathering. These elegant, flaky pastries aren’t only visually appealing but also packed with flavor, making them an impressive addition to any holiday spread. The combination of Parmesan cheese and fresh herbs creates a rich and savory taste that’s certain to please your guests’ palates.
Best of all, these palmiers are quick and easy to make, allowing you more time to enjoy the festivities. The key to success with this recipe is using puff pastry, which provides the light, buttery layers that make palmiers so irresistible. The pastry is generously sprinkled with grated Parmesan and a medley of fresh herbs, then rolled and sliced to create the distinctive palmier shape.
Baking these in the oven crisps them to golden perfection, resulting in a snack that’s both delicate and full of flavor. Perfect for a serving size of 4-6 people, this recipe can easily be doubled for larger gatherings.
Ingredients:
- 1 sheet of puff pastry (thawed if frozen)
- 1/2 cup grated Parmesan cheese
- 2 tablespoons fresh parsley, finely chopped
- 1 tablespoon fresh thyme leaves
- 1 tablespoon fresh rosemary, finely chopped
- 1/4 teaspoon salt
- 1/4 teaspoon black pepper
- 1 egg, beaten (for egg wash)
Cooking Instructions:
- Preheat the Oven: Start by preheating your oven to 400°F (200°C). Line a baking sheet with parchment paper to prevent sticking and guarantee easy cleanup.
- Prepare the Puff Pastry: Roll out the thawed puff pastry sheet on a lightly floured surface to smooth any creases and make it slightly thinner. Aim for a rectangle approximately 10×12 inches in size.
- Mix the Filling: In a small bowl, combine the grated Parmesan cheese, chopped parsley, thyme leaves, rosemary, salt, and black pepper.
- Assemble the Palmiers: Evenly spread the Parmesan and herb mixture over the entire surface of the pastry. Gently press the mixture into the dough to help it adhere.
- Shape the Palmiers: Starting at one long edge, roll the pastry tightly towards the center. Repeat with the opposite edge until both rolls meet in the middle. Use a sharp knife to slice the rolled pastry into 1/2-inch thick slices.
- Apply Egg Wash: Arrange the slices on the prepared baking sheet, leaving space between each piece. Brush the tops with the beaten egg to give them a golden sheen when baked.
- Bake: Place the baking sheet in the preheated oven and bake for 12-15 minutes, or until the palmiers are puffed and golden brown. Keep an eye on them to avoid over-browning.
- Cool and Serve: Remove the palmiers from the oven and allow them to cool on a wire rack for a few minutes before serving.
Extra Tips:
For best results, confirm your puff pastry is kept cold until you’re ready to use it, as this helps achieve the flakiest texture. If you find the pastry becomes too warm while working, pop it back in the fridge for a few minutes.
Additionally, feel free to experiment with different herb combinations based on your preference or what you have on hand. These palmiers can also be made in advance and stored in an airtight container for up to two days, making them a convenient option for holiday entertaining.
Mini Quiches With Seasonal Vegetables
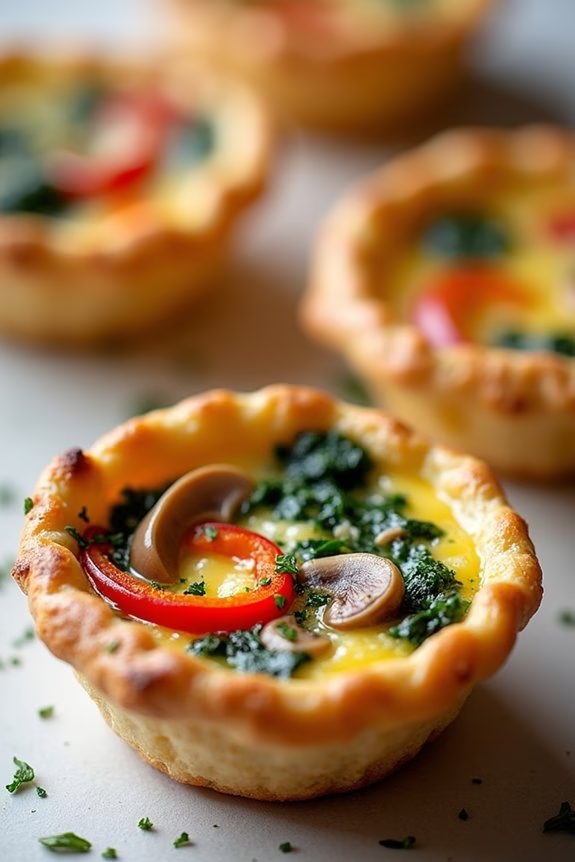
Mini Quiches With Seasonal Vegetables are a delightful and budget-friendly appetizer perfect for your Christmas gatherings. These bite-sized quiches aren’t only delicious but also versatile, allowing you to use whatever seasonal vegetables are available, guaranteeing a fresh and festive touch. The creamy filling combined with the crispiness of the pastry shell makes them an irresistible addition to any holiday spread.
Plus, they can be prepared ahead of time and quickly reheated, making your holiday preparations stress-free.
The beauty of Mini Quiches With Seasonal Vegetables lies in their adaptability. You can easily tailor them to suit your guests’ dietary preferences by choosing a variety of vegetables, from spinach and mushrooms to bell peppers and zucchini. Not to mention, they look as good as they taste, adding a splash of color to your appetizer table.
These mini quiches are perfect for serving 4-6 people, making them a convenient and tasty option for small gatherings.
Ingredients (Serves 4-6):
- 1 sheet of puff pastry, thawed
- 4 large eggs
- 1 cup milk
- 1/2 cup grated cheese (cheddar or your choice)
- 1/2 cup diced seasonal vegetables (e.g., bell peppers, zucchini, spinach, mushrooms)
- Salt and pepper to taste
- 1 tablespoon olive oil
- 1 teaspoon dried herbs (such as thyme or mixed herbs)
Cooking Instructions:
- Preheat and Prepare: Preheat your oven to 375°F (190°C). Lightly grease a muffin tin to accommodate your mini quiches.
- Prepare the Pastry: Roll out the puff pastry on a floured surface to about 1/8 inch thickness. Cut the pastry into circles slightly larger than the muffin tin cups. Gently press each pastry circle into the muffin tin to create a shell.
- Sauté Vegetables: In a skillet, heat olive oil over medium heat. Add your diced seasonal vegetables and sauté for about 5 minutes until they’re tender. Season with salt, pepper, and dried herbs. Remove from heat and set aside.
- Mix the Filling: In a mixing bowl, whisk together the eggs and milk until well combined. Stir in the grated cheese, sautéed vegetables, and any additional seasonings you prefer.
- Fill the Pastry Shells: Pour the egg mixture into each pastry shell, filling them about three-quarters full. Be careful not to overfill, as the mixture will puff up as it cooks.
- Bake: Place the muffin tin in the preheated oven and bake for 18-20 minutes, or until the quiches are golden brown and the filling is set.
- Cool and Serve: Allow the mini quiches to cool in the tin for a few minutes before carefully removing them. Serve warm, or allow them to cool completely to serve at room temperature.
Extra Tips:
For a flakier crust, make sure that your puff pastry stays cold until it’s ready to go into the oven. You can also experiment with different cheese varieties for a unique flavor twist.
If you’re preparing in advance, these mini quiches can be stored in the refrigerator for up to two days and reheated in the oven before serving. Additionally, feel free to add some cooked bacon or ham for a non-vegetarian version, catering to all taste preferences at your festive gathering.
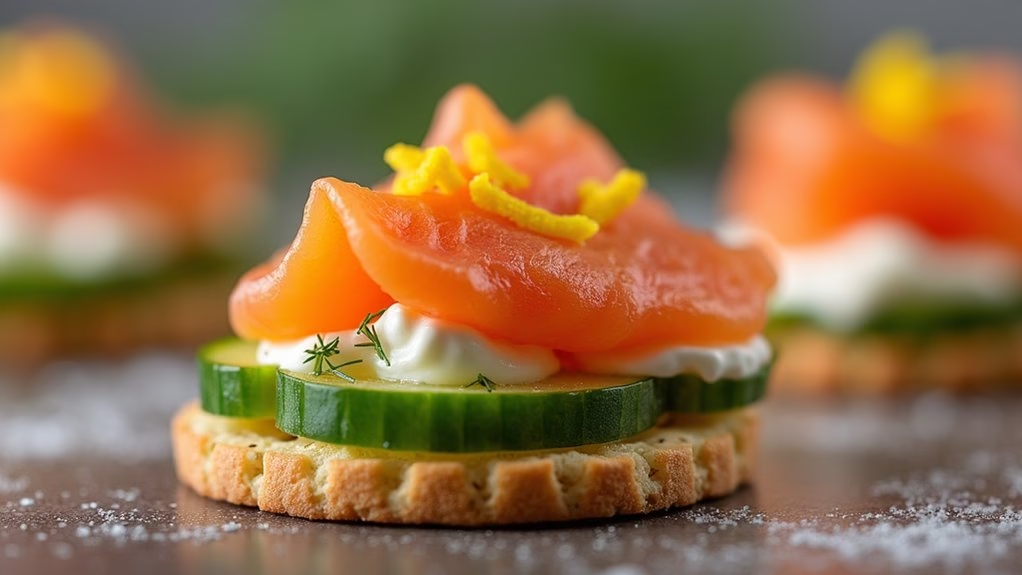
Smoked Salmon and Cucumber Canapés
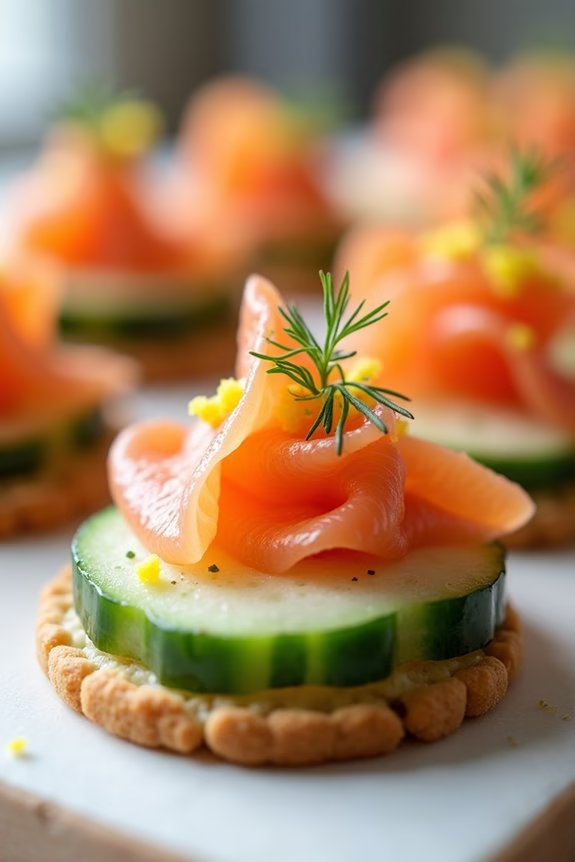
Smoked Salmon and Cucumber Canapés are an elegant and budget-friendly appetizer perfect for your Christmas gatherings. This delightful recipe combines the rich, savory flavor of smoked salmon with the invigorating crunch of cucumber, all atop a crispy cracker base.
These canapés not only look sophisticated but also are incredibly easy to assemble, making them an ideal choice for hosts who want to impress without spending hours in the kitchen. Whether you’re hosting an intimate dinner or a larger party, these canapés are sure to be a hit with your guests.
The beauty of this appetizer lies in its simplicity and the balance of flavors. The creamy, tangy spread made from cream cheese and dill enhances the smoky taste of the salmon, while the cucumber adds a fresh note that lightens the overall bite.
The combination of textures—from the crunchy base to the velvety topping—makes these canapés a delight to eat. Best of all, the ingredients are easily accessible and won’t break the bank, allowing you to create a festive appetizer that looks as good as it tastes.
Ingredients (serves 4-6 people):
- 12 crackers (such as water crackers or whole-grain crackers)
- 4 ounces of smoked salmon, thinly sliced
- 1 medium cucumber, thinly sliced
- 4 ounces of cream cheese, softened
- 1 tablespoon fresh dill, chopped
- 1 tablespoon lemon juice
- Salt and pepper to taste
- Lemon zest for garnish (optional)
Instructions:
- Prepare the Cream Cheese Spread: In a small mixing bowl, combine the softened cream cheese with the chopped dill and lemon juice. Mix well until the ingredients are thoroughly blended. Season the mixture with salt and pepper to taste.
- Slice the Cucumber: Wash the cucumber thoroughly and pat dry. Using a sharp knife or mandoline, thinly slice the cucumber into rounds. Aim for slices that are about 1/8 inch thick to guarantee they fit well on the crackers.
- Assemble the Canapés: Lay out the crackers on a serving platter. Spread a small dollop (about a teaspoon) of the cream cheese mixture onto each cracker, smoothing it with the back of a spoon or a butter knife.
- Add the Cucumber and Salmon: Place a slice of cucumber on top of the cream cheese on each cracker. Follow with a small slice of smoked salmon, arranging it attractively over the cucumber.
- Garnish and Serve: If desired, top each canapé with a small pinch of lemon zest for added freshness and color. Serve the canapés immediately or cover and refrigerate until ready to serve.
Extra Tips:
For the best presentation, confirm that the cream cheese is well softened, making it easier to spread evenly on the crackers. If you prefer, you can use flavored cream cheese, such as chive or garlic, for an extra kick.
Always assemble the canapés close to serving time to maintain the crispness of the crackers. If you’re preparing them in advance, keep the components separate and assemble just before serving. Additionally, feel free to experiment with different herbs like chives or parsley for varied flavor profiles.