
There’s something truly heartwarming about traditional Christmas appetizers that just never go out of style. They bring a cozy, nostalgic vibe to our holiday gatherings. From the delightful crunch of spiced nuts to the elegant touch of a classic shrimp cocktail, these recipes always set a festive mood. Each dish feels like a little culinary hug, made with love and quality ingredients. Curious about the timeless appetizers that continue to enchant us year after year?
Spiced Nuts
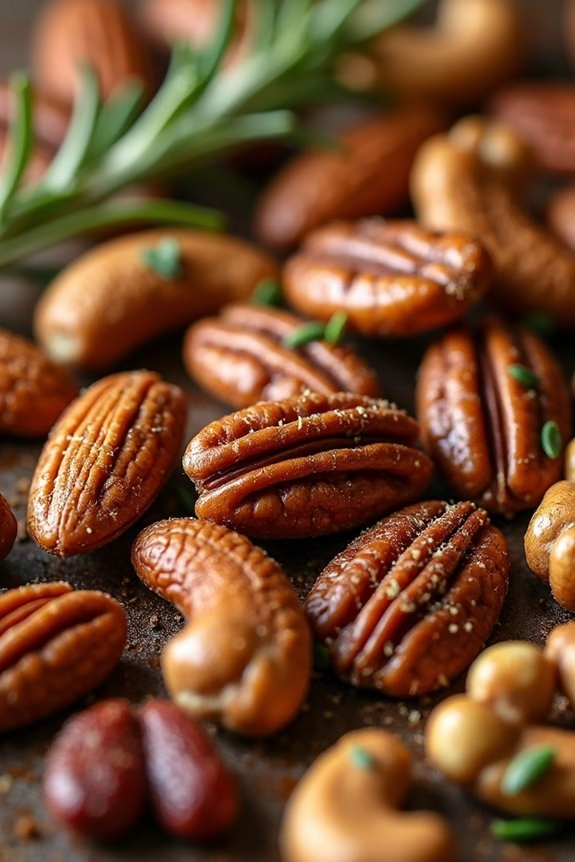
Spiced nuts are a quintessential Christmas appetizer that brings warmth and flavor to any holiday gathering. Originating from a blend of traditional spices and fresh nuts, this recipe is perfect for those who want to offer guests a savory snack with a hint of sweetness and heat. The combination of aromatic spices with the natural richness of nuts creates a delightful treat that pairs well with festive beverages.
Whether you’re hosting a large holiday party or an intimate family gathering, spiced nuts are a versatile and easy-to-make appetizer that will leave your guests craving more. This recipe is designed to serve 4-6 people, making it ideal for a cozy Christmas celebration. The ingredients are simple and can often be found in your pantry, allowing you to whip up this snack without a last-minute dash to the grocery store.
The preparation involves roasting the nuts to perfection, enhancing their natural flavors while the spices add an irresistible aroma that fills your kitchen. Let’s explore the ingredient list and step-by-step instructions to create this delightful holiday treat.
Ingredients:
- 2 cups mixed nuts (such as almonds, walnuts, pecans, and cashews)
- 2 tablespoons unsalted butter
- 2 tablespoons brown sugar
- 1 tablespoon maple syrup
- 1 teaspoon salt
- 1 teaspoon ground cinnamon
- 1/2 teaspoon ground cumin
- 1/2 teaspoon cayenne pepper
- 1/4 teaspoon ground ginger
- 1 tablespoon fresh rosemary, chopped
Instructions:
- Preheat the Oven: Start by preheating your oven to 350°F (175°C). This will guarantee that the oven is at the right temperature when it’s time to roast the nuts.
- Prepare the Nuts: Spread the mixed nuts evenly on a baking sheet lined with parchment paper. Make sure they’re in a single layer, which allows them to roast evenly.
- Melt the Butter: In a small saucepan over low heat, melt the unsalted butter. Once melted, remove from heat and stir in the brown sugar, maple syrup, salt, ground cinnamon, ground cumin, cayenne pepper, and ground ginger. Mix until the sugar is dissolved and the spices are well combined.
- Coat the Nuts: Pour the spice mixture over the nuts on the baking sheet. Use a spatula or your hands to toss the nuts, guaranteeing they’re evenly coated with the buttery spice mixture.
- Roast the Nuts: Place the baking sheet in the preheated oven and roast the nuts for about 15-20 minutes, stirring halfway through. This guarantees that the nuts are roasted evenly and prevents them from burning.
- Add Rosemary: Once the nuts are done roasting, remove them from the oven and immediately sprinkle the fresh chopped rosemary over them. Toss the nuts again to distribute the rosemary evenly.
- Cool and Serve: Allow the spiced nuts to cool on the baking sheet. As they cool, they’ll become crisp. Once cooled, transfer them to a serving dish and enjoy.
Extra Tips:
For an added flavor dimension, try using smoked paprika instead of cayenne pepper for a smoky undertone. Be mindful not to over-roast the nuts, as they can quickly go from perfectly toasted to burnt within minutes.
If you prefer a sweeter version, you can increase the amount of brown sugar or maple syrup to suit your taste. For a nut-free option, consider using pumpkin seeds or sunflower seeds as a substitute. Finally, store any leftovers in an airtight container to maintain their freshness and crunchiness for up to a week.
Cheese Ball With Pecans
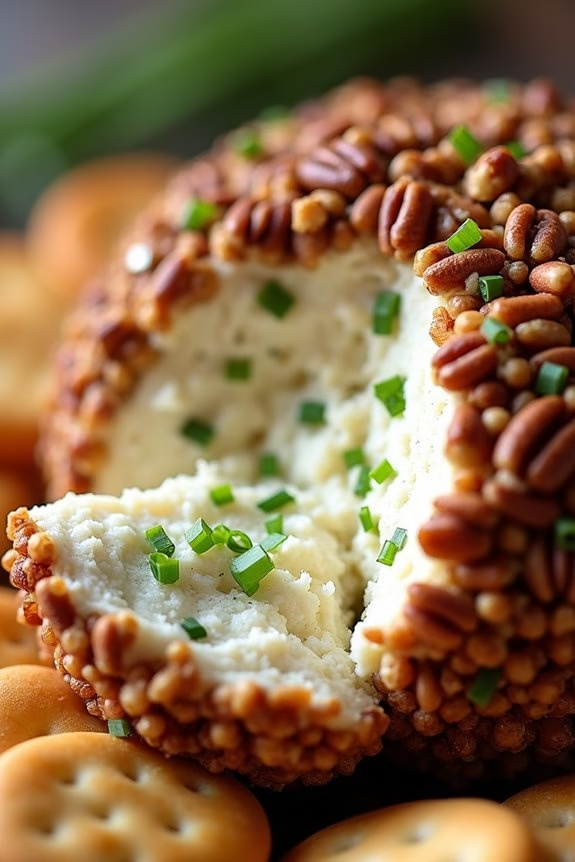
A Cheese Ball With Pecans is a delightful and savory appetizer that adds a touch of elegance to any holiday gathering. This traditional Christmas dish combines creamy cheese with a hint of spice, all enveloped in a crunchy pecan coating. It’s perfect for spreading on crackers or fresh bread, making it a versatile addition to your festive table. The combination of flavors and textures guarantees that every bite is a delicious treat.
Making a Cheese Ball With Pecans isn’t only straightforward but also allows for some creative flair with your choice of seasonings and additional ingredients. This recipe serves 4-6 people, making it ideal for intimate gatherings or as part of a larger appetizer spread. The key to a great cheese ball lies in its balance of flavors and the quality of the ingredients used, from the creaminess of the cheese to the freshness of the herbs and nuts.
Ingredients:
- 16 oz cream cheese, softened
- 1 cup shredded sharp cheddar cheese
- 1 tablespoon Worcestershire sauce
- 1 teaspoon garlic powder
- 1 teaspoon onion powder
- 1/2 teaspoon paprika
- 1/4 teaspoon cayenne pepper (optional, for heat)
- 1/4 cup chopped fresh chives
- 1 cup chopped pecans
- Salt and pepper to taste
- Crackers or bread for serving
Cooking Instructions:
- Prepare the Cheese Mixture: In a large mixing bowl, combine the softened cream cheese and shredded cheddar cheese. Mix until well blended and smooth. This can be done using a hand mixer or by hand with a sturdy spatula.
- Add Seasonings: Stir in the Worcestershire sauce, garlic powder, onion powder, paprika, cayenne pepper (if using), and chopped chives. Mix thoroughly to confirm all ingredients are evenly distributed. Taste and adjust the seasoning with salt and pepper as needed.
- Shape the Cheese Ball: Once the cheese mixture is well combined, use your hands to shape it into a ball. This can be done by transferring the mixture onto a piece of plastic wrap and using it to help mold the cheese into a round shape. Verify it’s compact and smooth on the surface.
- Coat with Pecans: Spread the chopped pecans on a plate. Roll the cheese ball over the pecans, pressing gently to make sure they stick evenly to the surface. Make sure the entire cheese ball is well-coated with pecans for that delicious crunchy texture.
- Chill the Cheese Ball: Wrap the cheese ball in plastic wrap and refrigerate for at least 2 hours, or until firm. This chilling time allows the flavors to meld and the cheese to firm up, making it easier to slice and serve.
- Serve: Once chilled, remove the cheese ball from the refrigerator and let it sit at room temperature for about 15 minutes before serving. This will make it easier to spread. Serve with an assortment of crackers or fresh bread slices.
Extra Tips:
For a more festive appearance, consider adding dried cranberries or chopped herbs to the pecan coating for a pop of color and additional flavor.
If you want to prepare this dish in advance, the cheese ball can be made a day ahead and kept refrigerated until serving. Just confirm it’s well wrapped to maintain freshness.
Additionally, feel free to experiment with different types of cheeses, such as blue cheese or gouda, to customize the flavor profile to your liking.
Classic Shrimp Cocktail
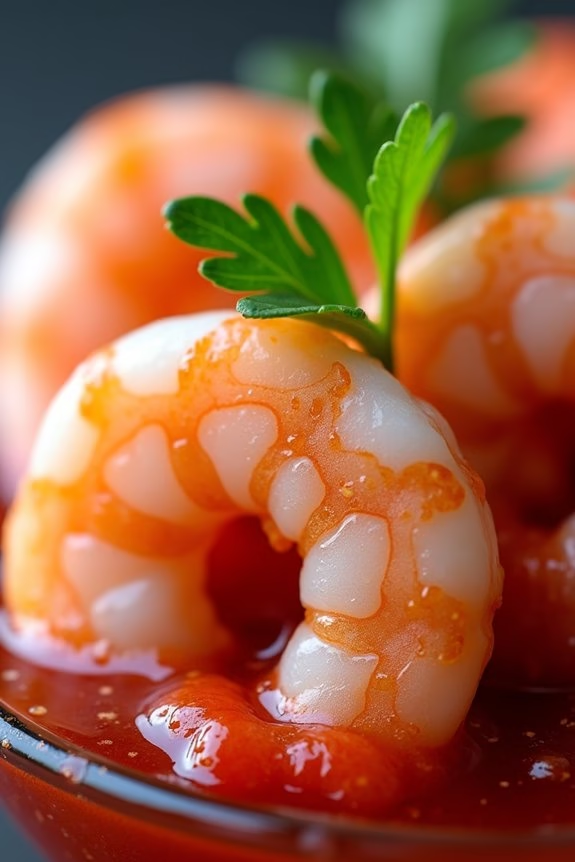
The Classic Shrimp Cocktail is a timeless appetizer that has become a staple at holiday gatherings and festive occasions. Its simplicity and elegance make it a favorite among hosts and guests alike. Served chilled with a tangy cocktail sauce, this dish is perfect for setting the tone of any holiday meal.
Preparing a Classic Shrimp Cocktail involves poaching jumbo shrimp to perfection and pairing them with a zesty homemade cocktail sauce that adds just the right amount of kick.
To create this delectable appetizer, it’s important to start with high-quality shrimp and fresh ingredients for the cocktail sauce. The shrimp should be succulent and cooked just right to retain their natural sweetness and firm texture.
The cocktail sauce, often made with ketchup, horseradish, lemon juice, and Worcestershire sauce, provides a flavorful contrast to the cool, tender shrimp. Follow the recipe below to serve a delicious Classic Shrimp Cocktail for 4-6 people.
Ingredients:
- 1 ½ pounds large shrimp, peeled and deveined, with tails on
- 1 lemon, halved
- 1 tablespoon Old Bay seasoning
- 1 teaspoon salt
- Ice
- 1 cup ketchup
- 2 tablespoons prepared horseradish
- 1 tablespoon fresh lemon juice
- 1 teaspoon Worcestershire sauce
- 1/4 teaspoon hot sauce (optional)
- Fresh parsley, for garnish
Instructions:
- Prepare the Shrimp: Fill a large pot with water and add the lemon halves, Old Bay seasoning, and salt. Bring the water to a boil, then reduce the heat to a simmer.
- Cook the Shrimp: Add the shrimp to the simmering water and cook for 2-3 minutes, or until the shrimp are pink and opaque. Remove the shrimp with a slotted spoon and immediately transfer them to an ice bath to stop the cooking process.
- Chill the Shrimp: Allow the shrimp to cool completely in the ice bath, then drain and pat them dry with paper towels. Chill the shrimp in the refrigerator until ready to serve.
- Make the Cocktail Sauce: In a medium bowl, combine the ketchup, horseradish, lemon juice, Worcestershire sauce, and hot sauce (if using). Stir until well mixed. Taste and adjust the seasoning if needed.
- Assemble the Cocktail: Arrange the chilled shrimp on a platter or in individual cocktail glasses. Serve alongside the cocktail sauce. Garnish with fresh parsley for an added touch of color.
Extra Tips:
When preparing the Classic Shrimp Cocktail, be mindful not to overcook the shrimp, as they can become tough and lose their delicate flavor.
The ice bath is essential for halting the cooking process and ensuring the shrimp remain perfectly tender. For an extra flavor boost, you can add a splash of vodka to the cocktail sauce or experiment with different types of hot sauce to suit your taste preference.
Remember to chill the cocktail sauce before serving for the best flavor and presentation.
Stuffed Mushrooms
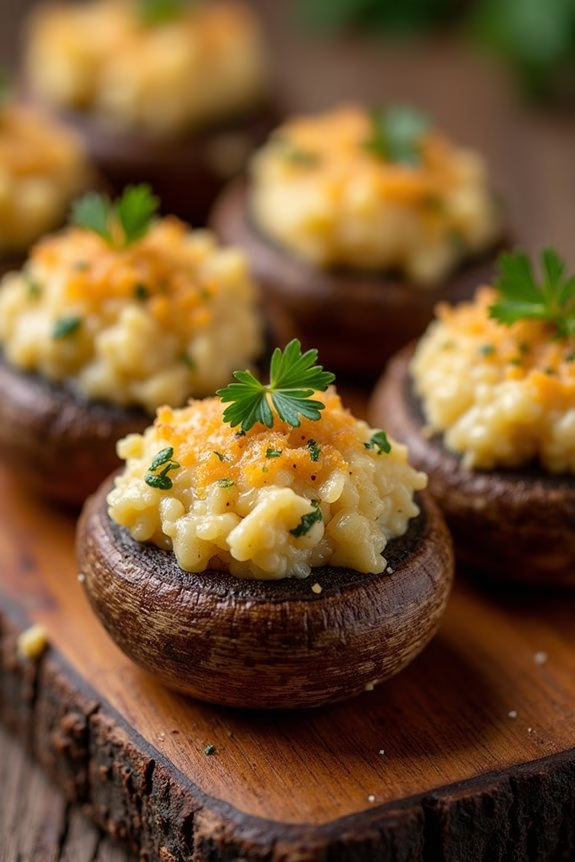
Stuffed mushrooms are a classic Christmas appetizer that combines savory flavors and an elegant presentation to start your holiday meal off right. These bite-sized delights are perfect for entertaining, offering a rich blend of cheeses, herbs, and breadcrumbs, all nestled within tender mushroom caps.
Whether served warm or at room temperature, stuffed mushrooms make a versatile and crowd-pleasing addition to your festive table. Preparing this traditional dish is a delightful experience that showcases the earthy flavor of mushrooms paired with a delicious filling.
The recipe is straightforward and can be easily adapted to suit your taste preferences. Whether you prefer a vegetarian version or one with a hint of meat, stuffed mushrooms are a perfect way to kick off any holiday gathering. Below is a recipe that serves 4-6 people, guaranteeing everyone at your celebration gets to enjoy this delicious appetizer.
Ingredients (Serves 4-6):
- 24 large white button mushrooms
- 2 tablespoons olive oil
- 1 small onion, finely chopped
- 2 cloves garlic, minced
- 1/2 cup breadcrumbs
- 1/2 cup grated Parmesan cheese
- 1/4 cup cream cheese, softened
- 1/4 cup finely chopped fresh parsley
- 1 teaspoon dried oregano
- Salt and pepper to taste
- 2 tablespoons melted butter
- Extra Parmesan cheese for topping
Cooking Instructions:
- Preheat the Oven: Begin by preheating your oven to 375°F (190°C). This guarantees that it will be at the right temperature when the mushrooms are ready to be baked.
- Prepare the Mushrooms: Carefully clean the mushrooms with a damp paper towel to remove any dirt. Remove the stems and set them aside. Place the mushroom caps on a baking sheet, with the cavity facing up.
- Chop the Stems: Finely chop the mushroom stems that were removed earlier. These will be used as part of the stuffing mixture.
- Cook the Filling: In a skillet, heat the olive oil over medium heat. Add the chopped onion and garlic, sautéing until they become fragrant and the onion is translucent. Add the chopped mushroom stems and cook for an additional 3-4 minutes.
- Mix the Stuffing: In a mixing bowl, combine the cooked onion mixture with breadcrumbs, Parmesan cheese, cream cheese, parsley, oregano, salt, and pepper. Stir until well combined, forming a cohesive stuffing.
- Stuff the Mushrooms: Using a spoon or small scoop, fill each mushroom cap generously with the stuffing mixture. Place them back on the baking sheet.
- Bake the Mushrooms: Drizzle the melted butter over the stuffed mushrooms and sprinkle with extra Parmesan cheese. Bake in the preheated oven for 20-25 minutes or until the tops are golden brown and the mushrooms are tender.
- Serve: Remove the mushrooms from the oven and let them cool slightly before serving. They can be enjoyed warm or at room temperature.
Extra Tips:
For an added depth of flavor, consider adding finely chopped cooked bacon or sausage to the stuffing mixture. You can also experiment with different types of cheese, such as mozzarella or feta, to create unique variations.
When preparing the mushrooms, be gentle to prevent breaking the caps. If you prefer a spicier kick, add a pinch of red pepper flakes to the stuffing mix. Finally, remember that mushrooms release moisture as they cook, so baking them on a wire rack placed on a baking sheet can help keep them from becoming soggy.
Deviled Eggs
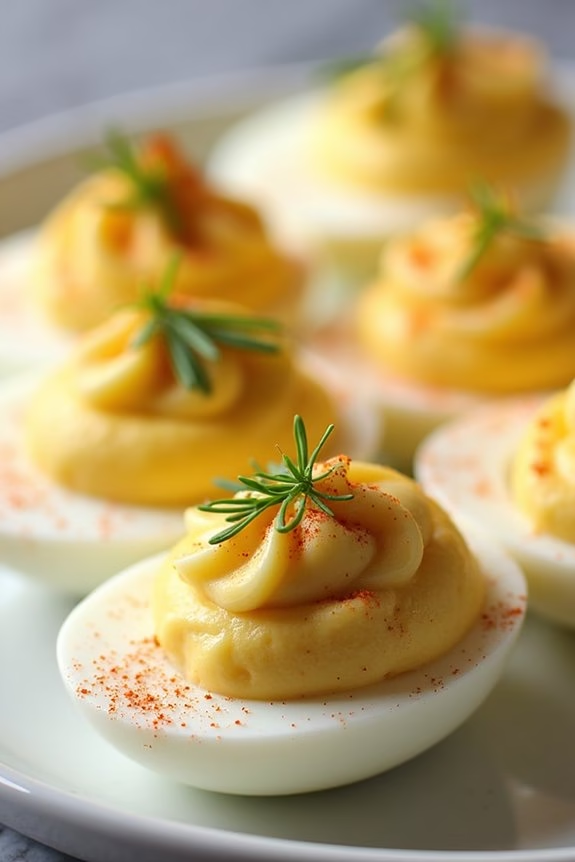
Deviled eggs are a quintessential appetizer that grace many holiday tables, particularly during Christmas. Known for their creamy filling and slightly tangy flavor, deviled eggs are both delicious and easy to prepare. They’re a versatile dish that can be dressed up with various toppings, making them a favorite at any festive gathering.
The origins of deviled eggs can be traced back to ancient Rome, where boiled eggs were seasoned with spicy sauces. Over the centuries, this classic dish evolved, and today, it remains a staple in many households’ holiday menus.
Preparing deviled eggs for your Christmas gathering not only adds a touch of tradition to your spread but also provides a delightful treat that can be customized to suit different tastes. Whether you prefer a classic filling or a more adventurous one with added spices, deviled eggs offer endless possibilities. The following recipe yields enough deviled eggs to serve 4-6 people, making it perfect for a small family gathering or as part of a larger buffet. Enjoy this simple yet elegant appetizer that’s sure to please your guests.
Ingredients for 4-6 People:
- 6 large eggs
- 1/4 cup mayonnaise
- 1 teaspoon Dijon mustard
- 1 teaspoon white vinegar
- Salt, to taste
- Freshly ground black pepper, to taste
- Paprika, for garnish
- Fresh chives or dill, for garnish (optional)
Cooking Instructions:
- Boil the Eggs: Place the eggs in a single layer in a saucepan. Cover them with cold water, about an inch above the eggs. Bring the water to a rolling boil over medium-high heat. Once boiling, cover the saucepan with a lid, remove it from the heat, and let the eggs sit in the hot water for 10-12 minutes.
- Cool and Peel the Eggs: After the eggs are cooked, carefully transfer them to a bowl of ice water using a slotted spoon. Let them cool for at least 5 minutes. This helps to stop the cooking process and makes peeling easier. Once cooled, gently tap each egg on a hard surface and peel off the shells.
- Prepare the Filling: Slice each egg in half lengthwise. Remove the yolks and place them in a medium-sized mixing bowl. Set the egg whites aside on a serving platter.
- Mix the Filling: Mash the yolks with a fork until they’re crumbled. Add the mayonnaise, Dijon mustard, white vinegar, salt, and pepper. Mix until the ingredients are well combined and the mixture is smooth.
- Fill the Egg Whites: Spoon or pipe the yolk mixture back into the hollowed-out egg whites. You can use a piping bag with a decorative tip for a more elegant presentation if desired.
- Garnish: Lightly sprinkle paprika over the filled eggs for a pop of color. Add a small piece of fresh chive or dill on top of each egg for an aromatic touch.
Extra Tips:
When making deviled eggs, freshness is key. Use eggs that aren’t too fresh, as slightly older eggs tend to peel easier after boiling. If you’re in a pinch, you can prepare the eggs and the yolk mixture a day in advance. Just keep them separately stored in airtight containers in the refrigerator, and assemble them just before serving.
For an extra flavor boost, consider adding a pinch of cayenne pepper or a dash of hot sauce to the yolk mixture. Adjust the seasonings to your preference, and enjoy the classic taste of deviled eggs at your Christmas celebration.
Pigs in a Blanket

Pigs in a Blanket are a beloved traditional Christmas appetizer that brings both simplicity and deliciousness to any festive gathering. This dish features savory cocktail sausages encased in a golden, flaky pastry, making it a hit with both kids and adults alike.
Whether you’re hosting a large Christmas party or a small family gathering, Pigs in a Blanket are certain to be a crowd-pleaser. They’re easy to prepare and can be made ahead of time, allowing you to spend more time enjoying the festivities and less time in the kitchen.
The origins of Pigs in a Blanket can be traced back to Europe, but they’ve become a staple in many Christmas celebrations around the world. The beauty of this recipe lies in its versatility; you can use different types of sausages and pastry to suit your taste.
Plus, the dish pairs well with a variety of dipping sauces, adding an extra layer of flavor to these delightful morsels. Below is a classic recipe for making Pigs in a Blanket that will serve 4-6 people, perfect for a cozy holiday gathering.
Ingredients (Serves 4-6):
- 1 package of cocktail sausages (approximately 24 sausages)
- 1 sheet of puff pastry or crescent roll dough
- 1 egg
- 1 tablespoon water
- Optional: sesame seeds or poppy seeds for garnish
Cooking Instructions:
- Preheat the Oven: Preheat your oven to 375°F (190°C) to guarantee it’s hot and ready for baking.
- Prepare the Pastry: If using puff pastry, let it thaw according to package instructions. Once thawed, roll it out on a lightly floured surface to smooth out any creases. If using crescent roll dough, unroll it onto a clean surface.
- Cut the Pastry: Cut the pastry or dough into strips about 1.5 inches wide and 3 inches long. The size of the strips may vary slightly depending on the size of the sausages you’re using.
- Wrap the Sausages: Place one sausage at the end of each pastry strip and roll it up, securing the seam by pressing gently. Repeat this process for all the sausages.
- Prepare the Egg Wash: In a small bowl, whisk together the egg and water to create an egg wash. This will give the pastry a nice golden color when baked.
- Brush with Egg Wash: Place the wrapped sausages on a baking sheet lined with parchment paper. Brush each piece with the egg wash using a pastry brush. If desired, sprinkle some sesame seeds or poppy seeds on top for added texture and flavor.
- Bake: Bake in the preheated oven for 12-15 minutes, or until the pastry is golden brown and puffed up.
- Serve: Remove from the oven and let cool slightly before serving. These are best enjoyed warm, accompanied by your choice of dipping sauces such as mustard, ketchup, or a tangy barbecue sauce.
Extra Tips:
When preparing Pigs in a Blanket, consider experimenting with different flavors of sausages, such as spicy, cheese-filled, or even vegetarian options to cater to diverse palates.
If you’re making them ahead of time, you can prepare the wrapped sausages and store them in the refrigerator, covered, for up to a day before baking. Additionally, if using frozen puff pastry, guarantee it’s completely thawed before working with it to avoid any cracking or breaking.
Always keep an eye on them while baking, as ovens can vary, and you want to avoid over-browning the pastry. Enjoy these tasty bites during your holiday festivities!
Mini Quiches

Mini quiches are a delightful and versatile appetizer perfect for adding a touch of elegance to your Christmas spread. These bite-sized treats aren’t only visually appealing but also pack a punch of flavor in every mouthful. With a creamy, savory filling encased in a buttery, flaky crust, mini quiches can be customized with a variety of fillings to suit different tastes and dietary preferences.
Whether you’re hosting a large family gathering or an intimate dinner, these mini quiches are guaranteed to be a hit among your guests.
Preparing mini quiches for Christmas is a wonderful way to incorporate seasonal ingredients and flavors, such as spinach, mushrooms, cheese, and bacon. They can be made in advance, allowing you to spend more time enjoying the festivities with your loved ones. This recipe will guide you through creating a batch of scrumptious mini quiches, perfect for serving 4-6 people. With a few simple steps, you’ll be able to whip up these delightful appetizers in no time.
Ingredients for Mini Quiches (serving size: 4-6 people):
- 1 sheet of puff pastry or pie crust
- 4 large eggs
- 1 cup of heavy cream
- 1/2 cup of grated cheddar cheese
- 1/4 cup of grated Parmesan cheese
- 1/2 cup of diced cooked bacon or ham
- 1/2 cup of chopped spinach or kale
- 1/4 cup of diced onions
- Salt and pepper to taste
- 1 tablespoon of olive oil
- Cooking spray or butter for greasing the muffin tin
Cooking Instructions:
- Preheat the Oven: Begin by preheating your oven to 375°F (190°C). This guarantees the oven is at the right temperature for baking the mini quiches evenly.
- Prepare the Muffin Tin: Lightly grease a mini muffin tin with cooking spray or butter to prevent the quiches from sticking.
- Roll Out the Dough: On a floured surface, roll out the puff pastry or pie crust to about 1/8-inch thickness. Use a round cutter or glass to cut circles slightly larger than the muffin tin cavities.
- Line the Muffin Tin: Gently press each dough circle into the muffin tin cavities, ensuring they cover the sides completely.
- Sauté the Vegetables: In a skillet, heat the olive oil over medium heat. Add the diced onions and cook until translucent. If using spinach or kale, add it to the skillet and sauté until wilted. Set aside to cool slightly.
- Prepare the Filling: In a mixing bowl, whisk together the eggs and heavy cream until well combined. Stir in the cheddar cheese, Parmesan cheese, cooked bacon or ham, sautéed onions, and spinach. Season with salt and pepper.
- Fill the Quiches: Pour the egg mixture into the dough-lined muffin cavities, filling each about 3/4 full. Be careful not to overfill as the filling will puff up during baking.
- Bake the Quiches: Place the muffin tin in the preheated oven and bake for 18-20 minutes, or until the quiches are set and the tops are golden brown.
- Cool and Serve: Once baked, remove the quiches from the oven and let them cool for a few minutes before carefully removing them from the muffin tin. Serve warm or at room temperature.
Extra Tips:
For a more robust flavor, consider adding a pinch of nutmeg or a dash of hot sauce to the egg mixture. If you prefer a vegetarian option, simply omit the bacon or ham and add more vegetables or a different cheese variety, like feta or goat cheese, for extra flavor.
Swedish Meatballs
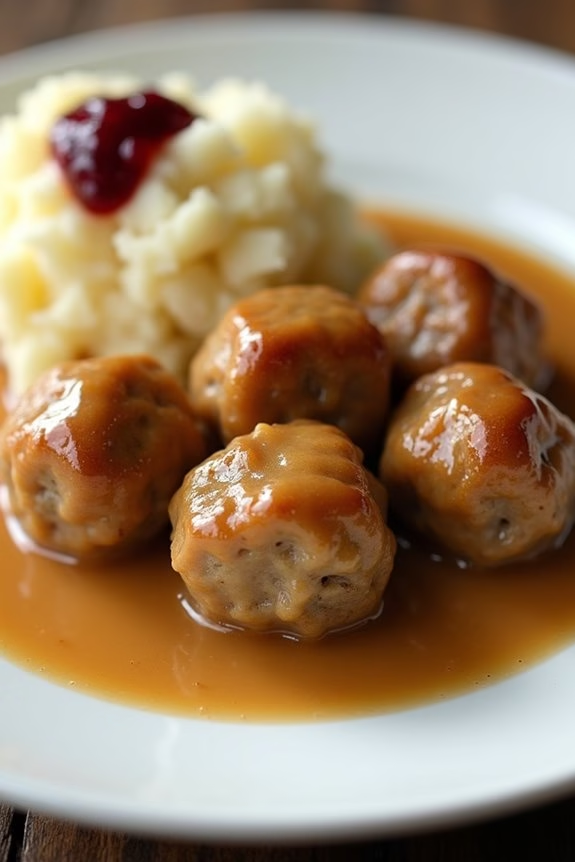
Swedish meatballs, or “köttbullar,” are a beloved traditional appetizer that perfectly captures the essence of Scandinavian cuisine. Known for their tender texture and savory flavor, these delightful morsels are often served with a rich, creamy gravy that complements the well-seasoned meat.
Whether you’re hosting a festive holiday party or simply looking to add a touch of international flair to your Christmas dinner, Swedish meatballs are sure to be a crowd-pleaser. Their warm, comforting taste is ideal for those chilly winter evenings and pairs beautifully with a variety of sides, such as lingonberry sauce or mashed potatoes.
The key to authentic Swedish meatballs lies in the combination of meats and the subtle spices that infuse every bite. Traditionally, a mix of beef and pork is used, along with breadcrumbs soaked in milk to achieve that perfect, melt-in-your-mouth consistency.
The use of allspice and nutmeg adds a distinctive depth of flavor that’s characteristic of Swedish cuisine. This recipe serves 4-6 people, making it a great option for small gatherings or family dinners. Follow the steps below to create a dish that will transport your taste buds to the heart of Sweden.
Ingredients:
- 1 pound ground beef
- 1/2 pound ground pork
- 1/2 cup breadcrumbs
- 3/4 cup milk
- 1 small onion, finely chopped
- 1 egg
- 1 teaspoon salt
- 1/2 teaspoon black pepper
- 1/4 teaspoon ground allspice
- 1/4 teaspoon ground nutmeg
- 2 tablespoons butter
- 2 tablespoons all-purpose flour
- 2 cups beef broth
- 1/2 cup heavy cream
- Salt and pepper to taste
Cooking Instructions:
- Prepare the Breadcrumb Mixture: In a small bowl, combine the breadcrumbs and milk. Let them soak for about 5 minutes until the breadcrumbs absorb the milk and become soft.
- Mix the Meatball Ingredients: In a large bowl, combine the ground beef, ground pork, soaked breadcrumbs, chopped onion, egg, salt, black pepper, allspice, and nutmeg. Mix everything thoroughly with your hands until well incorporated.
- Shape the Meatballs: Roll the mixture into small balls, about 1 inch in diameter, and place them on a tray or plate. You should have approximately 20-24 meatballs.
- Cook the Meatballs: In a large skillet, melt the butter over medium heat. Add the meatballs in batches, making sure not to overcrowd the pan. Cook each batch for about 5-7 minutes, turning occasionally, until browned on all sides and cooked through. Remove the meatballs from the skillet and set them aside.
- Make the Gravy: In the same skillet, add the flour to the remaining butter and meatball drippings. Stir continuously for about 1 minute until the flour is lightly browned. Gradually whisk in the beef broth, ensuring there are no lumps. Bring the mixture to a simmer and cook for about 5 minutes until slightly thickened.
- Finish the Gravy: Stir in the heavy cream and season the gravy with salt and pepper to taste. Return the meatballs to the skillet, gently coating them in the gravy. Simmer for an additional 3-5 minutes to allow the flavors to meld.
- Serve: Transfer the meatballs and gravy to a serving dish and serve hot. They pair wonderfully with lingonberry sauce or mashed potatoes.
Extra Tips:
For the best results, make sure your hands are slightly damp when rolling the meatballs to prevent the mixture from sticking. If you prefer a smoother gravy, you can strain it before adding the meatballs back in.
Additionally, these meatballs can be made ahead of time and frozen, making them a convenient option for holiday meal prep. Simply cook them and freeze in an airtight container, then reheat in the gravy when you’re ready to serve. Enjoy your festive Swedish meatballs with family and friends!
Spinach and Artichoke Dip

Spinach and Artichoke Dip is a classic appetizer that’s perfect for holiday gatherings, offering a creamy and savory blend of flavors that everyone loves. It’s ideal for those looking to impress guests with a dish that’s both delicious and easy to prepare.
This dip combines tender spinach, tangy artichokes, and a mix of cheeses to create a warm, inviting dish that pairs beautifully with crackers, bread, or vegetables.
Perfect for serving 4-6 people, this Spinach and Artichoke Dip can be prepared in advance and baked just before serving, making it a convenient option for busy holiday schedules. Whether you’re planning a cozy family dinner or a festive party, this appetizer is sure to be a hit.
Let’s explore the ingredients and steps to create this delightful dish.
Ingredients:
- 1 cup frozen chopped spinach, thawed and drained
- 1 cup canned artichoke hearts, drained and chopped
- 1/2 cup cream cheese, softened
- 1/2 cup sour cream
- 1/4 cup mayonnaise
- 1 clove garlic, minced
- 1 cup shredded mozzarella cheese
- 1/2 cup grated Parmesan cheese
- Salt and pepper to taste
Cooking Instructions:
- Preheat the Oven: Start by preheating your oven to 350°F (175°C). This guarantees that it’s at the right temperature when you’re ready to bake the dip.
- Prepare the Spinach and Artichokes: Make certain the spinach is fully thawed and drained. Squeeze out any excess moisture to prevent the dip from becoming watery.
- Chop the artichoke hearts into small, bite-sized pieces.
- Mix the Creamy Base: In a large mixing bowl, combine the softened cream cheese, sour cream, and mayonnaise. Mix until smooth and well-blended. This creamy base will bind the ingredients together.
- Add Flavorings: Stir in the minced garlic, grated Parmesan cheese, salt, and pepper. Mix well to guarantee the flavors are evenly distributed.
- Combine All Ingredients: Add the drained spinach, chopped artichokes, and half of the shredded mozzarella cheese to the creamy mixture. Stir until everything is well combined.
- Transfer to Baking Dish: Spoon the mixture into a medium-sized baking dish, spreading it evenly. Top with the remaining mozzarella cheese to create a cheesy crust.
- Bake: Place the dish in the preheated oven and bake for 20-25 minutes, or until the cheese is bubbly and golden brown on top.
- Serve: Once baked, remove the dip from the oven and let it cool slightly before serving. Serve with crackers, sliced bread, or fresh vegetables for dipping.
Extra Tips:
For the best flavor, verify that all ingredients are at room temperature before mixing, as this helps them combine more smoothly.
You can also prepare the dip a day in advance; simply cover and refrigerate it until you’re ready to bake. If you like a bit of heat, consider adding a pinch of red pepper flakes to the mixture.
Finally, remember to taste and adjust the seasoning before baking to guarantee the perfect balance of flavors. Enjoy your Spinach and Artichoke Dip with your favorite dippers!
Prosciutto-Wrapped Melon
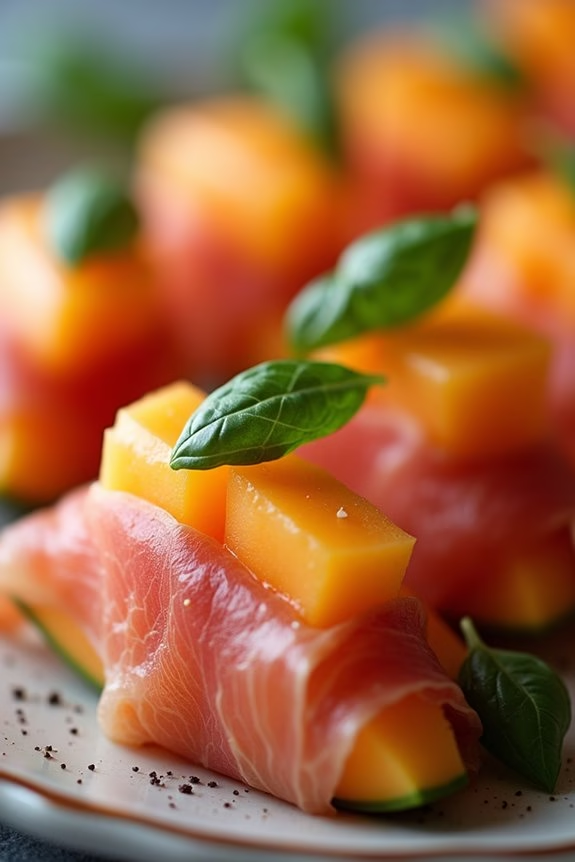
Prosciutto-wrapped melon is a delightful and revitalizing appetizer that beautifully balances the sweet and juicy flavors of ripe melon with the savory, salty notes of prosciutto. This classic Italian-inspired dish is a popular choice for Christmas gatherings, offering a simple yet elegant addition to your festive spread.
The contrast in flavors and textures makes it an irresistible treat that can be prepared quickly and easily, allowing you to spend more time enjoying the company of your loved ones.
The key to a successful prosciutto-wrapped melon lies in using high-quality ingredients. Choose a ripe cantaloupe or honeydew melon for its sweetness and pair it with thinly sliced, high-quality prosciutto. This appetizer isn’t only visually appealing with its vibrant colors but also a light and revitalizing way to start your holiday meal.
It’s perfect for serving a crowd, as it can be prepared ahead of time and assembled just before serving.
Ingredients (Serves 4-6):
- 1 ripe cantaloupe or honeydew melon
- 12-18 slices of prosciutto
- Fresh basil leaves (optional)
- Freshly ground black pepper (optional)
- Toothpicks or skewers for serving
Instructions:
- Prepare the Melon: Begin by cutting the melon in half and scooping out the seeds with a spoon. Use a sharp knife to cut the melon into wedges, confirming each wedge is roughly the same size for even presentation. Once cut, remove the rind from each wedge.
- Wrap with Prosciutto: Lay a slice of prosciutto flat on a clean surface. Place a melon wedge at one end of the prosciutto slice and gently roll it up until the melon is fully wrapped. Repeat this step with all melon wedges.
- Add Garnish: If desired, place a fresh basil leaf on top of each prosciutto-wrapped melon and secure it using a toothpick or skewer. This not only adds a burst of flavor but also helps keep the prosciutto in place.
- Season and Serve: Arrange the prosciutto-wrapped melon on a serving platter. If you like, you can add a light sprinkle of freshly ground black pepper to enhance the flavors. Serve immediately or refrigerate until ready to serve.
Extra Tips:
For the best flavor, confirm the melon is perfectly ripe; it should have a sweet aroma and give slightly to pressure. If preparing in advance, wrap the melon wedges in prosciutto on the day of serving to maintain their freshness and prevent the prosciutto from becoming soggy.
You can also experiment with different types of melon or even drizzle a little balsamic glaze over the top for an added touch of sophistication.
Cranberry Brie Bites
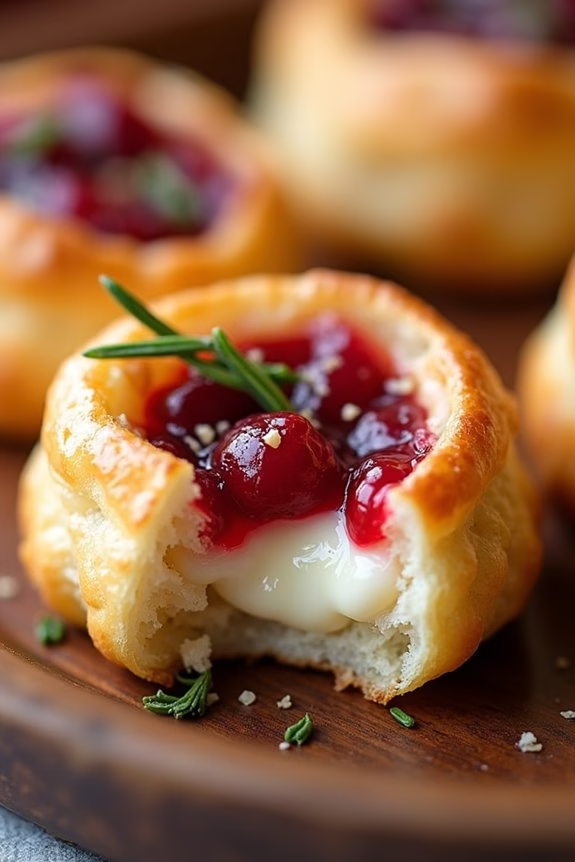
Cranberry Brie Bites are a delightful and elegant appetizer perfect for holiday gatherings. The combination of creamy brie, tart cranberry sauce, and flaky puff pastry creates a symphony of flavors that’s certain to impress your guests. These bites aren’t only delicious but also incredibly easy to prepare, making them an ideal choice for both novice and experienced cooks alike.
Whether you’re hosting a large Christmas party or enjoying a cozy dinner with family, these bites are guaranteed to be a hit.
The beauty of Cranberry Brie Bites lies in their simplicity and versatility. They can be prepared in advance and baked just before serving, allowing you to spend more time enjoying the festivities with your loved ones. The use of store-bought puff pastry saves time without compromising on taste, while the cranberry sauce can be made from scratch or purchased, depending on your preference.
With their festive appearance and mouthwatering taste, Cranberry Brie Bites are sure to become a staple on your holiday menu.
Ingredients for 4-6 servings:
- 1 sheet of puff pastry, thawed
- 8 oz brie cheese, cut into small cubes
- 1/2 cup cranberry sauce
- 1/4 cup chopped pecans (optional)
- 1 tablespoon fresh rosemary, finely chopped (optional)
Cooking Instructions:
- Preheat the Oven: Begin by preheating your oven to 375°F (190°C). This guarantees that the puff pastry will cook evenly and achieve a golden, flaky texture.
- Prepare the Puff Pastry: Roll out the puff pastry sheet on a lightly floured surface. Cut the sheet into approximately 24 squares, each about 2 inches by 2 inches.
- Assemble the Bites: Place each puff pastry square into the cups of a mini muffin tin, gently pressing them down to form little cups.
- Add the Brie: Place a small cube of brie cheese into each pastry cup. Be sure to cut the brie into pieces that are small enough to fit inside the cup without overflowing.
- Add Cranberry Sauce: Spoon about a teaspoon of cranberry sauce over the brie in each cup. If you prefer a sweeter or more tart flavor, adjust the amount of cranberry sauce to your liking.
- Optional Toppings: Sprinkle chopped pecans and rosemary over the top of each bite for added flavor and a touch of elegance.
- Bake: Place the muffin tin in the preheated oven and bake for 15-20 minutes, or until the puff pastry is golden brown and the cheese is melted and bubbly.
- Cool and Serve: Allow the bites to cool for a few minutes before transferring them to a serving platter. They can be served warm or at room temperature.
Extra Tips:
To guarantee the best results, use a sharp knife to cut the puff pastry and brie. This will help maintain clean edges and prevent the cheese from sticking. If you find that the pastry is too soft to work with, pop it in the refrigerator for a few minutes to firm up.
Additionally, these bites can be assembled and frozen before baking, making them a convenient option for preparing ahead of time. Just bake them directly from the freezer, adding a few extra minutes to the baking time. Enjoy your Cranberry Brie Bites with a glass of sparkling wine to complement the rich flavors.
Sausage Rolls

Sausage rolls are a classic and beloved appetizer that often graces the tables during the festive season. These tasty morsels are perfect for Christmas gatherings, offering a delicious and savory treat that’s easy to make and certain to please the crowd. With a flaky puff pastry exterior and a flavorful sausage filling, they’re both comforting and indulgent, making them a must-have on any holiday menu.
Made with a few simple ingredients, sausage rolls are highly adaptable to various tastes and preferences. Whether you like them seasoned traditionally or with a twist of herbs and spices, they’re sure to be a hit. This recipe will guide you through making sausage rolls that serve 4-6 people, perfect for a cozy gathering or as part of a larger spread of appetizers.
Ingredients for 4-6 Servings:
- 500g of sausage meat
- 1 onion, finely chopped
- 2 cloves of garlic, minced
- 1 tablespoon fresh thyme leaves
- 1 tablespoon fresh parsley, chopped
- 1 teaspoon Dijon mustard
- Salt and pepper to taste
- 1 sheet of puff pastry (ready-rolled)
- 1 egg, beaten (for egg wash)
- Sesame seeds (optional for topping)
Cooking Instructions:
- Preheat the Oven: Start by preheating your oven to 200°C (390°F) to make sure it’s hot enough to cook the sausage rolls evenly and give them a nice golden color.
- Prepare the Filling: In a large bowl, combine the sausage meat, finely chopped onion, minced garlic, thyme leaves, parsley, Dijon mustard, salt, and pepper. Mix thoroughly using your hands or a spoon until all the ingredients are well combined.
- Roll the Pastry: Lay out the sheet of puff pastry on a lightly floured surface. If it’s a bit thick, gently roll it out to make certain it’s even. Cut the pastry in half lengthwise to create two long rectangles.
- Assemble the Rolls: Divide the sausage mixture in half and shape each portion into a long log. Place one sausage log along the long edge of each pastry rectangle. Brush the opposite edge with the beaten egg to help seal the pastry.
- Seal and Cut: Roll the pastry over the sausage filling, pressing down the egg-washed edge to seal. Make sure the seam is underneath. Using a sharp knife, cut each roll into 4-6 pieces, depending on your desired size.
- Prepare for Baking: Place the sausage rolls on a baking sheet lined with parchment paper. Brush the tops with the remaining beaten egg and sprinkle with sesame seeds if desired.
- Bake: Bake in the preheated oven for 20-25 minutes, or until the pastry is golden brown and the sausage is cooked through. Remove from the oven and let cool slightly before serving.
Extra Tips:
For an extra touch of flavor, consider adding a pinch of nutmeg or cayenne pepper to the sausage mixture. If you prefer a vegetarian option, you can substitute the sausage meat with a plant-based alternative.
Remember, the key to perfect sausage rolls is making sure the pastry is cold when you start assembling, as this helps achieve that beautiful flaky texture. Additionally, don’t overcrowd the baking sheet to allow proper airflow and even cooking.
Enjoy these sausage rolls warm for the best taste experience!
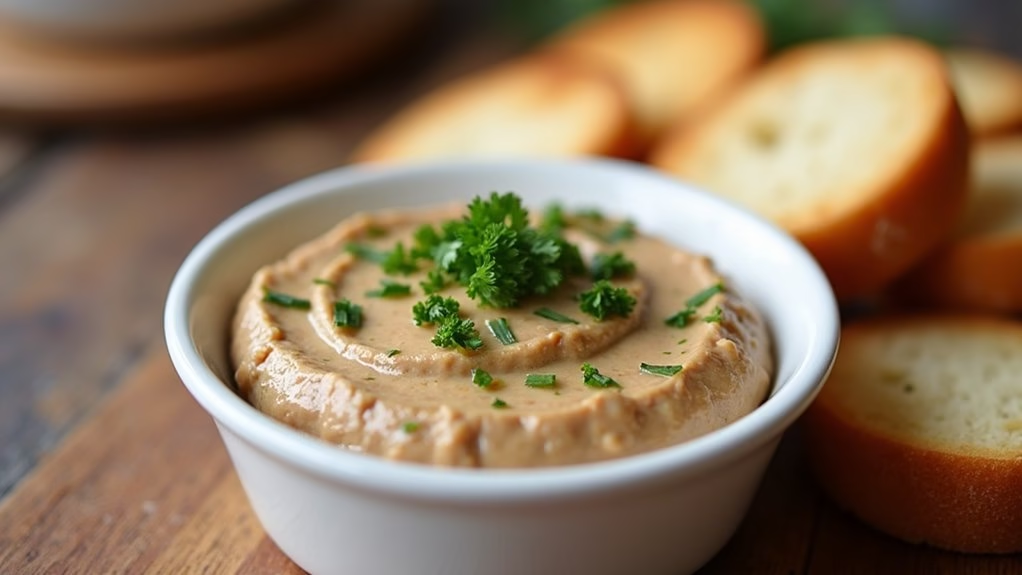
Chicken Liver Pâté
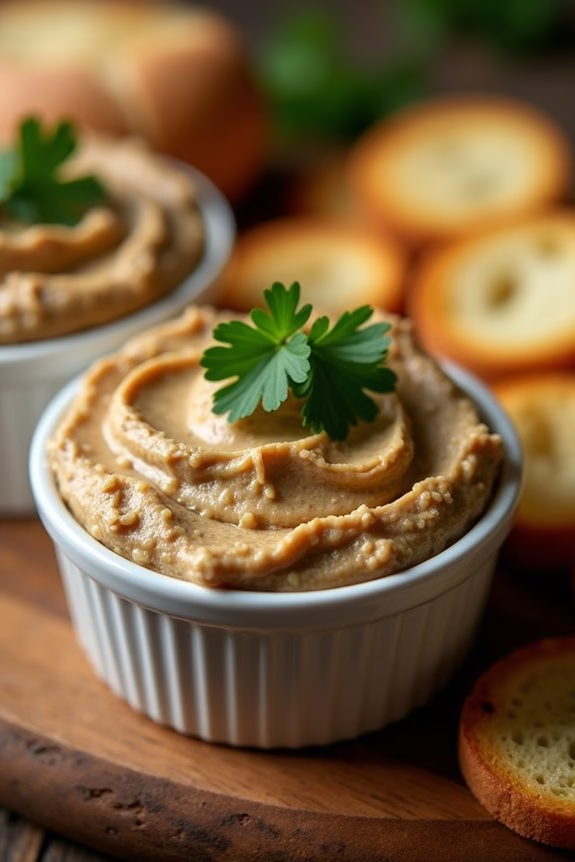
Chicken Liver Pâté is a classic and elegant appetizer, perfect for adding a touch of sophistication to your holiday spread. This smooth and creamy pâté is made from chicken livers blended with butter, spices, and a splash of brandy or cognac, then chilled until set. Traditionally served with slices of toasted baguette or crackers, this dish is sure to impress your guests with its rich flavor and velvety texture.
Whether you’re hosting a festive dinner or a casual gathering, Chicken Liver Pâté will make a delightful addition to your menu.
The process of making Chicken Liver Pâté is simple yet rewarding. By carefully selecting fresh ingredients and following each step with precision, you can achieve a pâté that rivals any gourmet offering. The key is to cook the chicken livers just right, guaranteeing they remain tender while developing a deep, savory taste.
When blended with aromatic herbs and a hint of alcohol, the result is a luscious spread that’s both indulgent and comforting. With this recipe, you’ll be able to create a traditional Christmas appetizer that’s sure to become a favorite year after year.
Ingredients for 4-6 servings:
- 1 pound fresh chicken livers, trimmed
- 1 small onion, finely chopped
- 2 cloves garlic, minced
- 1/2 cup unsalted butter, divided
- 1/4 cup brandy or cognac
- 1 teaspoon fresh thyme leaves
- 1/2 teaspoon salt
- 1/4 teaspoon freshly ground black pepper
- 1/4 cup heavy cream
- 2 tablespoons fresh parsley, chopped (optional for garnish)
Cooking Instructions:
- Prepare the Chicken Livers: Begin by rinsing the chicken livers under cold water and pat them dry with paper towels. Trim any visible fat or connective tissue, then set them aside.
- Sauté the Aromatics: In a large skillet, melt 2 tablespoons of butter over medium heat. Add the chopped onion and minced garlic, and sauté until the onion is soft and translucent, about 5 minutes.
- Cook the Livers: Increase the heat to medium-high and add the chicken livers to the skillet. Cook them for about 5-7 minutes, stirring occasionally, until they’re browned on the outside but still slightly pink inside.
- Add the Brandy: Carefully pour the brandy into the skillet. Allow it to simmer for 2-3 minutes, letting the alcohol evaporate and the flavors meld together. Stir in the thyme, salt, and pepper.
- Blend the Mixture: Transfer the liver mixture to a food processor. Add the remaining butter and heavy cream, then blend until smooth and creamy. Adjust seasoning to taste.
- Chill the Pâté: Pour the blended pâté into a serving dish or individual ramekins. Smooth the top with a spatula and cover with plastic wrap. Refrigerate for at least 2 hours, or until set.
- Serve: Just before serving, garnish with chopped parsley if desired. Serve the pâté with toasted baguette slices or your favorite crackers.
Extra Tips:
For the best results, it’s important to not overcook the chicken livers. They should remain slightly pink inside to guarantee a tender texture.
If you don’t have brandy or cognac, a dry white wine can be used as a substitute, though the flavor will be slightly different.
When blending the mixture, take care to achieve a smooth consistency; don’t be afraid to let the food processor run for a bit longer if needed.
Finally, for a festive touch, consider serving the pâté with a selection of pickles or chutneys to complement its richness.