
The holiday season is fast approaching, and I’m on the lookout for appetizers that will wow my guests and keep them coming back for more. Bacon is the ultimate ingredient that takes these recipes to another level with its irresistible flavor. From the spicy bacon-wrapped jalapeño poppers to the sweet maple-glazed bacon skewers, each one is a delightful treat. Are you curious about the rest? Let’s explore these mouthwatering delights together.
Bacon-Wrapped Jalapeño Poppers
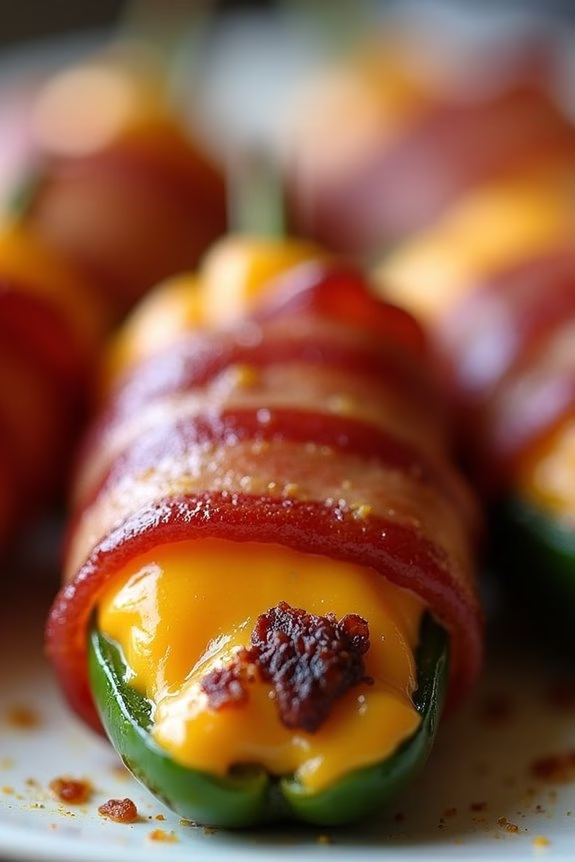
Bacon-Wrapped Jalapeño Poppers are the perfect appetizer for those who enjoy a combination of heat and savory flavors. These poppers are ideal for Christmas gatherings or any festive occasion, as they offer a delightful crunch paired with creamy, cheesy goodness, all wrapped in the irresistible flavor of crispy bacon.
The poppers are easy to prepare and can be made ahead of time, leaving you free to enjoy the festivities with your friends and family. The spicy kick of the jalapeños is balanced by a rich filling made from cream cheese and cheddar, while the bacon wrap provides a smoky, savory finish.
This appetizer isn’t only visually appealing but also mouthwateringly delicious, making it a crowd-pleaser for both spice lovers and those who appreciate the comforting flavors of cheese and bacon. Let’s explore how you can make this delightful dish for a serving size of 4-6 people.
Ingredients:
- 12 fresh jalapeño peppers
- 8 ounces cream cheese, softened
- 1 cup shredded cheddar cheese
- 1 teaspoon garlic powder
- 1 teaspoon onion powder
- 24 slices of bacon
- Toothpicks
Instructions:
1. Prepare the Jalapeños: Begin by preheating your oven to 400°F (200°C). Cut each jalapeño pepper in half lengthwise and remove the seeds and membranes to reduce the heat.
Be certain you wear gloves or wash your hands thoroughly after handling the peppers to avoid irritation.
2. Make the Filling: In a medium-sized bowl, combine the softened cream cheese, shredded cheddar cheese, garlic powder, and onion powder. Mix until well combined, creating a smooth and creamy filling.
3. Stuff the Jalapeños: Spoon the cheese mixture into each jalapeño half, filling them generously. Be careful not to overfill, as the cheese will expand slightly when baked.
4. Wrap with Bacon: Take one slice of bacon and wrap it around each stuffed jalapeño half, securing it with a toothpick. If the bacon slices are too long, you can cut them in half before wrapping.
5. Bake the Poppers: Place the bacon-wrapped jalapeños on a baking sheet lined with parchment paper or a wire rack. Bake in the preheated oven for 20-25 minutes, or until the bacon is crispy and the cheese is bubbly.
6. Serve: Remove from the oven and let them cool for a few minutes before serving. The poppers can be served warm or at room temperature.
Extra Tips:
For a smokier flavor, you can use smoked bacon or add a dash of smoked paprika to the cheese filling. If you prefer a milder taste, consider using mini sweet peppers instead of jalapeños.
Additionally, you can experiment with different cheese combinations, such as adding Monterey Jack or pepper jack for a twist. These poppers can also be cooked on a grill for an extra layer of flavor, just make sure to monitor them closely to prevent burning.
Enjoy your festive appetizer with a cooling dip like ranch or blue cheese dressing.
Maple-Glazed Bacon Skewers
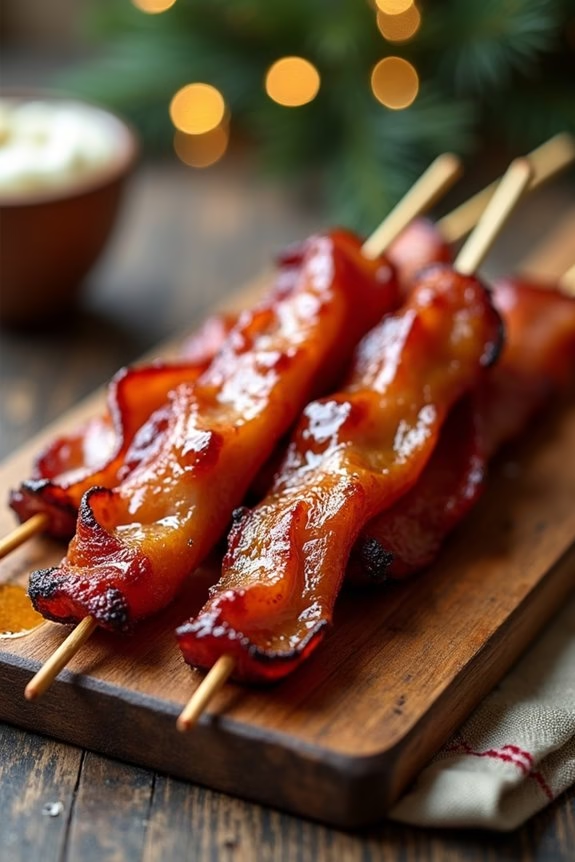
Maple-Glazed Bacon Skewers are the perfect holiday appetizer that combines the savory delight of bacon with the sweetness of maple syrup. This dish is incredibly easy to prepare and will certainly be a crowd-pleaser at your Christmas gathering. The bacon is glazed with a mixture of maple syrup and a hint of spice, then skewered and baked to crispy, caramelized perfection.
Whether you’re hosting a large party or a cozy family dinner, these skewers are a delicious way to kick off the festivities.
The beauty of Maple-Glazed Bacon Skewers lies in their simplicity and the balance of flavors. The smoky bacon pairs beautifully with the rich, sweet maple glaze, creating an irresistible combination that will have guests reaching for seconds.
These skewers aren’t only flavorful but also visually appealing, making them an excellent addition to any appetizer spread. The following recipe serves 4-6 people, making it ideal for a small to medium-sized gathering.
Ingredients:
- 1 lb thick-cut bacon
- 1/2 cup pure maple syrup
- 1 teaspoon Dijon mustard
- 1/2 teaspoon cayenne pepper
- Wooden skewers (soaked in water for 30 minutes)
Cooking Instructions:
- Preheat the Oven: Preheat your oven to 375°F (190°C) and line a baking sheet with foil or parchment paper. Place a wire rack on top of the baking sheet to allow the bacon to cook evenly.
- Prepare the Glaze: In a small bowl, mix together the maple syrup, Dijon mustard, and cayenne pepper until well combined. This glaze will add a sweet and spicy kick to the bacon.
- Skewer the Bacon: Thread each strip of bacon onto the soaked wooden skewers, weaving the bacon in and out so it stays secure. This will help the bacon cook evenly and make it easy to serve.
- Apply the Glaze: Using a pastry brush, generously coat each bacon strip with the maple glaze. Make sure to cover both sides for maximum flavor.
- Bake the Skewers: Place the skewers on the wire rack in the prepared baking sheet. Bake in the preheated oven for about 25-30 minutes or until the bacon is crispy and the glaze is caramelized. Keep an eye on them to prevent burning.
- Serve: Once done, remove the skewers from the oven and let them cool slightly before serving. They can be served warm or at room temperature.
Extra Tips:
When preparing the Maple-Glazed Bacon Skewers, consider using high-quality pure maple syrup for the best flavor. If you prefer a less spicy version, you can reduce or omit the cayenne pepper.
Soaking the wooden skewers in water prior to baking prevents them from burning in the oven. Additionally, ascertain your bacon is evenly spaced on the wire rack to allow proper air circulation and even cooking.
If you have leftovers, store them in an airtight container in the refrigerator and reheat them in the oven to keep them crisp.
Cheesy Bacon Spinach Dip

Cheesy Bacon Spinach Dip is a mouthwatering appetizer perfect for any Christmas gathering. This warm, gooey dip combines the smoky flavor of bacon with creamy cheese and fresh spinach, creating a delightful combination that will have your guests coming back for more.
Whether you’re hosting a family dinner or a festive party, this dip is bound to be a crowd-pleaser. The rich flavors and satisfying texture make it a great starter to whet your guests’ appetites for the holiday feast to come.
This recipe is designed to serve 4-6 people, making it ideal for small gatherings. The combination of cheeses and the savory bacon complements the earthy taste of spinach, providing a harmonious blend of flavors.
With minimal preparation and cooking time, this dip isn’t only delicious but also convenient, allowing you to spend more time enjoying the company of your loved ones.
Ingredients:
- 8 slices of bacon
- 1 (10-ounce) package of frozen chopped spinach, thawed and drained
- 1 (8-ounce) package of cream cheese, softened
- 1 cup sour cream
- 1 cup shredded mozzarella cheese
- ½ cup grated Parmesan cheese
- 1 teaspoon garlic powder
- ½ teaspoon onion powder
- Salt and pepper to taste
- Bread or crackers for serving
Instructions:
1. Prepare the Bacon:
Start by cooking the bacon in a skillet over medium heat until crispy. Once cooked, remove the bacon from the skillet and place it on a plate lined with paper towels to absorb excess grease.
Once cooled, crumble the bacon into small pieces and set aside.
2. Mix the Ingredients:
In a large mixing bowl, combine the softened cream cheese, sour cream, mozzarella cheese, and Parmesan cheese. Stir in the garlic powder, onion powder, salt, and pepper.
Once the mixture is smooth, fold in the drained spinach and crumbled bacon until everything is evenly incorporated.
3. Bake the Dip:
Preheat your oven to 375°F (190°C). Transfer the mixture to an oven-safe baking dish, spreading it evenly.
Place the dish in the preheated oven and bake for 20-25 minutes, or until the dip is bubbly and the top is lightly golden.
4. Serve:
Remove the dip from the oven and let it cool for a few minutes before serving. Serve the Cheesy Bacon Spinach Dip warm with slices of bread or crackers for dipping.
Extra Tips:
For the best results, verify that the spinach is thoroughly drained to prevent the dip from becoming watery.
You can also prepare the dip ahead of time and store it in the refrigerator until you’re ready to bake it, which makes it an excellent choice for stress-free entertaining.
If you prefer a spicy kick, consider adding a pinch of red pepper flakes or a dash of hot sauce to the mixture. Additionally, feel free to experiment with different types of cheese to customize the flavors to your liking.
Bacon-Wrapped Dates With Goat Cheese
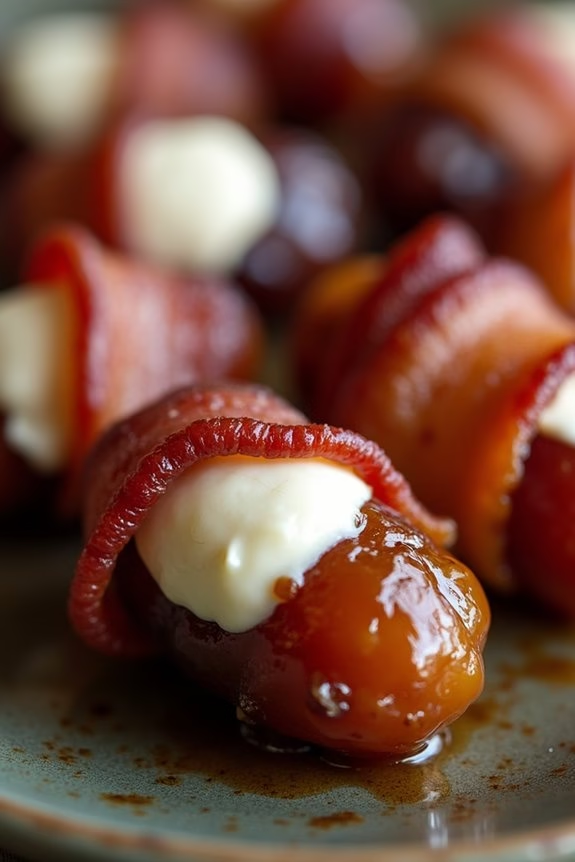
Bacon-Wrapped Dates With Goat Cheese are a delightful appetizer that combines the savory taste of bacon with the sweet, rich flavor of dates, all balanced by the creamy tang of goat cheese. This classic treat is perfect for holiday gatherings, offering a harmonious blend of textures and flavors that will have guests reaching for more.
These bite-sized morsels aren’t only easy to prepare but also allow for some creativity with additional fillings or glazes. These appetizers are a great addition to any Christmas party menu, providing a sophisticated yet simple option that can be prepared ahead of time and cooked just before serving.
The natural sweetness of the Medjool dates pairs beautifully with the salty crunch of the bacon and the creamy goat cheese filling. As an added bonus, the recipe can be easily doubled or halved, depending on the number of guests you’re expecting. Here’s how you can make this delicious dish for 4-6 people.
Ingredients:
- 18-24 Medjool dates, pitted
- 6-8 ounces goat cheese
- 12 slices of bacon, cut in half
- 18-24 toothpicks
- Optional: 2 tablespoons honey or balsamic glaze for drizzling
Cooking Instructions:
- Preheat the Oven: Preheat your oven to 375°F (190°C) and line a baking sheet with parchment paper to prevent sticking and ease cleaning.
- Prepare the Dates: Carefully make a small slit in each date lengthwise and remove the pit, if not already pitted, guaranteeing you keep the date intact as much as possible.
- Fill with Goat Cheese: Use a small spoon or a piping bag to fill each date with approximately 1 teaspoon of goat cheese. Confirm the cheese is evenly distributed inside the date.
- Wrap in Bacon: Take a half-slice of bacon and wrap it snugly around each stuffed date. Secure the bacon in place by spearing through the middle with a toothpick.
- Bake: Arrange the bacon-wrapped dates on the prepared baking sheet, leaving some space between each one for even cooking. Bake in the preheated oven for 20-25 minutes, or until the bacon is crispy and golden brown.
- Drizzle and Serve: If desired, drizzle honey or balsamic glaze over the dates just before serving to add an extra layer of flavor. Serve warm.
Extra Tips: For an additional flavor boost, consider adding a small almond or piece of walnut inside each date along with the goat cheese. This adds a pleasant crunch and complements the other flavors beautifully.
When choosing bacon, opt for thin-sliced varieties as they wrap easier and cook more evenly. If you’re making these ahead of time, assemble the dates and store them in the refrigerator, then bake them just before your guests arrive.
Bacon and Cheddar Stuffed Mushrooms

Bacon and Cheddar Stuffed Mushrooms are a delightful appetizer that perfectly combines the earthy flavor of mushrooms with the savory taste of bacon and the creamy texture of melted cheddar cheese. This dish is perfect for holiday gatherings, offering a warm and inviting start to your Christmas festivities.
The juicy mushrooms serve as bite-sized vessels for a rich filling that will leave your guests asking for more. These stuffed mushrooms aren’t only easy to prepare, but they’re also a hit amongst all age groups. The combination of crispy bacon, sharp cheddar, and tender mushrooms creates a balanced flavor that’s both comforting and indulgent.
With a few simple steps, you can prepare a delicious appetizer that will be the star of your Christmas spread.
Ingredients (Serves 4-6 people):
- 20-24 large white button mushrooms
- 6 slices of bacon
- 1 cup shredded cheddar cheese
- 1/2 cup cream cheese, softened
- 1/4 cup breadcrumbs
- 2 cloves garlic, minced
- 2 tablespoons chopped fresh parsley
- 1 tablespoon olive oil
- Salt and pepper to taste
Cooking Instructions:
- Prepare the Mushrooms: Preheat your oven to 375°F (190°C). Clean the mushrooms with a damp paper towel, gently removing any dirt. Carefully remove the stems and set them aside.
- Cook the Bacon: In a skillet over medium heat, cook the bacon until crispy. Remove from the pan and drain on a paper towel. Once cooled, crumble the bacon into small pieces.
- Sauté the Garlic: In the same skillet, add a tablespoon of olive oil and sauté the minced garlic until fragrant, about 1 minute. Add the mushroom stems (finely chopped) to the skillet and cook for another 2-3 minutes. Set aside to cool slightly.
- Make the Filling: In a mixing bowl, combine the crumbled bacon, sautéed garlic and mushroom stems, cream cheese, cheddar cheese, breadcrumbs, and chopped parsley. Season with salt and pepper to taste, then mix until well combined.
- Stuff the Mushrooms: Using a small spoon, fill each mushroom cap with the cheese and bacon mixture, pressing gently to compact the filling.
- Bake: Arrange the stuffed mushrooms on a baking sheet lined with parchment paper. Bake in the preheated oven for 15-20 minutes, or until the cheese is melted and the tops are golden brown.
- Serve: Remove from the oven and let cool for a few minutes before serving. Garnish with extra parsley if desired.
Extra Tips:
When selecting mushrooms, choose ones that are uniform in size for even cooking. Confirm the mushrooms are dry before stuffing to prevent them from becoming soggy.
Additionally, you can prepare the filling a day in advance and store it in the refrigerator, making the assembly process quicker on the day of your event. For a spicier kick, consider adding a pinch of cayenne pepper to the filling mixture.
Enjoy your festive appetizer!
Bacon-Wrapped Asparagus Bundles
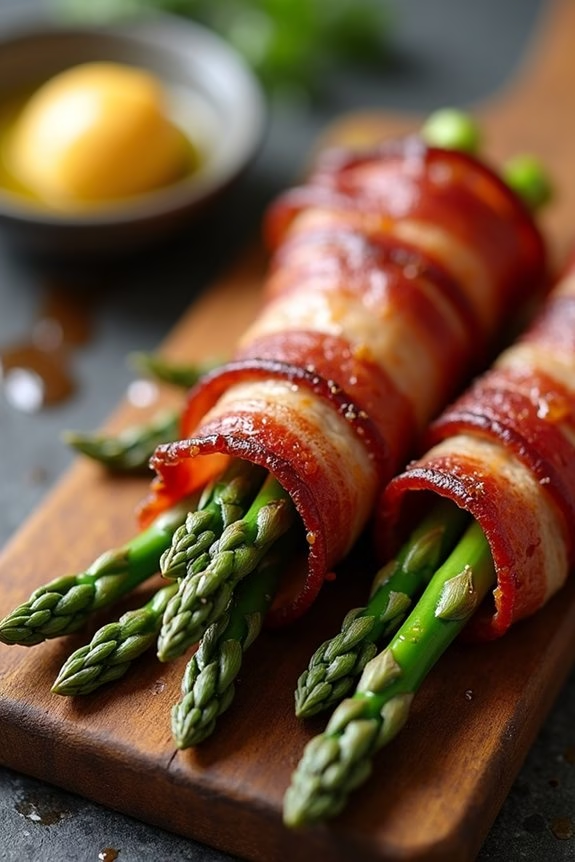
Bacon-wrapped asparagus bundles are a delightful and savory appetizer that perfectly combines the earthiness of asparagus with the smoky, salty flavor of bacon. This dish isn’t only visually appealing but also easy to prepare, making it a great choice for your Christmas appetizer spread.
The crisp asparagus spears wrapped in tender bacon become a crowd favorite, bringing together a perfect balance of textures and tastes. Serve these bundles as a festive starter to impress your guests and set the tone for a memorable holiday gathering.
Whether you’re hosting a large family dinner or a more intimate celebration, these bacon-wrapped asparagus bundles are bound to be a hit. The preparation is straightforward, making it an ideal recipe for those who want to enjoy the festivities without spending too much time in the kitchen.
The combination of fresh asparagus spears and high-quality bacon guarantees a delicious result that can be prepared ahead of time and quickly baked before serving. The recipe below serves 4-6 people, providing a generous amount of bundles for everyone to enjoy.
Ingredients (Serves 4-6):
- 24 asparagus spears, trimmed
- 12 slices of bacon
- 2 tablespoons olive oil
- 1 teaspoon garlic powder
- 1 teaspoon black pepper
- 1 teaspoon salt
- 1 tablespoon balsamic vinegar (optional)
- Toothpicks (optional)
Cooking Instructions:
- Preheat the Oven: Begin by preheating your oven to 400°F (200°C). This will guarantee the bacon crisps up nicely while the asparagus remains tender.
- Prepare the Asparagus: Wash the asparagus spears thoroughly and trim the tough ends. You can do this by bending each spear until it naturally breaks or by cutting about an inch from the bottom.
- Season the Asparagus: In a large bowl, toss the asparagus with olive oil, garlic powder, salt, and black pepper, assuring even coating. This step will enhance the flavor and help the asparagus roast beautifully.
- Wrap with Bacon: Take two asparagus spears and wrap them tightly with a slice of bacon, starting from one end and spiraling to the other. Secure with a toothpick if necessary. Repeat with the remaining asparagus and bacon.
- Arrange on Baking Sheet: Place the bacon-wrapped asparagus bundles on a baking sheet lined with parchment paper or aluminum foil, ensuring they’re spaced out to allow even cooking.
- Bake: Transfer the baking sheet to the preheated oven and bake for 20-25 minutes, or until the bacon is crispy and the asparagus is tender. If desired, you can flip the bundles halfway through cooking for even crispiness.
- Drizzle with Balsamic Vinegar: (Optional) Once baked, remove the bundles from the oven and drizzle with balsamic vinegar to add a touch of acidity and sweetness that complements the savory flavors.
Extra Tips:
For the best results, choose fresh asparagus that’s vibrant green and firm to the touch. The thickness of the asparagus can affect cooking time; thinner spears will cook faster, while thicker ones may need a few extra minutes.
If you prefer extra-crispy bacon, consider partially cooking the bacon in a skillet before wrapping the asparagus. This will also help reduce the cooking time in the oven. Additionally, these bundles can be prepared in advance and stored in the refrigerator, then baked just before serving, allowing you to enjoy more time with your guests.
Candied Bacon Bites
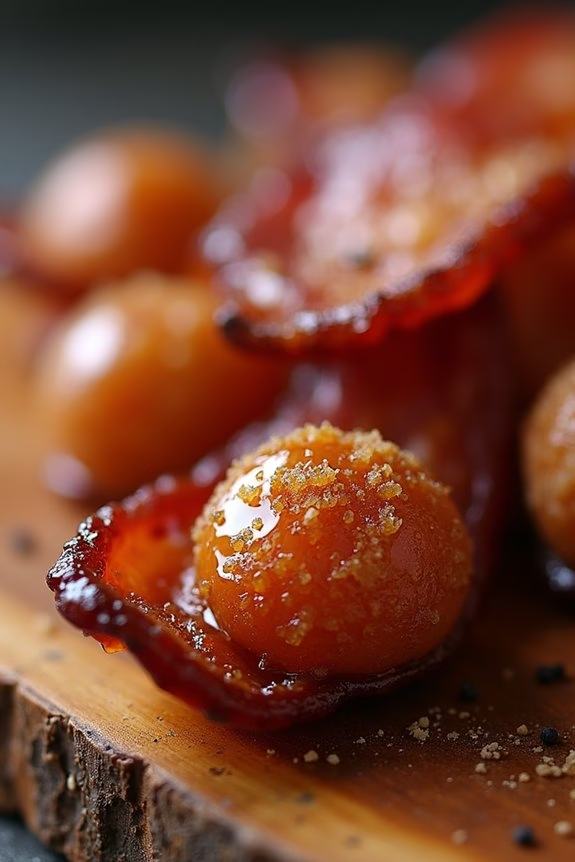
Candied Bacon Bites are the perfect festive appetizer to kick off your holiday celebrations. These sweet and salty treats are sure to be a hit with your guests, combining the irresistible flavor of crispy bacon with a mouthwatering sugary glaze.
Whether served at a Christmas party or as a tantalizing snack while opening presents, these bites are both simple to prepare and assured to impress. With their delightful crunch and rich taste, Candied Bacon Bites offer a gourmet touch without the hassle of complex cooking.
To make these delicious bites, the key is to balance the sweetness of the glaze with the savory bacon, creating a harmonious blend of flavors. The process involves coating thick slices of bacon with a mixture of brown sugar and maple syrup, then baking until perfectly crispy.
This recipe is designed to serve 4-6 people, making it ideal for small gatherings or to be doubled for larger parties. Fresh out of the oven, these bites are best enjoyed warm, allowing the sweet glaze to shine through.
Ingredients (serving size: 4-6 people):
- 1 pound thick-cut bacon
- 1 cup brown sugar
- 1/4 cup pure maple syrup
- 1/2 teaspoon ground black pepper
- 1/4 teaspoon cayenne pepper (optional, for a spicy kick)
Cooking Instructions:
- Preheat the Oven: Begin by preheating your oven to 400°F (200°C). Line a baking sheet with aluminum foil for easy cleanup, and place a wire rack on top of the baking sheet. This allows the bacon to cook evenly and the fat to drain away.
- Prepare the Bacon: In a medium-sized bowl, mix together the brown sugar, maple syrup, ground black pepper, and cayenne pepper if you’re using it. Once combined, generously coat each slice of bacon with the sugar mixture. Confirm both sides are well-coated for a consistent glaze.
- Arrange on Rack: Lay the coated bacon slices in a single layer on the wire rack. Make sure the slices don’t overlap, as this will prevent them from crisping up properly.
- Bake the Bacon: Place the baking sheet in the preheated oven and bake for 20-25 minutes, or until the bacon is crispy and the sugar has caramelized. Keep a close eye during the last few minutes to prevent burning, as sugar can quickly turn from caramelized to burnt.
- Cool and Serve: Once baked to perfection, remove the bacon from the oven and let it cool on the rack for a few minutes. The bacon will continue to crisp as it cools. Transfer the Candied Bacon Bites to a serving platter and serve warm.
Extra Tips:
For best results, use thick-cut bacon, as thinner slices may become too brittle once baked. If you prefer a smokier flavor, consider using applewood or hickory-smoked bacon.
Additionally, if you have a sweet tooth, you can add a touch more maple syrup to the glaze. Always remember to monitor the bacon closely towards the end of baking, as the sugar content can make it prone to burning quickly.
Finally, these bites are incredibly versatile and can be tailored to your taste, whether by adding a pinch of spice or a dusting of cinnamon for a holiday twist.
Bacon and Fig Crostini
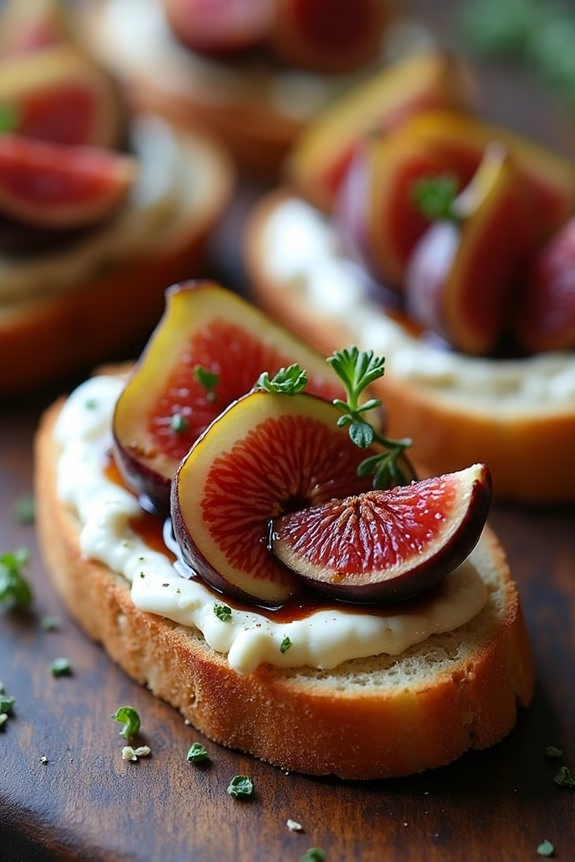
Bacon and Fig Crostini is a delightful appetizer that perfectly blends savory and sweet flavors, making it an ideal choice for your Christmas gatherings. This elegant yet simple dish combines crispy bacon with the rich sweetness of figs, all served on a crunchy crostini topped with creamy goat cheese. The harmonious combination of textures and flavors is bound to impress your guests and add a festive touch to your holiday table.
This recipe is designed to serve 4-6 people, making it a great option for small to medium-sized gatherings. The preparation is straightforward, requiring minimal ingredients yet delivering maximum flavor. Whether you’re an experienced cook or a beginner in the kitchen, Bacon and Fig Crostini is a foolproof choice that will elevate your appetizer game this holiday season.
Ingredients:
- 1 baguette, sliced into 1/2-inch thick rounds
- 6 slices of bacon
- 6 fresh figs, quartered
- 4 oz goat cheese
- 2 tablespoons honey
- 1 tablespoon balsamic glaze
- Fresh thyme leaves for garnish
- Olive oil for drizzling
Instructions:
- Preheat the Oven: Preheat your oven to 400°F (200°C). This will guarantee that your crostini and bacon cook evenly and become perfectly crispy.
- Prepare the Baguette: Arrange the baguette slices on a baking sheet. Drizzle lightly with olive oil to help them crisp up in the oven. Bake for about 5-7 minutes until golden brown. Remove from the oven and set aside to cool slightly.
- Cook the Bacon: While the baguette is in the oven, cook the bacon in a skillet over medium heat until crispy. Remove the bacon from the skillet and drain on paper towels. Once cooled, break each slice into smaller pieces that will fit on the baguette rounds.
- Assemble the Crostini: Spread a generous amount of goat cheese on each baguette slice. Place a piece of bacon and a quartered fig on top of the cheese. Drizzle each crostini with a small amount of honey and balsamic glaze for added sweetness.
- Garnish and Serve: Sprinkle fresh thyme leaves over the top of each crostini for a burst of flavor and a touch of color. Serve immediately while the crostini are still warm for the best taste and texture.
Extra Tips:
For an extra layer of flavor, consider toasting the baguette slices with a hint of garlic by rubbing a cut clove over the bread before adding the olive oil.
If fresh figs aren’t available, dried figs can be rehydrated in warm water for a similar effect. Additionally, the balsamic glaze can be made by reducing balsamic vinegar on the stove until it thickens, offering a homemade touch.
Always taste your honey and balsamic glaze together before drizzling to ascertain the balance of sweetness and tanginess meets your preference.
Bacon-Wrapped Shrimp With Garlic Butter
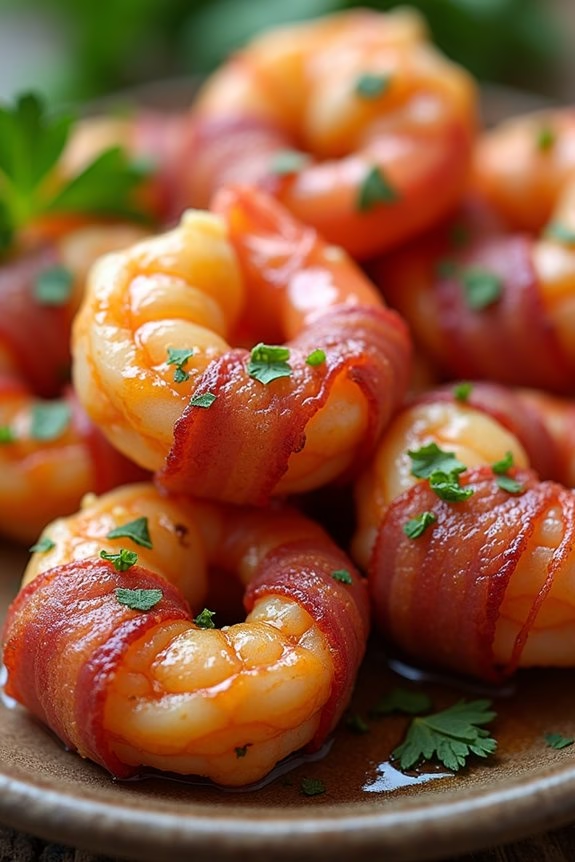
The holiday season is the perfect time to indulge in delightful appetizers that are both impressive and easy to prepare. Bacon-Wrapped Shrimp With Garlic Butter is a crowd-pleaser that combines the succulent taste of shrimp with the rich, savory flavor of bacon, all finished with a luscious garlic butter sauce.
This dish isn’t only visually appealing but also deliciously addictive, making it a perfect start to your Christmas festivities. Whether you’re hosting a small gathering or a large party, this appetizer is bound to be a hit.
The combination of crispy bacon and tender shrimp, enhanced by a buttery garlic sauce, creates a mouthwatering treat that will have your guests coming back for more. The key to this dish is using fresh shrimp and high-quality bacon to guarantee the best flavor and texture.
The garlic butter adds an aromatic touch that perfectly complements the savory bacon and sweet shrimp. Serve these tasty morsels hot from the oven, and watch them disappear in no time.
Ingredients for 4-6 servings:
- 24 large shrimp, peeled and deveined
- 12 slices of bacon, cut in half
- 4 tablespoons unsalted butter
- 4 cloves garlic, minced
- 1 tablespoon lemon juice
- Salt and black pepper to taste
- 1 tablespoon fresh parsley, chopped
- Toothpicks
Cooking Instructions:
- Preheat the oven: Start by preheating your oven to 400°F (200°C). Line a baking sheet with parchment paper or aluminum foil for easy cleanup.
- Prepare the bacon and shrimp: Take the halved bacon slices and wrap each piece around a shrimp, securing it with a toothpick. Make sure the bacon wraps around the shrimp tightly to promote even cooking.
- Bake the bacon-wrapped shrimp: Arrange the wrapped shrimp on the prepared baking sheet, ensuring they’re evenly spaced. Bake in the preheated oven for 15-20 minutes or until the bacon is crispy and the shrimp is cooked through.
- Make the garlic butter sauce: While the shrimp are baking, melt the butter in a small saucepan over medium heat. Add the minced garlic and sauté for about 1-2 minutes until fragrant. Stir in the lemon juice, salt, and black pepper, then remove from heat.
- Coat the shrimp with garlic butter: Once the shrimp are baked, remove them from the oven and brush generously with the garlic butter sauce. Make sure each piece is well-coated for maximum flavor.
- Garnish and serve: Transfer the bacon-wrapped shrimp to a serving platter, sprinkle with chopped fresh parsley, and serve immediately.
Extra Tips:
For best results, use fresh shrimp that are similar in size to promote even cooking. If using frozen shrimp, make sure they’re fully thawed and patted dry before wrapping them in bacon.
To prevent the bacon from unwrapping during cooking, you can partially cook it in a skillet for a few minutes before wrapping the shrimp. This will also help achieve a crispier texture.
Additionally, feel free to experiment with different herbs or spices in the garlic butter sauce to suit your taste. Enjoy your holiday appetizer!
Bacon and Cranberry Brie Bites
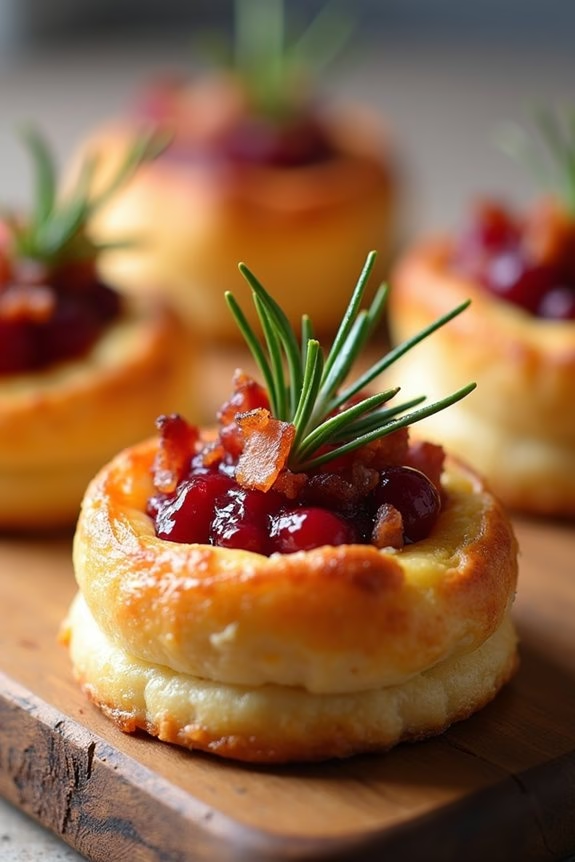
The holiday season often brings a delightful array of appetizers to the table, and these Bacon and Cranberry Brie Bites perfectly embody festive flavors.
These little bites are an excellent blend of savory and sweet, combining the richness of creamy brie with the tang of cranberries and the smokiness of bacon. Not only are they visually appealing, with their golden pastry shells and vibrant cranberry topping, but they also offer a burst of flavors in every bite, making them an irresistible treat for any Christmas gathering.
Ideal for serving 4-6 people, these bites are quite easy to assemble and cook, making them an excellent choice for a stress-free appetizer. Using store-bought puff pastry saves time and effort, while the combination of ingredients guarantees a gourmet taste.
Whether you’re hosting a large party or a small family gathering, these cheesy, crispy, and flavorful bites are sure to impress your guests and add a touch of elegance to your holiday spread.
Ingredients (serves 4-6 people):
- 1 sheet puff pastry, thawed
- 8 ounces brie cheese, rind removed and cut into small cubes
- 6 slices bacon, cooked and crumbled
- 1/2 cup cranberry sauce (store-bought or homemade)
- 1 egg, beaten (for egg wash)
- Fresh rosemary, finely chopped (for garnish)
Instructions:
- Preheat and Prepare: Preheat your oven to 375°F (190°C). Line a baking sheet with parchment paper to prevent sticking and guarantee even baking.
- Roll and Cut Pastry: On a lightly floured surface, roll out the puff pastry to smooth out any seams. Cut the pastry into 2-inch squares, using a sharp knife or a pastry cutter. You should have approximately 24 squares.
- Assemble the Bites: Place each pastry square into a mini muffin tin, gently pressing down to create a small cup. Into each cup, place a cube of brie cheese, a generous teaspoon of cranberry sauce, and a sprinkle of crumbled bacon.
- Apply Egg Wash: Lightly brush the edges of the pastry with the beaten egg. This will give the bites a nice golden finish when baked.
- Bake: Place the muffin tin in the preheated oven and bake for 12-15 minutes, or until the pastry is puffed and golden brown and the cheese has melted.
- Garnish and Serve: Remove from the oven and allow to cool for a few minutes. Garnish each bite with a small sprig of fresh rosemary before serving.
Extra Tips:
- If you prefer homemade cranberry sauce, make sure it’s cool and thick enough to scoop easily before assembling the bites.
- For an added crunch, consider adding some chopped walnuts or pecans on top before baking.
- Brie can be sticky and soft, so for easier handling, you can chill it in the fridge before cutting it into cubes.
- These bites are best served warm, but they can be prepared a few hours ahead of time and kept at room temperature. Simply reheat in the oven for a few minutes before serving.
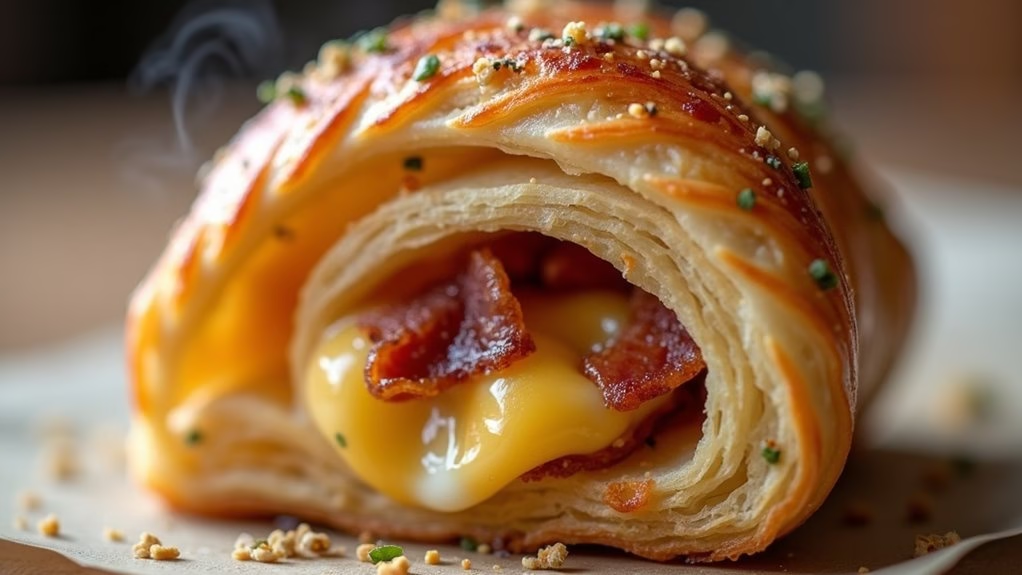
Savory Bacon and Cheese Pinwheels

Indulge in the perfect holiday treat with these Savory Bacon and Cheese Pinwheels. These delightful appetizers are a fantastic addition to your Christmas spread, delivering the irresistible combination of crispy bacon and gooey cheese encased in flaky puff pastry. Ideal for a gathering of 4-6 people, these pinwheels aren’t only simple to prepare but also a surefire way to impress your guests with their rich flavors and delectable presentation.
Whether you’re hosting a cozy family dinner or a festive party, these pinwheels are bound to be a hit. The beauty of these pinwheels lies in their versatility and ease of preparation. By using store-bought puff pastry, you save time without compromising on taste or texture.
The filling, made with a blend of sharp cheddar cheese, cream cheese, and crispy bacon bits, is seasoned to perfection with a touch of garlic and herbs. Once rolled and baked, each pinwheel offers a satisfying bite that combines the buttery flakiness of the pastry with the savory filling. These pinwheels are an excellent make-ahead option, allowing you to enjoy the festivities without being tied to the kitchen.
Ingredients (serving size: 4-6 people):
- 1 sheet of puff pastry, thawed
- 6 slices of bacon, cooked and crumbled
- 1 cup sharp cheddar cheese, shredded
- 4 oz cream cheese, softened
- 1 teaspoon garlic powder
- 1 teaspoon dried Italian herbs
- 1 egg, beaten (for egg wash)
- Salt and pepper to taste
Cooking Instructions:
- Preheat and Prepare Ingredients: Preheat your oven to 400°F (200°C). Lay the thawed puff pastry sheet on a lightly floured surface to prevent sticking.
- Make the Filling: In a medium bowl, combine the softened cream cheese, shredded cheddar cheese, crumbled bacon, garlic powder, and Italian herbs. Mix well until all ingredients are evenly incorporated. Season with salt and pepper to taste.
- Assemble the Pinwheels: Spread the cheese and bacon mixture evenly over the puff pastry, leaving a small border around the edges. Carefully roll the pastry sheet into a tight log, starting from one of the longer sides.
- Slice and Arrange: Using a sharp knife, slice the rolled log into approximately 1-inch thick pinwheels. Place them on a baking sheet lined with parchment paper, making sure there’s some space between each pinwheel.
- Apply Egg Wash: Brush the tops of the pinwheels with the beaten egg to give them a beautiful golden color once baked.
- Bake: Place the baking sheet in the preheated oven and bake for 15-20 minutes or until the pinwheels are golden brown and puffed.
- Serve: Remove from the oven and let them cool slightly on a wire rack. Serve warm for the best taste experience.
Extra Tips:
- For added flavor, consider adding a sprinkle of chopped fresh herbs such as parsley or chives before baking.
- If preparing in advance, you can assemble the pinwheels, wrap the log in plastic wrap, and refrigerate for a few hours before slicing and baking.
- Guarantee the cream cheese is well softened before mixing to make spreading easier and to avoid tearing the pastry.
- These pinwheels are also delicious when served at room temperature, making them a flexible option for any holiday gathering.