
Get ready to delight your guests with 14 scrumptious low-carb Christmas appetizers. These recipes are perfect for festive gatherings, offering delicious flavors without the guilt. From bacon-wrapped Brussels sprouts to creamy spinach and artichoke dip, there’s something for everyone. Impress with vibrant smoked salmon cucumber bites or zesty avocado shrimp cups. Explore these festive treats that cater to your dietary preferences and taste amazing.
Bacon-Wrapped Brussels Sprouts
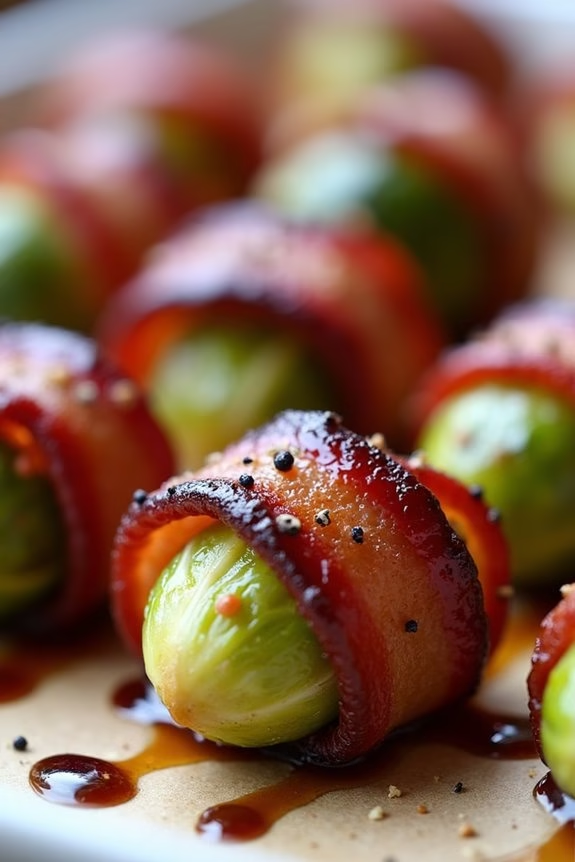
Bacon-wrapped Brussels sprouts are an irresistible low-carb appetizer perfect for your Christmas gatherings. This dish combines the savory, crispy texture of bacon with the slightly nutty, tender bite of roasted Brussels sprouts. It’s a delightful combination that will have your guests reaching for more.
The caramelization of the Brussels sprouts, enhanced by a hint of seasoning, complements the salty richness of the bacon, creating a flavor-packed appetizer that’s both satisfying and festive.
Not only are these bacon-wrapped Brussels sprouts delicious, but they’re also incredibly easy to prepare. With just a few ingredients and minimal prep time, you can whip up this dish quickly, leaving you more time to enjoy the holiday festivities with your loved ones.
Whether you’re hosting a large family dinner or a small gathering, these appetizers are sure to be a hit. Plus, they fit perfectly into a low-carb diet, making them a guilt-free indulgence during the holidays.
Ingredients (serving size: 4-6 people):
- 1 pound Brussels sprouts, trimmed and halved
- 12 slices of bacon, cut in half
- 2 tablespoons olive oil
- Salt and pepper to taste
- 1 tablespoon balsamic glaze (optional)
- Toothpicks
Instructions:
- Preheat the Oven: Start by preheating your oven to 400°F (200°C). This temperature is ideal for guaranteeing the bacon becomes crispy while the Brussels sprouts roast to perfection.
- Prepare the Brussels Sprouts: Trim the ends of the Brussels sprouts and cut them in half. Place them in a bowl and toss with olive oil, salt, and pepper to guarantee they’re evenly coated.
- Wrap the Brussels Sprouts: Take each halved Brussels sprout and wrap it with a half-slice of bacon. Secure the bacon in place with a toothpick, guaranteeing it goes through both the bacon and the Brussels sprout to hold everything together.
- Arrange on Baking Sheet: Place the bacon-wrapped Brussels sprouts on a baking sheet lined with parchment paper or a silicone baking mat. Make sure they’re spaced evenly to allow for even cooking.
- Bake: Place the baking sheet in the preheated oven and bake for 20-25 minutes. Check occasionally to guarantee the bacon is crisping evenly. You may want to flip them halfway through the cooking time for even browning.
- Add Balsamic Glaze: If using, drizzle the balsamic glaze over the bacon-wrapped Brussels sprouts right after removing them from the oven. The glaze adds a sweet and tangy note that complements the savory flavors.
- Serve: Allow the sprouts to cool slightly before serving. Arrange them on a platter and serve warm.
Extra Tips:
For the best results, choose Brussels sprouts that are uniform in size to guarantee even cooking. If you prefer extra crispy bacon, you can partially pre-cook the bacon slices before wrapping them around the sprouts.
Just be cautious not to overcook them, as they’ll continue to crisp in the oven. Additionally, for a different flavor twist, consider sprinkling a bit of garlic powder or smoked paprika on the sprouts before wrapping them in bacon. This will add an extra layer of flavor that your guests will love.
Creamy Spinach and Artichoke Dip
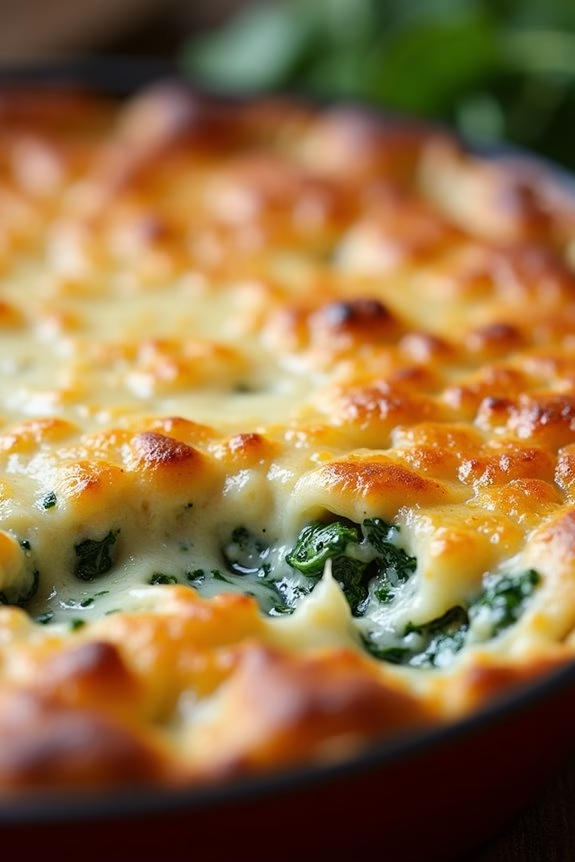
Creamy Spinach and Artichoke Dip is a delightful low-carb appetizer perfect for any Christmas gathering. This dish combines the rich flavors of spinach, artichoke hearts, and a blend of creamy cheeses to create a warm, indulgent dip that pairs wonderfully with fresh vegetables or low-carb crackers.
It’s a crowd-pleaser that satisfies both those who are watching their carb intake and those who are simply looking for a delicious start to their festive meal.
The beauty of this Creamy Spinach and Artichoke Dip lies in its simplicity and rich flavors. The recipe is straightforward, with a focus on fresh ingredients and a creamy texture that makes it hard to resist. This dish is perfect for serving 4-6 people, making it an ideal choice for intimate holiday gatherings.
Whether it’s served in a warm, bubbling dish straight from the oven or scooped into a bowl, this dip is sure to be a hit at your Christmas party.
Ingredients for 4-6 servings:
- 1 (10 oz) package frozen chopped spinach, thawed and drained
- 1 (14 oz) can artichoke hearts, drained and chopped
- 1 cup cream cheese, softened
- 1 cup sour cream
- 1 cup grated Parmesan cheese
- 1 cup shredded mozzarella cheese
- 2 cloves garlic, minced
- 1/2 teaspoon salt
- 1/4 teaspoon black pepper
- 1/4 teaspoon crushed red pepper flakes (optional)
Cooking Instructions:
- Preheat the Oven: Start by preheating your oven to 350°F (175°C) to make certain it’s hot enough to bake the dip evenly.
- Prepare the Spinach and Artichokes: Drain the thawed spinach thoroughly to remove excess water. Chop the artichoke hearts into small, bite-sized pieces. This will guarantee an even distribution of flavor throughout the dip.
- Mix the Ingredients: In a large mixing bowl, combine the softened cream cheese, sour cream, Parmesan cheese, and mozzarella cheese. Stir until the mixture is smooth and well-blended.
- Add Seasonings: Incorporate the minced garlic, salt, black pepper, and crushed red pepper flakes if using. Mix well to make sure the spices are evenly distributed.
- Combine Everything: Add the prepared spinach and artichokes to the cheese mixture. Stir until all the ingredients are well combined and coated in the creamy base.
- Bake the Dip: Transfer the mixture to a baking dish, spreading it evenly. Place in the preheated oven and bake for 20-25 minutes, or until the top is golden brown and the dip is bubbly around the edges.
- Serve Warm: Remove from the oven and allow to cool slightly before serving. Pair with low-carb crackers or fresh vegetable sticks for dipping.
Extra Tips:
For an extra layer of flavor, consider adding a dash of lemon juice to the mixture before baking to brighten the dish.
Using freshly grated Parmesan cheese can enhance the flavor profile considerably. If you want a more robust garlic flavor, feel free to add an additional clove of garlic.
Keep an eye on the dip as it bakes to prevent the top from over-browning; if necessary, cover with foil for the last few minutes of baking.
Smoked Salmon Cucumber Bites
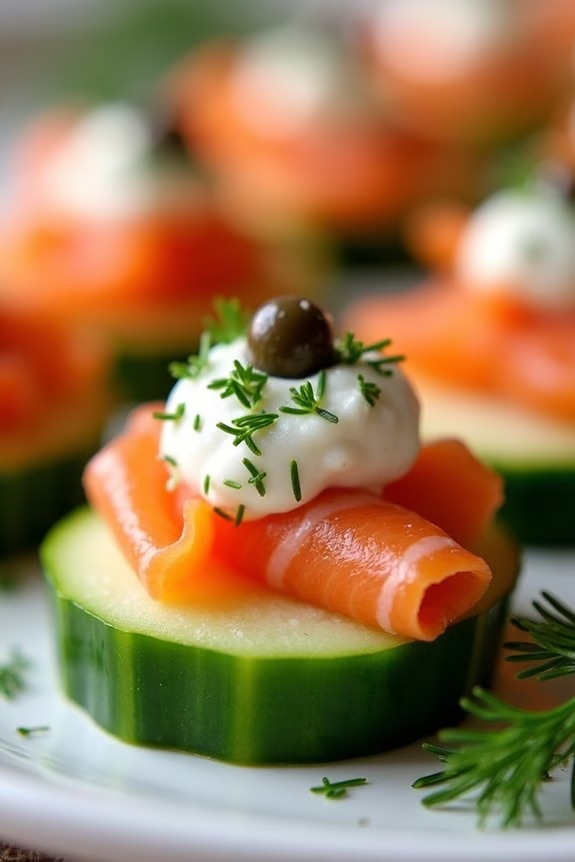
Smoked Salmon Cucumber Bites are a delightful low-carb appetizer perfect for your Christmas gatherings. These elegant bites feature a revitalizing crunch from the cucumber, a creamy tang from the seasoned cream cheese, and a rich, smoky flavor from the salmon.
They’re easy to assemble and make for a stunning presentation on any holiday table. The combination of flavors and textures guarantees that these bites will be a hit with your guests, whether they’re following a low-carb diet or not.
This recipe is designed to serve 4-6 people, making it ideal for small gatherings or as part of a larger spread of appetizers. Each bite-sized piece is packed with flavor and nutrition, providing a healthy alternative to traditional carb-heavy holiday snacks.
With minimal ingredients and preparation time, you can whip up these bites in no time, leaving you free to enjoy the festivities.
Ingredients:
- 2 large cucumbers
- 8 ounces of cream cheese, softened
- 1 tablespoon lemon juice
- 1 tablespoon fresh dill, chopped
- Salt and pepper to taste
- 8 ounces of smoked salmon, thinly sliced
- Optional: capers for garnish
Cooking Instructions:
- Prepare the Cucumbers: Wash the cucumbers thoroughly and peel them if desired. Slice the cucumbers into thick rounds, approximately 1/2 inch thick. Arrange them on a serving platter.
- Make the Cream Cheese Mixture: In a medium-sized bowl, combine the softened cream cheese, lemon juice, chopped dill, salt, and pepper. Mix until smooth and well combined.
- Assemble the Bites: Using a small spoon or piping bag, place a dollop of the cream cheese mixture onto each cucumber slice. Be generous with the amount to guarantee a good balance of flavors.
- Add the Smoked Salmon: Tear the smoked salmon into small pieces and place them on top of the cream cheese mixture on each cucumber slice. Press down gently to secure the salmon.
- Optional Garnish: For an extra pop of flavor, add a few capers on top of the salmon or sprinkle with additional fresh dill.
Extra Tips:
To guarantee the best results, make sure that your cream cheese is at room temperature before mixing, as this will make it easier to achieve a smooth consistency.
You can prepare the cream cheese mixture a day ahead and keep it refrigerated, but be sure to assemble the bites just before serving to maintain the crispness of the cucumber.
For a variation, try adding a small amount of horseradish to the cream cheese mixture for a little kick or using different herbs such as chives or parsley. Enjoy your Smoked Salmon Cucumber Bites chilled for the best flavor and texture!
Zucchini Pizza Bites
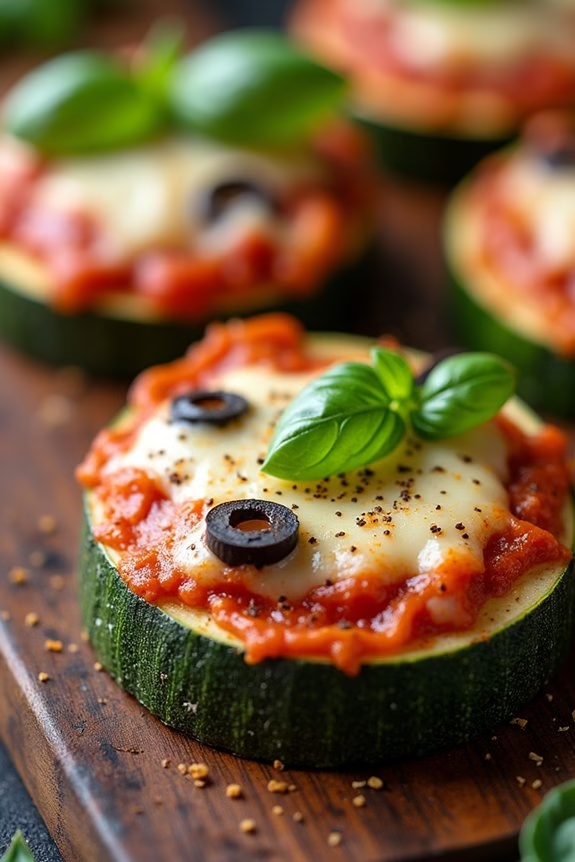
Zucchini Pizza Bites are the perfect low-carb Christmas appetizer that will delight your guests with their delicious flavors and healthy ingredients. These bite-sized treats combine the savory taste of pizza with the nutritional benefits of zucchini, making them a guilt-free indulgence. Easy to prepare and visually appealing, they’re certain to be a hit at any holiday gathering, offering a delightful contrast to the heavier dishes on the table.
Whether you’re hosting a family get-together or attending a festive potluck, Zucchini Pizza Bites are versatile enough to fit any occasion. Their simplicity in preparation doesn’t compromise on taste, allowing you to enjoy the essence of pizza without the carbs. With a crispy base of roasted zucchini topped with marinara sauce, mozzarella cheese, and your choice of toppings, this appetizer is a crowd-pleaser that can be customized to suit everyone’s preferences.
Ingredients for 4-6 people:
- 4 medium zucchinis
- 1 cup marinara sauce
- 2 cups shredded mozzarella cheese
- 1/2 cup sliced pepperoni or any toppings of your choice (like bell peppers, olives, mushrooms)
- 1 teaspoon Italian seasoning
- 1 tablespoon olive oil
- Salt and pepper to taste
- Fresh basil leaves for garnish (optional)
Cooking Instructions:
- Preheat the Oven: Start by preheating your oven to 400°F (200°C) to make certain it’s hot enough to roast the zucchini well.
- Prepare the Zucchini: Wash the zucchinis thoroughly and slice them into 1/4-inch thick rounds. Try to maintain even thickness for consistent cooking.
- Season the Zucchini: Arrange the zucchini slices on a baking sheet lined with parchment paper. Drizzle olive oil over the slices and season with salt, pepper, and Italian seasoning. Use your hands to make sure each slice is evenly coated.
- Roast the Zucchini: Place the baking sheet in the oven and roast the zucchini for 10-12 minutes, or until they’re just starting to become tender but still firm.
- Add the Toppings: Remove the zucchini from the oven and carefully spoon a small amount of marinara sauce onto each slice. Sprinkle mozzarella cheese over the top and add your desired toppings such as pepperoni, bell peppers, or olives.
- Bake the Pizza Bites: Return the baking sheet to the oven and bake for an additional 5-7 minutes, or until the cheese is melted and bubbly.
- Garnish and Serve: Once baked, remove from the oven and let the bites cool for a minute. Garnish with fresh basil leaves if using, and serve warm.
Extra Tips:
For an added touch of flavor, consider using smoked mozzarella or adding a sprinkle of red pepper flakes for a spicy kick. If you’re preparing these in advance, you can slice and roast the zucchini, then store them in the fridge. When ready to serve, simply add the toppings and bake.
This appetizer is best served fresh, but leftovers can be stored in an airtight container in the fridge for up to 2 days and reheated in the oven for a crispier bite.
Prosciutto-Wrapped Asparagus
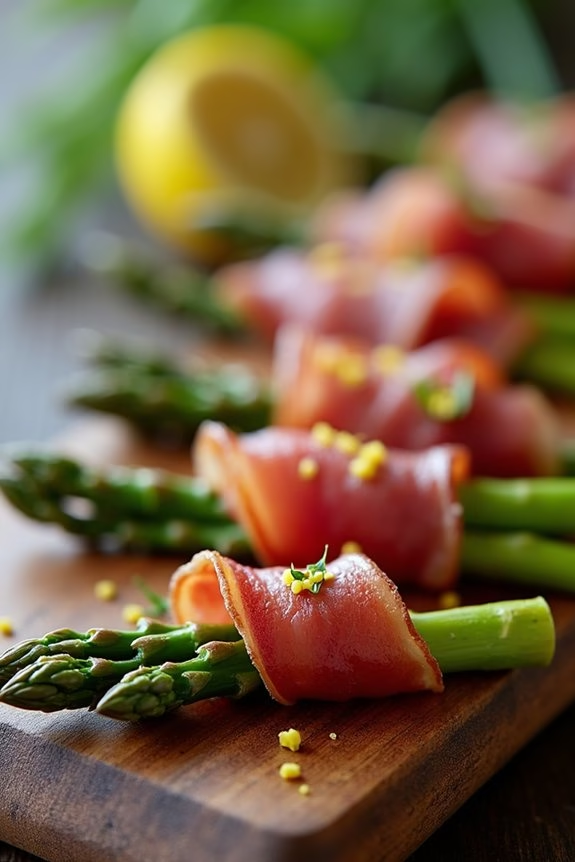
Prosciutto-Wrapped Asparagus is a delightful low-carb appetizer that brings together the crisp freshness of asparagus with the savory, rich flavor of prosciutto. Perfect for a Christmas gathering, this dish isn’t only elegant but also incredibly easy to prepare.
The combination of textures and flavors will surely impress your guests, and it pairs beautifully with a variety of other holiday dishes. This recipe serves 4-6 people and requires minimal ingredients, making it a stress-free addition to your festive menu.
The secret lies in selecting fresh asparagus and high-quality prosciutto, which together create a mouth-watering appetizer that’s both healthy and delicious. Whether you’re hosting a large gathering or a cozy dinner, Prosciutto-Wrapped Asparagus is a simple yet sophisticated choice.
Ingredients:
- 1 pound fresh asparagus (about 24 spears)
- 12 slices of prosciutto
- 2 tablespoons olive oil
- Salt, to taste
- Black pepper, to taste
- 1 tablespoon lemon zest (optional, for garnish)
Cooking Instructions:
- Preheat the Oven: Start by preheating your oven to 400°F (200°C). This guarantees that it reaches the right temperature by the time you’re ready to bake the asparagus.
- Prepare the Asparagus: Wash the asparagus thoroughly under cold running water. Trim the woody ends by snapping them off where they naturally break. This will guarantee that the asparagus is tender and easy to eat.
- Wrap the Asparagus: Take each slice of prosciutto and cut it in half lengthwise. Wrap one half-slice of prosciutto around each asparagus spear, starting from the base and spiraling up towards the tip. Make sure to cover most of the asparagus but leave the tips exposed for a nice presentation.
- Season: Place the wrapped asparagus on a baking sheet lined with parchment paper. Drizzle olive oil evenly over the asparagus spears. Season with a pinch of salt and a generous amount of freshly ground black pepper.
- Bake: Put the baking sheet in the preheated oven and bake for 10-12 minutes, or until the prosciutto becomes crispy and the asparagus is tender. Keep an eye out to avoid overcooking, as asparagus can become mushy.
- Garnish and Serve: Once baked, remove the asparagus from the oven and let it cool slightly. Sprinkle with lemon zest for an extra burst of vitality and serve immediately.
Extra Tips:
When selecting asparagus, look for firm, bright green spears with compact tips. Thin spears are ideal for this recipe as they cook quickly and evenly.
If you prefer, you can also add a sprinkle of grated Parmesan cheese before baking for an extra layer of flavor. To prepare ahead of time, wrap the asparagus in prosciutto the day before and store it in the refrigerator, then bake just before serving.
This dish pairs well with a crisp white wine or sparkling water for an invigorating and festive touch.
Cheesy Cauliflower Breadsticks
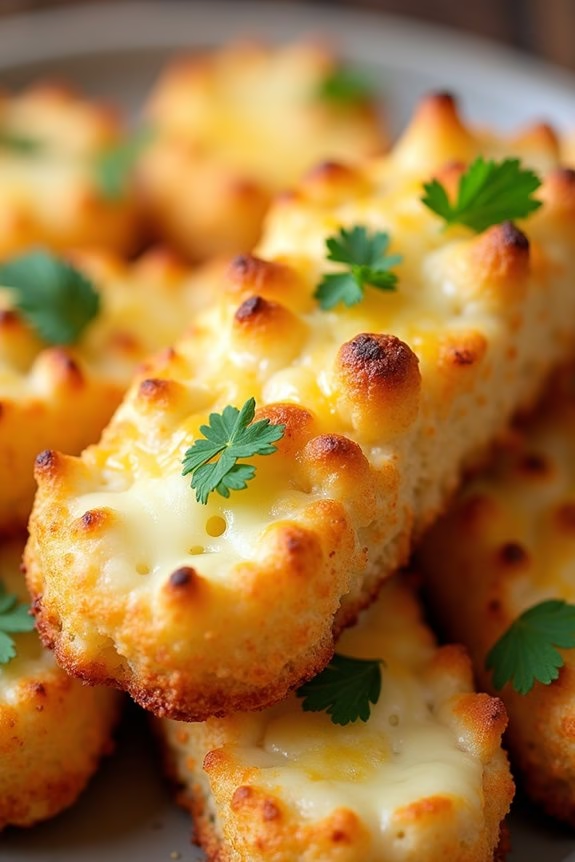
Indulge in a delicious, low-carb alternative to traditional breadsticks with these Cheesy Cauliflower Breadsticks. Perfect for a holiday appetizer or a cozy night in, these breadsticks are flavorful, cheesy, and incredibly satisfying without the extra carbs. Made with fresh cauliflower and a blend of cheeses, they offer a delightful, guilt-free way to enjoy one of your favorite comfort foods.
Whether you’re following a low-carb diet or just looking for a new recipe to try, these breadsticks will surely become a go-to.
These Cheesy Cauliflower Breadsticks aren’t only easy to make but also packed with nutrients. The cauliflower provides a good source of vitamins C and K, while the cheese adds protein and calcium. Plus, they’re versatile enough to serve with a variety of dips or alongside a main dish.
With ingredients you likely already have in your kitchen, this recipe transforms humble cauliflower into a mouth-watering treat that everyone will love. The result is a perfectly cheesy, flavorful snack that you can feel confident about serving to family and friends.
Ingredients (Serves 4-6):
- 1 large head of cauliflower
- 1 cup shredded mozzarella cheese
- 1/2 cup grated Parmesan cheese
- 1 large egg
- 2 cloves garlic, minced
- 1 teaspoon dried oregano
- 1 teaspoon dried basil
- 1/4 teaspoon salt
- 1/4 teaspoon black pepper
- 1 tablespoon chopped fresh parsley (optional, for garnish)
Cooking Instructions:
- Preheat the Oven: Begin by preheating your oven to 425°F (220°C). Line a baking sheet with parchment paper and set aside.
- Prepare the Cauliflower: Remove the leaves and stem from the cauliflower, then cut it into florets. Place the florets in a food processor and pulse until they achieve a rice-like consistency.
- Cook the Cauliflower Rice: Transfer the cauliflower rice to a microwave-safe bowl. Microwave on high for about 5 minutes, until the cauliflower is tender. Let it cool slightly, then transfer to a clean kitchen towel. Wring out as much moisture as possible from the cauliflower, guaranteeing it’s dry to avoid soggy breadsticks.
- Mix the Ingredients: In a large mixing bowl, combine the cauliflower rice, mozzarella cheese, Parmesan cheese, egg, minced garlic, oregano, basil, salt, and pepper. Mix well until all the ingredients are fully incorporated.
- Form the Dough: Spread the cauliflower mixture onto the prepared baking sheet, shaping it into a rectangle about 1/4 inch thick.
- Bake the Breadsticks: Place the baking sheet in the preheated oven and bake for 15-20 minutes, or until the edges are golden brown and the center is set.
- Add More Cheese (Optional): If desired, sprinkle additional mozzarella cheese over the top of the baked breadsticks and return them to the oven for an additional 5 minutes, or until the cheese is melted and bubbly.
- Serve and Garnish: Remove from the oven and let cool slightly. Cut the cauliflower breadsticks into strips and garnish with fresh parsley if using. Serve warm.
Extra Tips:
For best results, verify that the cauliflower is thoroughly drained after cooking to prevent the breadsticks from becoming too moist. You can experiment with different cheese blends or add a pinch of red pepper flakes for a little heat.
These breadsticks pair wonderfully with marinara sauce, ranch dressing, or garlic butter for dipping. If you have leftovers, store them in an airtight container in the refrigerator and reheat them in the oven or on a skillet to retain their crispness.
Deviled Eggs With a Twist
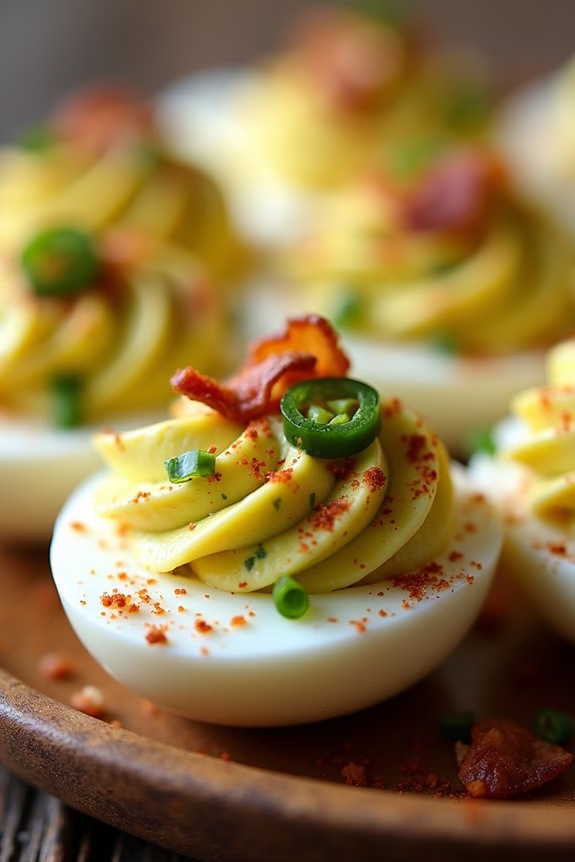
Deviled eggs are a classic appetizer that graces many holiday tables, but this version adds a unique twist to make them even more irresistible for your low-carb Christmas feast. By incorporating flavorful ingredients and creative garnishes, these deviled eggs are elevated to new heights, offering a delightful surprise for all your guests.
The creamy filling is enhanced with unexpected flavors that balance perfectly, making them a standout choice for any gathering. This recipe serves 4-6 people, guaranteeing everyone at your holiday event can enjoy these delectable bites.
With a focus on maintaining a low-carb profile, these deviled eggs aren’t only tasty but also fit seamlessly into a variety of dietary preferences. Whether you’re hosting a small family dinner or a larger festive party, these deviled eggs with a twist are sure to be a hit.
Ingredients:
- 12 large eggs
- 1/2 cup mayonnaise
- 1 tablespoon Dijon mustard
- 1 tablespoon apple cider vinegar
- 1 teaspoon smoked paprika
- 1/2 teaspoon garlic powder
- Salt and pepper to taste
- 1 avocado, diced
- 2 tablespoons fresh chives, finely chopped
- 2 slices of cooked bacon, crumbled
- 1 tablespoon pickled jalapeños, chopped (optional)
Cooking Instructions:
- Boil the Eggs: Place eggs in a large pot and cover them with cold water. Bring the water to a boil over medium-high heat. Once boiling, remove the pot from heat and cover it. Let the eggs sit in the hot water for 12 minutes.
- Cool and Peel: After 12 minutes, transfer the eggs to an ice bath to cool for at least 5 minutes. Once cooled, gently peel the eggs and slice them in half lengthwise, removing the yolks and placing them in a mixing bowl.
- Prepare the Filling: Mash the yolks with a fork until they’re crumbly. Add the mayonnaise, Dijon mustard, apple cider vinegar, smoked paprika, garlic powder, salt, and pepper. Mix until the filling is smooth and well combined.
- Add a Twist: Gently fold in the diced avocado and half of the chopped chives into the yolk mixture. This will add a creamy texture and a burst of fresh flavor.
- Fill the Egg Whites: Spoon or pipe the yolk mixture back into the cavity of each egg white half. Be generous, guaranteeing each egg is well-filled.
- Garnish: Top each deviled egg with a sprinkle of the remaining chives, crumbled bacon, and a small amount of chopped pickled jalapeños if desired for a spicy kick.
- Serve: Arrange the deviled eggs on a platter and serve immediately, or cover and refrigerate until ready to serve.
Extra Tips:
For perfectly peeled eggs, use eggs that are at least a week old, as fresher eggs are harder to peel. When mashing the yolks, guarantee they’re thoroughly smooth to avoid lumps in your filling.
If you prefer a bit more heat, adjust the amount of pickled jalapeños according to your taste. To create a more elegant presentation, consider using a piping bag with a star tip to fill the egg whites.
Finally, these deviled eggs can be made a few hours in advance and stored in the refrigerator, making them a convenient option for stress-free holiday hosting.
Stuffed Mini Bell Peppers
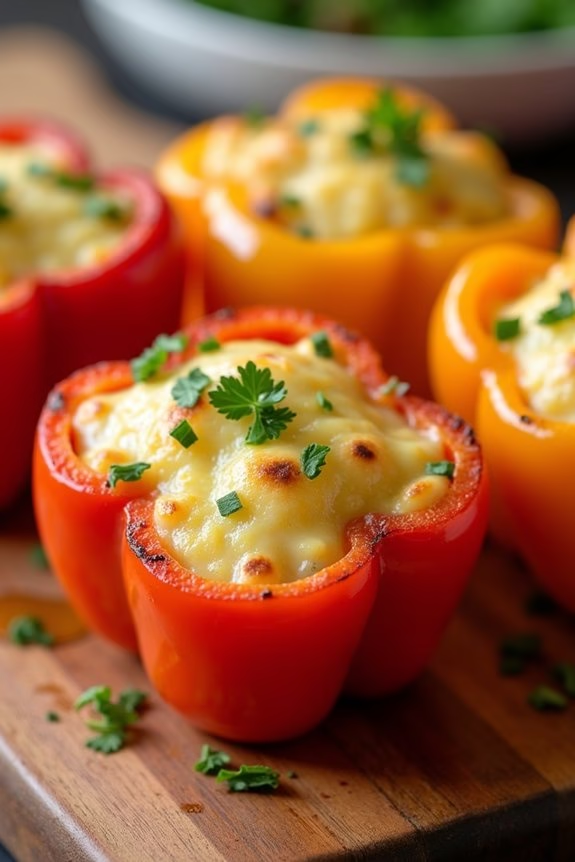
If you’re looking for a festive and delicious low-carb appetizer to serve at your Christmas gathering, these Stuffed Mini Bell Peppers are an excellent choice. Not only are they colorful and appealing to the eye, but they also pack a punch of flavor with a creamy and savory filling.
These bite-sized treats are easy to prepare ahead of time, making them a stress-free addition to your holiday menu. Plus, they’re a healthier option that allows your guests to indulge without the guilt.
The mini bell peppers are filled with a mixture of cream cheese, cheddar cheese, and Italian herbs, giving them a rich, cheesy taste with a hint of spice. The peppers are then baked to perfection, resulting in a delightful soft texture that complements the creamy filling.
These Stuffed Mini Bell Peppers are sure to be a hit at your Christmas celebration, appealing to both low-carb eaters and those who simply love flavorful appetizers.
Ingredients for 4-6 servings:
- 20 mini bell peppers
- 8 oz cream cheese, softened
- 1 cup shredded cheddar cheese
- 1 teaspoon garlic powder
- 1 teaspoon onion powder
- 1 teaspoon Italian seasoning
- 1/2 teaspoon salt
- 1/4 teaspoon black pepper
- 1 tablespoon olive oil
- Fresh parsley, chopped (for garnish)
Cooking Instructions:
- Preheat the Oven: Start by preheating your oven to 375°F (190°C). This guarantees that the peppers will cook evenly and achieve a slight crispness.
- Prepare the Peppers: Wash the mini bell peppers thoroughly and pat them dry. Slice each pepper in half lengthwise and remove the seeds and membranes to create a cavity for the filling.
- Make the Filling: In a medium-sized mixing bowl, combine the softened cream cheese, shredded cheddar cheese, garlic powder, onion powder, Italian seasoning, salt, and black pepper. Mix until all the ingredients are well incorporated and the mixture is smooth.
- Stuff the Peppers: Using a small spoon, fill each pepper half with the cheese mixture, pressing it in gently to make sure it’s well packed. Be careful not to overfill, as the filling will expand slightly during baking.
- Arrange and Drizzle: Place the stuffed peppers on a baking sheet lined with parchment paper. Drizzle the olive oil over the peppers to help them roast nicely.
- Bake: Transfer the baking sheet to the preheated oven and bake for 15-20 minutes, or until the peppers are tender and the cheese filling is bubbly and slightly golden on top.
- Garnish and Serve: Remove the peppers from the oven and let them cool for a couple of minutes. Sprinkle chopped fresh parsley over the top for a pop of color and added freshness. Serve warm or at room temperature.
Extra Tips:
When preparing these Stuffed Mini Bell Peppers, make sure the cream cheese is softened to room temperature before mixing, as this will make it easier to combine with the other ingredients.
If you prefer a bit of heat, consider adding a pinch of cayenne pepper or a diced jalapeño to the cheese mixture. Additionally, these peppers can be prepared a day in advance and stored in the refrigerator; simply bake them just before serving to maintain their freshness and texture.
Almond-Crusted Mozzarella Sticks
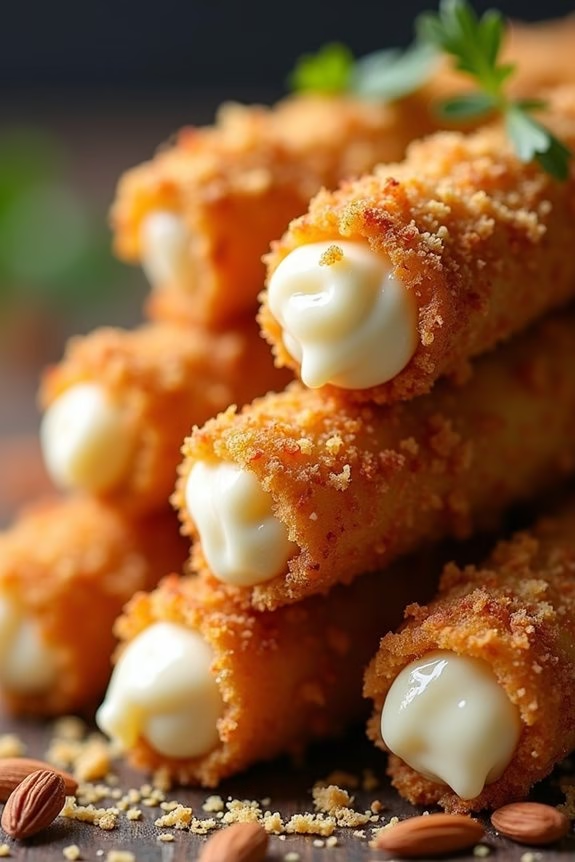
If you’re looking to add a little crunch to your holiday spread without the carb overload, Almond-Crusted Mozzarella Sticks are the perfect addition to your festive table. This delightful twist on a classic favorite combines the gooey goodness of mozzarella with a crispy almond coating, creating a snack that’s not only delicious but also low in carbohydrates.
Whether you’re hosting a party or simply indulging in a cozy night in, these mozzarella sticks will surely impress your guests and satisfy your cravings. This recipe makes enough for 4-6 people, making it ideal for smaller gatherings or as a part of a larger appetizer assortment.
With the perfect blend of textures and flavors, Almond-Crusted Mozzarella Sticks are easy to prepare and can be made in advance, allowing you to enjoy the festivities without being stuck in the kitchen. Here’s how to make these mouthwatering treats:
Ingredients:
- 12 mozzarella sticks
- 1 cup almond flour
- 1 cup finely crushed almonds
- 2 large eggs
- 1 teaspoon garlic powder
- 1 teaspoon onion powder
- 1 teaspoon Italian seasoning
- Salt and pepper to taste
- Olive oil spray
Cooking Instructions:
- Prepare the Ingredients: Begin by unwrapping the mozzarella sticks and placing them on a tray lined with parchment paper. Place the tray in the freezer for at least 1 hour to guarantee the cheese remains firm during the cooking process.
- Create the Coating: In a shallow bowl, combine almond flour, crushed almonds, garlic powder, onion powder, Italian seasoning, salt, and pepper. Mix well to guarantee all the ingredients are evenly distributed. In a separate bowl, beat the eggs until smooth.
- Coat the Mozzarella Sticks: Remove the mozzarella sticks from the freezer. Dip each stick into the beaten eggs, ensuring it’s completely covered, then roll it in the almond mixture, pressing gently to adhere the coating. Repeat this process for a double coating, which helps to keep the cheese from oozing out during cooking.
- Preheat the Oven: Preheat your oven to 400°F (200°C). Line a baking sheet with parchment paper and lightly spray with olive oil.
- Bake the Sticks: Place the coated mozzarella sticks on the prepared baking sheet, ensuring they aren’t touching. Lightly spray the tops with olive oil. Bake in the preheated oven for 10-12 minutes or until the coating is golden brown and crispy. Keep an eye on them to prevent overcooking.
- Serve: Remove the mozzarella sticks from the oven and let them cool for a minute or two before serving. Enjoy them warm with your favorite low-carb marinara sauce or a side of ranch dressing.
Extra Tips:
When making Almond-Crusted Mozzarella Sticks, it’s essential to freeze the cheese sticks beforehand. This step prevents the cheese from melting too quickly and seeping out during baking.
Additionally, for an extra crispy texture, you can bake the sticks on a wire rack placed over the baking sheet, allowing hot air to circulate all around. If you prefer a spicier version, consider adding a pinch of cayenne pepper to the almond mixture.
These mozzarella sticks are versatile and can be customized to suit your taste preferences!
Garlic Parmesan Roasted Mushrooms
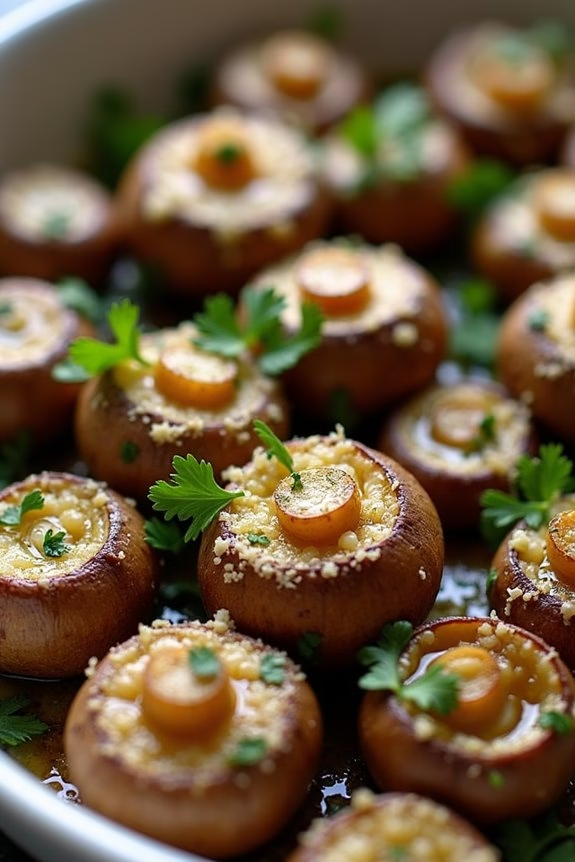
Garlic Parmesan Roasted Mushrooms are the perfect low-carb appetizer to elevate your Christmas feast. These savory bites aren’t only delicious but incredibly easy to prepare, making them a fantastic choice for both novice cooks and seasoned chefs alike. The combination of fresh mushrooms, aromatic garlic, and rich Parmesan creates a depth of flavor that will leave your guests reaching for more.
Whether you’re hosting a large holiday gathering or a small family dinner, these roasted mushrooms are sure to impress and satisfy everyone’s taste buds.
The beauty of this recipe lies in its simplicity and the capacity to showcase the natural flavors of the mushrooms. Roasting them in the oven allows the mushrooms to develop a deep, earthy flavor while the garlic and Parmesan add a delightful savory touch. The mushrooms are lightly seasoned, allowing the cheese and garlic to take center stage.
This appetizer isn’t only a feast for the taste buds but also a visually appealing dish that will add a touch of elegance to your holiday table.
Ingredients (serves 4-6):
- 1 pound of fresh whole mushrooms (button or cremini)
- 3 tablespoons olive oil
- 4 cloves garlic, minced
- 1/4 cup grated Parmesan cheese
- 1 teaspoon dried thyme
- 1 teaspoon dried parsley
- Salt and pepper to taste
- Fresh parsley for garnish (optional)
Cooking Instructions:
- Preheat the Oven: Start by preheating your oven to 400°F (200°C). This guarantees that your mushrooms will cook evenly and achieve a perfect roasted texture.
- Prepare the Mushrooms: Clean the mushrooms by wiping them with a damp paper towel to remove any dirt. Trim the stems if necessary, and place the whole mushrooms in a large mixing bowl.
- Make the Seasoning Mix: In a small bowl, combine the olive oil, minced garlic, grated Parmesan cheese, dried thyme, dried parsley, salt, and pepper. Stir well to create a paste-like mixture.
- Coat the Mushrooms: Pour the seasoning mixture over the mushrooms in the mixing bowl. Toss the mushrooms thoroughly to guarantee they’re evenly coated with the garlic and Parmesan mixture.
- Arrange on Baking Sheet: Line a baking sheet with parchment paper or lightly grease it with cooking spray. Spread the seasoned mushrooms in a single layer on the prepared baking sheet.
- Roast the Mushrooms: Place the baking sheet in the preheated oven and roast the mushrooms for 20-25 minutes, or until they’re tender and golden brown. The cheese should be melted and slightly crispy.
- Serve: Once roasted, remove the mushrooms from the oven and allow them to cool slightly. Transfer them to a serving platter and garnish with fresh parsley if desired. Serve warm.
Extra Tips:
For an extra burst of flavor, consider adding a splash of balsamic vinegar to the seasoning mix before coating the mushrooms. If you prefer a spicier kick, a pinch of red pepper flakes can be included in the seasoning as well.
It’s important to not overcrowd the baking sheet, as this can cause the mushrooms to steam rather than roast. If necessary, use two baking sheets to guarantee even cooking. Enjoy these Garlic Parmesan Roasted Mushrooms as a delightful appetizer or as a side dish to complement your holiday spread.
Keto Sausage Balls

Keto Sausage Balls are a delightful low-carb appetizer perfect for your Christmas gathering. These savory treats combine the bold flavors of sausage, cheese, and spices, making them a hit with both keto enthusiasts and those who simply love good food.
They’re easy to prepare and can be made ahead of time, allowing you to focus on enjoying the holiday season with your loved ones.
These sausage balls aren’t only delicious but also incredibly versatile. You can serve them as appetizers before the main meal or as a part of a festive buffet. With just a few simple ingredients, you can whip up a batch of these tasty bites that are sure to please a crowd. The following recipe yields approximately 24 sausage balls, perfect for serving 4-6 people.
Ingredients:
- 1 pound ground pork sausage
- 1 1/2 cups almond flour
- 1 cup shredded cheddar cheese
- 1 teaspoon baking powder
- 1/4 cup cream cheese, softened
- 1 large egg
- 1/2 teaspoon garlic powder
- 1/2 teaspoon onion powder
- 1/4 teaspoon paprika
- 1/4 teaspoon salt
- 1/4 teaspoon black pepper
Instructions:
1. Preheat the Oven: Begin by preheating your oven to 375°F (190°C). This guarantees that the sausage balls will cook evenly and develop a nice golden-brown exterior.
2. Prepare the Baking Sheet: Line a baking sheet with parchment paper. This will prevent the sausage balls from sticking and make cleanup much easier.
3. Mix the Ingredients: In a large mixing bowl, combine the ground pork sausage, almond flour, shredded cheddar cheese, baking powder, cream cheese, and egg. Add the garlic powder, onion powder, paprika, salt, and black pepper.
Mix everything together thoroughly until well combined. Using your hands works best for this step to guarantee all ingredients are evenly distributed.
4. Shape the Sausage Balls: Once the mixture is well combined, scoop out small portions and roll them into 1-inch balls. Place each ball onto the prepared baking sheet, ensuring they’re spaced evenly apart.
5. Bake the Sausage Balls: Place the baking sheet in the preheated oven and bake for 20-25 minutes, or until the sausage balls are cooked through and golden brown. You may want to turn them halfway through the cooking time to guarantee even browning.
6. Cool and Serve: Once cooked, remove the sausage balls from the oven and let them cool slightly on the baking sheet. Transfer them to a serving platter and enjoy warm or at room temperature.
Extra Tips:
For an extra flavor boost, consider adding chopped fresh herbs like parsley or chives to the sausage mixture.
If you prefer a spicier option, you can incorporate a pinch of cayenne pepper or use spicy sausage.
These sausage balls can also be made ahead and stored in the refrigerator for up to two days before baking. Simply shape them and keep them covered until you’re ready to bake, which makes them a convenient option for holiday entertaining.
Caprese Salad Skewers
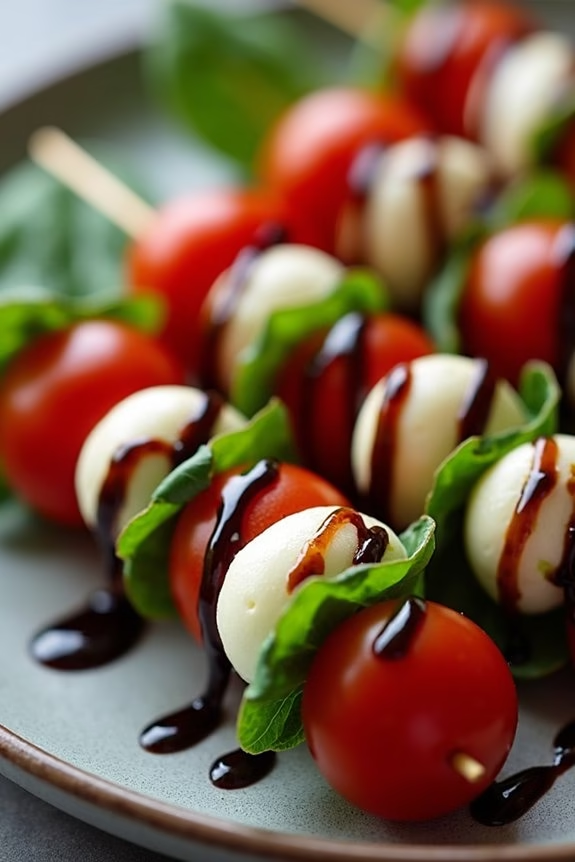
The Caprese Salad Skewers are a delightful and visually appealing appetizer perfect for any holiday gathering, especially during the festive Christmas season. This dish captures the essence of the classic Italian Caprese salad but presents it in a convenient and bite-sized format. The combination of fresh mozzarella, sweet cherry tomatoes, and fragrant basil leaves, all drizzled with a balsamic glaze, offers a burst of flavor that’s both invigorating and satisfying.
Not only is this appetizer low in carbohydrates, making it a healthy choice, but it’s also incredibly easy to assemble, guaranteeing you spend more time enjoying the festivities with your loved ones. Ideal for serving 4-6 people, these skewers bring a touch of elegance to any appetizer spread. The vibrant colors and aromatic scents make them an attractive addition to your holiday table.
The key to achieving the perfect Caprese Salad Skewers lies in using fresh, high-quality ingredients. Each skewer is a harmonious blend of textures and tastes, providing a delightful experience with every bite. Whether you’re hosting a large gathering or an intimate dinner, these skewers are sure to impress your guests with their simplicity and deliciousness.
Ingredients for 4-6 people:
- 24 cherry tomatoes
- 24 bocconcini balls (fresh mozzarella balls)
- 24 fresh basil leaves
- 3 tablespoons extra virgin olive oil
- Salt and freshly ground black pepper to taste
- 2 tablespoons balsamic glaze
- 24 wooden skewers or toothpicks
Cooking Instructions:
- Prepare the Ingredients: Begin by washing the cherry tomatoes and fresh basil leaves under cold water. Pat them dry with a paper towel to remove any excess moisture. Drain the bocconcini balls from their liquid and set them aside.
- Assemble the Skewers: Take a wooden skewer or toothpick and start assembling by sliding on one cherry tomato. Follow this with one bocconcini ball and a fresh basil leaf. Repeat this process until you have filled the skewer, leaving a small space at the end for handling. Repeat this process for all 24 skewers.
- Season the Skewers: Once all skewers are assembled, arrange them on a serving platter. Drizzle the skewers evenly with extra virgin olive oil. Sprinkle a pinch of salt and a few grinds of black pepper over the top for seasoning.
- Add the Finishing Touches: In conclusion, drizzle the balsamic glaze over the skewers generously. This adds a sweet and tangy flavor that complements the fresh ingredients beautifully.
- Serve and Enjoy: These Caprese Salad Skewers are best served fresh. You can prepare them a few hours in advance and store them in the refrigerator, but make sure to bring them to room temperature before serving for the best flavor.
Extra Tips:
For an added twist, consider using flavored balsamic glaze or infused olive oils, such as garlic or basil-infused oil, to enhance the flavors further. If you prefer a richer taste, you can substitute cherry tomatoes with sun-dried tomatoes.
Also, be certain not to over-skewer the ingredients, as this can cause them to tear or not sit properly on the skewer. Finally, if you have leftover ingredients, they can be used to create a quick Caprese salad by layering them in a dish and drizzling with olive oil and balsamic glaze.
Buffalo Cauliflower Bites

Buffalo Cauliflower Bites are a delightful, low-carb appetizer perfect for any Christmas gathering. This dish takes the beloved flavors of buffalo wings and transforms them into a vegetarian-friendly option that will impress even the most discerning of guests. The rich, spicy buffalo sauce perfectly coats the tender cauliflower florets, providing a satisfying crunch with every bite.
Not only is this dish a healthier alternative to traditional holiday appetizers, but it also caters to a wider range of dietary preferences. Ideal for serving 4 to 6 people, these Buffalo Cauliflower Bites can be enjoyed by everyone, whether they’re following a low-carb lifestyle or simply looking to try something new. The preparation is straightforward, and the cooking process guarantees that each piece of cauliflower is perfectly crisp and flavorful.
Paired with a cooling ranch or blue cheese dip, these bites will surely be a hit at your festive party.
Ingredients:
- 1 large head of cauliflower
- 1 cup almond flour
- 1 cup unsweetened almond milk
- 1 teaspoon garlic powder
- 1 teaspoon onion powder
- 1 teaspoon smoked paprika
- Salt and pepper to taste
- 1 cup buffalo sauce
- 2 tablespoons unsalted butter
- Fresh parsley, for garnish
Instructions:
- Preheat the Oven: Start by preheating your oven to 425°F (220°C) to make certain it’s hot and ready for baking once you’ve prepped the cauliflower.
- Prepare the Cauliflower: Wash and cut the cauliflower into bite-sized florets. Make sure they’re all roughly the same size to guarantee even cooking.
- Make the Batter: In a large mixing bowl, combine the almond flour, garlic powder, onion powder, smoked paprika, salt, and pepper. Gradually whisk in the almond milk until you have a smooth batter.
- Coat the Cauliflower: Dip each cauliflower floret into the batter, allowing any excess to drip off. Place them on a baking sheet lined with parchment paper to prevent sticking.
- Bake the Cauliflower: Place the baking sheet in the preheated oven and bake for about 20 minutes, flipping the florets halfway through, until they’re golden brown and crispy.
- Prepare the Buffalo Sauce: While the cauliflower is baking, heat the buffalo sauce and butter in a small saucepan over low heat, stirring until the butter is fully melted and the sauce is well combined.
- Toss the Cauliflower in Sauce: Once the cauliflower is done baking, remove it from the oven and transfer the florets to a large bowl. Pour the buffalo sauce over the top and gently toss to coat each piece evenly.
- Final Bake: Return the coated cauliflower to the baking sheet and bake for an additional 10 minutes, which will help the sauce adhere and enhance the flavors.
- Garnish and Serve: Once baked, remove the cauliflower from the oven and let it cool slightly. Garnish with fresh parsley and serve immediately with your choice of dipping sauce.
Extra Tips:
For an extra crispy texture, consider broiling the cauliflower for the last 2-3 minutes of the final bake. Keep a close eye on it to prevent burning.
If you prefer a milder flavor, reduce the amount of buffalo sauce or use a milder wing sauce. Additionally, make certain that your baking sheet isn’t overcrowded; if necessary, use two sheets or bake in batches to allow each piece to crisp up nicely.
Enjoy these bites fresh from the oven for maximum crunch and flavor.
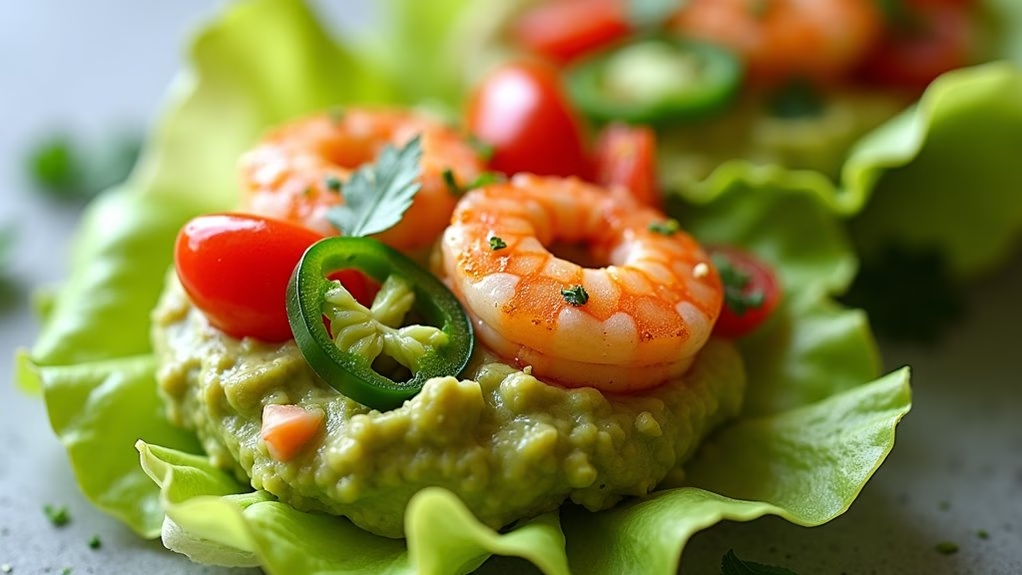
Avocado Shrimp Cups
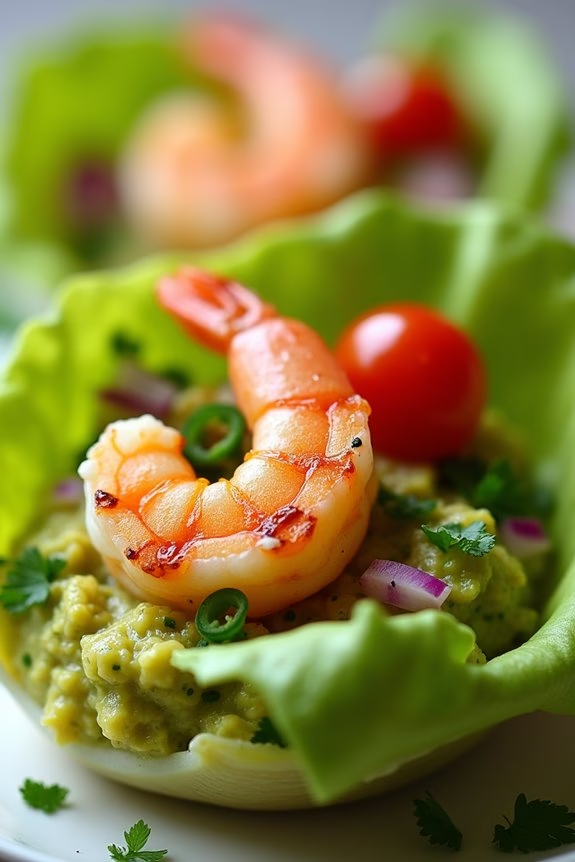
Avocado Shrimp Cups are a delightful and low-carb appetizer perfect for your Christmas gatherings. These cups aren’t only visually appealing but also pack a punch in flavor, making them a crowd-pleaser. The creamy texture of the avocado pairs beautifully with the succulent shrimp, while a hint of lime and a sprinkle of fresh herbs lift the flavors to a new level.
They’re an excellent choice for those looking to maintain a low-carb diet during the festive season without compromising on taste. This recipe is simple yet elegant, allowing you to spend less time in the kitchen and more time with your guests.
The preparation involves minimal cooking, as the shrimp can either be boiled or grilled, and the rest of the ingredients are fresh and require only a bit of chopping and mixing. These Avocado Shrimp Cups are served in bite-sized portions, making them perfect finger food for your holiday party.
Let’s explore the ingredients and steps needed to create this delicious dish for a serving size of 4-6 people.
Ingredients (Serving Size: 4-6 people):
- 2 large ripe avocados
- 12 medium shrimp, peeled and deveined
- 1 tablespoon olive oil
- 1 clove garlic, minced
- Juice of 1 lime
- Salt and pepper to taste
- 2 tablespoons fresh cilantro, chopped
- 1 small jalapeño, finely chopped (optional)
- 1/4 cup red onion, finely chopped
- 1/4 cup cherry tomatoes, quartered
- Lettuce leaves or endive leaves for serving
Cooking Instructions:
- Prepare the Avocado Mixture: Cut the avocados in half, remove the pit, and scoop the flesh into a mixing bowl. Mash the avocado with a fork until smooth. Add lime juice, salt, pepper, and minced garlic, then mix well. Stir in the chopped cilantro, jalapeño (if using), red onion, and cherry tomatoes. Adjust seasoning to taste and set aside.
- Cook the Shrimp: Heat the olive oil in a skillet over medium heat. Add the shrimp and sauté for about 2-3 minutes on each side until they turn pink and are cooked through. Remove from heat and allow them to cool slightly. You can also grill the shrimp if preferred.
- Assemble the Cups: Lay out the lettuce or endive leaves on a serving platter. Spoon a generous amount of the avocado mixture onto each leaf. Top with a cooked shrimp.
- Serve: Arrange the Avocado Shrimp Cups on a platter for serving. Garnish with extra cilantro or a slice of lime if desired. Serve immediately.
Extra Tips: For the best texture and flavor, choose ripe avocados that yield slightly to gentle pressure. If you’re preparing the dish in advance, you can prevent the avocado from browning by keeping the avocado mixture in an airtight container with a thin layer of lime juice on top.
The shrimp can be cooked a few hours ahead of time and added to the cups just before serving. If you want to add more spice, consider leaving some seeds in the jalapeño.