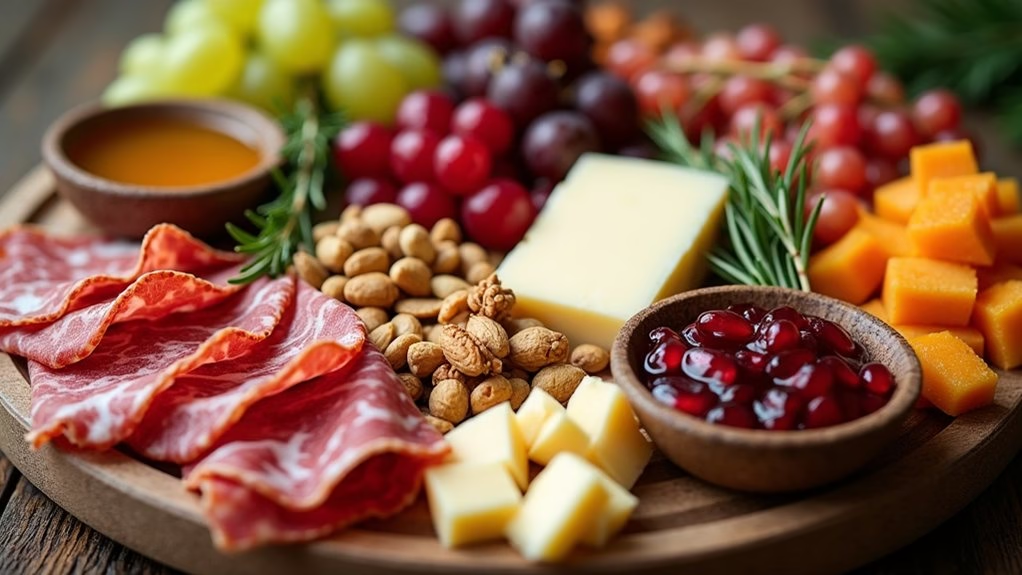
When it comes to Christmas gatherings, appetizers can really set the mood. I’ve curated 13 easy Christmas appetizer recipes that will leave your guests impressed while keeping your time in the kitchen stress-free. From Cranberry Brie Bites to savory Spinach and Artichoke Dip Cups, these dishes offer a delightful mix of flavors. They are simple yet sophisticated, perfect for creating a memorable festive atmosphere. Curious about what else is on the list?
Cranberry Brie Bites

Cranberry Brie Bites are a delightful and elegant appetizer perfect for your Christmas gatherings. These bites combine the creamy richness of Brie cheese with the sweet-tart flavor of cranberry sauce, all nestled in a flaky, golden puff pastry shell. They aren’t only visually appealing but also incredibly easy to make, guaranteeing you can spend more time enjoying the company of your guests rather than stuck in the kitchen.
These small but flavorful treats are ideal for serving at any holiday party or festive occasion. The balance of textures and flavors makes them a crowd-pleaser, and they can be prepared in advance, making them a stress-free option for any host. The following recipe yields approximately 24 bites, which is perfect for serving 4-6 people.
Ingredients:
- 1 sheet of puff pastry, thawed
- 8 oz Brie cheese, rind removed and cut into small cubes
- 1/2 cup cranberry sauce (homemade or store-bought)
- 1/4 cup chopped walnuts (optional)
- 1 egg, beaten (for egg wash)
- Fresh rosemary sprigs for garnish (optional)
Instructions:
- Preheat the Oven: Begin by preheating your oven to 375°F (190°C). This guarantees that the oven is hot enough to cook the puff pastry evenly and give it a nice crisp.
- Prepare the Puff Pastry: On a lightly floured surface, roll out the thawed puff pastry sheet until it’s smooth and even. Cut the pastry into approximately 2-inch squares. You should have around 24 squares in total.
- Assemble the Bites: Place each square of puff pastry into the cups of a mini muffin tin, pressing down gently to create small pastry cups. Add a small cube of Brie cheese to each pastry cup.
- Add Cranberry Sauce and Nuts: Spoon about 1 teaspoon of cranberry sauce over the Brie in each cup. If desired, sprinkle a few chopped walnuts on top for added texture and flavor.
- Apply Egg Wash: Brush the edges of the puff pastry with the beaten egg. This will help give the pastry a beautiful golden color when baked.
- Bake: Place the muffin tin in the preheated oven and bake for 15-20 minutes, or until the puff pastry is golden brown and the cheese is melted and bubbly.
- Cool and Garnish: Once baked, remove the bites from the oven and allow them to cool slightly in the muffin tin. Carefully remove each bite and place them on a serving platter. Garnish with fresh rosemary sprigs if desired.
Extra Tips:
For a more vibrant flavor, consider using a homemade cranberry sauce with added orange zest or a splash of orange juice. If you prefer a nuttier flavor, try substituting the walnuts with pecans or almonds.
These bites can be made a day in advance; simply assemble the bites and store them in the fridge until you’re ready to bake them. This will save you time on the day of your event. Remember to serve them warm for the best taste experience.
Caprese Christmas Wreath
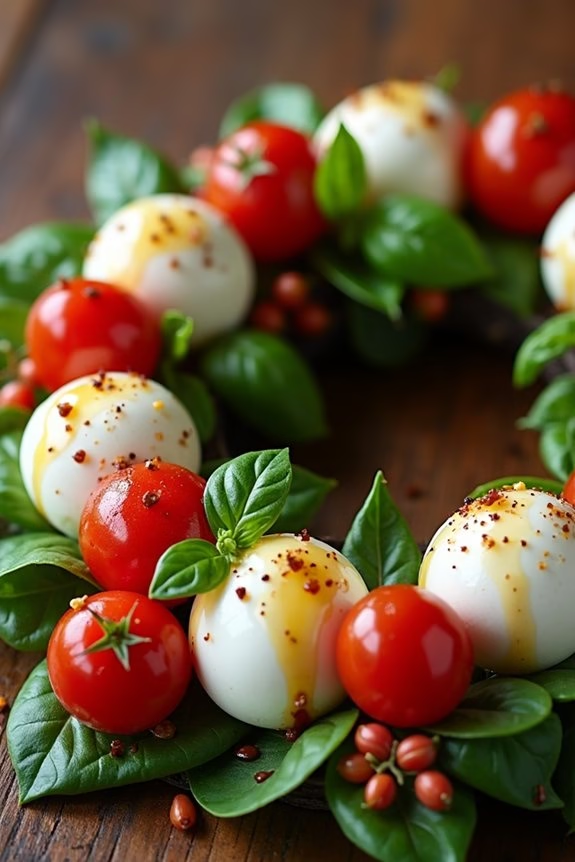
Caprese Christmas Wreath is a festive and visually stunning appetizer that’s perfect for holiday gatherings. This dish combines the classic flavors of a traditional Caprese salad with a presentation that will wow your guests. Fresh mozzarella balls, juicy cherry tomatoes, and aromatic basil leaves are artfully arranged in the shape of a wreath, creating an eye-catching centerpiece for your holiday table. Drizzled with balsamic glaze, this appetizer not only looks beautiful but also delivers a burst of fresh, savory flavors.
This Caprese Christmas Wreath isn’t only easy to make but also offers a delightful balance of textures and tastes. The creamy mozzarella pairs perfectly with the sweet and tangy flavor of the tomatoes, while the basil adds a fragrant crispness. The balsamic glaze provides a touch of acidity that ties all the elements together. This recipe serves 4-6 people, making it an ideal choice for small to medium-sized gatherings. It’s a light and invigorating option that will leave your guests satisfied but not too full before the main course.
Ingredients (Serves 4-6):
- 16 oz fresh mozzarella balls (bocconcini)
- 16 oz cherry tomatoes
- Fresh basil leaves
- 2 tablespoons extra-virgin olive oil
- Salt and freshly ground black pepper to taste
- Balsamic glaze for drizzling
- Optional: Crusty bread or crackers for serving
Instructions:
- Prepare the Ingredients: Begin by draining the mozzarella balls and patting them dry with paper towels. This will help them absorb the flavors better. Wash the cherry tomatoes and basil leaves thoroughly and set them aside.
- Assemble the Wreath: On a large, round serving platter, start by arranging the mozzarella balls in a circular pattern, leaving space in the center to resemble a wreath. Follow with the cherry tomatoes, placing them in between the mozzarella balls. Add basil leaves intermittently around the wreath to create a vibrant color contrast.
- Season the Wreath: Drizzle the extra-virgin olive oil over the arranged mozzarella, tomatoes, and basil. Season with salt and freshly ground black pepper to taste. The olive oil will enhance the flavors and help the seasoning adhere to the ingredients.
- Add the Finishing Touch: Finally, drizzle balsamic glaze over the entire wreath. Be generous, as the glaze adds a delightful sweet and tangy flavor that complements the mozzarella and tomatoes beautifully.
- Serve and Enjoy: If desired, place crusty bread or crackers on the side for serving. This adds a crunchy element and allows guests to create their own Caprese bites.
Extra Tips:
For the best results, use high-quality, fresh ingredients. The mozzarella should be soft and creamy, the tomatoes ripe and sweet, and the basil fragrant. If you prefer a more intense balsamic flavor, you can make your own balsamic reduction by simmering balsamic vinegar on the stove until it thickens.
This appetizer can be prepared ahead of time, but for maximum freshness and flavor, it’s best to add the olive oil and balsamic glaze just before serving.
Bacon-Wrapped Dates

Bacon-wrapped dates are a delightful appetizer that combine sweet and savory flavors into one bite-sized treat. The natural sweetness of the dates pairs beautifully with the salty, crispy bacon, creating a harmonious combination that’s certain to be a hit at any holiday gathering.
This recipe is simple to prepare and requires minimal ingredients, making it a fantastic choice for entertaining during the festive season. The magic of bacon-wrapped dates lies in their simplicity; the natural flavors of the ingredients shine through without the need for heavy seasoning.
This dish can be prepared ahead of time, allowing you to enjoy the holiday festivities without being stuck in the kitchen. Whether you serve them as an hors d’oeuvre for a holiday party or as a starter for Christmas dinner, these tasty bites are guaranteed to be a crowd-pleaser.
Ingredients (Serves 4-6):
- 24 pitted Medjool dates
- 12 slices of bacon, cut in half
- 24 almonds or pecans (optional)
- 24 toothpicks
Cooking Instructions:
- Preheat the Oven: Start by preheating your oven to 375°F (190°C). Line a baking sheet with parchment paper or aluminum foil for easy cleanup.
- Prepare the Dates: If desired, stuff each pitted date with an almond or pecan. This adds a delightful crunch and a nutty flavor to the sweet and savory combination.
- Wrap the Dates: Take a half slice of bacon and wrap it around each date snugly. Secure the bacon in place by inserting a toothpick through the center of each wrapped date.
- Arrange on Baking Sheet: Place the wrapped dates on the prepared baking sheet, ensuring they’re evenly spaced and not touching. This allows the bacon to cook evenly and become crispy.
- Bake the Dates: Place the baking sheet in the preheated oven and bake for 15-20 minutes. Halfway through the baking time, turn the dates over to guarantee the bacon cooks evenly on all sides. Bake until the bacon is crispy and browned to your liking.
- Cool and Serve: Once the bacon is crispy, remove the baking sheet from the oven and allow the dates to cool for a few minutes. Serve them warm as an appetizer for your Christmas gathering.
Extra Tips:
For an extra layer of flavor, consider drizzling the bacon-wrapped dates with a little balsamic glaze or honey before serving. This adds a touch of tanginess that complements the sweet and savory elements beautifully.
If you prefer a spicier kick, you can sprinkle a pinch of cayenne pepper or smoked paprika on the bacon before wrapping the dates. Remember to keep an eye on the baking time, as different types of bacon may cook at slightly different rates.
Enjoy these irresistible bites, and watch them disappear quickly from the appetizer tray!
Spinach and Artichoke Dip Cups

Spinach and Artichoke Dip Cups are a delightful twist on the classic spinach and artichoke dip, perfect for serving as a festive appetizer during the holiday season. These individual servings are both convenient and elegant, making them a standout dish at any Christmas gathering. The creamy, cheesy filling of spinach, artichoke hearts, and a blend of cheeses is nestled in crisp, golden phyllo cups, offering a delightful combination of textures and flavors.
Creating these Spinach and Artichoke Dip Cups is surprisingly straightforward, and they’re guaranteed to impress your guests. The recipe yields 4-6 servings, making it ideal for a small gathering or as part of a larger spread of appetizers. Whether you’re hosting a dinner party or simply enjoying a cozy evening with family, these dip cups are sure to become a holiday favorite.
Ingredients for 4-6 servings:
- 1 cup frozen chopped spinach, thawed and drained
- 1 can (14 oz) artichoke hearts, drained and chopped
- 1/2 cup cream cheese, softened
- 1/2 cup sour cream
- 1/4 cup mayonnaise
- 1/2 cup grated Parmesan cheese
- 1/2 cup shredded mozzarella cheese
- 2 cloves garlic, minced
- 1/2 teaspoon salt
- 1/4 teaspoon black pepper
- 1/4 teaspoon crushed red pepper flakes (optional)
- 1 package phyllo pastry cups (about 15-20 cups)
Cooking Instructions:
- Prepare the Oven: Preheat your oven to 375°F (190°C). This guarantees that the phyllo cups will bake evenly and become perfectly crispy.
- Mix the Filling: In a large mixing bowl, combine the softened cream cheese, sour cream, and mayonnaise. Stir until smooth. Add the grated Parmesan cheese, shredded mozzarella cheese, minced garlic, salt, black pepper, and crushed red pepper flakes if using. Mix well to combine all ingredients.
- Incorporate Spinach and Artichokes: Gently fold in the chopped spinach and artichoke hearts into the cheese mixture. Confirm the ingredients are evenly distributed for a consistent flavor in every bite.
- Fill the Phyllo Cups: Arrange the phyllo pastry cups on a baking sheet. Spoon the spinach and artichoke mixture into each cup, filling them generously but ensuring the filling doesn’t overflow.
- Bake: Place the baking sheet in the preheated oven and bake for 12-15 minutes or until the filling is hot and bubbly, and the phyllo cups are golden brown. Keep a close eye to prevent them from burning.
- Cool and Serve: Allow the dip cups to cool slightly before serving. They can be enjoyed warm or at room temperature.
Extra Tips:
For an added layer of flavor, consider sprinkling a bit of extra mozzarella cheese on top of each cup before baking, which will melt to form a delicious golden crust.
If you don’t have phyllo pastry cups, you can use mini tart shells or even make your own using phyllo dough sheets. Simply cut the dough into squares, layer a few pieces together, and press them into mini muffin tins to form cups.
Keep an eye on your oven, as baking times may vary slightly depending on the size of the cups and your specific oven settings. Enjoy these cups as a standalone appetizer or alongside a variety of other holiday treats.
Smoked Salmon Canapés

The holiday season is the perfect time to delight your guests with elegant and flavorful appetizers, and smoked salmon canapés are an ideal choice. These bite-sized delights offer a delightful combination of smoky salmon, creamy cheese, and fresh herbs, all atop a crisp base. Not only are they visually appealing, but they also pack a punch of flavor that will have your guests reaching for seconds.
Whether you’re hosting an intimate gathering or a larger festive party, smoked salmon canapés are sure to impress.
These canapés are simple to prepare, making them an excellent option for both novice and experienced cooks. The key is to use high-quality ingredients to guarantee the best flavor. With minimal cooking required, they can be assembled quickly, allowing you to spend more time enjoying the festivities.
Below is a recipe designed to make enough canapés to serve 4-6 people, making it perfect for a small holiday gathering.
Ingredients:
- 12 slices of smoked salmon
- 12 small slices of pumpernickel or rye bread
- 8 oz (225g) cream cheese, softened
- 2 tablespoons sour cream
- 1 tablespoon lemon juice
- 1 tablespoon fresh dill, finely chopped
- Salt and pepper, to taste
- 12 small sprigs of fresh dill, for garnish
- 1 tablespoon capers, drained and rinsed
Instructions:
- Prepare the Cream Cheese Mixture: In a medium-sized bowl, combine the softened cream cheese, sour cream, lemon juice, and finely chopped dill. Mix well until the ingredients are fully incorporated and the mixture is smooth. Season with salt and pepper to taste.
- Prepare the Bread Base: Lay out the slices of pumpernickel or rye bread on a clean, flat surface. If the slices are too large, you may cut them into smaller, canapé-sized pieces, approximately 2 inches in diameter, using a round cookie cutter or a small glass.
- Assemble the Canapés: Spread a generous layer of the cream cheese mixture onto each piece of bread, making sure that the surface is evenly covered. Place a slice of smoked salmon on top of the cream cheese layer, folding it if necessary to fit the bread.
- Garnish the Canapés: Add a small sprig of fresh dill and a few capers on top of each salmon slice for garnish. This not only adds visual appeal but also enhances the flavor profile of the canapés.
- Serve: Arrange the finished canapés on a serving platter. They can be served immediately or covered and refrigerated for up to two hours before serving to allow the flavors to meld.
Extra Tips:
When selecting smoked salmon, opt for a good-quality, thinly sliced variety for the best taste and texture. Make sure that the cream cheese is at room temperature before mixing to guarantee a smooth and creamy consistency.
If you prefer a bit of zest, consider adding a pinch of lemon zest to the cream cheese mixture. Additionally, you can experiment with different herbs such as chives or parsley for a unique twist.
Finally, these canapés pair wonderfully with a chilled glass of sparkling wine or champagne, making them a festive addition to any holiday gathering.
Cheesy Garlic Pull-Apart Bread
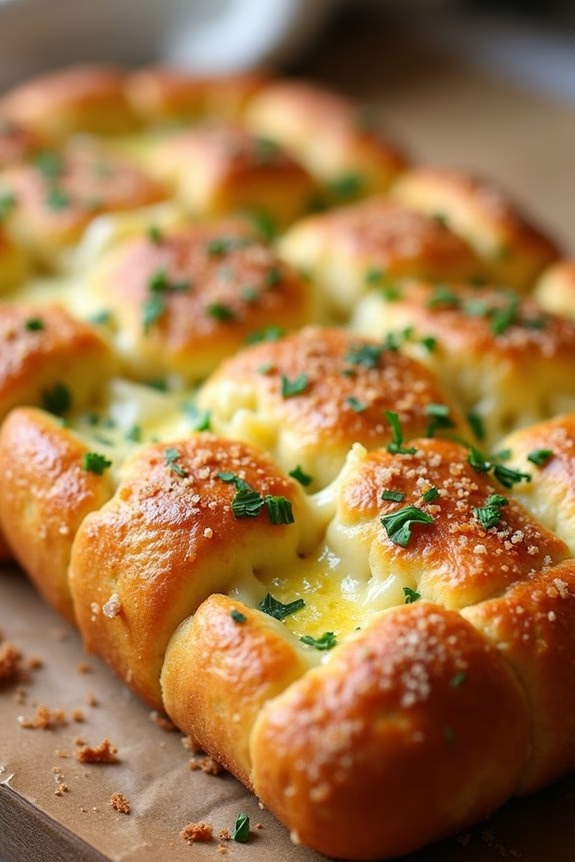
Cheesy Garlic Pull-Apart Bread is a delightful appetizer perfect for the holiday season. This dish isn’t only visually appealing but also incredibly delicious, making it a crowd-pleaser at any Christmas gathering. The combination of gooey melted cheese and aromatic garlic, all nestled within a warm, crusty bread, makes it an irresistible treat for your guests.
It’s also a great dish to prepare in advance, freeing you up to enjoy the festivities.
The beauty of Cheesy Garlic Pull-Apart Bread lies in its simplicity and versatility. You can customize it with different types of cheese, herbs, and even add-ins like pepperoni or sun-dried tomatoes to suit your taste preferences. This appetizer is best enjoyed fresh out of the oven, with the cheese still bubbling and the bread soft and buttery.
Serve it as a starter to your Christmas meal or as a delicious snack during festive gatherings. Here’s how to make this scrumptious dish for 4-6 people:
Ingredients:
- 1 large loaf of crusty bread (sourdough or Italian)
- 1 1/2 cups shredded mozzarella cheese
- 1/2 cup grated Parmesan cheese
- 1/4 cup unsalted butter, melted
- 3 cloves garlic, minced
- 2 tablespoons fresh parsley, chopped
- 1 teaspoon dried oregano
- Salt and pepper to taste
Instructions:
- Preheat the Oven: Start by preheating your oven to 375°F (190°C). This guarantees it’s hot and ready when you’re done preparing the bread.
- Prepare the Bread: Use a serrated knife to make cuts in the bread, forming a grid pattern. Be careful not to cut all the way through; leave about an inch at the bottom so the loaf stays intact.
- Mix the Garlic Butter: In a small bowl, combine the melted butter, minced garlic, chopped parsley, dried oregano, salt, and pepper. Stir well to guarantee the garlic and herbs are evenly distributed.
- Fill the Bread: Gently pull apart the bread sections and drizzle the garlic butter mixture into the cuts. Make sure it seeps down into the crevices for maximum flavor.
- Add the Cheese: Stuff the shredded mozzarella and grated Parmesan into the cuts, ensuring each section is generously filled with cheese.
- Bake: Place the prepared loaf on a baking sheet lined with parchment paper or aluminum foil. Bake in the preheated oven for 15-20 minutes, or until the cheese is melted and bubbly, and the bread is golden brown.
- Serve: Remove from the oven and let it cool for a couple of minutes before serving. Enjoy the bread warm, pulling apart the cheesy sections as you eat.
Extra Tips:
For the best results, choose a bread that has a sturdy crust but a soft interior, like sourdough or Italian bread. This will help hold the cheese and garlic butter without becoming too soggy.
If you’re a fan of spicy flavors, consider adding a pinch of red pepper flakes to the garlic butter mixture for an extra kick. Additionally, if you want to prepare the bread ahead of time, you can assemble it and wrap it in foil, then refrigerate. When ready to serve, just pop it in the oven as directed.
Prosciutto-Wrapped Asparagus
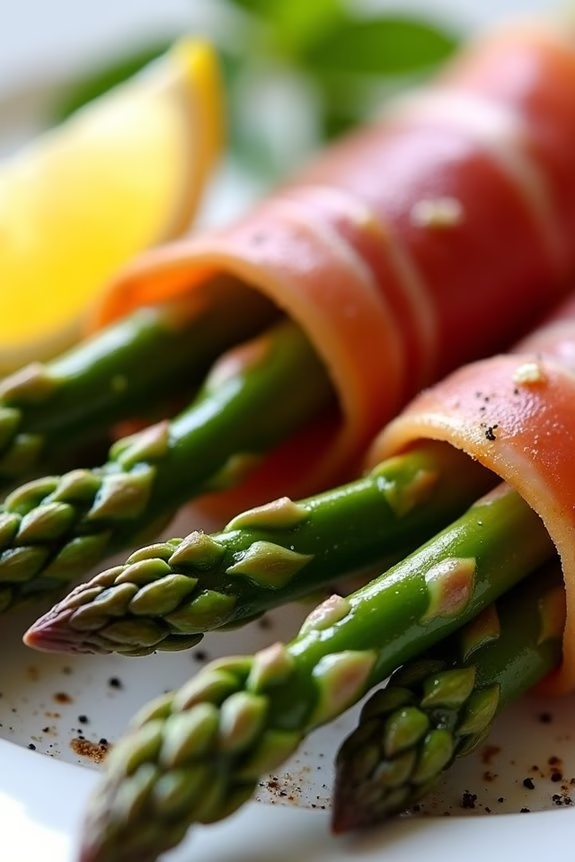
Prosciutto-Wrapped Asparagus is a delightful and elegant appetizer perfect for your Christmas gatherings. The combination of tender asparagus and savory prosciutto creates a harmonious balance of flavors that’s bound to impress your guests. This dish isn’t only visually appealing with its vibrant green and pink hues, but also incredibly easy to prepare, making it an ideal choice for both novice and experienced cooks.
The beauty of Prosciutto-Wrapped Asparagus lies in its simplicity. The fresh asparagus spears are lightly seasoned and then wrapped in thin slices of salty prosciutto, which crisps up beautifully in the oven, adding a delightful texture to each bite. The dish can be served warm or at room temperature, making it a versatile addition to your holiday spread. Serve this appetizer alongside a chilled glass of white wine or champagne for a truly festive experience.
Ingredients for 4-6 servings:
- 1 pound of fresh asparagus, trimmed
- 8 ounces of thinly sliced prosciutto
- 1 tablespoon of olive oil
- 1/2 teaspoon of black pepper
- 1/2 teaspoon of garlic powder
- 1 lemon, cut into wedges
Cooking Instructions:
- Preheat the Oven: Start by preheating your oven to 400°F (200°C). This will guarantee that it’s at the right temperature for baking the asparagus until tender and the prosciutto until crispy.
- Prepare the Asparagus: Wash the asparagus under cold water and pat them dry with a paper towel. Trim the woody ends of the asparagus by snapping them off or cutting them with a knife.
- Season the Asparagus: Place the asparagus in a large bowl. Drizzle with olive oil, then sprinkle with black pepper and garlic powder. Toss the asparagus gently to ensure they’re evenly coated with the seasoning.
- Wrap with Prosciutto: Take one slice of prosciutto and wrap it around each asparagus spear, starting just below the tip and spiraling down to the base. Repeat this process until all asparagus spears are wrapped.
- Arrange on Baking Sheet: Place the prosciutto-wrapped asparagus spears in a single layer on a baking sheet lined with parchment paper. Ensure they aren’t overlapping to allow for even cooking.
- Bake in the Oven: Put the baking sheet into the preheated oven and bake for 15-20 minutes, or until the asparagus is tender and the prosciutto is crispy and golden brown.
- Serve: Once cooked, remove the baking sheet from the oven and let the asparagus cool slightly. Transfer to a serving platter and garnish with lemon wedges for a fresh citrusy zing.
Extra Tips:
For the best results, select asparagus spears that are uniform in size to guarantee even cooking. If the prosciutto slices are too long, you can cut them in half before wrapping.
Experiment with additional seasonings such as Parmesan cheese or red pepper flakes to add more depth of flavor. If you have a grill available, you can also grill the prosciutto-wrapped asparagus for a smoky taste.
Remember to serve them immediately for the best texture and flavor, or keep them warm in the oven at a low temperature if needed.
Stuffed Mushrooms With Sausage
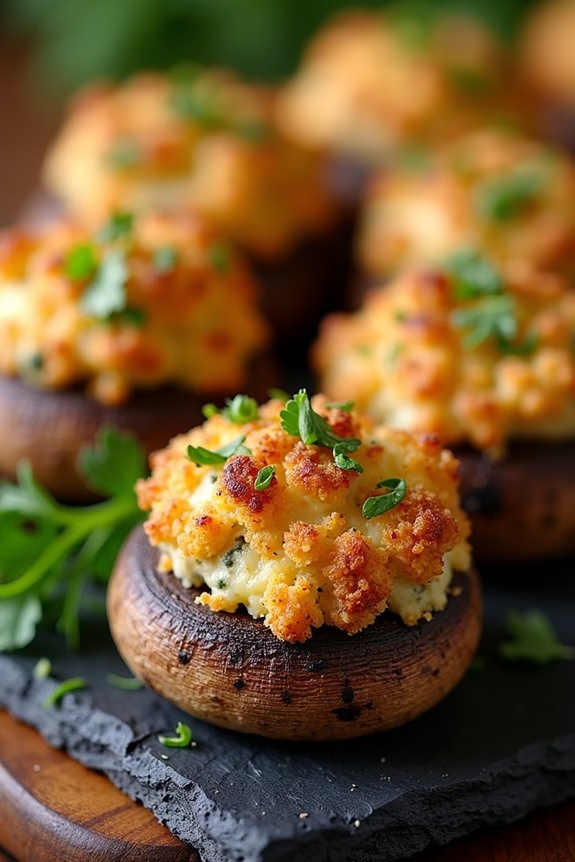
Bring a touch of gourmet flair to your Christmas appetizers with these delectable Stuffed Mushrooms With Sausage. This dish combines the earthy flavors of fresh mushrooms with savory sausage, aromatic herbs, and creamy cheese, making it a crowd-pleaser at any holiday gathering.
Perfectly bite-sized, these stuffed mushrooms aren’t only delicious but also easy to prepare, allowing you to enjoy the festivities without spending too much time in the kitchen. The balance of flavors and textures in this dish is simply irresistible.
The tender mushroom caps serve as the perfect vessel for the flavorful sausage mixture, while the crunchy breadcrumb topping adds a delightful contrast. Whether you’re hosting a large holiday party or an intimate family gathering, these Stuffed Mushrooms With Sausage are sure to impress your guests and leave them asking for more.
Ingredients for 4-6 Servings:
- 24 large white mushrooms
- 2 tablespoons olive oil
- 1/2 pound Italian sausage, casings removed
- 1 small onion, finely chopped
- 2 cloves garlic, minced
- 1/2 cup breadcrumbs
- 1/4 cup grated Parmesan cheese
- 1/4 cup cream cheese, softened
- 2 tablespoons chopped fresh parsley
- Salt and pepper to taste
- 2 tablespoons butter, melted
Cooking Instructions:
- Prepare the Mushrooms: Preheat your oven to 375°F (190°C). Carefully clean the mushrooms with a damp cloth and remove the stems. Finely chop the stems and set aside, as they’ll be used in the stuffing.
- Cook the Sausage Mixture: Heat olive oil in a skillet over medium heat. Add the sausage, breaking it up with a spoon as it cooks. Once the sausage is browned, add the chopped onion, garlic, and reserved mushroom stems. Sauté until the onions are translucent and the mixture is fragrant.
- Combine the Stuffing Ingredients: In a large mixing bowl, combine the cooked sausage mixture with breadcrumbs, Parmesan cheese, cream cheese, and parsley. Season with salt and pepper to taste. Mix until all ingredients are well incorporated.
- Stuff the Mushrooms: Arrange the mushroom caps on a baking sheet, cavity side up. Spoon the sausage mixture into each mushroom cap, pressing lightly to confirm the stuffing stays in place.
- Bake the Mushrooms: Drizzle the melted butter over the stuffed mushrooms. Bake in the preheated oven for 20-25 minutes, or until the mushrooms are tender and the tops are golden brown.
- Serve and Enjoy: Remove from the oven and allow to cool for a few minutes before serving. Arrange on a platter and garnish with additional parsley if desired.
Extra Tips:
For an extra layer of flavor, consider adding a splash of white wine to the sausage mixture as it cooks. If you prefer a spicier taste, opt for hot Italian sausage instead of mild.
To make this recipe ahead of time, prepare the stuffing and fill the mushroom caps, then cover and refrigerate until you’re ready to bake. This makes it a perfect hassle-free appetizer during the busy holiday season.
Pomegranate Goat Cheese Bites

Pomegranate Goat Cheese Bites are a delightful and festive appetizer perfect for any holiday gathering. These bite-sized treats combine the creamy richness of goat cheese with the sweet-tart burst of pomegranate seeds, all nestled on a crunchy base.
They’re not only visually appealing with their vibrant colors but also a symphony of flavors and textures that will leave your guests wanting more. This appetizer is simple yet sophisticated, making it an excellent choice for both casual and formal occasions.
The combination of ingredients not only tastes amazing but also provides a healthy option for those looking to indulge without guilt. The bites can be prepared in advance, making them a stress-free addition to your Christmas menu.
Ingredients (serving size: 4-6 people):
- 1 cup of goat cheese, softened
- 1 tablespoon of honey
- 1 teaspoon of lemon zest
- 1/4 teaspoon of salt
- 1/4 teaspoon of freshly ground black pepper
- 1/2 cup of pomegranate seeds
- 1/4 cup of chopped fresh mint leaves
- 24 mini phyllo shells or crackers
- 2 tablespoons of chopped walnuts (optional, for garnish)
Cooking Instructions:
- Prepare the Goat Cheese Mixture: In a medium mixing bowl, combine the softened goat cheese, honey, lemon zest, salt, and pepper. Mix well until the ingredients are thoroughly incorporated and the mixture is smooth and creamy.
- Assemble the Bites: Take the mini phyllo shells or crackers and arrange them on a serving platter. Using a small spoon or a piping bag, fill each shell or top each cracker with the goat cheese mixture, making certain of an even distribution.
- Add the Pomegranate Seeds: Generously sprinkle pomegranate seeds over each filled shell or cracker. The seeds should gently press into the goat cheese to guarantee they stay in place.
- Garnish with Mint: Sprinkle the fresh mint leaves over the top of the bites for a burst of color and fresh flavor. If using, add a few pieces of chopped walnuts on top for added crunch and a nutty flavor.
- Chill and Serve: Place the assembled bites in the refrigerator for about 15 minutes to allow the flavors to meld and the cheese to set slightly. Serve chilled and enjoy!
Extra Tips:
For the best flavor, use high-quality goat cheese and fresh pomegranate seeds. If pomegranate seeds aren’t available, you can substitute with dried cranberries.
To prevent the phyllo shells from becoming soggy, fill them with the goat cheese mixture shortly before serving. Feel free to experiment with different herbs, such as basil or thyme, to suit your taste preferences.
These bites can be made a few hours in advance, just remember to keep them refrigerated until serving time.
Mini Beef Wellington Bites
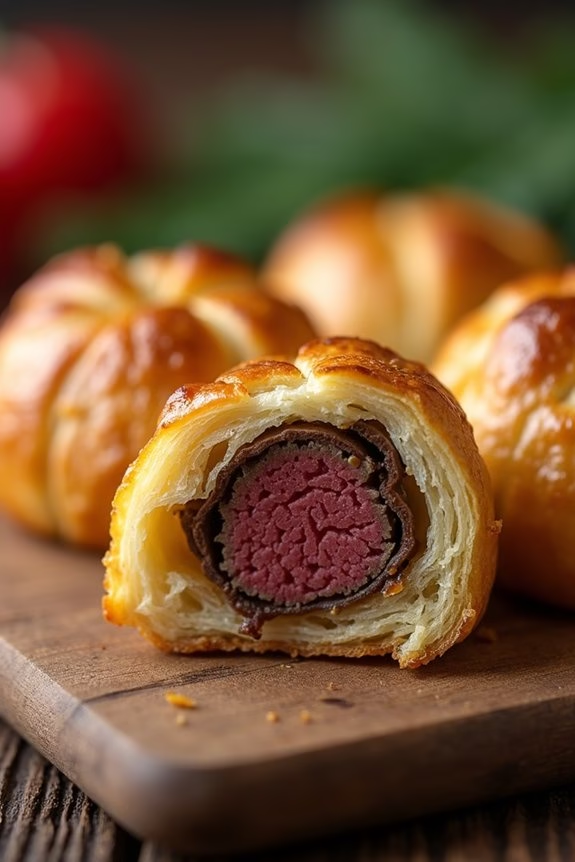
Mini Beef Wellington Bites are a delightful twist on the classic Beef Wellington, tailored perfectly for festive gatherings and holiday parties. These bite-sized appetizers encapsulate the rich and savory flavors of a beef tenderloin, paired with a decadent mushroom duxelles, enveloped in flaky puff pastry. Perfect for serving at Christmas get-togethers, these appetizers are sure to impress your guests with their sophisticated taste and elegant presentation.
Crafting these Mini Beef Wellington Bites involves a few key steps, but the result is well worth the effort. The process begins with preparing a succulent beef tenderloin, which is seared to lock in juices and flavor. This is accompanied by a creamy mushroom duxelles, which adds an earthy depth to the dish. The assembly is completed with a buttery puff pastry, which crisps up beautifully in the oven, creating a perfect contrast to the tender beef inside.
Here’s how to make these elegant appetizers for a serving size of 4-6 people.
Ingredients:
- 1 pound beef tenderloin
- Salt and pepper to taste
- 2 tablespoons olive oil
- 1 tablespoon Dijon mustard
- 1 tablespoon unsalted butter
- 8 ounces mushrooms, finely chopped
- 2 cloves garlic, minced
- 1 tablespoon fresh thyme, chopped
- 1 sheet puff pastry, thawed
- 1 egg, beaten
- 1 tablespoon water
Instructions:
- Prepare the Beef Tenderloin: Cut the beef tenderloin into small, bite-sized pieces. Season each piece with salt and pepper. Heat the olive oil in a skillet over medium-high heat. Once hot, sear each piece of beef for about 1-2 minutes on each side until browned. Remove from the skillet and brush with Dijon mustard. Let them cool.
- Make the Mushroom Duxelles: In the same skillet, add butter. Once melted, add finely chopped mushrooms, garlic, and thyme. Cook over medium heat until the mushrooms release their moisture and become golden brown, about 5-7 minutes. Season with salt and pepper. Let the mixture cool.
- Prepare the Puff Pastry: Preheat your oven to 400°F (200°C). Roll out the puff pastry on a floured surface. Cut the pastry into squares large enough to envelop the beef pieces.
- Assemble the Wellington Bites: Place a small spoonful of the mushroom mixture in the center of each pastry square. Top with a piece of beef. Fold the corners of the pastry over the beef and seal the edges by pinching them together.
- Bake: Place the assembled bites on a baking sheet lined with parchment paper. Brush each bite with a mixture of beaten egg and water. Bake in the preheated oven for 15-20 minutes, or until the pastry is golden brown and puffed.
- Serve: Allow the bites to cool slightly before serving. They can be served warm or at room temperature.
Extra Tips:
When preparing the beef, aim for uniformity in size to guarantee even cooking. The mushroom duxelles can be made a day ahead and stored in the refrigerator to save time on the day of the event. If you’re short on time, ready-to-use frozen puff pastry is a convenient option, just remember to thaw it properly before use.
Finally, make sure to seal the pastry edges well to prevent them from opening during baking. Enjoy serving these delicious bites as part of your holiday feast!
Roasted Red Pepper Hummus

Roasted Red Pepper Hummus is a delightful appetizer that’s perfect for any festive occasion, especially during the Christmas season. This creamy and flavorful dip combines the smoky sweetness of roasted red peppers with the rich, nutty taste of chickpeas and tahini. It’s not only delicious but also healthy, making it a crowd-pleaser for those who are health-conscious or following a plant-based diet.
Serve it with an assortment of fresh vegetables, pita bread, or crackers to add a vibrant and colorful touch to your holiday spread.
This hummus recipe isn’t only easy to prepare but also versatile, allowing you to adjust the flavors to your liking. With just a few simple ingredients and a food processor, you can whip up this Roasted Red Pepper Hummus in no time.
Whether you’re hosting a large holiday gathering or a small family dinner, this recipe will serve 4-6 people, making it an ideal appetizer for parties and get-togethers. Let’s explore the ingredients and steps to make this delicious dish.
Ingredients (serving size: 4-6 people):
- 1 can (15 oz) of chickpeas, drained and rinsed
- 2 large red bell peppers
- 1/4 cup tahini
- 2 cloves garlic, minced
- 3 tablespoons lemon juice
- 2 tablespoons olive oil
- 1 teaspoon ground cumin
- 1 teaspoon salt
- 1/4 teaspoon cayenne pepper (optional)
- 2 tablespoons water
- Fresh parsley for garnish
Instructions:
- Roast the Red Peppers: Preheat your oven to 450°F (232°C). Place the red bell peppers on a baking sheet lined with foil. Roast them for about 20-25 minutes, turning occasionally, until the skin is charred and blistered. Remove from the oven and place in a bowl, covering with plastic wrap or a lid to let them steam for about 10 minutes. This helps loosen the skin.
- Prepare the Peppers: Once cooled, peel off the charred skin from the peppers and remove the seeds and stems. Chop the peppers into smaller pieces to make them easier to blend.
- Blend the Ingredients: In a food processor, combine the chickpeas, roasted red peppers, tahini, minced garlic, lemon juice, olive oil, cumin, salt, and cayenne pepper if using. Blend until smooth. If the mixture is too thick, add the water a tablespoon at a time until you reach your desired consistency.
- Adjust Seasoning: Taste the hummus and adjust the seasoning if needed, adding more salt, lemon juice, or cayenne pepper according to your preference.
- Serve: Transfer the hummus to a serving bowl and garnish with fresh parsley. Drizzle with a little extra olive oil if desired. Serve with pita bread, fresh vegetables, or your choice of dippers.
Extra Tips:
When making Roasted Red Pepper Hummus, it’s important to verify that the chickpeas are well-drained to prevent excess liquid from thinning the hummus.
For an even creamier texture, you can peel the chickpeas before blending, although it’s not necessary. Feel free to experiment with additional spices like smoked paprika or paprika for an extra kick of flavor.
If you prefer a milder flavor, you can omit the cayenne pepper. Roasted Red Pepper Hummus can be made ahead of time and stored in an airtight container in the refrigerator for up to a week, making it a convenient option for busy holiday preparations.
Deviled Eggs With a Twist

Deviled eggs are a classic appetizer often found at holiday gatherings, and with a little creativity, they can become an unexpected delight on your Christmas table. This recipe introduces a playful twist to the traditional deviled eggs by incorporating a blend of tangy mustard, sweet relish, and a hint of paprika. The addition of crispy bacon bits and fresh chives not only elevates the flavor profile but also adds a delightful texture and color to the dish.
Whether you’re hosting a festive dinner or attending a potluck, these deviled eggs with a twist are sure to impress your guests and leave them asking for more. Creating this scrumptious appetizer is surprisingly easy and requires only a few ingredients. The creamy yolk filling is perfectly balanced with the right amount of seasoning, making these deviled eggs a standout dish among the holiday spread.
With a serving size of 4-6 people, this recipe allows you to prepare a generous portion that can be easily scaled up for larger gatherings. Let’s explore the ingredients and steps needed to make these delicious deviled eggs with a twist.
Ingredients (Serves 4-6):
- 6 large eggs
- 3 tablespoons mayonnaise
- 1 tablespoon Dijon mustard
- 1 tablespoon sweet pickle relish
- 1 teaspoon white vinegar
- Salt and pepper, to taste
- 2 strips of bacon, cooked and crumbled
- 1 tablespoon fresh chives, finely chopped
- Paprika, for garnish
Cooking Instructions:
- Boil the Eggs: Place the eggs in a saucepan and cover them with cold water. Bring the water to a boil over medium-high heat. Once boiling, cover the saucepan with a lid and remove it from the heat. Let the eggs sit in the hot water for 10-12 minutes.
- Prepare the Filling: While the eggs are cooking, prepare the bacon by cooking it in a skillet over medium heat until crisp. Remove the bacon from the skillet and let it cool on a paper towel-lined plate. Once cooled, crumble the bacon into small pieces.
- Peel the Eggs: After the eggs have finished cooking, drain the hot water and transfer the eggs to a bowl of ice water to cool for about 5 minutes. Once cooled, gently tap the eggs on a hard surface to crack the shells and peel them carefully.
- Make the Filling: Slice each egg in half lengthwise and remove the yolks, placing them in a small mixing bowl. Add mayonnaise, Dijon mustard, sweet pickle relish, and white vinegar to the yolks. Mash and mix until smooth. Season with salt and pepper to taste.
- Assemble the Eggs: Spoon or pipe the yolk mixture back into the egg whites. Garnish each deviled egg with a sprinkle of crumbled bacon, fresh chives, and a dash of paprika.
- Chill and Serve: Arrange the deviled eggs on a serving platter and refrigerate for at least 30 minutes before serving to allow the flavors to meld and the eggs to chill.
Extra Tips:
For the best results, use eggs that are a few days old, as they tend to peel more easily than fresh eggs. If you prefer a smoother filling, use a food processor to blend the yolk mixture. For a spicier version, consider adding a dash of hot sauce or a pinch of cayenne pepper to the yolk mixture.
To guarantee your deviled eggs stay upright on the platter, slice a small piece off the bottom of each egg white half to create a flat surface. Enjoy these tasty deviled eggs with a twist as a delightful addition to any holiday celebration!
Holiday Charcuterie Board
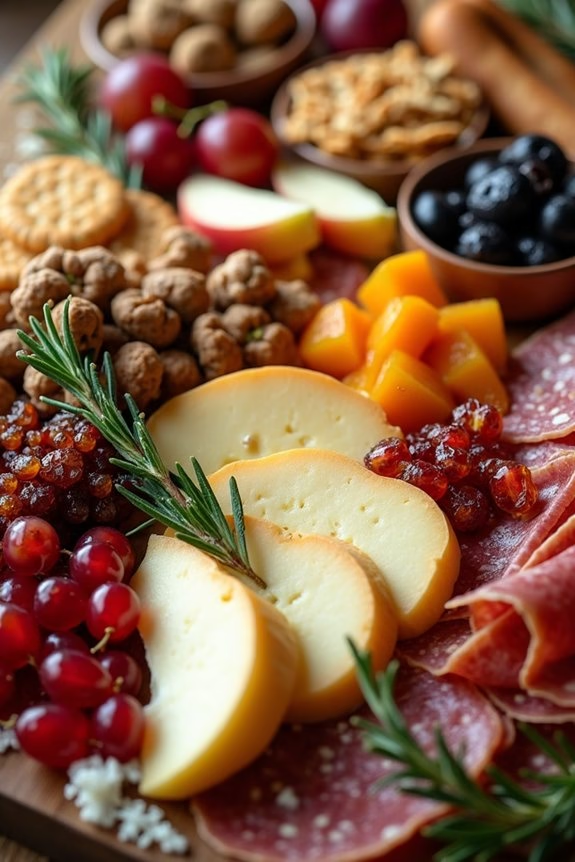
A Holiday Charcuterie Board is a festive and visually stunning appetizer that’s perfect for celebrating the Christmas season. It’s an artful assembly of a variety of meats, cheeses, fruits, nuts, and other delectable items that cater to a wide range of tastes. This board isn’t only a feast for the taste buds but also a delight for the eyes, with its vibrant colors and diverse textures.
Whether hosting a small gathering or a larger holiday party, this charcuterie board is guaranteed to impress your guests and bring a touch of elegance to your table.
The beauty of a charcuterie board lies in its versatility and the creative freedom it allows. You can personalize it with your favorite ingredients, and it can be effortlessly tailored to suit dietary preferences and restrictions. Preparing a Holiday Charcuterie Board involves thoughtfully selecting and arranging ingredients to create a harmonious balance of flavors and aesthetics.
The key is to include a variety of cured meats, cheeses, fresh and dried fruits, nuts, and accompaniments like olives, jams, and honey. With the right selection, your charcuterie board will be the highlight of your holiday feast.
Ingredients for 4-6 people:
- 6 ounces of prosciutto
- 6 ounces of salami
- 6 ounces of chorizo
- 8 ounces of assorted cheeses (cheddar, brie, goat cheese)
- 1 cup of mixed nuts (almonds, walnuts, pistachios)
- 1 cup of mixed olives
- 1 cup of dried fruits (apricots, figs, cranberries)
- 2 cups of fresh fruits (grapes, apple slices, pomegranate seeds)
- 2 tablespoons of honey
- 1/2 cup of fruit preserves or jam
- Assorted crackers and breadsticks
- Fresh rosemary sprigs for garnish
Instructions:
- Select a Board: Choose a large, flat surface such as a wooden cutting board, marble slab, or a large platter to assemble your charcuterie board. Make sure it’s clean and dry.
- Arrange the Cheeses: Begin by placing the cheeses on different areas of the board. Cut some into cubes or slices for easy serving, while leaving others whole for a more rustic look. This helps create a visual anchor.
- Add the Meats: Fold or roll the slices of prosciutto, salami, and chorizo, and place them in small clusters around the cheeses. This adds texture and makes it easy for guests to pick up.
- Include the Fruits: Distribute the fresh and dried fruits randomly across the board. The vibrant colors of grapes, apple slices, and pomegranate seeds will add a festive touch.
- Scatter the Nuts and Olives: Fill in gaps with mixed nuts and olives. These small items can be used to fill empty spaces and add variety to the board.
- Add Sweet Elements: Place small bowls or ramekins on the board and fill them with honey and fruit preserves. These can be paired with cheeses for a sweet and savory combination.
- Arrange Crackers and Breadsticks: Lay out an assortment of crackers and breadsticks along the edges of the board or in small piles for easy access.
- Garnish and Serve: Finally, garnish the board with fresh rosemary sprigs for an aromatic touch. Serve immediately or cover and refrigerate for up to an hour before serving.
Extra Tips:
When creating your Holiday Charcuterie Board, think about incorporating a range of textures and flavors, such as creamy, crunchy, sweet, and savory. Opt for a variety of cheese types, such as soft, semi-soft, and hard, to cater to different preferences.
Consider labeling some items if your guests are unfamiliar with certain ingredients. Additionally, make certain you have small serving utensils available, such as cheese knives and small tongs, to keep the presentation neat. This allows guests to effortlessly build their own plates while maintaining the board’s aesthetic appeal.

