
As I plan my Christmas dinner, I can’t help but feel excited about sharing these 13 delightful recipes that radiate joy and warmth. From the classic roast turkey with herb butter to the sweetly glazed ham with pineapple, each dish is a celebration in itself. I’m thrilled to pass on these cherished recipes that have been the highlight of my holiday gatherings. Ready to discover the perfect menu to make your Christmas truly magical?
Classic Roast Turkey With Herb Butter
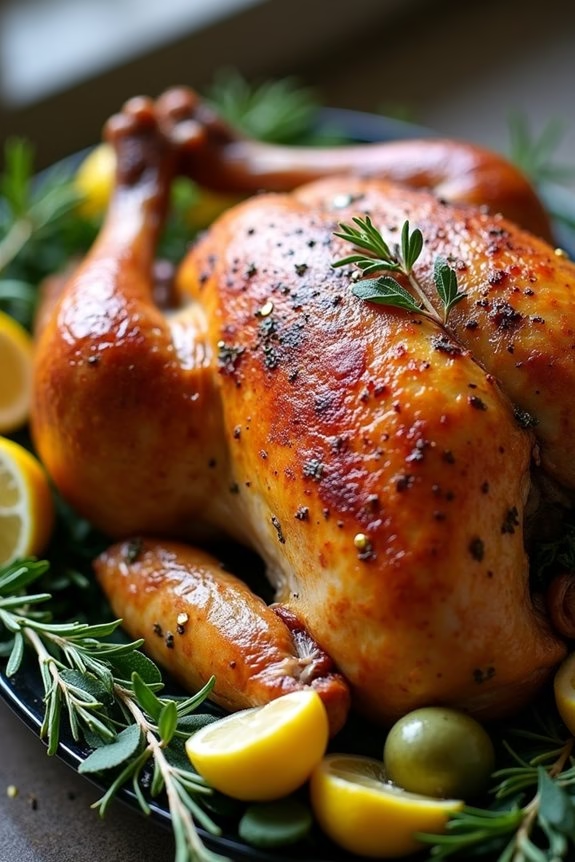
Classic Roast Turkey With Herb Butter is a timeless centerpiece for any holiday feast. This dish embodies the essence of Christmas with its aromatic blend of herbs and the rich, succulent meat of a perfectly roasted turkey. The herb butter infuses the turkey with flavors that are both comforting and festive, creating a culinary experience that will delight your family and guests.
Whether you’re hosting a large gathering or an intimate dinner, this roast turkey promises to be the highlight of your holiday table.
Roasting a turkey to perfection requires attention to detail and a bit of patience, but the results are more than worth it. By using a combination of fresh herbs and butter, you achieve a moist and flavorful turkey with golden, crispy skin. This recipe serves 4-6 people, making it ideal for a family gathering or a small holiday party.
Let’s explore the ingredients and steps to create this delightful dish.
Ingredients for Classic Roast Turkey With Herb Butter (serving size: 4-6 people):
- 1 whole turkey (8-10 pounds)
- 1 cup unsalted butter, softened
- 1 tablespoon fresh rosemary, minced
- 1 tablespoon fresh thyme, minced
- 1 tablespoon fresh sage, minced
- 4 cloves garlic, minced
- Salt and pepper to taste
- 1 lemon, halved
- 1 onion, quartered
- 2 cups chicken broth
Cooking Instructions:
- Prepare the Herb Butter: In a mixing bowl, combine the softened butter, minced rosemary, thyme, sage, and garlic. Mix until the herbs are evenly distributed throughout the butter.
- Preheat the Oven: Preheat your oven to 325°F (165°C). This will guarantee your turkey cooks evenly and retains its moisture.
- Prepare the Turkey: Remove the turkey from its packaging, and remove the giblets and neck from the cavity. Pat the turkey dry with paper towels, both inside and out.
- Season the Turkey: Gently loosen the skin over the turkey breast by sliding your fingers between the skin and breast meat. Spread half of the herb butter under the skin, massaging it gently to distribute the butter evenly. Rub the remaining herb butter over the entire surface of the turkey. Season generously with salt and pepper.
- Stuff the Turkey: Place the lemon halves and onion quarters inside the cavity of the turkey. This will add flavor and aroma to the meat as it roasts.
- Roast the Turkey: Place the turkey on a rack in a roasting pan. Pour the chicken broth into the bottom of the pan to keep the turkey moist. Roast in the preheated oven, basting occasionally with pan juices, until the internal temperature reaches 165°F (74°C) in the thickest part of the thigh, approximately 3 to 3.5 hours.
- Rest the Turkey: Once cooked, remove the turkey from the oven and let it rest for at least 20-30 minutes before carving. This allows the juices to redistribute, guaranteeing a moist and tender turkey.
Extra Tips: For an even more flavorful turkey, consider preparing the herb butter a day in advance and allowing the turkey to marinate with the butter in the refrigerator overnight.
Be sure to bring the turkey to room temperature before roasting to guarantee even cooking. If you prefer a darker, crisper skin, increase the oven temperature to 375°F (190°C) during the last 30 minutes of roasting. Remember to regularly check the internal temperature with a meat thermometer to prevent overcooking.
Honey Glazed Ham With Pineapple
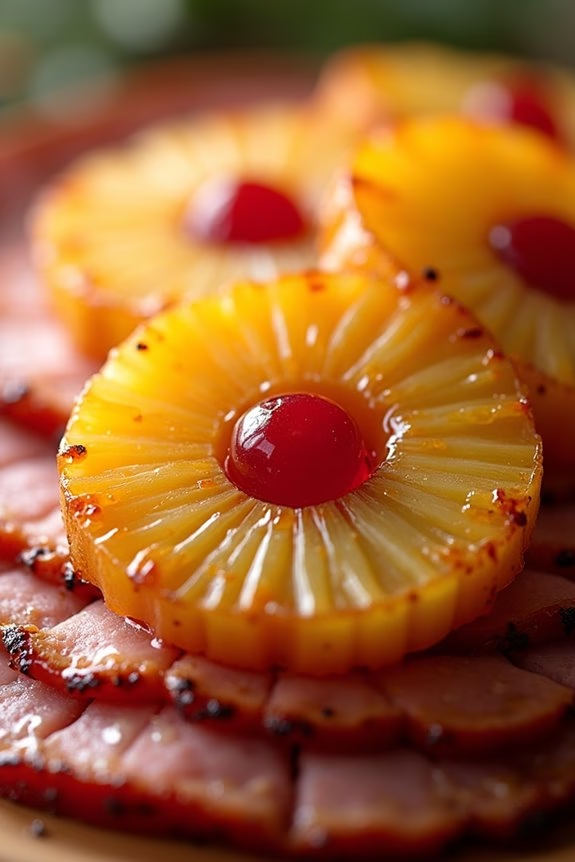
Indulge in the festive spirit with a delectable Honey Glazed Ham With Pineapple that promises to be the showstopper of your Christmas dinner. This classic holiday dish combines the savory richness of ham with the sweet, tangy burst of pineapple, all enveloped in a luscious honey glaze.
Whether you’re hosting an intimate gathering or a joyous family feast, this dish is sure to warm hearts and create memorable moments around the dining table. The harmonious blend of flavors in this Honey Glazed Ham makes it a versatile centerpiece that pairs beautifully with an array of side dishes.
The caramelized pineapple rings not only add a delightful contrast in taste, but also serve as a vibrant garnish that elevates the dish’s presentation. Perfectly suited for a serving size of 4-6 people, this recipe guarantees everyone gets to enjoy a slice of holiday cheer.
Ingredients (for 4-6 servings):
- 1 (5-7 lb) bone-in fully cooked ham
- 1 cup honey
- 1/2 cup brown sugar
- 1/4 cup Dijon mustard
- 1/2 cup pineapple juice
- 1/4 cup apple cider vinegar
- 1 teaspoon ground cloves
- 1 can (20 oz) pineapple slices
- Whole cloves (optional for garnish)
- Maraschino cherries (optional for garnish)
Cooking Instructions:
- Preheat the Oven: Preheat your oven to 325°F (165°C) to confirm it’s ready for the ham.
- Prepare the Ham: Remove the ham from its packaging and place it on a rack in a roasting pan. Score the surface of the ham in a crisscross pattern, about 1/4 inch deep, to allow the glaze to penetrate.
- Make the Glaze: In a medium saucepan, combine the honey, brown sugar, Dijon mustard, pineapple juice, apple cider vinegar, and ground cloves. Heat the mixture over medium heat, stirring frequently until the sugar dissolves and the glaze is smooth.
- Apply the Glaze: Brush half of the prepared glaze over the ham, confirming it gets into the scored cuts. Reserve the remaining glaze for later.
- Decorate with Pineapples: Arrange the pineapple slices over the surface of the ham, securing them with toothpicks if needed. If using whole cloves or maraschino cherries, place them in the center of each pineapple ring for added flavor and presentation.
- Roast the Ham: Place the ham in the preheated oven and bake for about 1.5 to 2 hours, basting it with the reserved glaze every 20-30 minutes. Keep an eye on the ham to confirm it doesn’t dry out or burn.
- Check for Doneness: The ham is ready when it reaches an internal temperature of 140°F (60°C). Use a meat thermometer to check for accuracy.
- Rest and Serve: Remove the ham from the oven and let it rest for 10-15 minutes before carving. This allows the juices to redistribute, keeping the meat moist.
Extra Tips: To enhance the ham’s flavor, consider marinating it in a mixture of pineapple juice and honey overnight before cooking. If you prefer a more pronounced caramelization, broil the ham for the last few minutes of cooking, but keep a close watch to prevent burning.
For those who enjoy a bit of spice, add a pinch of cayenne pepper to the glaze. Leftover ham can be stored in the refrigerator for up to 3 days or frozen for longer preservation. Enjoy the festive flavors and happy holidays!
Prime Rib With Garlic and Rosemary
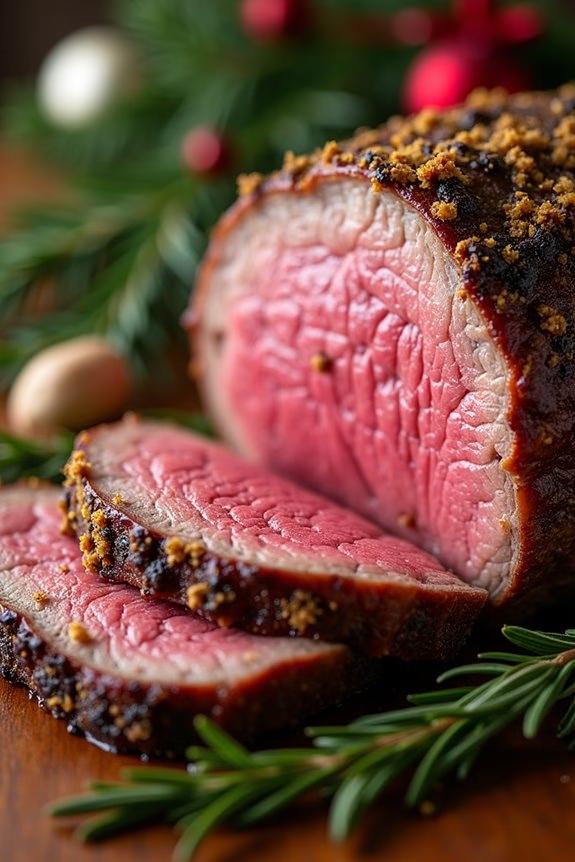
Prime Rib with Garlic and Rosemary is a classic holiday dish that brings a touch of elegance and warmth to any Christmas dinner. This succulent roast is revered for its rich flavor and tender texture, making it a centerpiece worthy of festive gatherings. The combination of garlic and rosemary infuses the meat with an aromatic depth, while the prime rib itself offers a melt-in-your-mouth experience that’s bound to impress your family and friends.
Preparing Prime Rib with Garlic and Rosemary for 4-6 people involves selecting a high-quality cut of beef and allowing it to absorb the flavors of the herbs and garlic. This dish requires some time and patience, but the end result is well worth the effort. By following the steps below, you can create a memorable meal that will leave your guests enthusiastic about the next holiday season.
Ingredients (for 4-6 servings):
- 1 (4-5 pounds) bone-in prime rib roast
- 4 cloves garlic, minced
- 2 tablespoons fresh rosemary, chopped
- 2 tablespoons olive oil
- 1 teaspoon sea salt
- 1 teaspoon black pepper
- 1 cup beef broth or red wine (optional, for deglazing)
Cooking Instructions:
- Preparation: Remove the prime rib from the refrigerator at least 3 hours before cooking to allow it to reach room temperature. This helps guarantee even cooking throughout the roast.
- Preheat the Oven: Set your oven to 450°F (230°C).
- Season the Roast: In a small bowl, mix the minced garlic, chopped rosemary, olive oil, sea salt, and black pepper. Rub this mixture evenly over the entire surface of the prime rib, making certain that the flavors penetrate the meat.
- Roast the Meat: Place the prime rib on a roasting rack inside a roasting pan, bone side down. Insert a meat thermometer into the thickest part of the roast, avoiding the bone. Roast in the preheated oven for 20 minutes to create a flavorful crust.
- Adjust Heat and Continue Roasting: Reduce the oven temperature to 325°F (165°C) and continue roasting until the thermometer reads 120°F (49°C) for medium-rare, about 1.5 to 2 hours. Adjust cooking time based on your preferred level of doneness (125°F/52°C for medium).
- Rest the Meat: Remove the roast from the oven and transfer it to a cutting board. Tent it loosely with aluminum foil and let it rest for at least 20-30 minutes. This allows the juices to redistribute, making the meat more tender and juicy.
- Optional Deglazing: If desired, use the drippings in the roasting pan to make a simple sauce. Place the pan over medium heat on the stovetop, add beef broth or red wine, and scrape up the browned bits. Simmer until slightly reduced, then strain before serving.
- Carve and Serve: Slice the prime rib against the grain into thick slices and serve with your choice of side dishes, such as roasted vegetables or mashed potatoes.
Extra Tips:
For the best results, always use a meat thermometer to check the internal temperature of the prime rib. This guarantees that the roast reaches your desired level of doneness without overcooking.
Additionally, consider dry-aging your prime rib in the refrigerator for up to 3 days prior to cooking. This technique intensifies the flavor and enhances tenderness.
Finally, remember that resting the meat is essential, as it allows the juices to settle and prevents them from spilling out when you carve the roast.
Enjoy your delectable Prime Rib with Garlic and Rosemary, a dish that embodies the spirit of the holiday season.
Festive Stuffed Pork Loin
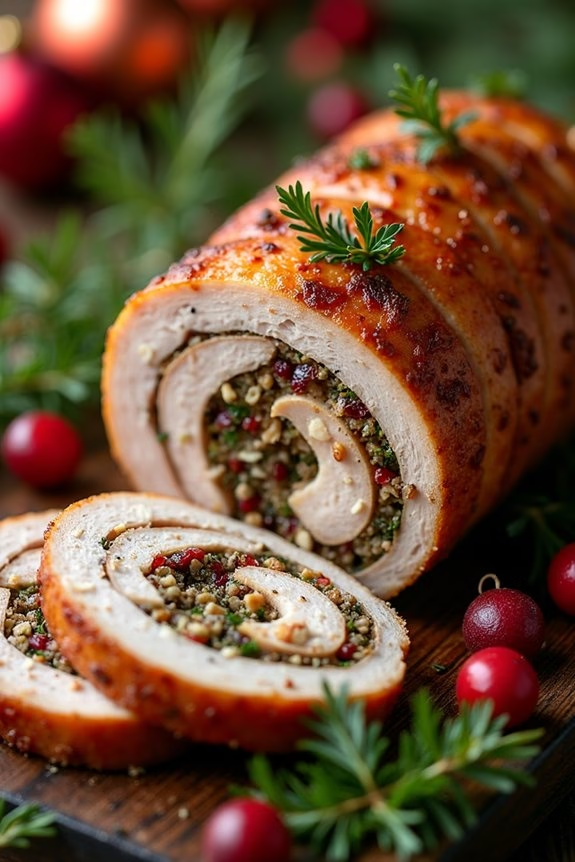
The Festive Stuffed Pork Loin is a delicious centerpiece for any Christmas dinner. This dish combines the savory flavors of roasted pork with a delightful stuffing that incorporates seasonal ingredients, bringing warmth and joy to your holiday table. A perfect choice for those who seek an elegant yet hearty meal, this recipe guarantees that the pork remains juicy and flavorful while the stuffing adds a burst of taste in every bite.
This recipe serves 4-6 people, making it ideal for family gatherings or intimate holiday parties. The stuffing is a harmonious blend of herbs, fruits, and nuts, which complement the rich flavor of the pork. With its festive presentation and decadent taste, the Festive Stuffed Pork Loin is sure to impress your guests and create lasting holiday memories.
Ingredients:
- 1 (3-4 pound) boneless pork loin
- 2 tablespoons olive oil
- Salt and pepper to taste
- 1 cup fresh breadcrumbs
- 1/2 cup dried cranberries
- 1/2 cup chopped walnuts
- 1/2 cup chopped fresh parsley
- 1 small onion, finely chopped
- 2 cloves garlic, minced
- 1/2 cup chicken broth
- 1 tablespoon fresh thyme leaves
- 1 tablespoon Dijon mustard
Cooking Instructions:
- Prepare the Pork Loin: Preheat your oven to 375°F (190°C). Lay the pork loin on a clean cutting board and carefully slice it horizontally, stopping about 1 inch from the other side. Open the loin like a book and flatten it gently with a meat mallet to an even thickness.
- Season the Pork: Rub the pork loin all over with olive oil, then season generously with salt and pepper. Set aside.
- Make the Stuffing: In a large mixing bowl, combine the breadcrumbs, dried cranberries, walnuts, parsley, onion, garlic, chicken broth, thyme, and Dijon mustard. Mix until the ingredients are well combined and the stuffing holds together.
- Stuff the Pork Loin: Spread the stuffing mixture evenly over the inside of the pork loin. Roll the pork tightly from one end to the other and secure it with kitchen twine at 2-inch intervals to hold the stuffing in place.
- Sear the Pork Loin: Heat a large ovenproof skillet over medium-high heat. Sear the pork loin on all sides until golden brown, about 3-4 minutes per side.
- Roast the Pork Loin: Transfer the skillet to the preheated oven. Roast for 45-60 minutes, or until an internal temperature of 145°F (63°C) is reached.
- Rest and Serve: Remove the pork loin from the oven and let it rest for 10 minutes before slicing. This allows the juices to redistribute, guaranteeing a moist and flavorful dish. Slice and serve with your favorite holiday sides.
Extra Tips:
To guarantee your Festive Stuffed Pork Loin turns out perfectly, make sure not to overstuff the pork as this can cause the stuffing to spill out during cooking. If you find the stuffing is too loose, add a bit more chicken broth for moisture.
For added flavor, consider marinating the pork loin overnight with your favorite herbs and spices. Finally, using an instant-read thermometer will help you achieve the perfect doneness without overcooking the pork.
Baked Salmon With Dill and Lemon
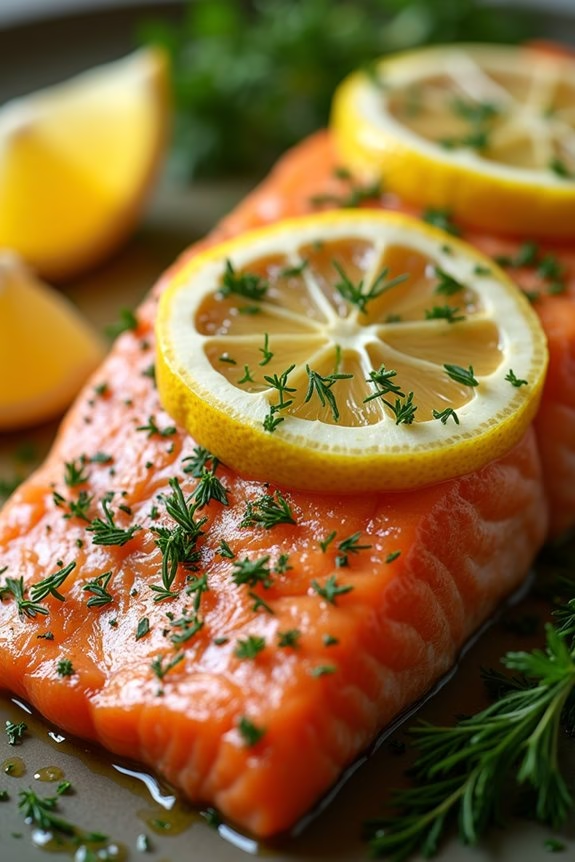
Baked Salmon With Dill and Lemon is a simple yet elegant dish perfect for a holiday Christmas dinner. This flavorful recipe combines the rich taste of salmon with the fresh and aromatic flavors of dill and lemon, resulting in a meal that’s both healthy and delicious. The preparation is straightforward, making it an excellent choice for both seasoned chefs and beginners looking to impress their guests with a sophisticated dish.
This recipe is designed to serve 4-6 people, making it ideal for a small family gathering or intimate dinner party. The salmon is baked to perfection, guaranteeing it’s moist and tender, while the dill and lemon infuse the fish with a reviving aroma. Serve this dish with your favorite sides, such as roasted vegetables or a fresh salad, to complete your holiday feast.
Ingredients:
- 2 lbs salmon fillet
- 2 tablespoons olive oil
- 1 lemon, thinly sliced
- 3 tablespoons fresh dill, chopped
- 2 cloves garlic, minced
- Salt, to taste
- Black pepper, to taste
- 1 tablespoon butter
- 1/4 cup white wine (optional)
Cooking Instructions:
- Preheat the Oven: Begin by preheating your oven to 375°F (190°C). This guarantees that the oven is at the right temperature when you’re ready to bake the salmon, allowing for even cooking.
- Prepare the Baking Dish: Lightly grease a baking dish with olive oil to prevent the salmon from sticking. You can also line the dish with parchment paper for easier cleanup.
- Season the Salmon: Place the salmon fillet in the baking dish, skin-side down. Drizzle olive oil over the top of the fish. Season generously with salt and black pepper. Spread the minced garlic evenly over the salmon.
- Add Lemon and Dill: Arrange the lemon slices on top of the salmon. Sprinkle the chopped dill over the fish, guaranteeing even coverage to infuse the salmon with its fresh flavor.
- Add Butter and Wine: Dot the salmon with small pieces of butter. If using, pour the white wine around the salmon in the baking dish. The butter will add richness, while the wine contributes a subtle depth of flavor.
- Bake the Salmon: Cover the baking dish with foil and place it in the preheated oven. Bake for about 20-25 minutes, or until the salmon is cooked through and flakes easily with a fork. The internal temperature should reach 145°F (63°C).
- Serve: Remove the salmon from the oven and let it rest for a few minutes before serving. This allows the juices to redistribute, keeping the fish moist and flavorful. Serve with your choice of side dishes.
Extra Tips:
When selecting salmon, opt for a fresh, high-quality fillet for the best results. If possible, choose wild-caught salmon for a richer flavor.
When baking, make sure to not overcook the fish, as it can become dry. If you’re not a fan of white wine, you can substitute with vegetable broth for a non-alcoholic option that still adds depth to the dish.
Additionally, you can garnish the finished dish with extra dill or a few lemon wedges for a final touch of revival and color.
Vegetarian Nut Roast With Cranberry Sauce
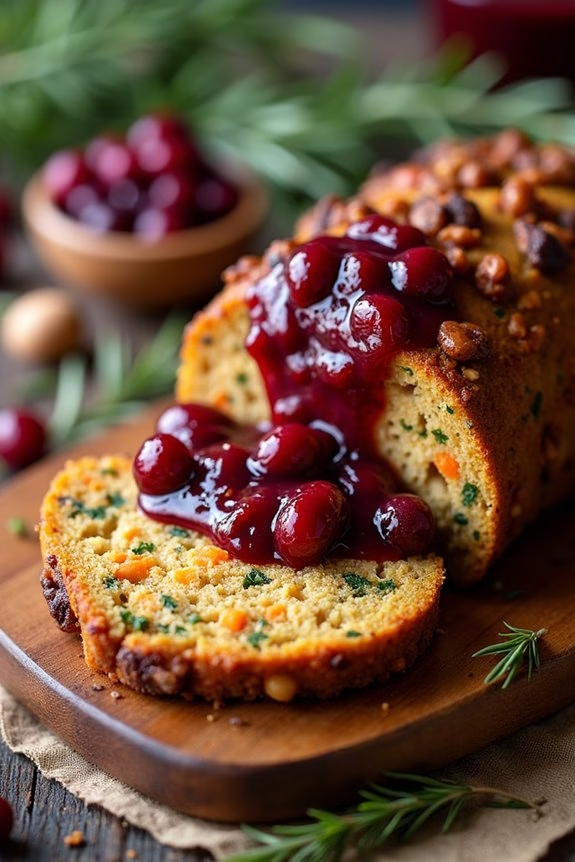
Vegetarian Nut Roast With Cranberry Sauce is a delightful and hearty dish that’s perfect for a festive Christmas dinner. This nut roast is a savory combination of nuts, vegetables, and herbs that come together beautifully to create a rich and flavorful loaf. The addition of a tangy cranberry sauce not only complements the nutty flavors but also adds a festive touch, making it a centerpiece-worthy dish for both vegetarians and meat-eaters alike.
A nut roast is an excellent alternative for those looking to enjoy a filling and nutritious meal without meat. It’s packed with proteins and healthy fats from the nuts, while the vegetables provide essential vitamins and a burst of color. The homemade cranberry sauce is a quick and easy way to add some zest and sweetness, balancing the savory elements of the roast.
Here’s how you can prepare this delicious dish for a serving size of 4-6 people:
Ingredients:
- 1 cup mixed nuts (such as walnuts, almonds, and cashews)
- 1 tablespoon olive oil
- 1 onion, finely chopped
- 2 cloves garlic, minced
- 1 carrot, grated
- 1 zucchini, grated
- 1 cup breadcrumbs
- 1/2 cup cooked lentils
- 2 tablespoons soy sauce or tamari
- 1 tablespoon tomato paste
- 1 teaspoon dried thyme
- 1 teaspoon dried rosemary
- Salt and pepper to taste
- 1/2 cup fresh or frozen cranberries
- 1/4 cup sugar
- 1/4 cup water
- 1 tablespoon orange juice
Cooking Instructions:
- Preheat the Oven and Prepare the Nuts: Preheat your oven to 350°F (175°C). Spread the mixed nuts onto a baking sheet and toast them in the oven for about 10 minutes until they’re golden brown and fragrant. Once cooled, roughly chop the nuts.
- Sauté the Vegetables: Heat the olive oil in a large skillet over medium heat. Add the chopped onion and garlic, sautéing until the onion is translucent. Stir in the grated carrot and zucchini, cooking for another 5 minutes until the vegetables are softened.
- Combine Ingredients: In a large mixing bowl, combine the sautéed vegetables, chopped nuts, breadcrumbs, cooked lentils, soy sauce, tomato paste, thyme, rosemary, salt, and pepper. Mix until all ingredients are well incorporated and the mixture holds together.
- Shape and Bake the Nut Roast: Line a loaf pan with parchment paper. Transfer the nut mixture into the loaf pan, pressing it down firmly and evenly. Bake in the preheated oven for 45-50 minutes or until the top is golden brown and the loaf is firm to touch.
- Prepare the Cranberry Sauce: While the nut roast is baking, prepare the cranberry sauce. In a small saucepan, combine the cranberries, sugar, water, and orange juice. Bring to a boil over medium heat, then reduce the heat and simmer for about 10 minutes, or until the cranberries have burst and the sauce has thickened.
- Serve: Let the nut roast cool for a few minutes before slicing. Serve with a generous spoonful of cranberry sauce on top or on the side.
Extra Tips:
For best results, make sure the nuts are well-toasted, as this enhances their flavor and adds a nice crunch to the roast. You can also add your favorite herbs or spices to the mix for a personalized touch. If the mixture seems too dry, a splash of vegetable broth can help bind it.
Finally, for an even richer taste, consider adding a handful of grated cheese to the nut mixture before baking. Enjoy your festive meal!
Creamy Mashed Potatoes With Chives
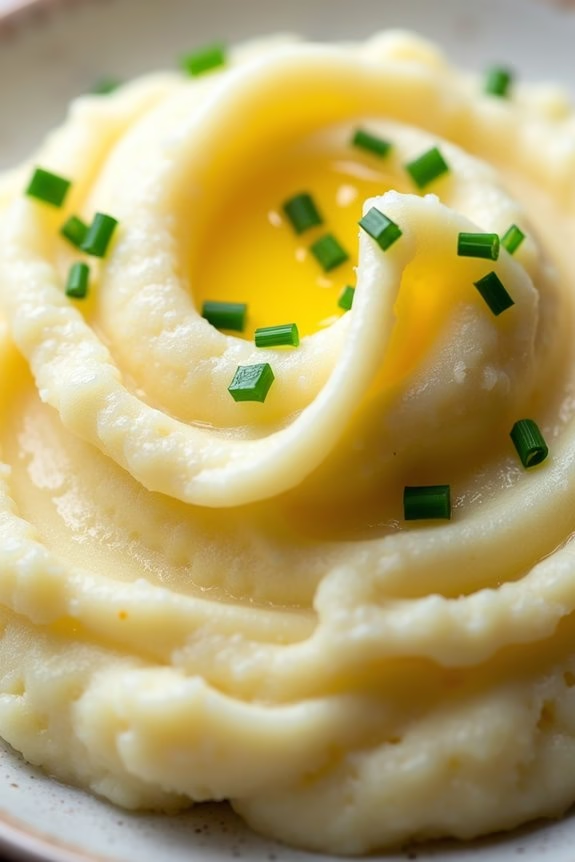
Creamy Mashed Potatoes With Chives is a comforting and classic side dish that perfectly complements any holiday meal. This recipe elevates traditional mashed potatoes by incorporating rich creaminess and the fresh, mild flavor of chives. The result is a smooth, velvety texture with a subtle onion-like taste that pairs beautifully with roast meats, gravy, or any festive main course.
Whether you’re hosting a holiday dinner or simply enjoying a cozy family meal, these mashed potatoes will bring warmth and delight to your table.
This dish is designed to serve 4-6 people, making it an ideal choice for intimate gatherings or larger family celebrations. The key to perfect mashed potatoes lies in the balance of flavors and achieving the right consistency. By carefully selecting the right type of potatoes and using fresh ingredients, you can guarantee that your mashed potatoes are creamy, flavorful, and irresistible.
Ingredients:
- 3 pounds of Yukon Gold potatoes
- 1 cup of heavy cream
- 4 tablespoons of unsalted butter
- 1/4 cup of fresh chives, chopped
- Salt to taste
- Pepper to taste
Instructions:
- Prepare the Potatoes: Peel the Yukon Gold potatoes and cut them into evenly-sized chunks. This guarantees they cook evenly. Place the potato chunks into a large pot and fill it with cold water until the potatoes are fully submerged.
- Cook the Potatoes: Add a generous pinch of salt to the pot and bring the water to a boil over high heat. Once boiling, reduce the heat to medium and let the potatoes simmer for about 15-20 minutes, or until they’re fork-tender.
- Heat the Cream and Butter: While the potatoes are cooking, combine the heavy cream and unsalted butter in a small saucepan. Heat over low heat until the butter has melted and the mixture is warm. Be careful not to boil.
- Drain and Mash: Once the potatoes are cooked, drain them thoroughly and return them to the pot. Allow them to sit for a minute to let excess moisture evaporate. Begin mashing the potatoes with a potato masher until they reach your desired consistency.
- Incorporate the Cream Mixture: Gradually add the warm cream and butter mixture to the mashed potatoes, stirring continuously until well combined. Adjust the consistency by adding more cream if needed.
- Season and Add Chives: Season the mashed potatoes with salt and pepper to taste. Finally, fold in the chopped chives, making sure they’re evenly distributed throughout the dish.
Extra Tips:
To achieve the creamiest mashed potatoes, it’s essential to use Yukon Gold potatoes as they naturally have a buttery flavor and smooth texture.
Make sure to start cooking the potatoes in cold water to guarantee they cook evenly from the outside in. Avoid over-mixing the potatoes once the cream and butter are added, as this can result in a gluey texture.
Finally, for an extra touch of flavor, consider adding roasted garlic or a sprinkle of parmesan cheese right before serving.
Garlic Butter Green Beans With Almonds
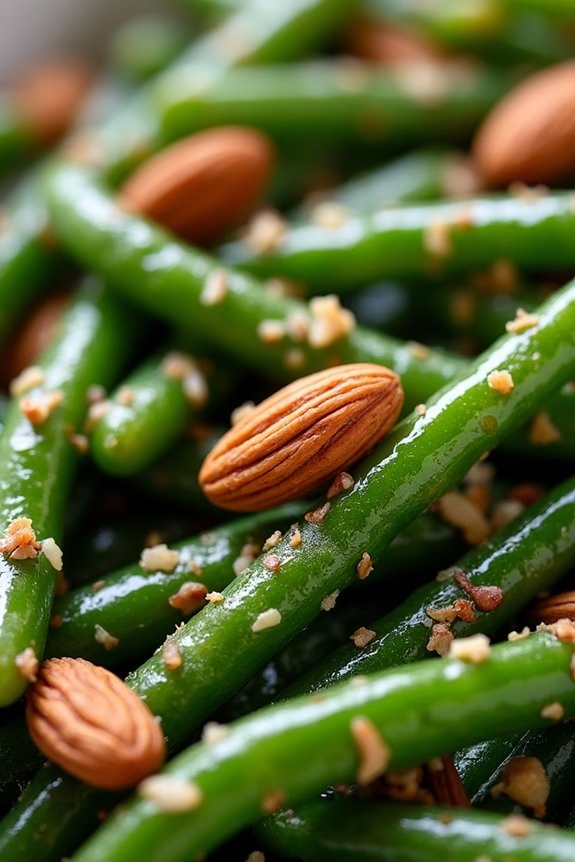
Garlic Butter Green Beans With Almonds is a delightful side dish that pairs wonderfully with any holiday meal. The vibrant green beans, lightly sautéed in garlic-infused butter, offer a crisp texture and a savory flavor that complements the nutty richness of toasted almonds. This dish not only adds a splash of color to your Christmas dinner table but also brings a burst of flavor that’s both simple and elegant.
Whether you’re serving it alongside a succulent roast or as part of a vegetarian spread, these green beans are sure to be a crowd-pleaser. Elevating the humble green bean to new heights, this recipe is all about enhancing its natural flavor while adding a bit of holiday flair.
The key to its success lies in the balance of textures and tastes: the tender-crisp beans, the crunch of almonds, and the aromatic notes of garlic and butter. It’s a quick and easy dish that can be prepared in under 20 minutes, making it an ideal choice for a busy holiday season. With just a few ingredients, you can create a dish that’s as beautiful as it’s delicious.
Ingredients for 4-6 servings:
- 1 pound fresh green beans, trimmed
- 3 tablespoons unsalted butter
- 3 cloves garlic, minced
- 1/3 cup sliced almonds
- Salt and pepper to taste
- 1 tablespoon lemon juice (optional)
Cooking Instructions:
- Prepare the Green Beans: Start by washing and trimming the green beans. Remove any tough ends and verify they’re of uniform size for even cooking.
- Blanch the Green Beans: Bring a large pot of salted water to a boil. Add the green beans and cook for about 3 minutes, until they’re bright green and slightly tender. Immediately transfer them to a bowl of ice water to stop the cooking process and preserve their vibrant color.
- Toast the Almonds: In a large skillet over medium heat, add the sliced almonds. Toast them gently, stirring frequently, until they’re golden brown and fragrant. This should take about 3-5 minutes. Remove them from the skillet and set aside.
- Sauté the Garlic: In the same skillet, melt the butter over medium heat. Add the minced garlic and sauté for about 1-2 minutes until it becomes fragrant and lightly golden, being careful not to burn it.
- Combine and Season: Drain the green beans and add them to the skillet with the garlic butter. Toss them to coat evenly. Season with salt and pepper to taste. Cook for another 2-3 minutes until the green beans are heated through and tender-crisp.
- Finish the Dish: Add the toasted almonds to the skillet and toss everything together. If desired, drizzle with lemon juice for an added burst of freshness. Serve immediately for the best texture and flavor.
Extra Tips: For a more pronounced garlic flavor, consider letting the garlic sit in the melted butter for a few extra minutes before adding the green beans. If you prefer a spicier dish, a pinch of red pepper flakes can be added alongside the garlic.
For convenience, the green beans can be blanched a day in advance and stored in the refrigerator, allowing you to quickly finish the dish just before serving. Remember that the key to this dish isn’t overcooking the green beans; they should remain crisp and vibrant.
Sweet Potato Casserole With Marshmallow Topping

Sweet Potato Casserole with Marshmallow Topping is a quintessential holiday dish that brings warmth and sweetness to any Christmas dinner table. This delightful casserole combines the natural sweetness of sweet potatoes with a gooey marshmallow topping, creating a dessert-like side dish that both adults and children will love.
The combination of creamy sweet potatoes and toasted marshmallows offers a perfect blend of textures and flavors, making it an irresistible addition to your festive menu.
For this recipe, you’ll start by preparing a luscious sweet potato base that’s smooth and rich in flavor. The sweet potatoes are cooked until tender and then mashed with a blend of butter, brown sugar, and aromatic spices like cinnamon and nutmeg. The final touch is a layer of fluffy marshmallows that are broiled to a golden brown, creating a caramelized topping that’s both beautiful and delicious.
This recipe serves 4-6 people, making it perfect for a small gathering or a larger spread with multiple dishes.
Ingredients:
- 4 large sweet potatoes (about 2 lbs)
- 1/2 cup unsalted butter, softened
- 1/2 cup brown sugar
- 1/4 cup milk
- 1 teaspoon vanilla extract
- 1/2 teaspoon ground cinnamon
- 1/4 teaspoon ground nutmeg
- 1/4 teaspoon salt
- 2 cups mini marshmallows
Instructions:
- Preheat the Oven: Begin by preheating your oven to 350°F (175°C), which will guarantee it’s ready for baking the casserole.
- Cook the Sweet Potatoes: Peel the sweet potatoes and cut them into large chunks. Place them in a large pot, cover with water, and bring to a boil. Cook for about 20 minutes or until the sweet potatoes are fork-tender.
- Mash the Sweet Potatoes: Drain the cooked sweet potatoes and transfer them to a large mixing bowl. Add the softened butter, brown sugar, milk, vanilla extract, cinnamon, nutmeg, and salt. Use a potato masher or electric mixer to blend everything until smooth and creamy.
- Assemble the Casserole: Transfer the mashed sweet potato mixture into a greased 9×13-inch baking dish, spreading it out evenly.
- Add the Marshmallow Topping: Evenly distribute the mini marshmallows over the top of the sweet potato mixture, covering it completely for a consistent browned top.
- Bake the Casserole: Place the assembled casserole in the preheated oven and bake for 25-30 minutes, or until the marshmallows are golden brown and the sweet potato mixture is heated through.
- Serve and Enjoy: Once baked, allow the casserole to cool for a few minutes before serving. This allows the marshmallow topping to slightly set, making it easier to cut and serve.
Extra Tips:
For an added crunch, consider sprinkling chopped pecans over the marshmallows before baking. This not only enhances the texture but also adds a nutty flavor that complements the sweetness of the dish.
If you prefer a less sweet casserole, adjust the amount of brown sugar to your taste. Additionally, keep a close eye on the marshmallows while they’re in the oven, as they can quickly go from golden brown to burnt. If you find the marshmallows browning too fast, you can loosely cover the dish with aluminum foil partway through the baking process.
Cranberry and Pecan Stuffing
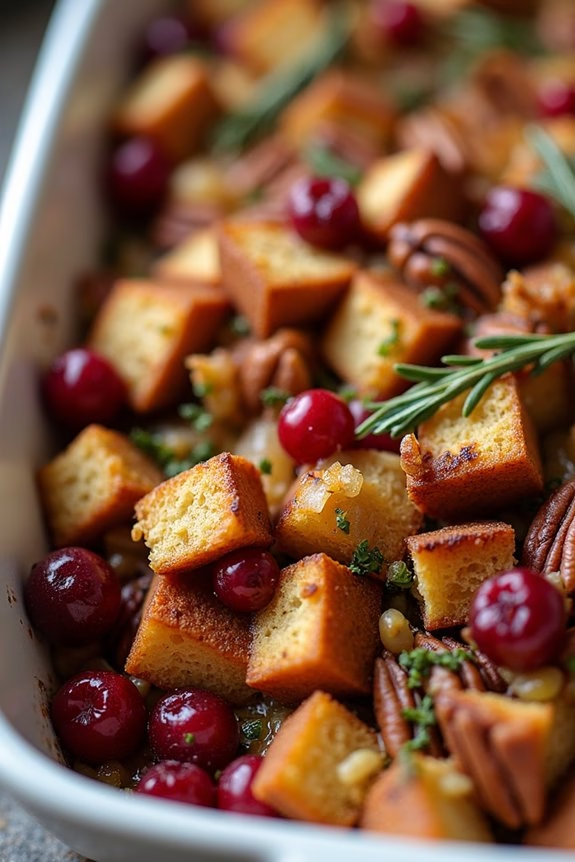
Cranberry and Pecan Stuffing is a festive and flavorful side dish that complements any Christmas dinner. The combination of tart cranberries and crunchy pecans adds a delightful twist to the traditional stuffing, providing a burst of flavor and texture in every bite.
Whether you’re serving it alongside a roast turkey or a glazed ham, this stuffing is bound to be a hit at your holiday gathering. This dish brings together the warmth of classic herbs with the sweetness of dried cranberries and the nuttiness of toasted pecans.
It can be prepared ahead of time, allowing you to focus on other aspects of your holiday meal. Perfect for a serving size of 4-6 people, this stuffing is both comforting and sophisticated, making it an excellent addition to your Christmas table.
Ingredients (Serves 4-6):
- 1 loaf of rustic bread, cubed (about 8 cups)
- 1 cup dried cranberries
- 1 cup chopped pecans
- 1 stick unsalted butter
- 1 large onion, diced
- 3 stalks celery, diced
- 2 cloves garlic, minced
- 2 teaspoons fresh sage, chopped
- 2 teaspoons fresh thyme, chopped
- 2 1/2 cups chicken or vegetable broth
- Salt and pepper to taste
Cooking Instructions:
- Prepare the Bread: Preheat your oven to 350°F (175°C). Spread the cubed bread evenly on a baking sheet and bake for about 10-15 minutes until lightly toasted and golden. Remove from the oven and let it cool.
- Toast the Pecans: In a dry skillet over medium heat, toast the chopped pecans for 3-5 minutes, stirring frequently until they’re fragrant. Be careful not to burn them. Set aside.
- Cook the Aromatics: In a large skillet, melt the butter over medium heat. Add the diced onion and celery, cooking until they’re soft and translucent, about 5-7 minutes. Stir in the minced garlic, chopped sage, and thyme, cooking for an additional minute until fragrant.
- Combine Ingredients: In a large mixing bowl, combine the toasted bread cubes, cranberries, toasted pecans, and the cooked onion mixture. Season with salt and pepper to taste.
- Add the Broth: Gradually pour the chicken or vegetable broth over the stuffing mixture, tossing gently to guarantee the bread absorbs the liquid evenly. The mixture should be moist but not soggy.
- Bake the Stuffing: Transfer the stuffing mixture to a greased baking dish. Cover with aluminum foil and bake in the preheated oven for 25 minutes. Remove the foil and bake for an additional 15-20 minutes until the top is crispy and golden brown.
Extra Tips:
For added depth of flavor, you can substitute half of the broth with apple cider. If you prefer a vegetarian version, verify you use vegetable broth instead of chicken broth.
Additionally, this stuffing can be assembled the day before and stored in the refrigerator; simply bake it just before serving to confirm it’s warm and crispy. Feel free to adjust the amount of cranberries and pecans to suit your taste preferences, or even add some cooked sausage for a heartier dish.
Roasted Brussels Sprouts With Bacon
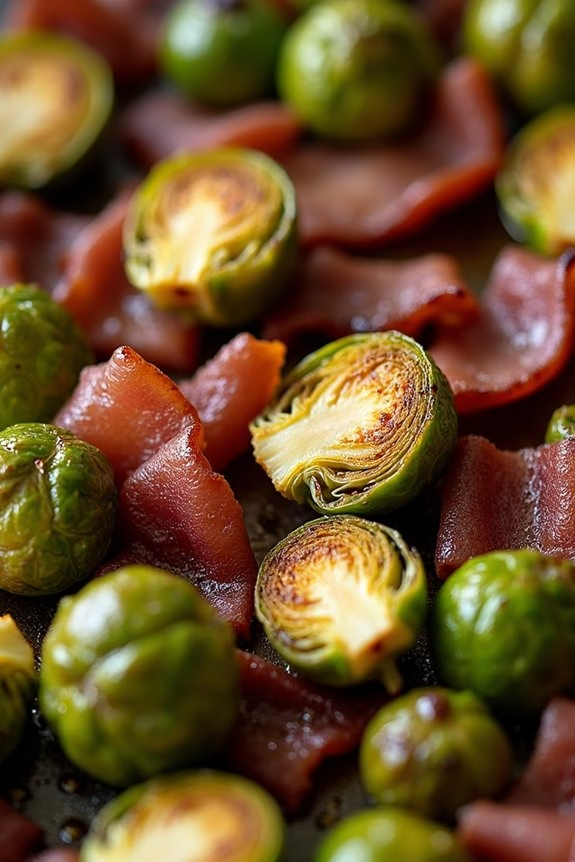
Roasted Brussels Sprouts with Bacon is a delightful side dish perfect for your holiday Christmas dinner. This recipe combines the earthy flavors of Brussels sprouts with the savory, smoky taste of crispy bacon, resulting in a dish that’s both comforting and festive.
The natural sweetness of the roasted Brussels sprouts is enhanced by the rich, salty crunch of the bacon bits, making it a crowd-pleaser that pairs beautifully with any main course.
Cooking Roasted Brussels Sprouts with Bacon is surprisingly simple and requires minimal ingredients, yet the result is a dish that’s full of flavor and texture. By roasting the Brussels sprouts, you bring out their natural sweetness while achieving a crispy exterior.
The addition of bacon not only provides a delicious contrast but also adds an aromatic depth to the dish. This recipe serves 4-6 people, making it an ideal addition to your holiday spread.
Ingredients:
- 2 pounds Brussels sprouts, trimmed and halved
- 6 slices of bacon, chopped
- 2 tablespoons olive oil
- 1 teaspoon salt
- 1/2 teaspoon black pepper
- 1 tablespoon balsamic vinegar (optional)
Cooking Instructions:
1. Preheat the Oven: Begin by preheating your oven to 400°F (200°C). This temperature is ideal for roasting the Brussels sprouts to achieve a crispy texture.
2. Prepare the Brussels Sprouts: Trim the ends of the Brussels sprouts and remove any yellow or damaged outer leaves. Cut each sprout in half to facilitate even cooking.
3. Mix with Bacon and Seasoning: In a large bowl, combine the halved Brussels sprouts and chopped bacon. Drizzle with olive oil and sprinkle with salt and black pepper. Toss everything together until the Brussels sprouts and bacon are evenly coated with the seasoning and oil.
4. Roast: Spread the Brussels sprouts and bacon mixture evenly on a baking sheet lined with parchment paper. Make sure they’re in a single layer for even roasting.
Place the baking sheet in the preheated oven and roast for 25-30 minutes, or until the Brussels sprouts are tender and the bacon is crispy.
5. Add Balsamic Vinegar (Optional): If using, drizzle the roasted Brussels sprouts and bacon with balsamic vinegar immediately after removing them from the oven. Toss gently to combine. This step adds a tangy sweetness that complements the dish beautifully.
6. Serve: Transfer the roasted Brussels sprouts with bacon to a serving platter and serve hot as a delicious side dish.
Extra Tips:
When selecting Brussels sprouts, look for ones that are firm and bright green, as these are the freshest and will roast best.
Also, be sure to spread the Brussels sprouts and bacon in a single layer on the baking sheet; overcrowding can lead to steaming instead of roasting, which will prevent them from getting crispy.
For additional flavor, consider adding a sprinkle of garlic powder or a squeeze of fresh lemon juice after roasting. This dish can be made ahead of time and reheated before serving, making it a convenient option for busy holiday meal preparations.
Yorkshire Pudding With Gravy
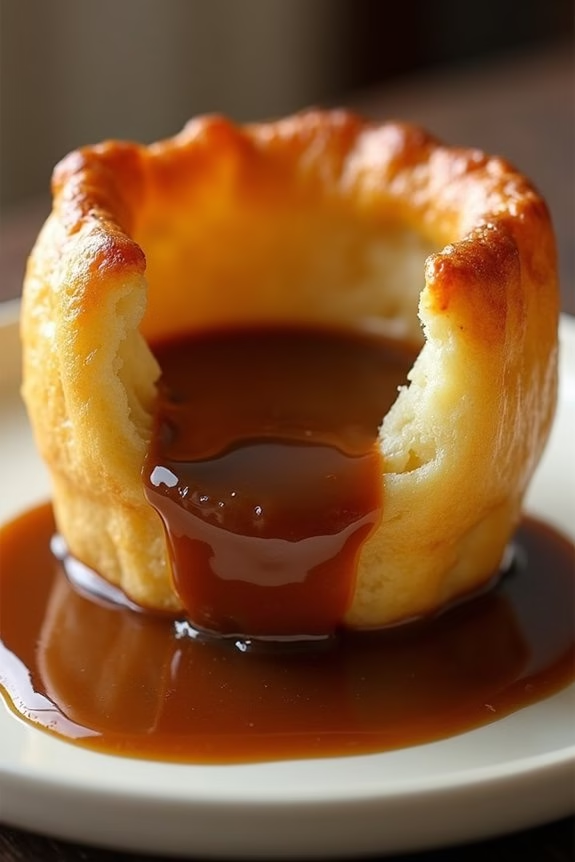
Yorkshire Pudding With Gravy is a quintessential British dish that perfectly complements any holiday Christmas dinner. Light, airy, and golden, these puddings are a delightful addition to any festive meal, pairing wonderfully with rich, savory gravy. Traditionally served alongside roast beef, Yorkshire puddings can also be enjoyed with other meats or even as a standalone dish with a generous ladle of gravy. The key to achieving the perfect Yorkshire pudding is guaranteeing a high temperature in both the oven and the oil in the baking tin, allowing the batter to rise beautifully.
While the origins of Yorkshire Pudding date back to the 18th century, its popularity has persisted due to its simple ingredients and delicious taste. The batter is made from just flour, eggs, milk, and a pinch of salt, creating a versatile foundation that can be adapted to various tastes and occasions. The accompanying gravy, made from rich beef stock and pan drippings, enhances the flavor, making this dish a must-have on your Christmas dinner table. Follow this recipe to create a serving size for 4-6 people, guaranteeing everyone gets a taste of this festive favorite.
Ingredients:
- 1 cup all-purpose flour
- 3 large eggs
- 1 cup milk
- 1/2 teaspoon salt
- 2 tablespoons vegetable oil or beef drippings
- 2 cups beef stock
- 2 tablespoons all-purpose flour (for gravy)
- Salt and pepper to taste
Cooking Instructions:
- Preheat your oven to 425°F (220°C). It’s essential that your oven is fully preheated to guarantee the puddings rise properly.
- In a mixing bowl, whisk together the flour and salt. Create a well in the center of the flour and add the eggs. Gradually pour in the milk while whisking constantly to create a smooth batter. Let the batter rest for at least 30 minutes, allowing the flour to absorb the liquid and the batter to become lighter.
- Place a muffin tin or a special Yorkshire pudding tin in the oven to heat up. Once hot, carefully remove the tin and add about a teaspoon of vegetable oil or beef drippings into each compartment. Return the tin to the oven for an additional 5 minutes to guarantee the fat is very hot.
- Quickly pour the batter into the hot tin, filling each compartment about halfway. The sizzling sound as the batter hits the hot fat is a good indicator of the temperature. Bake in the oven for 20-25 minutes until the puddings have risen and are golden brown. Don’t open the oven door during this time, as this can cause the puddings to deflate.
- While the puddings are baking, prepare the gravy. In a saucepan, heat the beef stock until it begins to simmer. In a separate small bowl, mix the 2 tablespoons of flour with a little cold water to form a slurry. Gradually add this to the simmering stock, whisking continuously to avoid lumps. Cook until the gravy thickens to your desired consistency, then season with salt and pepper to taste.
- Serve the Yorkshire puddings hot, drizzled with the freshly made gravy.
Extra Tips:
To guarantee your Yorkshire puddings rise to their full potential, make sure the oil in the tin is smoking hot before adding the batter. This initial high heat is essential for creating the perfect rise.
Resting the batter before baking also contributes to a lighter texture, so don’t skip this step. If you’re planning to make these ahead of time, they can be reheated in a hot oven for a few minutes just before serving.
For a richer flavor, consider using beef drippings instead of vegetable oil. Enjoy these crispy delights with your Christmas feast!
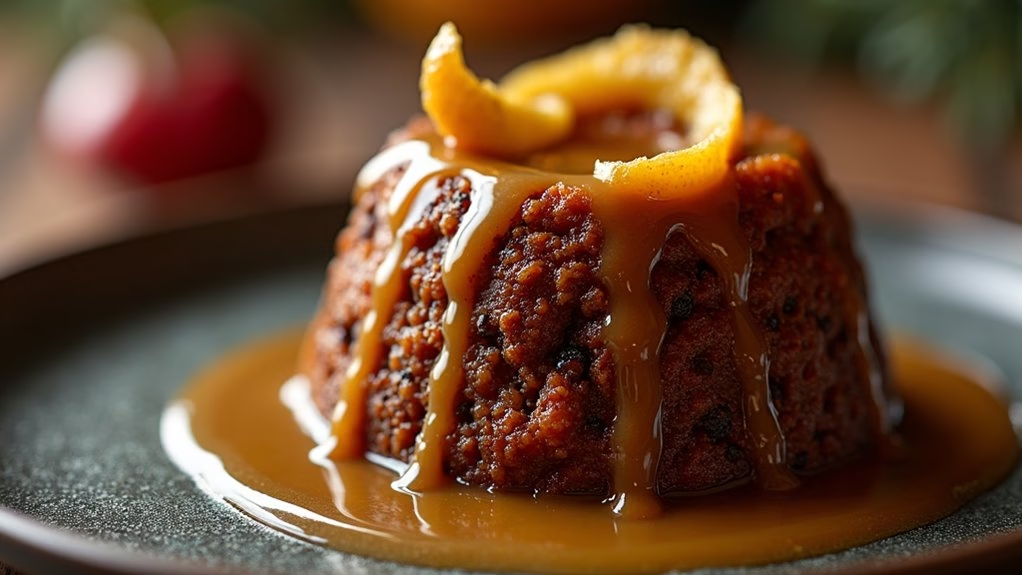
Traditional Christmas Pudding With Brandy Sauce
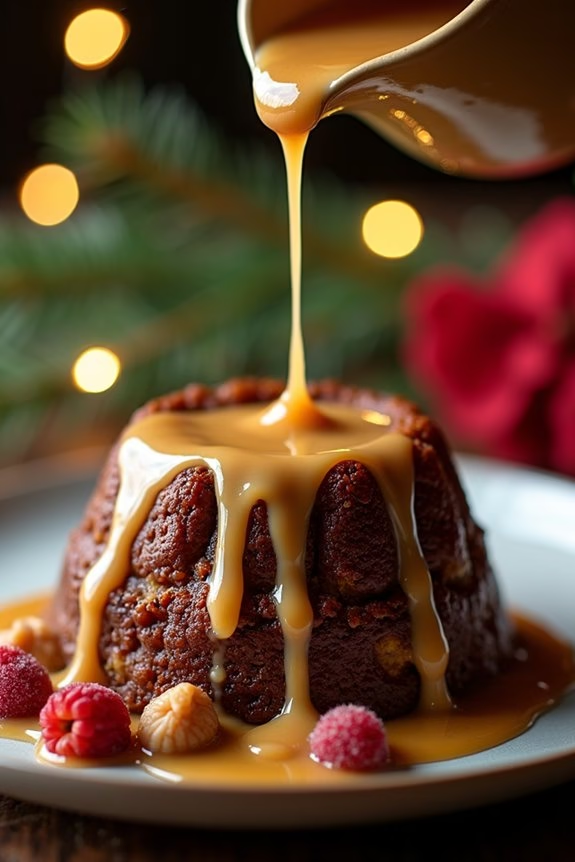
Traditional Christmas Pudding With Brandy Sauce is a classic festive dessert that brings warmth and joy to the holiday table. This rich, indulgent pudding is made with a mixture of dried fruits, nuts, and spices, creating a symphony of flavors that perfectly captures the spirit of Christmas. The pudding is traditionally steamed for several hours, resulting in a dense, moist cake that’s served hot with a generous pour of brandy sauce, adding a delightful kick to every bite.
Making a Traditional Christmas Pudding may seem intimidating, but with a bit of planning and patience, it can easily become a cherished holiday tradition. The process involves mixing the ingredients, allowing the flavors to meld together, and then steaming the pudding until it reaches the perfect consistency. The brandy sauce, which is a creamy and boozy accompaniment, is the perfect finishing touch that elevates the dish to gourmet status. This recipe is designed to serve 4-6 people, making it ideal for a family gathering or a special holiday celebration.
Ingredients:
*For the Christmas Pudding:*
- 125g suet or butter
- 125g dark brown sugar
- 125g plain flour
- 125g fresh breadcrumbs
- 1 teaspoon baking powder
- 1 teaspoon ground cinnamon
- 1 teaspoon mixed spice
- 1/4 teaspoon ground nutmeg
- 125g raisins
- 125g sultanas
- 50g currants
- 50g mixed peel
- 50g chopped almonds
- 1 apple, peeled and grated
- Zest of 1 lemon
- Zest of 1 orange
- 2 large eggs
- 150ml stout or dark ale
- 2 tablespoons brandy
For the Brandy Sauce:
- 50g butter
- 50g plain flour
- 500ml milk
- 75g caster sugar
- 5 tablespoons brandy
Cooking Instructions:
- Prepare the Ingredients:
- Gather all ingredients and prepare them as specified (grating the apple, zesting the lemon and orange, chopping the almonds).
- Mix the Dry Ingredients:
- In a large bowl, combine the suet, dark brown sugar, plain flour, breadcrumbs, baking powder, and spices (cinnamon, mixed spice, and nutmeg). Stir well to guarantee an even distribution of ingredients.
- Add the Fruits and Nuts:
- Stir in the raisins, sultanas, currants, mixed peel, and chopped almonds. Add the grated apple, lemon zest, and orange zest.
- Mix the Wet Ingredients:
- In a separate bowl, beat the eggs, then mix in the stout (or dark ale) and brandy. Pour the wet mixture into the dry ingredients and mix thoroughly until combined.
- Prepare the Pudding Basin:
- Grease a 1.2-liter pudding basin with butter. Spoon the mixture into the basin, pressing down lightly to compact it.
- Cover and Steam the Pudding:
- Cover the top of the basin with a double layer of parchment paper and a layer of foil. Secure with string. Place the basin in a large saucepan, add boiling water to reach halfway up the sides of the basin, and steam for 5-6 hours, checking occasionally to top up the water if necessary.
- Make the Brandy Sauce:
- Melt the butter in a saucepan over medium heat, stir in the flour, and cook for 1-2 minutes. Gradually add the milk, stirring constantly until the sauce thickens. Add the sugar and brandy, stirring until smooth.
- Serve the Pudding:
- Once the pudding is steamed, let it cool slightly before turning it out onto a serving plate. Serve warm with the brandy sauce drizzled over the top.
Extra Tips:
When preparing the pudding, it’s crucial to give the mixture a good stir to confirm all ingredients are evenly distributed. The pudding can be made weeks in advance, allowing the flavors to deepen over time.
Simply store it in a cool, dry place, and re-steam it for about 2 hours before serving. If you prefer a non-alcoholic version of the brandy sauce, you can replace the brandy with a tablespoon of vanilla extract. Enjoy your festive treat!