

The holiday season is the perfect time to bring back the cherished recipes from Grandma’s kitchen.
Think of the succulent roast goose with chestnut stuffing and the tender honey-glazed ham that were always a hit.
Have you ever tried making Yorkshire pudding or a classic green bean casserole?
These recipes truly capture the warmth of family gatherings.
Let’s explore these nostalgic culinary traditions together.
Roast Goose With Chestnut Stuffing
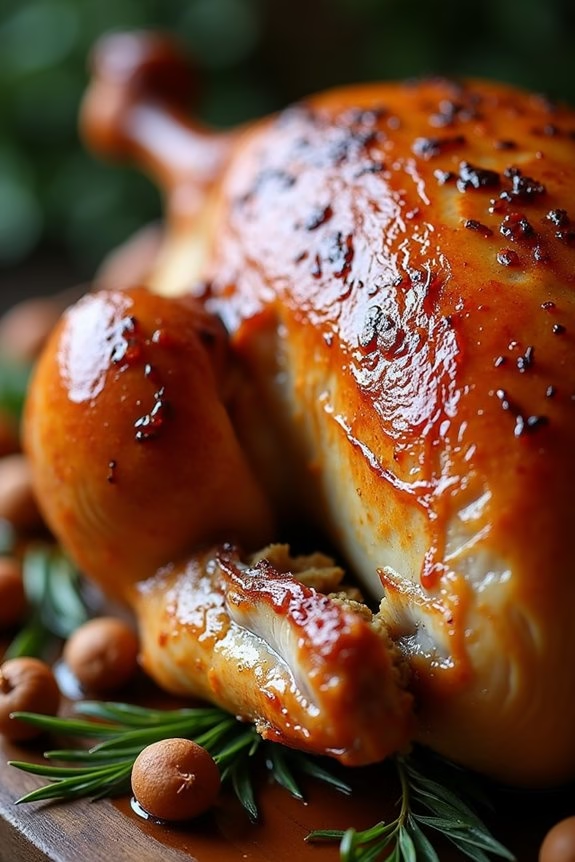
Roast Goose with Chestnut Stuffing is a classic dish that adds a touch of elegance and tradition to your Christmas dinner table. The rich flavor of goose, combined with the savory and slightly sweet chestnut stuffing, makes for an unforgettable holiday feast. Goose is a poultry with a higher fat content than turkey or chicken, which helps to keep the meat juicy and flavorful, perfect for special occasions. The chestnut stuffing complements the goose with its nutty flavor, providing a perfect balance to the richness of the meat.
When preparing your Roast Goose with Chestnut Stuffing, it’s important to reflect on the timing and technique to guarantee that the goose is cooked to perfection. This dish is best served to a gathering of 4-6 people, making it an ideal centerpiece for an intimate holiday celebration. The following recipe will guide you through the process of preparing and cooking this delightful dish, assuring that your Christmas dinner will be one to remember.
Ingredients (serves 4-6):
- 1 whole goose (approximately 10-12 pounds)
- Salt and freshly ground black pepper
- 1 lemon, halved
- 1 large onion, quartered
- 1 bunch of fresh herbs (such as thyme, rosemary, and sage)
- 1/2 cup of white wine
- 1/2 cup of chicken stock
For the Chestnut Stuffing:
- 2 tablespoons unsalted butter
- 1 onion, finely chopped
- 2 cloves garlic, minced
- 1 pound chestnuts, cooked, peeled, and roughly chopped
- 1 cup breadcrumbs
- 1/4 cup fresh parsley, chopped
- 1/2 teaspoon dried thyme
- Salt and pepper to taste
- 1 egg, lightly beaten
Cooking Instructions:
- Preheat the Oven: Start by preheating your oven to 350°F (175°C). This will guarantee the oven is at the right temperature when you’re ready to roast the goose.
- Prepare the Goose: Remove any excess fat from the goose cavity. Rinse the goose under cold water and pat dry with paper towels. Season the inside of the cavity generously with salt and pepper. Stuff the cavity with the lemon halves, onion quarters, and fresh herbs.
- Make the Chestnut Stuffing: In a large skillet over medium heat, melt the butter. Add the chopped onion and garlic, sautéing until softened. Stir in the chopped chestnuts, breadcrumbs, parsley, thyme, salt, and pepper. Remove from heat and let cool slightly before mixing in the beaten egg to bind the stuffing.
- Stuff the Goose: Fill the neck cavity of the goose with the chestnut stuffing. Secure the skin over the cavity with toothpicks or kitchen twine to keep the stuffing in place.
- Roast the Goose: Place the stuffed goose on a rack in a roasting pan. Pour the white wine and chicken stock into the bottom of the pan to create a flavorful base for basting. Roast the goose in the oven, basting occasionally with the pan juices, for approximately 2.5 to 3 hours, or until the internal temperature of the thickest part of the thigh reaches 165°F (74°C).
- Rest and Carve: Once cooked, remove the goose from the oven and let it rest for at least 20 minutes. This allows the juices to redistribute throughout the meat, making it more tender. Carve the goose and serve with the chestnut stuffing.
Extra Tips:
When roasting a goose, it’s important to keep in mind that it releases a significant amount of fat during cooking. Make sure to have a deep roasting pan to catch the fat, which can later be used for making delicious gravies or roasted vegetables.
Additionally, if the skin starts to brown too quickly, cover the bird loosely with aluminum foil to prevent it from burning while allowing the meat to cook through.
Finally, for added flavor, reflect on brining the goose overnight in a saltwater solution with spices and herbs before roasting. This will help to enhance the moisture and flavor of the meat.
Honey-Glazed Ham
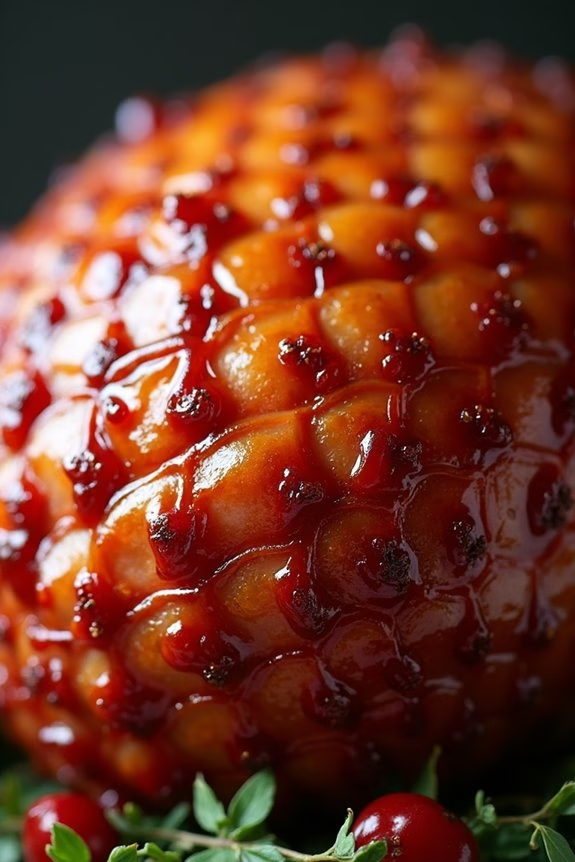
The Honey-Glazed Ham is a quintessential centerpiece for any Christmas dinner. Its enticing aroma, combined with the sweet and savory glaze, makes it a favorite among festive gatherings. The ham’s tenderness, infused with flavors of honey and spices, promises a delightful experience for your taste buds. This recipe is designed to serve 4-6 people, guaranteeing each guest gets a generous portion.
With this recipe, you’ll find yourself creating a ham that’s not only delicious but also visually appealing. The golden-brown glaze provides a beautiful sheen, making your Christmas dinner table even more inviting. Whether you’re a seasoned cook or trying your hand at preparing a holiday meal for the first time, this recipe offers a straightforward approach to achieving a perfectly glazed ham.
Ingredients (Serves 4-6 people):
- 1 fully cooked bone-in ham (about 4-5 pounds)
- 1 cup honey
- 1/2 cup brown sugar
- 1/4 cup Dijon mustard
- 1/4 cup apple cider vinegar
- 1/4 teaspoon ground cloves
- 1/4 teaspoon ground cinnamon
- 1/4 teaspoon ground ginger
- 1/2 teaspoon salt
- 1/2 teaspoon black pepper
Cooking Instructions:
- Preheat the Oven: Start by preheating your oven to 325°F (165°C). This will guarantee that your ham cooks evenly throughout.
- Prepare the Glaze: In a medium saucepan, combine the honey, brown sugar, Dijon mustard, apple cider vinegar, ground cloves, cinnamon, ginger, salt, and pepper. Heat over medium heat, stirring occasionally, until the sugar dissolves and the mixture is smooth. Remove from heat and set aside.
- Score the Ham: Place the ham on a rack in a shallow roasting pan. Using a sharp knife, score the surface of the ham in a diamond pattern, making shallow cuts about 1/4 inch deep. This allows the glaze to penetrate the meat, enhancing the flavor.
- Apply the Glaze: Brush half of the prepared glaze over the ham, guaranteeing it gets into the scored cuts. Reserve the remaining glaze for later use.
- Bake the Ham: Cover the ham loosely with aluminum foil to prevent the glaze from burning. Place it in the preheated oven and bake for about 1 1/2 to 2 hours, or until the internal temperature reaches 140°F (60°C).
- Reapply the Glaze: Approximately 30 minutes before the ham is done, remove the foil and brush the remaining glaze over the ham. This step will help develop a beautiful, caramelized crust.
- Rest and Serve: Once cooked, remove the ham from the oven and let it rest for about 10 minutes before carving. This resting period allows the juices to redistribute, guaranteeing a moist and flavorful ham.
Extra Tips:
When selecting your ham, opt for one with a bone-in, as it usually provides better flavor and moisture. If you prefer a more pronounced spice flavor, feel free to adjust the amount of cloves, cinnamon, and ginger according to your taste.
To prevent the glaze from sliding off, guarantee that the ham is at room temperature before applying the glaze. Leftover ham can be stored in an airtight container in the refrigerator and makes for excellent sandwiches or breakfast dishes the following day.
Yorkshire Pudding
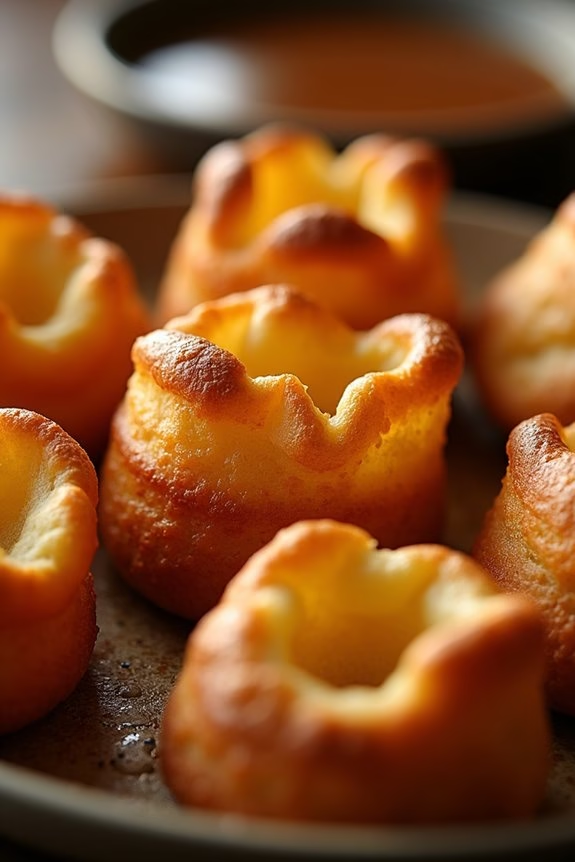
Yorkshire Pudding is a classic British side dish, traditionally served during Christmas dinner alongside a hearty roast. This light and airy pudding, with its delightfully crisp edges and tender center, is the perfect accompaniment to a rich and flavorful roast. The origins of Yorkshire Pudding date back to the 18th century when it was originally created to be served as a first course to fill diners before the more expensive meat was served, demonstrating its frugality and ability to satisfy.
Over time, Yorkshire Pudding has become a beloved staple on many tables, especially during the festive season. Its simple yet ingenious combination of ingredients—flour, eggs, milk, and a touch of salt—creates a batter that puffs up beautifully in the oven. The key to achieving the perfect Yorkshire Pudding lies in the preparation and the method of cooking, which guarantees a delectable texture and flavor.
Whether you’re a seasoned chef or new to the kitchen, this recipe will guide you to create the best Yorkshire Pudding for your Christmas feast.
Ingredients for serving size of 4-6 people:
- 1 cup all-purpose flour
- 1 cup whole milk
- 3 large eggs
- 1/2 teaspoon salt
- 1/4 cup beef drippings or vegetable oil
Cooking Instructions:
- Preheat the Oven: Start by preheating your oven to 425°F (220°C). This high temperature is vital for achieving the signature puffiness and crispness of Yorkshire Pudding.
- Prepare the Batter: In a large mixing bowl, combine the flour and salt. In a separate bowl, whisk together the eggs and milk until well blended. Gradually add the wet ingredients to the dry ingredients, whisking continuously until the batter is smooth and free of lumps. Let the batter rest at room temperature for at least 30 minutes; this helps the gluten relax and the flavors meld.
- Prepare the Muffin Tin: While the batter is resting, place a muffin tin in the oven to heat up. Once hot, carefully remove it from the oven and add about 1 teaspoon of beef drippings or vegetable oil to each cup. The oil should sizzle when it hits the hot tin, which is essential for the batter to rise properly.
- Bake the Puddings: Quickly pour the rested batter into the hot, oiled muffin cups, filling each about halfway. Return the tin to the oven and bake for 20-25 minutes, or until the puddings have puffed up and turned a deep golden brown. Avoid opening the oven door during baking, as this can cause the puddings to deflate.
- Serve Immediately: Once done, remove the Yorkshire Puddings from the oven and serve immediately while they’re still hot and crisp. They’re best enjoyed fresh from the oven, paired with roast meats and gravy.
Extra Tips:
To guarantee your Yorkshire Puddings rise beautifully, make sure the oven and muffin tin are thoroughly preheated. The batter should be poured into hot oil, which creates steam and helps the puddings rise.
For added flavor, you can infuse the oil with herbs or garlic before adding it to the muffin tin. If you prefer a richer taste, substitute some milk with cream. Remember, practice makes perfect; don’t be discouraged if they’re not perfect on the first try. Enjoy your delightful Yorkshire Puddings with a generous drizzle of gravy!
Classic Green Bean Casserole
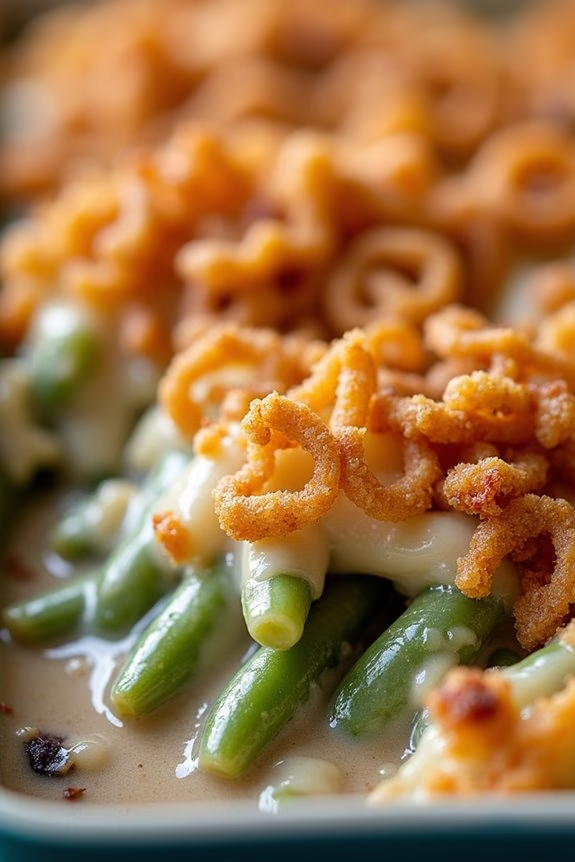
The Classic Green Bean Casserole is a staple on many holiday dinner tables, offering a comforting blend of tender green beans, creamy mushroom sauce, and a crispy onion topping. This dish isn’t only delicious but also convenient, making it a perfect choice for both seasoned cooks and kitchen novices.
Its rich flavors and textures complement any festive spread, ensuring that it holds a special place in holiday celebrations.
Originally created in the 1950s, the green bean casserole has stood the test of time and remains a beloved dish in American cuisine. Its simple yet flavorful recipe is easy to follow, and the ingredients are often pantry staples.
Whether you’re preparing this dish for a family gathering or a larger festive feast, the Classic Green Bean Casserole is sure to delight your guests with its nostalgic taste and comforting warmth.
Ingredients for 4-6 people:
- 1 pound fresh green beans, trimmed and cut into 1-inch pieces
- 1 can (10.5 ounces) condensed cream of mushroom soup
- 1/2 cup milk
- 1 teaspoon soy sauce
- 1/4 teaspoon black pepper
- 1 1/3 cups French-fried onions
- 1 cup shredded cheddar cheese (optional)
Cooking Instructions:
- Preheat and Prepare: Preheat your oven to 350°F (175°C). Lightly grease a 9×13-inch baking dish to prevent sticking.
- Blanch the Green Beans: Bring a large pot of salted water to a boil. Add the green beans and blanch for about 5 minutes until they’re bright green and tender-crisp. Drain and immediately transfer the beans to a bowl of ice water to stop the cooking process. Drain again after a few minutes.
- Make the Sauce: In a large mixing bowl, combine the cream of mushroom soup, milk, soy sauce, and black pepper. Stir until smooth and well combined.
- Assemble the Casserole: Add the blanched green beans to the mushroom sauce mixture, ensuring the beans are evenly coated. Stir in 2/3 cup of the French-fried onions. If using, incorporate the cheddar cheese for an extra layer of flavor.
- Bake the Casserole: Pour the green bean mixture into the prepared baking dish. Spread it evenly. Bake in the preheated oven for about 25 minutes, or until the mixture is bubbly and heated through.
- Add Crispy Topping: Remove the casserole from the oven and sprinkle the remaining 2/3 cup of French-fried onions over the top. Return to the oven and bake for an additional 5 minutes or until the onions are golden brown.
Extra Tips:
For a twist on the traditional recipe, consider adding sautéed garlic or sliced mushrooms to the sauce for an extra depth of flavor.
If you prefer using fresh ingredients, substitute fresh mushrooms for the canned soup by sautéing them with onions and making a roux with flour, milk, and broth to create a homemade mushroom sauce.
Additionally, you can make the casserole in advance and refrigerate it before the final baking step, allowing you to save time on the day of your gathering.
Scalloped Potatoes

Scalloped Potatoes are a classic and comforting side dish that makes a perfect addition to your Christmas dinner table. This decadent dish features tender slices of potatoes enveloped in a creamy and cheesy sauce, baked to perfection with a golden crust. The rich flavors and inviting aroma of scalloped potatoes will surely be a hit with family and friends, adding warmth and joy to your holiday gathering.
Preparing Scalloped Potatoes isn’t only straightforward but also rewarding, as it beautifully complements any main course, from roast turkey to ham. The combination of simple ingredients like potatoes, cheese, and cream, seasoned with herbs and spices, creates a delightful harmony of flavors.
Whether you’re a seasoned cook or a beginner, this recipe will guide you through the steps to create a memorable dish that will have your guests asking for seconds.
Ingredients (serving size: 4-6 people):
- 4 large russet potatoes
- 2 cups heavy cream
- 2 cups shredded cheddar cheese
- 3 tablespoons unsalted butter
- 2 cloves garlic, minced
- 1 teaspoon salt
- 1/2 teaspoon black pepper
- 1/2 teaspoon paprika
- 1 tablespoon fresh thyme leaves (or 1 teaspoon dried thyme)
- 1/4 cup grated Parmesan cheese
Cooking Instructions:
- Preheat the oven: Start by preheating your oven to 375°F (190°C). This guarantees that it’s at the right temperature by the time you’re ready to bake the scalloped potatoes.
- Prepare the potatoes: Peel the russet potatoes and slice them evenly to about 1/8-inch thickness. Uniform slices ensure even cooking. You can use a mandoline slicer for precision.
- Make the cream mixture: In a saucepan, melt the butter over medium heat. Add the minced garlic and sauté until fragrant, about 1 minute. Pour in the heavy cream, then add salt, black pepper, paprika, and thyme. Stir the mixture and heat until it just begins to simmer. Remove from heat.
- Layer the dish: In a greased baking dish, arrange a layer of potato slices, slightly overlapping each other. Pour a portion of the cream mixture over the potatoes and sprinkle with cheddar cheese. Repeat the layers until all ingredients are used, finishing with a layer of cheddar cheese on top.
- Bake the potatoes: Cover the baking dish with aluminum foil and place it in the preheated oven. Bake for 45 minutes. Remove the foil and sprinkle the grated Parmesan cheese on top. Return to the oven and bake uncovered for an additional 15 minutes, or until the top is golden brown and bubbly.
- Rest before serving: Allow the scalloped potatoes to rest for at least 10 minutes before serving. This helps the sauce thicken and makes serving easier.
Extra Tips:
For a richer flavor, consider adding a pinch of nutmeg or a dash of cayenne pepper to the cream mixture. If you prefer a crispier top, broil the dish for the last 2-3 minutes of baking.
Additionally, Yukon Gold potatoes can be used as an alternative to russet potatoes for a buttery texture. Make sure to slice the potatoes thinly and evenly for the best results, as thicker slices may require a longer baking time. Enjoy this delightful dish as part of your festive feast!
Cranberry Sauce With Orange Zest
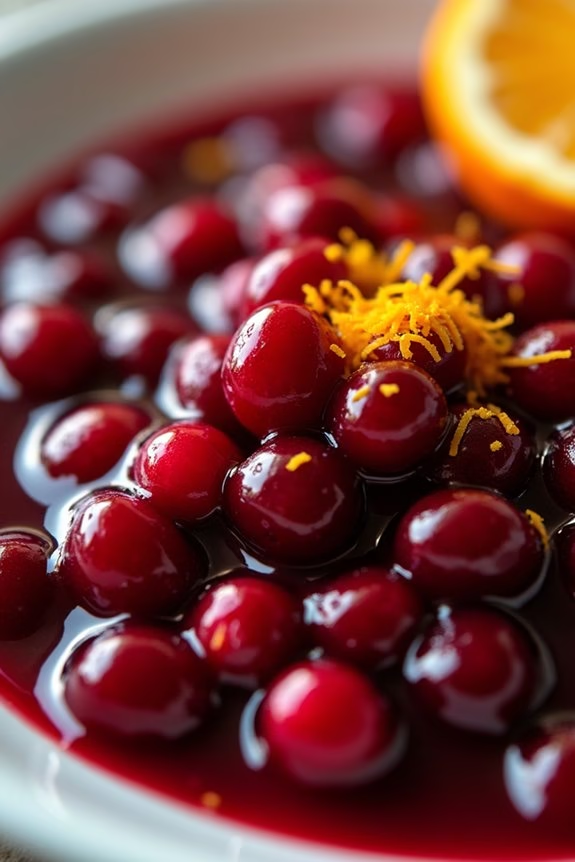
Cranberry sauce is a delightful addition to any Christmas dinner, adding a burst of tartness and color to the spread. This particular recipe for Cranberry Sauce with Orange Zest elevates the traditional cranberry sauce by infusing it with the bright, citrusy notes of fresh oranges. The combination of sweet and tangy flavors, along with the hint of orange, perfectly complements savory dishes like roasted turkey or ham, making it an indispensable part of your holiday meal.
Making this sauce is both simple and rewarding, as the ingredients come together to create a dish that’s both visually appealing and delicious. The process allows the cranberries to burst and blend with the sugars and orange zest, creating a thick, jam-like consistency that’s both vibrant and aromatic. Not only does it make a delicious side, but it also makes for a wonderful topping on desserts or breakfast items like pancakes. This recipe will serve 4-6 people, making it ideal for a family gathering or small festive celebration.
Ingredients (serves 4-6):
- 12 ounces fresh cranberries
- 1 cup granulated sugar
- 1 cup orange juice (preferably freshly squeezed)
- Zest of one orange
- 1/4 teaspoon ground cinnamon
- 1/4 teaspoon salt
Cooking Instructions:
- Prepare the Ingredients: Start by rinsing the cranberries thoroughly under cold water and set them aside to drain. Zest the orange using a fine grater, making sure to avoid the bitter white pith beneath the zest.
- Combine the Ingredients: In a medium saucepan, combine the fresh cranberries, granulated sugar, orange juice, orange zest, ground cinnamon, and salt. Stir the mixture well to guarantee that the sugar starts to dissolve and the ingredients are evenly distributed.
- Cook the Sauce: Place the saucepan over medium-high heat and bring the mixture to a gentle boil. Once boiling, reduce the heat to medium-low and let it simmer. As it cooks, the cranberries will begin to pop and break down, releasing their natural pectin and thickening the sauce. Stir occasionally to prevent sticking and guarantee even cooking.
- Thicken the Sauce: Allow the sauce to simmer for about 10-15 minutes, or until it reaches your desired thickness. Remember that the sauce will continue to thicken as it cools, so don’t worry if it’s slightly runny when done cooking.
- Cool and Serve: Once the sauce has reached the desired consistency, remove it from the heat and let it cool to room temperature. Transfer the sauce to a serving dish or airtight container and refrigerate it until ready to serve. The flavors will continue to meld and improve as it sits.
Extra Tips:
For added texture and flavor, consider stirring in a handful of chopped nuts, such as walnuts or pecans, once the sauce has cooled. If you prefer a slightly sweeter sauce, you can adjust the sugar to taste, or add a tablespoon of honey or maple syrup.
Additionally, this sauce can be made a day or two in advance, allowing the flavors to deepen and saving you time on the day of your Christmas feast. Remember to taste and adjust the seasoning, such as adding more orange zest or a pinch of salt, to suit your personal preference.
Cornbread Dressing
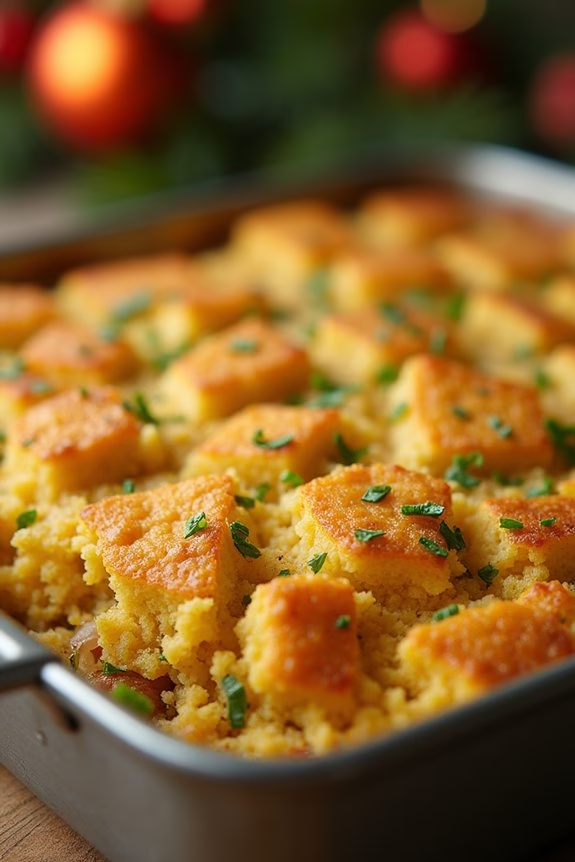
Cornbread dressing is a staple dish that brings warmth and a sense of comfort to any Christmas dinner table. This savory and slightly sweet dish combines crumbled cornbread with an array of herbs and vegetables, creating a flavorful side that perfectly complements roasted meats.
Whether you’re a fan of traditional southern cuisine or simply looking for a hearty addition to your festive feast, cornbread dressing is sure to be a crowd-pleaser.
The beauty of cornbread dressing lies in its versatility and ease, making it an excellent choice for both novice and experienced cooks. The key is to use a well-seasoned cast iron skillet to bake the cornbread, which adds an extra layer of flavor through its even heat distribution.
Once the cornbread is prepared, it’s combined with sautéed vegetables and aromatic herbs, then baked to a golden perfection. This dish, serving 4-6 people, can be made a day in advance, allowing the flavors to meld together beautifully.
Ingredients:
- 2 cups of crumbled cornbread
- 1 cup of cubed stale white bread
- 1/2 cup of unsalted butter
- 1 cup of chopped onions
- 1 cup of chopped celery
- 1 tablespoon of minced garlic
- 2 teaspoons of dried sage
- 1 teaspoon of dried thyme
- 1 teaspoon of salt
- 1/2 teaspoon of black pepper
- 2 cups of chicken broth
- 2 large eggs, beaten
Cooking Instructions:
- Prepare the Cornbread and Bread Cubes: Begin by preheating your oven to 350°F (175°C). Crumble the cornbread into a large mixing bowl. Add the cubed stale white bread and mix them together. Set aside.
- Sauté the Vegetables: In a large skillet, melt the unsalted butter over medium heat. Add the chopped onions and celery, sautéing them until they become soft and translucent, approximately 5 minutes. Stir in the minced garlic, dried sage, thyme, salt, and black pepper. Cook for an additional 2 minutes until the spices are fragrant.
- Combine Ingredients: Pour the sautéed vegetable mixture over the bread and cornbread in the mixing bowl. Gently toss to combine, ensuring the bread is evenly coated with the butter and vegetable mixture.
- Add Liquids: Gradually pour in the chicken broth while gently folding the mixture. The bread should absorb the liquid but remain slightly moist. Once mixed, add the beaten eggs and fold them in until fully incorporated.
- Bake the Dressing: Transfer the mixture to a greased 9×13-inch baking dish. Spread it evenly, then cover with aluminum foil. Bake in the preheated oven for 30 minutes. Afterward, remove the foil and bake for an additional 15 minutes, or until the top is golden brown and slightly crispy.
- Serve: Allow the cornbread dressing to cool for 10 minutes before serving. This resting period helps the dressing set, making it easier to serve.
Extra Tips:
For a richer flavor, consider using homemade chicken broth instead of store-bought varieties. If you prefer a more moist dressing, increase the chicken broth slightly, but be cautious not to make it overly soggy.
Feel free to customize the dish by adding cooked sausage, chopped pecans, or dried cranberries for added texture and flavor. Always taste and adjust the seasoning before baking, as the saltiness can vary depending on the broth used.
Braised Red Cabbage

Braised Red Cabbage is a classic side dish often served during Christmas meals. The dish combines the deep, earthy flavor of red cabbage with the sweetness of apples and the tang of vinegar, resulting in a perfect balance that complements rich holiday entrees. Its vibrant color adds a festive touch to any holiday table, making it not just a treat for the taste buds but also a feast for the eyes.
This dish is both comforting and healthy, delivering a good dose of vitamins and fiber. This recipe for Braised Red Cabbage serves 4-6 people and is ideal for a holiday gathering. The preparation is straightforward, requiring only a few ingredients and minimal hands-on time, leaving you free to attend to the main event of your Christmas dinner.
The gentle simmer allows the flavors to meld beautifully, infusing the cabbage with the aromatic spices and sweetness of fruit, creating a dish that’s both hearty and fragrant.
Ingredients:
- 1 medium red cabbage, cored and thinly sliced
- 2 apples, peeled, cored, and sliced
- 1 large onion, thinly sliced
- 2 tablespoons vegetable oil
- 1/2 cup apple cider vinegar
- 1/3 cup brown sugar
- 1 teaspoon ground cinnamon
- 1/2 teaspoon ground allspice
- 1/4 teaspoon ground cloves
- Salt and pepper to taste
Instructions:
- Prepare the Ingredients: Start by washing the red cabbage thoroughly. Remove the outer leaves, core it, and slice it thinly. Peel, core, and slice the apples. Thinly slice the onion as well.
- Heat the Oil: In a large pot or Dutch oven, heat the vegetable oil over medium heat. Once hot, add the sliced onions and sauté them for about 5 minutes until they begin to soften and turn translucent.
- Add the Cabbage and Apples: Add the sliced red cabbage and apples to the pot. Stir them together with the onions, making certain they’re well mixed.
- Season the Mixture: Sprinkle the brown sugar, cinnamon, allspice, and cloves over the cabbage mixture. Season with salt and pepper to taste. Stir well to combine all the ingredients.
- Add the Vinegar: Pour the apple cider vinegar over the seasoned cabbage mixture. Stir again to confirm everything is evenly coated.
- Simmer the Cabbage: Cover the pot, reduce the heat to low, and let the cabbage simmer for about 1-1.5 hours. Stir occasionally to prevent sticking, and check the seasoning. The cabbage should be tender and the flavors well combined.
- Adjust Seasoning: Before serving, taste the cabbage and adjust the seasoning if necessary, adding more salt, pepper, or sugar depending on your preference.
Extra Tips:
For an even deeper flavor, consider preparing the Braised Red Cabbage a day in advance. The extra time allows the flavors to meld and intensify, making the dish even more delicious.
If you find the cabbage too tangy, a little extra brown sugar can help balance it out. Additionally, leftovers can be stored in the refrigerator for up to three days and make a great addition to sandwiches or as a side to other meals.
Old-Fashioned Bread Pudding
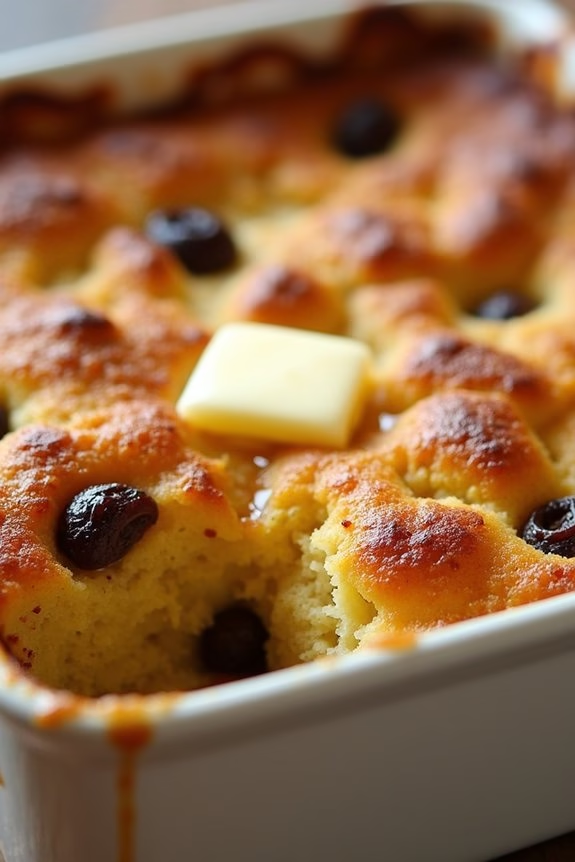
Old-Fashioned Bread Pudding is a classic dessert that brings warmth and nostalgia to any Christmas dinner. Its rich, creamy texture combined with the subtle sweetness of raisins and a hint of vanilla create a comforting dish that’s both simple and sophisticated.
Perfect for the holidays, this dessert isn’t only delicious but also uses ingredients you likely already have in your kitchen, making it a convenient choice during the busy festive season.
Making bread pudding is a great way to repurpose stale bread, transforming it into a delightful treat that both children and adults will enjoy. The custard mixture seeps into the bread, infusing it with flavor and moisture, while the baked top provides a pleasant contrast with its slight crispness.
Whether served on its own or with a drizzle of caramel sauce or a dollop of whipped cream, Old-Fashioned Bread Pudding is sure to be a hit with your family and friends.
Ingredients for 4-6 servings:
- 6 cups of day-old bread, cubed
- 2 cups whole milk
- 1/2 cup heavy cream
- 3/4 cup granulated sugar
- 4 large eggs
- 1 teaspoon vanilla extract
- 1 teaspoon ground cinnamon
- 1/2 teaspoon ground nutmeg
- 1/4 teaspoon salt
- 1/2 cup raisins
- 2 tablespoons unsalted butter, melted
Cooking Instructions:
- Preheat the Oven: Start by preheating your oven to 350°F (175°C). This guarantees that the oven is at the right temperature when it’s time to bake the pudding.
- Prepare the Bread: Place the cubed bread into a large mixing bowl. If the bread isn’t already stale, you can lightly toast it in the oven for about 10 minutes to dry it out.
- Make the Custard Mixture: In a separate bowl, whisk together the milk, heavy cream, granulated sugar, eggs, vanilla extract, cinnamon, nutmeg, and salt until well combined.
- Combine Bread and Custard: Pour the custard mixture over the cubed bread, assuring all pieces are soaked evenly. Gently fold in the raisins, distributing them throughout the mixture.
- Transfer to Baking Dish: Grease a 9×13-inch baking dish with some of the melted butter. Pour the bread and custard mixture into the dish, spreading it out evenly. Drizzle the remaining melted butter over the top.
- Bake the Pudding: Place the dish in the preheated oven and bake for 45-50 minutes, or until the pudding is set in the center and the top is golden brown.
- Cool and Serve: Allow the bread pudding to cool slightly before serving. It can be enjoyed warm or at room temperature, depending on your preference.
Extra Tips: For a richer flavor, consider soaking the raisins in a little bit of rum or brandy for about 30 minutes before adding them to the mixture. This adds a festive touch to the dessert.
If you want an extra crunchy top, sprinkle a bit of sugar over the pudding before baking. Leftover bread pudding can be stored in the refrigerator for up to 3 days and reheated in the oven.
Traditional Plum Pudding
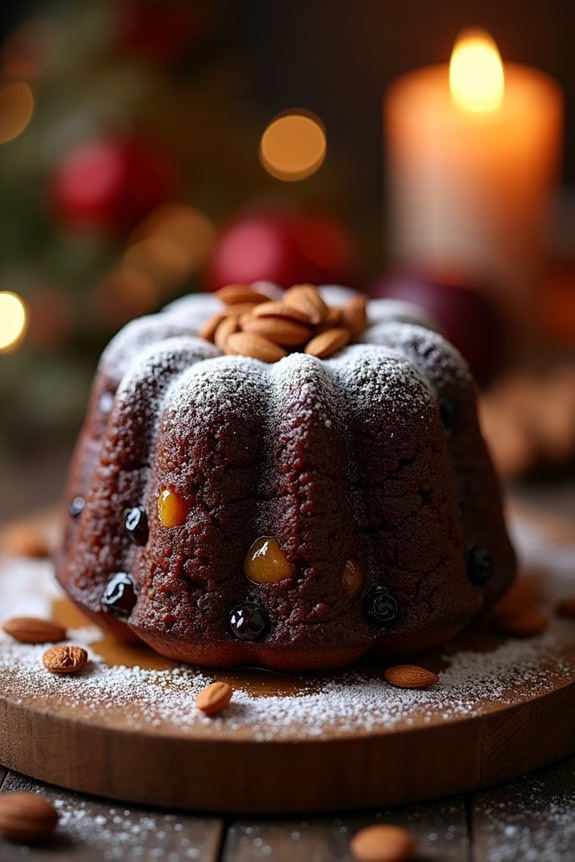
Plum pudding, a quintessential British Christmas dessert, is a rich, dense steamed pudding that’s packed with dried fruits, spices, and a hint of brandy. Despite its name, plum pudding doesn’t contain plums. Historically, the term “plum” referred to raisins or other dried fruits. This pudding is traditionally made well in advance of Christmas, allowing its flavors to develop and mature over time, making it an essential part of the festive celebration.
The origins of plum pudding date back to the 15th century, and it has evolved considerably over time. It was initially a savory dish that eventually transformed into the sweet version we recognize today. Preparing this pudding is an activity that often involves the entire family, with each member taking a turn to stir the mixture while making a wish. This recipe serves 4-6 people, perfect for a cozy family gathering.
Ingredients for Traditional Plum Pudding (serves 4-6):
- 150g plain flour
- 150g breadcrumbs
- 200g suet or butter
- 150g dark brown sugar
- 150g raisins
- 150g currants
- 100g sultanas
- 50g chopped mixed peel
- 50g chopped almonds
- 2 teaspoons mixed spice
- 1/2 teaspoon ground cinnamon
- 1/2 teaspoon ground nutmeg
- Zest of 1 lemon
- Zest of 1 orange
- 3 eggs, beaten
- 150ml milk
- 100ml brandy or rum
Cooking Instructions:
- Prepare the Mixing Bowl: In a large mixing bowl, combine the plain flour, breadcrumbs, and suet or butter. Mix thoroughly to guarantee the suet is well distributed.
- Add the Dry Ingredients: Stir in the dark brown sugar, raisins, currants, sultanas, mixed peel, and chopped almonds. Confirm all the fruits and nuts are evenly coated with the flour and breadcrumb mixture.
- Spice it Up: Add the mixed spice, ground cinnamon, and ground nutmeg to the bowl. Mix well to distribute the spices evenly throughout the mixture.
- Citrus Zest: Grate the zest of one lemon and one orange into the mixture. Stir well to combine and release the citrus oils, enhancing the pudding’s flavor.
- Combine the Wet Ingredients: In a separate bowl, beat the eggs thoroughly. Stir in the milk and brandy or rum, mixing until fully combined.
- Form the Pudding Mixture: Gradually add the wet ingredients to the dry ingredients, stirring continuously. The mixture should be thick and drop from the spoon with ease. If necessary, add a little more milk to achieve the right consistency.
- Prepare for Steaming: Grease a 1.5-liter pudding basin and line the bottom with a circle of baking parchment. Spoon the pudding mixture into the basin, pressing it down slightly to remove any air pockets.
- Seal the Basin: Cover the top of the basin with a double layer of baking parchment, followed by a layer of foil. Secure tightly with string, guaranteeing it’s waterproof and steam-tight.
- Steam the Pudding: Place the pudding basin in a large pot or steamer, adding boiling water to reach halfway up the sides of the basin. Cover the pot and steam the pudding for 4-5 hours, checking periodically to confirm the water level remains constant.
- Cool and Store: Once cooked, remove the pudding from the pot and allow it to cool. Replace the parchment and foil with fresh layers once completely cooled. Store in a cool, dry place until Christmas. Reheat by steaming for 1-2 hours before serving.
Extra Tips:
For best results, prepare your plum pudding several weeks before Christmas to allow the flavors to mature. You can periodically “feed” the pudding by poking small holes in it and drizzling with additional brandy or rum.
If you don’t have a pudding basin, a heatproof mixing bowl can be used as an alternative. When serving, consider flambéing the pudding with a little warm brandy for a dramatic presentation. Just heat the brandy, pour it over the pudding, and ignite with a long match.
Always verify the pudding is adequately reheated before serving for the best taste and texture.
Mince Pies
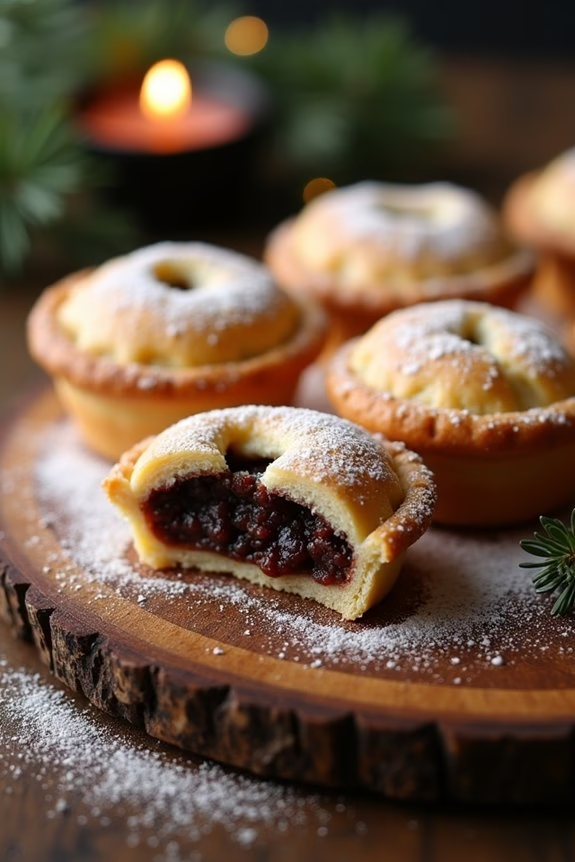
Mince pies are a classic festive treat that have been enjoyed during the Christmas season for centuries. Originating from the United Kingdom, these small, sweet pies are filled with a mixture of dried fruits, spices, and often a hint of brandy or rum, offering a delightful burst of flavors in every bite.
Traditionally, they were made with minced meat alongside the fruits and spices, but today, they’re generally sweet and meat-free. Perfect for sharing with family and friends, mince pies are a staple at holiday gatherings and a wonderful way to evoke the warmth and coziness of the season.
Making mince pies at home isn’t only rewarding but also allows you to customize the flavors to suit your taste. Whether you choose to make your own mincemeat filling or buy a quality store-bought version, the process is quite straightforward.
The buttery, flaky pastry encasing the rich, fruity filling is a delightful combination that’s sure to please any crowd. This recipe will guide you through the steps to create delicious homemade mince pies that serve 4-6 people, guaranteeing there’s plenty to go around your festive table.
Ingredients for 4-6 servings:
- 225g plain flour
- 125g unsalted butter, diced
- 1-2 tablespoons cold water
- 300g mincemeat (store-bought or homemade)
- 1 small egg, beaten, for glazing
- Icing sugar, for dusting
Cooking Instructions:
1. Prepare the Pastry: In a large mixing bowl, combine the plain flour and diced unsalted butter. Use your fingertips to rub the butter into the flour until the mixture resembles breadcrumbs. Add 1-2 tablespoons of cold water, gradually, mixing until the dough comes together.
Form the dough into a ball, wrap it in cling film, and chill in the refrigerator for at least 30 minutes.
2. Preheat the Oven: Preheat your oven to 200°C (180°C fan) or 400°F, and lightly grease a 12-hole pie or muffin tin with butter.
3. Roll Out the Pastry: On a lightly floured surface, roll out the chilled pastry to about 3mm thickness. Using a round cutter slightly larger than the holes in your tin, cut out 12 circles and gently press them into the prepared tin.
Re-roll the pastry scraps as needed to cut out 12 smaller circles for the lids.
4. Fill the Pies: Spoon approximately one tablespoon of mincemeat into each pastry case, being careful not to overfill.
5. Seal and Glaze: Place a smaller pastry circle on top of each pie, pressing the edges gently to seal. Use a sharp knife to make a small slit in the top of each pie for steam to escape.
Brush the tops with beaten egg to give them a golden glaze.
6. Bake: Place the tin in the preheated oven and bake for 20-25 minutes, or until the pastry is golden and crisp.
7. Cool and Serve: Once baked, allow the mince pies to cool in the tin for a few minutes before transferring them to a wire rack. Dust with icing sugar before serving.
Extra Tips:
For a more indulgent filling, consider adding a small splash of brandy or rum to your mincemeat before filling the pies. If you prefer a more citrusy flavor, a bit of grated orange zest can be mixed into the mincemeat.
To prevent the pastry from becoming soggy, verify the mincemeat is well-drained if it’s particularly juicy. Finally, mince pies are best enjoyed warm, so consider reheating them gently in the oven before serving for an extra comforting treat.
Classic Fruitcake
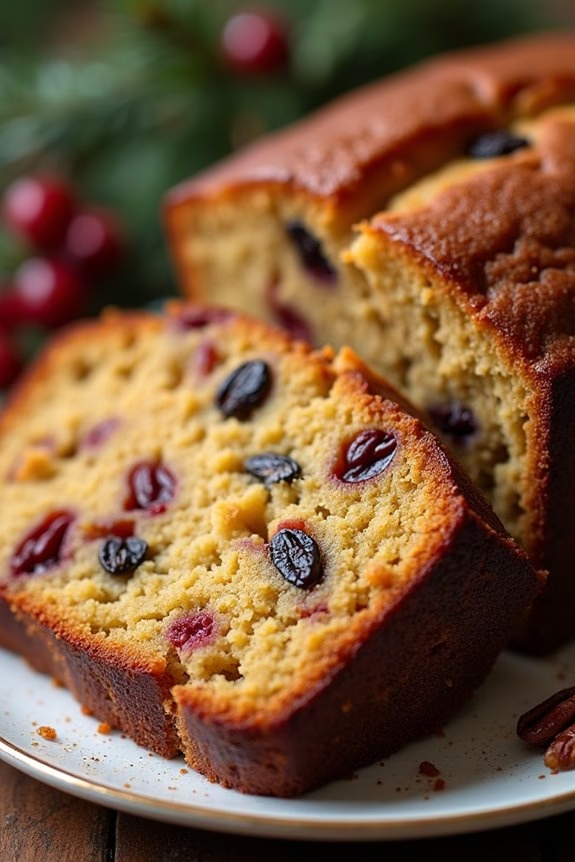
Classic Fruitcake is a staple dish during the Christmas season, known for its rich, dense texture and a delightful combination of dried fruits and nuts. This traditional dessert is often prepared weeks in advance to allow the flavors to meld together harmoniously, resulting in a moist and flavorful cake that’s enjoyed by many during festive celebrations.
The beauty of a classic fruitcake lies not only in its taste but also in its ability to be customized with your favorite fruits and nuts, making it a personal and cherished addition to any holiday gathering.
The origins of fruitcake can be traced back to ancient Rome, where a mixture of barley, pomegranate seeds, nuts, and raisins was combined into a cake-like concoction. Over time, the recipe evolved, and by the Middle Ages, it included honey, preserved fruits, and spices.
The classic fruitcake we recognize today is a symbol of celebration and goodwill, making it the perfect centerpiece for any Christmas dinner. Let’s plunge into the recipe for a Classic Fruitcake that serves 4-6 people.
Ingredients:
- 1 cup unsalted butter, softened
- 1 cup brown sugar, packed
- 4 large eggs
- 1 teaspoon vanilla extract
- 2 cups all-purpose flour
- 1 teaspoon baking powder
- 1/2 teaspoon salt
- 1 teaspoon ground cinnamon
- 1/2 teaspoon ground nutmeg
- 1/2 teaspoon ground cloves
- 1/2 cup orange juice
- 1 tablespoon orange zest
- 1 cup chopped pecans or walnuts
- 1 cup mixed candied fruits
- 1 cup raisins
- 1/2 cup chopped dried apricots
- 1/2 cup brandy or rum (optional for soaking)
Instructions:
- Preparation of Fruits and Nuts: Begin by pre-soaking the mixed candied fruits, raisins, and dried apricots in brandy or rum for at least 1 hour, or overnight if possible. This will enhance the flavor and keep the cake moist. Once soaked, drain the fruits and set them aside.
- Preheat Oven and Prepare Pan: Preheat your oven to 325°F (165°C). Grease and line a 9×5 inch loaf pan with parchment paper, ensuring that the paper extends over the sides for easy removal.
- Cream Butter and Sugar: In a large mixing bowl, cream together the softened butter and brown sugar until light and fluffy. This should take about 3-5 minutes.
- Add Eggs and Vanilla: Add the eggs one at a time to the butter-sugar mixture, beating well after each addition. Stir in the vanilla extract until well combined.
- Combine Dry Ingredients: In a separate bowl, sift together the all-purpose flour, baking powder, salt, ground cinnamon, ground nutmeg, and ground cloves. Gradually add the dry ingredients to the wet ingredients, mixing until just combined.
- Incorporate Fruits and Nuts: Gently fold in the soaked fruits, nuts, orange juice, and orange zest into the batter. Mix until the ingredients are evenly distributed.
- Bake the Cake: Transfer the batter into the prepared loaf pan and smooth the top with a spatula. Bake in the preheated oven for 1 1/2 to 2 hours, or until a toothpick inserted into the center comes out clean. If the top of the cake starts to brown too quickly, cover it with aluminum foil during the last 30 minutes of baking.
- Cool and Store: Allow the fruitcake to cool in the pan for about 15 minutes before transferring it to a wire rack to cool completely. Once cooled, wrap the cake tightly in plastic wrap and store it in an airtight container. For the best flavor, let the cake sit for at least a few days before serving.
Extra Tips: For an even more intense flavor, you can brush the fruitcake with additional brandy or rum every few days as it matures. This helps to keep the cake moist and enhances its taste over time.
Remember to store the fruitcake in a cool, dark place, and it can last for several weeks, making it an excellent make-ahead dessert for the holiday season. If you prefer a non-alcoholic version, simply substitute the brandy or rum with additional orange juice.
Gingerbread Cookies

Gingerbread cookies are a delightful treat that perfectly embody the festive spirit of Christmas. Their warm, spiced flavor combined with the crisp texture makes them a favorite during the holiday season. These cookies aren’t only delicious but also fun to make, especially when you get creative with decorating.
Whether you prefer them plain or adorned with icing and sprinkles, gingerbread cookies can add a touch of joy to your Christmas dinner. This recipe is designed to yield enough cookies for 4-6 people, making it ideal for a cozy family gathering. The rich molasses and spices create a comforting aroma that fills your home as they bake, evoking cherished holiday memories.
Set aside some time to prepare this classic Christmas treat, and you’ll be rewarded with cookies that are as delightful to look at as they’re to eat.
Ingredients for 4-6 people:
- 3 cups all-purpose flour
- 3/4 teaspoon baking soda
- 1 tablespoon ground ginger
- 1 tablespoon ground cinnamon
- 1/2 teaspoon ground cloves
- 1/2 teaspoon ground nutmeg
- 1/2 teaspoon salt
- 1/4 teaspoon black pepper (optional, for a bit of heat)
- 3/4 cup unsalted butter, softened
- 3/4 cup packed dark brown sugar
- 1 large egg
- 1/2 cup unsulfured molasses
- 2 teaspoons vanilla extract
- Icing and sprinkles for decoration (optional)
Cooking Instructions:
- Prepare the Dry Ingredients: In a medium-sized bowl, whisk together the flour, baking soda, ginger, cinnamon, cloves, nutmeg, salt, and black pepper if using. This guarantees that all the dry ingredients are evenly distributed.
- Mix the Wet Ingredients: In a separate large bowl, use an electric mixer to cream the softened butter and dark brown sugar together until light and fluffy. Beat in the egg, molasses, and vanilla extract until well combined.
- Combine the Ingredients: Gradually add the dry ingredients to the wet ingredients, mixing on low speed until the dough comes together. Be careful not to overmix, as this can make the cookies tough.
- Chill the Dough: Divide the dough into two equal portions, wrap each in plastic wrap, and flatten into disks. Refrigerate for at least 1 hour, or until firm. This step is essential for rolling out the dough easily.
- Preheat the Oven: When ready to bake, preheat your oven to 350°F (175°C). Line baking sheets with parchment paper to prevent the cookies from sticking.
- Roll Out the Dough: On a lightly floured surface, roll out one disk of dough to about 1/4-inch thickness. Use cookie cutters to cut shapes, then transfer them to the prepared baking sheets, spacing them about 1 inch apart.
- Bake the Cookies: Bake in the preheated oven for 8-10 minutes, or until the edges are just beginning to brown. Keep an eye on them as they bake to prevent burning. Allow the cookies to cool on the baking sheets for a few minutes before transferring them to a wire rack to cool completely.
- Decorate: Once completely cool, decorate the cookies with icing and sprinkles as desired. Let the icing set before serving.
Extra Tips:
To guarantee your gingerbread cookies have the perfect texture, make sure your butter is at room temperature before you begin. This helps it cream easily with the sugar, which is essential for the right consistency.
If you prefer softer cookies, you can slightly underbake them, but keep in mind they’ll continue to firm up as they cool. Also, don’t skip the chilling step; it makes the dough much easier to work with and helps the cookies maintain their shape during baking.
Enjoy these cookies with a glass of milk or a cup of hot cocoa for the ultimate holiday treat!