

Looking to shake up your Christmas dinner with something different this year? I’ve got you covered with a collection of unexpected and delightful recipes that will wow your guests. Think Moroccan Lamb Tagine or a colorful Spanish Paella. These dishes are more than just meals; they’re memorable experiences to share with loved ones. Break away from the usual and discover endless possibilities for a festive feast!
Moroccan Lamb Tagine
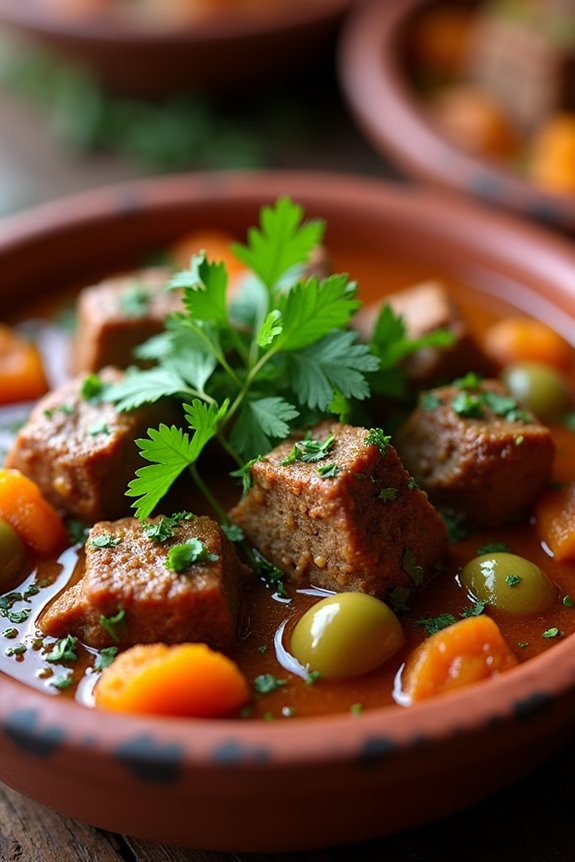
For those looking to add a touch of exotic flair to their Christmas dinner, Moroccan Lamb Tagine offers an aromatic and flavorful alternative to traditional holiday dishes. This slow-cooked stew combines tender lamb with a mix of sweet and savory spices, creating a rich and complex taste experience. The fragrant spices, dried fruits, and hearty vegetables meld together to create a dish that’s both comforting and sophisticated, perfect for a festive gathering.
Moroccan Lamb Tagine is traditionally cooked in a tagine, a conical clay pot that enhances the flavors by creating a moist, sealed environment. However, if you don’t have a tagine, a heavy-bottomed Dutch oven will work just as well. This dish serves 4-6 people and is best enjoyed with couscous or flatbread, which soak up the delicious sauce and complement the dish’s warm, spicy notes.
Ingredients (serves 4-6):
- 2 tablespoons olive oil
- 2 pounds lamb shoulder, cut into 2-inch cubes
- 1 large onion, finely chopped
- 3 garlic cloves, minced
- 1 teaspoon ground cumin
- 1 teaspoon ground coriander
- 1 teaspoon ground cinnamon
- 1 teaspoon ground ginger
- 1/2 teaspoon ground turmeric
- 1/2 teaspoon ground black pepper
- 1 cup beef or chicken stock
- 1 can (14 ounces) diced tomatoes
- 1 cup dried apricots, halved
- 1/2 cup pitted green olives
- 1 tablespoon honey
- 1/2 cup chopped fresh cilantro
- Salt to taste
Cooking Instructions:
- Prep the Lamb: Start by patting the lamb cubes dry with paper towels. This guarantees a good sear. Season them generously with salt and pepper.
- Brown the Lamb: Heat the olive oil in a tagine or Dutch oven over medium-high heat. Add the lamb cubes in batches, making sure not to overcrowd the pan, and brown them on all sides. Remove the lamb and set aside.
- Sauté the Aromatics: In the same pot, reduce the heat to medium and add the chopped onion. Sauté for about 5 minutes until translucent. Add the minced garlic and sauté for another minute until fragrant.
- Add the Spices: Stir in the ground cumin, coriander, cinnamon, ginger, turmeric, and black pepper. Cook for 1-2 minutes, stirring continuously to prevent burning, until the spices are aromatic.
- Deglaze and Simmer: Return the browned lamb to the pot. Add the beef or chicken stock, diced tomatoes, dried apricots, olives, and honey. Stir well to deglaze the pot, scraping up any browned bits from the bottom.
- Cook the Tagine: Bring the mixture to a simmer. Reduce the heat to low, cover, and cook for 2-3 hours or until the lamb is tender and the flavors are well melded. Stir occasionally and add more stock if the tagine becomes too dry.
- Finish and Serve: Stir in the chopped cilantro just before serving. Taste and adjust the seasoning with salt if necessary. Serve the tagine hot, garnished with additional cilantro if desired.
Extra Tips:
For a deeper flavor, marinate the lamb overnight in the spices and olive oil before cooking. This allows the flavors to penetrate the meat more thoroughly.
If you prefer a thicker sauce, remove the lid during the last 30 minutes of cooking to allow some of the liquid to evaporate. Additionally, you can customize the dried fruits and nuts to your taste; almonds or raisins can be excellent additions for added sweetness and texture.
Thai Green Curry With Seafood
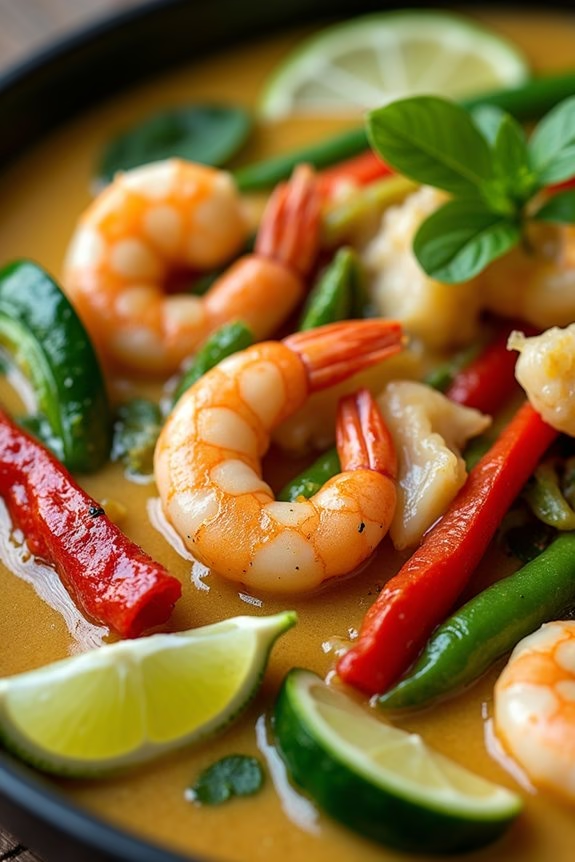
Looking to add a bit of exotic flair to your Christmas dinner this year? Why not try a delicious Thai Green Curry with Seafood? This dish is a wonderful departure from traditional holiday meals, offering a vibrant and aromatic combination of flavors that are sure to delight your taste buds. The creamy coconut milk pairs beautifully with the fresh seafood, while the green curry paste provides a perfect balance of spice and zest, making it a festive choice for those who enjoy a bit of heat with their meal.
This dish isn’t only packed with bold flavors but is also quite easy to prepare, allowing you to spend more time with your loved ones instead of in the kitchen. Perfect for serving 4-6 people, the Thai Green Curry with Seafood can be the centerpiece of your non-traditional holiday meal. This recipe is versatile and can be adjusted according to your preference for seafood, whether it be shrimp, fish, or a combination of your favorites. Let’s plunge into the ingredients and instructions to create this delightful dish.
Ingredients (Serves 4-6):
- 2 tablespoons vegetable oil
- 3 tablespoons Thai green curry paste
- 1 can (14 ounces) coconut milk
- 1 cup chicken or seafood broth
- 1 tablespoon fish sauce
- 1 tablespoon brown sugar
- 1 pound mixed seafood (shrimp, scallops, fish fillets)
- 1 cup green beans, trimmed and cut into 2-inch pieces
- 1 red bell pepper, sliced
- 1 zucchini, sliced
- 1/2 cup fresh basil leaves
- 1 lime, cut into wedges
- Cooked jasmine rice, for serving
Cooking Instructions:
- Heat the Oil: In a large skillet or wok, heat the vegetable oil over medium heat. Once the oil is hot, add the Thai green curry paste and stir-fry for about 2 minutes until fragrant, confirming the paste is well combined with the oil.
- Add Coconut Milk and Broth: Pour in the coconut milk and chicken or seafood broth. Stir well to combine with the curry paste, and bring the mixture to a gentle simmer.
- Season the Curry: Add the fish sauce and brown sugar to the skillet, stirring until the sugar is fully dissolved. This will add a depth of flavor and balance out the spiciness of the curry.
- Cook the Seafood and Vegetables: Add the mixed seafood, green beans, red bell pepper, and zucchini to the skillet. Stir to coat everything in the curry sauce and simmer for about 6-8 minutes, or until the seafood is cooked through and the vegetables are tender yet crisp.
- Add Fresh Basil: Just before serving, stir in the fresh basil leaves, allowing them to wilt slightly from the heat.
- Serve: Serve the Thai Green Curry with Seafood over a bed of cooked jasmine rice. Garnish with lime wedges for an extra burst of citrus flavor.
Extra Tips:
When cooking Thai Green Curry with Seafood, it’s crucial to not overcook the seafood as it can become tough and rubbery. Keep an eye on your simmering time to confirm everything stays tender.
If you prefer a spicier dish, you can add more green curry paste or a few slices of fresh chili. Additionally, feel free to substitute or add other vegetables such as bamboo shoots or baby corn to suit your taste.
Finally, if you can’t find fresh basil, Thai basil or cilantro can be excellent alternatives for adding a fresh herbal note to the dish.
Italian Porchetta Roast
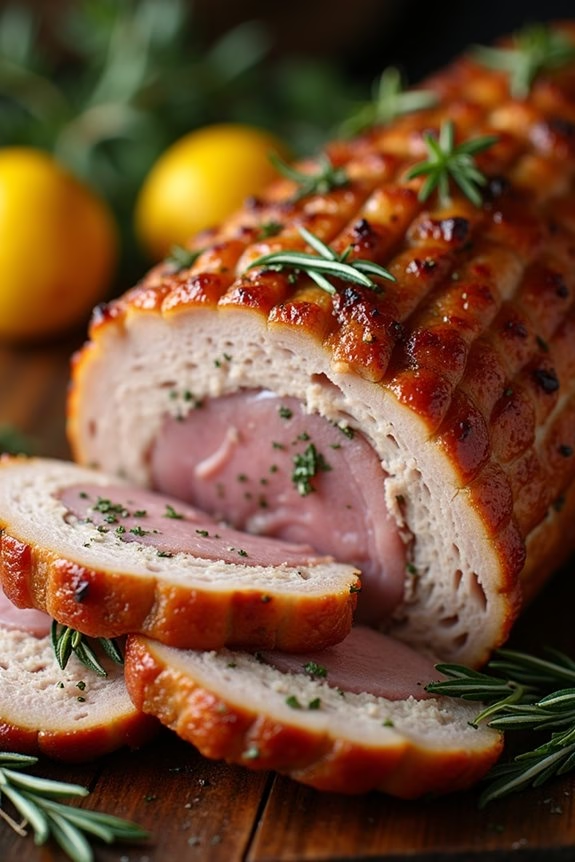
Italian Porchetta Roast is a classic Italian dish that embodies the spirit of festive gatherings with its savory flavors and aromatic herbs. This traditional roast is made from pork belly, which is carefully seasoned and rolled to create a succulent and flavorful centerpiece for your non-traditional Christmas dinner.
The key to an authentic Porchetta Roast lies in the balance of herbs and spices that infuse the meat with an irresistible aroma, making it a memorable dish for any holiday feast. Perfect for serving a group of 4-6 people, this Italian Porchetta Roast is both impressive and delicious.
The preparation involves a mix of fresh herbs, garlic, and a hint of citrus, which work together to enhance the natural flavors of the pork. When roasted to perfection, the outer layer of the pork becomes crisp and golden, while the inside remains tender and juicy. This dish isn’t only a treat for the taste buds but also a visual delight that will captivate your guests.
Ingredients:
- 4-5 pounds pork belly, skin-on
- 2 tablespoons olive oil
- 6 cloves garlic, minced
- 2 tablespoons fresh rosemary, chopped
- 2 tablespoons fresh sage, chopped
- 1 tablespoon fennel seeds, toasted
- Zest of 1 lemon
- 1 tablespoon kosher salt
- 1 teaspoon freshly ground black pepper
- 1 teaspoon red pepper flakes
- Kitchen twine
Cooking Instructions:
- Prepare the Pork Belly: Lay the pork belly skin-side down on a clean surface. Score the meat with a sharp knife, making shallow cuts in a crisscross pattern. This will help the seasonings penetrate deeper into the meat and enhance the flavor.
- Make the Seasoning Mixture: In a small bowl, combine the minced garlic, chopped rosemary, chopped sage, toasted fennel seeds, lemon zest, kosher salt, black pepper, and red pepper flakes. Mix well to form a fragrant seasoning paste.
- Season the Pork: Rub the seasoning paste evenly over the scored side of the pork belly, pressing it into the cuts to guarantee maximum flavor absorption. Roll the pork belly tightly, starting from one end, and secure it with kitchen twine at 1-inch intervals.
- Preheat the Oven: Preheat your oven to 325°F (165°C). Place a roasting rack inside a roasting pan to allow for even cooking.
- Roast the Pork: Place the rolled and tied pork belly on the roasting rack, skin-side up. Drizzle the olive oil over the skin and rub it in to help achieve a crispy crust. Transfer the pan to the oven and roast for about 3 to 3.5 hours, or until the internal temperature reaches 160°F (71°C).
- Rest and Serve: Once cooked, remove the porchetta from the oven and let it rest for at least 15 minutes before slicing. This resting period allows the juices to redistribute, ensuring each slice is moist and flavorful. Serve the porchetta with your favorite side dishes for a complete meal.
Extra Tips:
For an even crispier skin, you can increase the oven temperature to 425°F (220°C) during the last 20 minutes of roasting. Keep a close eye to prevent burning.
Make sure the pork belly is tightly rolled and secured with twine to maintain its shape during cooking. Additionally, if you have time, letting the seasoned pork rest in the refrigerator overnight will intensify the flavors, making your Porchetta Roast even more delicious.
Indian Spiced Cauliflower Steaks
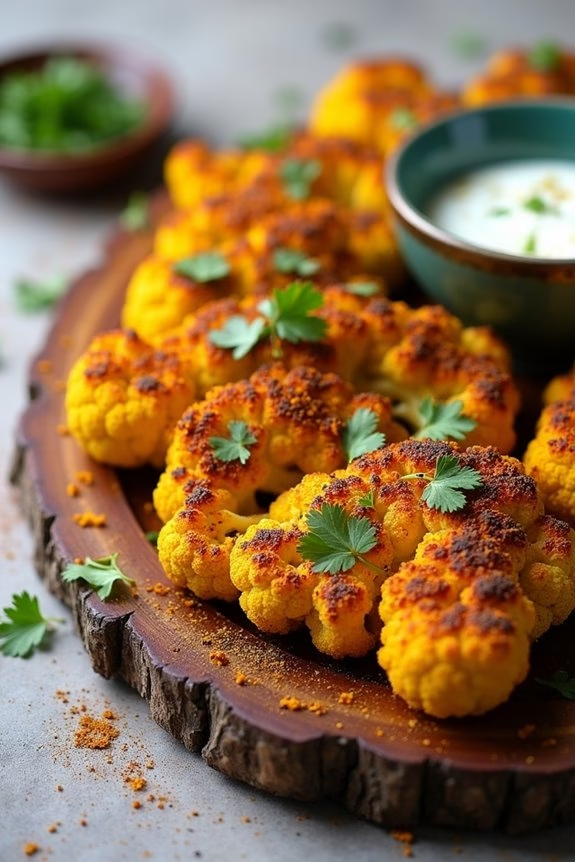
Indian Spiced Cauliflower Steaks are a delightful and flavorful twist on the traditional Christmas dinner. This dish brings together the earthy, robust flavors of Indian spices with the hearty texture of cauliflower, creating a satisfying and unique centerpiece for your holiday table.
The cauliflower steaks are marinated in a blend of spices and roasted to perfection, offering a vibrant and aromatic experience that will captivate your taste buds and impress your guests. Not only is this dish delicious, but it’s also a great option for those looking to incorporate more plant-based meals into their festive menu.
Perfect for serving 4-6 people, this recipe is both simple and quick to prepare, allowing you to spend more time enjoying the company of friends and family rather than being in the kitchen. The spices used in this dish, such as turmeric, cumin, and coriander, are known for their warming qualities, making it an ideal choice for a cozy winter gathering.
Paired with a zesty yogurt sauce or chutney, these cauliflower steaks make a complete meal that’s sure to be remembered and cherished by everyone at your table.
Ingredients:
- 2 large heads of cauliflower
- 3 tablespoons olive oil
- 1 teaspoon ground cumin
- 1 teaspoon ground coriander
- 1 teaspoon ground turmeric
- 1 teaspoon garam masala
- 1/2 teaspoon chili powder
- Salt to taste
- Freshly ground black pepper to taste
- 1 lemon, juiced
- Fresh cilantro leaves for garnish
- 1 cup plain yogurt (optional, for serving)
- 1 tablespoon lemon juice (for yogurt sauce)
- Salt to taste (for yogurt sauce)
Instructions:
- Prepare the Cauliflower: Preheat your oven to 400°F (200°C). Remove the outer leaves from the cauliflower heads and trim the stem so it sits flat. Slice each cauliflower head into 1-inch thick steaks, aiming for 2-3 steaks per head. Lay the steaks flat on a baking sheet lined with parchment paper.
- Make the Spice Mixture: In a small bowl, combine the olive oil, ground cumin, ground coriander, ground turmeric, garam masala, chili powder, salt, and black pepper. Mix well to form a paste.
- Season the Steaks: Using a brush or your hands, evenly coat each cauliflower steak with the spice mixture. Be sure to cover both sides and all the edges to guarantee maximum flavor.
- Roast the Cauliflower: Place the baking sheet in the preheated oven and roast the cauliflower steaks for 25-30 minutes, flipping them halfway through. The steaks should be golden brown and tender when pierced with a fork.
- Prepare the Yogurt Sauce (Optional): While the cauliflower is roasting, mix the plain yogurt, lemon juice, and a pinch of salt in a small bowl. Stir until smooth and set aside.
- Serve: Once the cauliflower steaks are done, remove them from the oven and drizzle with fresh lemon juice. Garnish with chopped cilantro leaves. Serve hot alongside the yogurt sauce or your choice of chutney.
Extra Tips:
When cutting the cauliflower into steaks, make sure to cut through the core to keep the slices intact. If you end up with some smaller florets from the edges, you can roast them alongside the steaks for extra crunchy bites.
Adjust the level of chili powder to suit your heat preference, and feel free to experiment with additional spices like smoked paprika or ginger for a personalized twist. If you’re using the yogurt sauce, allow it to sit for a few minutes before serving to enhance the flavors.
Enjoy your Indian Spiced Cauliflower Steaks as a main dish or as a flavorful side to complement other holiday offerings.
Korean Bulgogi Beef

If you’re seeking a non-traditional yet delightful dish for your Christmas dinner, Korean Bulgogi Beef could be the perfect choice. Bulgogi, which translates to “fire meat,” is a classic Korean dish known for its mouthwatering flavor profile, combining sweet, savory, and slightly smoky notes.
The dish features thinly sliced beef marinated in a mixture of soy sauce, sugar, sesame oil, garlic, and other aromatic ingredients, then grilled or stir-fried to perfection. Traditionally, it’s served with a side of rice and a variety of banchan (small Korean side dishes), making it an exciting and unique centerpiece for your holiday table.
Bulgogi is incredibly versatile and can be adapted to suit various tastes and dietary needs. By choosing high-quality beef, such as ribeye or sirloin, and allowing it to marinate thoroughly, you’ll guarantee a tender and flavorful result.
Whether you’re hosting a small family gathering or a larger festive celebration, this recipe for Korean Bulgogi Beef serves 4-6 people and is sure to impress your guests with its rich, vibrant flavors and enticing aroma.
Ingredients:
- 2 pounds beef ribeye or sirloin, thinly sliced
- 1/2 cup soy sauce
- 1/4 cup brown sugar
- 2 tablespoons sesame oil
- 4 cloves garlic, minced
- 1 tablespoon grated ginger
- 1 pear, grated
- 1/2 onion, grated
- 1/4 cup scallions, chopped
- 1 tablespoon sesame seeds
- 1/4 teaspoon black pepper
- 2 tablespoons vegetable oil
- 1/2 cup mushrooms, sliced (optional)
- 1 large carrot, julienned (optional)
Cooking Instructions:
1. Prepare the Marinade: In a large mixing bowl, combine the soy sauce, brown sugar, sesame oil, minced garlic, grated ginger, grated pear, and grated onion. Mix thoroughly until the sugar is dissolved. This marinade serves as the base flavor for the beef, infusing it with a balance of sweet and savory elements.
2. Marinate the Beef: Add the thinly sliced beef to the marinade, guaranteeing each piece is well coated. Cover the bowl with plastic wrap and refrigerate for at least 1 hour, or preferably overnight. The longer the beef marinates, the more flavorful and tender it will become.
3. Cook the Bulgogi: Heat the vegetable oil in a large skillet or grill pan over medium-high heat. Add the marinated beef in batches, being careful not to overcrowd the pan. Cook for about 2-3 minutes on each side, or until the beef is browned and cooked through.
If using mushrooms and carrots, add them to the pan during the last few minutes of cooking, stirring occasionally.
4. Finish and Garnish: Once cooked, transfer the bulgogi to a serving platter. Sprinkle with chopped scallions and sesame seeds for added flavor and visual appeal. Serve immediately with steamed rice and your choice of banchan or vegetables.
Extra Tips:
For an authentic Korean experience, consider serving the bulgogi with lettuce leaves for wrapping, along with a side of kimchi. If you don’t have access to an Asian pear, a regular pear or even apple can be used as a substitute to provide that necessary sweetness and tenderizing effect.
Additionally, freezing the beef slightly before slicing can help you achieve the thin slices needed for this dish. Remember to taste the marinade and adjust the sweetness or saltiness to your preference before adding the beef, guaranteeing a well-balanced flavor profile that your guests will love.
Middle Eastern Stuffed Eggplant
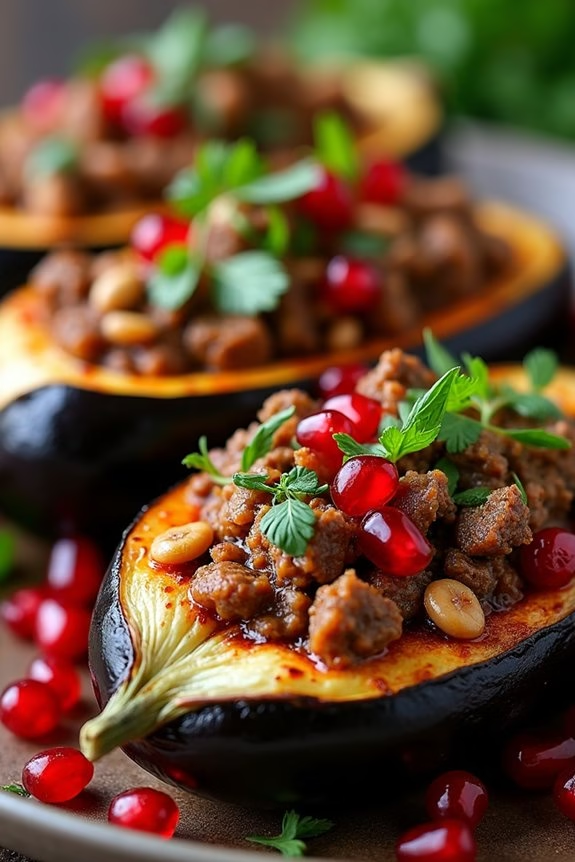
If you’re looking to shake things up this holiday season, try incorporating Middle Eastern flavors into your Christmas dinner with this delightful Middle Eastern Stuffed Eggplant. This dish combines the rich, savory taste of roasted eggplant with a flavorful filling of ground lamb, fragrant spices, and a touch of sweetness from dried fruits, creating a harmonious blend of sweet and savory that will delight your guests.
The stuffed eggplants are then baked to perfection, allowing the flavors to meld together beautifully. This recipe is perfect for a non-traditional Christmas dinner, offering a unique twist that’s both comforting and exotic. The dish is hearty enough to be a main course, complemented by a side of couscous or a fresh salad. It’s a great way to introduce new flavors and cooking techniques while still keeping the holiday spirit alive.
Here’s how you can make this delicious dish for 4-6 people.
Ingredients:
- 3 large eggplants
- 2 tablespoons olive oil
- 1 large onion, finely chopped
- 3 cloves garlic, minced
- 500g ground lamb
- 1 teaspoon ground cumin
- 1 teaspoon ground coriander
- 1/2 teaspoon ground cinnamon
- 1/4 teaspoon cayenne pepper
- Salt and pepper to taste
- 1/2 cup pine nuts, toasted
- 1/2 cup dried apricots, chopped
- 1/2 cup cooked rice
- 1/4 cup fresh parsley, chopped
- 1/4 cup fresh mint, chopped
- 2 tablespoons tomato paste
- 1 cup chicken or vegetable broth
- Pomegranate seeds for garnish (optional)
- Fresh mint leaves for garnish (optional)
Instructions:
- Prepare the Eggplants: Preheat your oven to 375°F (190°C). Cut the eggplants in half lengthwise and scoop out the flesh, leaving about a 1/2-inch thick shell. Reserve the flesh for the filling. Brush the eggplant shells with olive oil, season with salt and pepper, and place them on a baking sheet, cut side up. Roast in the oven for about 20 minutes until they’re slightly tender.
- Make the Filling: While the eggplants are roasting, heat the remaining olive oil in a large skillet over medium heat. Add the onion and garlic, sautéing until soft and translucent. Add the ground lamb, breaking it up with a spoon, and cook until browned. Stir in the cumin, coriander, cinnamon, cayenne pepper, salt, and pepper.
- Incorporate Other Ingredients: Add the reserved eggplant flesh, pine nuts, dried apricots, and cooked rice to the skillet. Cook for an additional 5 minutes. Stir in the tomato paste and half of the chopped parsley and mint, mixing well to combine.
- Stuff the Eggplants: Remove the eggplant shells from the oven and fill each shell generously with the lamb mixture. Pour the chicken or vegetable broth into the bottom of the baking dish to keep the eggplants moist during baking.
- Bake: Cover the baking dish with foil and bake for 30-35 minutes, or until the eggplants are tender and the filling is heated through.
- Garnish and Serve: Before serving, sprinkle the stuffed eggplants with the remaining parsley and mint. For an extra festive touch, garnish with pomegranate seeds and fresh mint leaves.
Extra Tips: When preparing the eggplants, make sure not to scoop out too much of the flesh, as a sturdy shell is essential for holding the filling. If you prefer a milder flavor, reduce the amount of cayenne pepper.
Feel free to experiment with different dried fruits like raisins or figs for a variation in sweetness. Additionally, this dish can be prepared a day in advance and reheated in the oven before serving, making it a stress-free option for entertaining.
Japanese Miso-Glazed Salmon
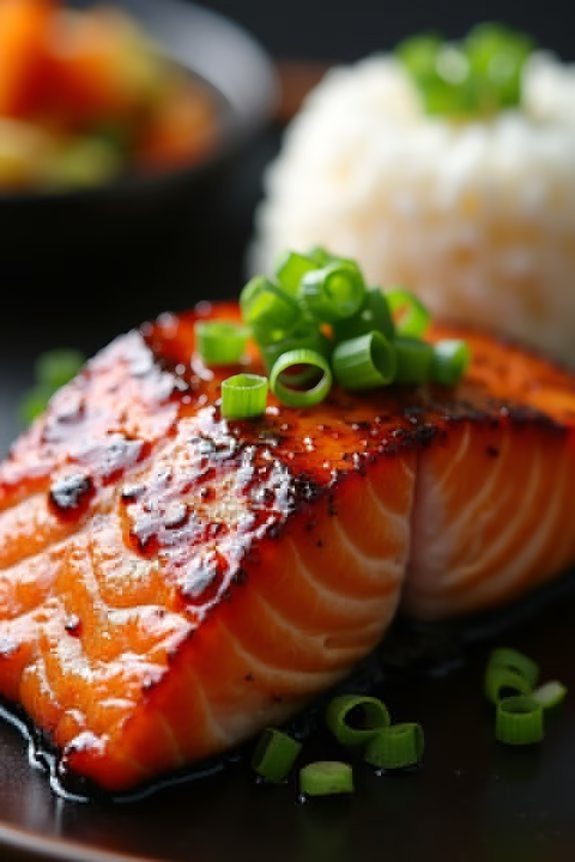
Bring a touch of Japanese cuisine to your Christmas table this year with a delightful dish of Japanese Miso-Glazed Salmon. This recipe offers a beautiful balance of flavors, where the sweetness of miso complements the rich, buttery taste of the salmon. It’s a perfect choice for those looking to break away from traditional holiday meals while still providing a memorable feast.
The dish isn’t only elegant but also relatively simple to prepare, making it an excellent option for holiday hosts who want to impress without spending hours in the kitchen.
Miso-Glazed Salmon is a harmonious blend of umami and sweetness, achieved by marinating the salmon in a mixture of miso paste, sake, soy sauce, and mirin. This process infuses the fish with deep flavor, which is then intensified by broiling, resulting in a beautifully caramelized crust.
Served with a side of steamed rice or seasonal vegetables, this dish will bring a touch of sophistication and culinary adventure to your festive dining experience. This recipe serves 4-6 people, perfect for a family gathering or an intimate Christmas dinner.
Ingredients:
- 4-6 salmon fillets (6-8 oz each)
- 1/2 cup white miso paste
- 1/4 cup sake
- 1/4 cup mirin
- 2 tablespoons soy sauce
- 2 tablespoons sugar
- 2 tablespoons vegetable oil
- 1 teaspoon grated ginger
- 2 tablespoons chopped green onions (for garnish)
- Lemon wedges (optional, for serving)
Instructions:
- Prepare the Marinade: In a medium bowl, combine the white miso paste, sake, mirin, soy sauce, sugar, vegetable oil, and grated ginger. Whisk until smooth and well blended.
- Marinate the Salmon: Place the salmon fillets in a shallow dish or a resealable plastic bag. Pour the miso marinade over the salmon, ensuring each fillet is evenly coated. Cover the dish with plastic wrap or seal the bag. Refrigerate and let the salmon marinate for at least 2 hours, or preferably overnight, to allow the flavors to fully penetrate the fish.
- Preheat the Broiler: Position the oven rack about 6 inches from the heat source. Preheat the broiler on high.
- Prepare the Baking Sheet: Line a baking sheet with aluminum foil and lightly oil it to prevent sticking.
- Broil the Salmon: Remove the salmon from the marinade, letting any excess drip off. Place the fillets on the prepared baking sheet. Broil for 8-10 minutes, or until the salmon is cooked through and the surface is caramelized and slightly charred. Keep a close eye on the salmon to prevent burning.
- Garnish and Serve: Carefully transfer the salmon to a serving platter. Garnish with chopped green onions and serve with lemon wedges on the side, if desired.
Extra Tips:
When preparing Japanese Miso-Glazed Salmon, it’s essential to use fresh, high-quality salmon for the best flavor and texture. If possible, opt for wild-caught salmon, which is typically more flavorful than farm-raised.
Be mindful of the broiling time; salmon can overcook quickly, so it’s better to slightly undercook it, allowing it to finish cooking with residual heat. Additionally, if you prefer a stronger miso flavor, you can increase the marinating time, but avoid leaving it for more than 24 hours as the marinade can become too overpowering.
Finally, consider using parchment paper instead of foil for easier cleanup and to prevent the salmon from sticking to the sheet.
Peruvian Ceviche
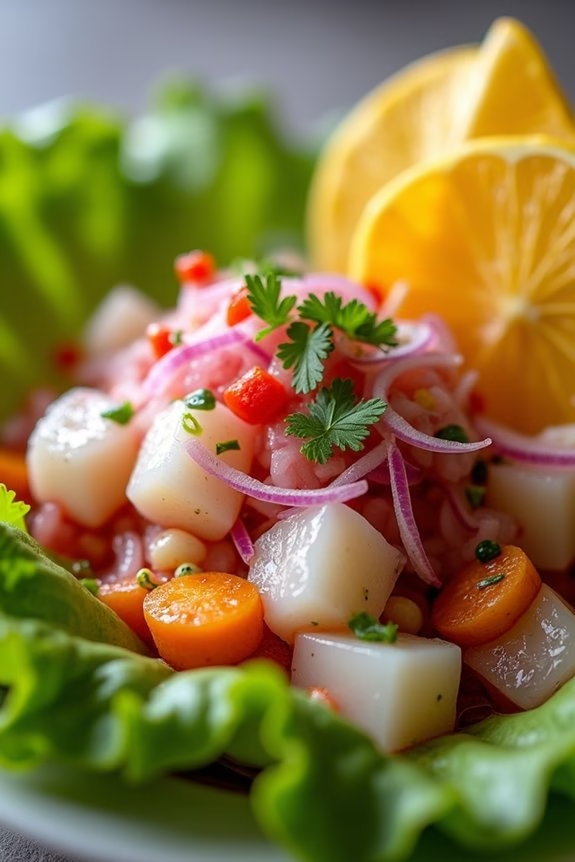
Peruvian Ceviche is a delightful and invigorating dish that adds a unique twist to your Christmas dinner. Originating from the coastal regions of Peru, this dish captures the essence of the ocean with its fresh fish marinated in citrus juices. It’s a fantastic way to bring a burst of flavor and a touch of elegance to your festive table.
The combination of lime, red onions, and chili peppers creates a harmony of tastes that’s both vibrant and energizing, making it a perfect starter or even a main course for those seeking a lighter, more invigorating Christmas meal.
Ceviche is traditionally served with sides like sweet potatoes, corn, or even plantain chips, which add a delightful contrast to the tangy and spicy fish. This recipe serves 4-6 people and is perfect for those who wish to explore international flavors during the holiday season. The simplicity of the dish highlights the quality of the ingredients, so sourcing the freshest fish is key to achieving the best results.
Ingredients for Serving 4-6 People:
- 1 ½ pounds of fresh white fish fillets (such as sea bass or tilapia)
- 1 cup freshly squeezed lime juice (about 8-10 limes)
- 1 medium red onion, thinly sliced
- 1-2 fresh chili peppers (such as aji amarillo or jalapeño), finely chopped
- 1 tablespoon chopped fresh cilantro
- Salt and freshly ground black pepper to taste
- 1 large sweet potato, peeled and sliced
- 1 ear of corn, kernels removed
- Lettuce leaves (for serving)
- Plantain chips (optional, for serving)
Cooking Instructions:
- Prepare the Fish: Start by cutting the fish fillets into small, bite-sized cubes. Confirm that the fish is extremely fresh and has been properly cleaned and deboned. Place the cubes in a shallow glass or ceramic dish.
- Marinate the Fish: Pour the freshly squeezed lime juice over the fish cubes, confirming that all pieces are fully submerged. Cover the dish with plastic wrap and refrigerate for about 20-30 minutes, or until the fish turns opaque and is ‘cooked’ by the citrus juice.
- Prepare the Vegetables: While the fish is marinating, thinly slice the red onion and finely chop the chili peppers. If you prefer less heat, you can remove the seeds from the peppers before chopping. Set these aside.
- Cook the Sweet Potato and Corn: In a medium pot, boil the sweet potato slices until tender. In a separate pot, boil the corn kernels until cooked. Drain both and allow them to cool slightly.
- Assemble the Ceviche: Once the fish is ready, drain off some of the lime juice, leaving just enough to keep the fish moist. Add the sliced red onion, chopped chili peppers, and cilantro to the fish. Season with salt and freshly ground black pepper to taste. Gently toss to combine.
- Serve: Arrange lettuce leaves on a serving platter or individual plates. Spoon the ceviche onto the lettuce, and add the boiled sweet potato slices and corn kernels around the ceviche. For an extra crunch, serve with plantain chips on the side.
Extra Tips:
When making ceviche, the key is using the freshest fish possible to guarantee the best flavor and texture. Always keep the fish chilled until you’re ready to marinate it.
If you’re serving this dish to guests who are new to ceviche, consider offering it as part of a tasting platter so they can sample the unique flavors. Adjust the amount of chili peppers according to your heat preference, and feel free to experiment with other fresh herbs or citrus fruits for a personalized touch.
Enjoy your non-traditional Christmas feast with this invigorating and exotic dish!
Spanish Paella With Mixed Seafood
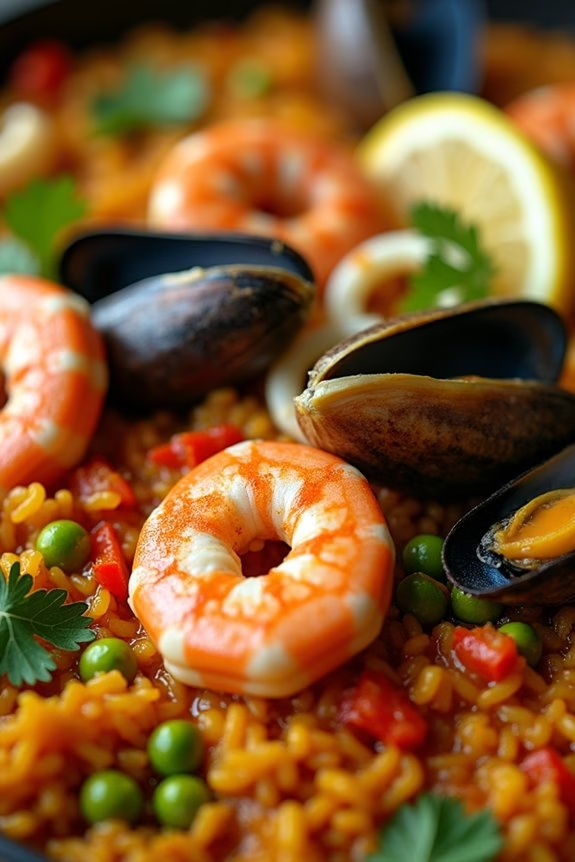
Paella is a traditional Spanish dish that originates from the region of Valencia, known for its vibrant saffron-infused rice cooked with a variety of meats and seafood. This version of paella incorporates a delightful mix of seafood, making it a perfect centerpiece for a non-traditional Christmas dinner. The combination of prawns, mussels, and calamari with aromatic spices creates a rich and flavorful medley that’s certain to impress your family and guests.
Cooking paella requires some patience and attention to detail, but the result is a comforting and visually stunning dish that encapsulates the spirit of togetherness. The key to a successful paella is to use high-quality ingredients and to allow the rice to develop a crispy, caramelized crust at the bottom, known as “socarrat.” This recipe serves 4-6 people, guaranteeing that everyone at your table gets a taste of this festive and delicious dish.
Ingredients:
- 1/4 cup olive oil
- 1 onion, finely chopped
- 1 red bell pepper, diced
- 4 garlic cloves, minced
- 2 cups Bomba or Arborio rice
- 1 tsp smoked paprika
- 1/2 tsp saffron threads, soaked in 2 tbsp warm water
- 1/2 cup dry white wine
- 4 cups seafood stock or fish broth
- 12 large prawns, deveined
- 12 mussels, cleaned and debearded
- 8 oz calamari rings
- 1 cup frozen peas
- Salt and pepper to taste
- Lemon wedges, for serving
- Fresh parsley, chopped, for garnish
Cooking Instructions:
- Prepare the Base: Heat the olive oil in a large paella pan or wide skillet over medium heat. Add the onion and red bell pepper, sautéing until they’re softened, about 5 minutes. Stir in the minced garlic and cook for an additional minute until fragrant.
- Toast the Rice: Add the rice to the pan, stirring to coat it with the oil and vegetables. Toast the rice for about 2 minutes until it becomes slightly translucent around the edges.
- Season and Simmer: Sprinkle the smoked paprika over the rice and stir in the saffron with its soaking water, allowing the flavors to infuse. Pour in the white wine, stirring until it mostly evaporates. Gradually add the seafood stock, stirring to combine. Season with salt and pepper.
- Cook the Seafood: Arrange the prawns, mussels, and calamari on top of the rice. Don’t stir the rice after this point. Simmer uncovered for about 15-20 minutes, until the seafood is cooked through and the rice is tender, absorbing most of the liquid.
- Add Peas and Rest: Scatter the frozen peas over the top and cook for an additional 5 minutes. Remove the pan from the heat and cover it with a clean kitchen towel, allowing it to rest for 5 minutes to finish cooking in its own steam.
- Serve: Garnish with fresh parsley and serve the paella directly from the pan with lemon wedges on the side for squeezing over the dish.
Extra Tips:
For the best socarrat, resist the urge to stir the rice after adding the seafood, as this helps the bottom layer of rice to crisp up. Use a wide, shallow pan to ensure even cooking and avoid overloading it, which can result in unevenly cooked rice.
If you have difficulty finding seafood stock, you can substitute it with chicken stock, but the seafood variety enhances the maritime flavors of the dish. Finally, always taste and adjust the seasoning to your preference before serving.
Jamaican Jerk Chicken

Jamaican Jerk Chicken is a flavorful and spicy dish that brings the vibrant tastes of the Caribbean to your Christmas dinner table. Unlike the traditional roast turkey or ham, this dish offers a tantalizing combination of spices and heat that’s bound to excite your taste buds. The key to authentic Jamaican Jerk Chicken lies in the marinade, which is made using a blend of aromatic spices, Scotch bonnet peppers, and allspice berries. This marinade is then infused into the chicken, allowing it to absorb the bold flavors before being grilled to perfection.
Preparing Jamaican Jerk Chicken for a festive meal is an excellent way to introduce new flavors to your family and friends. This recipe serves 4-6 people, making it ideal for a small gathering. Whether you’re an experienced cook or trying your hand at Caribbean cuisine for the first time, this recipe will guide you through the process of creating a mouthwatering dish that both honors tradition and brings something new to your holiday celebration.
Ingredients:
- 1 whole chicken (about 4-5 pounds), cut into pieces
- 1 tablespoon ground allspice
- 1 tablespoon dried thyme
- 1 tablespoon brown sugar
- 1 teaspoon ground cinnamon
- 1 teaspoon nutmeg
- 1 teaspoon salt
- 1 teaspoon black pepper
- 4 scallions, chopped
- 1 small onion, chopped
- 4 cloves garlic, minced
- 2 Scotch bonnet peppers, seeded and chopped
- 1/4 cup soy sauce
- 2 tablespoons vegetable oil
- Juice of 1 lime
- 1 tablespoon apple cider vinegar
Cooking Instructions:
- Prepare the Marinade: In a food processor or blender, combine the ground allspice, thyme, brown sugar, cinnamon, nutmeg, salt, black pepper, scallions, onion, garlic, Scotch bonnet peppers, soy sauce, vegetable oil, lime juice, and apple cider vinegar. Blend until you achieve a smooth paste.
- Marinate the Chicken: Place the chicken pieces in a large bowl or a resealable plastic bag. Pour the marinade over the chicken, making sure that each piece is thoroughly coated. Cover the bowl with plastic wrap or seal the bag, and refrigerate for at least 4 hours or overnight for the best flavor.
- Prepare the Grill: Preheat your grill to medium-high heat. If using a charcoal grill, prepare the coals for indirect cooking by placing them to one side of the grill.
- Grill the Chicken: Remove the chicken from the marinade, allowing any excess to drip off. Place the chicken on the grill, skin side down, over indirect heat. Cover the grill and cook for 40-50 minutes, turning occasionally, until the chicken is cooked through and the internal temperature reaches 165°F (75°C).
- Finish and Serve: Once cooked, remove the chicken from the grill and let it rest for about 5 minutes before serving. This allows the juices to redistribute, guaranteeing moist and flavorful chicken.
Extra Tips:
For those who enjoy extra heat, consider leaving the seeds in the Scotch bonnet peppers when making the marinade. If you can’t find Scotch bonnet peppers, habanero peppers are a suitable substitute with a similar level of heat.
To confirm the chicken has a nice smoky flavor, add some soaked wood chips to the coals or use a smoker box if you’re using a gas grill. Finally, serve your Jamaican Jerk Chicken with traditional sides like rice and peas or a fresh mango salad to enhance the Caribbean experience.
French Coq Au Vin
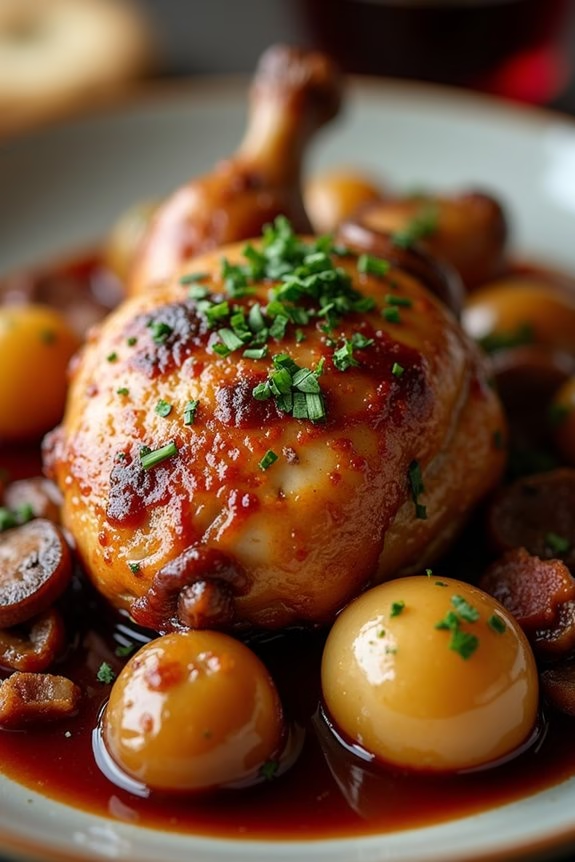
French Coq Au Vin is a classic dish that offers an exquisite blend of rich flavors, making it a perfect choice for a non-traditional Christmas dinner. This traditional French recipe features chicken slow-cooked in red wine, accompanied by mushrooms, onions, and bacon, creating a mouthwatering and hearty meal. The complexity of the flavors in Coq Au Vin can transform your holiday table into a French bistro, leaving your guests delighted and satisfied.
Originally a peasant dish, Coq Au Vin has gained popularity for its depth of taste and rustic appeal. It’s a dish that requires patience and care, but the results are well worth the effort. This recipe is designed to serve 4-6 people, making it ideal for a family gathering or an intimate dinner with friends. The key to a successful Coq Au Vin is in the quality of the wine and the slow cooking process, which allows the flavors to meld beautifully.
Ingredients:
- 1 whole chicken (about 3-4 pounds), cut into 8 pieces
- Salt and freshly ground black pepper
- 2 tablespoons olive oil
- 6 ounces bacon, diced
- 12 pearl onions, peeled
- 3 cloves garlic, minced
- 2 tablespoons all-purpose flour
- 2 cups red wine (preferably Burgundy or Pinot Noir)
- 1 cup chicken stock
- 1 tablespoon tomato paste
- 2 sprigs fresh thyme
- 1 bay leaf
- 8 ounces mushrooms, quartered
- 2 tablespoons unsalted butter
- 2 tablespoons chopped fresh parsley
Instructions:
- Prepare the Chicken: Season the chicken pieces generously with salt and pepper. Heat olive oil in a large Dutch oven or heavy-bottomed pot over medium-high heat. Add the chicken pieces and brown them on all sides, working in batches if necessary. Remove the chicken from the pot and set aside.
- Cook the Bacon and Vegetables: In the same pot, add the diced bacon and cook until crisp. Remove the bacon with a slotted spoon and set aside. Add the pearl onions to the bacon fat and sauté until they’re golden brown. Stir in the minced garlic and cook for another minute.
- Create the Base: Sprinkle the flour over the onions and garlic, stirring well to coat. Gradually add the red wine, stirring constantly to avoid lumps. Bring the mixture to a simmer and let it cook for a few minutes until slightly thickened.
- Simmer the Stew: Return the chicken and bacon to the pot. Add the chicken stock, tomato paste, thyme, and bay leaf. Stir well to combine. Cover the pot and let it simmer on low heat for about 45 minutes, or until the chicken is tender and fully cooked.
- Cook the Mushrooms: While the stew is simmering, melt butter in a skillet over medium heat. Add the mushrooms and sauté until they’re browned and tender. Add the mushrooms to the stew and continue to cook for an additional 10-15 minutes.
- Finish and Serve: Discard the thyme sprigs and bay leaf. Taste and adjust the seasoning with salt and pepper, if necessary. Stir in the chopped parsley just before serving. Serve the Coq Au Vin hot, accompanied by crusty bread or mashed potatoes to soak up the delicious sauce.
Extra Tips:
When preparing Coq Au Vin, it’s important to choose a good quality red wine, as it greatly influences the flavor of the dish. Burgundy or Pinot Noir is traditionally used, but any full-bodied red wine will work.
Be patient during the browning process of the chicken and vegetables, as this step is essential for developing the deep, caramelized flavors. If you have the time, marinating the chicken in wine and herbs overnight can enhance the taste even further.
Finally, make sure to cook the stew on low heat to allow the flavors to meld perfectly. Enjoy your flavorful journey to France with this delightful dish!
Greek Spanakopita Pie

Spanakopita is a traditional Greek dish that’s both savory and satisfying, making it an excellent choice for a non-traditional Christmas dinner. It’s a delightful spinach pie encased in layers of flaky phyllo dough, filled with a rich mixture of spinach, feta cheese, onions, and herbs. This dish not only brings a taste of Greece to your holiday table but also provides a nutritious and vegetarian-friendly option that will appeal to guests of all ages.
This classic Greek pie is known for its crispy crust and savory filling. The combination of fresh spinach and tangy feta cheese, seasoned with a hint of nutmeg and dill, creates a flavor profile that’s both comforting and exotic. Spanakopita can be served as a main dish or as a side, and its golden, flaky outer layer makes it as visually appealing as it’s delicious. Preparing Spanakopita for a festive gathering is a rewarding experience, as it fills your home with the fragrant aroma of herbs and spices.
Ingredients for 4-6 servings:
- 1 pound fresh spinach, washed and chopped
- 1/2 cup finely chopped onion
- 2 cloves garlic, minced
- 2 tablespoons olive oil
- 8 ounces feta cheese, crumbled
- 2 large eggs, beaten
- 1/4 cup fresh dill, chopped
- 1/4 teaspoon ground nutmeg
- Salt and pepper to taste
- 1/2 cup unsalted butter, melted
- 1 package phyllo dough (16 ounces)
Cooking Instructions:
- Preheat the Oven: Begin by preheating your oven to 350°F (175°C). This guarantees that the oven reaches the right temperature for evenly baking the Spanakopita.
- Prepare the Filling: In a large skillet, heat the olive oil over medium heat. Add the chopped onion and minced garlic, sautéing until the onion becomes translucent. Add the chopped spinach to the skillet, cooking until wilted, about 5 minutes. Remove from heat and let cool slightly.
- Mix the Filling: In a large mixing bowl, combine the cooked spinach mixture, crumbled feta cheese, beaten eggs, chopped dill, ground nutmeg, salt, and pepper. Stir until all ingredients are well combined.
- Prepare the Phyllo Dough: Unroll the phyllo dough and cover it with a damp cloth to prevent it from drying out. Brush a 9×13 inch baking dish with melted butter. Lay a sheet of phyllo dough in the dish and brush with more melted butter. Repeat this process, layering 6 sheets of phyllo dough, each brushed with butter.
- Assemble the Pie: Spread the spinach and feta filling evenly over the phyllo layers. Cover the filling with 6 more sheets of phyllo dough, brushing each with melted butter as you layer.
- Bake the Spanakopita: Once assembled, use a sharp knife to score the top layers of phyllo into squares or triangles. This will make cutting the pie easier after baking. Bake in the preheated oven for 45 minutes, or until the phyllo is golden brown and crisp.
- Cool and Serve: Allow the Spanakopita to cool for about 10 minutes before slicing. Serve warm or at room temperature.
Extra Tips:
When working with phyllo dough, it’s important to keep it covered with a damp cloth as it dries out quickly. If you find the phyllo tearing, don’t worry; simply patch it with extra layers, as the end result will still be deliciously flaky.
For added flavor, consider adding a sprinkle of lemon zest to the filling. Additionally, if you prefer a more substantial dish, you can include a layer of ricotta cheese in the filling for extra creaminess.