Halloween is the perfect time to unleash your creativity with treats that are as delightful to look at as they are to eat. I absolutely adore making Rice Krispie Treats because they’re simple yet versatile. These goodies are perfect for crafting fun shapes like ghostly figures and pumpkin bites. Whether you’re aiming for something spooky or playful, these treats are bound to impress. Are you ready to explore some not-so-scary ideas that’ll sweeten your Halloween festivities?
Ghostly Rice Krispie Treats

Get into the Halloween spirit with these spooktacular Ghostly Rice Krispie Treats! These delightful and easy-to-make snacks are perfect for parties, trick-or-treaters, or just a fun family activity. With a marshmallow base and a sweet, ghostly appearance, they’re bound to be a hit with kids and adults alike. Not only are they delicious, but they also add a festive touch to your Halloween spread.
These treats are a creative twist on the classic Rice Krispie Treats, with an added ghostly charm that makes them perfect for the season. Whether you’re planning a Halloween gathering or simply want to surprise your family with a themed dessert, these Ghostly Rice Krispie Treats are a great choice. The best part? They require minimal ingredients and can be whipped up in no time.
Ingredients (serves 4-6 people):
- 6 cups of Rice Krispies cereal
- 4 cups of mini marshmallows
- 3 tablespoons of unsalted butter
- White chocolate melts or candy coating
- Black icing or edible marker for decorating
- Nonstick cooking spray or butter for greasing
Cooking Instructions:
- Prepare the pan: Begin by lining a 9×13-inch baking dish with parchment paper or lightly grease it with nonstick cooking spray or butter. Set aside.
- Melt the butter: In a large saucepan, melt the unsalted butter over low heat. Stir occasionally to prevent it from browning.
- Add marshmallows: Once the butter has melted, add the mini marshmallows to the saucepan. Stir continuously until the marshmallows are completely melted and the mixture is smooth.
- Combine with Rice Krispies: Remove the saucepan from heat and quickly add the Rice Krispies cereal. Gently fold the cereal into the marshmallow mixture until well combined and evenly coated.
- Shape the treats: Transfer the mixture into the prepared baking dish. Use a buttered spatula or damp hands to press the mixture evenly into the dish. Allow it to cool and set for about 30 minutes.
- Cut and shape: Once the mixture has set, lift it out of the pan using the parchment paper. Use a ghost-shaped cookie cutter to cut out ghost shapes from the set mixture. Re-roll scraps if needed to cut more ghosts.
- Decorate the ghosts: Melt the white chocolate or candy coating according to package instructions. Dip each ghost shape into the melted chocolate, ensuring a smooth, even coating. Place the coated ghosts on a wire rack or parchment paper to set.
- Add facial features: Once the coating has hardened, use black icing or an edible marker to draw eyes and a mouth on each ghost, giving them a spooky, playful look.
Extra Tips:
For best results, work quickly when combining the Rice Krispies with the melted marshmallow mixture to guarantee even coating.
If you don’t have a ghost-shaped cookie cutter, you can use a knife to cut out ghost shapes freehand.
Store the finished Ghostly Rice Krispie Treats in an airtight container to keep them fresh and chewy.
For an extra touch, consider adding sprinkles or edible glitter before the chocolate coating sets, giving your ghostly creations a bit of extra sparkle.
Pumpkin-Shaped Rice Krispie Bites
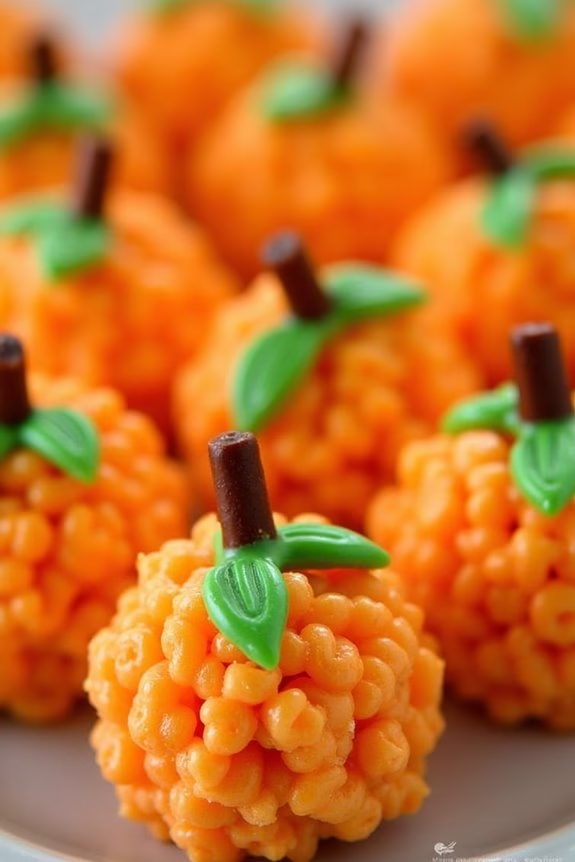
Pumpkin-Shaped Rice Krispie Bites are a delightful Halloween treat that combines the classic nostalgia of rice cereal treats with a festive twist. These bite-sized goodies aren’t only fun to make but also perfect for parties, gatherings, or simply enjoying with family and friends.
The gooey marshmallow mixture is infused with vibrant orange food coloring to mimic the appearance of mini pumpkins, and each “pumpkin” is adorned with a candy stem and leaf for an extra touch of Halloween charm.
These delightful treats are as delicious as they’re eye-catching, making them a standout addition to your Halloween celebration. The recipe is straightforward and involves the classic method of making Rice Krispie treats, but with a creative spin.
By shaping the mixture into small pumpkins and decorating them with edible embellishments, you can create a festive snack that’s sure to impress both kids and adults alike.
Ingredients for Pumpkin-Shaped Rice Krispie Bites (serving size: 4-6 people)
- 3 tablespoons unsalted butter
- 1 package (10 oz) mini marshmallows
- 6 cups Rice Krispies cereal
- Orange food coloring
- 24-30 Tootsie Roll candies (or similar chocolate candy for stems)
- Green icing or candy leaves for decoration
- Cooking spray or butter for greasing
Cooking Instructions
- Prepare the Ingredients: Begin by gathering all your ingredients. Before starting, unwrap the Tootsie Roll candies and set them aside for later use.
- Melt the Butter and Marshmallows: In a large pot over low heat, melt 3 tablespoons of unsalted butter. Once the butter has melted, add the entire package of mini marshmallows. Stir constantly until the marshmallows are completely melted and the mixture is smooth.
- Color the Mixture: Once the marshmallows are melted, remove the pot from heat. Add a few drops of orange food coloring to the mixture and stir until the color is evenly distributed. Adjust the color as needed to achieve the desired shade of pumpkin orange.
- Add the Cereal: Quickly add the 6 cups of Rice Krispies cereal to the pot and mix until the cereal is fully coated with the marshmallow mixture. Confirm that all the cereal is evenly coated for consistent flavor and texture.
- Shape the Pumpkins: Grease your hands with cooking spray or butter to prevent sticking. Take small handfuls of the mixture and shape them into balls about the size of a golf ball. Place them on a lined baking sheet.
- Add the Stems and Leaves: Press a Tootsie Roll candy into the top of each ball to create a pumpkin stem. Use green icing or candy leaves to add a decorative leaf next to the stem.
- Cool and Set: Allow the Pumpkin-Shaped Rice Krispie Bites to cool and set at room temperature for about 30 minutes before serving.
Extra Tips
When making Pumpkin-Shaped Rice Krispie Bites, it’s helpful to work quickly once the cereal is added to the marshmallow mixture as it can harden fast.
Keep your hands greased to make shaping the pumpkins easier and less messy. If the mixture becomes too hard to shape, briefly warm it up again over low heat.
For an added festive touch, you can add sprinkles or edible glitter to the mixture before shaping the pumpkins. Enjoy these treats within a day or two for the best taste and texture!
Monster Eyeball Krispie Delights
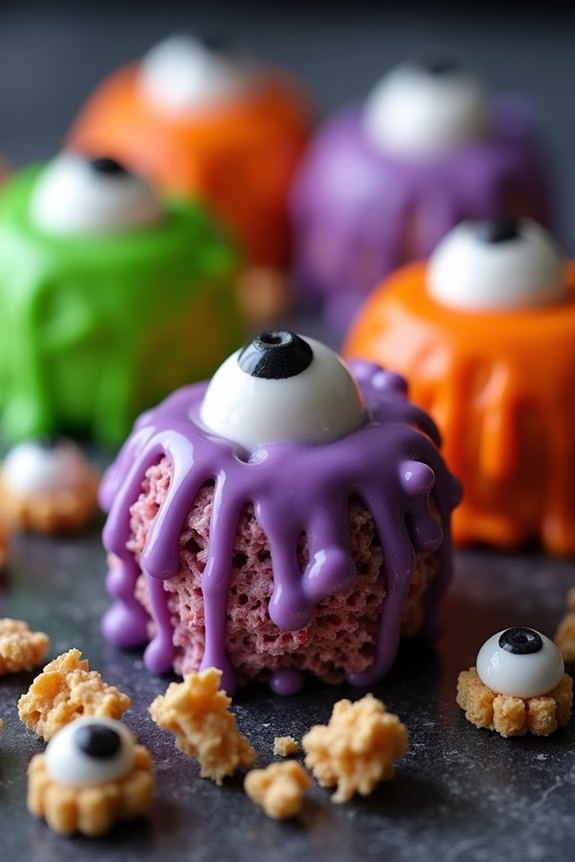
Monster Eyeball Krispie Delights are a fun and spooky treat perfect for Halloween gatherings. These gooey and crunchy delights are sure to be a hit with both kids and adults. The combination of marshmallow-coated Rice Krispies, colorful candy melts, and eerie candy eyeballs creates a visually striking and delicious treat that will add a playful touch to your Halloween party table.
With the right blend of ingredients and a touch of creativity, you can easily whip up these Monster Eyeball Krispie Delights in no time. The recipe is straightforward, making it an enjoyable activity for the whole family. Serve these playful treats as a dessert or a Halloween-themed snack. The following recipe will yield enough treats to serve 4-6 people.
Ingredients:
- 3 tablespoons unsalted butter
- 4 cups mini marshmallows
- 6 cups Rice Krispies cereal
- 1 cup green candy melts
- 1 cup purple candy melts
- 1 cup orange candy melts
- Candy eyeballs
Instructions:
- Prepare the Base: In a large saucepan, melt the unsalted butter over low heat. Once melted, add the mini marshmallows and stir continuously until completely melted and smooth.
- Mix the Krispies: Remove the saucepan from heat and quickly add the Rice Krispies cereal. Stir until the cereal is well coated with the marshmallow mixture.
- Shape the Treats: Transfer the mixture into a lightly greased 9×13 inch pan. Use a buttered spatula or wax paper to press the mixture evenly into the pan. Allow it to cool and set for about 30 minutes.
- Melt the Candy: While the treats are setting, melt each color of candy melts in separate bowls according to package instructions. This can typically be done using a microwave or a double boiler.
- Cut and Decorate: Once the Rice Krispie treats are set, cut them into squares or rectangles. Dip each piece halfway into one of the melted candy colors and place on a parchment-lined baking sheet.
- Add the Eyeballs: Before the candy coating hardens, place candy eyeballs onto the dipped portion of each treat. Press gently to verify they stick.
- Cool and Serve: Allow the candy coating to set completely at room temperature. Once set, your Monster Eyeball Krispie Delights are ready to serve.
Extra Tips: To make your Monster Eyeball Krispie Delights even more festive, consider using different colors of candy melts or adding sprinkles for extra texture and visual appeal.
If you’re short on time, you can speed up the setting process by placing the treats in the refrigerator for a few minutes. However, confirm they return to room temperature before serving for the best taste and texture.
Witch Hat Rice Krispie Treats
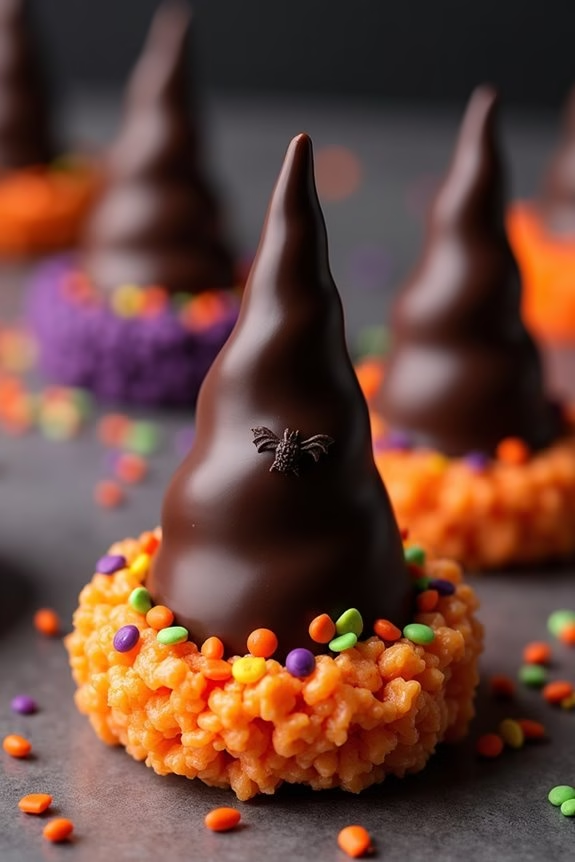
Celebrate Halloween with these delightful Witch Hat Rice Krispie Treats! These whimsical treats are perfect for adding a magical touch to your spooky festivities. Combining the classic crunch of Rice Krispies with a fun and festive twist, these treats are as enjoyable to make as they’re to eat.
Whether you’re hosting a Halloween party or just want to surprise your family with a creative dessert, these witch hat treats are guaranteed to cast a spell on everyone.
Creating Witch Hat Rice Krispie Treats is a fun activity to do with kids or friends, as you can get creative with decorating each hat. The recipe is straightforward, and with a few simple ingredients, you’ll have a batch of these spooky snacks ready in no time.
Get ready to impress with these colorful and delicious Halloween treats that are bound to become a seasonal favorite!
Ingredients (Serving Size: 4-6 people)
- 3 tablespoons unsalted butter
- 4 cups mini marshmallows
- 6 cups Rice Krispies cereal
- Black food coloring
- 12 chocolate sugar cones
- 1 cup semi-sweet chocolate chips
- 1/4 cup candy melts (orange or other Halloween colors)
- Assorted Halloween sprinkles
Instructions
- Prepare the Base Mixture: In a large saucepan, melt the butter over low heat. Add the mini marshmallows and stir until completely melted and smooth. Remove from heat and add a few drops of black food coloring, stirring until the mixture is uniformly colored.
- Mix with Cereal: Gradually add the Rice Krispies cereal to the melted marshmallow mixture. Stir until all the cereal is well coated and evenly mixed.
- Shape the Hat Brims: On a parchment-lined baking sheet, press the mixture into small circles, about 2-3 inches in diameter. These will form the brims of the witch hats. Allow them to cool and set for about 15 minutes.
- Prepare the Hat Cones: In a microwave-safe bowl, melt the chocolate chips in 30-second intervals, stirring after each, until smooth. Dip the open end of each chocolate sugar cone into the melted chocolate, coating the rim. Allow excess chocolate to drip off.
- Attach the Cones: Place the dipped end of each cone onto the center of a Rice Krispie circle to form the witch hat. Hold in place for a few seconds to ascertain it sticks.
- Decorate the Hats: Melt the candy melts according to package instructions. Use a spoon or piping bag to drizzle or dot the colored candy melts around the base of the cone. Sprinkle with Halloween sprinkles before the candy melts set.
- Cool and Serve: Allow the witch hat treats to cool completely so the chocolate and candy melts harden. Once set, transfer to a serving platter for a spooky display.
Extra Tips
For an added touch of fun, consider using different colors of candy melts for a variety of hat bands, or incorporate edible glitter for a magical sparkle.
If you want the hats to stand firmly, chill them in the refrigerator for about 10 minutes to help the chocolate set faster. Be careful not to press the cones too hard onto the Rice Krispie base to avoid cracking.
Mummy Rice Krispie Bars
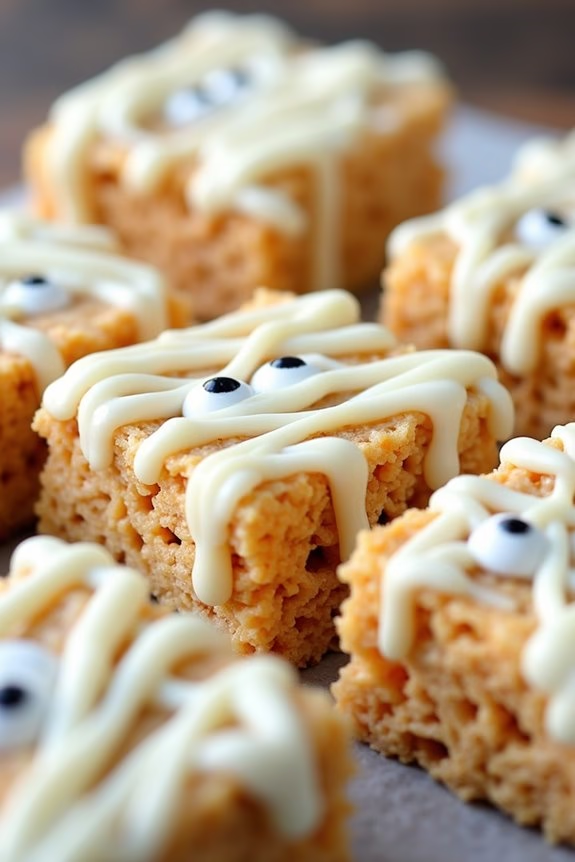
Mummy Rice Krispie Bars are a delightful and spooky treat perfect for Halloween festivities. These fun and easy-to-make bars combine the classic crunch of Rice Krispies with gooey marshmallow goodness, all wrapped up in a charming mummy disguise. Kids and adults alike will enjoy both making and eating these festive snacks, which are certain to be a hit at any Halloween party or gathering.
The process of creating Mummy Rice Krispie Bars is both simple and enjoyable, making it an ideal activity for families to do together. With just a few ingredients and some creativity, you can transform ordinary Rice Krispie treats into cute little mummies. This recipe serves 4-6 people, providing enough treats for a small group or party.
Ingredients:
- 6 cups Rice Krispies cereal
- 3 tablespoons butter
- 1 package (10 oz) mini marshmallows
- 1 teaspoon vanilla extract
- White chocolate or vanilla-flavored candy melts
- Mini candy eyes or chocolate chips
Instructions:
- Prepare the Pan: Start by greasing a 9×13-inch pan with non-stick spray or butter. This will prevent the Rice Krispie mixture from sticking when you press it into the pan.
- Melt the Butter: In a large saucepan, melt the butter over low heat. Stir continuously to make sure it doesn’t burn.
- Add Marshmallows: Once the butter is melted, add the mini marshmallows to the saucepan. Stir until the marshmallows are completely melted and smooth.
- Incorporate Vanilla: Stir in the vanilla extract to the melted marshmallow mixture for added flavor.
- Combine with Cereal: Remove the pan from heat and immediately add the Rice Krispies cereal. Stir quickly and thoroughly until all the cereal is evenly coated with the marshmallow mixture.
- Form the Bars: Pour the Rice Krispies mixture into the prepared pan. Using a buttered spatula or wax paper, press the mixture down evenly into the pan.
- Cool and Cut: Allow the Rice Krispie mixture to cool completely before cutting into bar shapes. Aim for around 12 bars.
- Prepare Mummy Wraps: Melt the white chocolate or candy melts according to package instructions. Drizzle or pipe the melted chocolate over each bar to create the appearance of mummy bandages.
- Add Eyes: While the drizzled chocolate is still wet, place mini candy eyes onto each bar to form the mummy’s face. Allow them to set until the chocolate is firm.
Extra Tips: For an extra spooky effect, consider using colored candy melts like orange or green for the mummy wraps. If you don’t have mini candy eyes, small chocolate chips can be used as a substitute.
Be sure to press the Rice Krispie mixture firmly into the pan to make sure the bars hold together well. If you want to add a little extra flavor, consider mixing in a pinch of salt with the marshmallows to enhance the sweetness.
Enjoy creating and sharing these Mummy Rice Krispie Bars as part of your Halloween celebration!
Frankenstein Marshmallow Squares

Frankenstein Marshmallow Squares are a spooky and delightful twist on the classic Rice Krispie Treats, perfect for Halloween festivities. These treats combine the gooey goodness of marshmallow and crispy rice cereal, adding a fun and creepy element by transforming them into green Frankenstein squares. They aren’t only easy to make but also a hit among kids and adults alike, making them an ideal addition to your Halloween party spread.
These Frankenstein Marshmallow Squares are visually appealing with their vibrant green color, which is achieved using food coloring. The finishing touches include using icing to create Frankenstein’s face, adding an extra layer of creativity and fun. The recipe is straightforward, requiring minimal ingredients and effort, yet the results are sure to impress your guests. This recipe serves 4-6 people, making it perfect for a small gathering or family celebration.
Ingredients:
- 6 cups rice cereal
- 10 oz bag of mini marshmallows
- 3 tablespoons unsalted butter
- Green food coloring
- Black icing or decorating gel
- Mini chocolate chips
- Candy eyes
Instructions:
- Prepare the Pan: Lightly grease a 9×13 inch baking pan with cooking spray or butter. This will prevent the treats from sticking to the pan.
- Melt the Butter: In a large saucepan, melt 3 tablespoons of unsalted butter over low heat. Stir continuously to prevent the butter from browning or burning.
- Add Marshmallows: Once the butter has melted, add the 10 oz bag of mini marshmallows to the saucepan. Stir constantly until the marshmallows are completely melted and smooth.
- Color the Mixture: Remove the saucepan from heat and add a few drops of green food coloring to the melted marshmallow mixture. Stir well until the color is evenly distributed. Add more drops as needed to achieve the desired shade of green.
- Combine with Rice Cereal: Pour the 6 cups of rice cereal into the green marshmallow mixture. Use a spatula to gently fold the cereal into the mixture until it’s evenly coated.
- Shape the Squares: Transfer the mixture into the prepared baking pan. Use a piece of wax paper or a greased spatula to press the mixture down evenly into the pan. Confirm it’s compact and level.
- Decorate: Once the mixture has cooled slightly, cut it into squares. Use black icing or decorating gel to draw Frankenstein’s hair and mouth on each square. Place candy eyes and mini chocolate chips for bolts on the sides of the squares to complete the look.
- Set: Allow the squares to set at room temperature for about 30 minutes before serving.
Extra Tips:
For a more intense green color, use gel food coloring as it tends to be more concentrated than liquid food coloring. If you find the mixture sticking to your spatula or hands while shaping, lightly grease them with cooking spray.
Additionally, you can prepare these treats a day ahead and store them in an airtight container to save time on the day of your event. Finally, get creative with the decorations—feel free to use other edible embellishments to make your Frankenstein squares even more unique.
Spider Web Krispie Treats
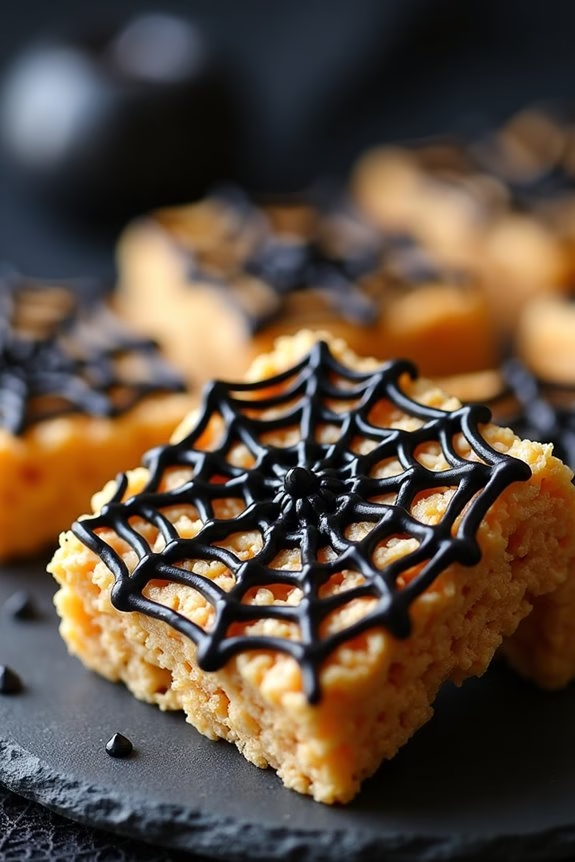
Spider Web Krispie Treats are a spooktacular twist on the classic Rice Krispie Treats, perfect for adding a ghoulish touch to your Halloween festivities. These treats aren’t only fun to make but also a hit with both kids and adults alike. The gooey marshmallow base combined with the crunchy rice cereal provides a delightful texture that’s hard to resist.
The addition of a white chocolate spider web design on top gives these treats an eerie, festive look that’s sure to amaze your guests. Ideal for a Halloween party or a fun family activity, Spider Web Krispie Treats are easy to prepare and can be made in advance, allowing you more time to focus on other party preparations.
With just a few basic ingredients, you can transform simple Rice Krispie Treats into a Halloween-themed delight that’s both visually appealing and delicious. Here’s how you can make this spooky treat for a serving size of 4-6 people.
Ingredients:
- 6 cups Rice Krispies cereal
- 4 tablespoons unsalted butter
- 1 package (10 oz) mini marshmallows
- 1/2 teaspoon vanilla extract
- 1 cup white chocolate chips
- Black food coloring gel or icing
- Non-stick cooking spray
Instructions:
- Prepare the Pan: Start by lightly spraying a 9×13 inch baking dish with non-stick cooking spray to guarantee the treats don’t stick. Set aside.
- Melt the Butter and Marshmallows: In a large saucepan over low heat, melt the butter. Once the butter has melted, add the mini marshmallows and stir constantly until they’re completely melted and well combined with the butter.
- Add Vanilla and Cereal: Remove the saucepan from the heat and stir in the vanilla extract. Gradually add the Rice Krispies cereal, stirring until the cereal is fully coated with the marshmallow mixture.
- Form the Base: Transfer the cereal mixture into the prepared baking dish. Use a spatula sprayed with non-stick cooking spray to press the mixture evenly into the dish.
- Melt and Color the White Chocolate: In a microwave-safe bowl, melt the white chocolate chips in 30-second intervals, stirring in between, until completely smooth. Once melted, add a drop or two of black food coloring gel to achieve a deep black color.
- Create the Spider Web: Pour the colored white chocolate into a piping bag or a resealable plastic bag with the corner snipped off. Pipe a spiral pattern over the Rice Krispie treats, starting from the center and working your way outwards. Use a toothpick to drag lines from the center to the edges to create a web effect.
- Set and Serve: Allow the chocolate to set completely. Once set, cut the treats into squares or rectangles and serve.
Extra Tips: For an even more festive look, you can add candy spiders or use additional colored icing to draw small spiders on the web. If you prefer, you can substitute the black food coloring with dark chocolate to create the web.
Confirm that your hands and tools are well-greased or sprayed with non-stick cooking spray when handling the sticky marshmallow mixture to make pressing the treats into the pan easier. Enjoy your eerie and delicious Spider Web Krispie Treats!
Candy Corn Rice Krispie Pops
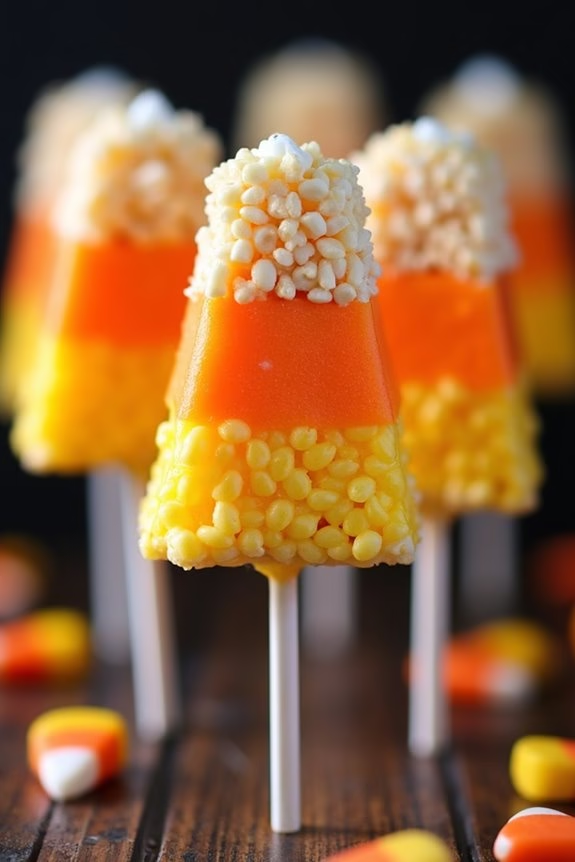
Halloween is the perfect time to get creative with your treats, and Candy Corn Rice Krispie Pops are a delightful twist on the classic Rice Krispie Treats. These festive goodies aren’t only easy to make but also fun for both kids and adults alike. They combine the gooey sweetness of marshmallows with the iconic colors of candy corn, making them an eye-catching addition to any Halloween party or gathering.
Plus, serving them on sticks makes them easy to enjoy without the mess.
Candy Corn Rice Krispie Pops are fundamentally layers of Rice Krispie treats colored to resemble candy corn. The combination of buttery rice cereal treats and the festive orange, yellow, and white colors will bring a smile to anyone’s face. Whether you’re making them for a classroom party, a family event, or just to enjoy at home, these pops are sure to be a hit.
With a few simple ingredients and some creativity, you can whip up a batch of these treats in no time.
Ingredients (serves 4-6 people):
- 6 cups Rice Krispies cereal
- 4 tablespoons unsalted butter
- 10 ounces mini marshmallows
- Yellow food coloring
- Orange food coloring
- 12 lollipop sticks or popsicle sticks
- Cooking spray or parchment paper
Instructions:
- Prepare the Pan: Begin by lining a 9×13-inch pan with parchment paper or lightly greasing it with cooking spray. This will prevent the treats from sticking to the pan and make them easier to remove later.
- Melt the Butter and Marshmallows: In a large pot, melt the butter over low heat. Once melted, add the mini marshmallows and stir continuously until they’re completely melted and the mixture is smooth. Remove the pot from the heat.
- Divide the Mixture: Divide the melted marshmallow mixture into three separate bowls. You’ll be coloring each portion differently to achieve the candy corn effect.
- Color the Mixtures: In the first bowl, add a few drops of yellow food coloring and stir until the color is uniform. In the second bowl, add a few drops of orange food coloring and mix well. Leave the third bowl plain for the white layer.
- Mix with Rice Krispies: Divide the Rice Krispies cereal evenly among the three bowls. Stir each bowl until the cereal is completely coated with the colored marshmallow mixture.
- Layer the Mixtures: Press the yellow-colored Rice Krispies mixture evenly into the prepared pan, creating the bottom layer. Next, press the orange mixture on top of the yellow layer, and finally, add the uncolored mixture as the top layer. Use a buttered spatula or wax paper to press down each layer firmly and evenly.
- Cool and Cut: Allow the layered Rice Krispie treats to cool completely at room temperature. Once cooled, remove the treats from the pan using the parchment paper and cut them into rectangles or triangles to mimic the shape of candy corn.
- Insert Sticks: Carefully insert a lollipop stick or popsicle stick into each piece, pushing it about halfway through to create the pop effect.
Extra Tips:
To make your Candy Corn Rice Krispie Pops even more festive, consider drizzling them with melted chocolate or adding sprinkles on top. If you don’t have food coloring, you can skip the coloring step, and they’ll still taste delicious.
Make sure the layers have cooled enough before cutting to maintain clean edges. If you find the mixture is sticking to your hands, lightly grease them with a bit of butter or cooking spray while pressing the layers into the pan. Enjoy your spooky treats!
Bat-Shaped Krispie Bites

Halloween is the perfect time to get creative in the kitchen, and these Bat-Shaped Krispie Bites are a delightful treat that brings a spooky twist to a classic favorite. Combining the gooey sweetness of marshmallows with the satisfying crunch of Rice Krispies, these bat-shaped goodies aren’t only delicious but are also incredibly fun to make. Perfect for parties or a festive family night, these treats will surely become a Halloween tradition.
Crafting these Bat-Shaped Krispie Bites is a delightful activity for both kids and adults alike. The process is simple and requires minimal ingredients, making it an ideal recipe for those who want to whip up something quick yet impressive. This recipe serves 4-6 people, so it’s perfect for a small get-together or family celebration.
Ingredients:
- 6 cups Rice Krispies cereal
- 4 tablespoons unsalted butter
- 10 oz (about 40 large) marshmallows
- Black food coloring
- 1 teaspoon vanilla extract
- 1 cup mini chocolate chips
- Candy eyes for decoration
Cooking Instructions:
- Prepare the Baking Sheet: Line a baking sheet with parchment paper or wax paper. This will prevent the Krispie bites from sticking as they cool.
- Melt the Butter and Marshmallows: In a large saucepan, melt the butter over low heat. Once melted, add the marshmallows and stir continuously until they’re completely melted and smooth. Add a few drops of black food coloring and the vanilla extract, mixing well to achieve an even color.
- Mix with Rice Krispies: Remove the saucepan from heat and immediately add the Rice Krispies cereal. Stir until all the cereal is well coated with the marshmallow mixture.
- Shape the Bats: Allow the mixture to cool slightly, enough to handle. Grease your hands with a little butter and shape the mixture into small bat shapes, using cookie cutters if available. Place them on the prepared baking sheet.
- Decorate: Before the shapes set completely, press mini chocolate chips into the wings of each bat to create a textured effect. Add candy eyes to give your bats a fun and spooky appearance.
- Cool and Set: Let the bat-shaped treats cool completely at room temperature until they’re firm and set.
Extra Tips:
To prevent the mixture from sticking to your hands, keep your hands lightly greased with butter or non-stick cooking spray while shaping the bats.
If you want to add a bit more flair, consider using colored candy melts or icing to add more details to the bats, such as wings or fangs.
These treats can be stored in an airtight container for up to two days, making them a perfect make-ahead Halloween treat. Enjoy your spooky creations!
Jack-O’-Lantern Rice Krispie Treats
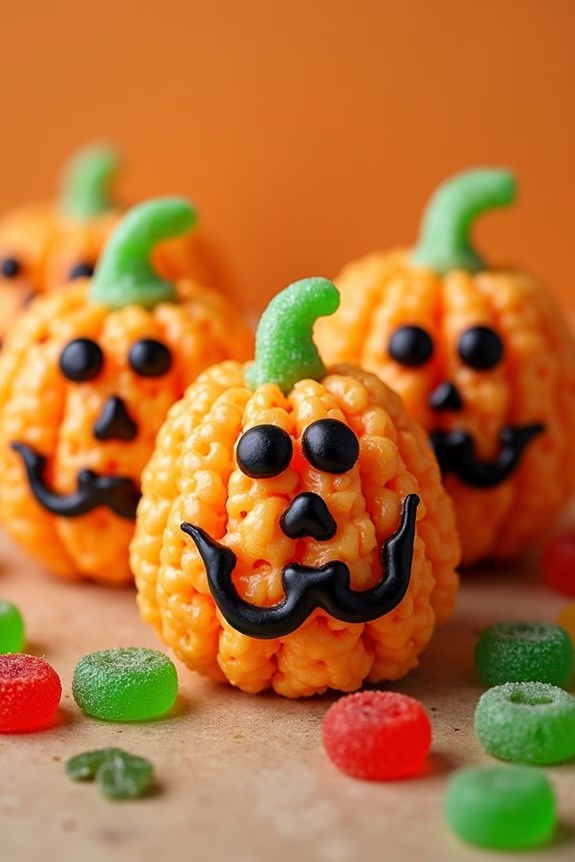
Halloween is a time for spooky fun and delicious treats, and Jack-O’-Lantern Rice Krispie Treats are a perfect addition to your festive celebrations. These delightful snacks combine the classic gooey texture of rice krispie treats with a Halloween twist, making them a hit for both kids and adults. Shaped and decorated to resemble smiling jack-o’-lanterns, they not only taste wonderful but also serve as a fun and creative activity to do with family and friends.
Creating Jack-O’-Lantern Rice Krispie Treats is a straightforward process that requires just a few ingredients and some creativity. The key to achieving the perfect texture is to carefully blend the marshmallows and cereal, while the decoration allows for plenty of personalization.
Whether you’re hosting a Halloween party or simply looking for a sweet treat to enjoy at home, these jack-o’-lanterns are sure to bring joy and a touch of spookiness to your festivities.
Ingredients for 4-6 servings:
- 3 tablespoons unsalted butter
- 1 package (10 oz) mini marshmallows
- 6 cups Rice Krispies cereal
- Orange food coloring
- Cooking spray
- Black decorating gel or icing
- Green candy melts or green gummy candies (for stems)
Cooking Instructions:
- Prepare Your Workspace: Begin by lining a large baking sheet with parchment paper and lightly spraying it with cooking spray. This will prevent the treats from sticking and make cleanup easier.
- Melt the Butter and Marshmallows: In a large saucepan, melt the unsalted butter over low heat. Once melted, add the mini marshmallows and stir continuously until they’re fully melted and the mixture is smooth.
- Add Food Coloring: Stir in a few drops of orange food coloring into the melted marshmallow mixture until you achieve a vibrant orange color, reminiscent of pumpkins.
- Mix in the Cereal: Remove the saucepan from heat and quickly add in the Rice Krispies cereal. Stir thoroughly until every piece of cereal is coated with the orange marshmallow mixture.
- Shape the Treats: With greased hands or using wax paper, shape the mixture into small balls about the size of a tennis ball. Place them on the prepared baking sheet.
- Add the Stems: Insert a small piece of green candy melt or a green gummy candy into the top of each ball to act as the pumpkin’s stem.
- Decorate the Faces: Once the treats have cooled slightly, use black decorating gel or icing to draw jack-o’-lantern faces on each treat. Get creative with different expressions!
Extra Tips:
When making Jack-O’-Lantern Rice Krispie Treats, it’s important to work quickly while the marshmallow mixture is still warm, as it will harden as it cools. Always keep a small bowl of water nearby to lightly wet your hands, which will help prevent sticking when forming the treats.
If you’re making these with children, let them get creative with different facial expressions and decorations, turning this recipe into a fun family activity. Additionally, you can store any leftovers in an airtight container for up to two days to maintain freshness.
Skeleton Krispie Bars
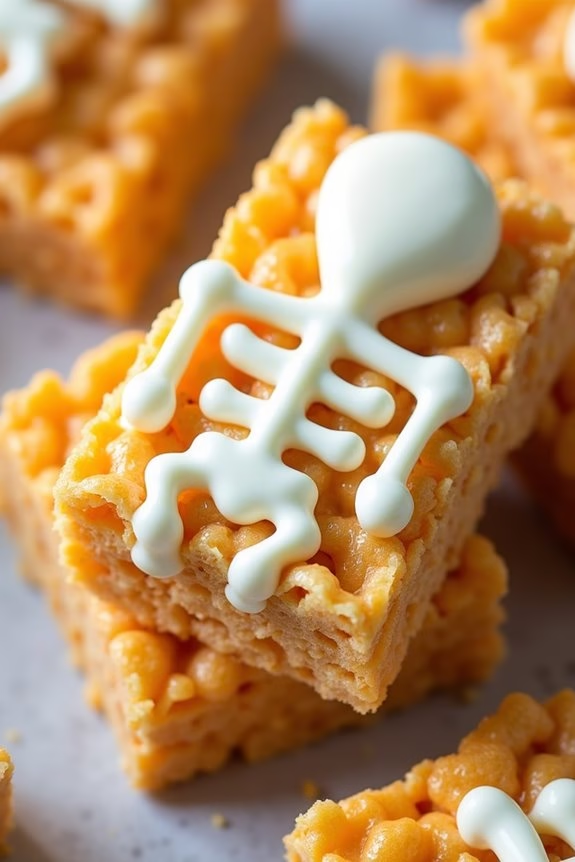
Skeleton Krispie Bars are a festive and fun twist on the classic Rice Krispie Treats, making them perfect for Halloween celebrations. These spooky delights are easy to make and are sure to be a hit at any Halloween party. By shaping the treats into bars and decorating them with white chocolate skeleton designs, you can create a delicious and eye-catching treat that will delight both kids and adults alike.
This recipe serves 4-6 people, making it ideal for small gatherings or as a special treat for your family. The combination of marshmallows, butter, and crispy rice cereal creates a chewy, sweet base that pairs perfectly with the creamy white chocolate decoration. Whether you’re an experienced baker or a novice in the kitchen, these Skeleton Krispie Bars are simple to prepare and require only a few ingredients.
Ingredients:
- 3 tablespoons unsalted butter
- 4 cups mini marshmallows
- 6 cups crispy rice cereal
- 1 cup white chocolate chips
- Black food coloring
- Cooking spray
Cooking Instructions:
- Prepare the Pan: Lightly spray a 9×13-inch baking dish with cooking spray. This will prevent the mixture from sticking to the pan.
- Melt the Butter: In a large saucepan, melt the butter over low heat. Stir continuously to prevent it from burning.
- Add Marshmallows: Once the butter has melted, add the mini marshmallows to the saucepan. Stir continuously until the marshmallows are completely melted and the mixture is smooth.
- Incorporate the Cereal: Remove the saucepan from the heat and add the crispy rice cereal. Stir until the cereal is evenly coated with the marshmallow mixture.
- Shape the Bars: Quickly transfer the mixture to the prepared baking dish. Use a spatula or wax paper to press down and spread the mixture evenly across the dish. Allow it to cool and set for about 30 minutes.
- Melt the Chocolate: In a microwave-safe bowl, melt the white chocolate chips in 30-second intervals, stirring in between each interval until fully melted and smooth.
- Decorate the Bars: Once the cereal mixture has set, cut it into bars. Use a piping bag or a zip-top bag with a corner snipped off to pipe skeleton designs onto each bar with the melted white chocolate. Use black food coloring to add eyes and other details if desired.
- Let the Chocolate Set: Allow the chocolate to set before serving. This can be sped up by placing the bars in the refrigerator for a few minutes.
Extra Tips:
To make piping the skeleton designs easier, you can use a squeeze bottle instead of a piping bag. If you want to add more flavor, consider adding a teaspoon of vanilla extract to the marshmallow mixture.
For extra fun, you could also add candy eyes or use different colored chocolates for more creative designs. When cutting the treats into bars, use a sharp knife and apply a bit of cooking spray on the blade to prevent sticking.
Enjoy your spooky Skeleton Krispie Bars!
Vampire Teeth Rice Krispie Snacks
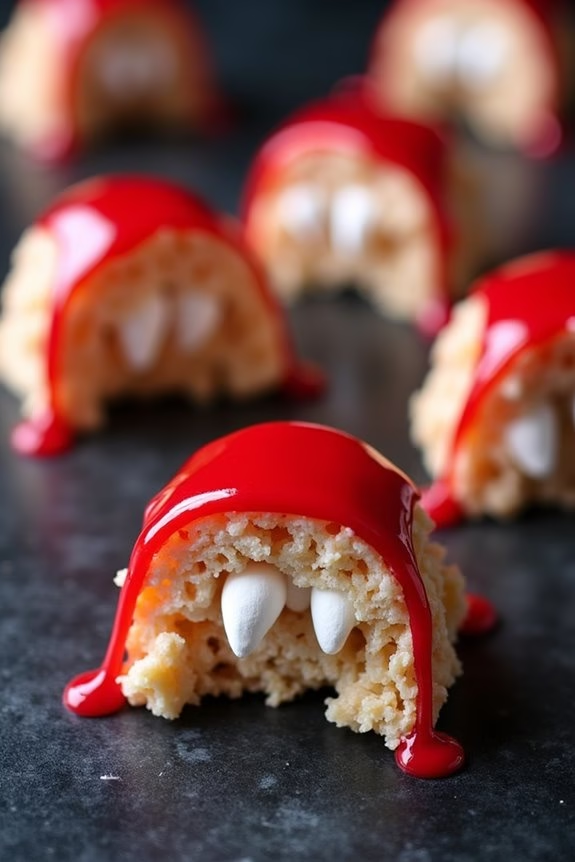
Vampire Teeth Rice Krispie Snacks are a spooky and fun treat perfect for Halloween festivities. These delightful snacks will add a touch of whimsy to any Halloween party, and they’re easy to make, making them a great activity to do with kids.
The combination of marshmallow, crisp rice cereal, and sweet candy creates a deliciously chewy and crunchy snack that’s sure to be a hit with both children and adults. The finishing touch of red icing and marshmallow “teeth” gives these treats their spooky appearance, making them the perfect addition to your Halloween dessert table.
Creating these Vampire Teeth Rice Krispie Snacks is a simple process that requires only a few basic ingredients and minimal preparation time. You begin by making a classic Rice Krispie Treat base, then transform them into vampire teeth with the help of mini marshmallows and red icing.
This recipe serves 4-6 people, providing enough for your family or a small gathering. With some creativity and a little bit of mess, these treats can easily become the highlight of your Halloween celebration.
Ingredients (Serves 4-6):
- 3 tablespoons butter
- 4 cups mini marshmallows
- 6 cups crisp rice cereal
- 1/2 cup mini marshmallows (for teeth)
- Red gel icing
Instructions:
- Prepare the Pan: Lightly grease a 9×13-inch pan with cooking spray or butter. This will prevent the Rice Krispie mixture from sticking.
- Melt the Butter and Marshmallows: In a large saucepan over low heat, melt 3 tablespoons of butter. Once melted, add 4 cups of mini marshmallows. Stir continuously until the marshmallows are completely melted and the mixture is smooth.
- Mix in the Cereal: Remove the saucepan from heat and immediately add 6 cups of crisp rice cereal to the melted marshmallow mixture. Stir until the cereal is fully coated with the marshmallow mixture.
- Press the Mixture into the Pan: Transfer the Rice Krispie mixture into the prepared pan. Use a spatula or wax paper to press the mixture evenly into the bottom of the pan. Allow it to cool slightly, but not completely.
- Cut and Shape: Once the mixture has set but is still slightly pliable, cut it into rectangles or squares. For each piece, shape it into a crescent to resemble a mouth.
- Decorate with Teeth and Icing: Along the curved edge of each crescent, press mini marshmallows into the Rice Krispie treat to resemble teeth. Then, using red gel icing, add a thin line along the base of the marshmallows to represent blood.
- Set and Serve: Allow the decorated treats to set completely. Once set, arrange them on a platter for serving.
Extra Tips: When working with the marshmallow mixture, it’s helpful to lightly grease your hands or tools with butter or cooking spray to prevent sticking. If you prefer a chewier texture, add an extra cup of mini marshmallows to the mixture.
For added fun, you can use colored marshmallows or add a few drops of food coloring to the melted marshmallow mixture to give the treats a unique hue. These treats are best enjoyed the day they’re made for peak freshness.
Haunted House Krispie Creations
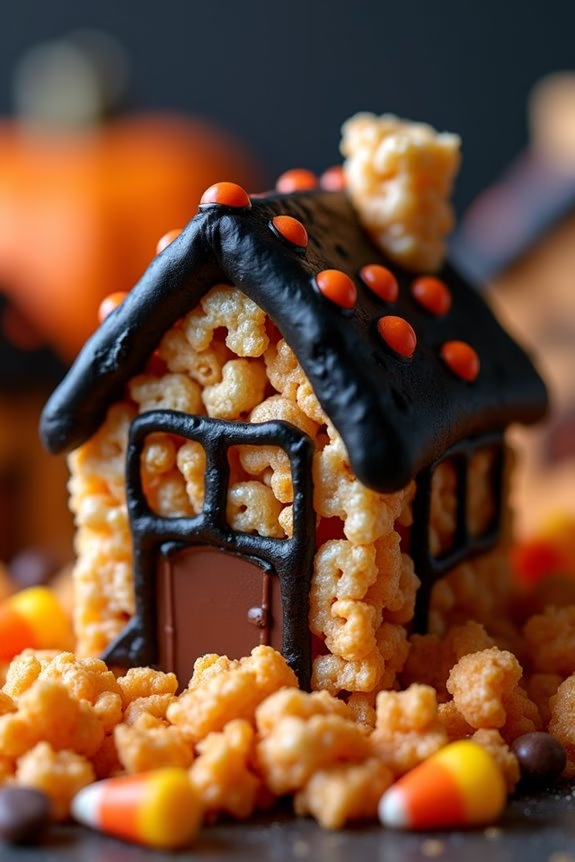
Get ready to spook your taste buds with our Haunted House Krispie Creations! These delightful and eerie treats aren’t only fun to make but also a fantastic way to get into the Halloween spirit. Perfect for parties or a family night in, these spooky rice krispie treats will surely be a hit with both kids and adults alike.
With just a few simple ingredients, you can craft your own haunted house masterpiece that’s as delicious as it’s hauntingly beautiful. Not only are these treats delicious, but they offer a creative culinary experience that allows you to express your Halloween spirit.
Decorate your haunted house with edible embellishments like chocolate chips, candy corn, and colored icing to bring your vision to life. Whether you’re a seasoned baker or just looking for a fun kitchen project, our Haunted House Krispie Creations promise to deliver both flavor and fright!
Ingredients (Serves 4-6)
- 6 cups crispy rice cereal
- 1 package (10 oz) mini marshmallows
- 3 tablespoons unsalted butter
- 1 teaspoon vanilla extract
- Assorted candies for decoration (such as candy corn, chocolate chips, gummy worms)
- Black and orange colored icing
- Cooking spray or butter for greasing
Cooking Instructions
- Prepare the Pan: Start by lightly greasing a 9×13-inch baking dish with cooking spray or butter. This will prevent the rice krispie mix from sticking to the pan.
- Melt the Butter: In a large saucepan over low heat, melt the butter completely. Confirm the butter doesn’t burn by stirring gently as it melts.
- Add Marshmallows: Once the butter is melted, add the mini marshmallows to the saucepan. Stir continuously until the marshmallows are fully melted and smooth. Remove from heat.
- Mix in Vanilla: Stir the vanilla extract into the melted marshmallow mixture to add a hint of flavor.
- Combine with Cereal: Pour the crispy rice cereal into the saucepan with the marshmallow mixture. Using a spatula, gently fold the cereal into the mixture until it’s evenly coated.
- Shape the Mixture: Transfer the mixture into the prepared baking dish. Use a spatula or buttered hands to press the mixture evenly into the dish.
- Create the Haunted House: Once the mixture has set slightly, cut the treat into pieces that can be assembled into a haunted house shape. This can include walls, a roof, and any additional structures like a chimney or door.
- Decorate: Use the colored icing to glue the pieces together and to add spooky details. Attach candies to the house to create windows, doors, and other haunting decorations.
- Set and Serve: Allow the decorated haunted house to set for about 30 minutes before serving to confirm stability.
Extra Tips
To make your haunted house more stable, consider using toothpicks to help hold the pieces together as the icing sets. Be sure to remove them before serving!
For added color and fun, you can tint the marshmallow mixture with food coloring before mixing in the cereal. If you want to get really creative, use edible glitter to give your haunted house an extra magical touch.
Enjoy your spooky creation with family and friends, and have a hauntingly good time!
Black Cat Rice Krispie Treats

Halloween is the perfect time to get creative with snacks and treats, and Black Cat Rice Krispie Treats are a fun and delicious way to celebrate the spooky season.
These whimsical treats aren’t only tasty but also appealing to the eyes, making them a hit at any Halloween party. With a few simple ingredients and a little imagination, you can transform traditional Rice Krispie treats into adorable black cats that will delight both kids and adults alike.
Perfect for serving 4-6 people, these Black Cat Rice Krispie Treats are easy to make and can be customized with your favorite decorations. Whether you’re hosting a Halloween party or just looking to make a fun treat with the family, this recipe is sure to be a crowd-pleaser.
Follow the instructions below to create these spooky yet charming treats.
Ingredients:
- 6 cups Rice Krispies cereal
- 4 cups mini marshmallows
- 3 tablespoons butter
- Black food coloring
- Black licorice strings
- Small candy eyes
- Chocolate chips or black candy melts
- Red or pink candy for noses (like M&M’s or jelly beans)
- Optional: Orange and green icing for decoration
Instructions:
1. Prepare the Pan: Begin by lightly greasing a 9×13 inch baking pan with butter or non-stick spray. This will prevent the Rice Krispie mixture from sticking.
2. Melt Butter and Marshmallows: In a large saucepan, melt the butter over low heat. Add in the mini marshmallows and stir continuously until they’re completely melted and combined with the butter.
3. Add Food Coloring: Once the marshmallow mixture is smooth, add black food coloring. Stir until you achieve a dark, even color. You may need to add a few drops at a time to reach the desired shade.
4. Mix in Cereal: Remove the saucepan from heat and immediately add the Rice Krispies cereal. Stir until the cereal is fully coated with the black marshmallow mixture.
5. Press into Pan: Transfer the mixture into the prepared baking pan. Use a buttered spatula or wax paper to evenly press and spread the mixture into the pan.
6. Cut into Shapes: Allow the mixture to cool slightly, then use a cat-shaped cookie cutter to cut out cat shapes. If you don’t have a cutter, you can shape them by hand.
7. Decorate the Cats: Melt the chocolate chips or black candy melts according to package instructions. Use a small amount to attach candy eyes and a red or pink candy nose to each cat treat.
Cut the black licorice into small pieces to create whiskers and stick them on using the melted chocolate. Optional: Use orange and green icing to add collars or bows for extra decoration.
8. Cool Completely: Allow the decorated treats to Cool Completely and set before serving.
Extra Tips:
For best results, use fresh marshmallows as older ones may not melt as well. If you prefer a softer texture, reduce the amount of Rice Krispies cereal by half a cup.
When adding food coloring, be cautious not to add too much at once; a little goes a long way. If you find the mixture too sticky to work with, lightly butter your hands or the tools you’re using.
Store any leftovers in an airtight container to keep them fresh. Enjoy your cute and spooky Black Cat Rice Krispie Treats!
Zombie Brain Krispie Delights

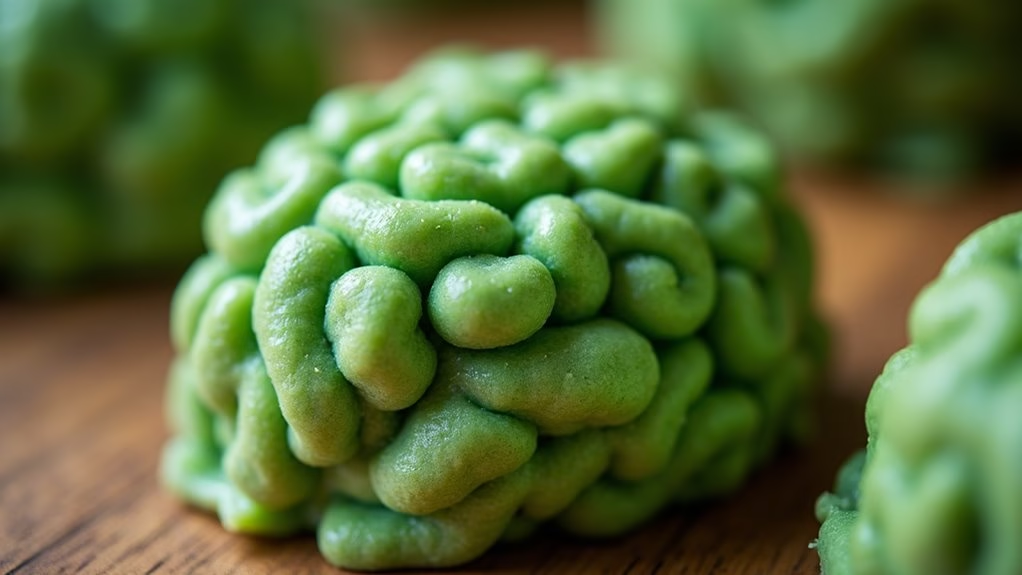
Zombie Brain Krispie Delights are the perfect spooky treat to serve at your Halloween gathering. These eerie, yet delicious, treats will surely be a hit with both kids and adults alike. The gruesome appearance of these Rice Krispie treats, resembling tiny zombie brains, is achieved by using a combination of green food coloring and a unique shaping technique.
Despite their ghastly look, these treats maintain the classic, chewy texture and sweet marshmallow flavor that we all know and love. Creating these Zombie Brain Krispie Delights isn’t only fun but also incredibly simple. With just a handful of ingredients and a little creativity, you can transform ordinary Rice Krispie treats into something truly extraordinary.
Whether you’re hosting a Halloween party or just looking to make a fun snack with the family, this recipe is sure to be a crowd-pleaser. Plus, it serves 4-6 people, making it an ideal option for both intimate gatherings and larger get-togethers.
Ingredients (Serves 4-6):
- 6 cups Rice Krispies cereal
- 4 cups mini marshmallows
- 3 tablespoons unsalted butter
- Green food coloring
- Non-stick cooking spray
Cooking Instructions:
1. Prepare the Pan: Begin by lightly spraying a 9×13 inch baking dish with non-stick cooking spray. This will prevent the treats from sticking to the dish.
2. Melt the Butter: In a large saucepan over medium-low heat, Melt the Butter completely. Be sure to stir continuously to avoid burning.
3. Add Marshmallows: Once the butter has melted, add the mini marshmallows to the saucepan. Stir them constantly until they’re completely melted and smooth.
4. Add Food Coloring: Remove the saucepan from heat and quickly stir in a few drops of green food coloring. Adjust the amount depending on how vibrant you want the color of your zombie brains to be.
5. Combine with Cereal: Pour the Rice Krispies cereal into the saucepan with the marshmallow mixture. Gently fold the cereal into the mixture until well combined and evenly coated.
6. Shape the Treats: Allow the mixture to cool slightly until it’s safe to handle but still moldable. Grease your hands with a bit of cooking spray to prevent sticking and shape the mixture into small brain-like mounds.
This can be done by forming small oval shapes and then creating shallow grooves on the surface with your fingers to mimic the texture of a brain.
7. Set and Serve: Place the shaped treats onto the prepared baking dish. Allow them to cool completely and set before serving.
Extra Tips: For an added Halloween touch, consider adding a small drop of red food coloring to the green mixture to create a more “bloody brain” effect. If you want your treats to be extra gooey, increase the amount of marshmallows to 5 cups.

